


GUIDE : Rebuilding the rear end

Posted
Settled In

GUIDE : Rebuilding the rear end
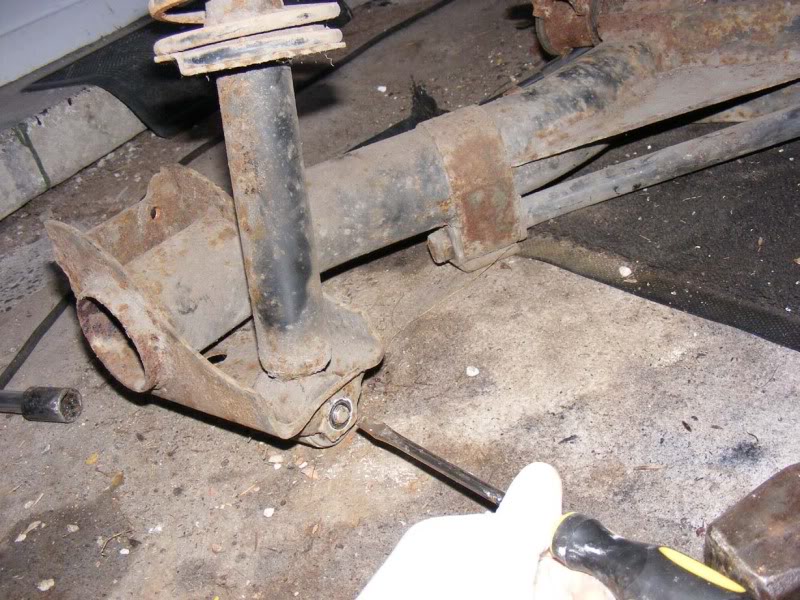
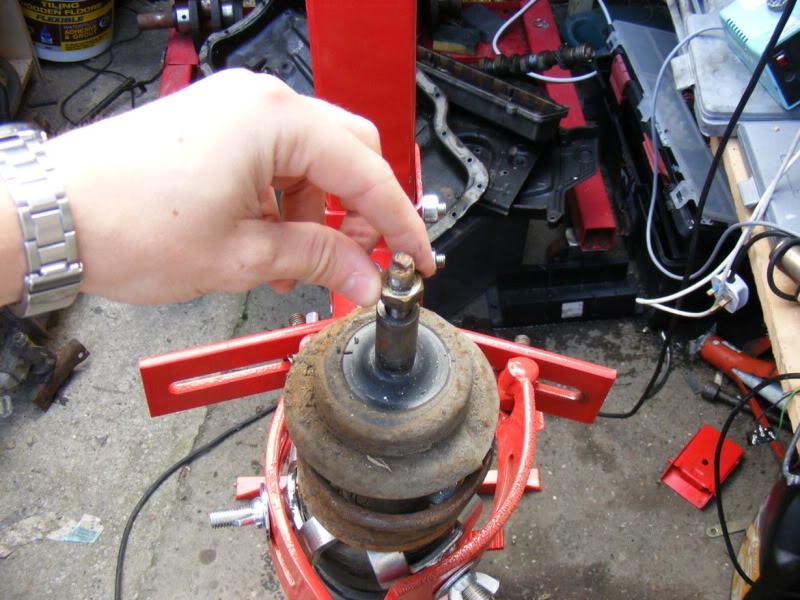
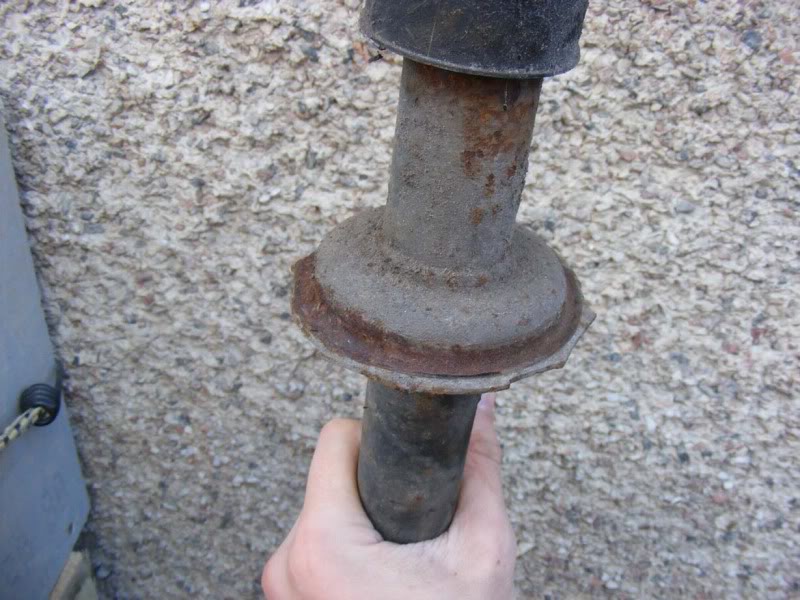
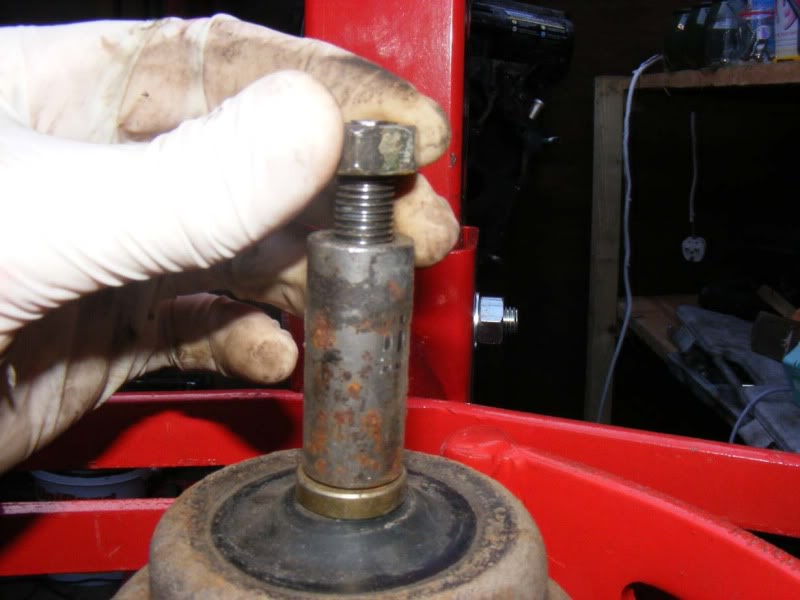
Step 60 - Removing the strut and spring is now just a case of getting a 17mm socket on the bolt as shown
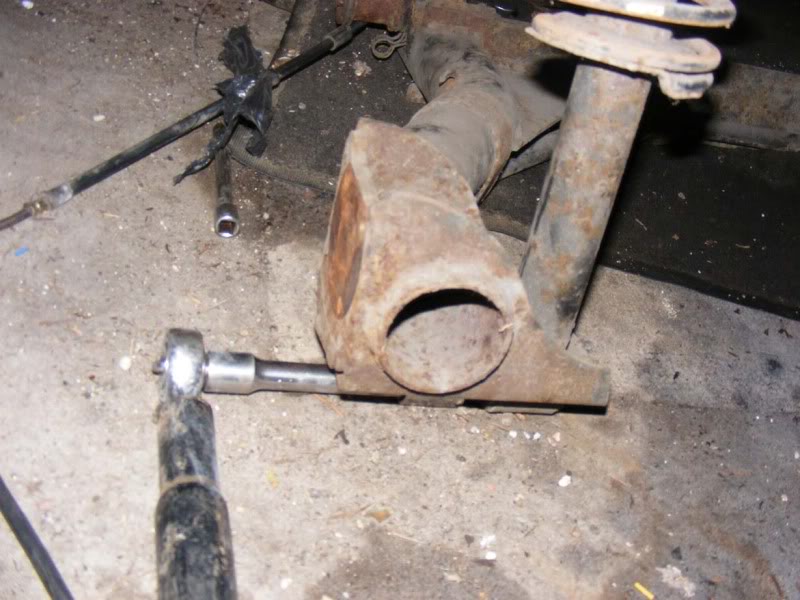
Step 61 - Then you'll need a socket on the nut. If it's rusty and dirty then tap the socket on with a hammer to get a snug fit
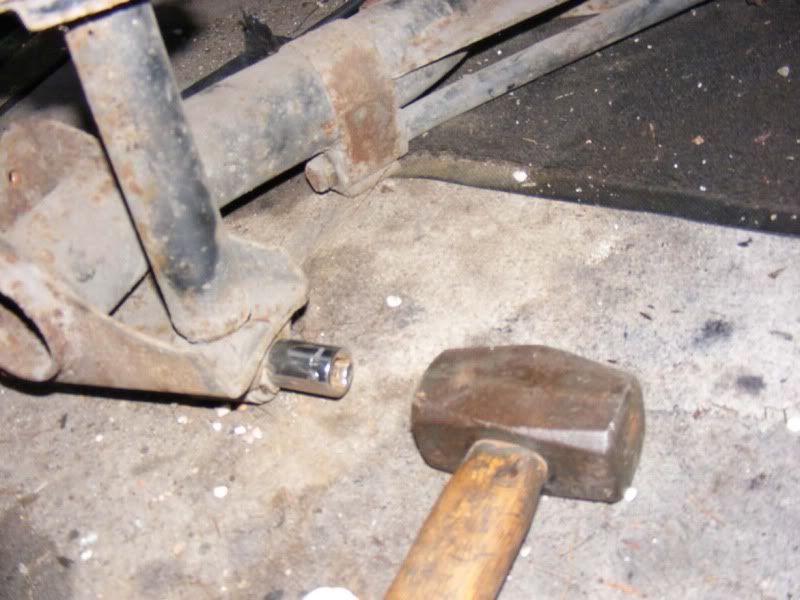
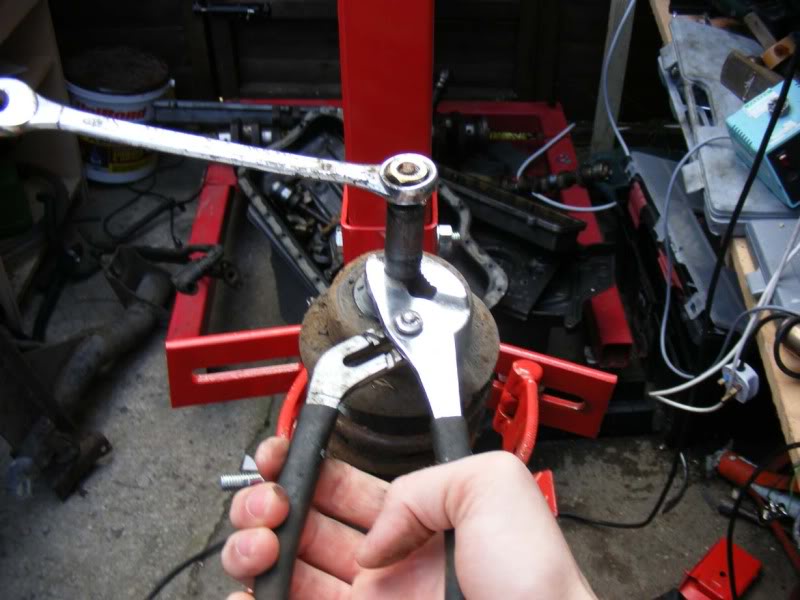
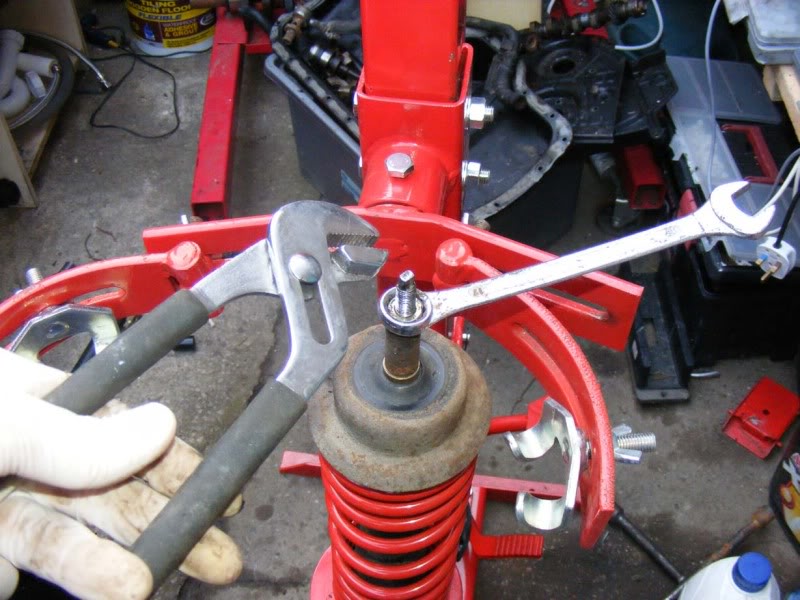
Step 62 - Then put your ratchet on (picture 1) and extend with a bar - I used the end of the jack handle (picture 2)

Step 61 - Then you'll need a socket on the nut. If it's rusty and dirty then tap the socket on with a hammer to get a snug fit
Step 62 - Then put your ratchet on (picture 1) and extend with a bar - I used the end of the jack handle (picture 2)
Posted
Settled In
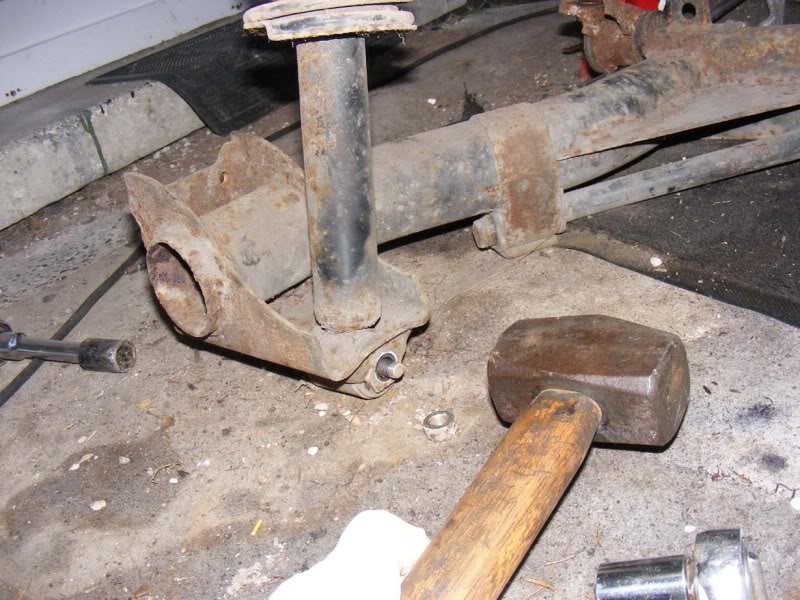
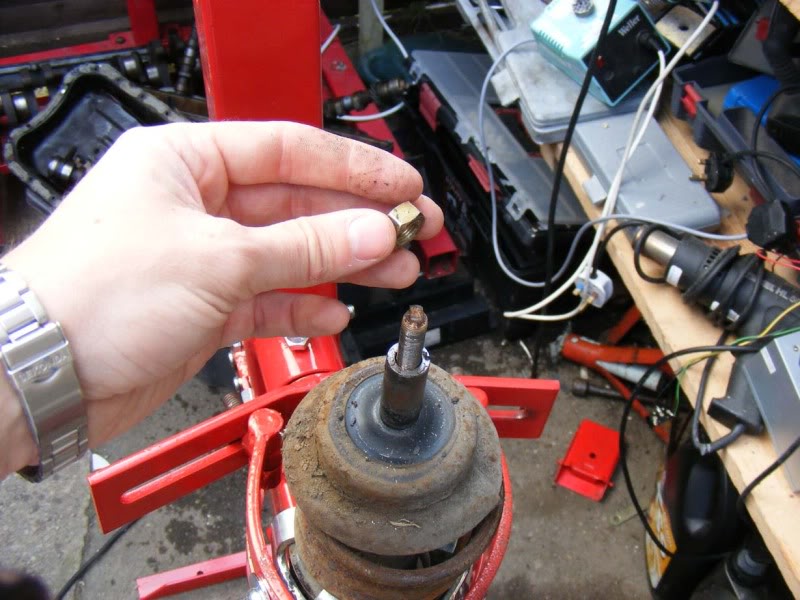
Step 63 - Now remove the nut from the bolt
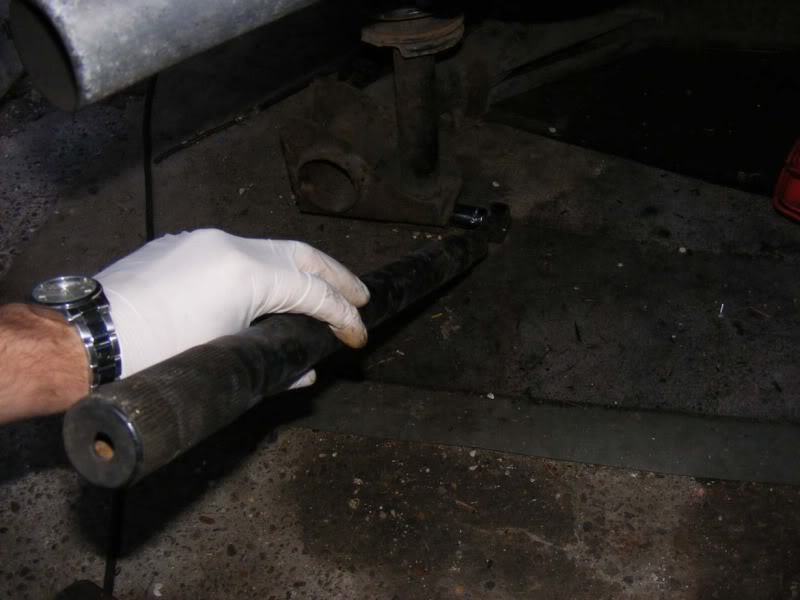
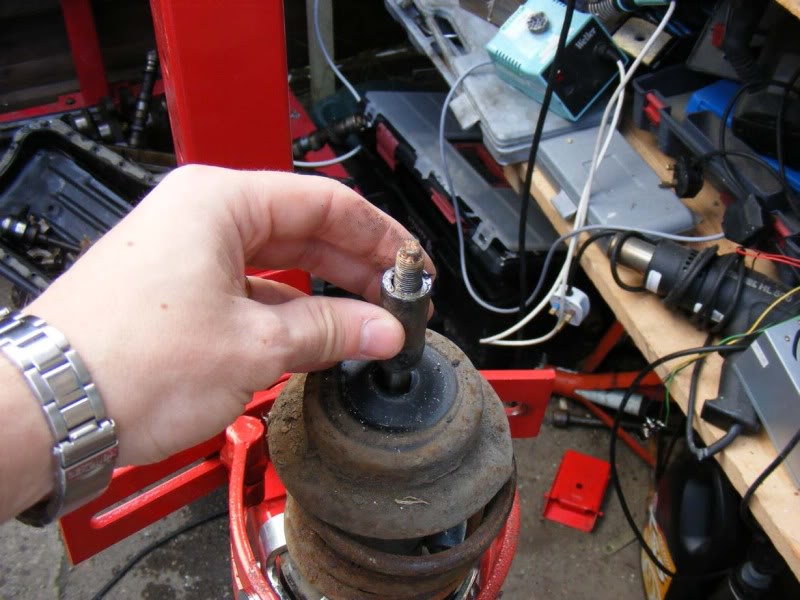
Step 64 - Once removed, tap the end of the bolt back through the strut (you might find rotating the bolt with the 17mm socket you fitted in step 60 helps to free it)
Step 65 - Complete extraction using a screwdriver and the hammer to tap the bolt right out
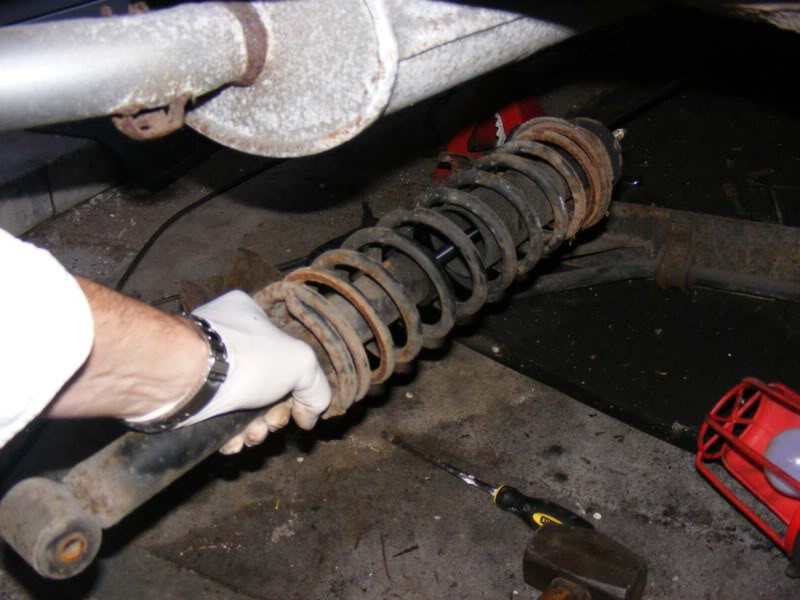
Step 66 - Now you can remove the coil and shock absorber/damper/strut completely
Step 64 - Once removed, tap the end of the bolt back through the strut (you might find rotating the bolt with the 17mm socket you fitted in step 60 helps to free it)
Step 65 - Complete extraction using a screwdriver and the hammer to tap the bolt right out
Step 66 - Now you can remove the coil and shock absorber/damper/strut completely
Posted
Settled In
Step 67 - Pop the nut and bolt back in place when you've finished so you don't loose it
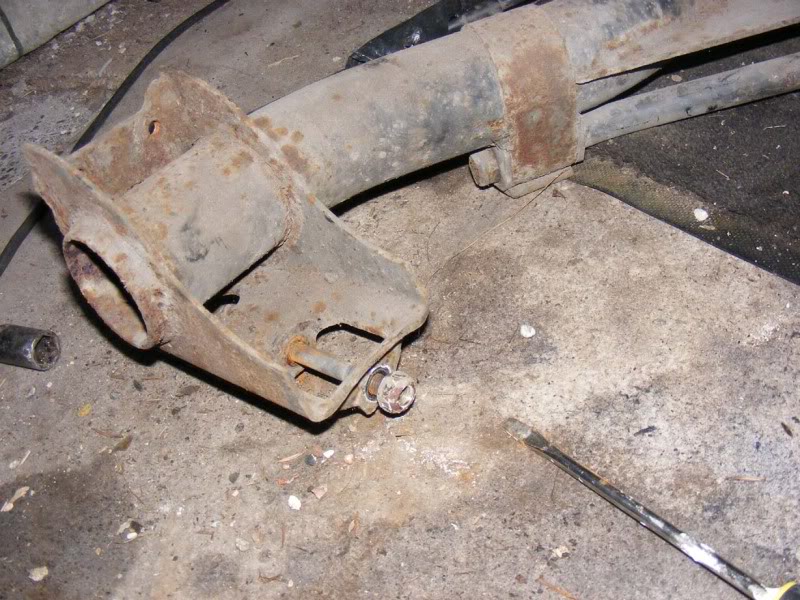
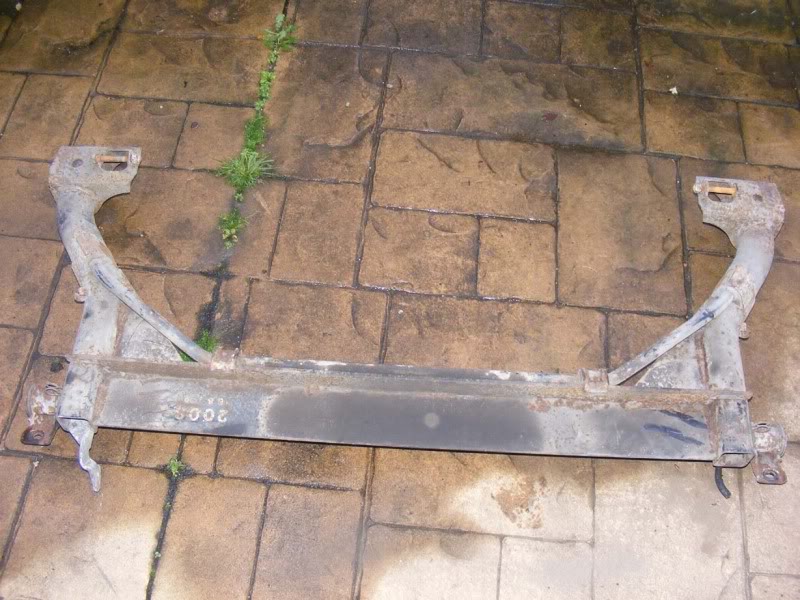
Step 68 - Now you should have a bare subframe. The only things attached are the bushes holding it on (we'll come to those) and the anti-roll bar. If your anti roll bar bushes are worn then simply remove the bar and slide new bushes on (see the front end rebuild guide for details on replacing roll bar bushes)
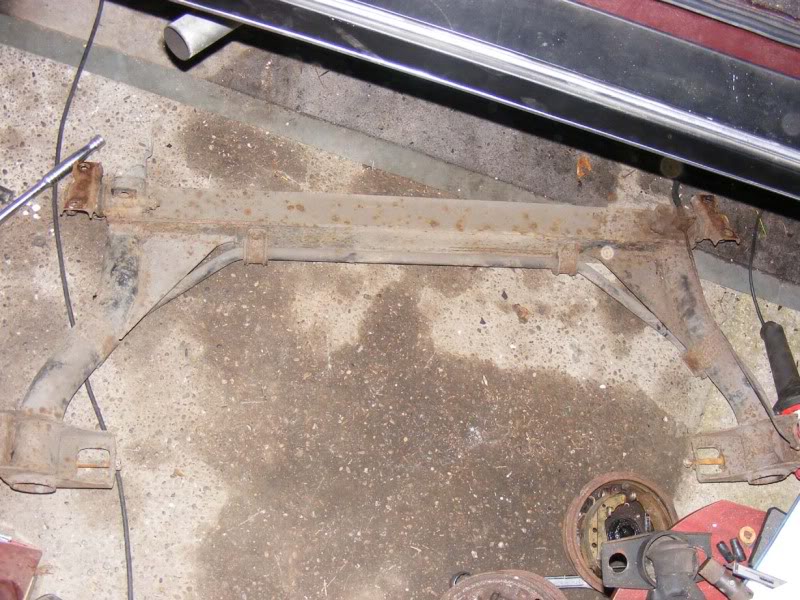
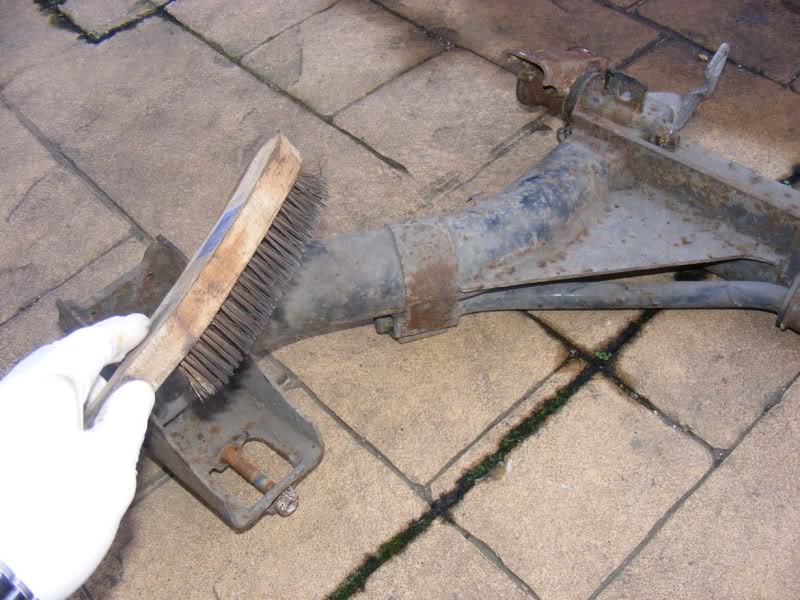
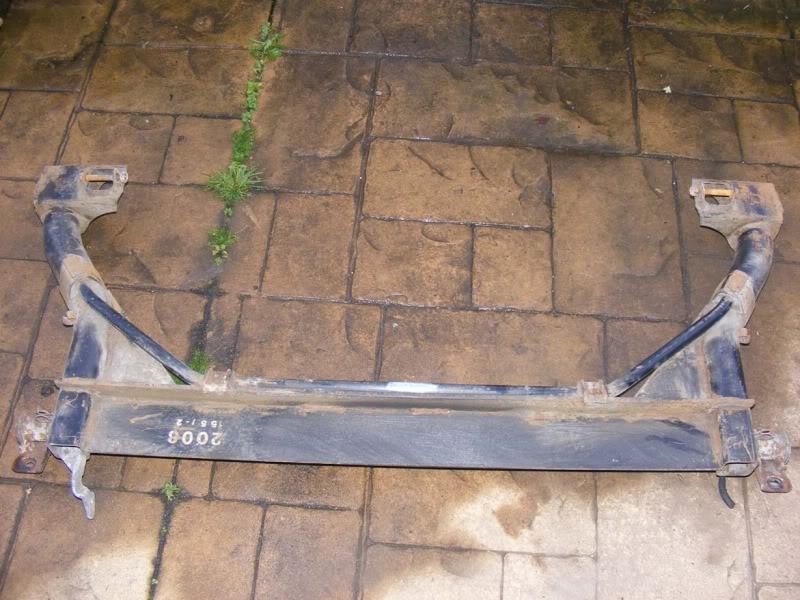
Step 69 - Use a wire brush to remove surface rust and dirt from the subframe (second and third pictures show a before and after of the hole subframe)
Step 68 - Now you should have a bare subframe. The only things attached are the bushes holding it on (we'll come to those) and the anti-roll bar. If your anti roll bar bushes are worn then simply remove the bar and slide new bushes on (see the front end rebuild guide for details on replacing roll bar bushes)
Step 69 - Use a wire brush to remove surface rust and dirt from the subframe (second and third pictures show a before and after of the hole subframe)
Posted
Settled In
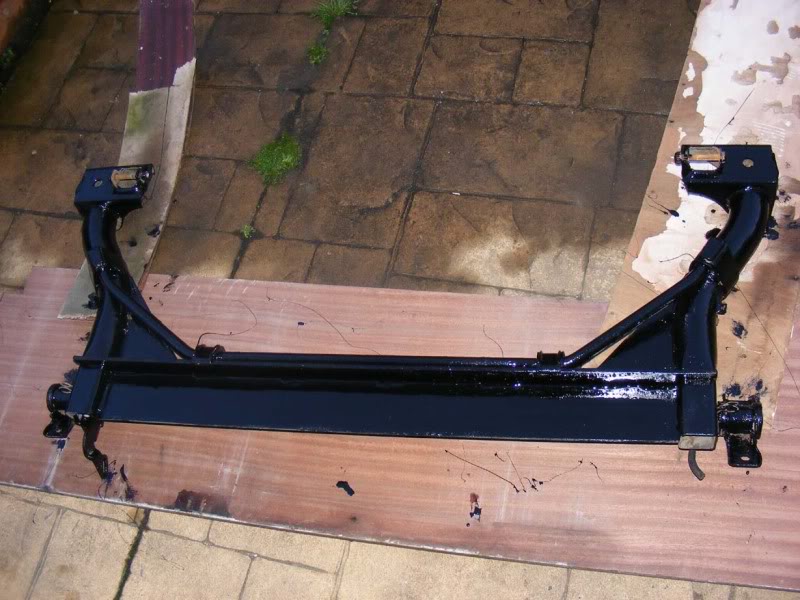
Step 70 - Now coat in Hammerite to protect it for the years to come
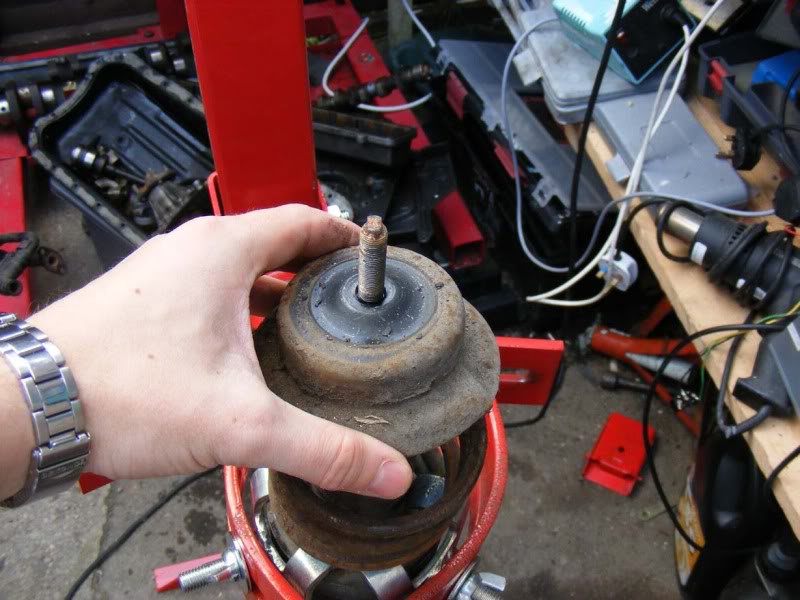
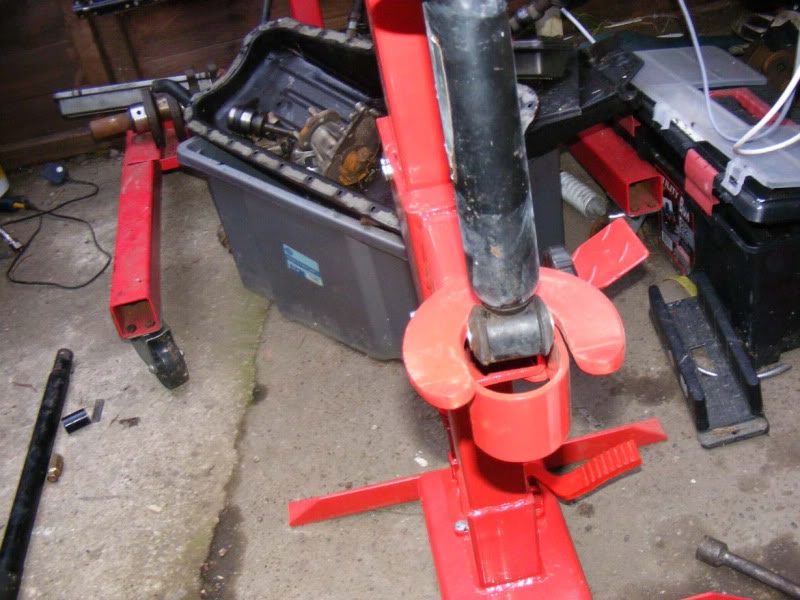
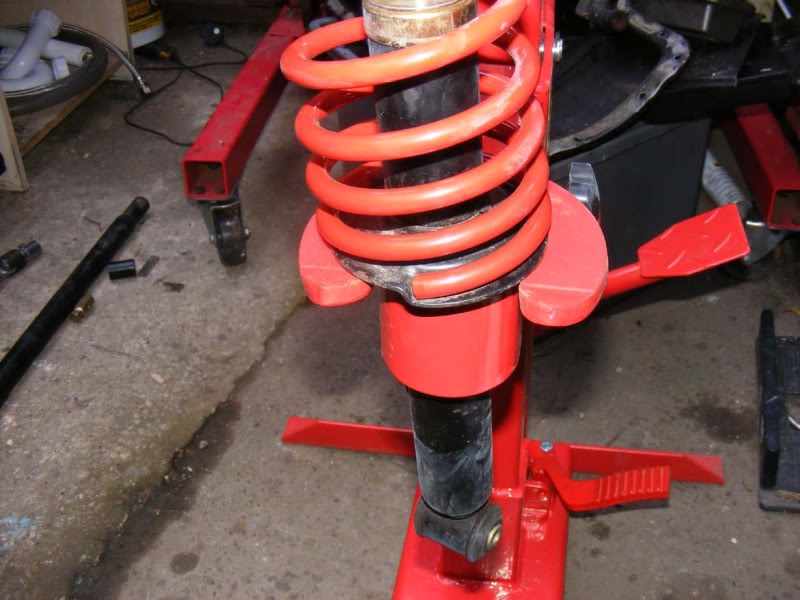
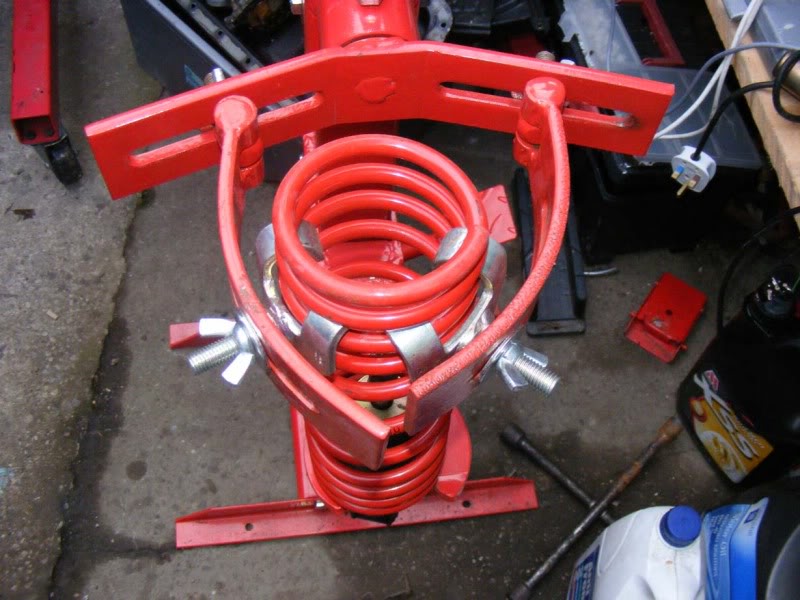
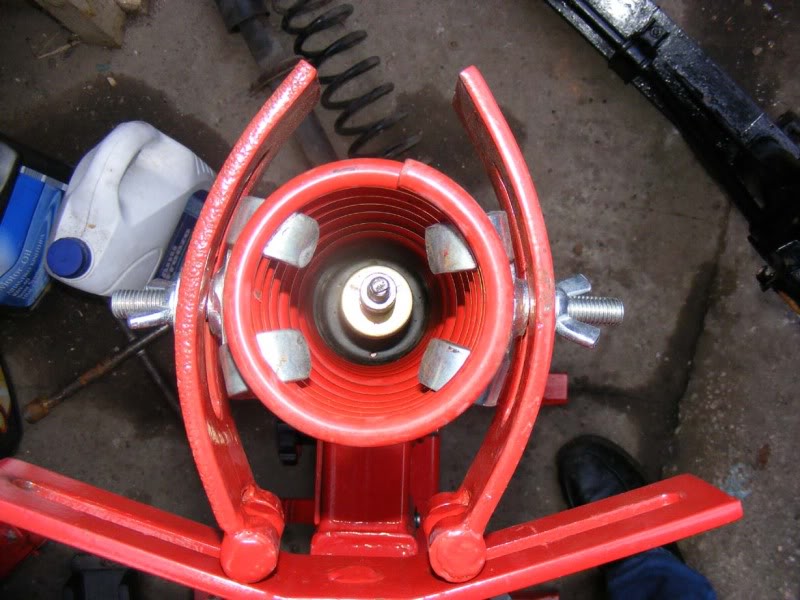
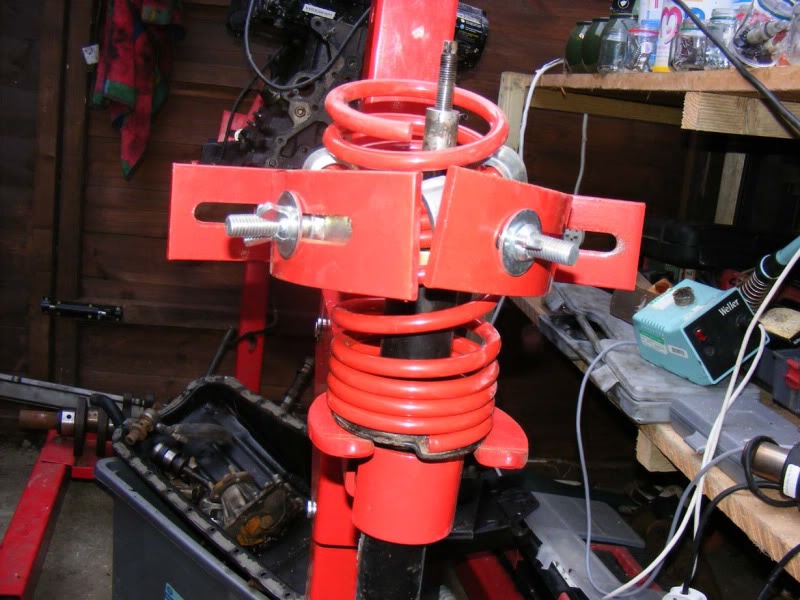
Step 71 - Time to rebuild the shocks and springs now, use a spring compressor (shown is a hydraulic one which will cost you about �70 and is WELL worth it, even if you only do one spring job a year it'll pay for itself quickly - failing that use TWO sets of ordinary clamps). Relieve the tension in the spring
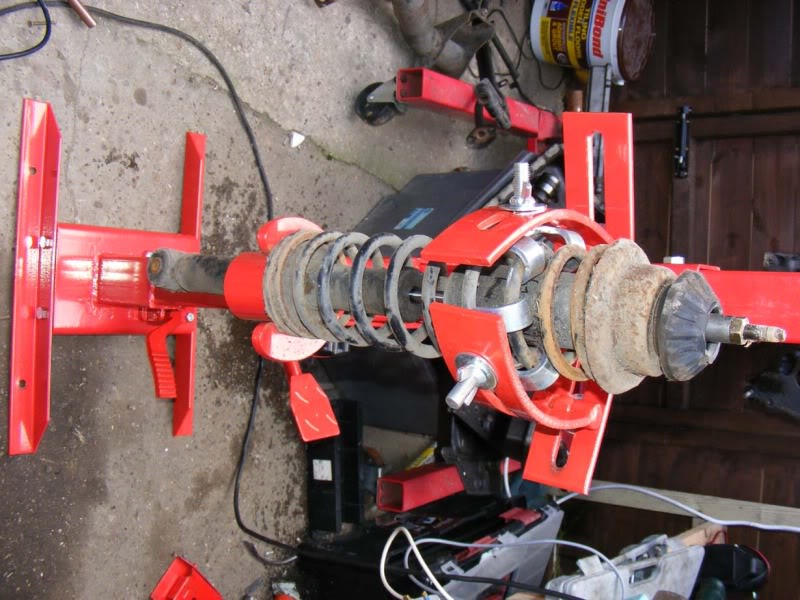
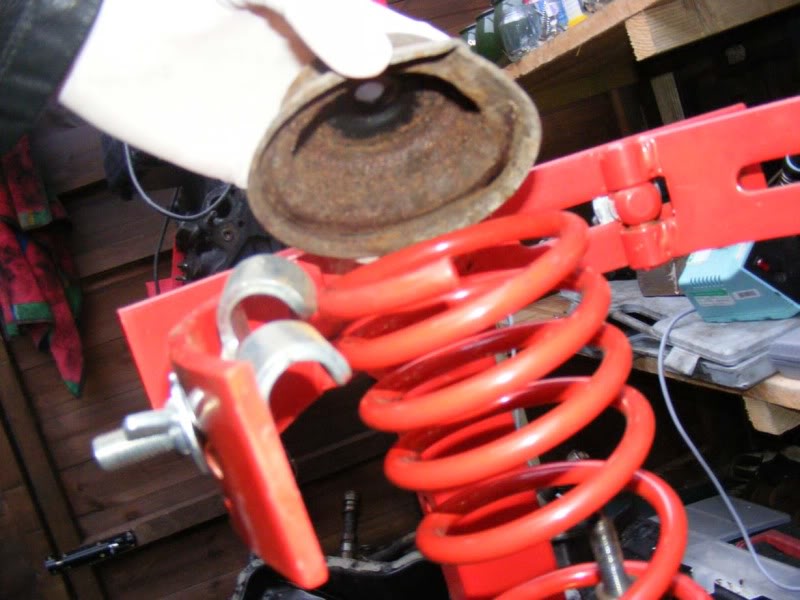
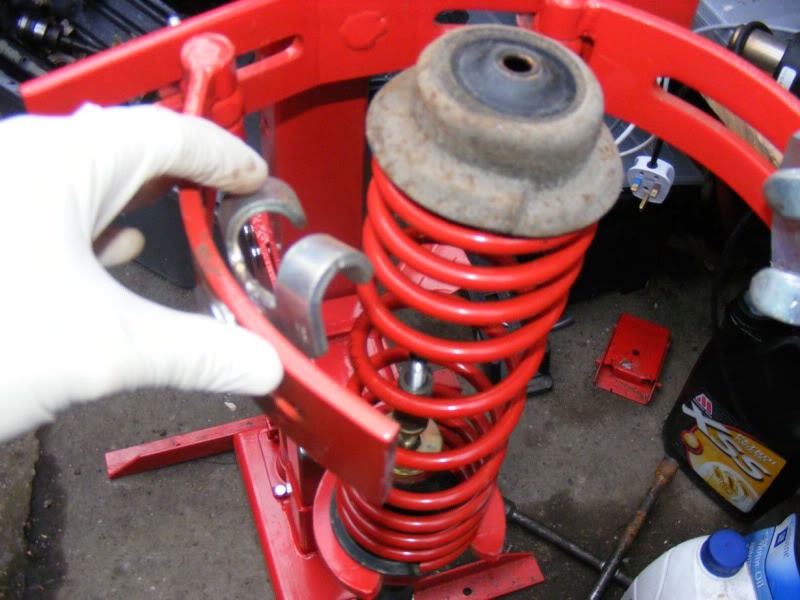
Step 72 - You will be able to pull (and twist) the top mount off

Step 71 - Time to rebuild the shocks and springs now, use a spring compressor (shown is a hydraulic one which will cost you about �70 and is WELL worth it, even if you only do one spring job a year it'll pay for itself quickly - failing that use TWO sets of ordinary clamps). Relieve the tension in the spring
Step 72 - You will be able to pull (and twist) the top mount off
Posted
Settled In
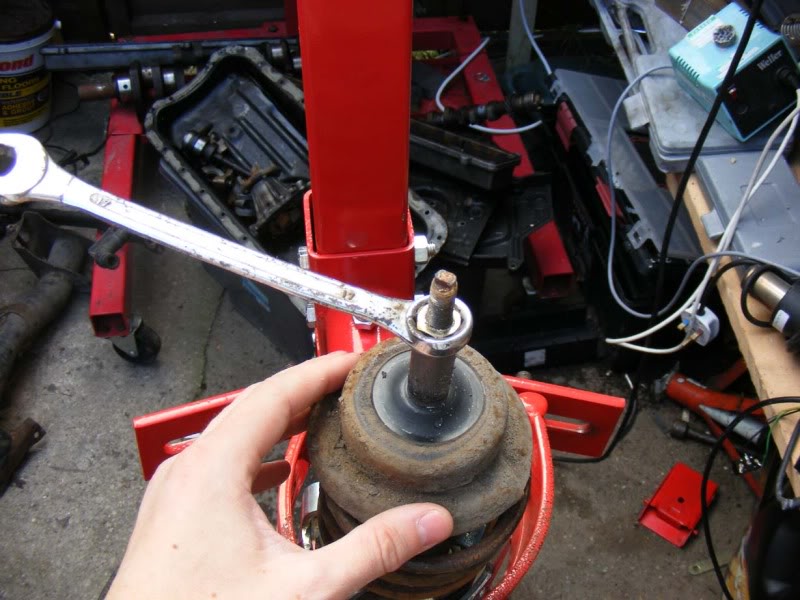
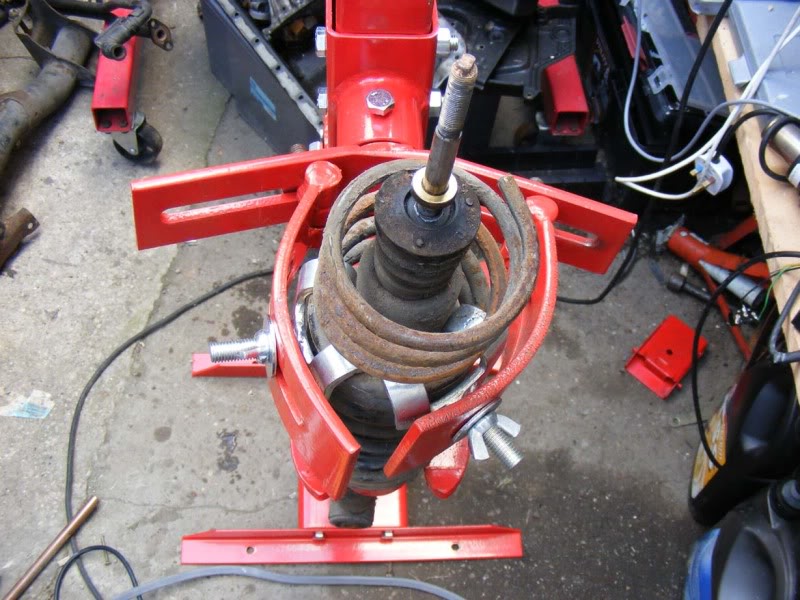
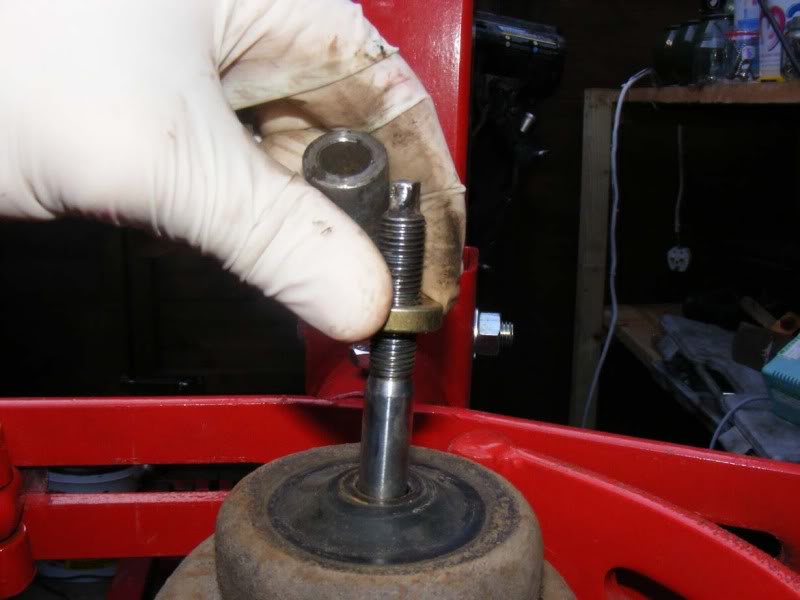
Step 73 - Now use a 17mm spanner to remove the top nut, note you will need to use mole grips or similar to hold the spindle (which has flats on it)
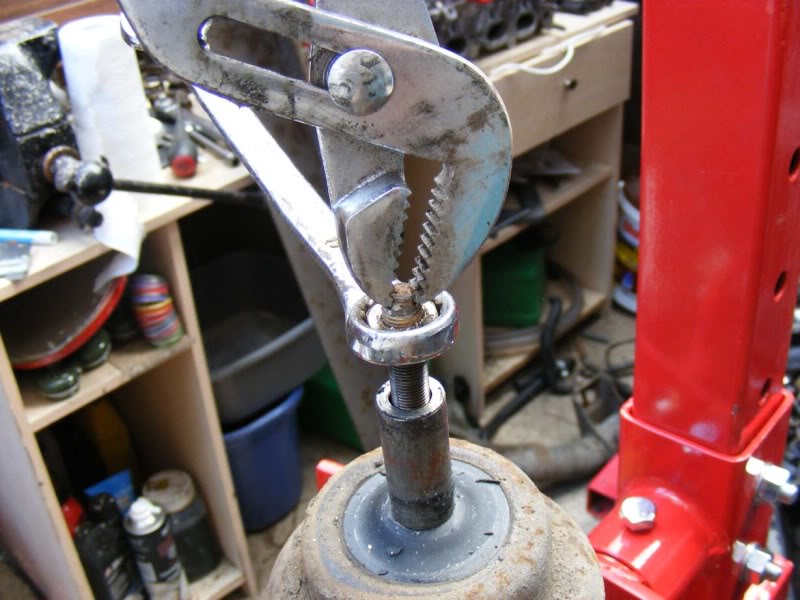
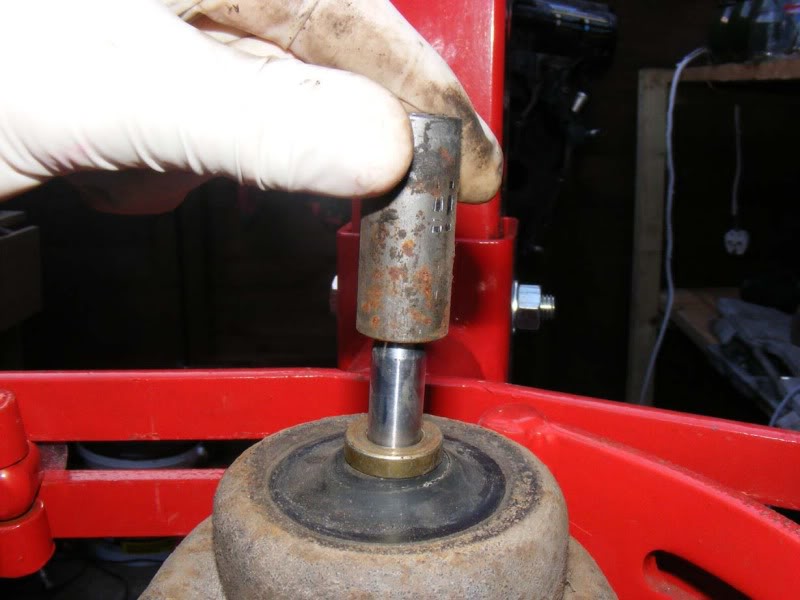
Step 74 - If you find the nut gets stuck at the top where the flats are, hold the spacer directly with mole grips as shown. Be absolutely certain that there is no tension on the spring when you remove the top nut!
Step 75 - Remove the top nut and spacer
Step 74 - If you find the nut gets stuck at the top where the flats are, hold the spacer directly with mole grips as shown. Be absolutely certain that there is no tension on the spring when you remove the top nut!
Step 75 - Remove the top nut and spacer
Posted
Settled In
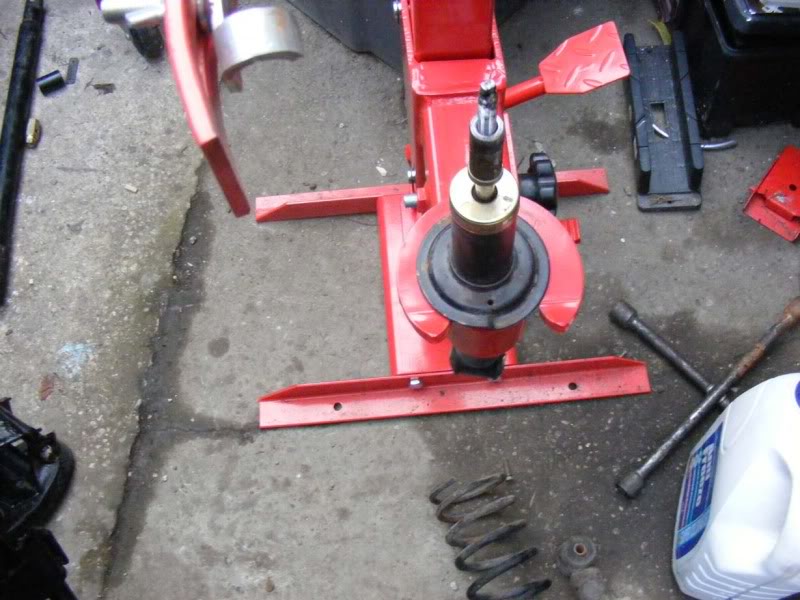
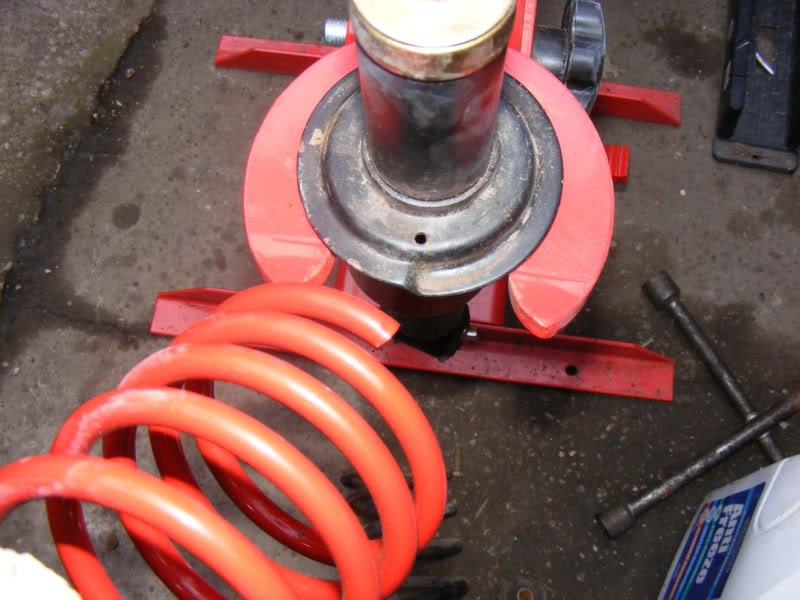
Step 76 - Now slide off the spring cup
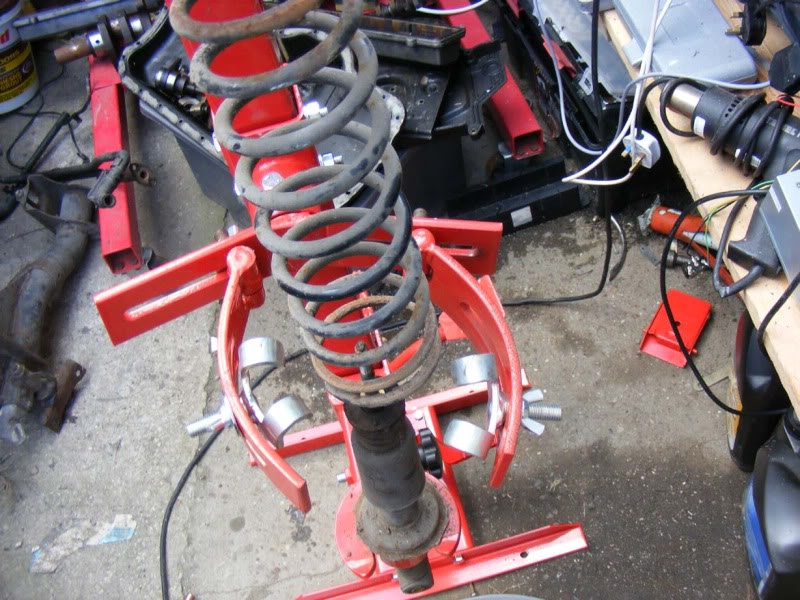
Step 77 - At this point you can relieve the spring tension slowly, very safe and easy with the hydraulic compressors
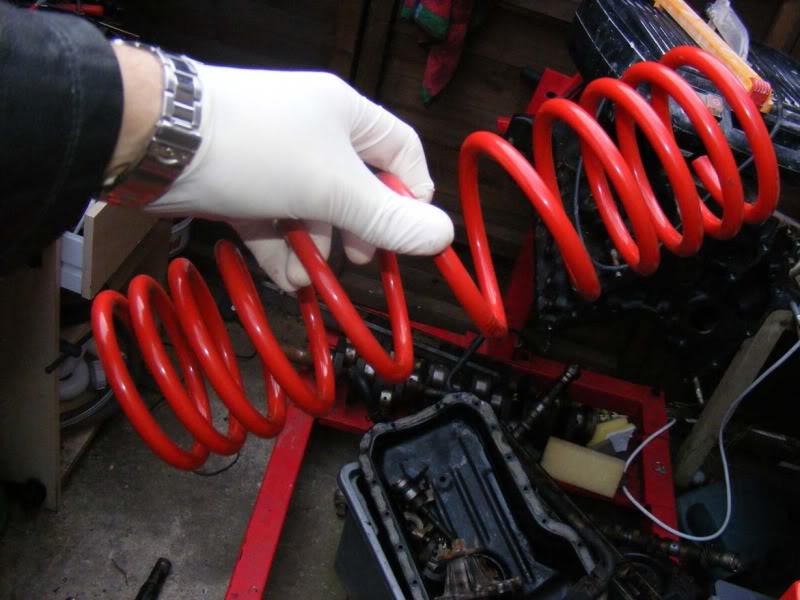
Step 78 - Once the spring tension is released, remove and discard the old spring
Step 77 - At this point you can relieve the spring tension slowly, very safe and easy with the hydraulic compressors
Step 78 - Once the spring tension is released, remove and discard the old spring
Posted
Settled In
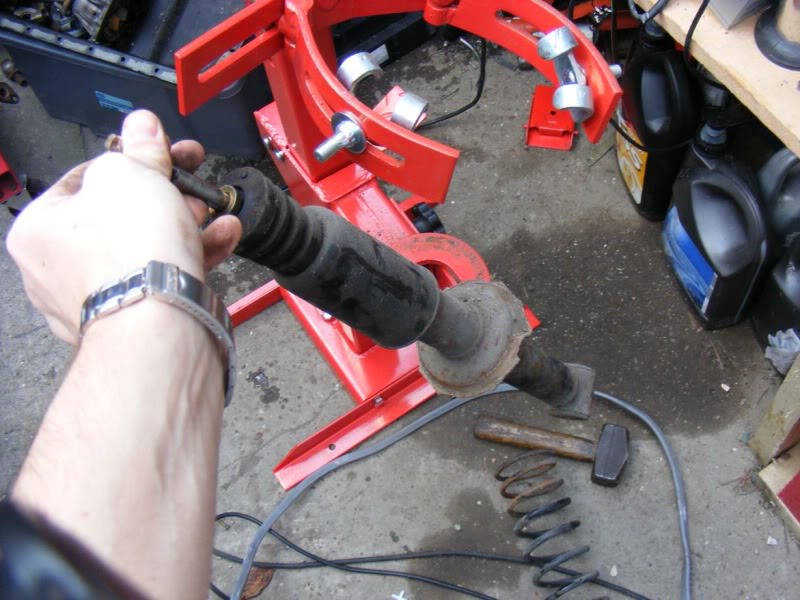
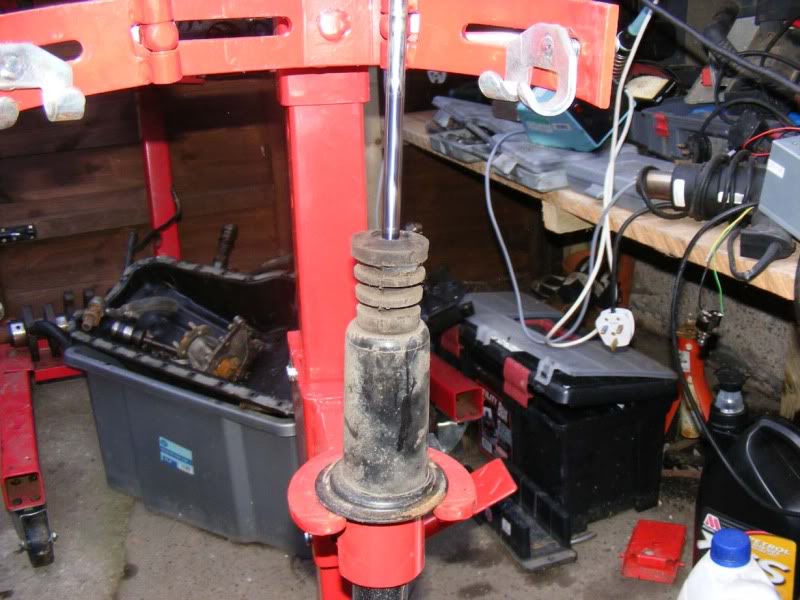
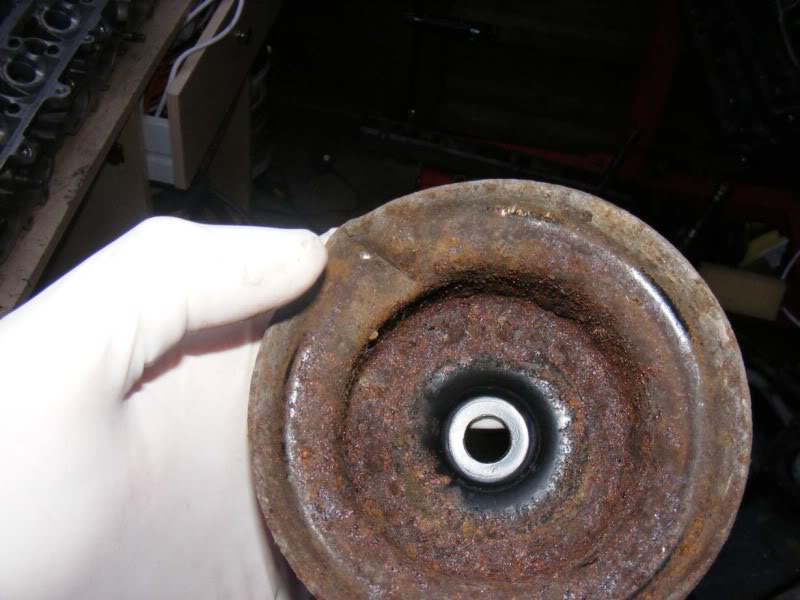
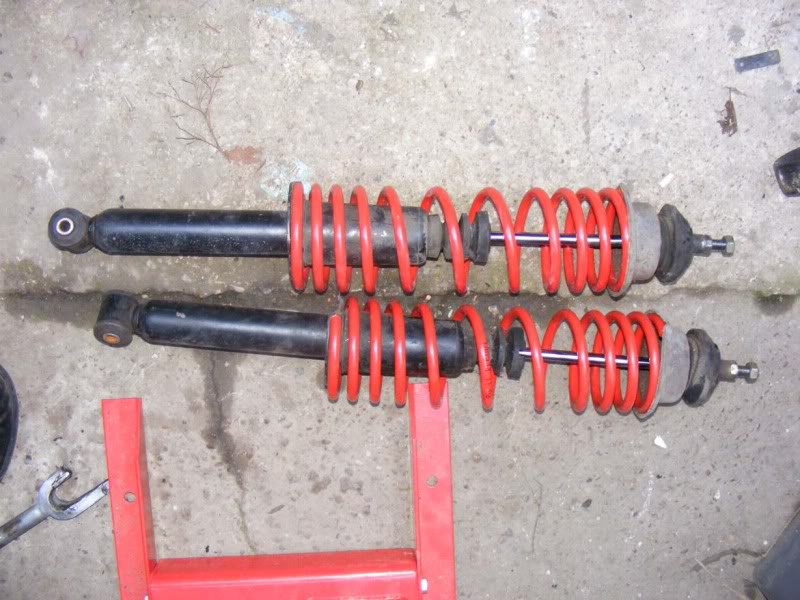
Step 79 - Remove and inspect the shock body. The second picture shows mine, the base where the spring sits was demolished
Step 80 - As always, keep everything in a neat order so you know what goes where when it comes to reassembly
Step 81 - Grab yourself a shiny new shock and prepare to reassemble

Step 80 - As always, keep everything in a neat order so you know what goes where when it comes to reassembly
Step 81 - Grab yourself a shiny new shock and prepare to reassemble
Posted
Settled In
Step 82 - Drop it into the compressor, seat it properly and tighten restraints then drop a new spring onto it. Make sure the spring lines up with the groove in the seat on the shock. Ensure you refit any covers from the old shock to the new one

Posted
Settled In
Step 83 - Drop the top cup on, again, make sure the groove lines up with the spring when fitted
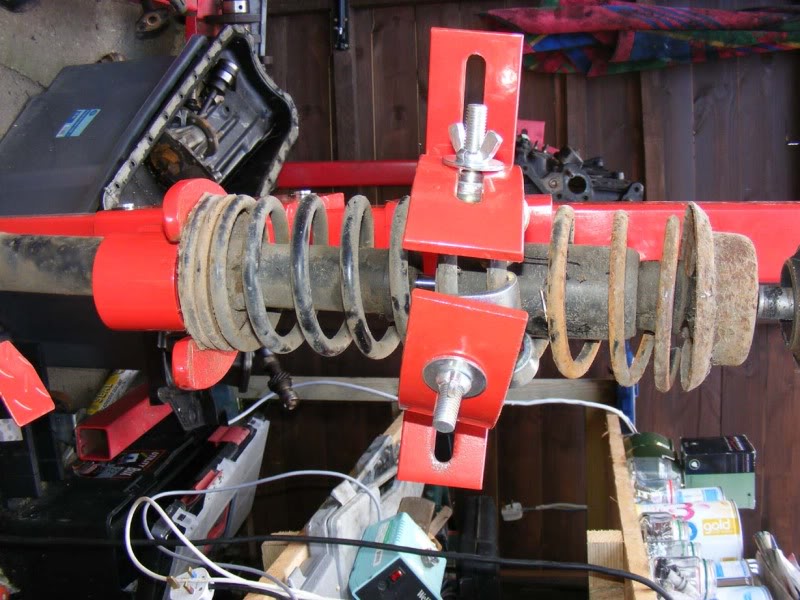
Step 84 - Hook the metal clamps over the spring near the top
Step 84 - Hook the metal clamps over the spring near the top
Posted
Settled In
Step 85 - Make sure you keep the shock central in the spring while you pump the pedal to compress it
Step 86 - Fit the washer, spacer and top nut. You will need to hold the flats again when it comes to tightening the top nut
Step 86 - Fit the washer, spacer and top nut. You will need to hold the flats again when it comes to tightening the top nut
Posted
Settled In
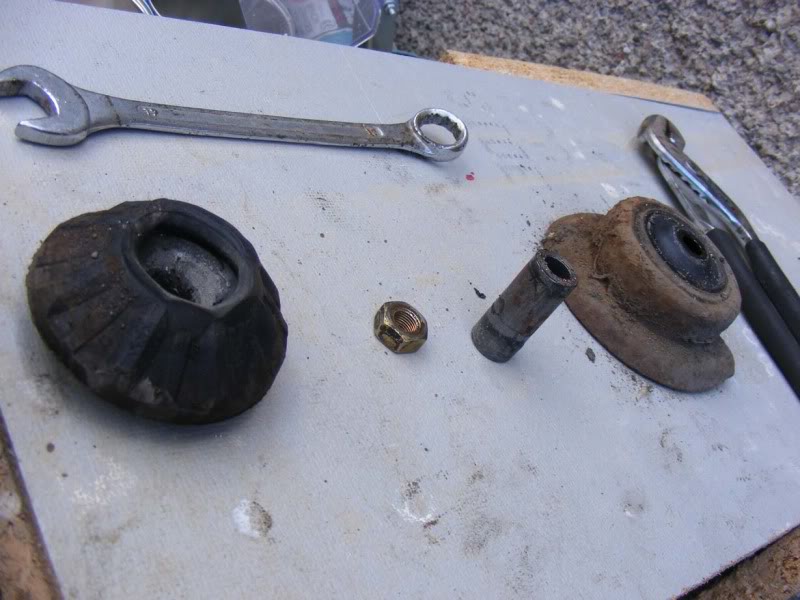
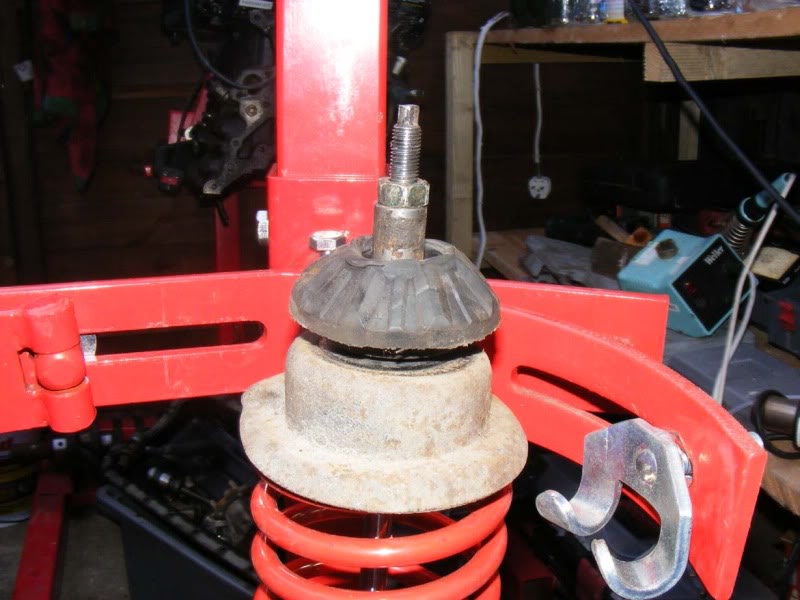
Step 87 - Fit your rubber top mount, replace if it is worn

Step 88 - Relieve the spring tension and remove shock/spring assembly
Step 89 - Repeat for the other side!
Step 88 - Relieve the spring tension and remove shock/spring assembly
Step 89 - Repeat for the other side!
Posted
Settled In
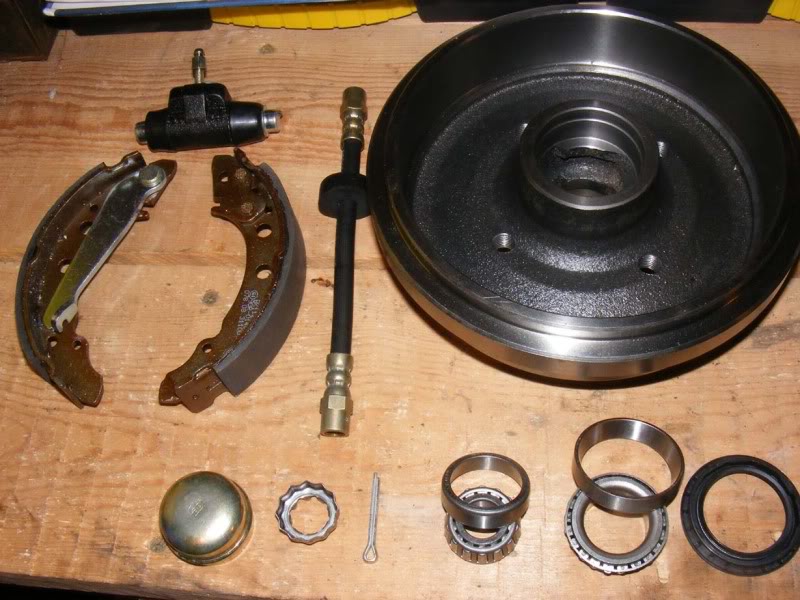
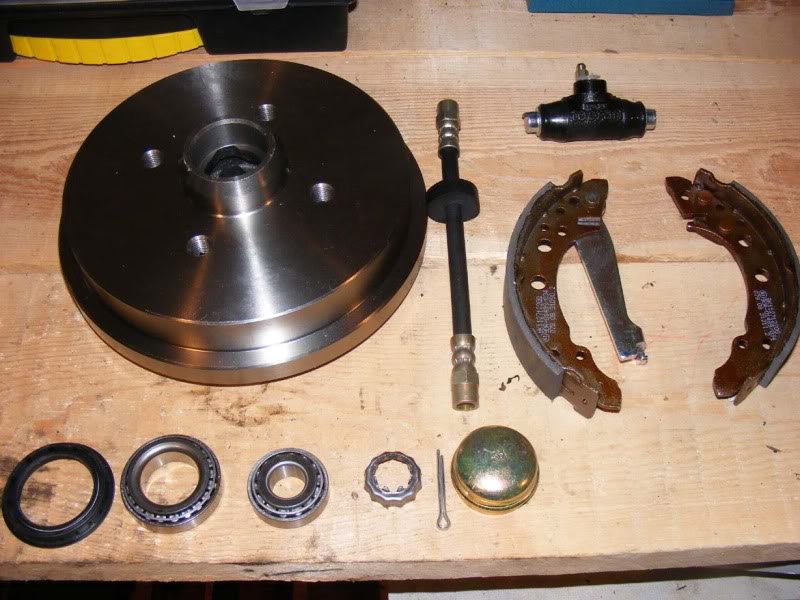
Step 90 - Time to rebuild those hubs, buy yourself a bunch of stuff from ebay for a few quid including inner and outer bearings, the drum itself, the hydraulic actuator, a set of shoes/pads, split pin etc for the hub nut, handbrake cable and prepare to flick springs everywhere!
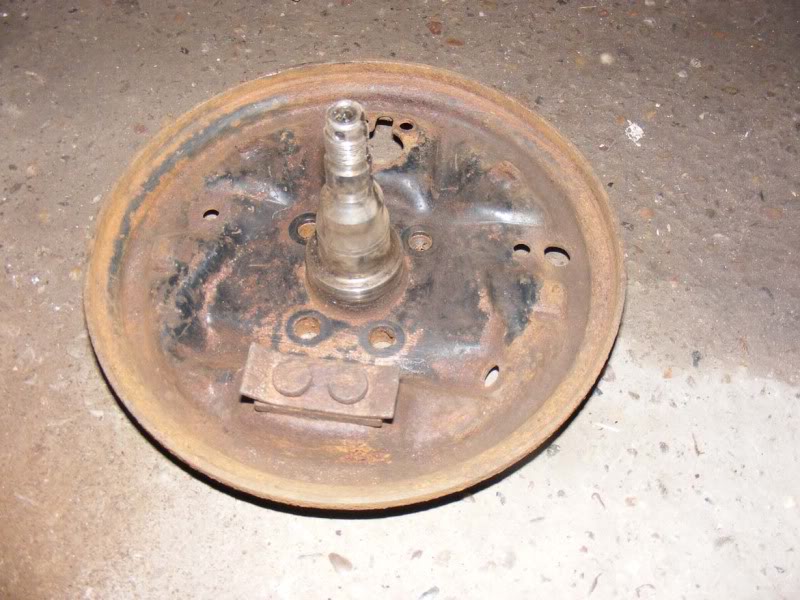
Step 91 - We already stripped the backplate earlier so we will now freshen it up a bit (you can replace but usually not required). Clean off any grease from the threads and shaft
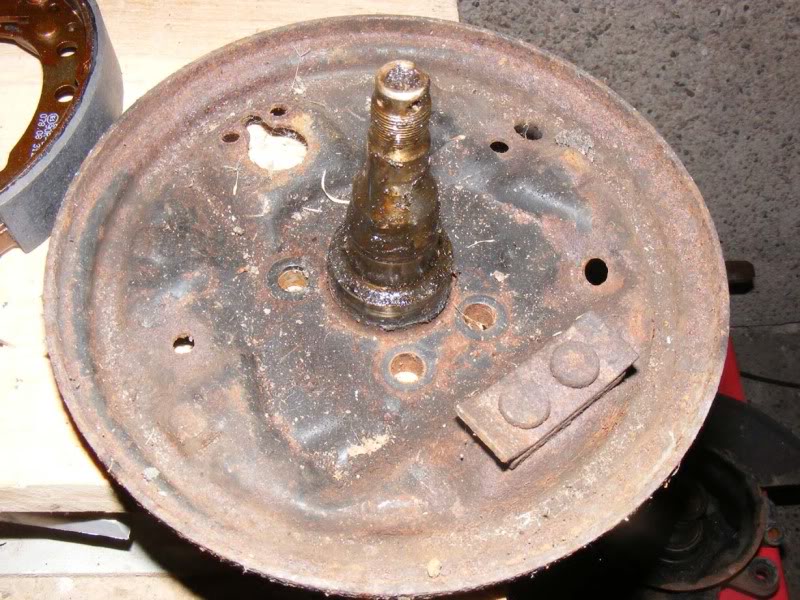
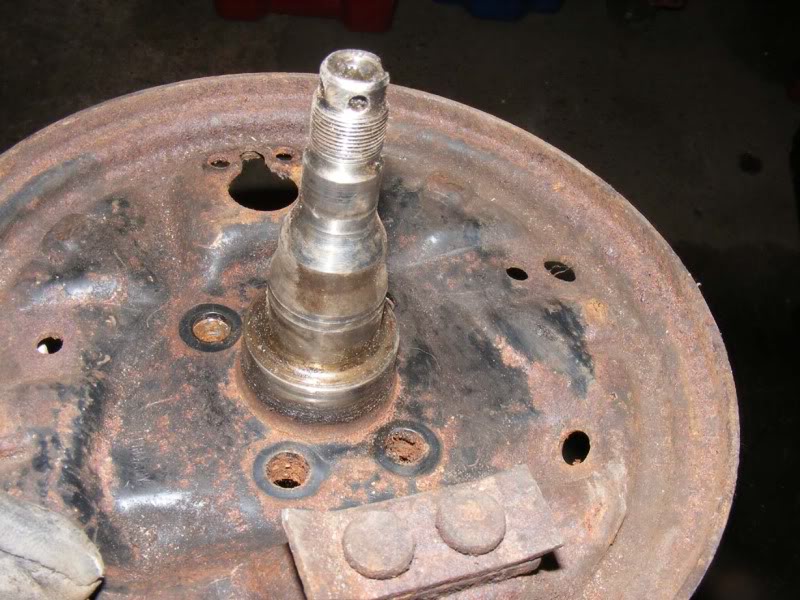
Step 91 - We already stripped the backplate earlier so we will now freshen it up a bit (you can replace but usually not required). Clean off any grease from the threads and shaft
Posted
Settled In
Step 92 - Take a wire brush and get busy flicking off the rusty corrosion, wear a mask if possible because it will be dusty
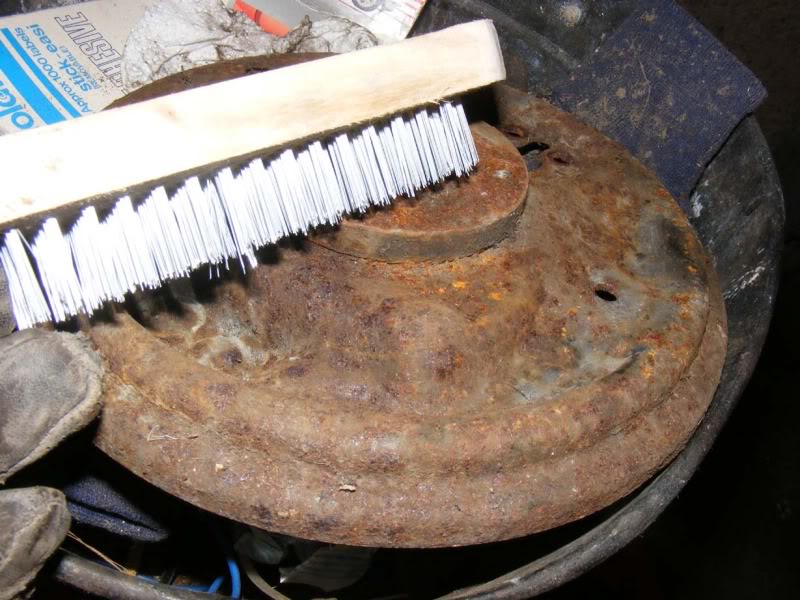
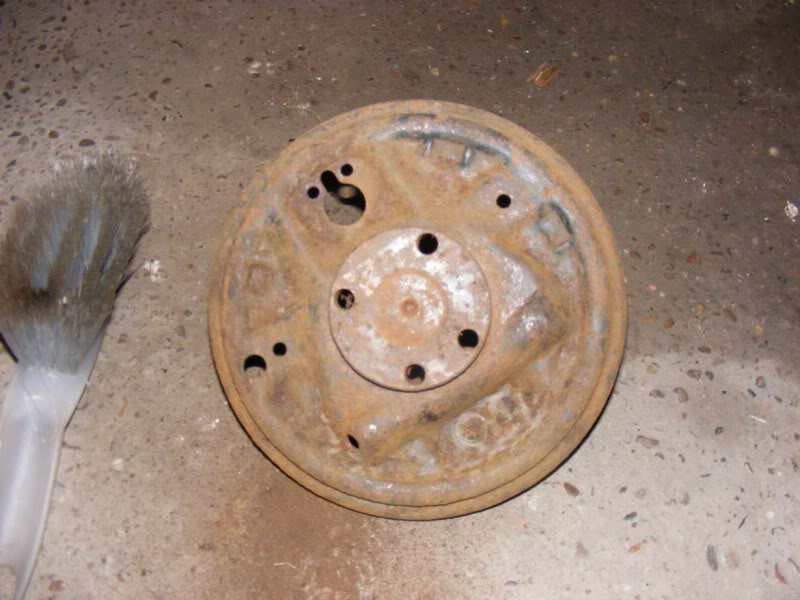
Step 93 - When you have finished you will probably have something quite orange like this
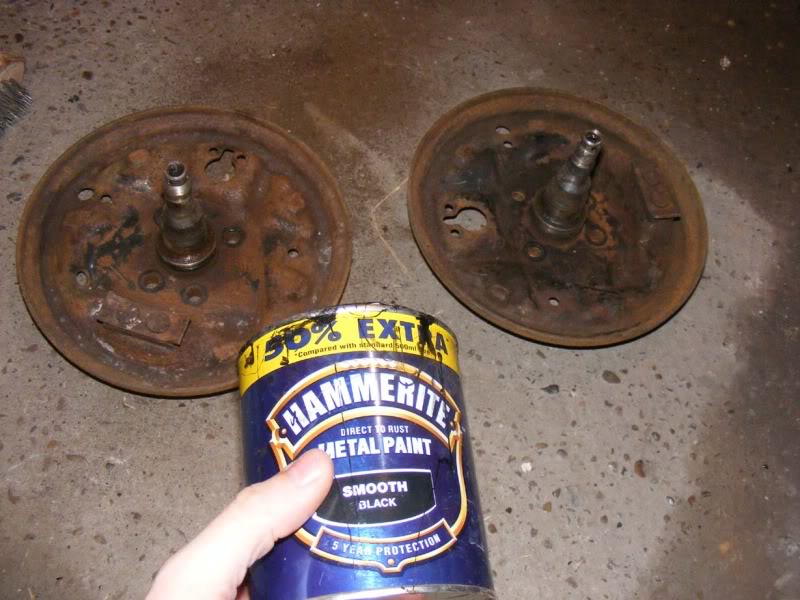
Step 94 - Time for some more Hammerite to bring it back to black and protect the backplate from the elements
Step 93 - When you have finished you will probably have something quite orange like this
Step 94 - Time for some more Hammerite to bring it back to black and protect the backplate from the elements
Posted
Settled In
Step 95 - Apply a liberal coating to both sides and wait for it to dry before doing the other side. Make sure you don't get any paint on the shaft itself, the bearing spins here
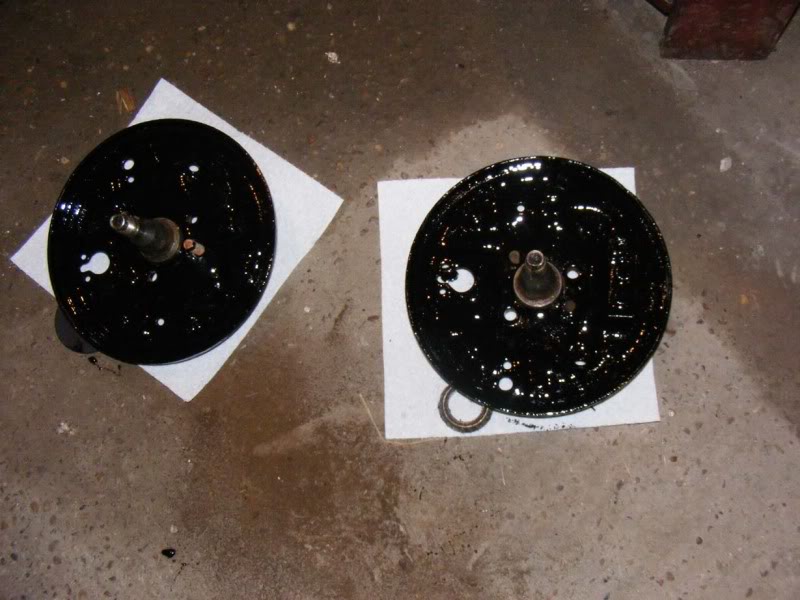
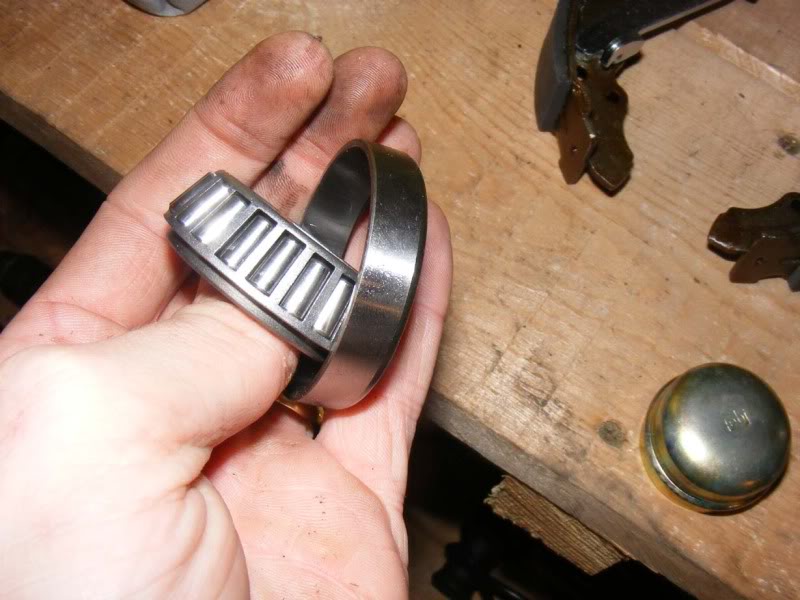
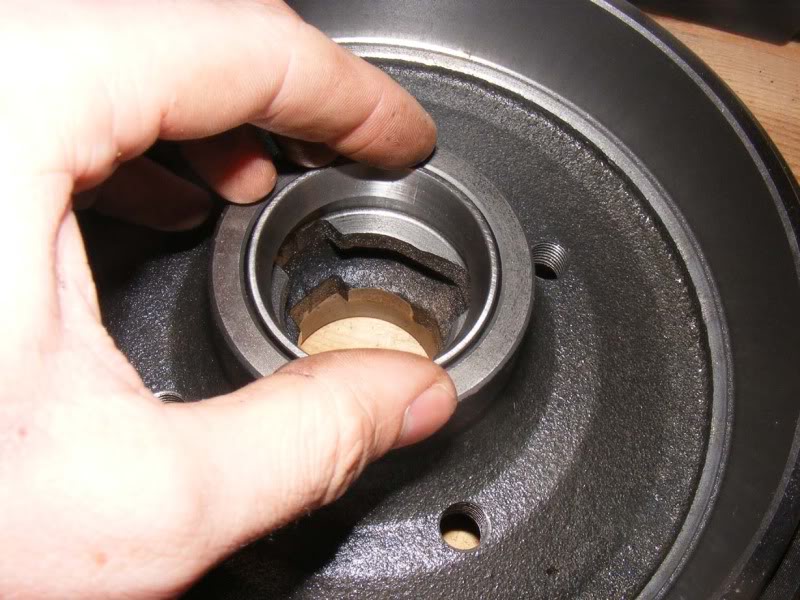
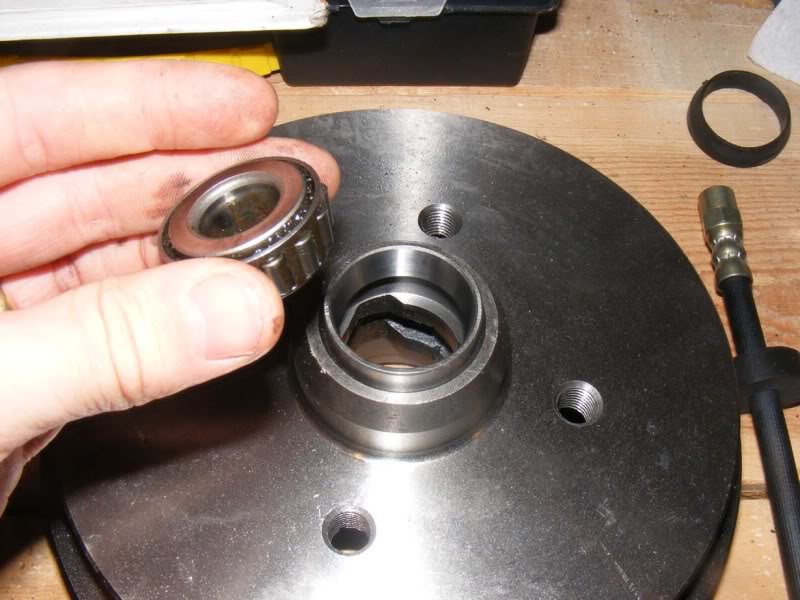
Step 96 - Now the bearings, these consist of two parts, the tapered piece with all the little roller bearings in it and the 'race' that it sits in and spins. The hard bit is making the race go in the hub because it is a very tight interference fit so you may want to pass it to a garage for these to be pressed in (don't pay more than �10-�15 though)
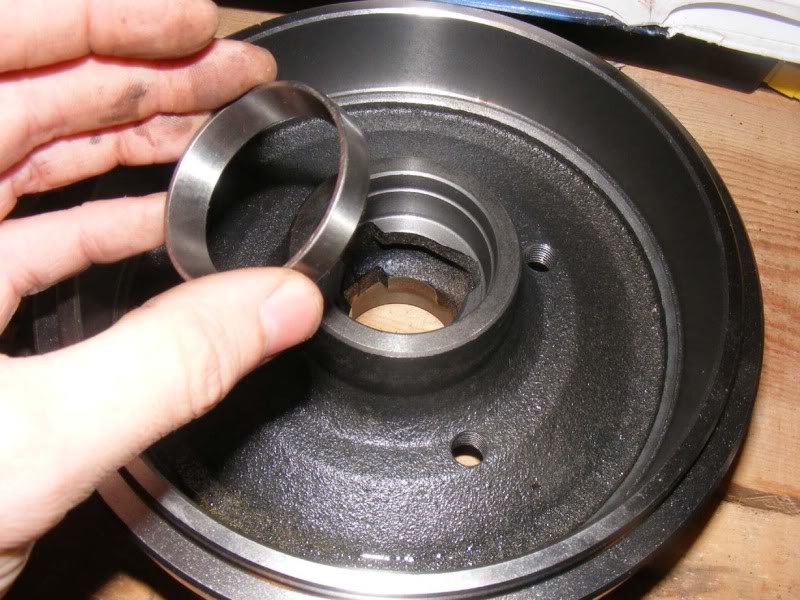
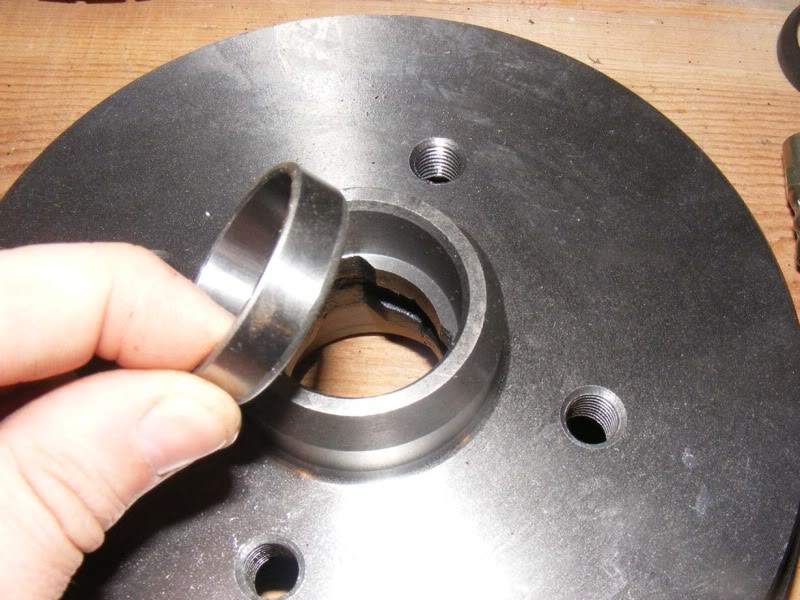
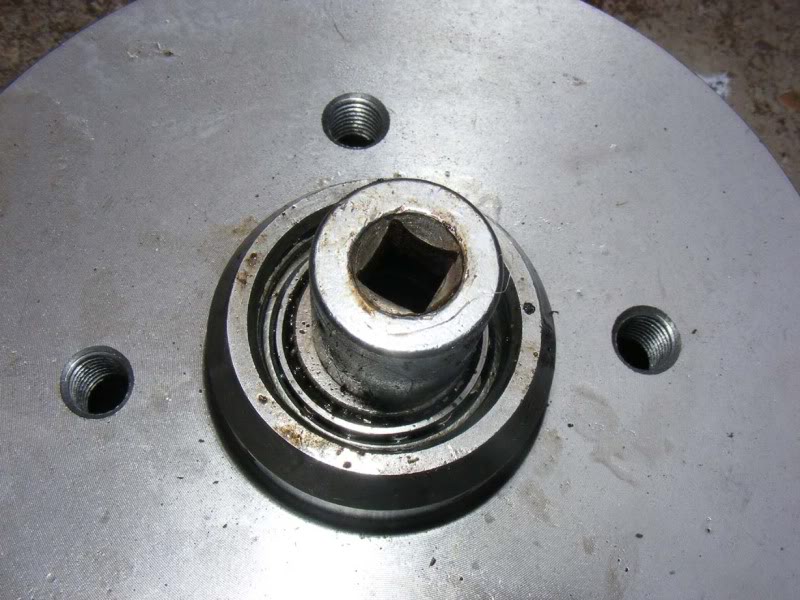
Step 97 - If you're a die hard like me then you can do it yourself with a little brain and a little brawn! The race needs to sit in the hub as shown (picture 1 shows inner and picture 2 outer)
Step 96 - Now the bearings, these consist of two parts, the tapered piece with all the little roller bearings in it and the 'race' that it sits in and spins. The hard bit is making the race go in the hub because it is a very tight interference fit so you may want to pass it to a garage for these to be pressed in (don't pay more than �10-�15 though)
Step 97 - If you're a die hard like me then you can do it yourself with a little brain and a little brawn! The race needs to sit in the hub as shown (picture 1 shows inner and picture 2 outer)
Posted
Settled In
Step 98 - You will be able to drop the race in so far and then you will meet resistance. Now, there are a number of things you can do here including use a bearing fitter tool, a socket just the right size, tubing cut to fit etc and then start smacking away. I went for what I consider to be a more sensible approach and less likely to destroy the race/hub
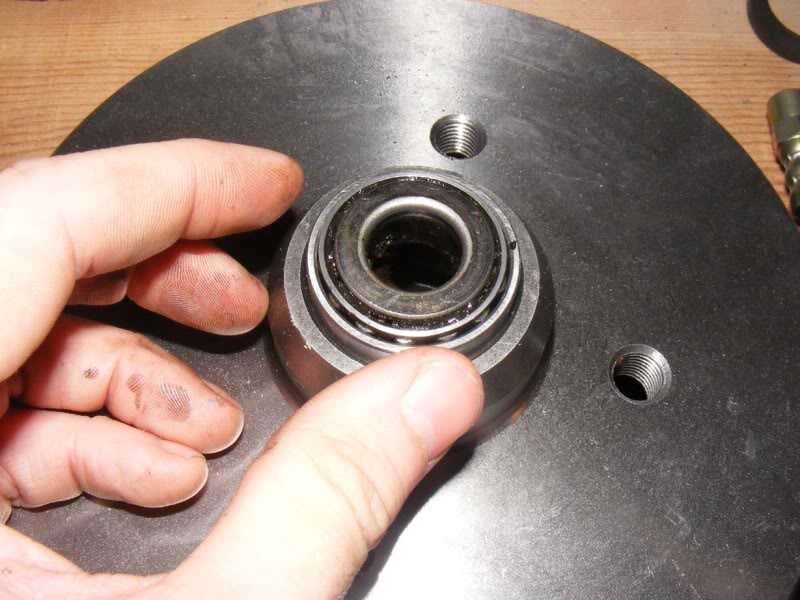
Step 99 - Clean up an old inner and outer bearing that you removed earlier

Step 100 - Pop the old bearing into the race (which is just placed over where it will sit in the picture)
Step 99 - Clean up an old inner and outer bearing that you removed earlier
Step 100 - Pop the old bearing into the race (which is just placed over where it will sit in the picture)
Posted
Settled In
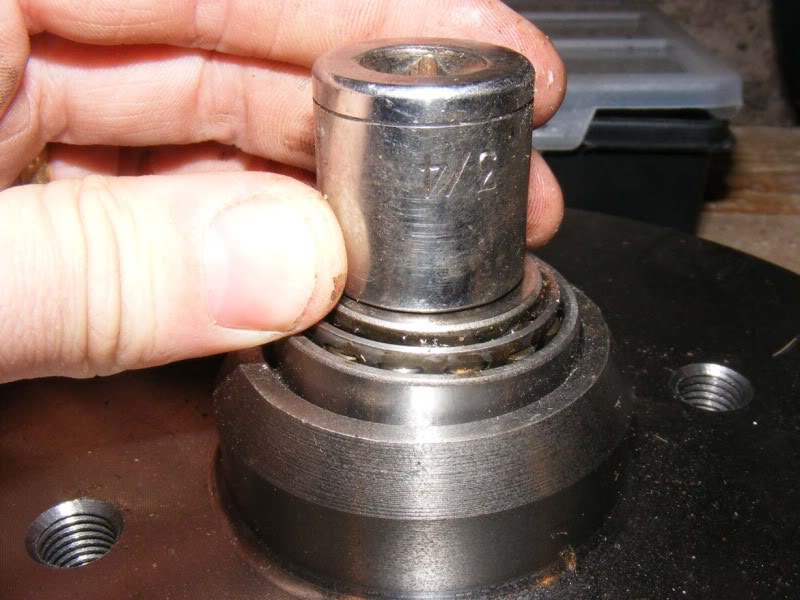
Step 101 - Find an appropriate socket that will only touch the old bearing and not the race itself (3/4" is fine for this)
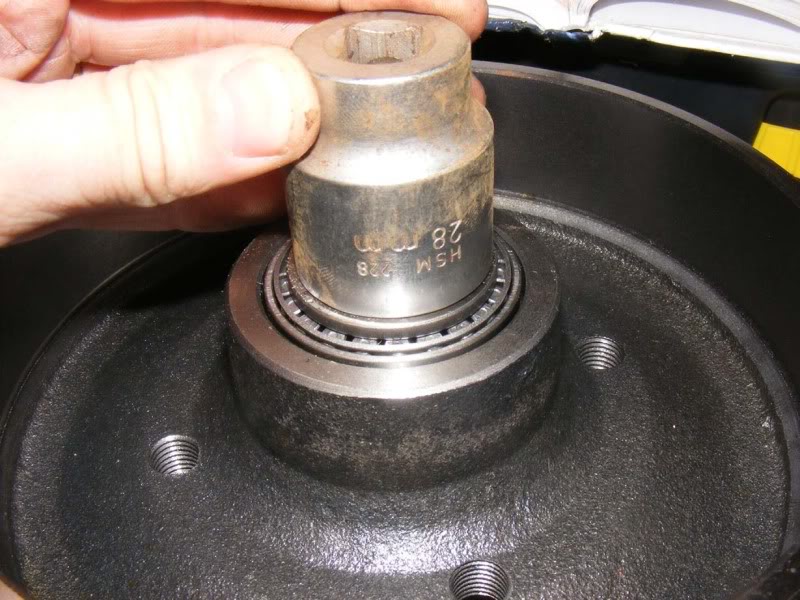
Step 102 - Do the same for the inner bearing (the bigger one), a 28mm is what I chose
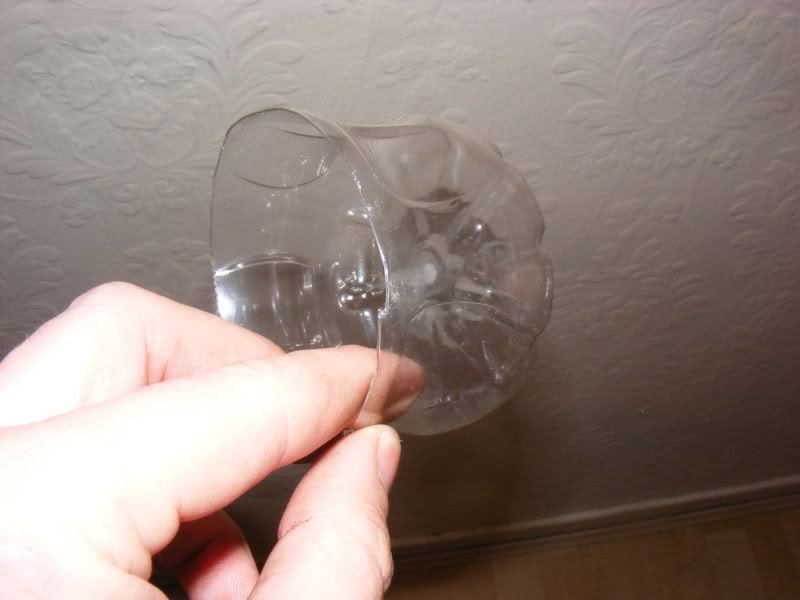
Step 103 - Now where we get a bit clever, cut the bottom of an old plastic bottle
Step 102 - Do the same for the inner bearing (the bigger one), a 28mm is what I chose
Step 103 - Now where we get a bit clever, cut the bottom of an old plastic bottle
Posted
Settled In
Step 104 - Put the new bearing races into the bottle
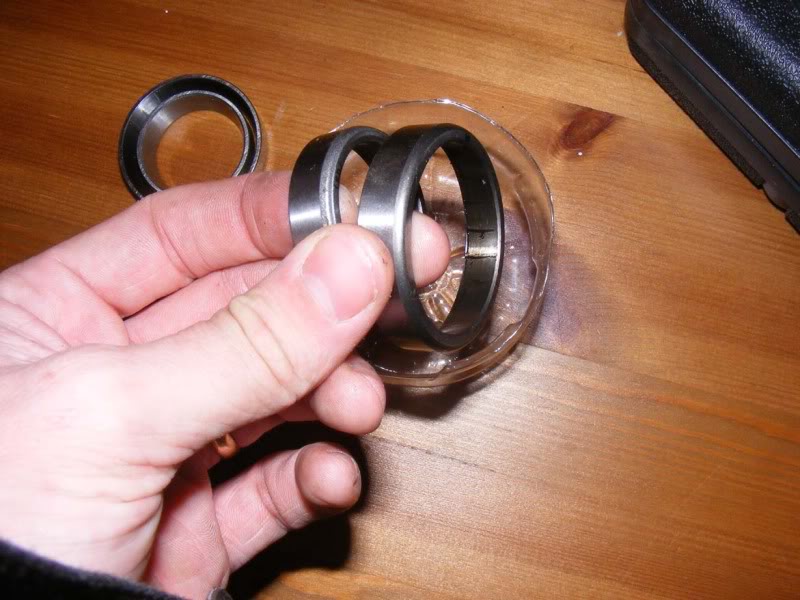
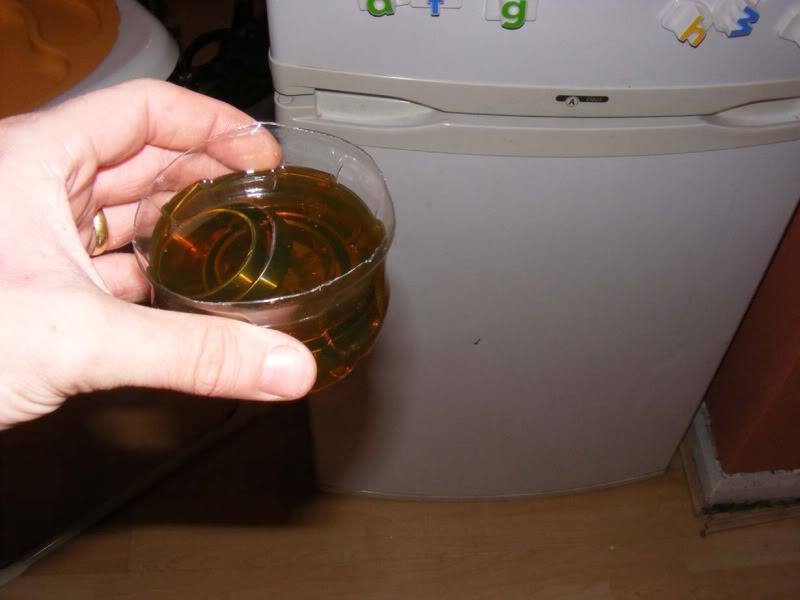
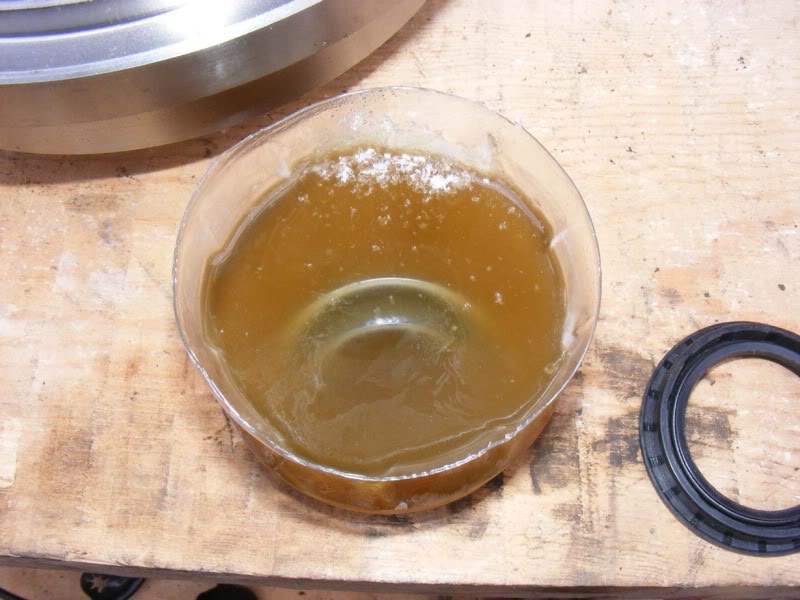
Step 105 - Fill with ordinary motor oil which will later act as a lubricant and stop them from freezing (read on …)

Step 106 - Put the races in your home freezer and leave them for a good few hours or overnight, this will chill them and cause the metal to shrink slightly
Step 105 - Fill with ordinary motor oil which will later act as a lubricant and stop them from freezing (read on …)
Step 106 - Put the races in your home freezer and leave them for a good few hours or overnight, this will chill them and cause the metal to shrink slightly
Posted
Settled In
Step 107 - Once chilled, remove the tub from the freezer and admire the oil's ability to lubricate at low temperatures
Step 108 - Remove one of the OUTER (smaller) bearing races and place onto the hub
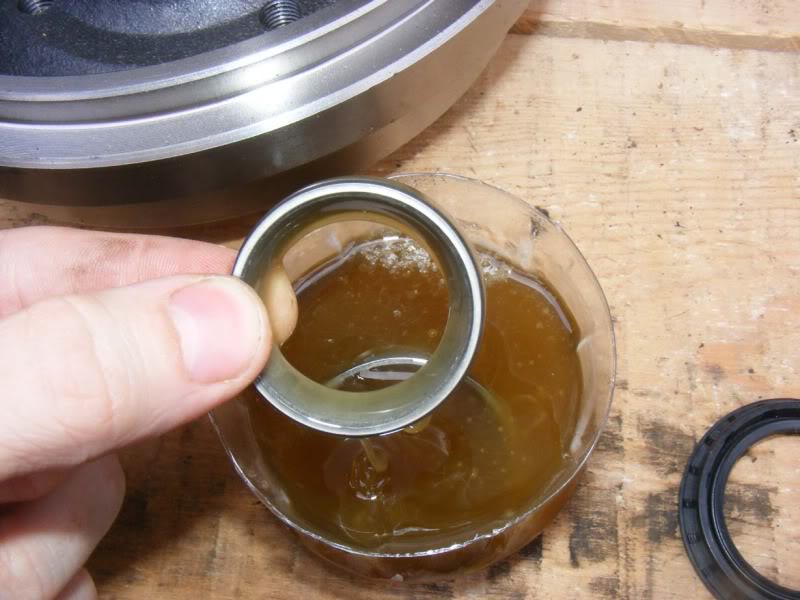

Step 109 - Now put the OLD bearing you cleaned up earlier into the race
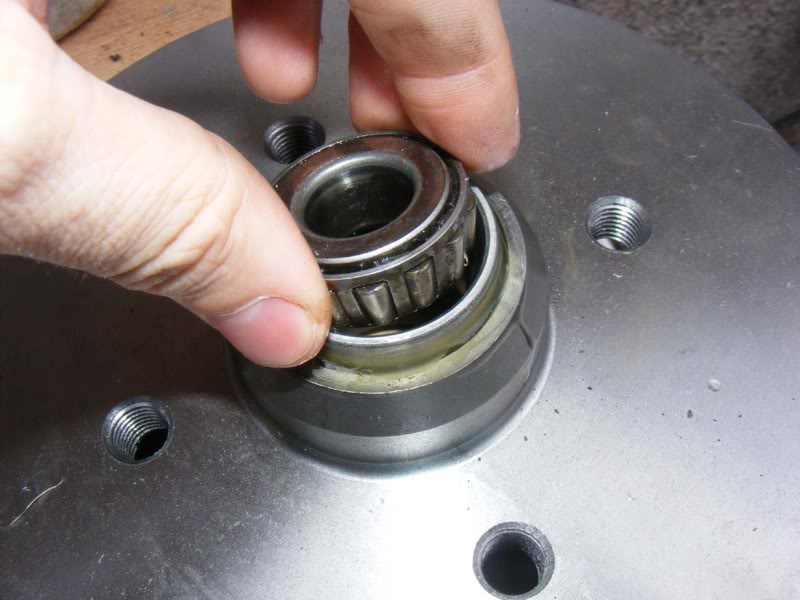
Step 108 - Remove one of the OUTER (smaller) bearing races and place onto the hub
Step 109 - Now put the OLD bearing you cleaned up earlier into the race
Posted
Settled In
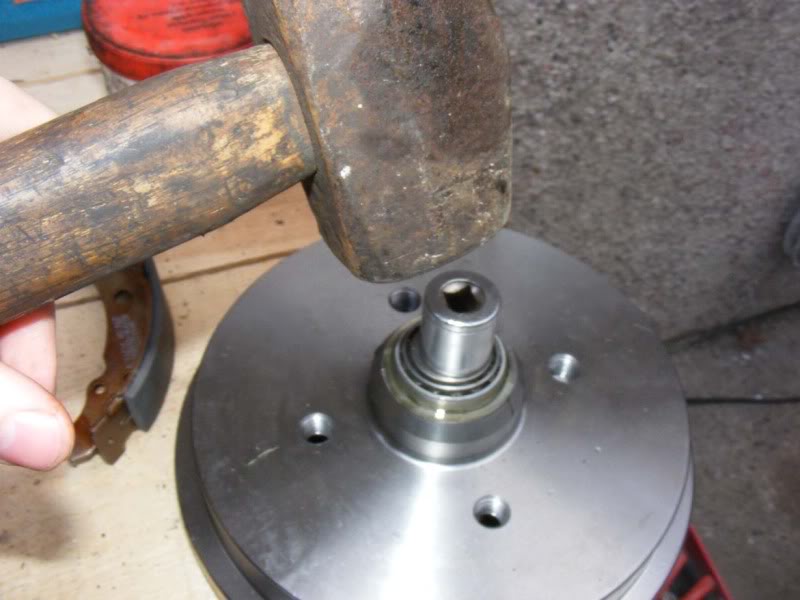
Step 110 - Drop the socket you found earlier in place and use a hammer to force the race in.
Some tips for you:
1. Don't be shy, smack it hard with a big hammer. Don't let your blow 'bounce' once you hit, ensure you have a solid push after you impact
2. Make sure that the race is square at all times, it is really important
3. Hold the socket you are hitting, you might want gloves on if you aren't a good shot
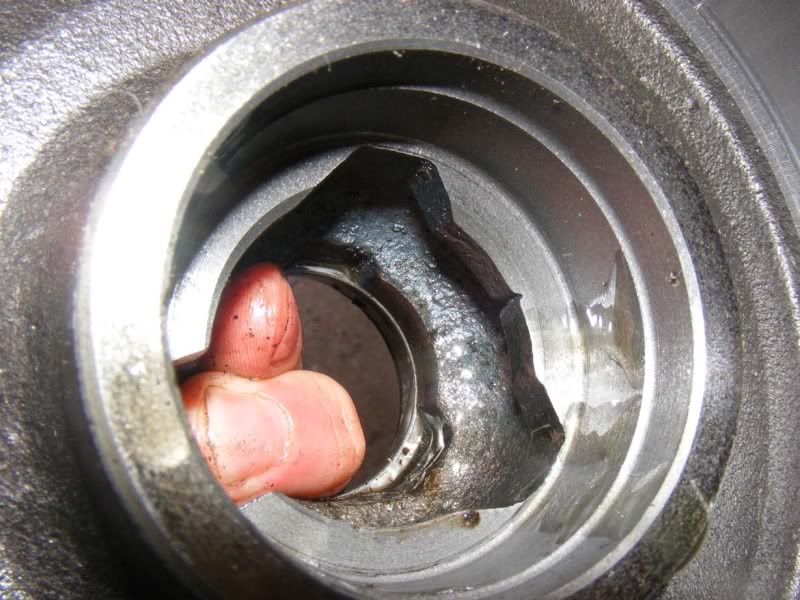
Step 111 - Drive it all the way home until you can remove the bearing and see no gap between the race and the flange in the hub. The third picture shows it fully seated from behind, wipe away excess oil once you have finished

Some tips for you:
1. Don't be shy, smack it hard with a big hammer. Don't let your blow 'bounce' once you hit, ensure you have a solid push after you impact
2. Make sure that the race is square at all times, it is really important
3. Hold the socket you are hitting, you might want gloves on if you aren't a good shot
Step 111 - Drive it all the way home until you can remove the bearing and see no gap between the race and the flange in the hub. The third picture shows it fully seated from behind, wipe away excess oil once you have finished
Posted
Settled In
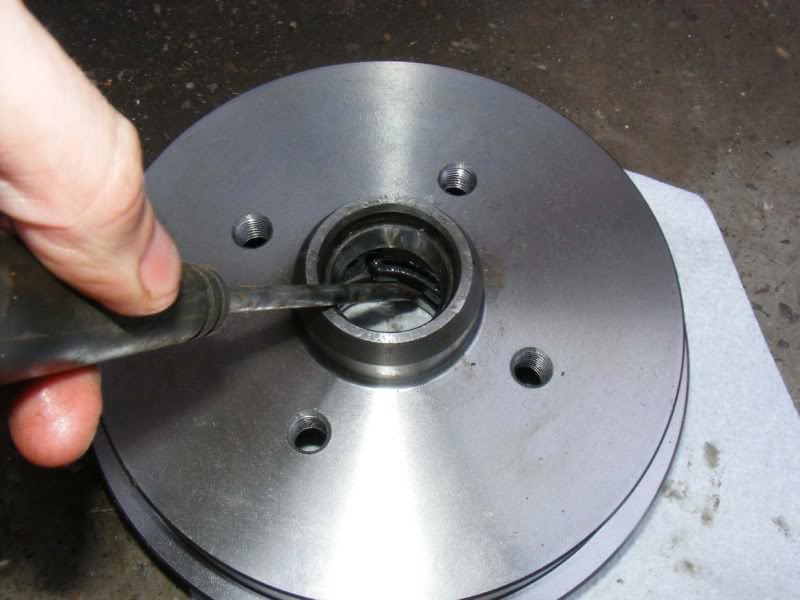
Step 112 - Note, if a any point the race is going in off square, turn the hub the other way up and use a flatblade screwdriver or chisel and tap the race out and have another go. Trust me you won't get it in if it isn't square without damaging something. If you get it dead square you can seat it with one hammer blow (but expect to be hitting it and rotating the hub normally)
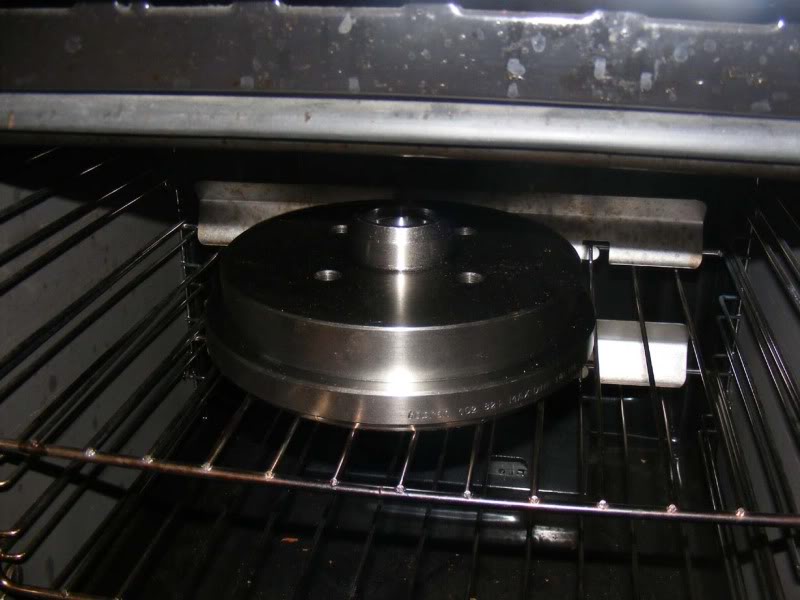
Step 113 - Now when it comes to the bigger bearings, I think you will really struggle with the chilling alone so now we need to use another tip, baking! Put the hub in the oven on gas mark 2 for 20 minutes, it will be plenty hot enough after that
Try not to leave oil in your oven, it's not good for you - especially if you have a wife who likes the oven! A baking tray etc will catch any lubricant that seeps out of the hub
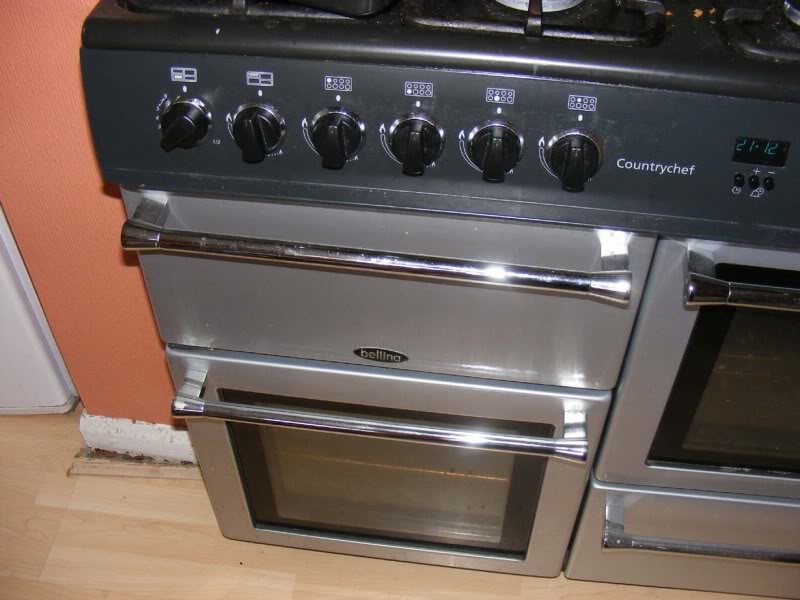
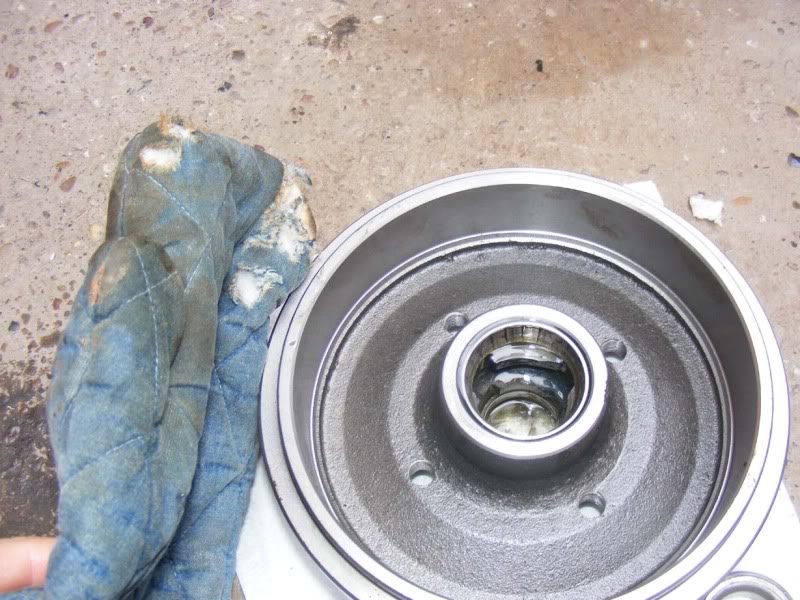
Step 114 - Take your steaming hub out with an oven glove and go back to your working area
Step 113 - Now when it comes to the bigger bearings, I think you will really struggle with the chilling alone so now we need to use another tip, baking! Put the hub in the oven on gas mark 2 for 20 minutes, it will be plenty hot enough after that
Try not to leave oil in your oven, it's not good for you - especially if you have a wife who likes the oven! A baking tray etc will catch any lubricant that seeps out of the hub
Step 114 - Take your steaming hub out with an oven glove and go back to your working area
0 guests and 0 members have just viewed this: None.