


1983 1.1 5dr c formel E in selvas green now with 1300 power!

Posted
Settled In

1983 1.1 5dr c formel E in selvas green now with 1300 power!
Crowson_punk said
went out this afternoon to have butchers at me intermitant brake light only to find it's solved itself???? lol ah well.
Mine did this, found I had a loose wire on the back of the fusebox in the end, might be worth a look.
Posted

Local Hero

Crowson_punk said
chrome trim for the grill
Jon.
I think the red trim goes well against the green myself

DubPartz
Posted
Old Timer

The prob with the brake light appears to be around the back as it worked with the cluster out but not in the light, then it worked and has since. thinking it may just have been a dodgy connector in the block.
Jon.
Posted
Old Timer

fresh from hottuning and fitted up with new top mounts!
They do need greasing but I'll do this just before I fit them!
has anybody got any good pics of where to jack the back end? May have access to a four poster with jacking rails but i'm not sure yet!!
Cheers!
Posted

Settled In
G

Posted
Old Timer
well I paid for them at about 6:30 last monday and they were here this morning before 9!
pretty good i recon. royal mail had battered the box a bit and theres a chip on one of the springs as a result but i cant fault the customer service from hottuning! loads of e-mails and contact!
Damn good price too
Jon.
Posted
Old Timer
just a few to start things off.
coilovers went on!

then bumpers came off as the back was damaged.

then i realised i had mismatched junkyard front wishbones, so on went new 'uns and i reconditioned the alternator,


the alt fell out so i fitted a 55 amp job.
fitted a new grill too, to help with visibility in the winter!

Jon.
Posted
Old Timer
my gear linkage refused to adjust so i set about fitting a repair kit. went to jack it up to fit it only for my sill to seperate from the floor…
so this morning i cut the bent bit of sill out only to find this,


the previous repair on the floor was achieved with a piece of 2mm angle. it had been what loosely resembled welding over the big hole.
the rest was filler and silicone. yes you read correctly, silicone.
so out came the rot,

and i set about making the repair panels whilst my mate (the same silly bugger who was grinding the exhaust in the other pic,) fabricated and repaired the lip on the section of sill i removed.

by the looks of it he's done a good job and we should get away with a quick spray with filler primer before top-coat!
I then tacked the panels in where i wanted them and left him to it whilst i got the rot cut out of the bottom of the front wing.

I know the ridge isn't perfect, but it's the first time i've made my own panels, and tbf i think i've done a good job.
he stopped for a fag half way through so it was about 50/50 on the welding.
After i knocked them back with the grinder we have this:

looking good i think. a spot of underseal and some paint and it'll disappear back under the carpet!!!
hopefully dad'll let me into the garage tomorrow (i've been hogging it since thursday… when my gears packed up…) and i'll get the sill back on and the wing repaired.
then it can all go back together and i'll be happy.
until next weekend when i have to repair the rear arche which has been bodged in a similar fashion!!!
Jon.
Posted
Settled In
love this project so far!
Posted
Settled In
should be seeing this on firday haha
Posted
Old Timer
so, I managed to get an hour and a bit on the car this afternoon before daylight faded.

the sill is on!!!!
as is the closing plate,

they both need the pinholes sorting and dressing back but as it's blacker than coal out there now i'm back in the warm!
I shall be off into the garage tonight to repair the dodgy bits on the front wing. If i'm lucky it should be done by the dusk tomoz!!
Lets hope i have gears when it is done lol
JOn.
Posted

Old Timer


Posted
Old Timer

As you can see i've removed the easy section and i prepped the new bit for this yesterday. The other bit was a bit more difficult as it not only needed some fairly gently radiuses but a curve on the top and a folded flange (thats actually rotted off…)

see what i mean!
with a bit of hammering and clever use of some round stock of dad's,


ta da!!! still need to cut the hole but i shall wait until i can measure the other side tomorrow!!
heres the next step before I fit it,

hoping I can just repair the top section and the bottom sections that have totally gone and then it'll save me some time!!
Jon.
Posted
Settled In
what sort of welder, wire and settings are you using?
Just learning to weld and need some pointers before patching rear arches.
cheers
CC
Posted
Old Timer
the main pointer would be take your time!!!!! welding the floor in took over an hour as we were going so slow to avoid distortion lol
the pics show how i do one squirt at a time. the main idea is to aim at the fresh metal and let it roll over the gap onto the old metal. less chance of blowing holes that way!!!
i use a lot of the advice on here
it has a good guide on making stuff and avoiding distortion.
with arches it is a good idea to buy new panels, they're only about �20 each and it's much easier than trying to make curves!
Jon.
Posted
Local Hero
Diesel Possessed
A97JCE
Feeby
A97JCE
Feeby
Posted
Old Timer
Jon.
Posted
Old Timer
righty then,
had a few issues since my last posts, such as the clutch cable pulling through and the need to completely overhaul the brakes at the back for the mot!
But it passed the test, and ran sweet as a nut. heres a few pics!
In "winter mode"

For those who've noticed, i sold my audi alloys to someone local, who gave me his wheels, (which I sold for �100,) and �60 which i thought was a no-brainer lol. SO a quick attack with some primer and white u-pol spray and my mates tatty seat steels became nice and white and went straight on lol!


Ignore my cretinous mate Skip lol, this was taken at weston park the night before the midlands festival of transport lol, We were wandering around with jaeger and coke lmao. And for those who wondered, mk1's make great kitchens!!!

once the spring set in and i didn't really need the extra lights to cut the the snow/fog/turd etc, off came the grill and with a little repair to the back bumper, (after mr white van man trashed it in november, bit of plastic welding on the bumper and glued it to the bar lol,) the bumpers went back on!

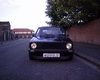
so this next one is pretty much as it is now!!!

This was all packed up and ready for Viva skegvegas vw show 2010!
Unfortunately the first time i drove it after getting my foot out of cast, my misses pointed out it was smoking on the overrun

Compression test revealed 149/150/151/100
ok I thought, I'm good at headgaskets, made a living out of doing them for a while, but to be safe i dropped a bit of oil down number 4 just incase it was the rings. Frigging pressure came up didn't it… to 150…So my rings are shot on number four.
The day before I found this out a mate offered me a 58k mk2 golf 1300 engine/box/loom/piping/carb etc for the princely sum of 70 pounds sterling!
So I'm off to his to wire in the gti lump he's put in the mk2 and to take my shiny new 1300 off to my mates workshop. gonna make a start labeling the wiring on site at his, and then friday night/sat morning we'll get it in. I'll make sure skip takes plenty of pics and I'll try and do a guide, as there isn't much on here about small block swaps.
Cheers,
Jon.
Posted
Settled In
my engine converstions got some random bits and bobs floating about which is slightly worrying….
Posted
Twitter Manager
0 guests and 0 members have just viewed this: None.