


My Mot'd 1975 Golf LS

Posted
Settled In

My Mot'd 1975 Golf LS
This has taken me alot of hit and miss to try and get the adhesion, and also the original finish.
Im using an ebay kit and it works very well for this.
Ok so this is what i have figured - to get the passivate to look anything like factory then the key is how the zinc plate looks when it comes out the tank…. now you could spend forever and a day messing about and trying to get that right.. here is the trick
Plonk part in zinc tank and plate the hell out of it, i usually slightly over amp it and leave it 60 min -90 mins to get a good thick zinc coat on it but this will leave it looking dull as hell and if you passivate it it willl just look like plop or not actually passivate at all.
So remove from tank and after trying several finishes the best one and one that takes zero effort is - get your dremel with one of those tiny brass wheel brushes on it- steel works but leaves direction mark's as you do it, the brass one doesn't.
Just touch the brush on the zinc and it will instantly shine- do all over - just take seconds..
Stick in yellow passivate and Agitate for about 1 - 1.5 minutes, too long and it tends to go too gold- it always looks more yellow once it dries off. It will have the rainbow yellow look without the pain of trying to having it looking spot on from the tank.
Thanks
Mark
Posted
Settled In
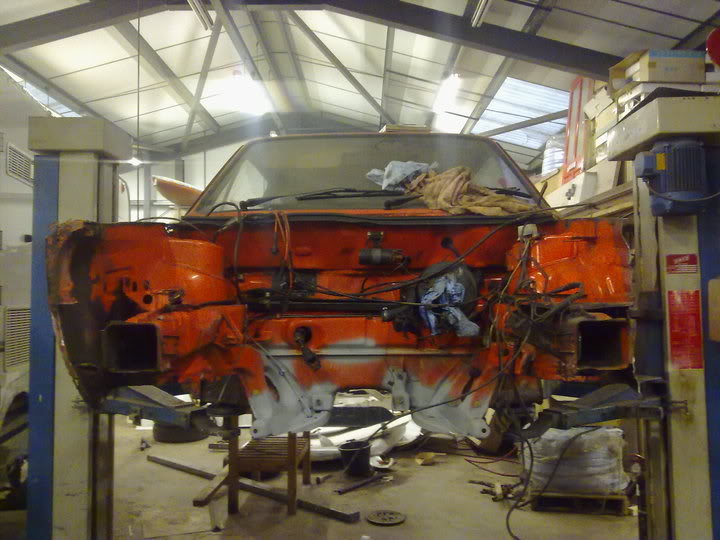
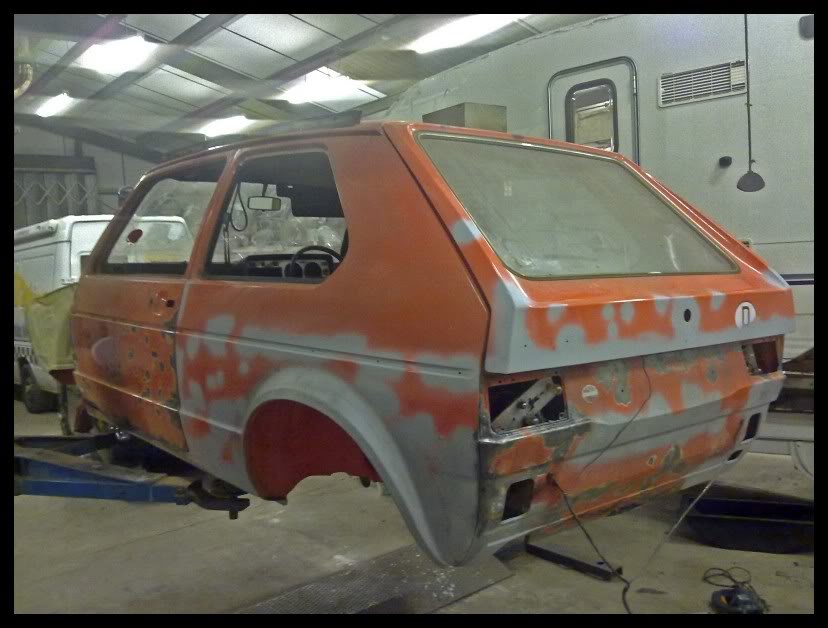
So this has basically turned into a part nut and bolt resto - rather by accident just because its seems a shame to short cut things.
This is a few pictures over the last few weeks - more time than i would want to admit to has been spent removing the Zeibart on the engine bay and bonnet - and now at around 35 litres of fuel with a paint brush
 so i can keep the original paint - not that you can paint over zeibart anyway
Tear down the front end - more as an escape from welding
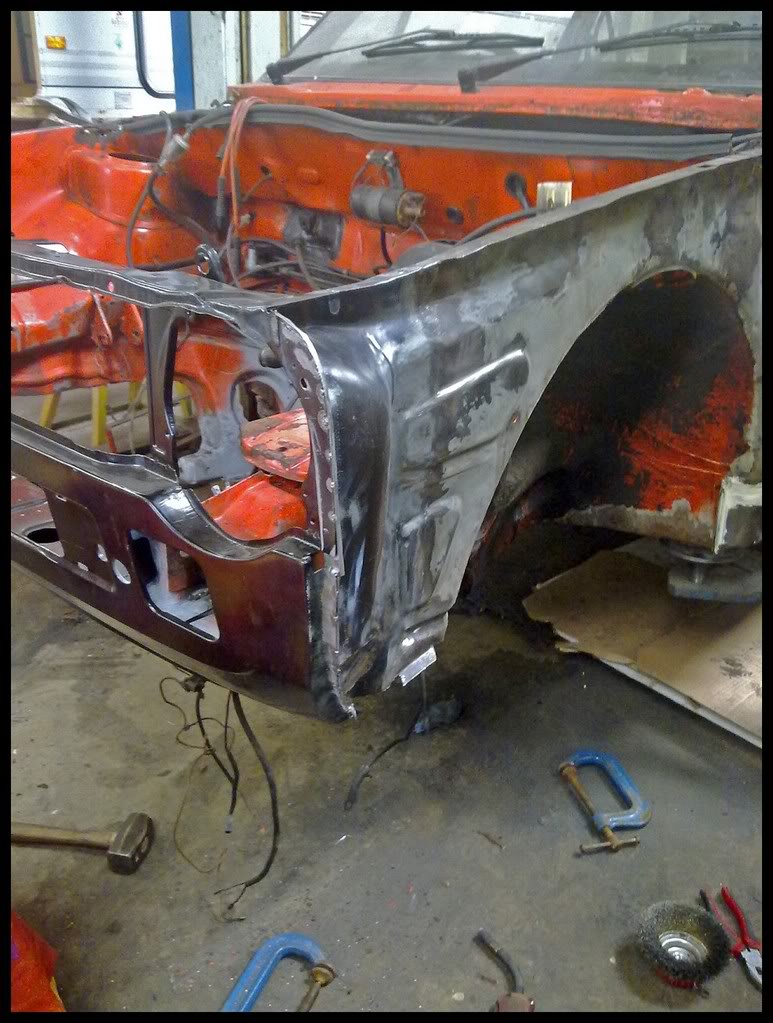
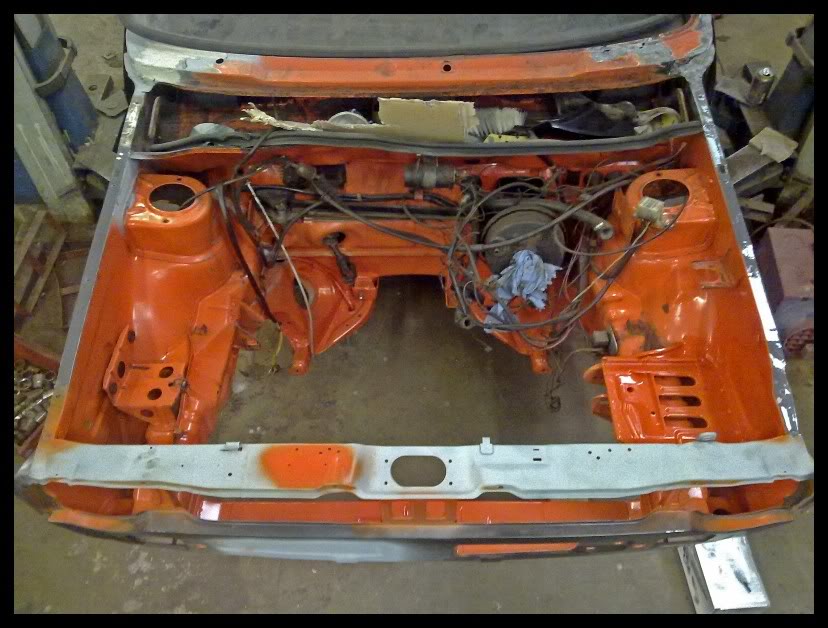
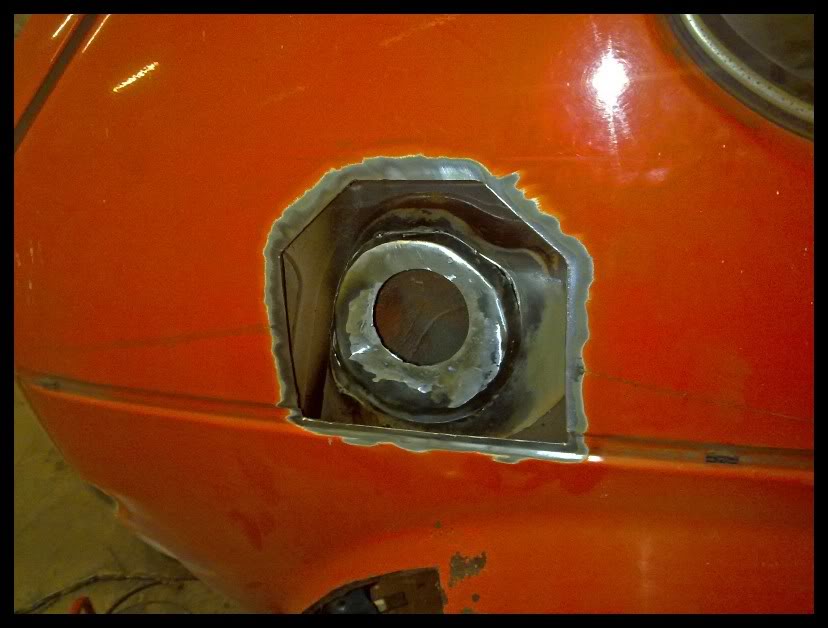
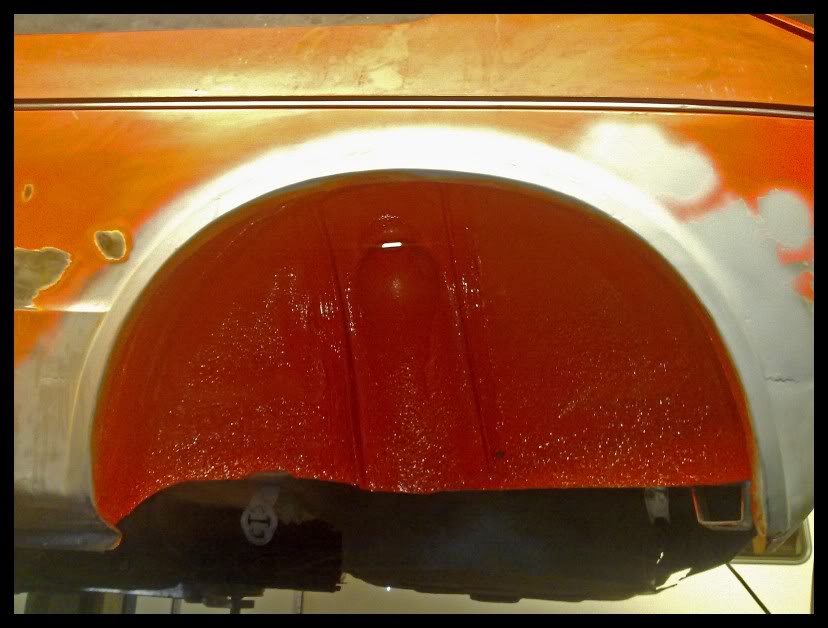
cleaned ready for refinishing

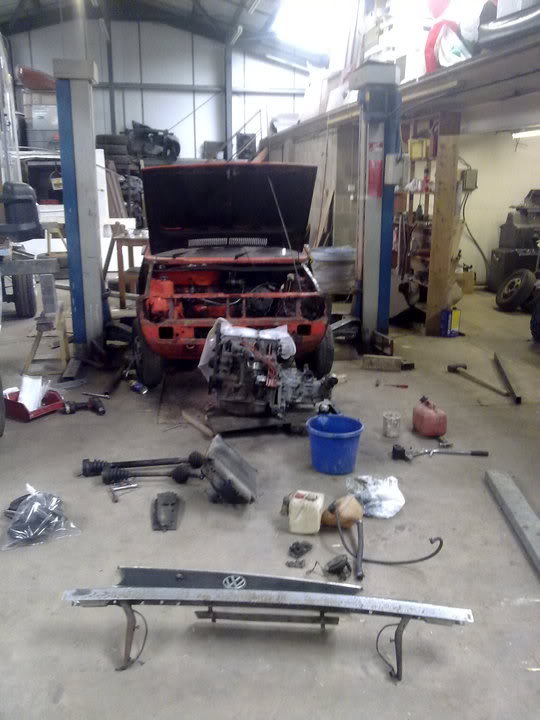
Part way through the re plating or repainting process - still lots of bits to work on- i'm also replating all the shift mechanism. Not looking bad for 200K
Zinc and passivate on everything as per original

Just changing the cam belt (wrong tensioner though :cry: )

Suspension out heading for paint, next up was the steering rack to be replaced by an Nos one
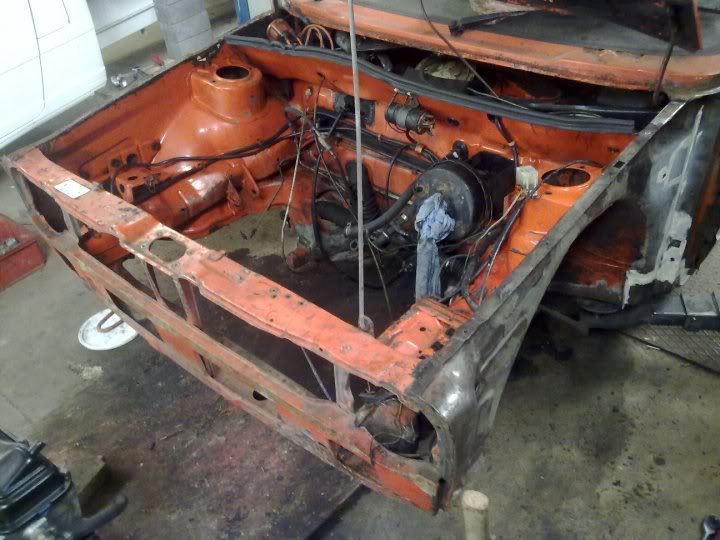
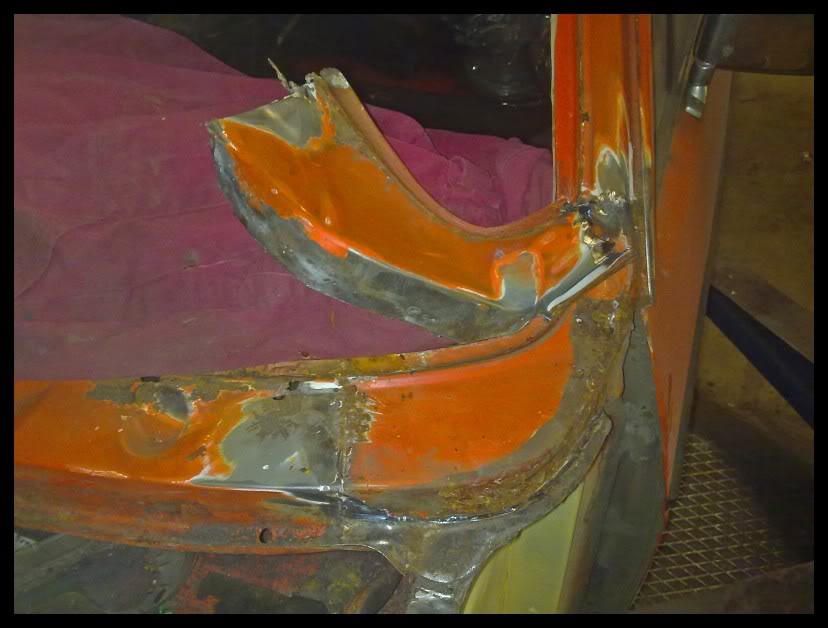
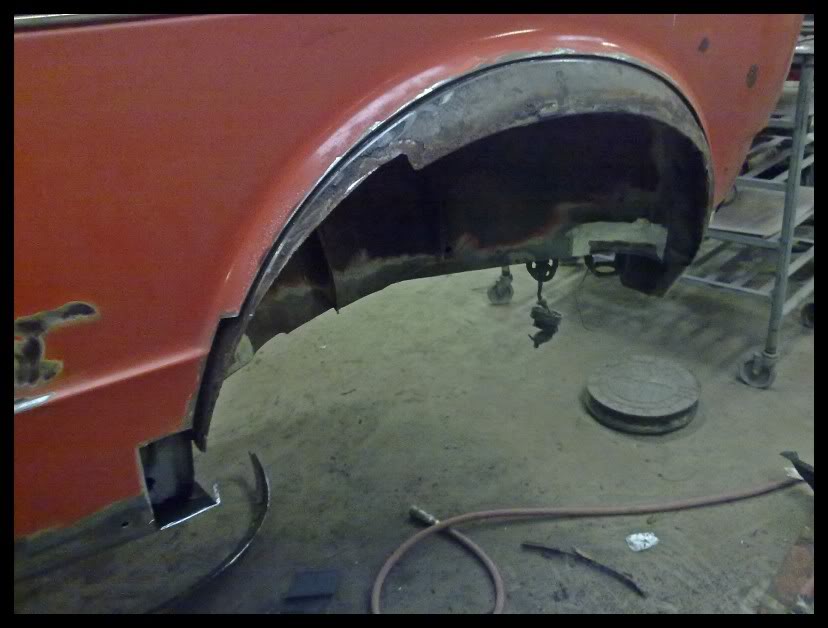
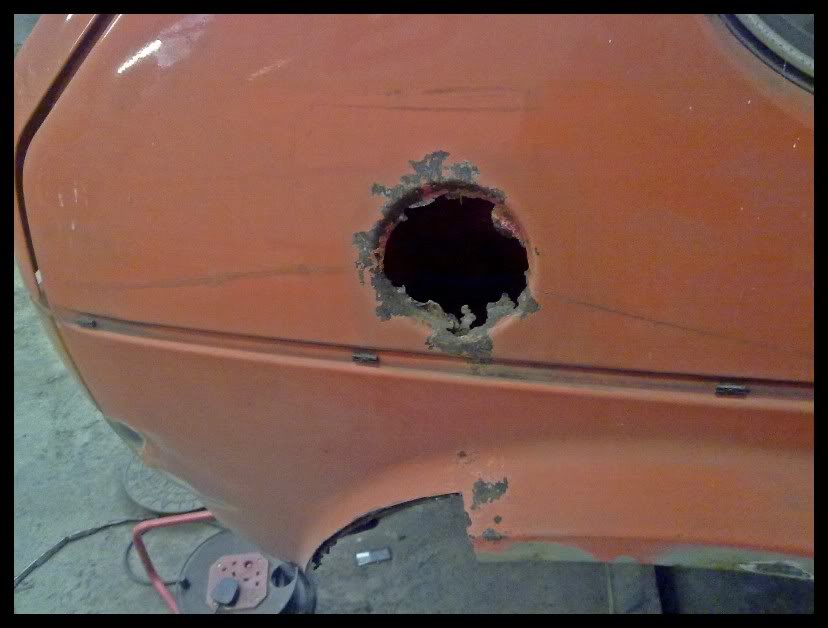
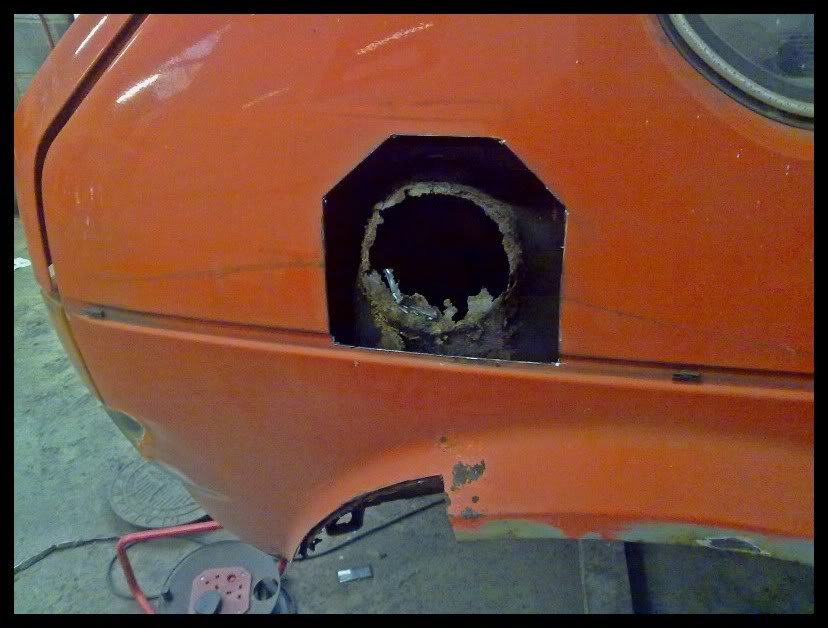
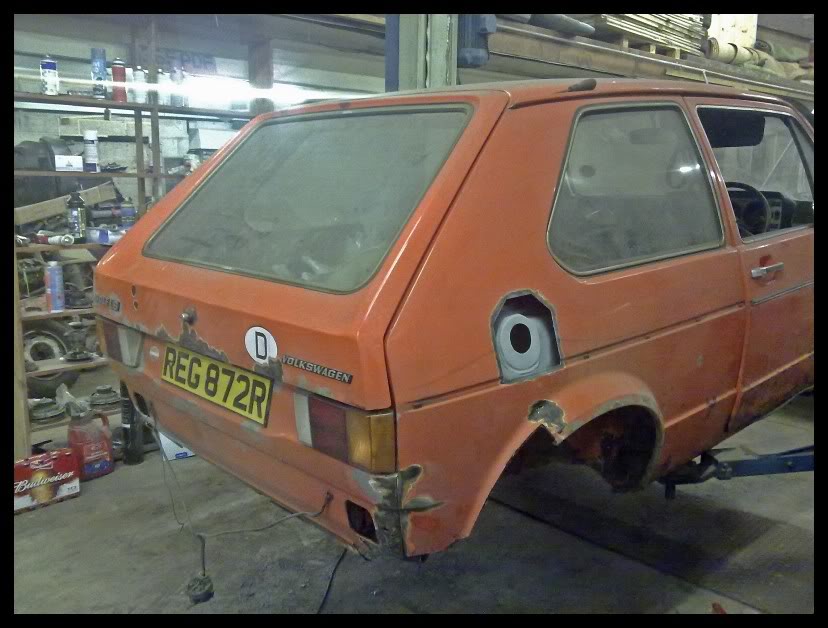
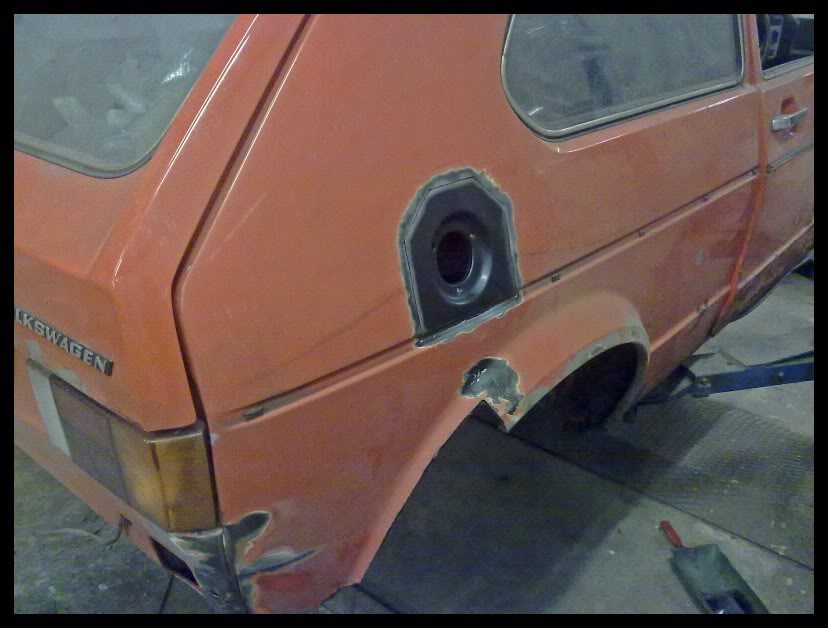
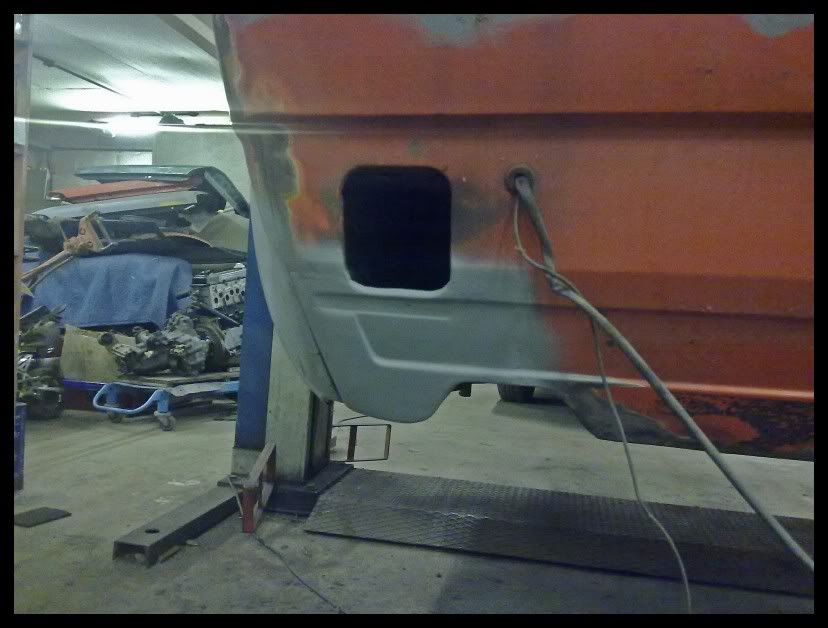
Engine bay mostly zeibart free, removed the front end as Dad had unfortunatly changed it after a very minor n/s prang in the early 80's, it had some rot in the double skin section so it had to go. Also removed the slightly roughly repaired very end of the N/s inner wing ready for a new part
So i dropped the the front suspension at the powder coaters this am, along with the tow bar and a few other parts which should be back tuesday -already had back the rear suspension/ few engine parts/engine mounts done etc and it looks really nice like the day it was made.
So tonight/ this weekend hopefully get the front end mostly done, hopefully get the last of the engine bay finished ready for a few small paint repairs next week.
Probably get the scuttle corners/ drivers side inner wing hopefully finished too - with the plan being to get all the front engine bay and inner wings ready and painted and engine/ front suspension back in by next weekend but we shall see as that's a bit ambitious
Cheers
Mark
Posted
Settling In

Well done so far…
Ocean Blue '76 Golf LS - Sold
Black Campaign GTI
Silver Campaign GTI
Black Campaign GTI
Silver Campaign GTI
Posted
Old Timer

Posted
Settled In
Posted
Settled In
So i was way too optomistic on what i was going to get done today - and the hangover didnt help.
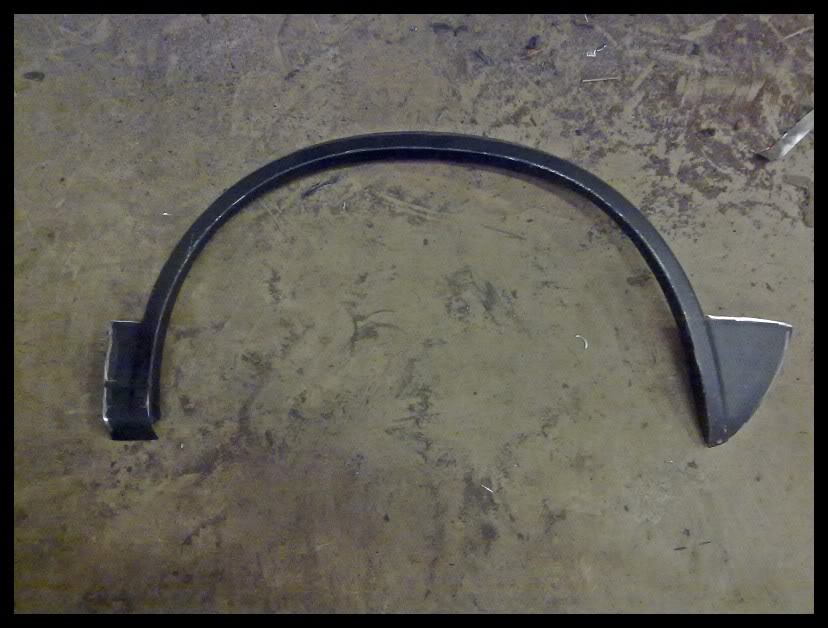
Picked up the n/s front inner wing front panel and as soon as i looked at it i could see there was trouble ahead - the pressing was a country mile off - all the front edge of the panel had been pressed at the wrong angle and all the strengthening pressings in the panel were nothing like the early style pressings but i had nothing else so i spent 2 hours correcting it and adding the pressings i needed. It turned out well but it was 2 hours lost…
I have used a later one size fits all front panel and i'm really impressed at the quality and fit - bob on but it has non of the early parts and as my Dad had changed the front panel before, the old one only has some of the parts i need to make it right -i want it as right as i can so i have set off in the direction of converting to make it right for the car - again really time consuming and in reality will take me the rest of tomorrow to complete. Thanks to the other swallowtail owner for his pics on here im using to get mine right 8)
Few pictures…
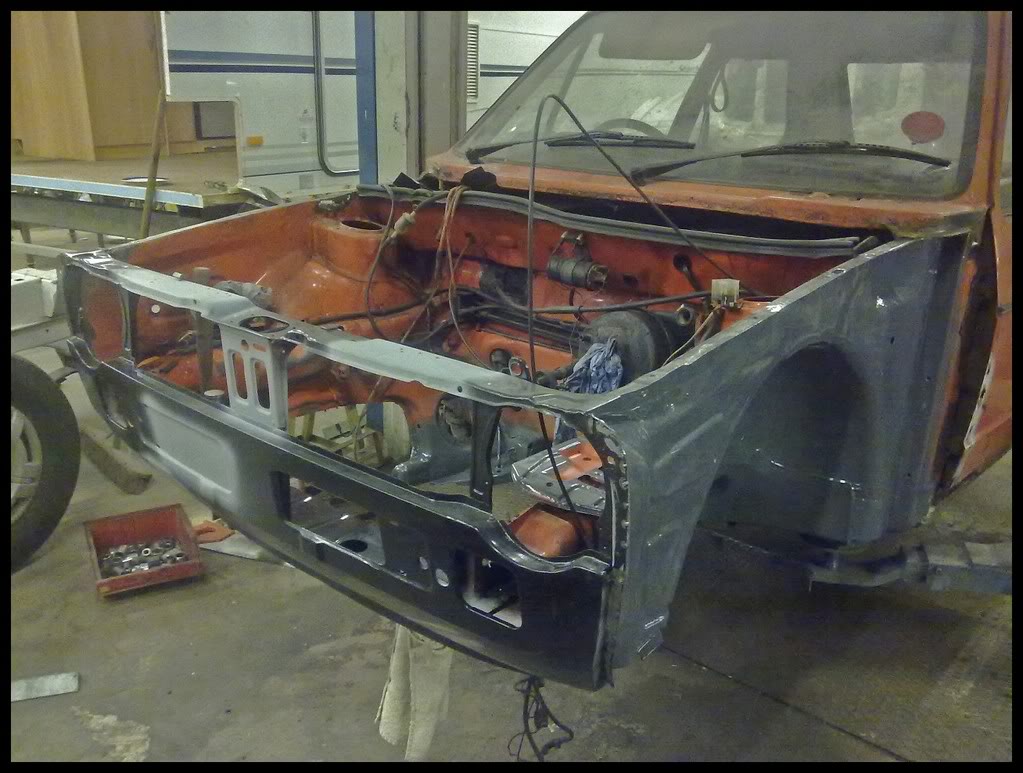
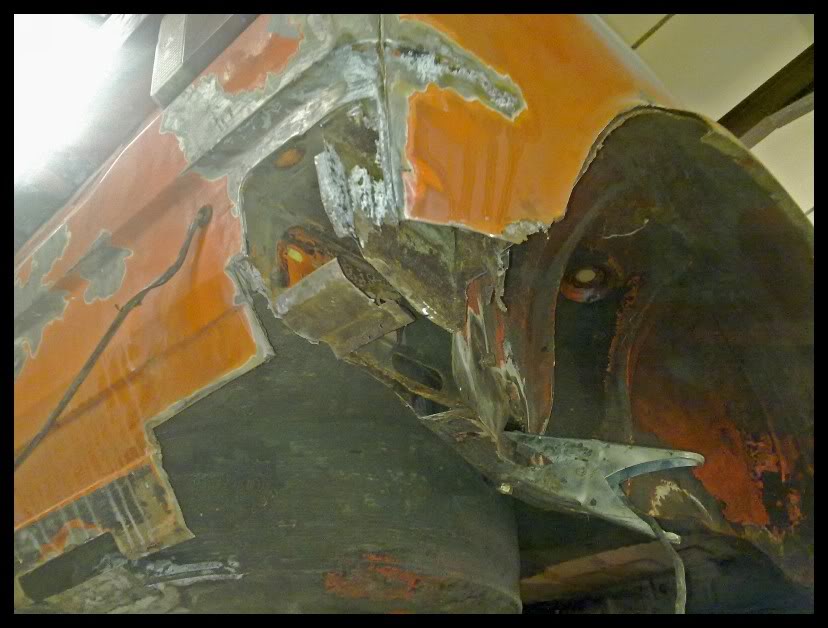
The front end welded on, and my handy work on the inner wing welded in- i almost thought it was for a mk2 or something it was so wrong

See the nasty pressings in the top panel on the right

Taking a grinder to a perfectly use able panel to "Fix" it
- i butt welded in the section off the old top panel seamlessly so you cant tell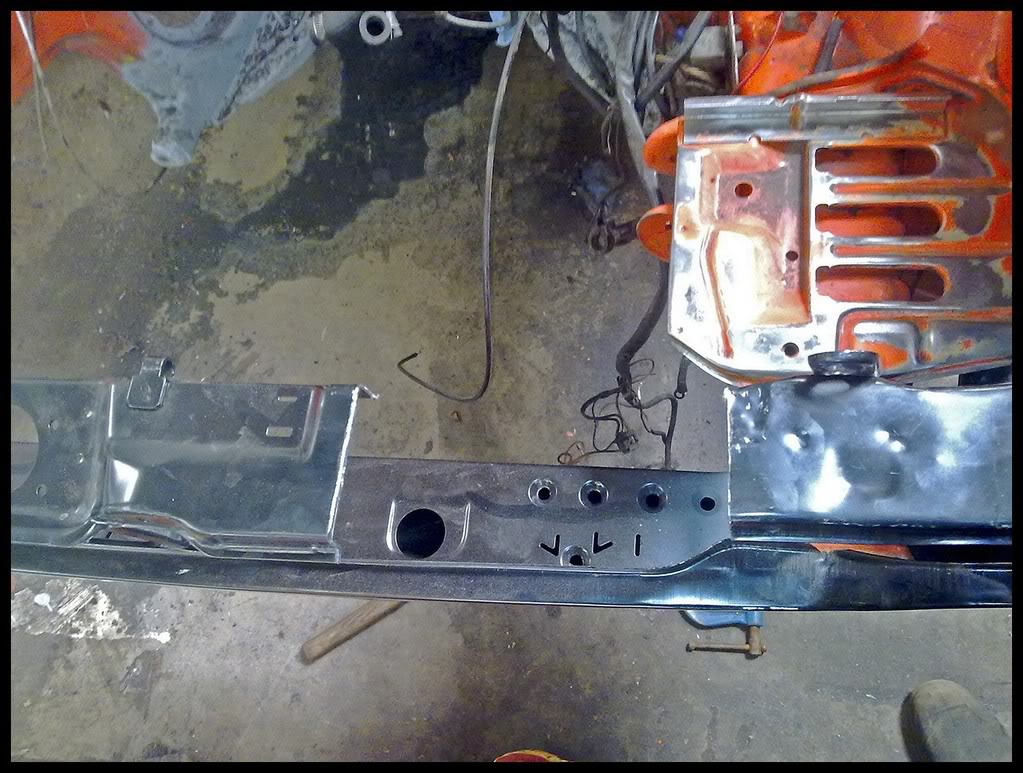
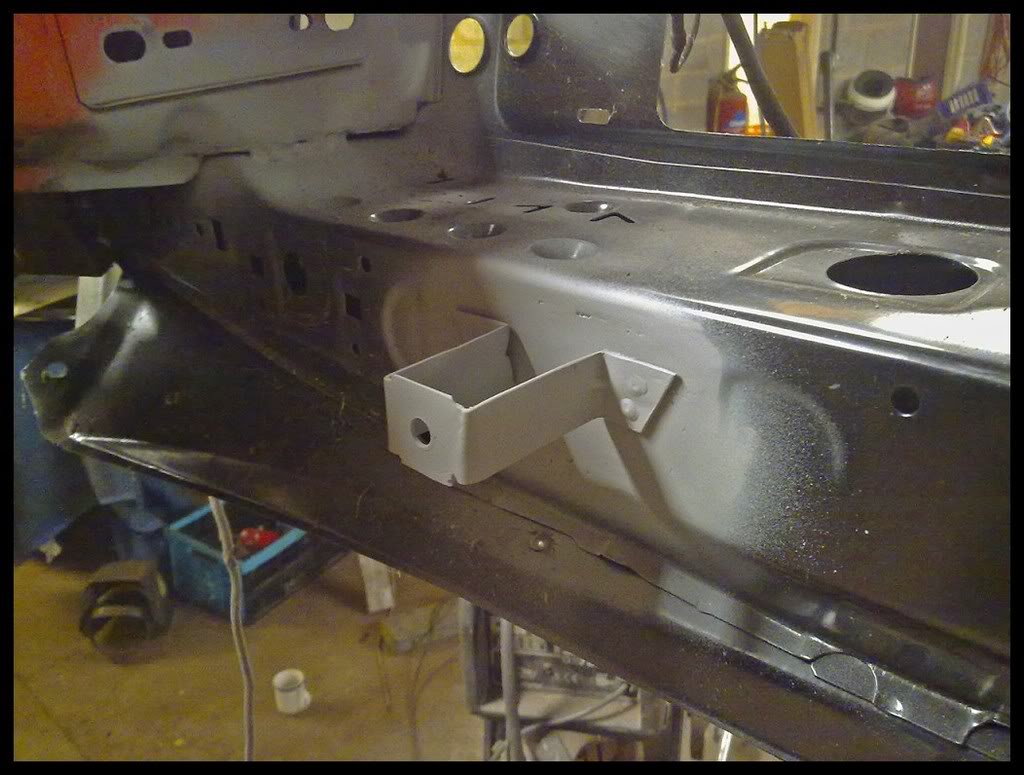
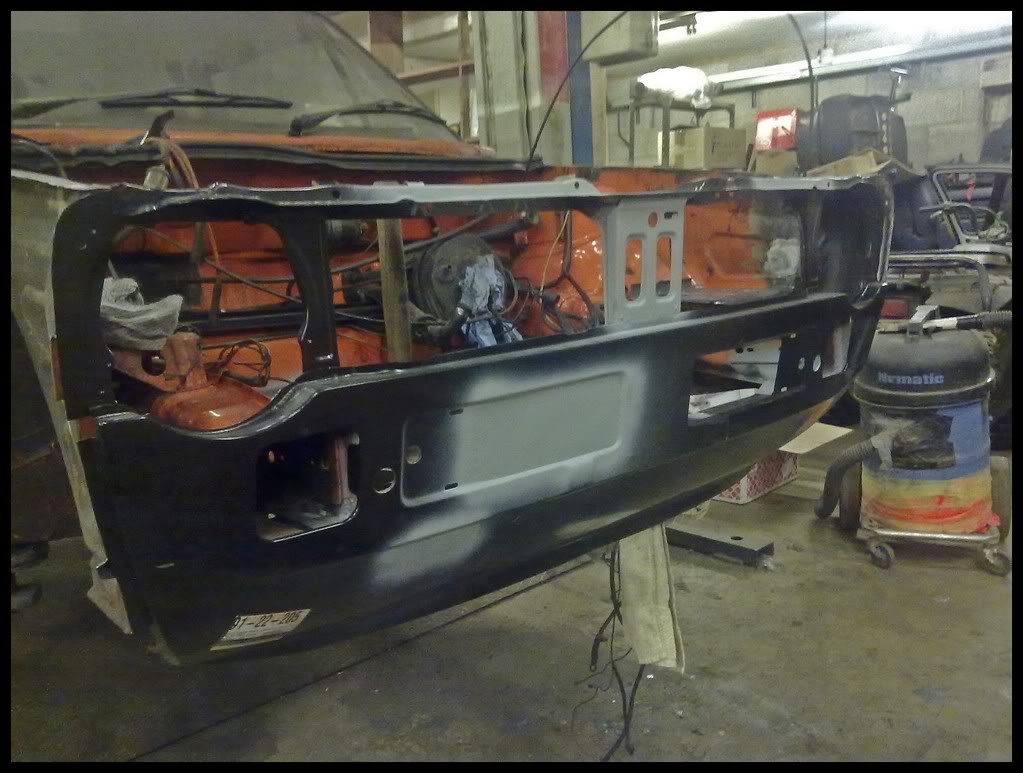
The toweye hitch got removed and welded up then i started on fixing the centre support panel - luckily i was able to use the bottom inner section of the old front panel to start to create a new upper section. I added a hole and a cut out to that part too- (Shiny bit in the middle with the 2 square holes in it )
Here is where i got to, still the inside holes near the radiator support area to fix to an early style - new horn bracket to be made and fixed on, centre support still to be welded in but its mostly ready, the o/s top edge of the slam panel needs a simular graft to get rid of a pressing and im sure i will think of more..

Day on it tomorrow too
Mark
Posted
Life Member


Posted
Settled In
More on it today - will post some pics shortly
Posted
Settled In
more of this

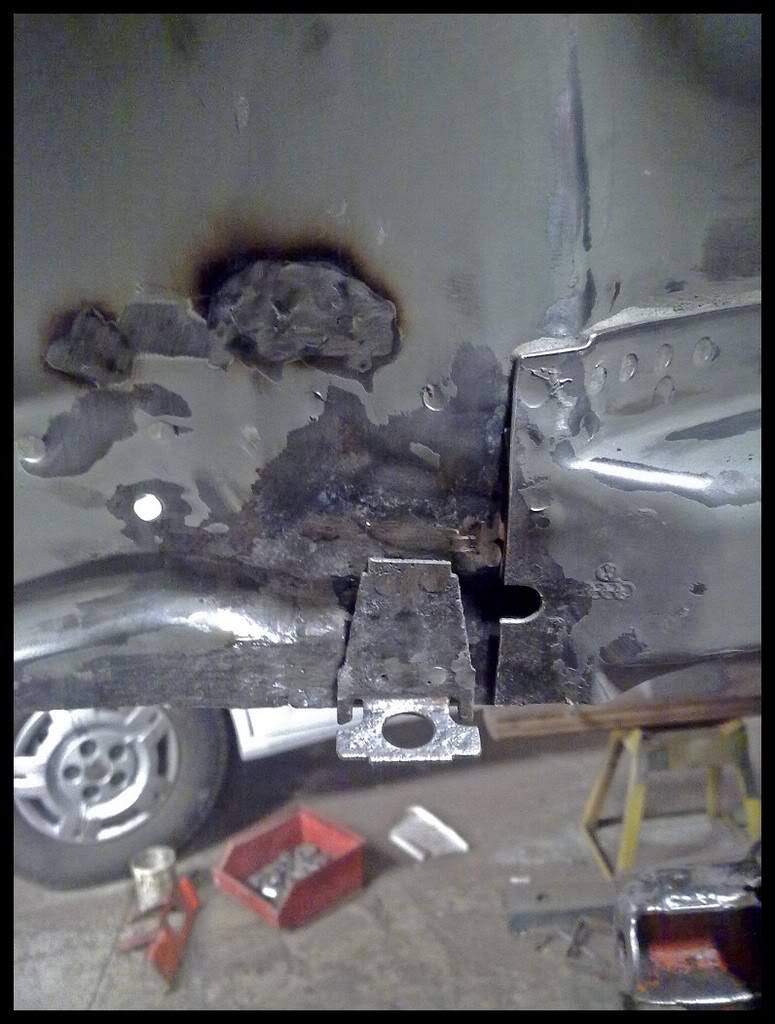
removed the horn bracket on the far side and made this one up from pictures, welded up the hole that sits here and mounted it up.
got the last of the welding jobs on the inner wing done, had to make up the part behind the bracket and make it all as was
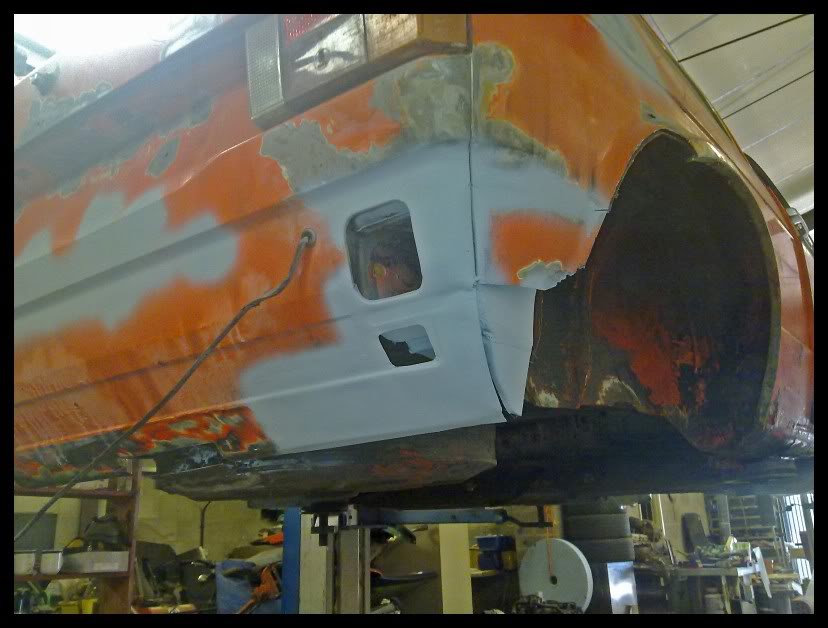
Last night i finished off the closing panel on the rhs and sorted the inner stamping on the inside radiator mounts, still o/s inner wing to do.
Got the second coat of Por15 on the inner wing after being happy with the adhesion of the first coat - also got the lower parts of the engine bay painted up ready for stone chip and top coat. front end this side nearly nailed
Dub boy - which tabs please??
More this weekend i guess
Mark
Posted
Settled In
Well progress…
Everything suspension wise is now powder coated and ready to go back in and apart from about 10 days break i have been busy working on the endless task that is the body work.
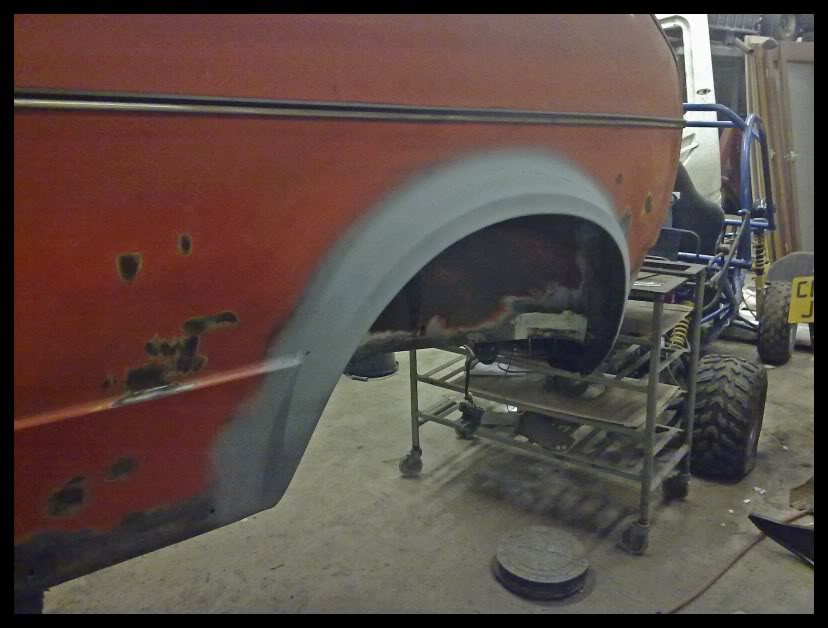
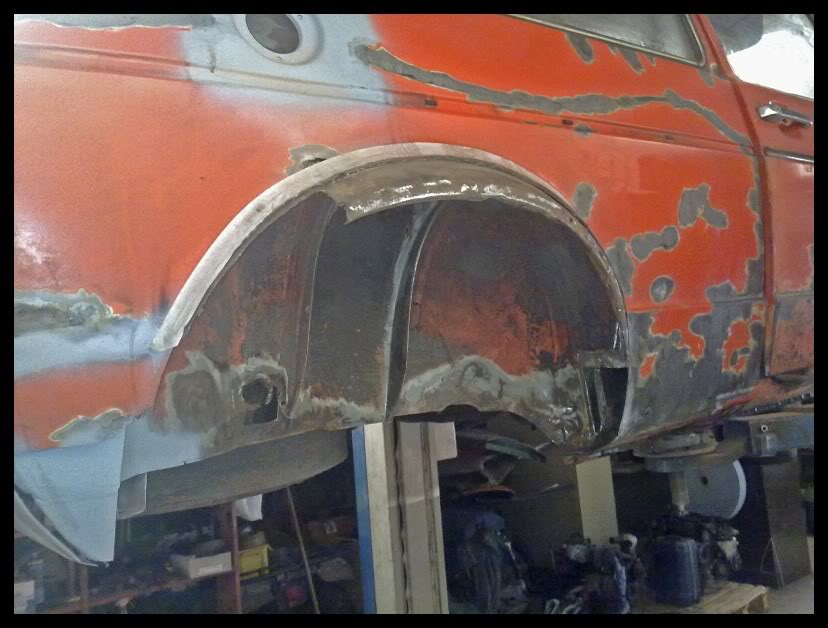
I am now finally getting towards the end on the engine bay and windscreen lowers and last night for a break moved onto one rear arch…
few pics from recent..
When my dad asked the man to weld in the windscreen repair panels in 1991 - i dont think he had this in mind….no wonder nothing aligned up..slap it over the top
He actually did me a favour on this side as i was able to fix the rust on the pillar and top of A post without changing it all. The drivers side was a mess and took me ages to fix the inner upper A post and had to change the outer panel anyhow..
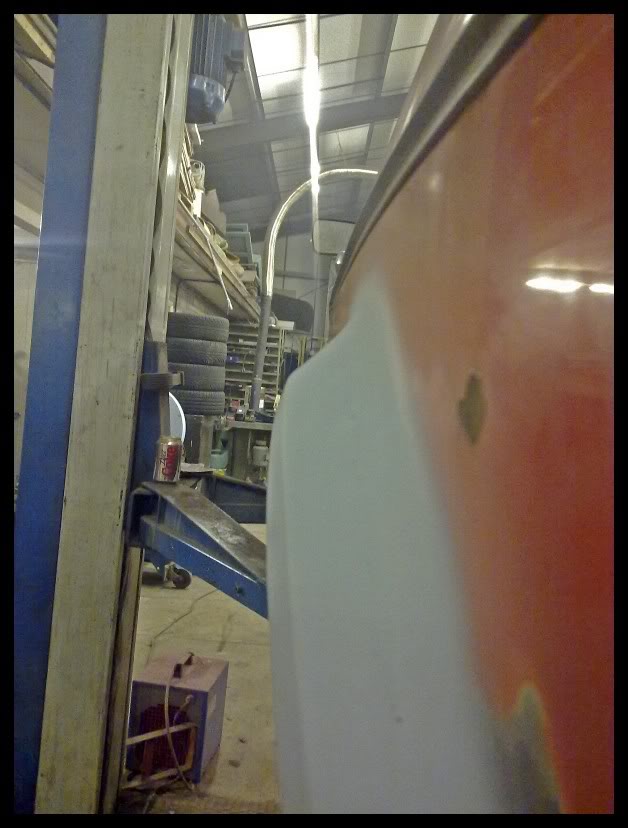
engine bay getting there..

just a few paint repairs to finish and the scuttle to clean out of old zeibart to go. I have only repainted the bits i have repaired in the engine bay, the rest is original paint with wear marks etc as i want to try and keep the character of the car. Still some scuttle repairs to finish at this point..
Last night for a change from engine bay - the rear arches which i have been doing a great job of putting off. I decided in the end to do the mid arch repair like alot of people do - that way you cant see it from the inside either..
The aim again was to do this so it needs zero filler (or as close to zero as i can get)..
cut the outer first , decided to leave the what remain of the inner and do it afterwards- that way i could ensure i got the outer in exactly the right place

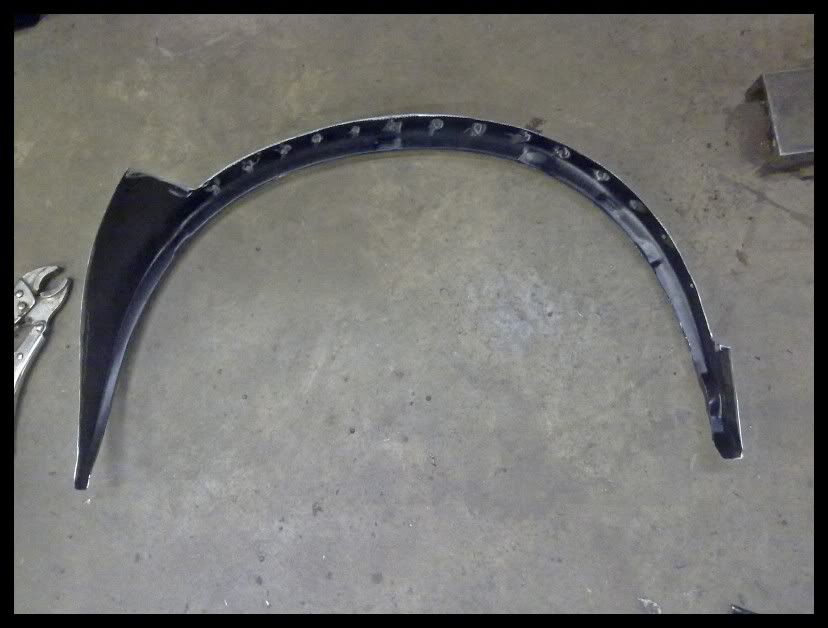
after alot of measuring/ trimming/luck i ended up with this for the repair panel
in …
spot on - with zero filler
So now the inner arch to do on sat which im sure will be fun..
Mark
Posted
Life Member
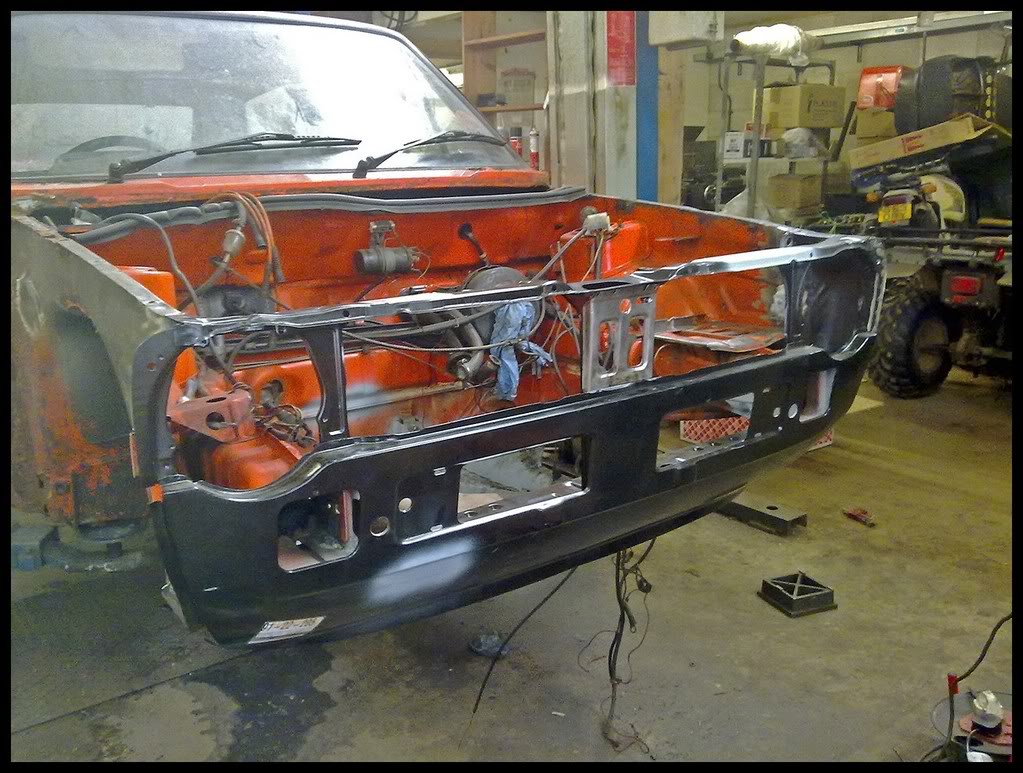
You still need to remove the slots for the trims behind the bumper though.
The holes on the slam panel are also slightly different to mine.
How did you weld the outer arch?
Posted
Settled In
dubboy said
Good work!
You still need to remove the slots for the trims behind the bumper though.
Cheers and Ah Nuts !! .. ah well better now i guess than when its finished…
.I will add it to the list of things i have forgotten - like the grommet hole in the inner wing on the pass side and also the grommet hole on the end of the sill..
The arch - Its Butt welded all round and done bit by bit to try and keep distortion down, ground it flat and finishing with a flap disk. To be honest i went up to do it and that alone and decided i wasn't going to weld it till i was absolutely happy with the panel alignment.
The inner is going to be fun though..
Could you show me a picture of the slam panel holes if possible please??
Thanks
Mark
Posted
Settled In
After much staring at it and deciding if i should change the inner arch up to the seam - ie the whole thing, in the end decided against it as i felt it would be much neater to repair the inner and seam it round and leave all the original factory joins.
So i basically cut the inner all the way round about 2 inches in from the lip and cut the inner to suit, after much trimming i made it this panel. The rear section of the arch was rusty so i left a bit more but basically the joint is inside the curve of the arch so neither inner or outer repair can be seen by looking into the rear quarter from inside the car
last night i moved on to to the fuel filler area, something i had not been looking forwards to - amazingly despite this much rust the original filler tube survived shotblasting and powder coating with no repairs!..
the rust -
Decided to cut it like this so i could repair the inner properly.
After a bit of playing about i made this up, just tacked to make sure the hole aligns with the outer at this point on a second attempt
seamed in and primered
as far as i got -tweeked the pattern panel to add the tiniest curve to it as they are pressed flat - ready to go in.

Cheers
Posted
Settled In
few random pics from recent
The other side was a mess once i had all the rot cut out, luckily the box section was just shot at the end.
Here alot later and still unfinished -all the box section repaired and all the seams put back - very time consuming but then i forgot to close the small square cutout before i welded the rear valance in :roll: . Ah well its on the list to fix
Outer arch removed ready for aligning with the inner before that gets replaced. Paint removed where all the rust spiders had got under the paint - luckily its not eaten the steel. The long one is where it was keyed many years ago ..
Got the n/s rear inner arch finished - found a way of duplicating the original finish with rubberised sealant and then blended where all the repairs had been made to join up to the original rubber coat including the factory brush marks so you cant tell
. Nice fresh coat of paint to finish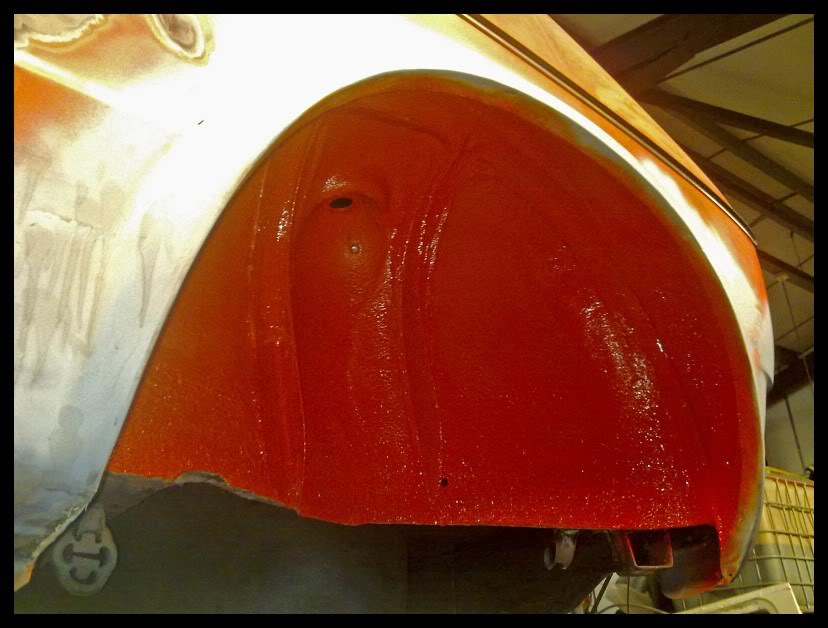
So i have the rear wheel arch to do inner and outer and the front half of the sill to replace and its welded. Infact front sill should be in tonight.
Booked in for paint start of September - cant wait!
cheers
Mark
Posted
Settled In
I'm waiting on a night class on welding starting before attempting welding on new arches etc.
I hope it looks this good.
Posted
Settled In
Good luck on your welding class - in all honesty its the getting the panel trimmed up and fitting like a glove that takes the longest - the better it fits the less work at the end. sometimes

Well brief update - welder was out of wire so i spent the night chasing the rust worms under the paint and getting every last bit of rust out of the back quarter before acid treating it . Stripped out the front door and rear glass too - and started to assess the repair of the front doors. They are definatly repairable but its not going to be fun.
The end is in sight for this side..
Posted

Old Timer
all the best….hope you dont burn yourself too much with the welding….ouch
Bob
Posted
Settled In
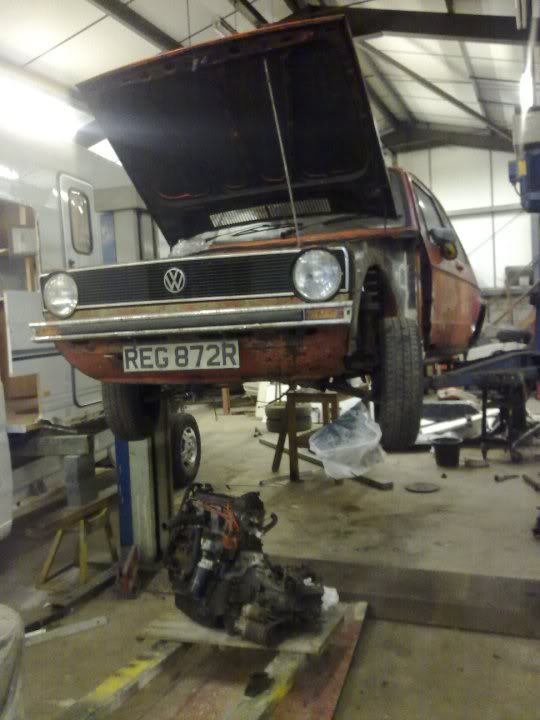
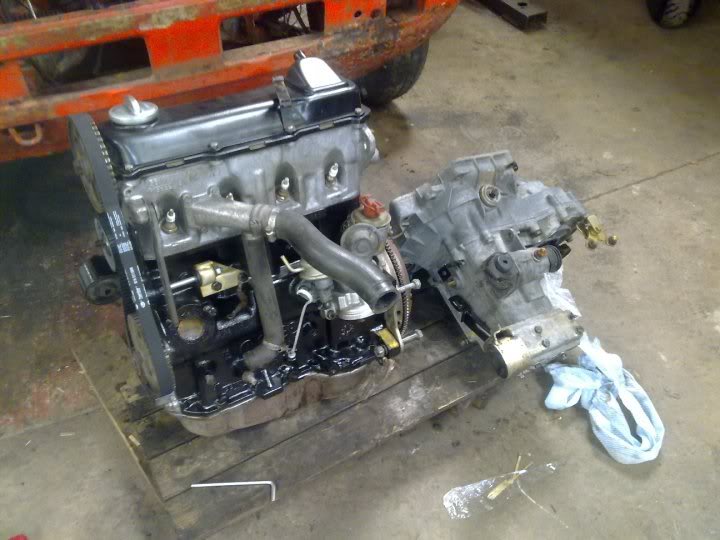
The engine has over 200k on it and is not rebuilt, same with the gearbox and while it did use a bit of oil 14 years ago when i parked it, I'm hoping to bring it back to life and use it for a while before may be rebuilding it further down the road if it ever needs it.
For the front doors its mainly just the lip inner and outer skin at the very bottom that hold the seal that has gone in places- i have a pair of real nice later hinge type mk1 doors im going to cut up and sacrifice just for that few inch section along the length of the door. It will be very fiddly to graft in and get it spot on but worth the extra effort to keep the original doors (i say that now
)Yep cant wait for paint !!
Posted
Local Hero
Why don't you re-build the engine since it is out, Much better to do rather than leave it for later.
Its the same thing as giving your body work a new lease of life. :mrgreen:
Diesel Possessed
A97JCE
Feeby
A97JCE
Feeby
Posted
Settled In
allana13 said
Just been reading through the build thread. looks awesome. Well done mate
Why don't you re-build the engine since it is out, Much better to do rather than leave it for later.
Its the same thing as giving your body work a new lease of life. :mrgreen:
Thanks… of course you are right - i really should do it now while its out but for a few factors…
i cant wait to get it driving and part of me want to see how far the original engine/gearbox will go..
Slightly longer term it is the plan but im guessing that like most other parts of this resto - finding genuine engine parts may be a struggle. Im sort of hoping that it lasts a few more years and long enough for me to slowly collect Nos parts to go through the engine properly… saying all that i havn't looked into what you can still get from VAG but i'm not optimistic given they seem to have deleted everything.
This all assumes it runs ok when i fire it back up
0 guests and 0 members have just viewed this: None.