


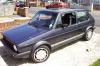
My mk1 resto

Posted
Settled In

My mk1 resto

Posted
Old Timer


Madone with the two Cabs 82 (UK RHD) and 85 (US LHD) (92 sold)
�
�
Posted
Settling In

Posted
Old Timer
And a few photographer guys took a few shots of it - nice to have proper pics of it rather than just my old camera phone ones….
Anyhow here's a few :


Posted
Settled In
Current MK1 rebuild elapsed time - 15 years and counting…
Is it normal to clean and paint bits of your car that will never be seen?
Not-so-new addition - 1996 MK1 Citi Golf (off the road for 4 years… and counting)
Is it normal to clean and paint bits of your car that will never be seen?
Not-so-new addition - 1996 MK1 Citi Golf (off the road for 4 years… and counting)
Posted
Local Hero

Glad to see it still looking so clean!
My Build Thread
All My Build Photos - https://www.flickr.com/photos/pix-al/albums/72157622794406840
My other hobby - www.pix-al.co.uk
All My Build Photos - https://www.flickr.com/photos/pix-al/albums/72157622794406840
My other hobby - www.pix-al.co.uk
Posted
Settled In
you are VW
Posted
Newbie

Congraulations, it's inspiring !!!!!!!
Christian K.
1981 Golf GLS 5 door
2007 Jetta 2.0 TFSi
1981 Golf GLS 5 door
2007 Jetta 2.0 TFSi
Posted

Settled In
Absolutely amazing and i wish i owned it!
Good on you! :wink:
Golf Mk1 project
BMW 325i Touring
BMW 325i Touring
Posted
Old Timer
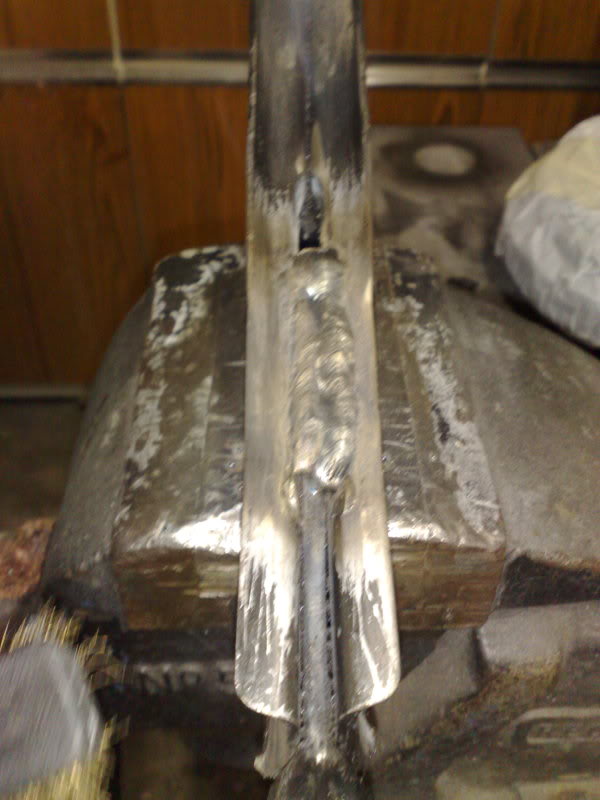
Had a look at the wishbones and noticed that the drivers side seemed to have pushed forward out of the rubber mount - was a bigger gap compared to pass side.

So thought it was just a dodgy mount and ordered a couple of superflex bushes to replace the rubber items (had poly bushed the rear wishbone mounts but hadn't did the fronts at the time)
So took the wishbones out and discovered another problem the mount hadn't been made correctly and under normal driving had obviously been under stress due to the unevenness of the wheels - drivers side wheel obviously sitting further forward.
One effectively longer than the other! Not good!

You can clearly see the difference here

So I ordered a replacement wishbone but found that it was a different make and the two skins weren't even level nor was the leg at the back welded in far enough so it went back and got refund.
Nothing else for it but to cut and re-weld rear leg to match the pass side.
First up old bush out and new poly bush in - quick guide method without the blow torch!
Big socket and small socket - big one goes on flared end and little socket on the other end pushing on the sleeve not the rubber obviously!

Wind up the vice till the sleeve hits the base of the big socket and stops moving leaving this:

Then cut this excess off with hacksaw - easy enough as the sleeve is hollow tube

Then back in the vice and squeeze the remainder out - then just squeeze new poly bush in small end of bush into flared end first!
Then had to make up jig to ensure that both wishbones were the same! So out came the big steel plate as a bench and put the good wish bone on and tacked on some angle as the jig points.

The cut the existing welds on the other wishbones to free up the rear leg and allow it to move into the right position.
Then put into the jig and tacked into position before transfer to the vice for a proper run of welds - see below:
Hard to beat the big oil cooled stick welder for laying it on!

Then all cleaned up and a coat of Zinga (the best primer ever say bye bye to rust!)

Then top coat of black and couple of clear coats and reassembled with the ball joint.
If you have noticed with the ball joint kits the bolts are pitifully weak (threads strip with no effort at all) and very small so I went to a bigger bolt (stainless) which only required really a slight ream out of wishbone and ball joint holes to fit a much better bolt. And of course rude not to polish the bolt head!

Then a quick couple of pics to show how things line up -
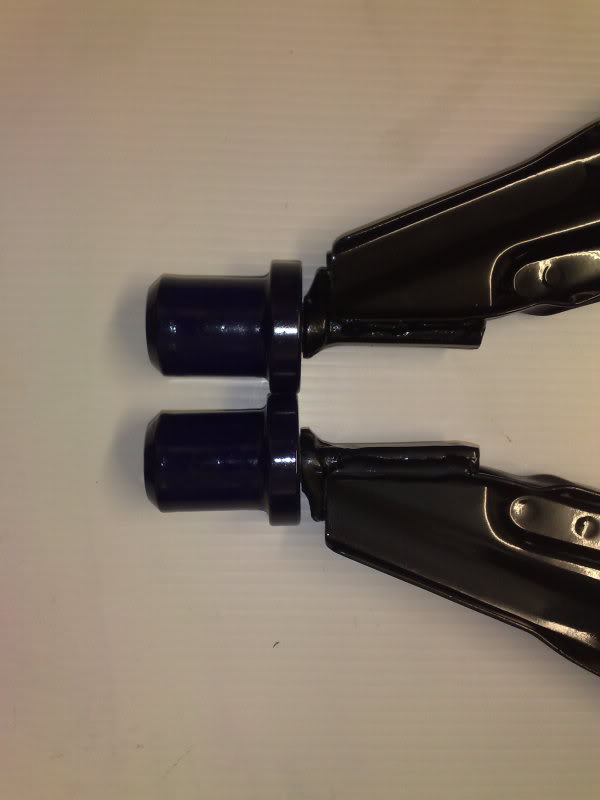

That's how it should be! That should improve the handling and with MOT next week it was a job that needed sorted!
Posted

Old Timer
Glad to see it winner some well desevred awards, and good to see you enjoying it!
Posted
Old Timer
Posted
Old Timer
Posted
Old Timer
Carbs4ever said
cheers pete and glad to hear you are having fun on the roads with your wagon!
Cheers, I'm having the tracking & camber done this week as it's all over the show
 Tho I will also be checking my wishbones as I brought 2 new pattern ones also :?
 Pete.
Posted
Old Timer
Really messed up the handling - easy enough fix though when i had a good look at it.
Posted
Old Timer
Madone with the two Cabs 82 (UK RHD) and 85 (US LHD) (92 sold)
�
�
Posted
Old Timer
K&N box filters - much better design and air flow than the foam variants which have large chunks of foam as separators and jam against the trumpet mouths - I didn't like them anyway - but they kept the dirt out I suppose!
I suppose why they were on the long finger was because the backing plate wouldn't fit without modifying the alternator top bracket mount. It was fouling on this so whipped off the alternator and removed about 10mm off the thickness of the top bracket mount - also spilt the alternator and removed the old paint and re painted as I wasn't happy with original paint job on it - it wasn't lacquered and had suffered.
Any way as you can see the back plate fits perfectly now.

Then on with the filter element and front plate

Then to the other one - no problems here

And there you go all done!

Went for a drive and it is definately an improvement! Nicer induction note and also better at cruising - due to eliminating the ram air effect with the filter front plates. All in all money well spent and they don't move up and down and get out of position like the foam ones did!
Posted
Settled In

Posted
Old Timer
Posted
Settled In
0 guests and 0 members have just viewed this: None.