


My mk1 resto

Posted

Local Hero


My mk1 resto
Stunning work as always! :mrgreen:
Andy
Andy
LINCOLNSHIRE REGION - https://www.facebook.com/groups/467122313360002/
1983 MK1 Golf GTI Campaign Model - Under (looooong) resto!
1962 Rover P4 80
2002 BMW 745i
2008 BMW Z4 2.5Si
LINCOLNSHIRE REGION - https://www.facebook.com/groups/467122313360002/
1983 MK1 Golf GTI Campaign Model - Under (looooong) resto!
1962 Rover P4 80
2002 BMW 745i
2008 BMW Z4 2.5Si
Posted
Old Timer

Posted

Local Hero
Cheers
1981 1600 GTI (coming to a road near you soon…)
1983 1100 C
1983 1100 C
Posted
Old Timer
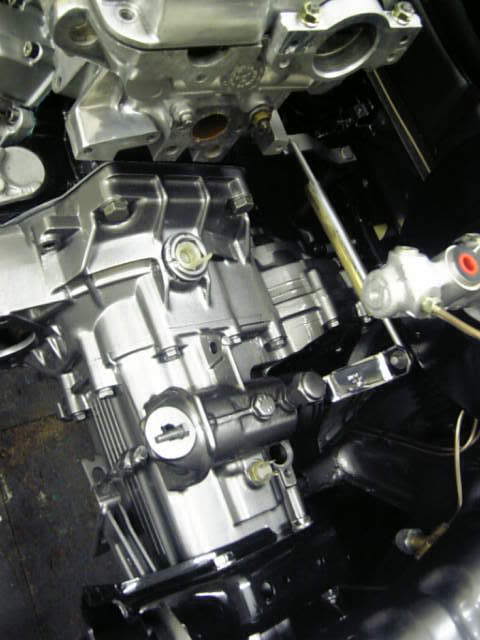
Do not purchase a 6a version as it is for the audi bubble block which is the same height as the 1.8 but acheives 2l with larger bores so the gasket is non compatible
Advised to use an ABF one by a good mate and also Storm Developments.
only alteration required to the gasket is the honing out of the left hand side head locating stud hole (you can see it elongated in the picture) to make the positioning of the head a sinch without gasket movement prior to bolting down of the head
Posted
Old Timer
Madone with the two Cabs 82 (UK RHD) and 85 (US LHD) (92 sold)
Posted
Old Timer
Posted
Old Timer
Before:
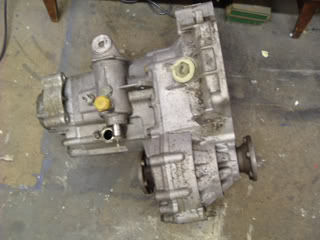
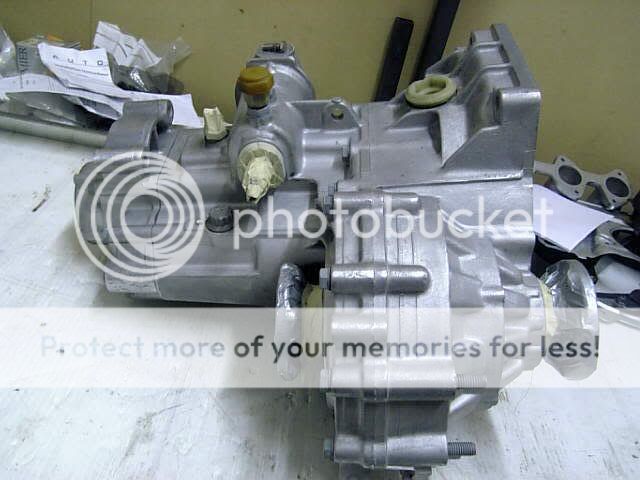
After:
The above pic is after taking the masking tape etc off and reapplying ordinary masking prior to painting ? in hindsight I should have got the casings blasted when the box was apart ? not doing this meant spending a bit of time sealing up the diff cup seals and all the rest of the seals and bits I didn?t want damaged by the blasting.
Then off to the painters for a few coats of BMW Sterling Grey ? same as the car
Was dearer than i expected - with ?40 quid of paint alone on it alone and they spent a bit of time deleting marks and pitts etc. But well pleased with it!
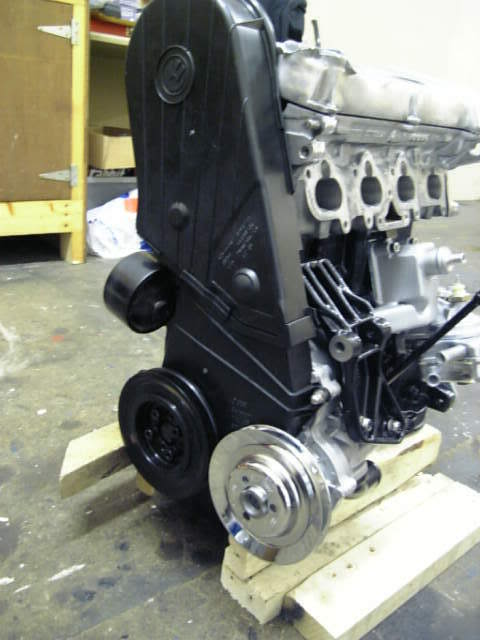
Then it was on to the engine ? crank pulley, new covers, tensioner, belt and timed ? pic shows the belt tension reading tool ? my mate brought it with him ? great bit of kit!
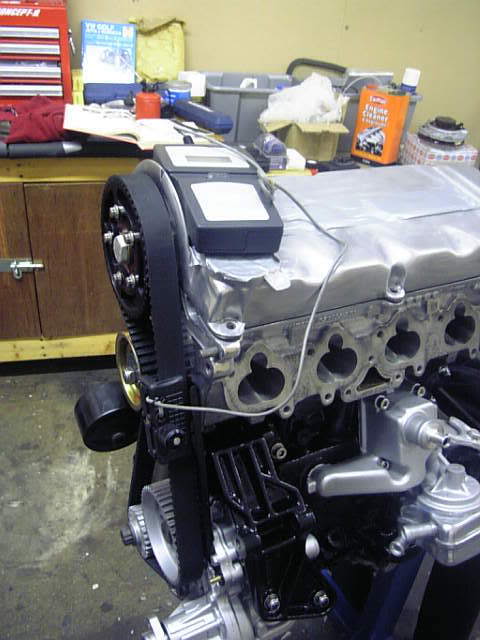
Then on to the clutch and fly wheel which all went together without any guff. Flywheel was soaked in Deox C overnight to clean the rust of it ? it is great stuff!
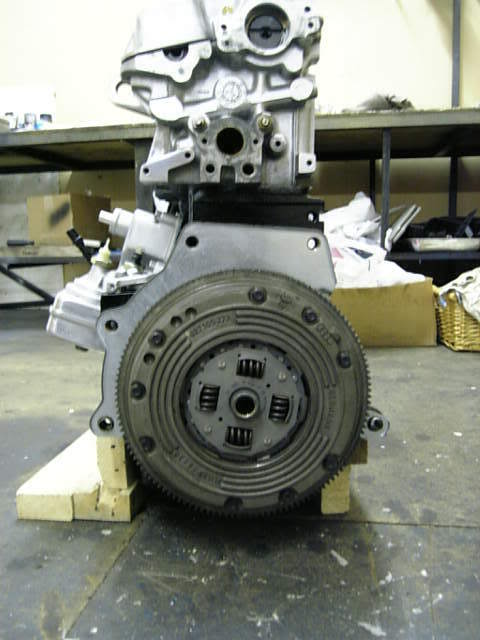
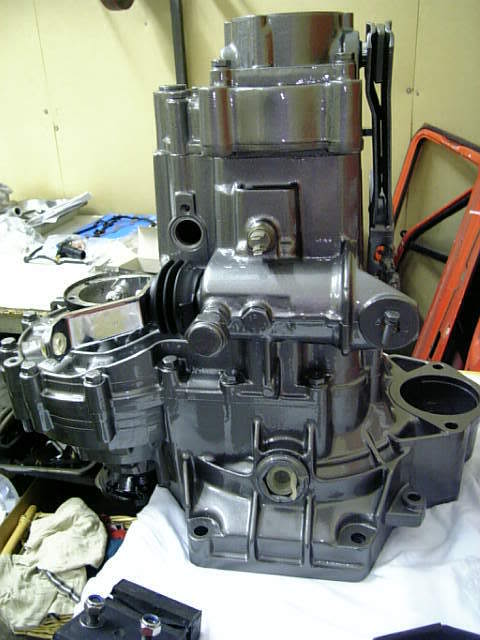
Still have a bit to do ? rocker cover needs a final polish and screwed down and a few other things before bolting the g?box on and getting it into the bay.
More next week.

Posted
Local Hero
Andy
LINCOLNSHIRE REGION - https://www.facebook.com/groups/467122313360002/
1983 MK1 Golf GTI Campaign Model - Under (looooong) resto!
1962 Rover P4 80
2002 BMW 745i
2008 BMW Z4 2.5Si
LINCOLNSHIRE REGION - https://www.facebook.com/groups/467122313360002/
1983 MK1 Golf GTI Campaign Model - Under (looooong) resto!
1962 Rover P4 80
2002 BMW 745i
2008 BMW Z4 2.5Si
Posted
Old Timer
Posted
Local Hero
8O Cheap!Carbs4ever said
no - only a tenner! 8)
Andy
LINCOLNSHIRE REGION - https://www.facebook.com/groups/467122313360002/
1983 MK1 Golf GTI Campaign Model - Under (looooong) resto!
1962 Rover P4 80
2002 BMW 745i
2008 BMW Z4 2.5Si
LINCOLNSHIRE REGION - https://www.facebook.com/groups/467122313360002/
1983 MK1 Golf GTI Campaign Model - Under (looooong) resto!
1962 Rover P4 80
2002 BMW 745i
2008 BMW Z4 2.5Si
Posted
Old Timer
Posted
Old Timer
First off big thanks to my Dad and my Brother for giving me a hand with the lifting etc!
Got the old pulley blocks into place and the telescopic tubes (with out the inserts) which I made to support the car earlier in the build..

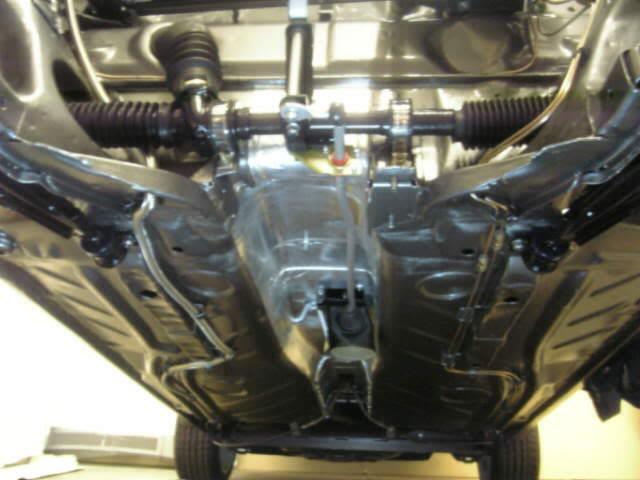
Cardboard to protect the paintwork from the chains. We then put the engine on a bit of plastic card which made it very easy to slide over the floor once we had the car hoisted up about 3 feet
Hoisted up like that gives plenty of room to sort out bolts and clean paint off threads etc! Not to mention get a pic of the floor pan:
Then we pulled the engine over till it was in the bay area and let the car down and put the chains on the engine to lift it into place.
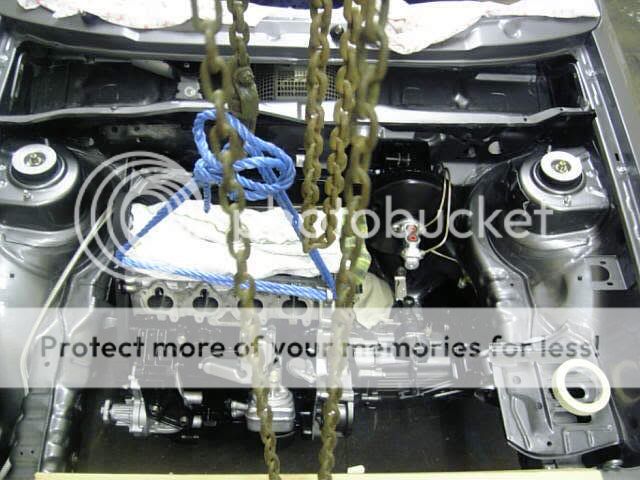
Then it was time to get the left and right mount bolts in place and the rearward gearbox mount ? haven?t put the front on yet as the starter motor laquer hadn?t dried fully.
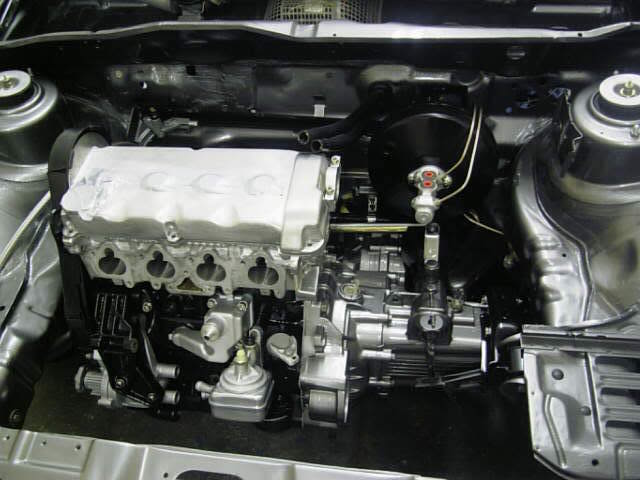
Pleased with how gearbox blends in to the bay! Also plenty of room for standard 16v dizzy cap!
Have to say that engine went in very painlessly and with no scratches to any paintwork! Again thanks to Dad and Nath for the extra 4 hands.
Posted
Old Timer
 ops: Had a few jars when I posted!</edit>
Posted
Old Timer
Madone with the two Cabs 82 (UK RHD) and 85 (US LHD) (92 sold)
Posted
Settled In

Posted
Old Timer
Madone with the two Cabs 82 (UK RHD) and 85 (US LHD) (92 sold)
Posted
Old Timer
did screw the carbs on on saturday and the alternator to see what the whole thing is like - need a longer alternator bracket which is being made at the minute out of stainless and a shorter belt.
next on the list is - finish inlet manifold polishing - get a vacumm take off milled into it then bend some alloy tubing to link the servo up with the inlet then start on a template for the rad then get the water hosing sorted then mount the carbs and plum them in mount filter king etc then wiring/headcloth/windows/carpet/interior………………….. 8O
must get goin!
Posted
Local Hero
My Build Thread
All My Build Photos - https://www.flickr.com/photos/pix-al/albums/72157622794406840
My other hobby - www.pix-al.co.uk
All My Build Photos - https://www.flickr.com/photos/pix-al/albums/72157622794406840
My other hobby - www.pix-al.co.uk
Posted
Old Timer
Carbs4ever said
unfortunately not!
did screw the carbs on on saturday and the alternator to see what the whole thing is like - need a longer alternator bracket which is being made at the minute out of stainless and a shorter belt.
next on the list is - finish inlet manifold polishing - get a vacumm take off milled into it then bend some alloy tubing to link the servo up with the inlet then start on a template for the rad then get the water hosing sorted then mount the carbs and plum them in mount filter king etc then wiring/headcloth/windows/carpet/interior………………….. 8O
must get goin!
rrrrrrrrrr the list of work to complete…. make sure you get pictures of the progress on this work… keep the great work up.
Madone with the two Cabs 82 (UK RHD) and 85 (US LHD) (92 sold)
Posted
Old Timer
i'll take plenty of piccies.

There are too many online users to list.