


Mk1 GTI Blue G60 Conversion

Posted
Local Hero


Just a little tip for those little pinholes and stuff like the edge of the scuttle etc.
Get yourself a piece of copper plate. (flatened out 22mm pipe is suffice.) Clamp or hold the copper behind the pin hole and mig the hole. (keep the gap between copper and steal to minimum. The weld will fill the hole but won't stick to the copper and the copper helps take the heat away to lessen the chance of blowing a bigger hole. Grind to clean up to a flush finish on both sides. Might take a couple of goes but will be better and quicker than cutting out and making a patch.
Hope i'm not telling you how to suck eggs!

Posted

Local Hero


Andy
LINCOLNSHIRE REGION -�https://www.facebook.com/groups/467122313360002/
1983 MK1 Golf GTI Campaign Model - Under (looooong) resto!
1962 Rover P4 80
2002 BMW 745i
2008 BMW Z4 2.5Si
LINCOLNSHIRE REGION -�https://www.facebook.com/groups/467122313360002/
1983 MK1 Golf GTI Campaign Model - Under (looooong) resto!
1962 Rover P4 80
2002 BMW 745i
2008 BMW Z4 2.5Si
Posted

Old Timer

Posted
Settled In

Cero said
Jimi, Again great work, how are you getting the welds so smoothed back - what grades of pads and tools are you using ?
Thanks! At the moment I am sanding the welds as much as I can with a sanding disk on a 4" grinder. Not sure of the grade but it is quite course. Before it goes to paint I will be going over all my welds with a 50mm sander with fine grade grits.�

Posted

Moderator


Posted
Settled In
Cheers also smudger
Posted
Settled In
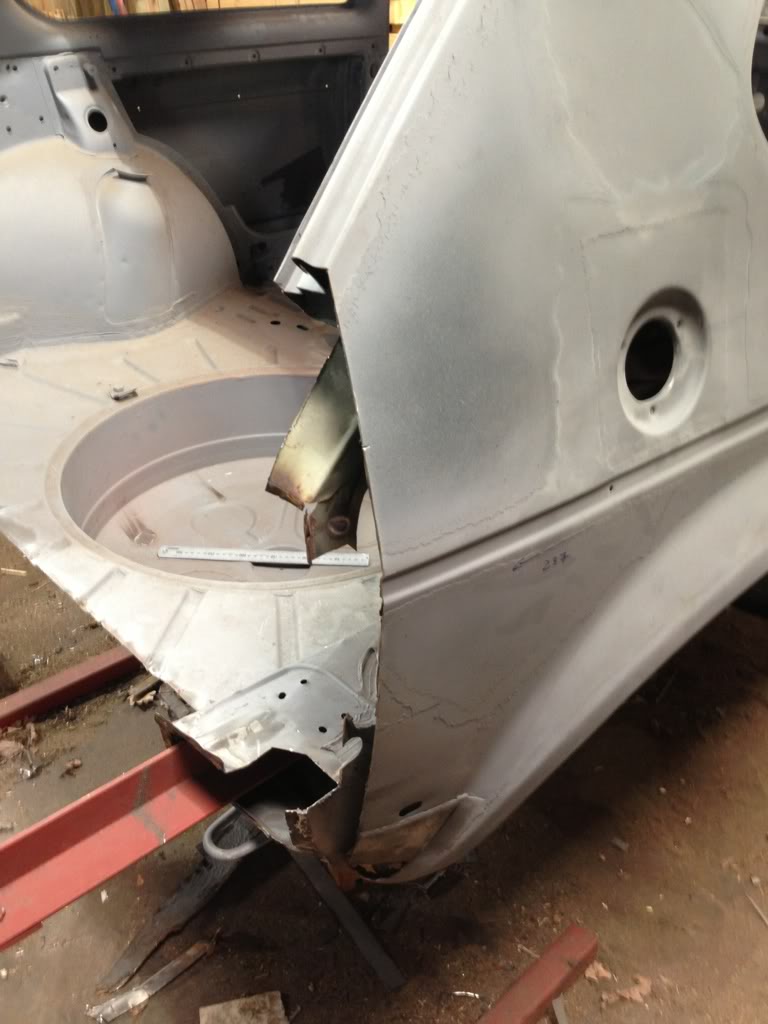
Hit a few snags when removing my rear panel, I'll let the pics do the talking.�
Welcome to my backend blues�

After rear panel was removed and also the overlaped lower corner, this was the scene that I was faced with�

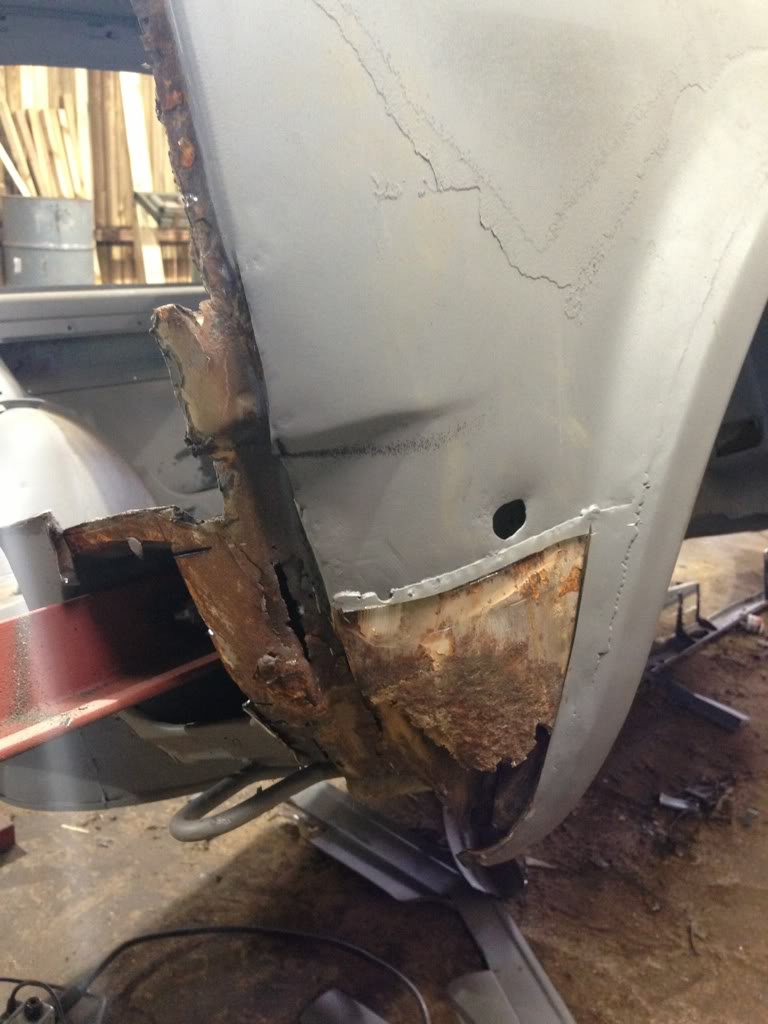
Basically there was no solid metal to attach a rear panel to. I didnt want to replace the whole rear quarter as I had already done a fair bit of work to it, fuel filler etc.
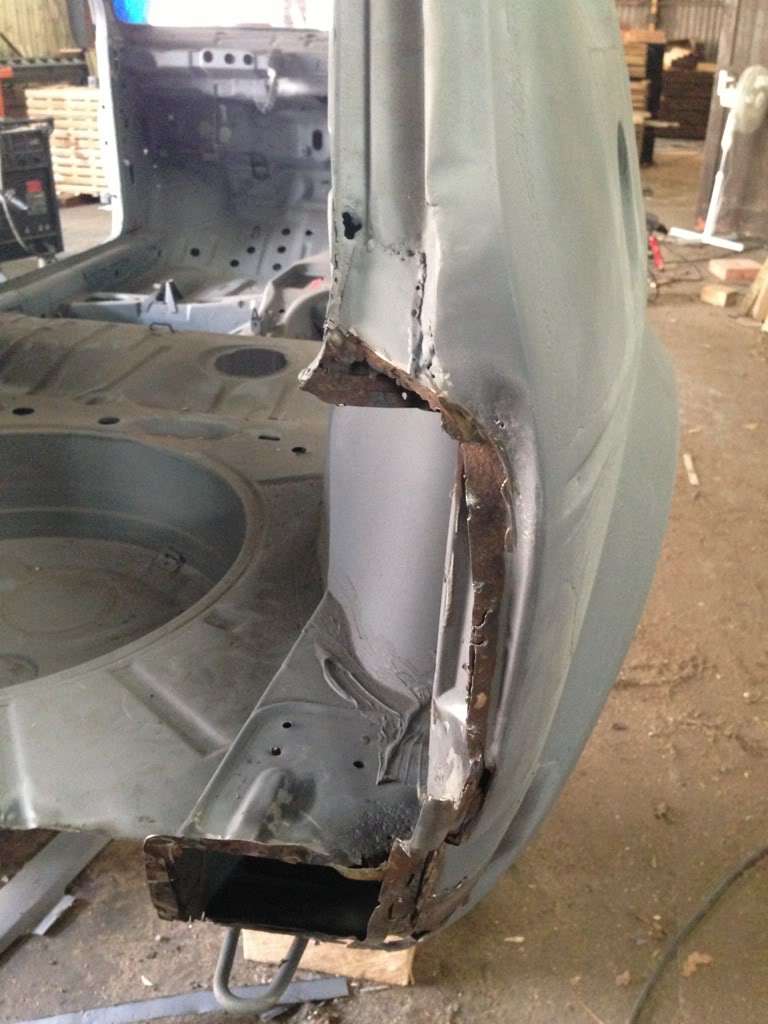
So it was the waiting game, contacting people who were breaking cars to see if they would cut me off the part I needed. Anyway after contacting a few people spkmk1 came to my rescue. Cheers mate
This was the part that arrived
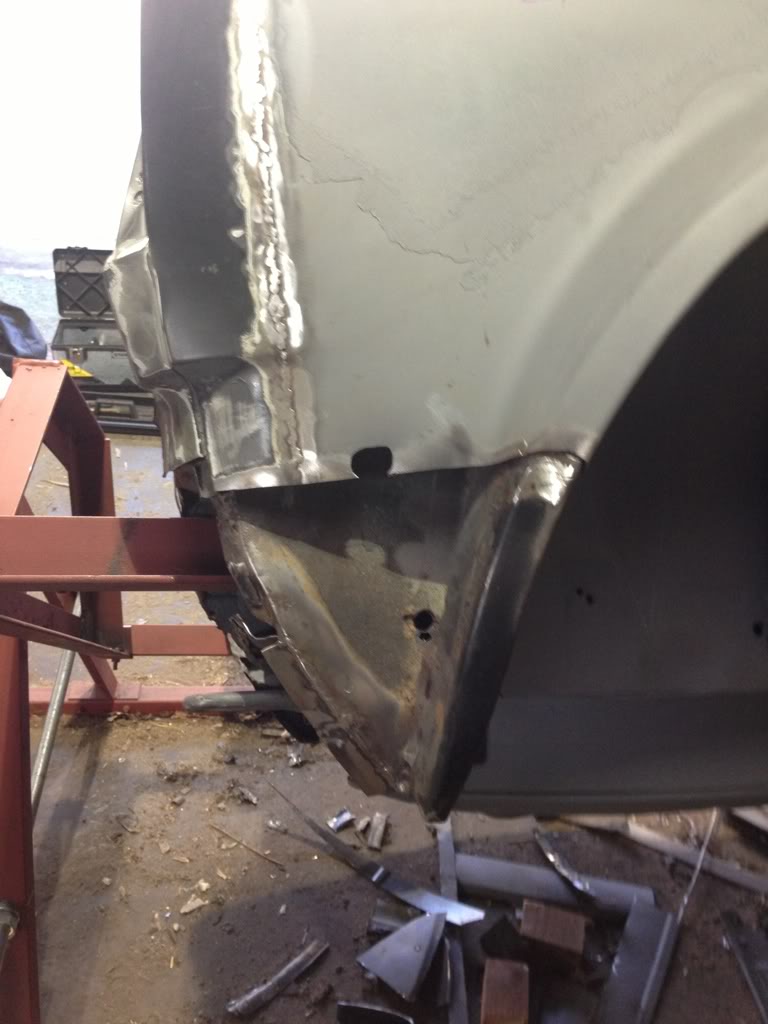
Next the bad bits were cut off the car.
The repair piece was cut, fettled and tacked into position. I left the piece of rear panel attached to retain rigidity.

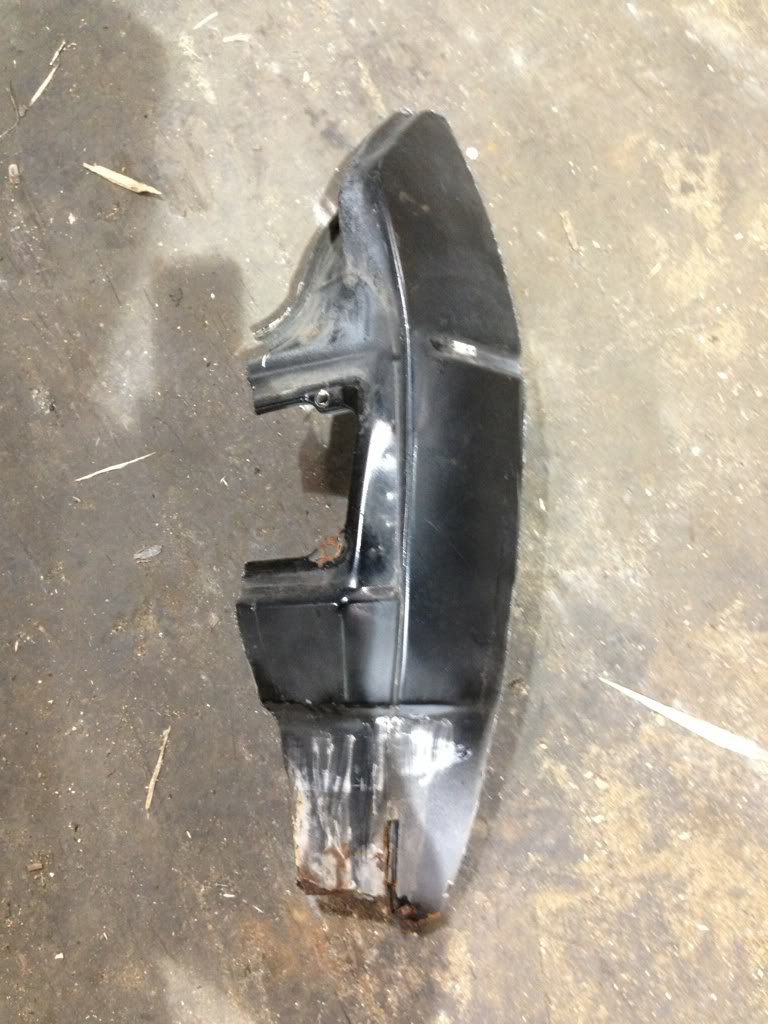
Lower corner cut out
Rear quarter welded and lower corner tacked into place.
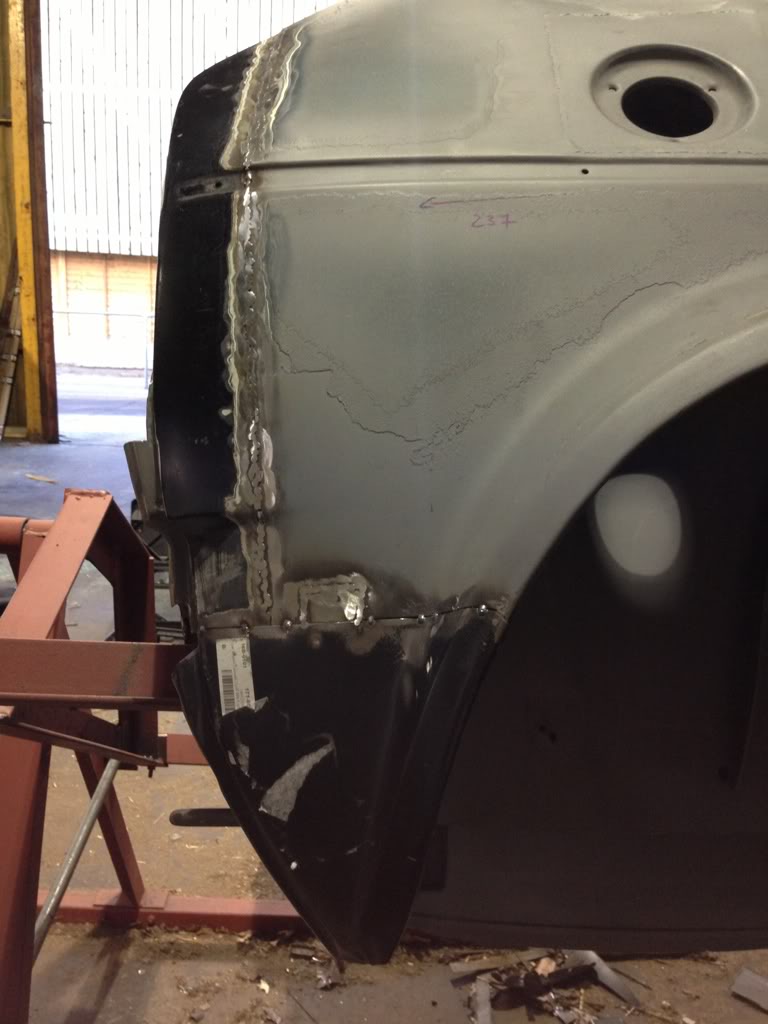
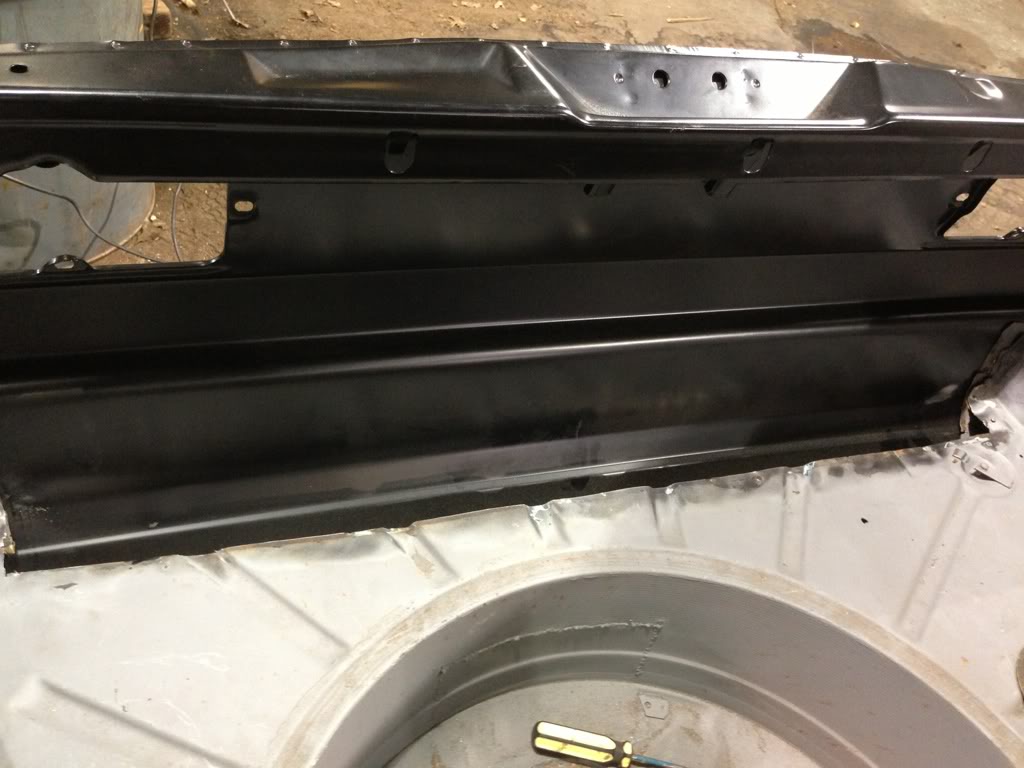
Picture of the new good metal that the rear panel can be attached to.
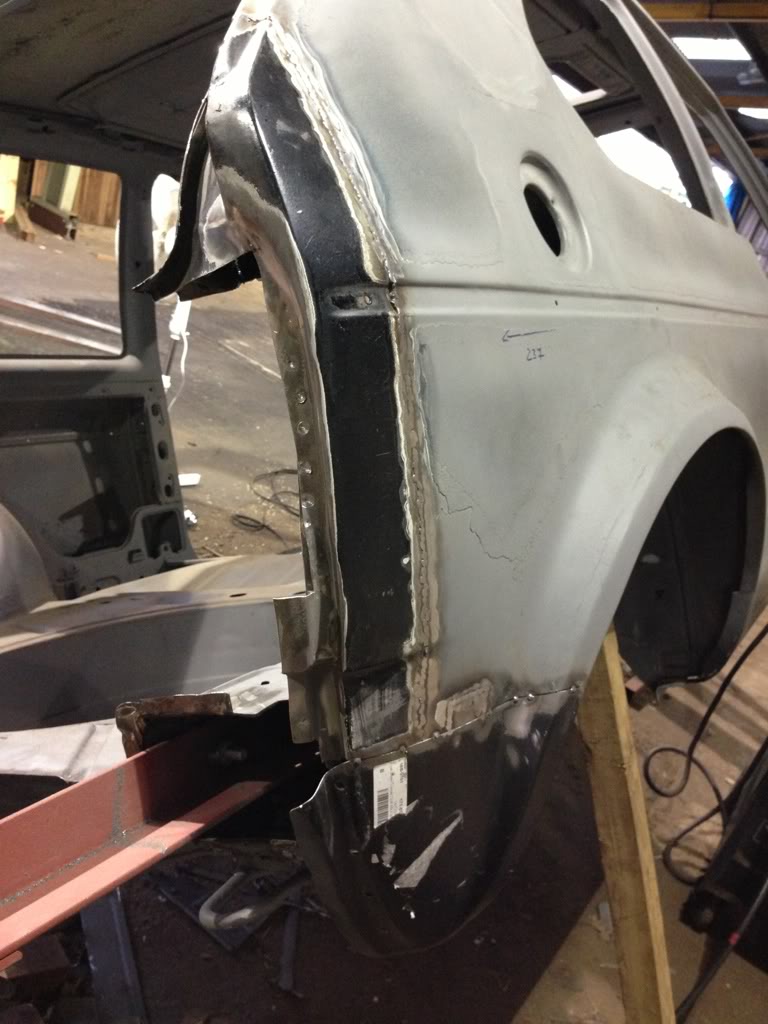
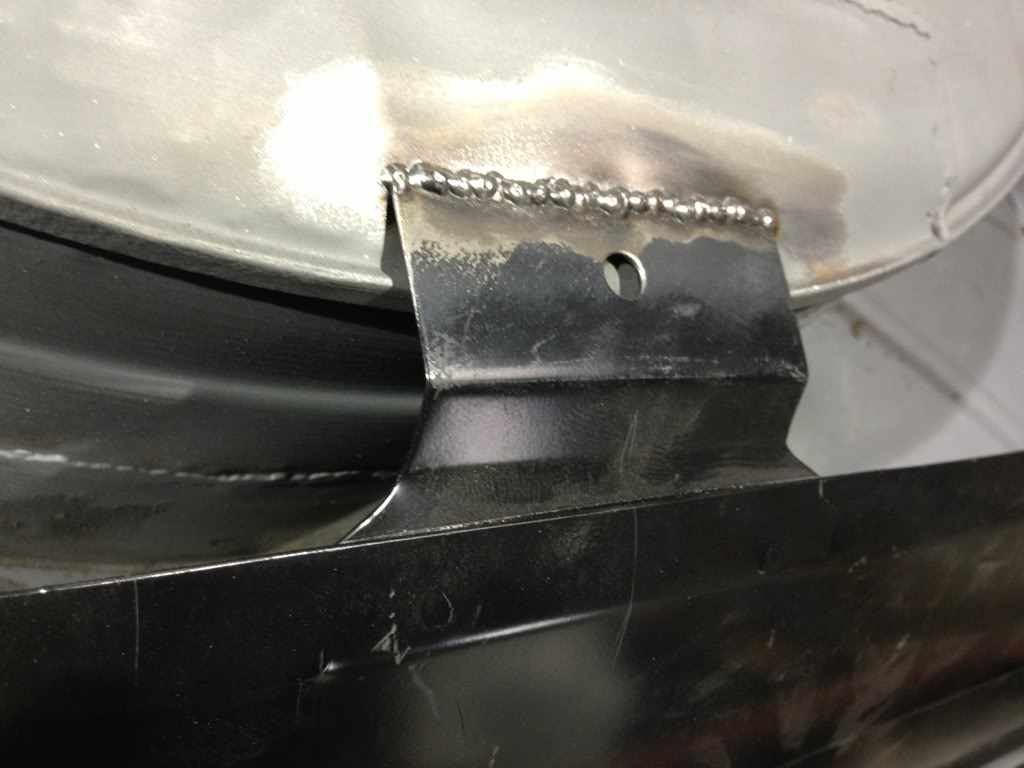
Inside corner repaired

Rear panel tacked into position.
Next up, I need to reattach the boot floor to the rear panel as I had cut some away that was rusted.
Repair piece made, welded in then primered

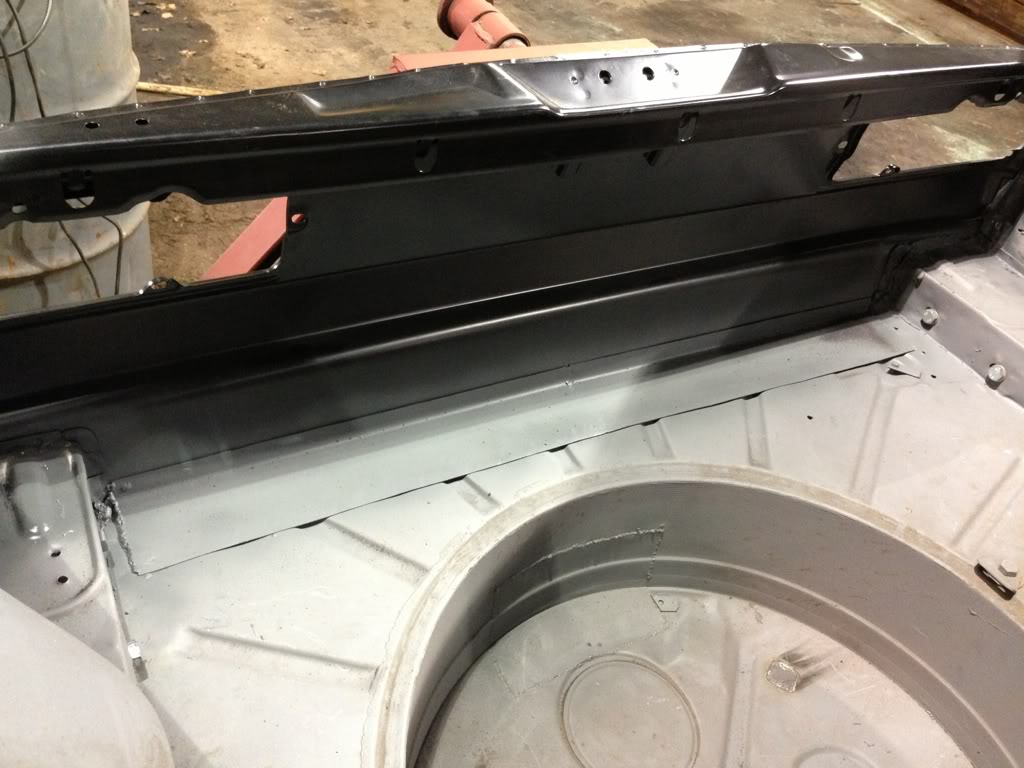
Attached to spare wheel well.
Finished and primered!

Thanks for looking�
Posted
Local Hero

Andy
LINCOLNSHIRE REGION -�https://www.facebook.com/groups/467122313360002/
1983 MK1 Golf GTI Campaign Model - Under (looooong) resto!
1962 Rover P4 80
2002 BMW 745i
2008 BMW Z4 2.5Si
LINCOLNSHIRE REGION -�https://www.facebook.com/groups/467122313360002/
1983 MK1 Golf GTI Campaign Model - Under (looooong) resto!
1962 Rover P4 80
2002 BMW 745i
2008 BMW Z4 2.5Si
Posted
Old Timer
Posted

Moderator
Turned out really good!!Andy.

Posted
Settled In
Hairyarse said
Wow damn fine work on that rear quarter chap, hat off to you
pazwaa said
Amazing job. There is so much quality fabrication going on at the moment on mk1 projects, it's great to see!
Melteddrummer said
Hey Jimi, fair play to you for tackling that so well,
Andy.
Cheers guys
�
Posted
Moderator
Posted
Old Timer
Posted
Settled In
smudger1980 said
Nice work mate.
Cero said
Really good job, enjoying seeing it all coming together, well done Jimi
Thanks
�Not too much more welding to do now.
Posted
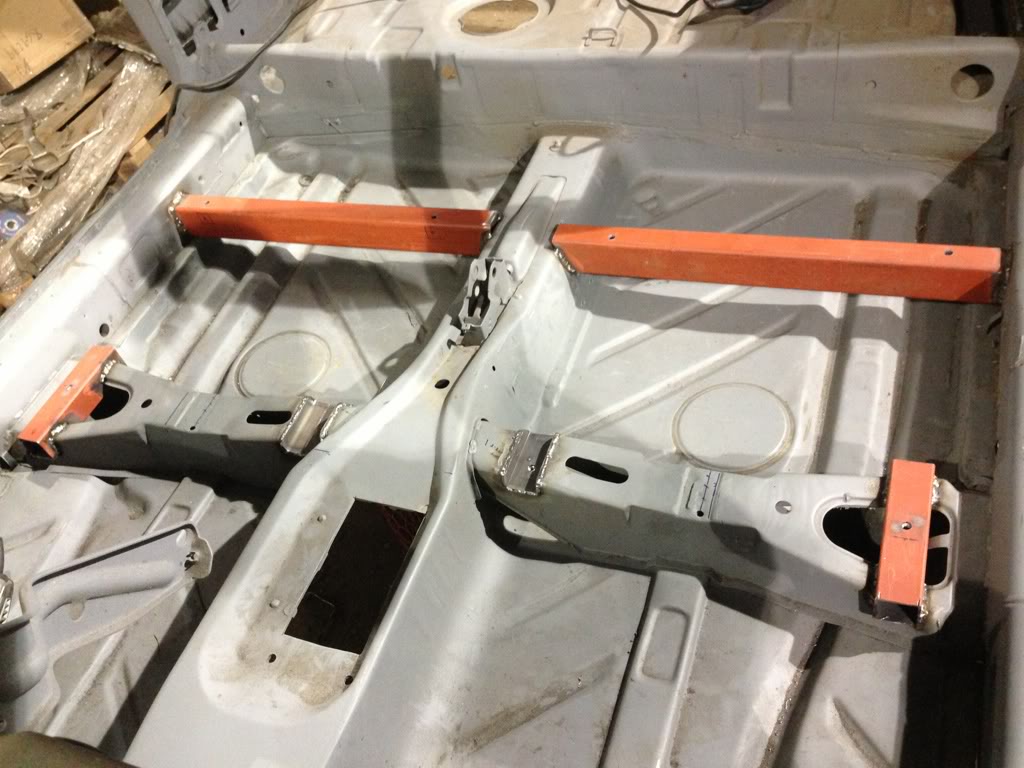
Settled In
First job was to remove the original runners and the center mount.
I decided to use some channel and box section to level up the slope on the original front mounting point, then use rectangular box for the rear mounts.

This is what I ended up with.

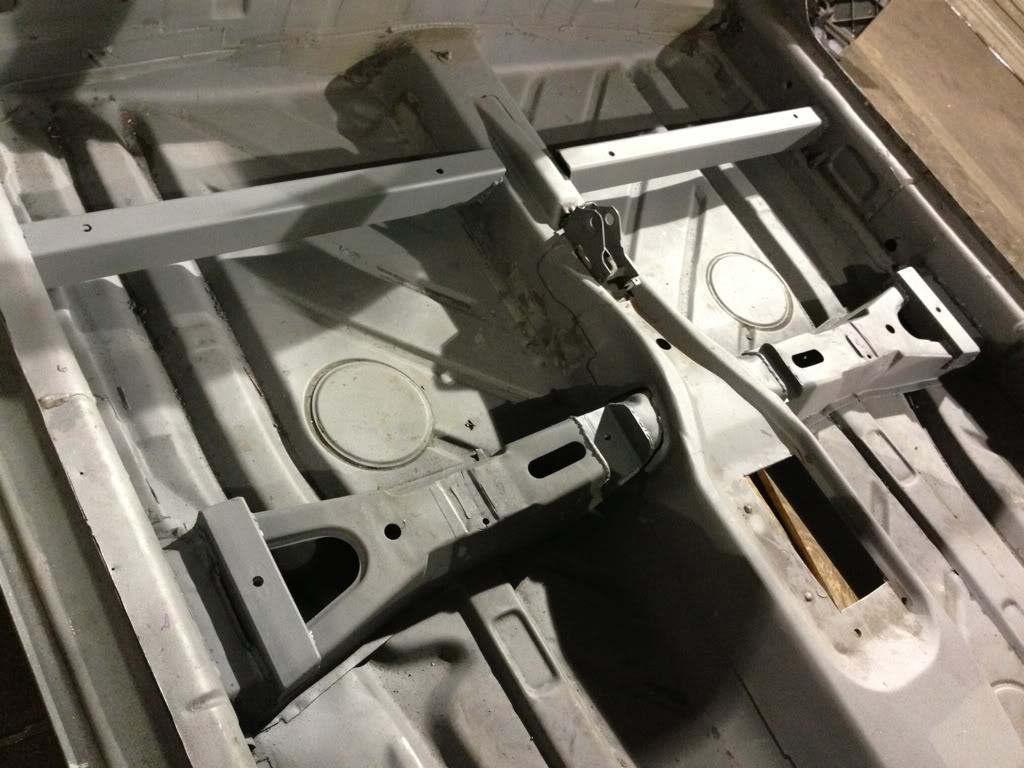
Next I angled the front of the box section and welded end plates on to make it look a little less like box section lol! Coat of grey primer aswell.
Seats installed!�
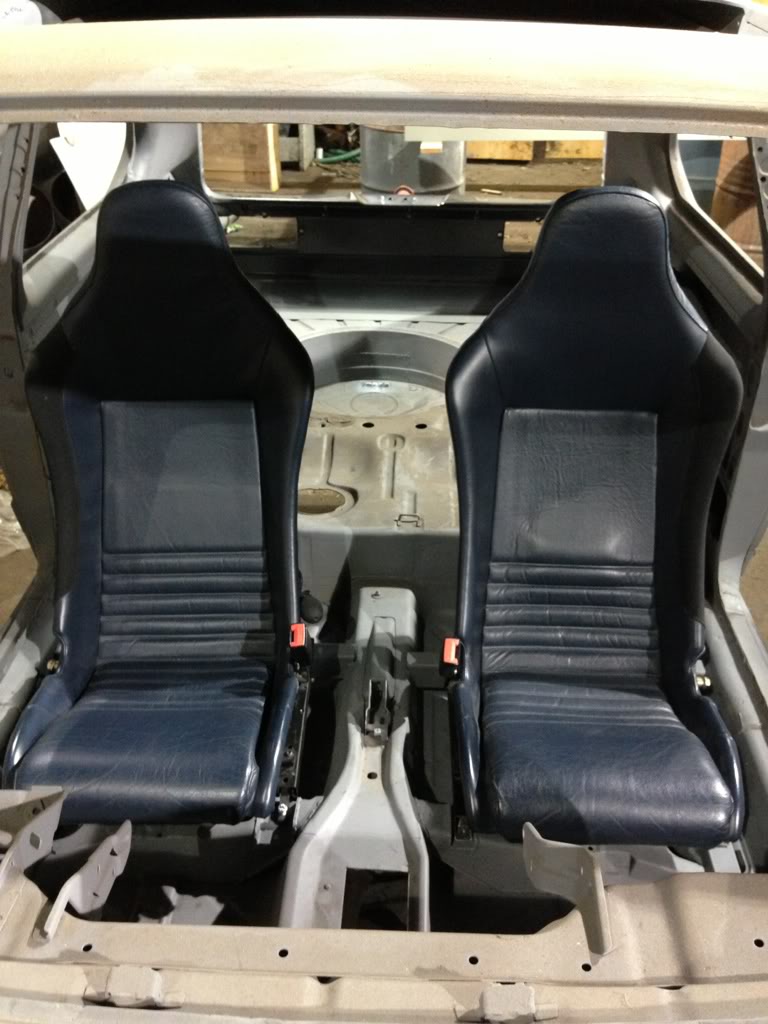
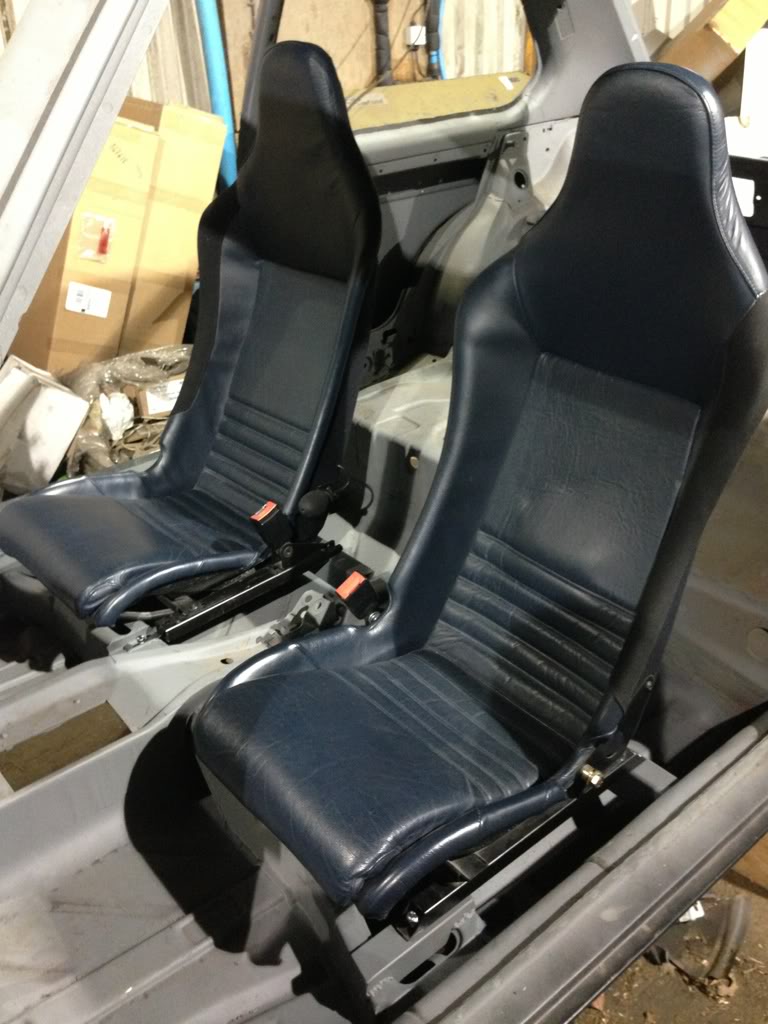
Positive point - they are very light in weight
Negative - they will make for a very hard ride
Posted
Old Timer
Posted
Old Timer
Posted
Settled In
Dubbuds said
Nice welds and loving the seats
Thanks
Cero said
Hope you're not planning on doing any long distance driving …
I have never been one to travel in comfort, will have to use a cushion for long journeys.
 �
�
Posted
Moderator

Posted
Settled In
Melteddrummer said
Another good instalment Jimi, I love the look of those seats mate
Cheers Andy, felt a bit sorry for the seats, so thought I would put them to good use
0 guests and 0 members have just viewed this: None.