


mk1 caddy- project "rustowagen"

Posted
Settling In

mk1 caddy- project "rustowagen"
anyways been grinding most of the weekend removing as much of the seam sealer as i can with a grinder then using a blow tourch to burn the rest off. takes a long time but it will be worth it once its all gone.
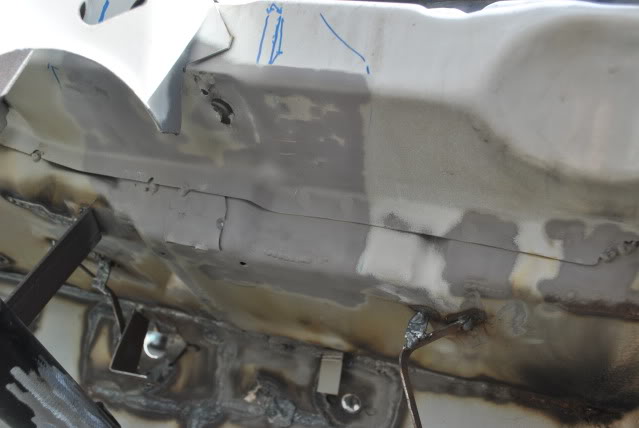
heres how the lower area was this morning after it had been ground with the wire wheel

thne this is after some more grinding with a rust/paint removal disk and a bit of buring and scraping with a blow tourch and screw driver.

and a cool pik of buring the sealer off


also made the decision to cut the scuttle out, wont be driven daily so wont have to put up with the loud noise that aparently you gain by cutting it out. will be doing something i havent seen before with it so should work out ok.


all comments welcome as usual guys
Posted

Local Hero


Andy
LINCOLNSHIRE REGION -�https://www.facebook.com/groups/467122313360002/
1983 MK1 Golf GTI Campaign Model - Under (looooong) resto!
1962 Rover P4 80
2002 BMW 745i
2008 BMW Z4 2.5Si
LINCOLNSHIRE REGION -�https://www.facebook.com/groups/467122313360002/
1983 MK1 Golf GTI Campaign Model - Under (looooong) resto!
1962 Rover P4 80
2002 BMW 745i
2008 BMW Z4 2.5Si
Posted
Settling In
Hairyarse said
Good work - love the burning pic! :twisted:
cheers buddy. was quite hard trying to burn and take a pik at the same time, wasnt overly sure where i was aiming :mrgreen:
Posted
Settled In

bay is starting to come along really well - its amazing how much difference removing the sealer and unused brackets makes
can't wait to see it all in primer - all the hard work will be worth it then
mike
Posted
Settling In
mike_B said
been keeping an eye on this - loving the work
bay is starting to come along really well - its amazing how much difference removing the sealer and unused brackets makes
can't wait to see it all in primer - all the hard work will be worth it then
mike
yeh the bays do clean up after a lot of hard work, when looking at the show cars at the time you just take it all for granted and dont reolise what goes into making the clean bays until you see pictures or do it yourself!
long way to go before primer but getting there dude!
come home from work today and see dad was in the garage working away, he had burnt all the seam sealer from the scuttle off for me. not sure if he doesnt trust me with a big flame but it saved me a job! just got to take it bake to bare metal now then primer time


drivers side suspension turret area now mostly free from the horrid lumpy sealer!

whats left of the sealer

Posted
Settled In
jimmy
Ratty 83' 1100 Golf Now With 5 Speedsssssssss (Holly)
93' Polo Coupe ! .. Mates Project Car (Poppy)
70' Beach Buggy - Holier Than A Church !!! (Lilly)
72' Beetle in a thousand pieces (bro's) (Daisy)
(Holly) 93' Polo Coupe ! .. Mates Project Car (Poppy)
70' Beach Buggy - Holier Than A Church !!! (Lilly)
72' Beetle in a thousand pieces (bro's) (Daisy)
Posted
Settled In
The gray caddy looks real nice 8)
Posted
Settling In


Posted
Settling In

Posted
Settling In
Posted
Settling In
so first off, i made these from off cuts of stainless from work, bent them to the same angles as original mk1 items, mild steel tab to be welded into the truck, then polished teh brackets and bolts

also made a "squared" U shape piece for the brackets to slot into on the rad. still only tacked on as i wasnt sure if they would be suitable, work really well i think and got the rad in properly yesterday


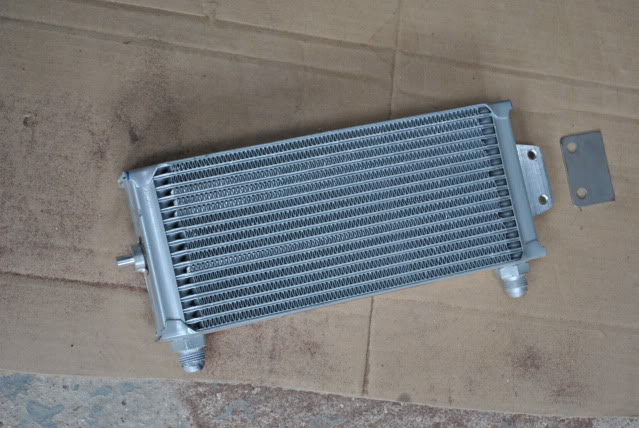
so next up was getting the oil cooler itself to "tuck" infront (grille side) of the radiator, wouldnt be hard with a little one but im using a 16row 235mm long beast. was a bit of a head ache trying to think how was the most effective and neatest way to mount/put it.
oil cooler with original mounts cut off, and locating pin and brackets tacked on, also a steel one that i welded in to the under side of the slam panel, larger holes for the bolts for a little play to get it positioned right, as its very close to the rad bracket once in
i wanted to get the cooler inline with the rad, so had to cut a piece of the front pannel out to get it in, also had to trim the upright which the head light fixes too to get it over as much as possible. Also cut the bottom addition piece that sits behind the bumper to get a bit more air flow as possible, had to cut it right down on the left side so the cooler's fins didnt smash on it.


once i new it all fitted i welded a new piece back into the front pannel to put the streth back in, cut some 10mm high strips of steel at work on the gillotine so they were nice and straight, then cut to lenth and bent it round the file i filed the curve into the front panel with, shot blasted the piece before welding and grinding it back. really chuffed how it come out nice and factory i think.


then zinc primed and cooler and rad back in for yet another fitting.


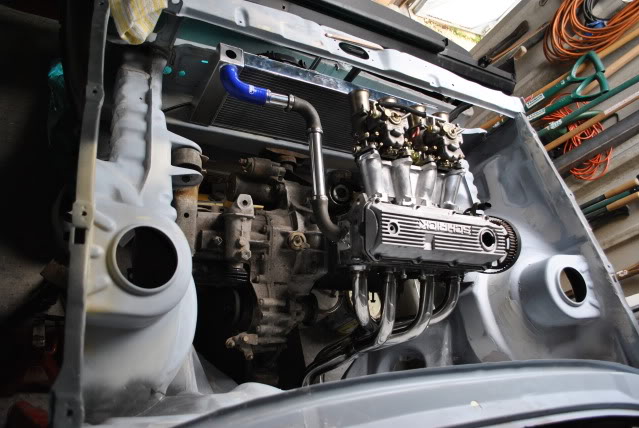
radiator in, carbs on and all nipped up for final place fitment. used one of the 90bends off the sandwich plate for the oil cooler, need to order another. going to use this instead of the straight one i was going to use to get the hose out the way of the airflow to the trumpets.


the oil cooler either sits parrallel with the front pannel or parrallel with the rad, i decided to match it to the front pannel for a bit more clearance for the rad.

think i need to get some 40mm trumpets instead of 60mm ones!

ordered a new grille from big boys toys, not overly happy with the quality, dont mind really as im cutting most of it up anyway. so grille back in and boooom, covers all the hard work back up and covers the oil cooler completly up! so going to the flat out between the slats to match the rest of the grille, or drill loads of holes in it so it keeps teh strenth in it. either way it wont stay like this!

hard to work this pic out, looking through where the head light goes, between the cooler and grille, (the grille is the fuzzy black bit to the right) pretty close and nice snug fitting.

and made my self feel better by putting wings and bumper back on to make it more caddy like!

if you read all of that thanks! wanted to have a good update and show all the work ive done to get the cooler in so it doesnt look like its just off the shelf and in.
all comments welcome as usual thanks
Posted
Settling In
right so, metal rings rolled from 10mm wide flat strips, shot blasted then welded and smoothed in. these support the oil lines when there in the truck, the rings had to be much bigger than the line itself in order to get the big metal fixings that go onto the cooler through.


finished my oil cooler off last week, got the brackets finished welded and rubber it down and painted it satting black to match the hoses and fixings. oil lines test fitted, cut down to lenth and fixings added on the ends


then finaly got the rad finished, stayed last a couple nights at work and polished it, first time with out the top and bottom cover on with card board over the core, then had the top and bottom weled on then re cut and buffed the weld hase out. then complete clean down with thinners. still got a couple bits to put on it and straighten some of the core fins back out from where i had it in and out the truck so much and knocked it a bit


oil lines back in with all fixings on, ran through the rings pictured above to support them and help keep the curves flowing


radiator back in, boom boom pow all line hidden again nice and neat

new classic black samco bends, i have 3 for the top hose and more ideas how to make it neat and one for the temp gauge and a bracing point. more to coe on this over the next couple weeks

a few of the radiator in and carbs on


cant get this one to flip round!!! if you look closely you can just see the oil lines tuck down and under into the cross member, really chuffed how they turned out. first plan was to run the lines parrarell but that couldnt work and the lines are to touch and stiff and the bends didnt flow to well and go through the chasis cross member well either.

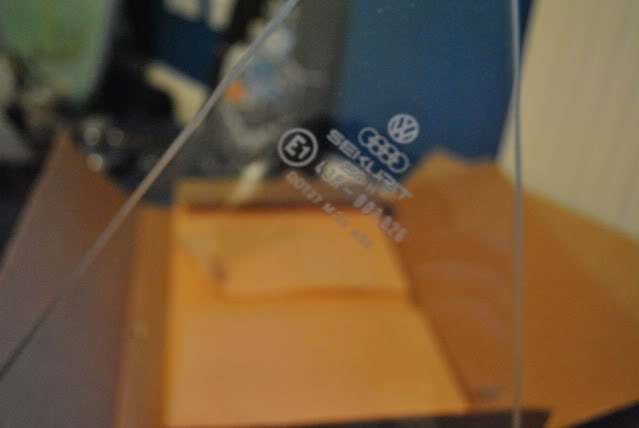
oh almost forgot! picked these up from inters last week, brand new everything apart from one lightly used rubber. CLEAR glass what!?…..


thats all for now. all comments welcome
Posted
Settling In


Posted

Settling In

Posted
Settling In
SoundillusioN said
Awesome!…. love the detail and i love what youve done with the cooling pipe work, may have to look into that! 8)
thankyou fella, took a while to sort out and ages to drill and make the holes but its worth it, works and looks good!
more progress with the pedal box, finaly its in propperly! one mount down 3 togo!
scrapped the first plan with the one threaded boss, took up to much room that i didnt have and wasnt going to be strong enough. so lower mounting points and another boss. ended up with this……

it bolts onto what will become the box that goes around and over the top of the pedal assebly
under side shot, each boss is welded all the way around excpet for the bolting face

all of which attached to the main brace and mouting point, which gets welded in solid to the car.

again nice weldings


so after, i sand blasted the bracket and a coat of weld through primer

more bits to cut out that got in the way of the bracket i made, this is part of the original bracket for the pedals and columb


shot blasted all welding areas and then once again weld through primer
bracket tacked in place

boom boom pow pedal box in

will start on the other mounts this week ready to go in, in a few weeks time.
also cut the S2 dash brackets out and rested my brown S1 dash in

and a nice dishy shot to finish up with…..

thanks for looking all comments welcome
0 guests and 0 members have just viewed this: None.