


83 gti full rebuild

Posted
#769729
(In Topic #92742)
Settling In

83 gti full rebuild
back home

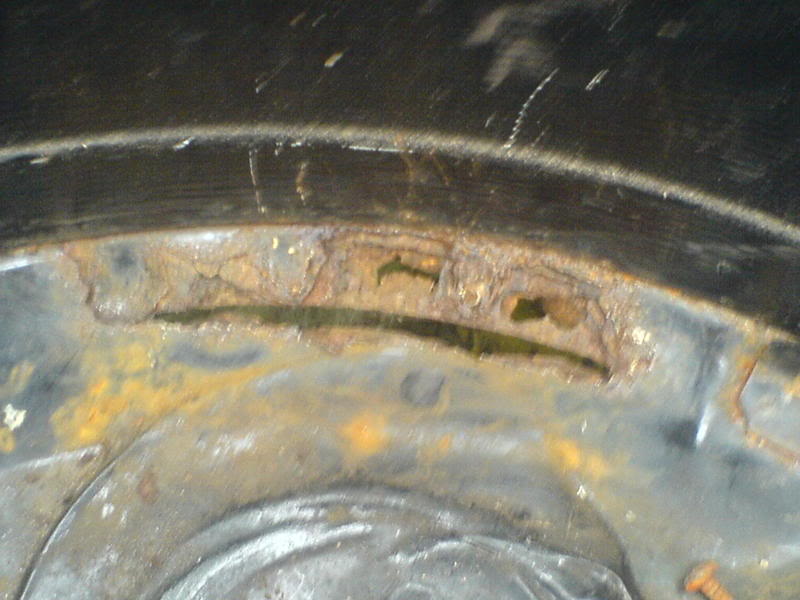
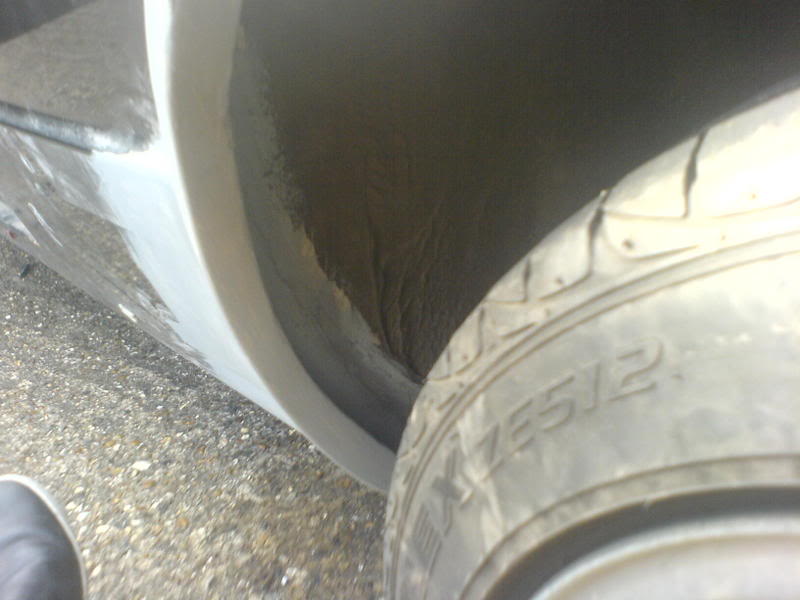
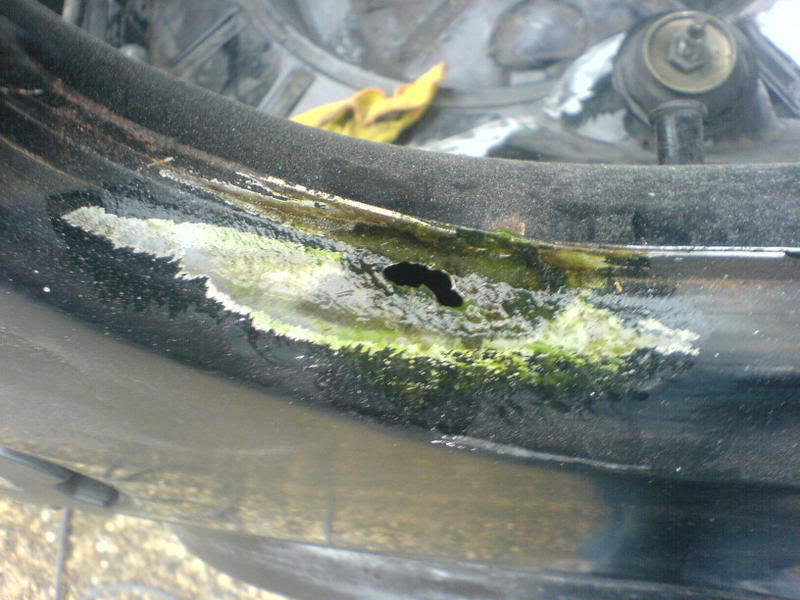
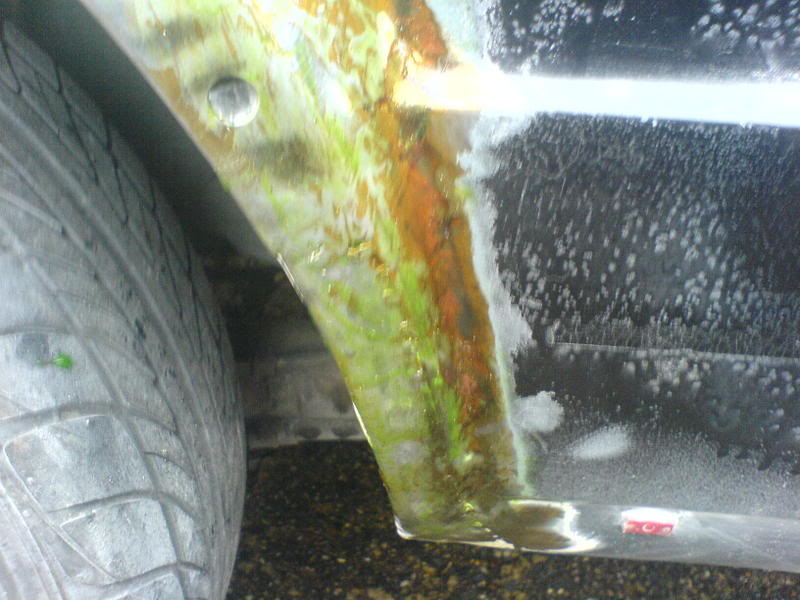
after a bit of looking i found a rusty spare wheel well
and the door after a closer inspection

The rear wheel arch also had a bit of rust but i didnt get a picture of it befor welding
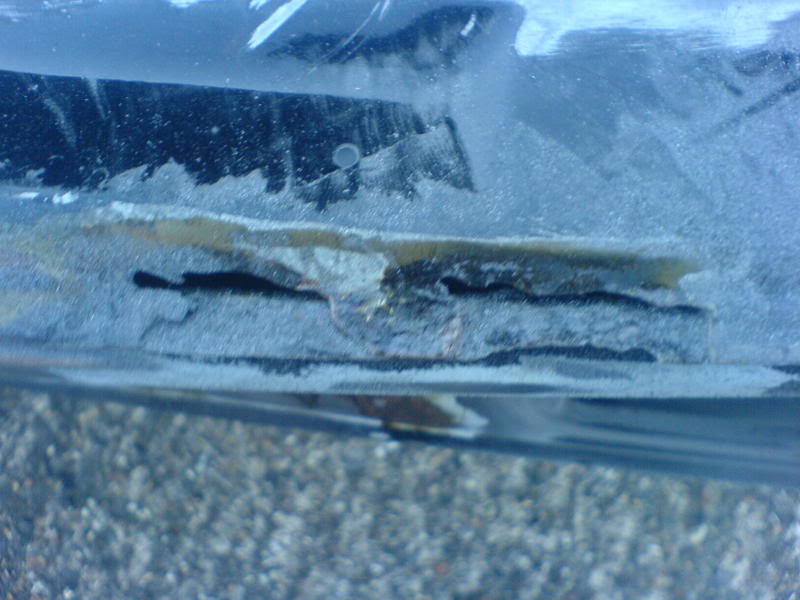
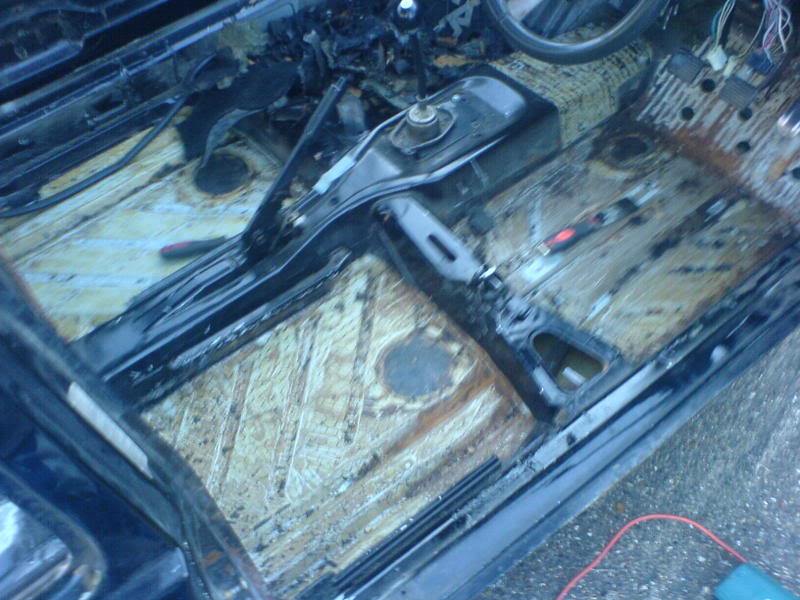
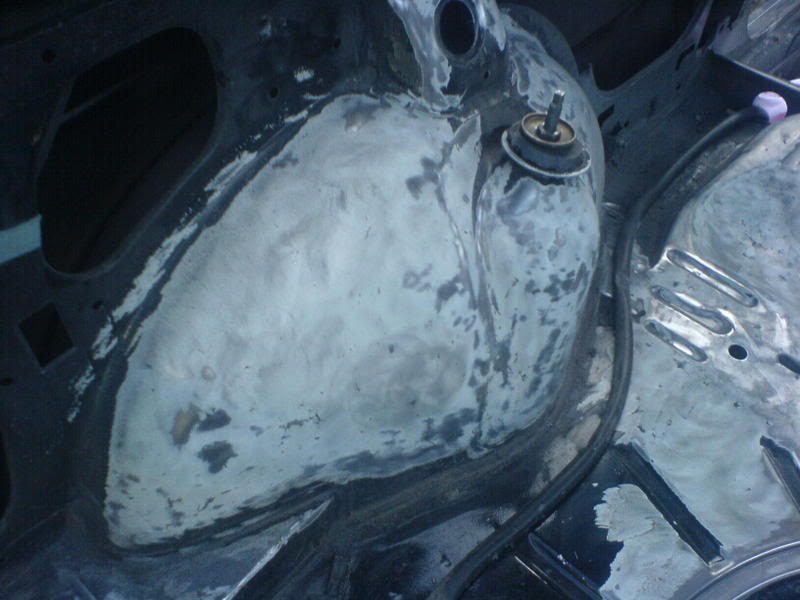
 But the worst rust was found when i realised my carpet was wet… couldnt find a leaking window seal so striped all the old rotten carpet sprayed the car with a hose to find a nice hole in the rain tray under the bonnet 8O I have now got all these rust problems welded up properly
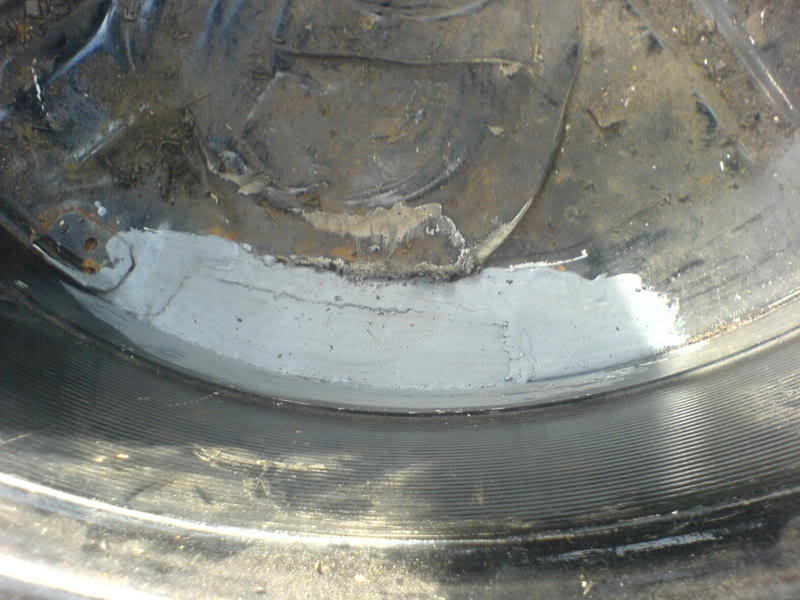
Rust cut out

Welded up

rear wheel arch welded up
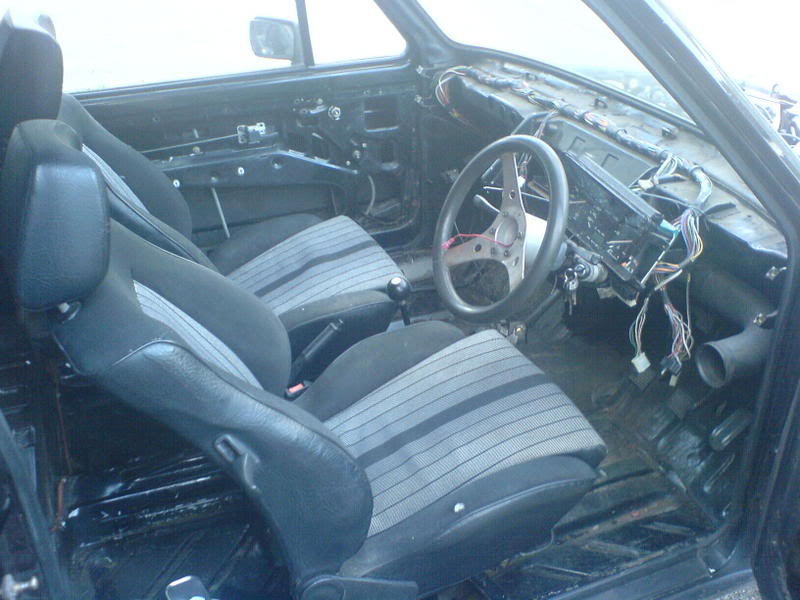
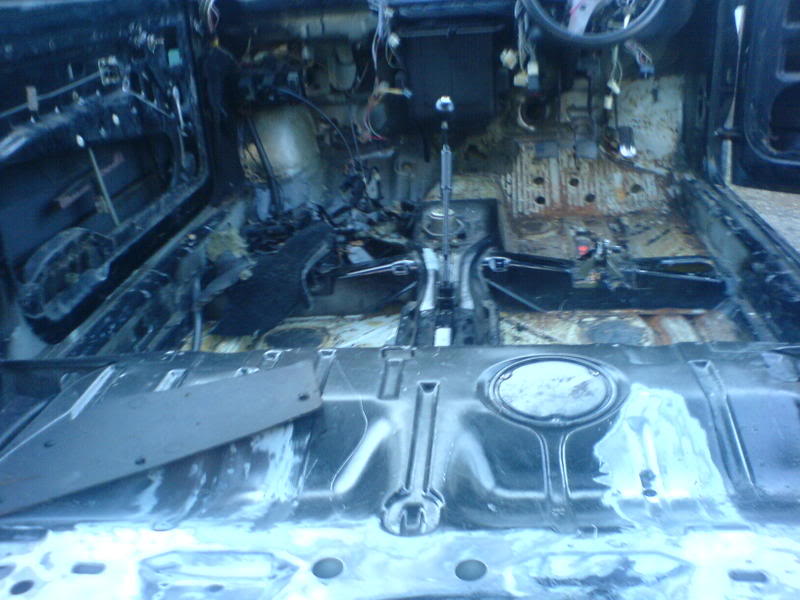
inside striped out
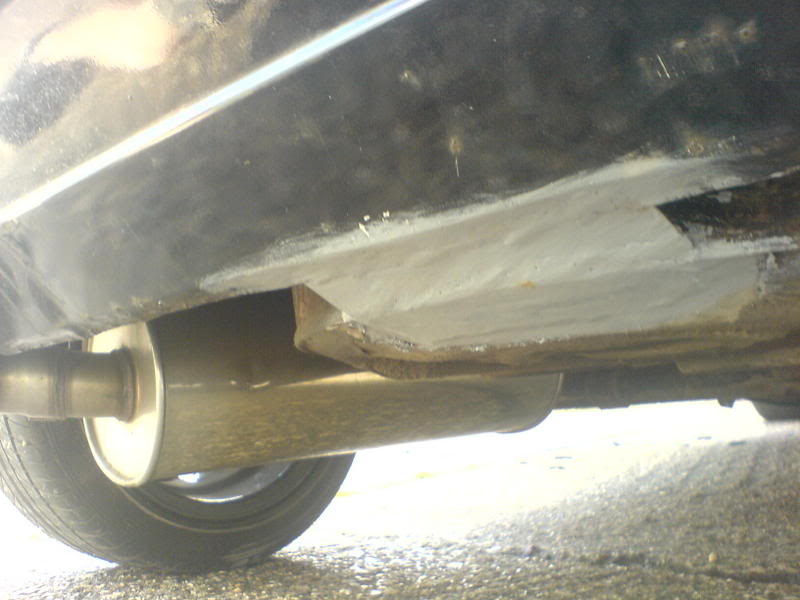
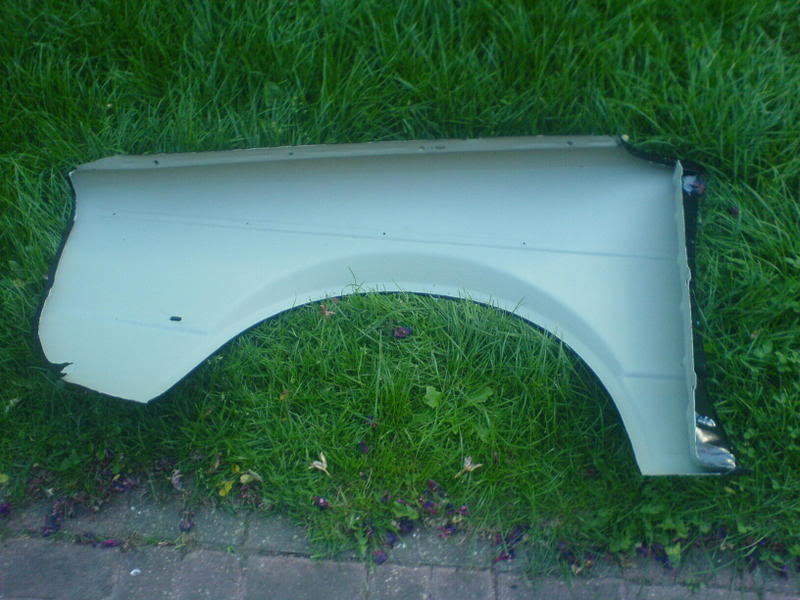
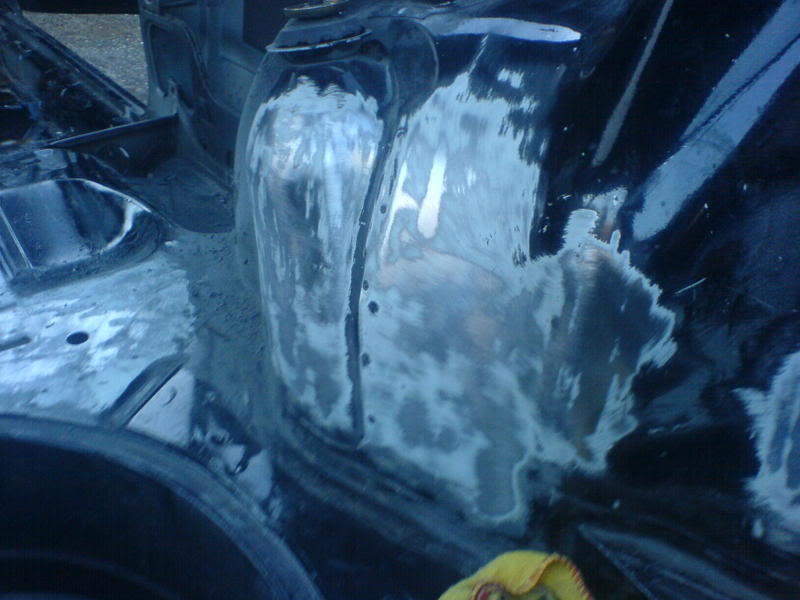
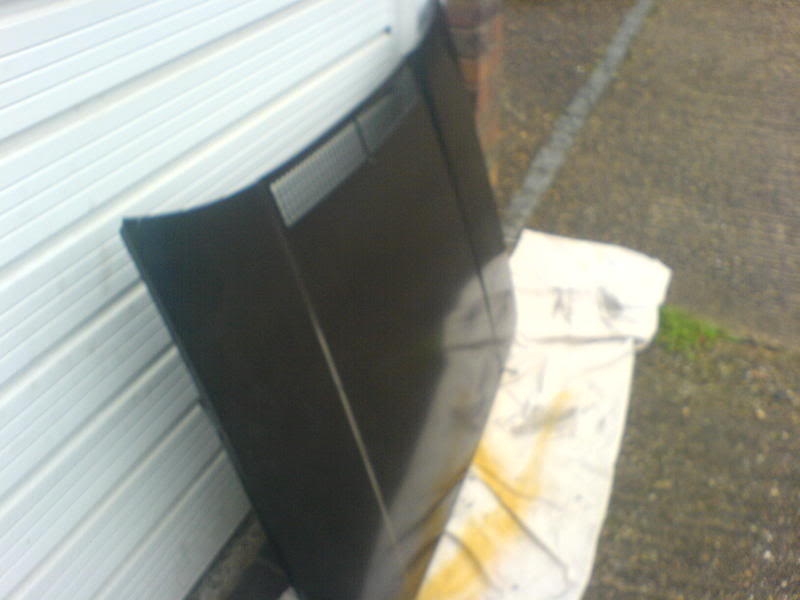
The wings and bonnet also needed replacing as they had a few dents and a dodgy arial hole weld up :evil:
so as the wings were off thought i would strip of the stone chip and underseal and redo them
The wingsalso got a coat of ruber seam sealant
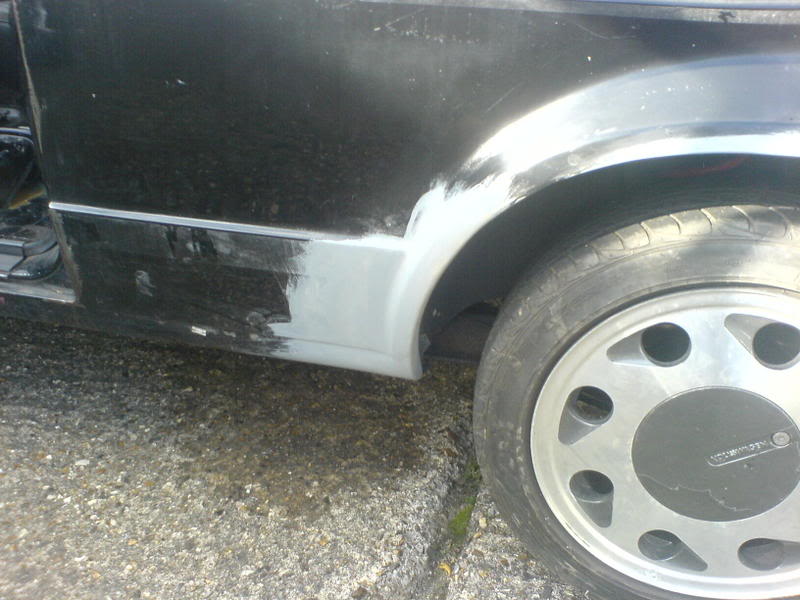
The car a few days ago with windows removed, where i found another small rust patch under the rear quater window rubber
 and also under the tailgate rubber seal but i havent taken pics yet.
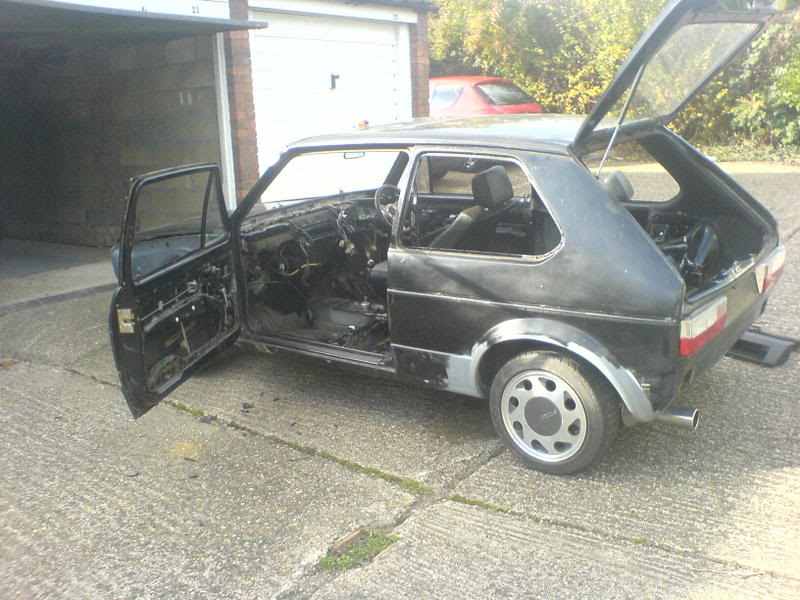
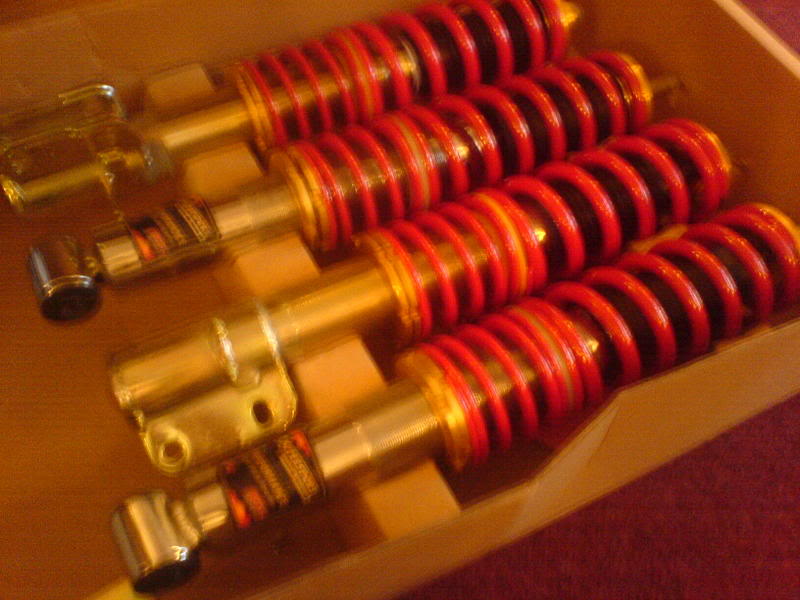
The next jobs on the list are remove rubber sound deadening from floor pans, which i have already started on…thats a fun job lol and to get the new rust sorted, as well as removing tailgate glass then doors and tailgate and prep the shell ready for a respray, which is going to be an audi grey. im going to spray the bonnet, wings, tailgate, inside the shell and doors myself to save on money as im still a poor student, but get the shell sprayed by a friends dad. after that i can start putting it back together with a few new parts that i got of ebay which include standard rear lights and a small front splitter. As well as fitting these badboys

Next on the list to buy is primer and paint, polly bush kit, gearbox linkage kit and headlights. I also have to sort out the dodgy wiring done by the po
to get the fan to work and also make the car tick over at less than 2000 rpm
Sorry for the bad pics there all camera phone, will try and get a proper digi camera soon as well as upload more pics from todays work
Dunc
Posted
Settling In

Posted
Old Timer

Madone with the two Cabs 82 (UK RHD) and 85 (US LHD) (92 sold)
�
�
Posted
Settling In
Posted

Old Timer
<a><img></a>
Posted
Settling In
it already came with groved brakes and uprated pads butthe electrics are a bit dodgy on this car.
Posted
Settling In
also found a small rust hole under rear window rubber which will also need welding up
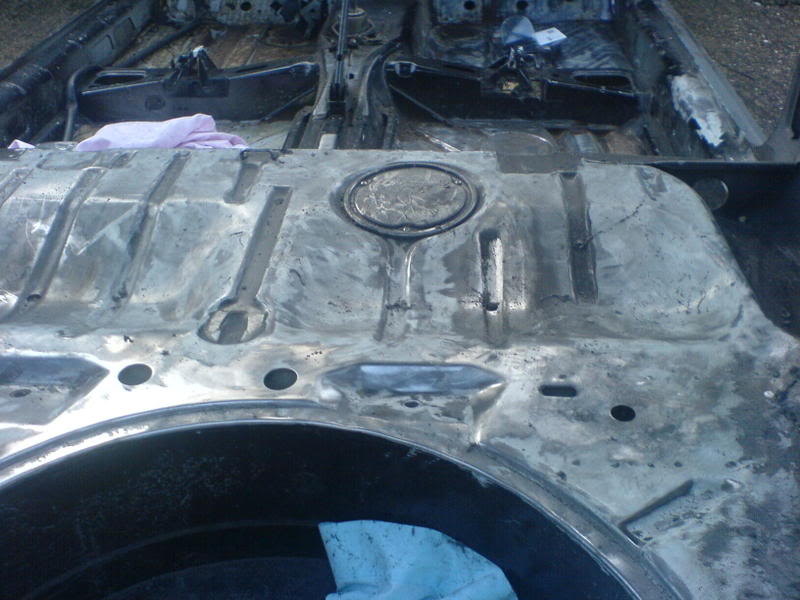
removed all the sound deadning from the floor pans to find no rust at all

also removed some of the damaged paint under the rear seats and rear suspension towers/arches
took the wire wheel to the other rear arch to remove some surface rust and found…filler, after removing it all i found out that this side had also been welded for rust but they made a good job of it just needs a small bit of grinding.
Also got a few more body parts for the car these include a new bonnet to go with the new wings and new front and rear bumpers
Posted
Old Timer
looks good, keep it up
nice one mate
JJ
Posted
Settling In

The new bumpers arived soz for the bad pictures still the camera phone :? hopefully if theres no rain over the weekend i can get the inside of the car preped for primer.
Yeah i checked underneath mate its suprisingly rust free which is cool. I will hopefully get it welded soon when i can aford to rent a welder for the weekend.
Posted
Settling In
Keep the posts coming!
Posted
Old Timer
I was just wondering where you bought the new bumpers from?
Did they come with the metal bits aswell?
Because im missing those :?
Thanks
Luke
_____________________
1982 mk1 golf gti (Going to paint inari Silver)
1990 black mk2 golf 1600 driver - Daily runabout
My project - http://www.vwgolfmk1.org.uk/modules.php?name=Forums&file=viewtopic&t=32082

Mk1 Golf Gti Abf conversion Project
Mk2 Golf Gti 16v
Mini Cooper S R53 (Daily)
Posted
Settling In
Thats where i got the bumpers from, they did come with the metal mounting arms as well and at a reasonable price fast service as well. They got lots of little bits as well, i got a accelerator cable with the bumpers deffo use them again. didnt get much work done this weekend had to fix my other car
Posted
Settling In

will this be ok to put back in once the car is sprayed the mounting point isnt rusty just the inner part
also removed more old paint from the rear of the car
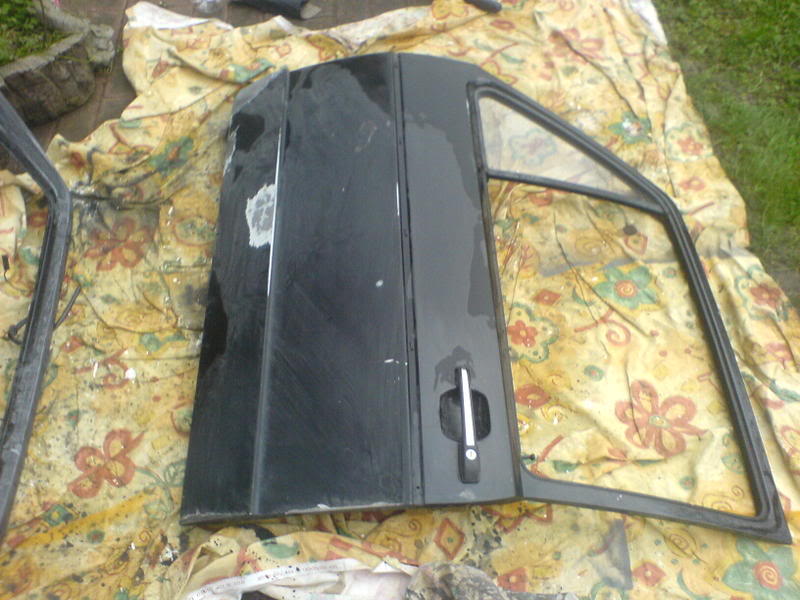
the door getting flatted down ready to be skimed with filler theres a few small chips/dings in the pasenger door
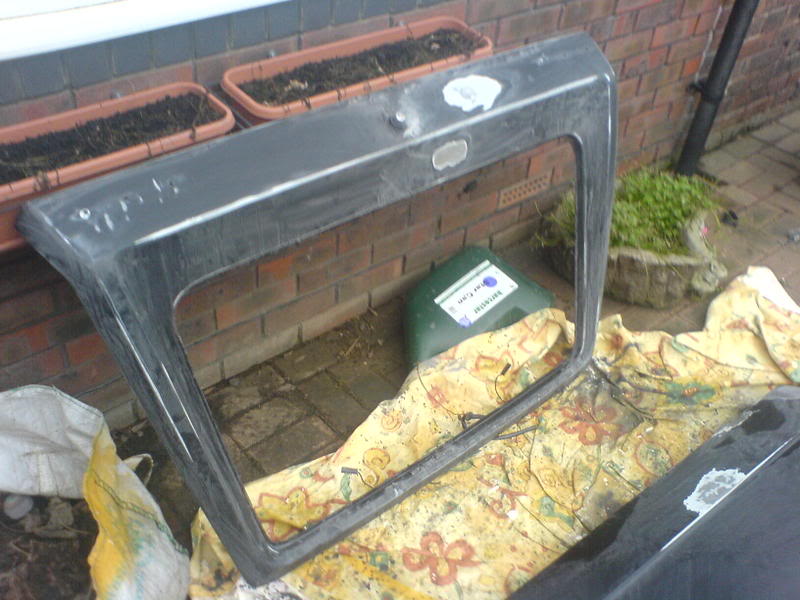
the tailgate with the wiper holes welded up i have the original sticker ser to go here again found on ebay
and a sneaky look at the new paint which will be getting sprayed during easter if all goes to plan

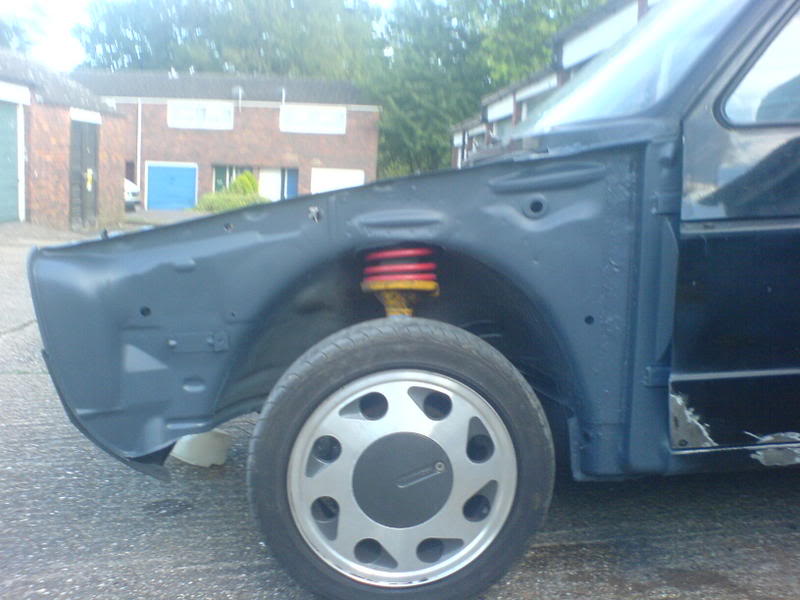
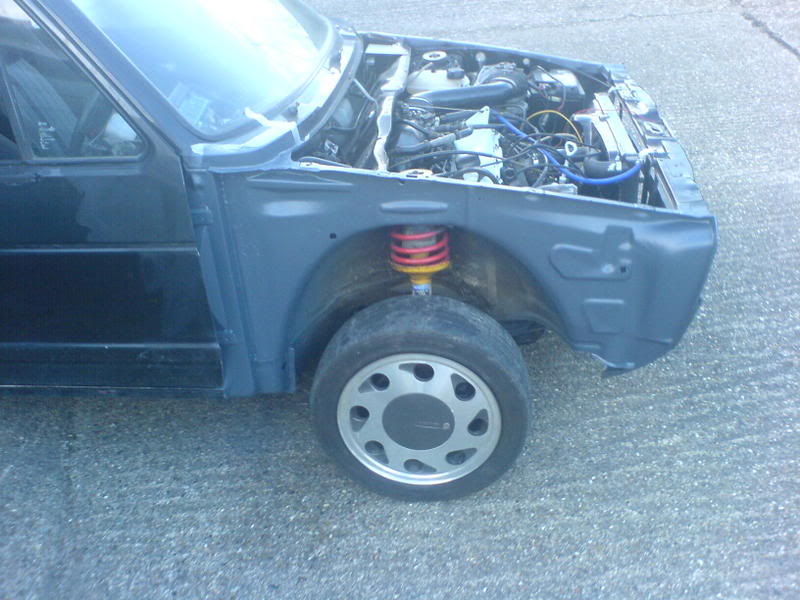
and the engine bay which i havent shown yet its quite clean with no rust on the strut towers
Posted
Old Timer
Posted
Settling In
Posted
Settling In

had the holes in the rear panel welded up as they had started to rust as well. The next step is to lead fill the arch and a few other little parts im not totally happy with, then i can get my mates media blaster and strip all the paint from the inside and out and get it all ready for zinc oxide primer and some high build. I decided that im only going to prime the shell and spray the inside then fit all the panels and pay a profesional to do the outside as i want a good finish 8) then i get to put it all back together with my new parts i've been collecting over the month's
the new parts


Things still to buy/get
primer
new windscreen & rubber
new tailgate glass rubber
windscreen wiper arms
Polly bush kit
Upper & lower omp strut brace kit
Carpet set
seats - http://www.cobraseats.com/le_mans.htm
And probably a load of other bits i cant remember at the moment
Things to do
remove the last of the rubber glue on floorpans
Media blasting
Lead filling
prepping with wet and dry inside and out
Priming
refit panels
get sprayed
sort out all the wireing
put everything back together
MOT & tax, insurance
DRIVE IT!!
Posted

Local Hero

Bet you cant wait to get it finished, I've got all that in front of me yet
Posted
Settling In
and pics
the hole

coming out from inside

i wish the previous owner would have left it alone it would have been much easier to work on lol
Posted

Web Team
Good progress there.

Posted
Old Timer
Thats what i did anyway. Expect theres a proper, civilised way to do it now.
I got a aftermarket sunroof on my car. Roof is realy flimsy as you say.
Might reskin the roof to get rid of it. Not sure though.
You may have to attempt it first and tell me how easy it is.
Luke
_____________________
1982 mk1 golf gti (Going to paint inari Silver)
1990 black mk2 golf 1600 driver (FOR SALE!!!!!!!!)
1993 White bmw 318is couple (m3 replica) - Daily runabout
My project - http://www.vwgolfmk1.org.uk/modules.php?name=Forums&file=viewtopic&t=32082
Mk1 Golf Gti Abf conversion Project
Mk2 Golf Gti 16v
Mini Cooper S R53 (Daily)
0 guests and 0 members have just viewed this: None.