


1980 Mars Red GTI BRMotorsport 142

Posted
Old Timer


1980 GTI
I wish I had a lathe, and a cnc machine - not entirely sure what I'd do with them mind….
Posted
Settled In


I've always been wary of the 4 branch manifolds on offer as they have a tendency to move the characteristics of the power delivery around too much. Quite often they'll steal low end torque and increase top end power, which isn't what I like. This way I can retain the original looks, but with the hidden enhancement of better flowing for the exhaust gases.
It's been an interesting journey splitting the engine apart and seeing how BRMotorsport made all that extra power and torque. I've learnt so much along the way, and also seen the opportunity to make a similar engine with even more power. I've been fairly protective of the engine's original spec and characteristics, but I can now see how you could tune them further!
Things are starting to come back in the bay, but they needed a lot of work and patience to bring up to standard. Gentle scraping with the back edge of a razor blade and gentle rubbing with thinners on the rubber sleeves…


�
 Last edit: by benandemu
1980 Mars Red GTI BRMotorsport 142
1983 Black GTI
1983 Black GTI
Posted

Settled In
76 ?
78 gls
83 gti 5v
78 gls
83 gti 5v

Settled In
Good job. Looking good.

Posted

Regional Host NE


Do not know a lot but willing to help if possible
1989 Sapphire Blue Mk1 Cabriolet KR
1985 Atlas Grey Mk2 GTI 2.0 ABF
1989 Sapphire Blue Mk1 Cabriolet KR
1985 Atlas Grey Mk2 GTI 2.0 ABF
Posted
Regional Host NE
Do not know a lot but willing to help if possible
1989 Sapphire Blue Mk1 Cabriolet KR
1985 Atlas Grey Mk2 GTI 2.0 ABF
1989 Sapphire Blue Mk1 Cabriolet KR
1985 Atlas Grey Mk2 GTI 2.0 ABF
Posted
Settled In

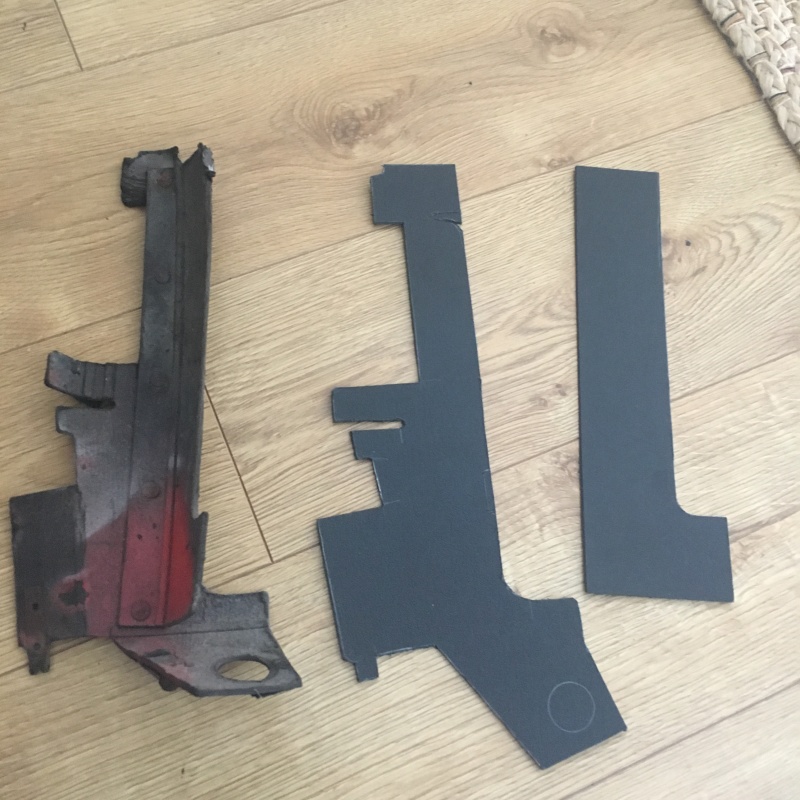
Then I identified which one I'm after…

Having cross referenced it with Graham's original ones (yomp)…

After this, the templates were taken ready to transfer to mill board.

There is a two piece one that requires some research on what rivets would be best to hold it together, but the actual shapes have come out ok so far.
�
Last edit: by benandemu
1980 Mars Red GTI BRMotorsport 142
1983 Black GTI
1983 Black GTI
Posted
Old Timer
Loving your work on the exhaust manifold BTW!
Posted
Settled In
There's loads of little bits going on in the background, but none of them significant enough on their own to photograph. The servo and brake bar are going to back together this week, and that'll be a another big step forward as the struts and brakes all also rebuilt and sorted.
In the meantime I'm cleaning and prepping lots of little fiddly bits such as wiring, switches, coil, and this manifold. It was ported last week, and I've just collected it from the sand blasters…

Old cast iron manifolds don't always survive the test of time. Quite often I've seen them crack after 3 decades of service. This one is ok, but the blasting reveals some heavy corrosion and subsequent pitting. Before that can be fitted to the engine it needed treating…

Last edit: by benandemu
1980 Mars Red GTI BRMotorsport 142
1983 Black GTI
1983 Black GTI
Settled In
When the brake bar linkage was reattached it was felt that the linkage could work more efficiently if the clevis pin on the brake pedal was 10mm longer. There just didn't seem to be enough adjustment in it, and when there was, it wasn't working the cam levers efficiently. Anyway, the threaded part of the clevis pin was removed and a new longer one machined up to replace it. It's difficult to picture, but it will be interesting to see if the extra leverage makes a difference as the previous position was way out of effective range oddly. Simply put, the brake pedal needed to travel a third of the way to the floor before you'd find the 'sweet spot' on the linkage. With the longer pin I should get a third of the pedal back (very hard to explain rather than show).
Anyway, here's a couple of progress pics of the brakes and steering.
I'm well aware the rear brake lines and connector aren't up to scratch yet…
�


I'm still gutted both my OEM brass brake light switches died last year. The new ones are silver.
There has of course been lots of other little bits happening still, but I'd rather show them all together rather than as odd components.�
Last edit: by benandemu
1980 Mars Red GTI BRMotorsport 142
1983 Black GTI
1983 Black GTI
Settled In
Gearbox was ready and waiting, just a few last bits before it's bolted back to the engine…


Then it's all ready and waiting for dropping in to place…

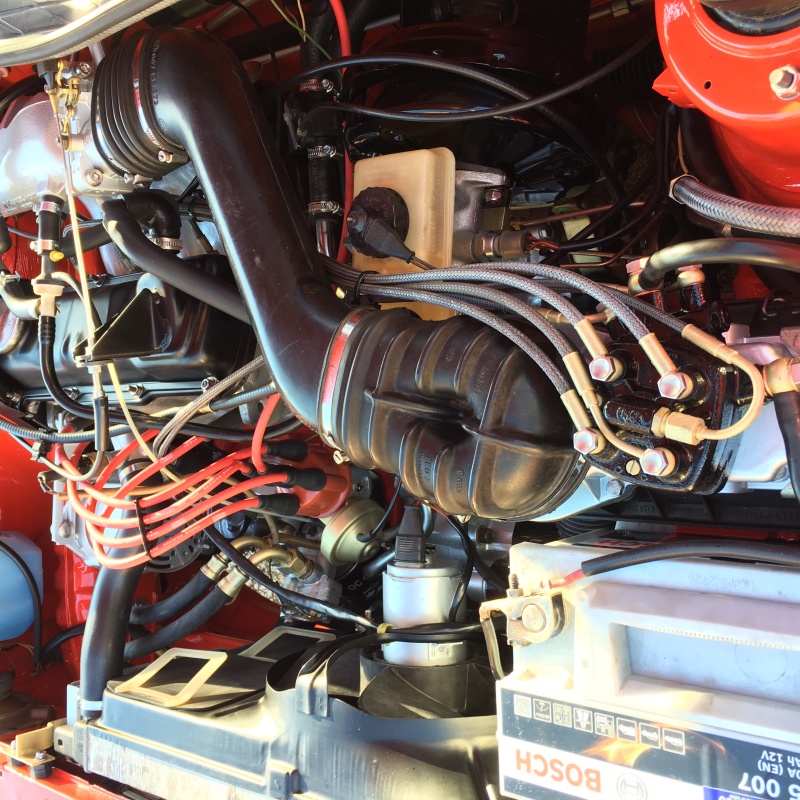
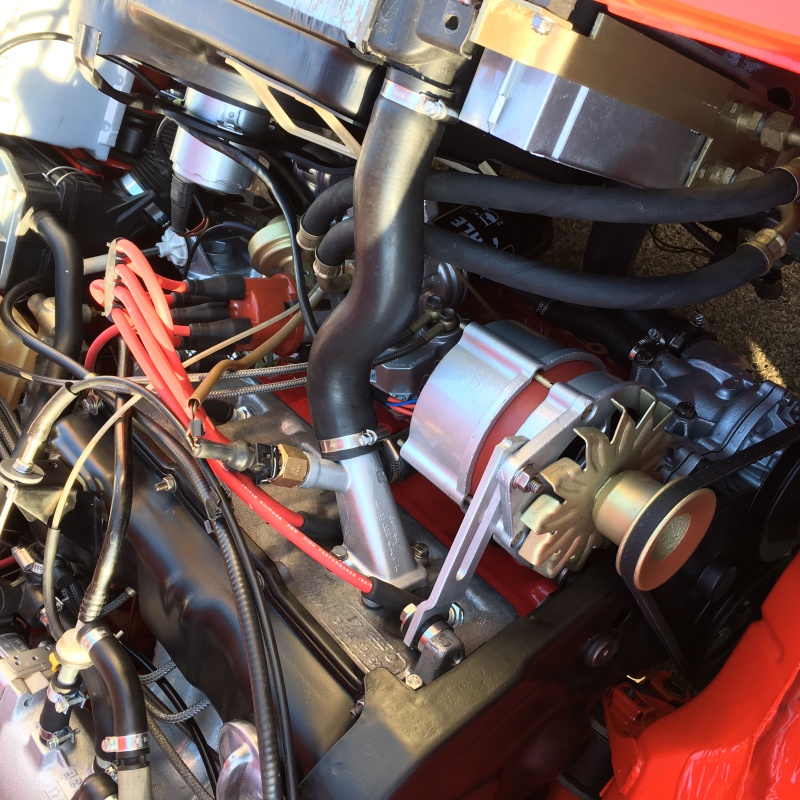
And finally, the big moment in this final phase of the car's restoration journey. It's so fulfilling to see the engine and box back in place, and easy to overlook all the little things that are still left to go. It's tempting to whack it back together and get driving it again, but the finish has to be right, and I have to maintain focus on all the details that will enhance the last few month's work.

I can't wait to drive it again, and I'm curious to see if I can notice a difference with the extra porting that's been done, and then of course there's the Neuspeed throttle body.
�
Last edit: by benandemu
1980 Mars Red GTI BRMotorsport 142
1983 Black GTI
1983 Black GTI
Posted
Settled In
The tracking is way off, the fuel mixture is too rich, the rad cards haven't been made yet (although I've ordered some mill board), there's still some untidy wiring in places, components are missing decals, and the car is filthy inside and out.


�
Last edit: by benandemu
1980 Mars Red GTI BRMotorsport 142
1983 Black GTI
1983 Black GTI
Posted
Old Timer
Posted
Settling In

1980 Mars Red GTI BRMotorsport 142

Sent from my iPhone using Tapatalk
Settled In
I managed to get some time putting the decals on and simplifying the look of the battery. Also, the millboard I ordered turned up, so I got to work making the top radiator card. It's come out really well, and gives me confidence for the more complicated side cards I'll attempt in the coming weeks.


�
Last edit: by benandemu
1980 Mars Red GTI BRMotorsport 142
1983 Black GTI
1983 Black GTI
Posted
Settled In
76 ?
78 gls
83 gti 5v
78 gls
83 gti 5v
Posted
Settled In
I never really totted up the time spent, but I knew it was getting away with me when I spent an hour cleaning the 45cm green wire that runs from the coil. An hour with a careful razor blade, some cotton wool, and a tub of thinners. I think it took me an hour to clean each oil or water sender too.
The aluminium parts were painted in aluminim silver, and then clear lacquered to further protect them. The alloy suffers oxidising and when left as an open surface is prone to trapping dirt. Even when you close the surface slightly through media blasting, it still traps oil and dirt within the grain of the surface. Painting them allows you to maintain the fresh look, and wipe them clean periodically. Furthermore, the original component is protected underneath and can be taken to back to its original state through simply blasting again.
I'm still working through a few bits on a snagging list now it's back on the road.
The early 'points and condenser' coil decal should be ready along with the correct S1 GTI ATE servo decal this Friday. Then I've got to find time to try and make some replica radiator cards. I need to find the right rivets, and tools to help me. Folding the millboard without snapping will be one challenge, and cutting its shapes accurately without making a mess will be the other. The originals used little drilled and riveted steel tabs to locate to the car too, but I'm thinking stainless for these.
Update: Decals now sorted…


�
Last edit: by benandemu
1980 Mars Red GTI BRMotorsport 142
1983 Black GTI
1983 Black GTI
Posted
Settled In
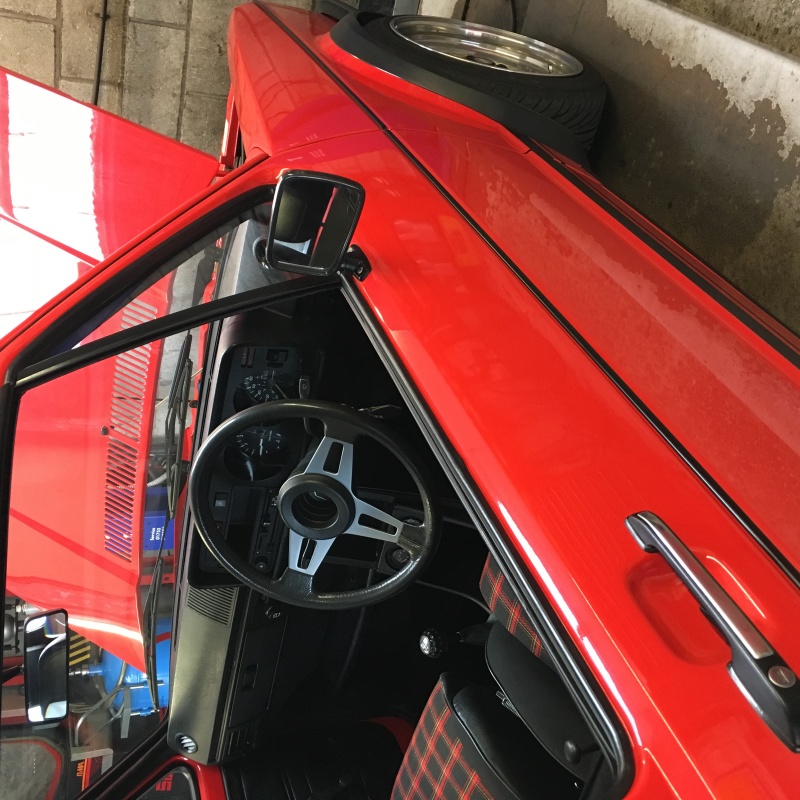
Here's a few of the car being fine tuned after its first few drives back on the road…


1980 Mars Red GTI BRMotorsport 142
1983 Black GTI
1983 Black GTI
Posted
Settled In
 I know that the forum doesn't get anywhere near the traffic it used to get, but I thought I'd drop some pics of the car here, just to keep the history of it going. It's been a good while since posting anything, and I was prompted because I'm about to replace and detail the rear axle again as a few years back the powder coating started flaking off in places. It was a poor job from a local guy no longer in business.�
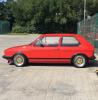
Anyway, the top pic is of the car picking up best GTI and Top 3 OEM+ at the 2021 AGM. I forgot to change my dog walking shoes after walking the dog at 4am!!
�

Then a few of the Club stand at NEC Classic car show. An amazing weekend, and a real privilege. I can't praise the club enough for their generosity and accommodation of the members selected to display their cars.
�


I've not figured out how to organise the words and pics properly when directly uploading.�
Last edit: by benandemu
1980 Mars Red GTI BRMotorsport 142
1983 Black GTI
1983 Black GTI
Posted
Old Timer
I personally prefer the forum, so it's good to see some content still coming through!
J
0 guests and 0 members have just viewed this: None.