


Rallye

Posted

Moderator


Posted

Local Hero
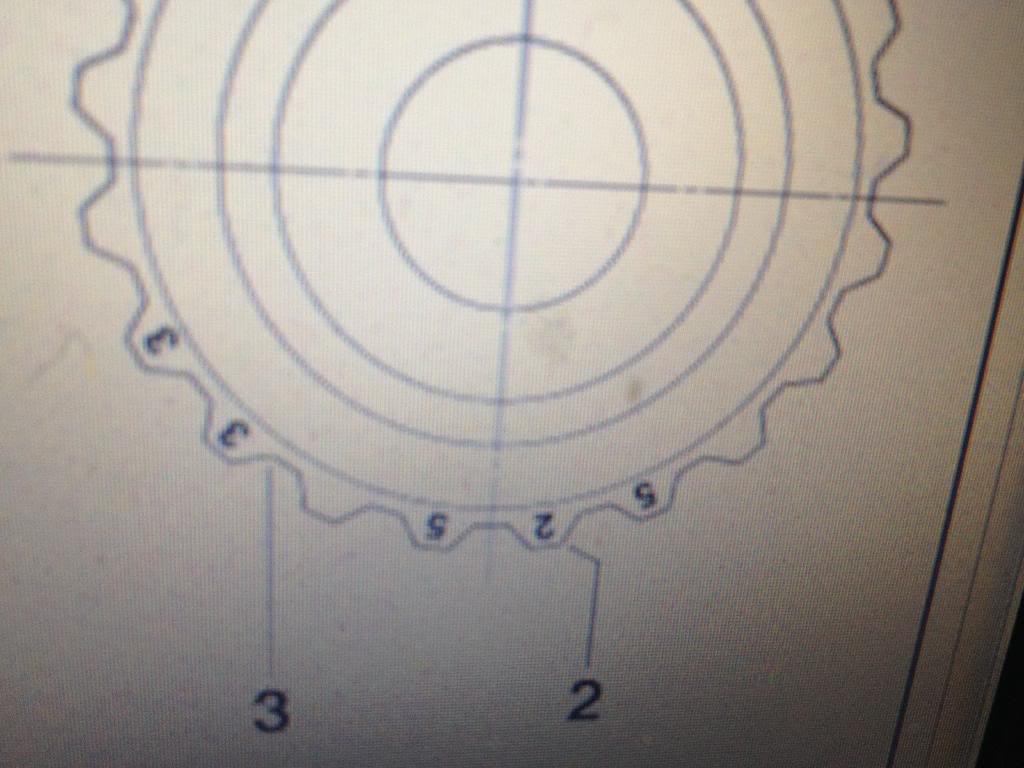
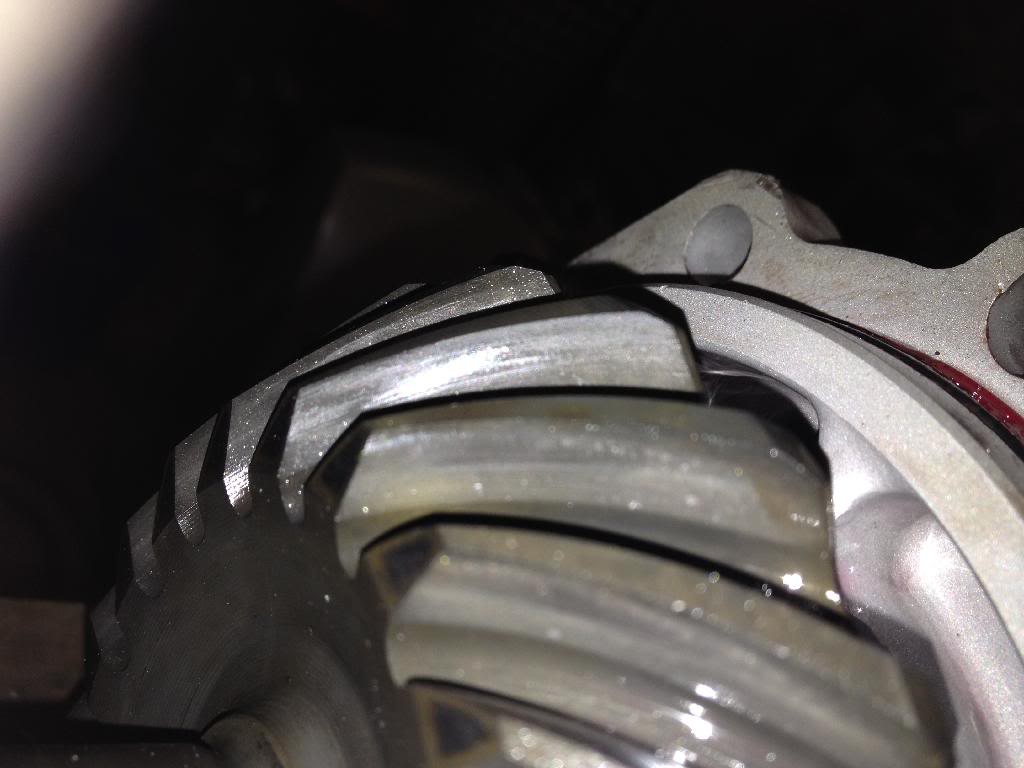
Hairyarse said
I would agree 50 and initials, can you check with supplier or are they not the ones that marked it?
Or can you make the measurement or is that a daft question??
These units are etched at the time they are lapped together on a machine. They must take this measurement at the point when they lap it so in answer to your question I would say its impossible to measure and these were probably made 20 years ago so impossible to ask a supplier. I do know the company that made the gears though.
Posted
Local Hero
Melteddrummer said
I think the top one is 611 as not many people write a nine with a tail like that, could be wrong though. As for the pic below, I think it's a 50 with an initial too. Are both pics the same gear? to the left of the pic in the top pic there is a similar initial to the bottom pic, is there not?
If it is 611 then it makes it the right way up in relation to the other gear however it does then make it 09 not 50.
I've just come back from a trip to Southampton to see a guy who is selling a load of Rallye parts.
We told him our predicament and he said "I've got a transfer box under here!"

However when he pulled it from under his bench it was from a normal syncro not a Rallye. We've had it off him anyway as none of the shims are available to set the rallye one up up so we thought it might be worth a punt just for the shims.
I've stripped some of it down tonight and the one gear I've been able to read is also etched the "right way" as per our original so I'm currently edging towards a pairing number of 611 and 0.09 as the measurement.

Posted
Local Hero
Think i'm going to go with 0.09mm and hope its ok!
Posted
Local Hero
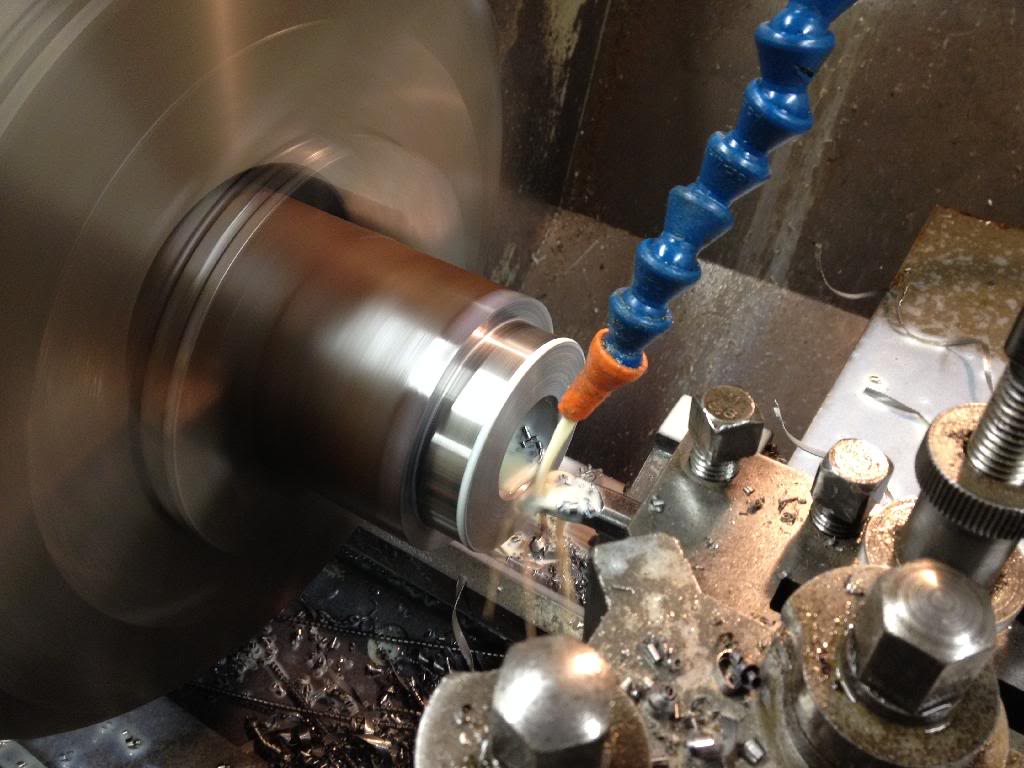
As I don't have the mandrel they call for I improvised and measured the nose of both new and old pinion gears against the datum face they tell you to measure.
Measuring the pinion nose position using a DTI and the digital read out on the lathe.
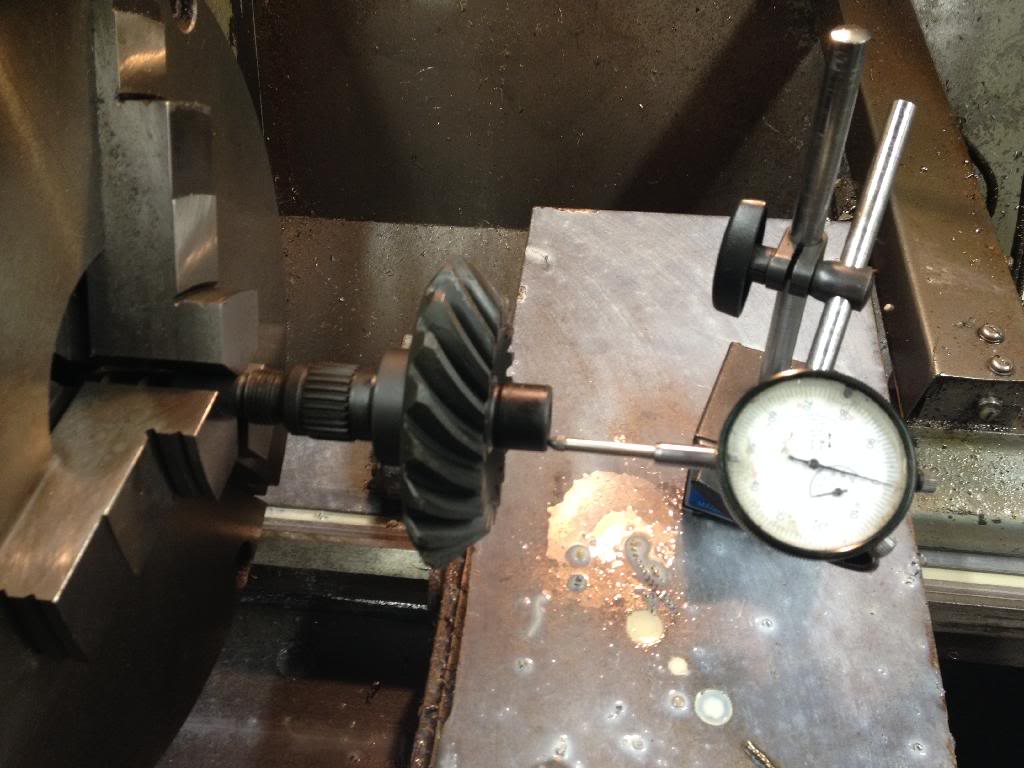
With some solder I was able to test the position of the original by assembling the unit and squashing the solder between the two faces of known dimensions and measuring the squashed solder with a micrometer then adding the pinion nose dimension and the OD/2 of the input shaft together.
It came within 0.05 mm of what it should have been so that proved that my unorthodox method would be ok to use for the new set.
All i had to do was to get a new piece of solder squashed by the new gears in the same way and the difference it measured less the "50" dimension would give me the dimension of the shim I required.
Luckily the shims that came out of the transfer box we picked up last night were just right when used with one of the originals.
It also told me that going for the "50" measurement would make more sense. Once I built it up it became apparent that I wouldn't be able to achieve the correct amount of backlash if I had gone with the "09" measurement.
Need to get some shims made up now but I think its heading in the right direction.
Posted

Local Hero


Andy
LINCOLNSHIRE REGION -�https://www.facebook.com/groups/467122313360002/
1983 MK1 Golf GTI Campaign Model - Under (looooong) resto!
1962 Rover P4 80
2002 BMW 745i
2008 BMW Z4 2.5Si
LINCOLNSHIRE REGION -�https://www.facebook.com/groups/467122313360002/
1983 MK1 Golf GTI Campaign Model - Under (looooong) resto!
1962 Rover P4 80
2002 BMW 745i
2008 BMW Z4 2.5Si
Posted
Local Hero
……
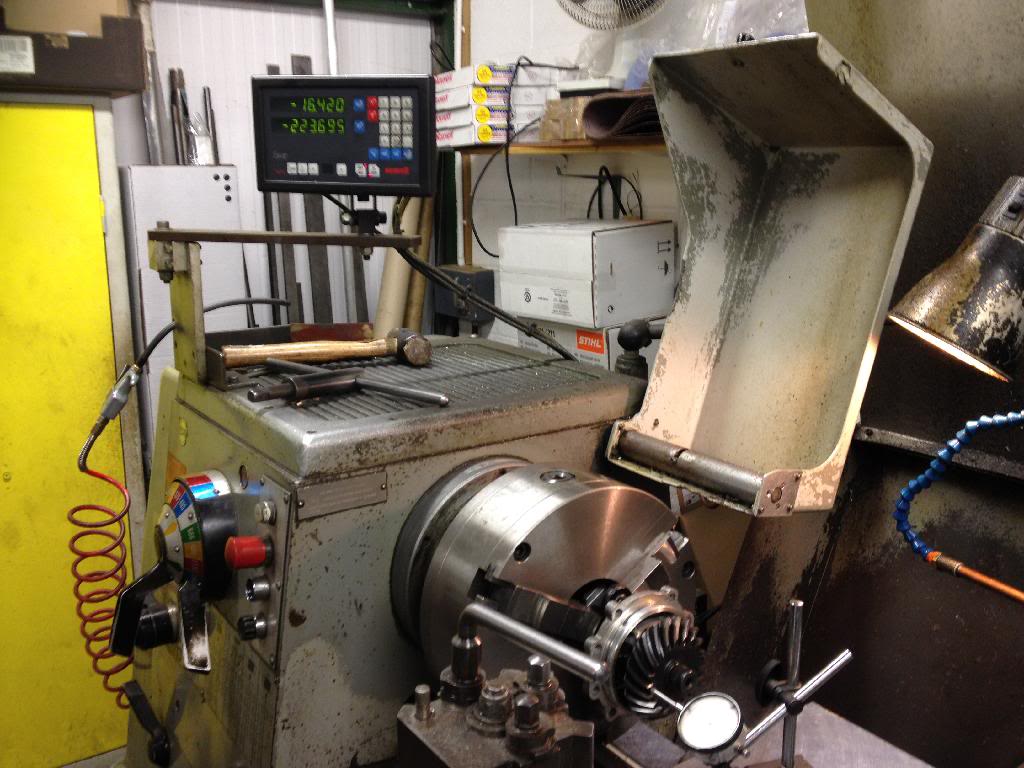
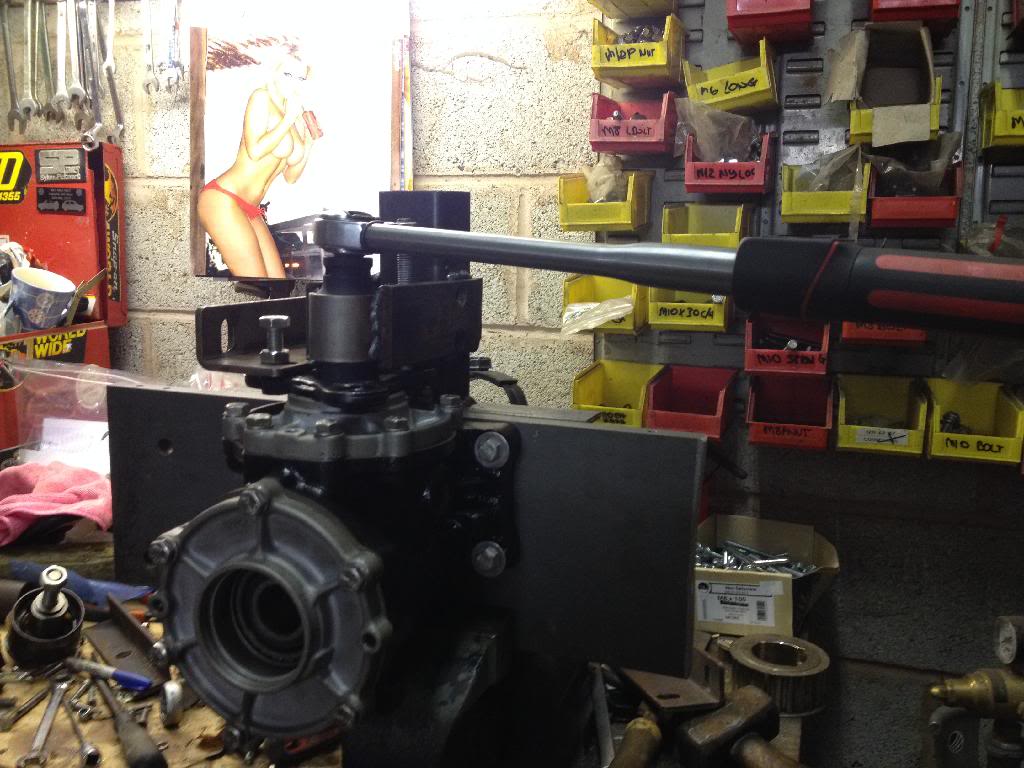
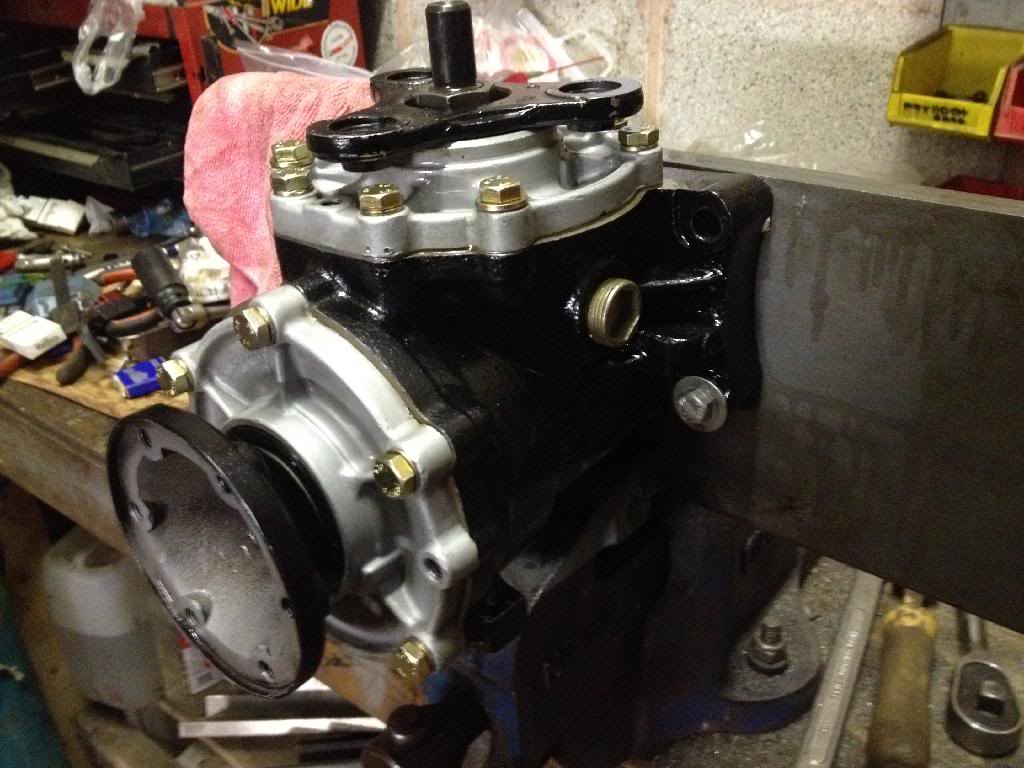
Then had to make a jig to support the box and socket so I could torque the nut back up to 350Nm. Was going to use this picture……….
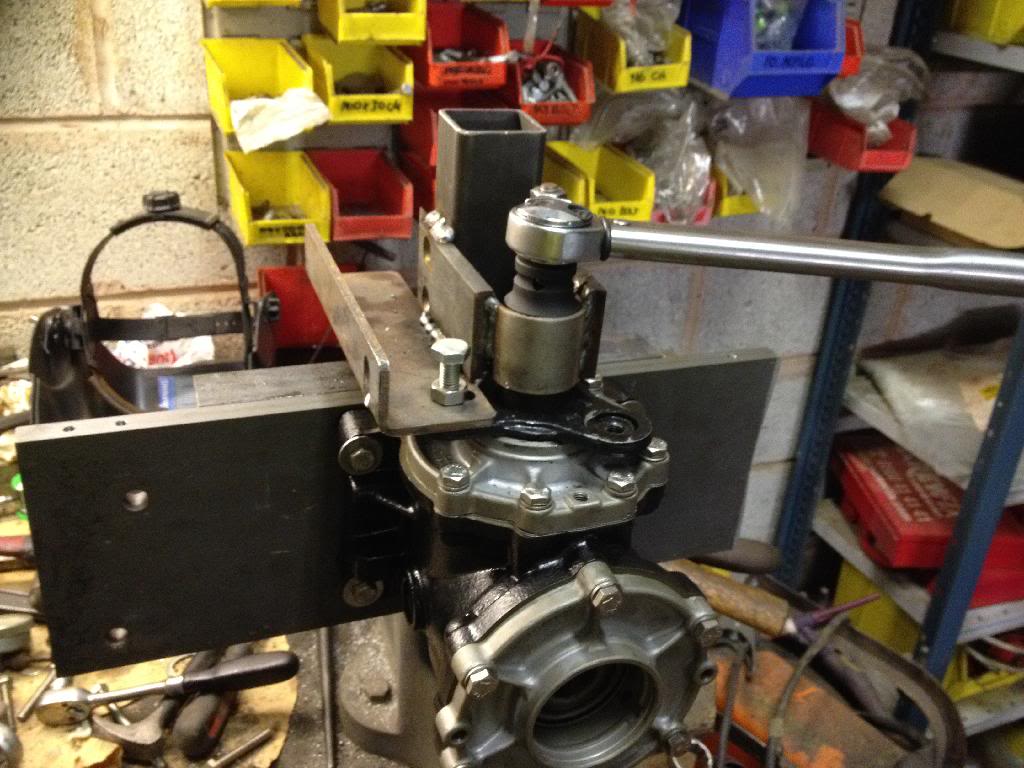
Then found a better pic
 …….
…….
I wanted to run it at speed on the jig to double check the pinion mesh and that the preloads on the bearings were not excessive as the set up instructions makes it rather tight with new bearings.
I filled it with oil and rigged up this and ran it for an hour on the bench…..
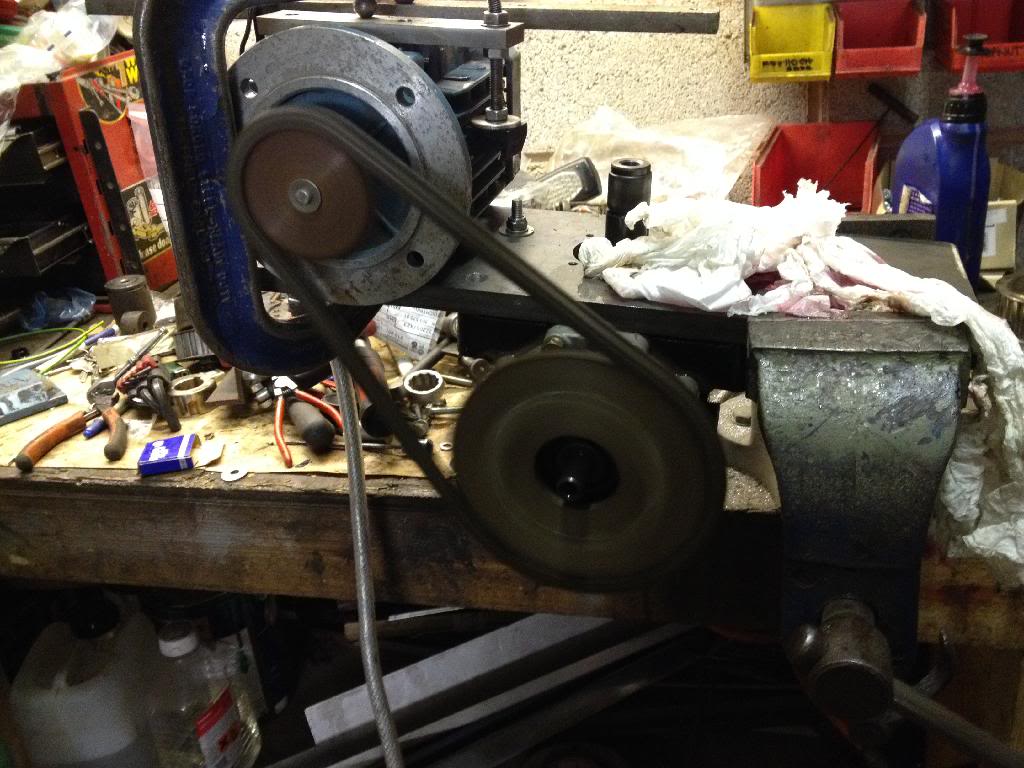
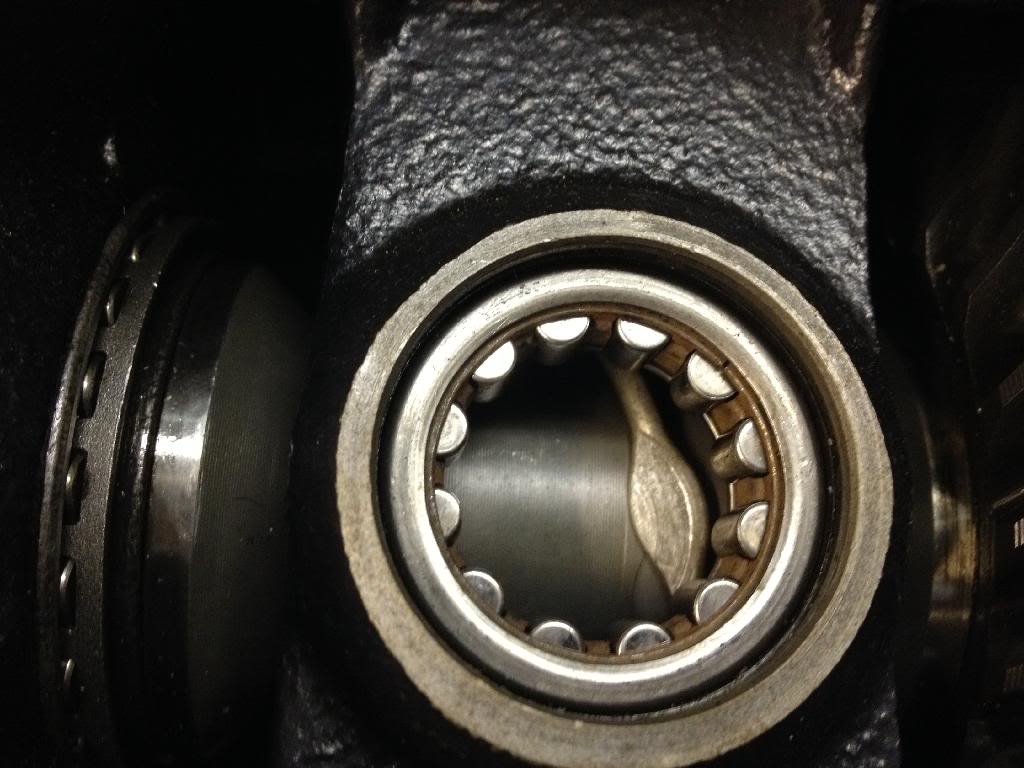
It gets warm but not hot which is what I would expect with the bearing loads. I then stripped it to see what marks showed up on the teeth.
The wear mark looks to be fairly in the middle of the teeth which should be about spot on. (the lighter grey mark)
Don't think I can do anymore now - just cross fingers!
Finished…..
 Last edit: by Yomp
Posted
Local Hero
Great patience and attention to detail Graham - I think you have done more than enough to ensure the longevity of this

Andy
LINCOLNSHIRE REGION -�https://www.facebook.com/groups/467122313360002/
1983 MK1 Golf GTI Campaign Model - Under (looooong) resto!
1962 Rover P4 80
2002 BMW 745i
2008 BMW Z4 2.5Si
LINCOLNSHIRE REGION -�https://www.facebook.com/groups/467122313360002/
1983 MK1 Golf GTI Campaign Model - Under (looooong) resto!
1962 Rover P4 80
2002 BMW 745i
2008 BMW Z4 2.5Si
Posted
Local Hero
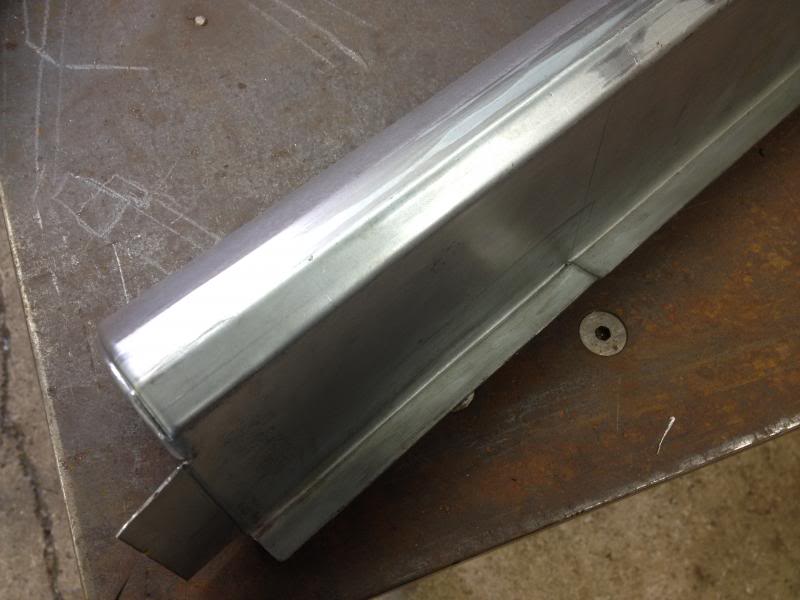
Using the LHS sill we got from Heritage we've managed to produce a replica opposite hand sill.
This has not been an easy task as although the sill looks parallel and straight, it has a slight curve along its length and tapers down to the front wing. There is also various folds and flanges to reproduce at each end.
We initially started with a flat 1mm sheet and had the 3 main angles put in on a bender. We then had to get the sill to curve using a blunt chisel in the folds onto a sandbag.
This then distorts the main faces of the sill as it tries to crumple them up. At that point I left the workshop and left it in the capable hands of the panel beater!


Anyway pics;
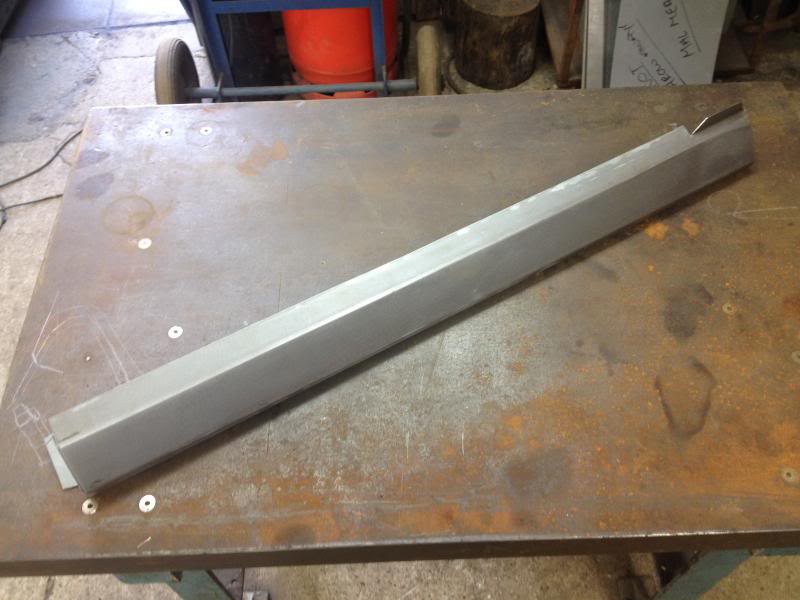

pic showing curve against straight edge
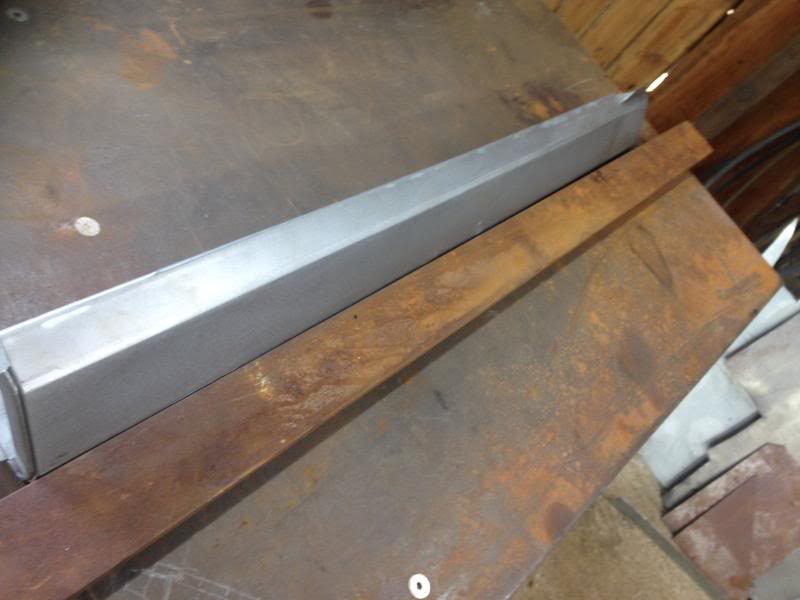
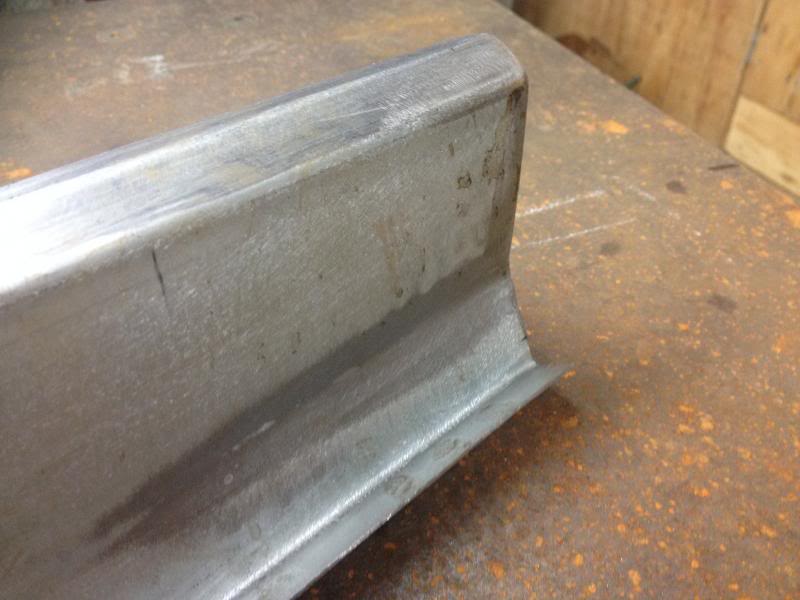
Lower rear detail
Rear detail
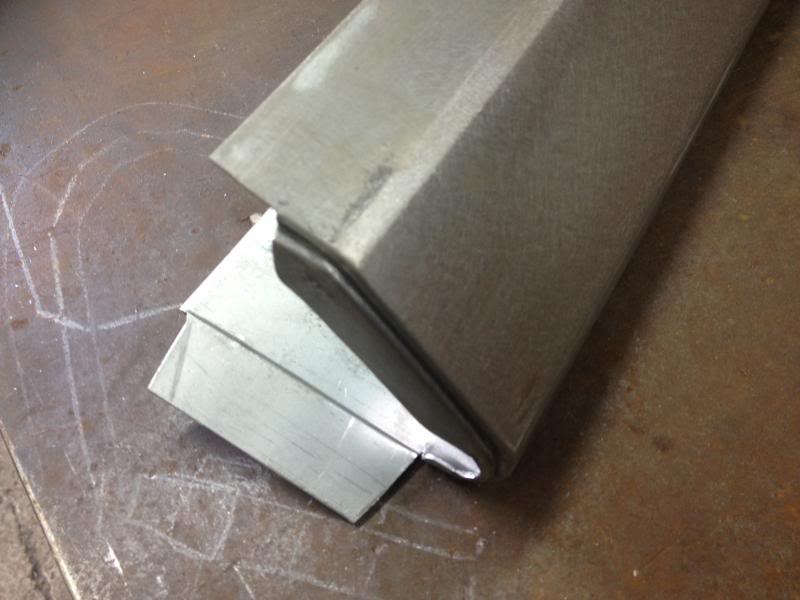
Front bottomside detail
The shell goes for Soda blasting this week and then a coat of epoxy primer before coming back to have both sills welded on and the welding completed. We thought it best to do it this way so the primer can get into the areas that won;t be accessible once the sills are on.
Posted
Local Hero
you're right, first glance the sill looks simple but its not. Great work, you must love your panel heater
Andy
LINCOLNSHIRE REGION -�https://www.facebook.com/groups/467122313360002/
1983 MK1 Golf GTI Campaign Model - Under (looooong) resto!
1962 Rover P4 80
2002 BMW 745i
2008 BMW Z4 2.5Si
LINCOLNSHIRE REGION -�https://www.facebook.com/groups/467122313360002/
1983 MK1 Golf GTI Campaign Model - Under (looooong) resto!
1962 Rover P4 80
2002 BMW 745i
2008 BMW Z4 2.5Si
Posted

Website Manager

Cheers,
Ade

Ade
Posted
Local Hero
Hairyarse said
you must love your panel heater
Problem with him is because he;s good - he's always busy so its difficult to get him to do it.
He does a lot of work building the 3 wheeler morgan bodies.
Posted
Old Timer

Maybe one to leave to the professionals Andy?
Posted
Local Hero
Graham - just keep him sweet then and take one for the team if you have to!
Andy
LINCOLNSHIRE REGION -�https://www.facebook.com/groups/467122313360002/
1983 MK1 Golf GTI Campaign Model - Under (looooong) resto!
1962 Rover P4 80
2002 BMW 745i
2008 BMW Z4 2.5Si
LINCOLNSHIRE REGION -�https://www.facebook.com/groups/467122313360002/
1983 MK1 Golf GTI Campaign Model - Under (looooong) resto!
1962 Rover P4 80
2002 BMW 745i
2008 BMW Z4 2.5Si
Posted
Moderator
Excellent work on the sill Graham.
Posted
Local Hero
Posted
Moderator
http://www.ebay.co.uk/itm/VW-GOLF-MK2-RALLYE-G60-BODYSHELL-VERY-RARE-/161218752991?pt=UK_CarsParts_Vehicles_CarParts_SM&hash=item258962f1df
Posted
Local Hero
Melteddrummer said
Not sure if it's any good to you Graham. It's just round the corner from me.
http://www.ebay.co.uk/itm/VW-GOLF-MK2-RALLYE-G60-BODYSHELL-VERY-RARE-/161218752991?pt=UK_CarsParts_Vehicles_CarParts_SM&hash=item258962f1df
I went up there last week to have a look at them but the straight one is rotten and the bent one is…….er……..bent!
you could possibly make 1 out of the 2 but the amount he is asking plus the transport costs and time sort of makes it prohibitive. there's probably the odd part here and there which may be useful. theyve been sat there for over 10 years.
Posted
Local Hero

Posted
Moderator
You've got to be careful not to fall through the floor in that part of the yard, I was there when the snow was here and went through the floor with 1 leg!!
0 guests and 0 members have just viewed this: None.