


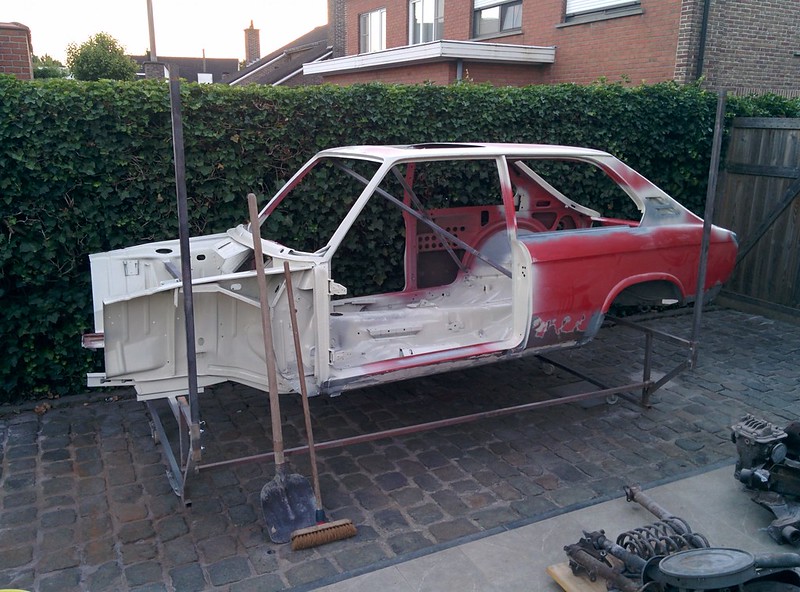
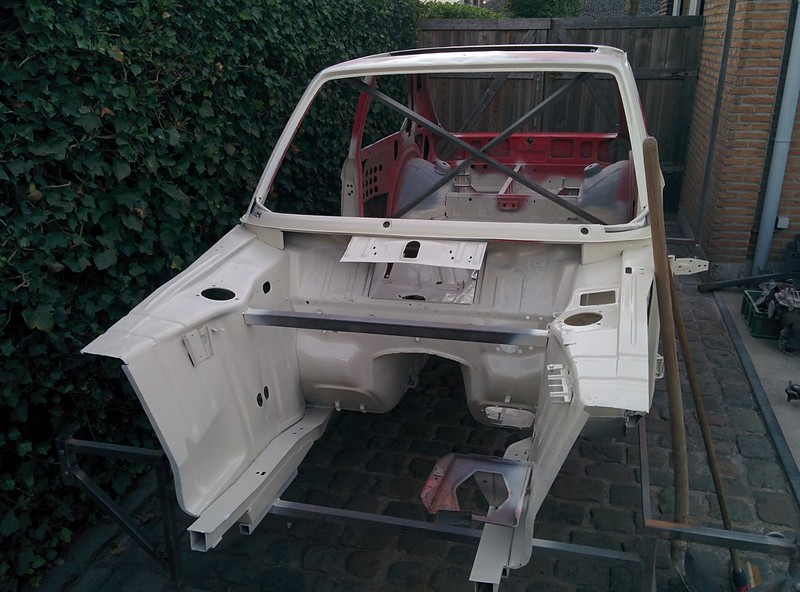
BMW 2002 Touring '74 Full restoration project


Old Timer

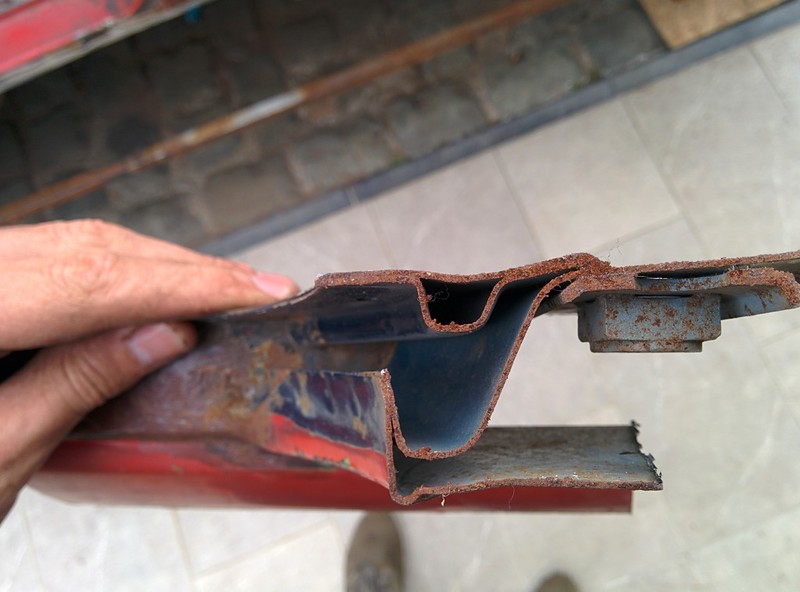
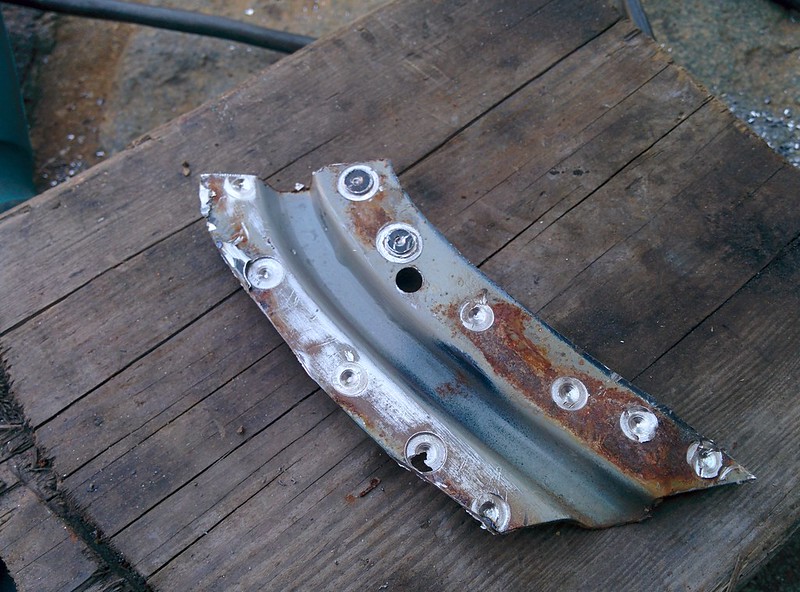
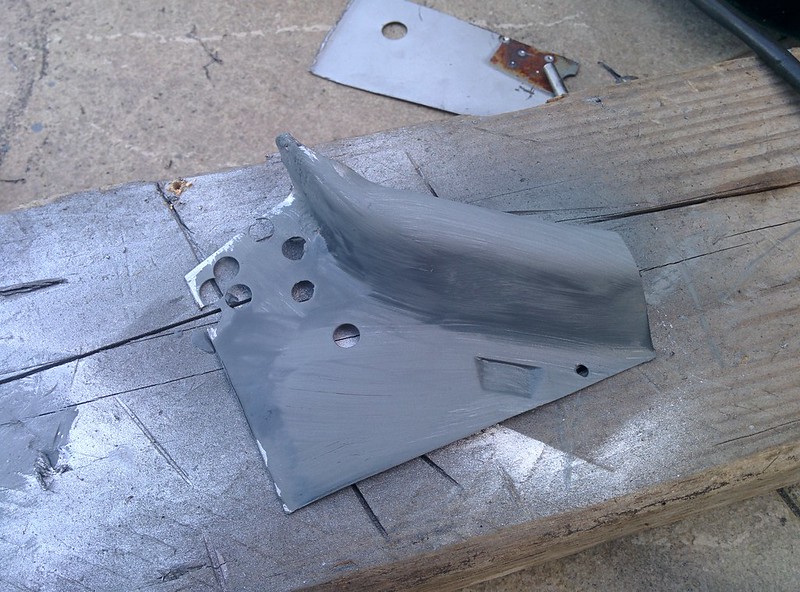
I first thought I might be able to reuse the original piece that I cut out and replace some of the rotten bits, I decided this would be too much of a hassle so I tried to form the repair section from a flat piece of 0,85mm sheet metal.
For the little step down section I was able to use some flat jaw welding vice grips to form it. To make the curve I bended the piece by hand and some hits with the hammer & dolly.
Still too big but getting there..

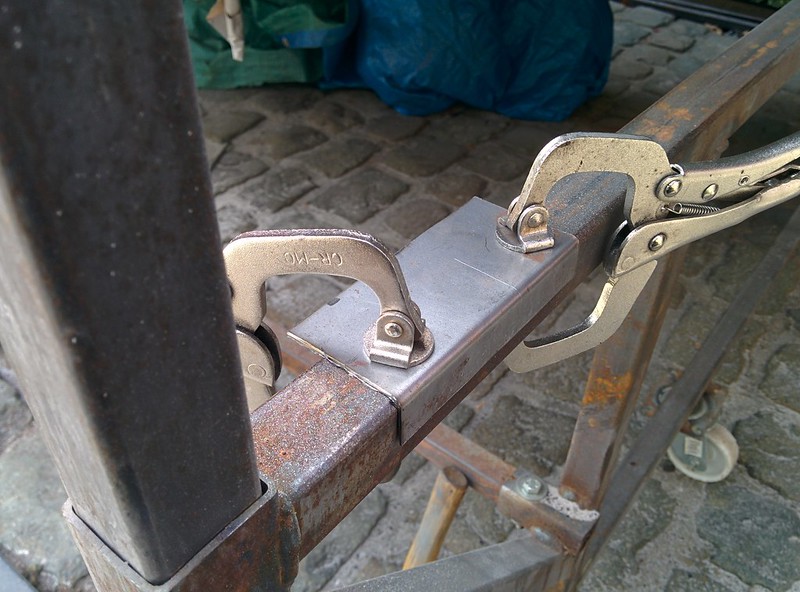
After trimming the exes off, some more forming and drilling the holes for plug welding

Had to ground some more off, ready to weld. These are some handy little clamps
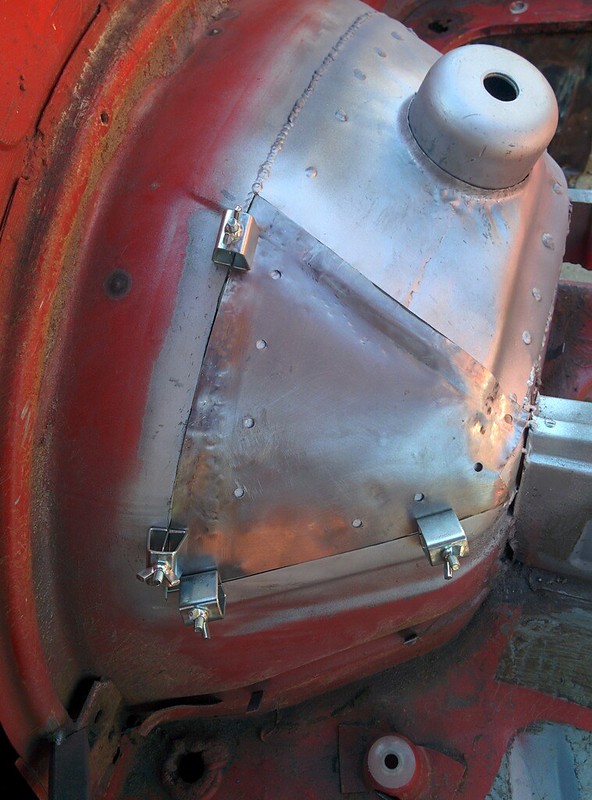
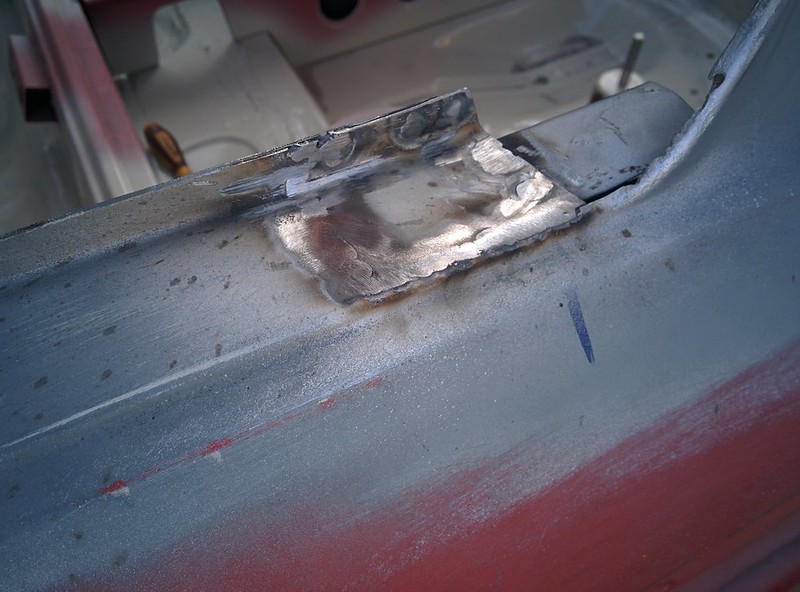
Fully welded and cleaned off.

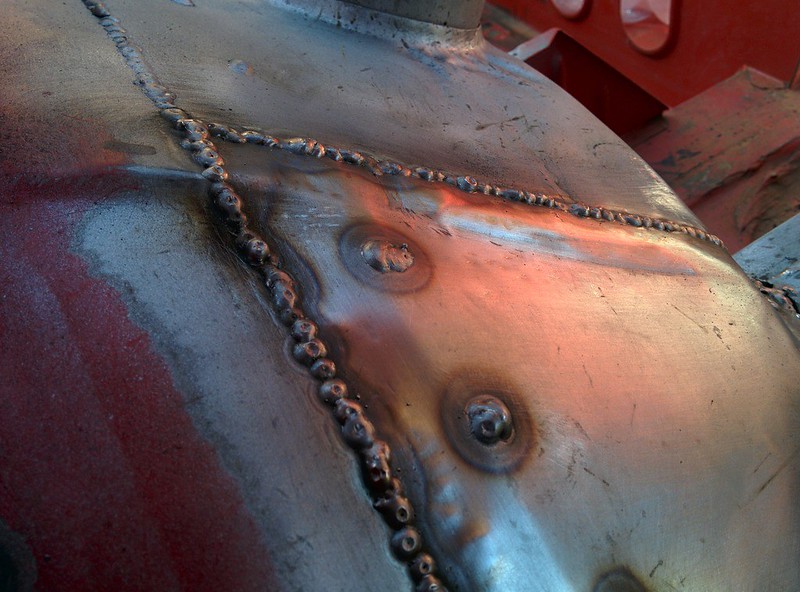
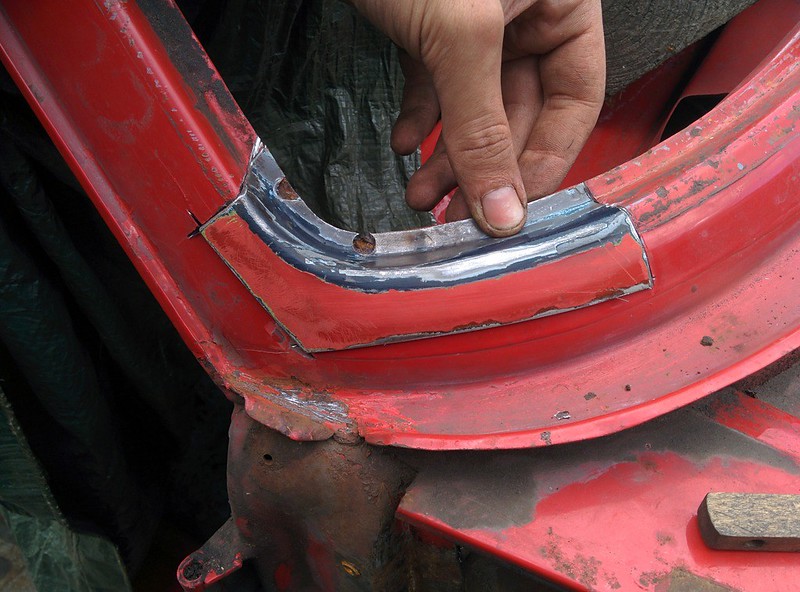
Detail of the step down, pretty close to the original shape. (Looks like it doesn't show up that good on photo)

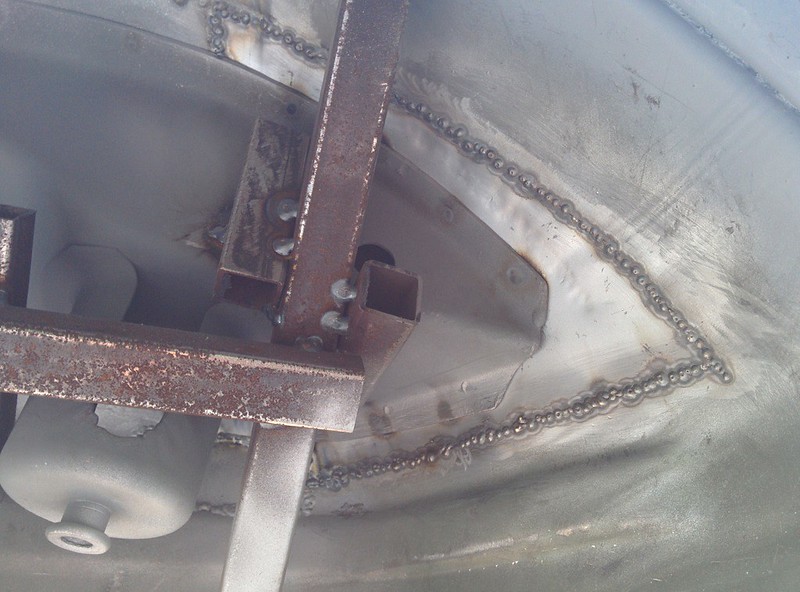
Checking the underside for penetration, seems to be good

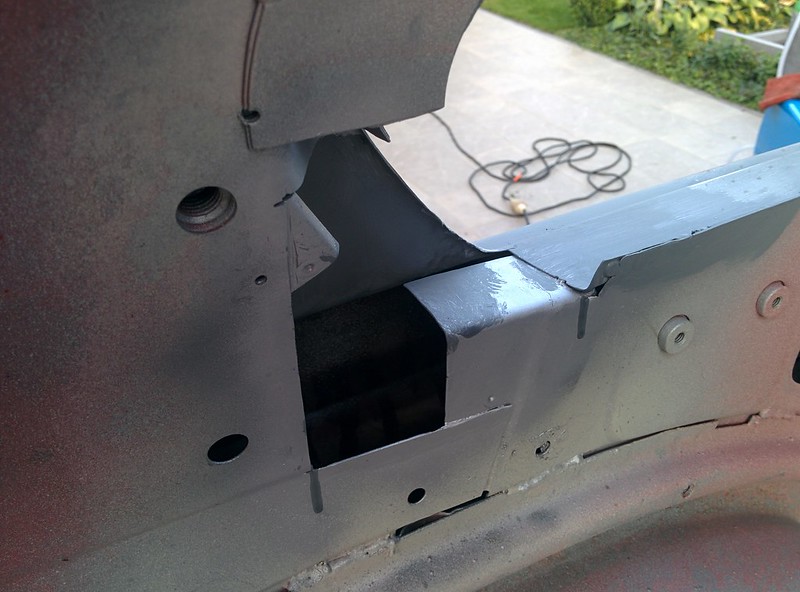
Jig fully removed and zinc primer added

Only thing that"s left is grinding all the welds down, welding a bead on the middle support and 4 beads on the side of the inner piece.
 Last edit: by D_Martijn
Posted
Old Timer
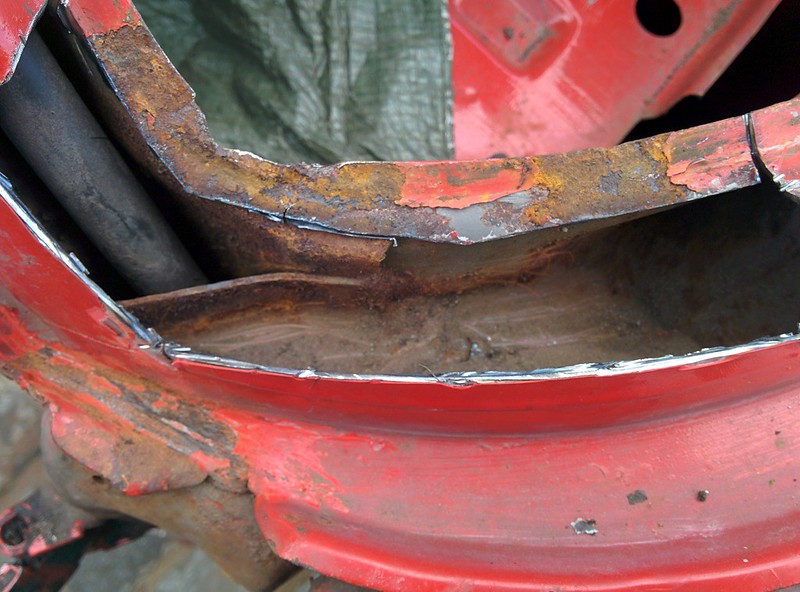
Today I had a look at the Hofmeister Kinks of our Touring, it was pretty clear that these will have to be replaced/patched up.

First layer of metal removed, exposed some more rust


Second layer removed, looks like there is something missing


Last piece removed, I still have to remove the flat piece too.
This will now get sandblasted before I put new metal in.

As for now, I sprayed some zinc primer on it to protect it a little bit till it gets sandblasted.

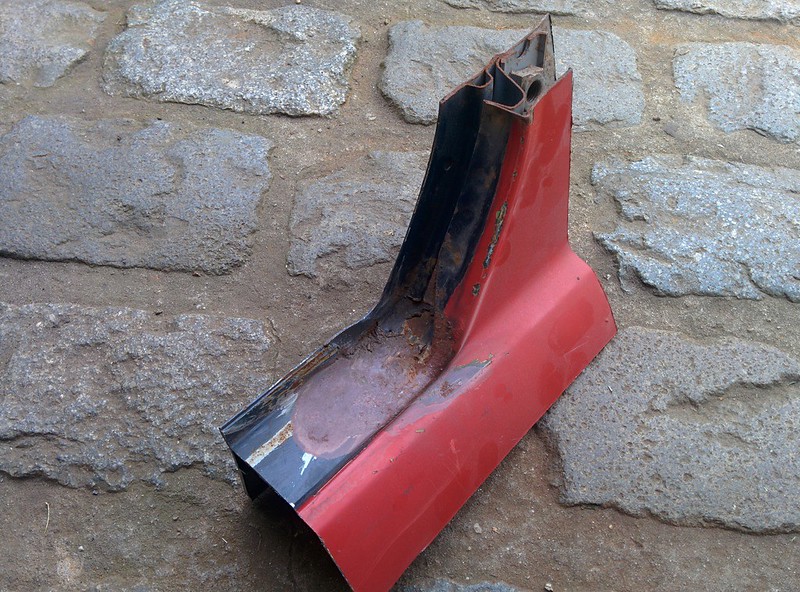
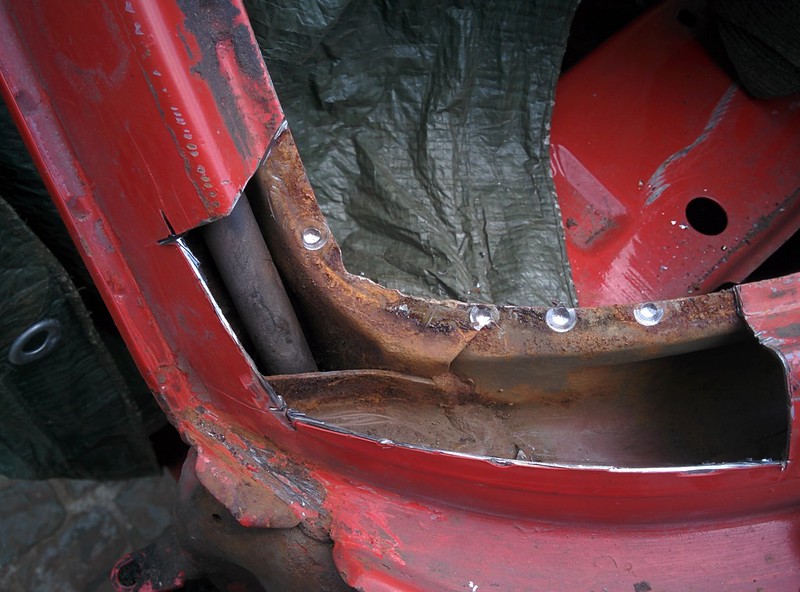
We were able to save this piece from the cut up shell, this is in much better shape than our kink

Here is a shot of all the layers, I thought some people might find this interesting


Other side, not as bad from the inside
 [/url]
Forget what I said earlier..
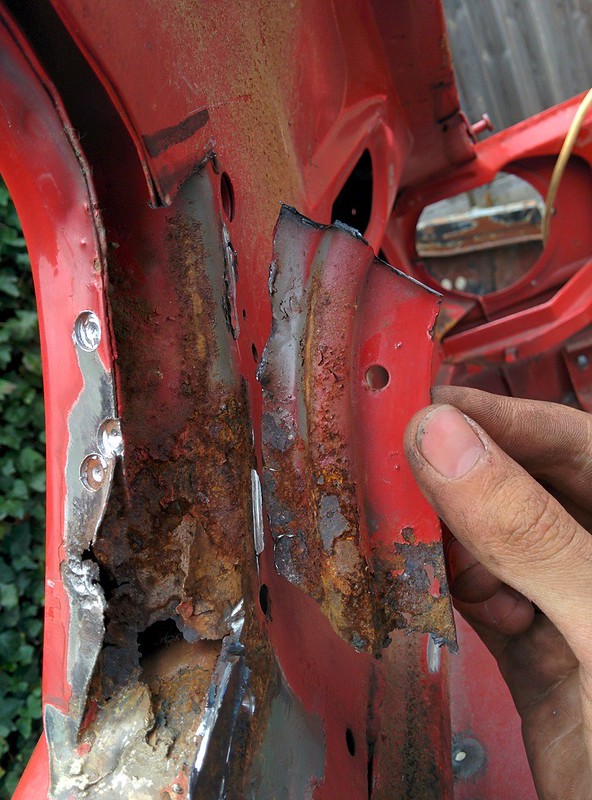
Everything removed except the flat piece. Same deal for this side, the replacement piece we got is in much better shape.

Last edit: by D_Martijn
Posted
Settled In

Beemer looks great, definitely something different, can't wait to see the end result, I'll be keeping my eyes peeled!
Posted

Local Hero


BMW 2002 Touring '74 Full restoration project
Sent from my iPhone using Tapatalk
Andy
LINCOLNSHIRE REGION -�https://www.facebook.com/groups/467122313360002/
1983 MK1 Golf GTI Campaign Model - Under (looooong) resto!
1962 Rover P4 80
2002 BMW 745i
2008 BMW Z4 2.5Si
LINCOLNSHIRE REGION -�https://www.facebook.com/groups/467122313360002/
1983 MK1 Golf GTI Campaign Model - Under (looooong) resto!
1962 Rover P4 80
2002 BMW 745i
2008 BMW Z4 2.5Si
Posted
Old Timer
MikeBott93
Yes, that would be cool having such a book about the mk1!Thank you!
Hairyarse
Yes.. Makes you wonder where else it might be hiding 
Posted
Old Timer
Still need to disassemble a few things further and remove some of the rubber bushes of the suspension bits.
There was a discount on the suspension bushes from WallothNesch I of course placed an order, great timing!
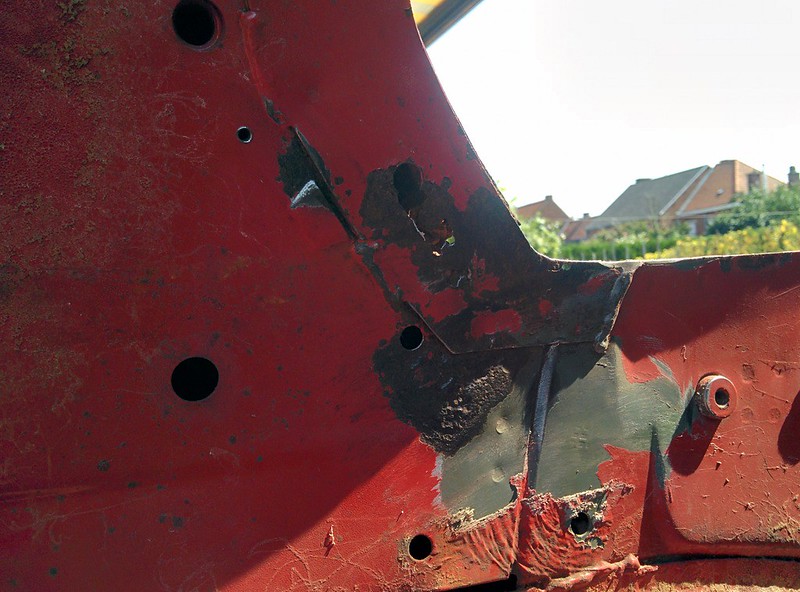
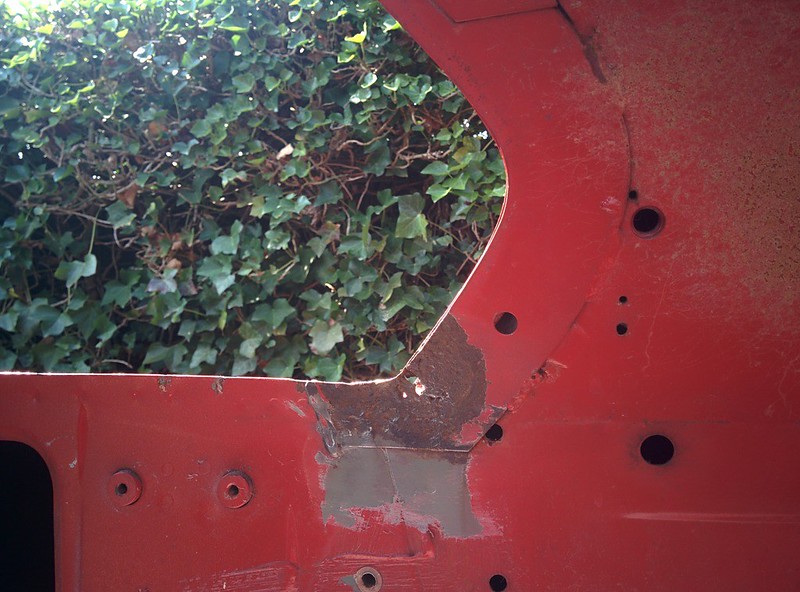
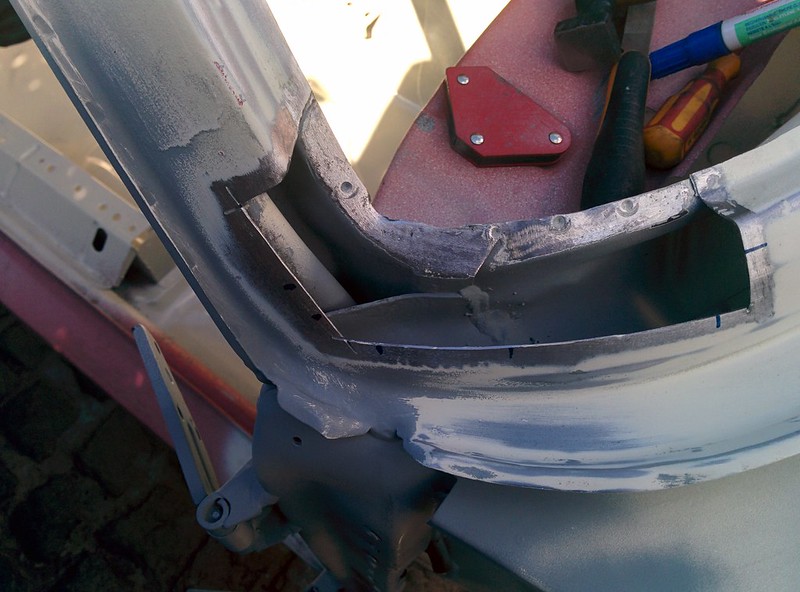
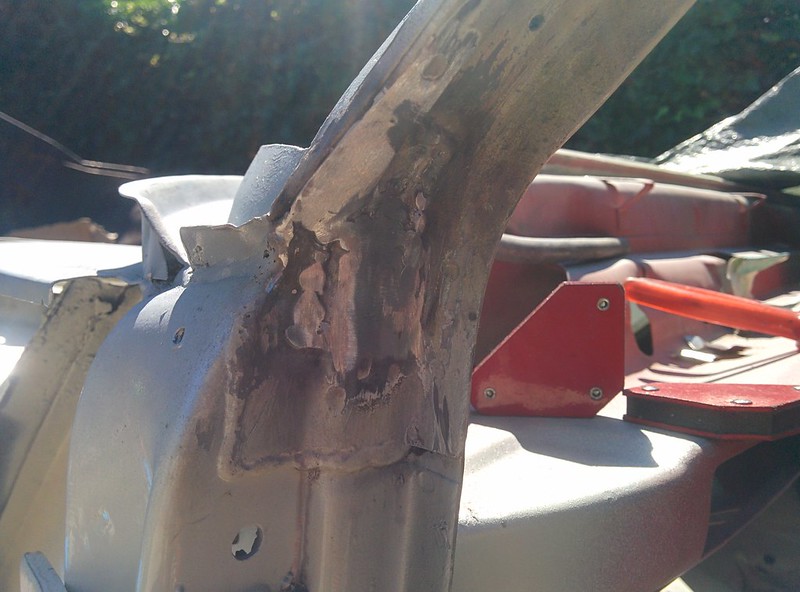
After sorting that stuff out, I had a look at the lower right side corner of the front a pillar. It was starting to get pretty thin on the seam where the window rubber sits over.
I first cut the required patch out of the panel that came from the cut up shell we got.
Then I marked the outline of that piece onto the corner and cut most of the rotted bit out.
Here you can see the rusted lip still in place.

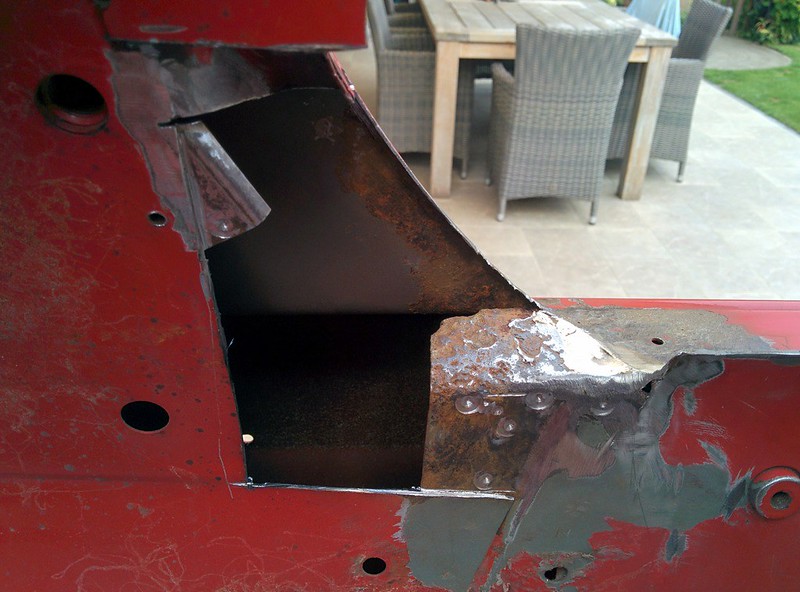
Then drilled out the spot welds and test fitted the patch. Still a bit of grinding left to make it fit.
Now that this piece is out it'll make it much easier to sandblast the inside

�
Last edit: by D_Martijn
Posted
Old Timer
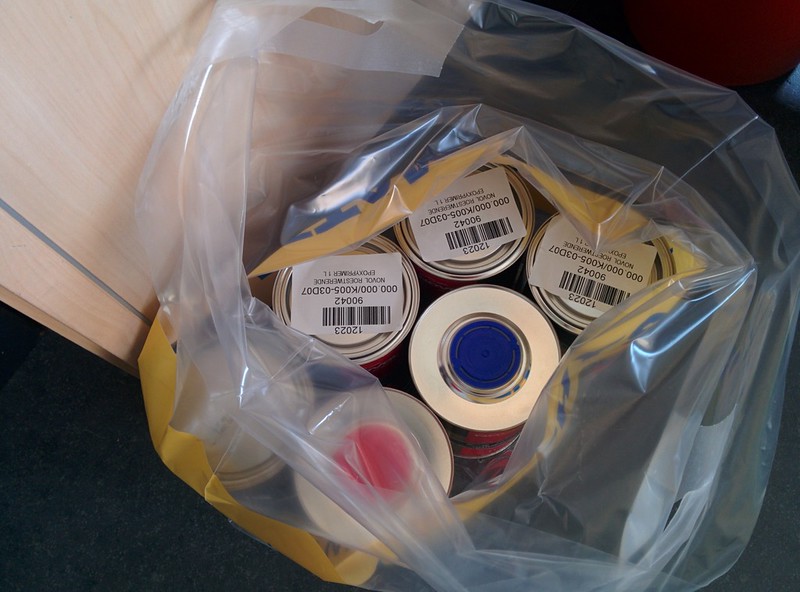
We also got 3liters of epoxy primer so we can paint our shell when the sandblaster comes on Thursday
He will also sandblast the suspension parts so I gave the local powder coating place a call, all set�


Last edit: by D_Martijn
Posted
Old Timer
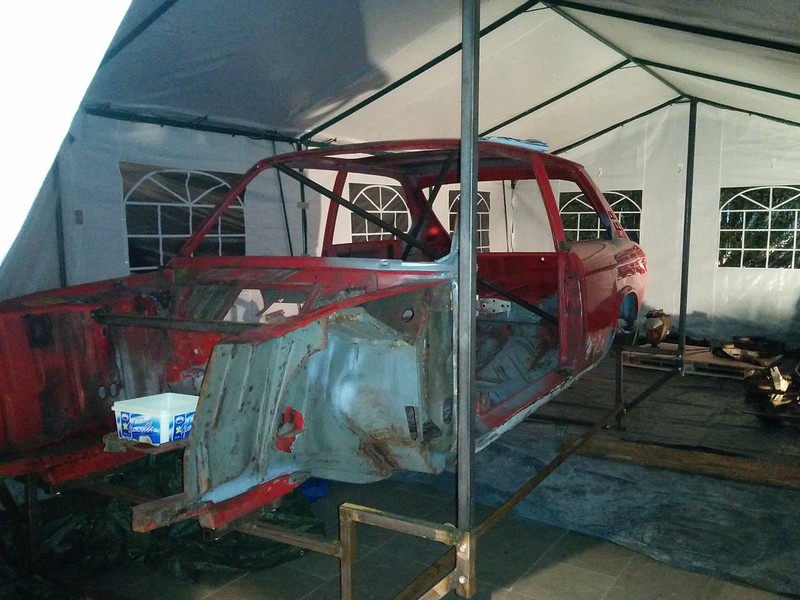
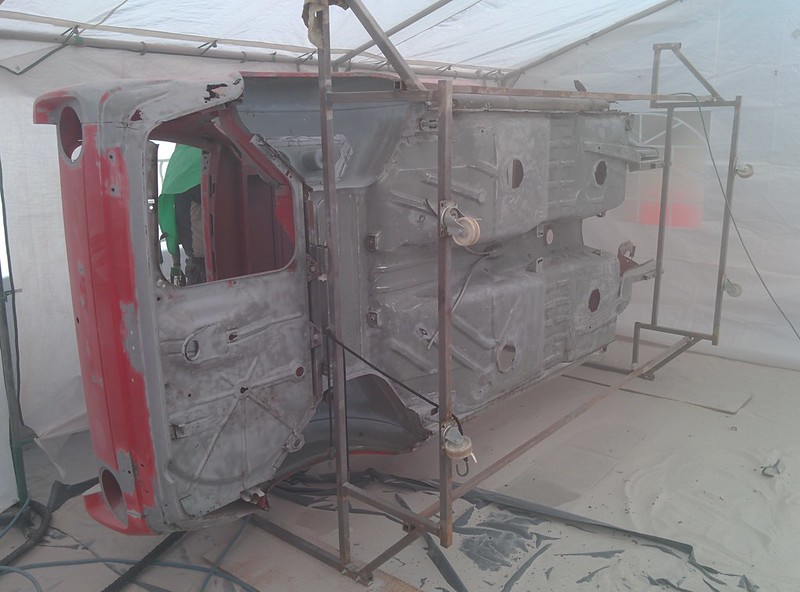
Yesterday evening we set our big party tent up in the backyard. This will serve as a blasting booth.
Hopefully it'll keep most of the dust inside
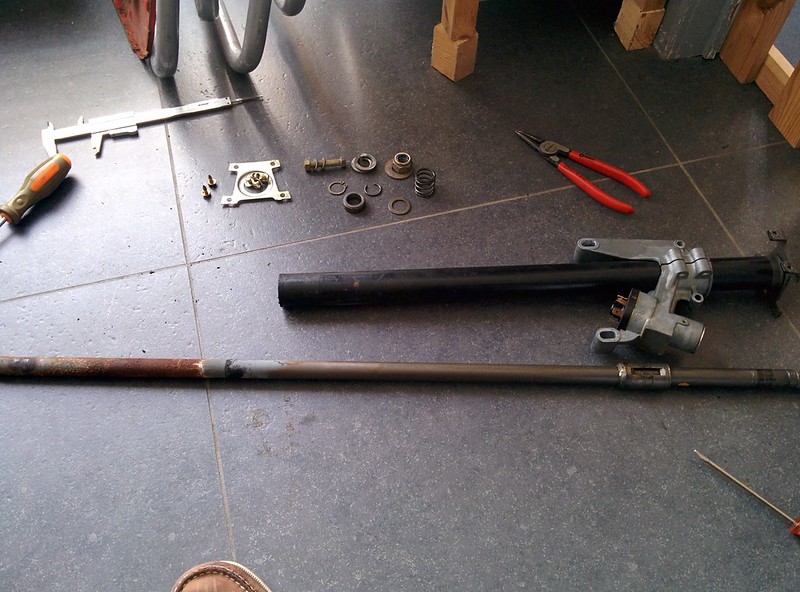
Today I still had to disassemble the steering column, luckily I found the right instructions in the BMW Shop Manual.The shaft will get galvanised and the column blasted and painted black.

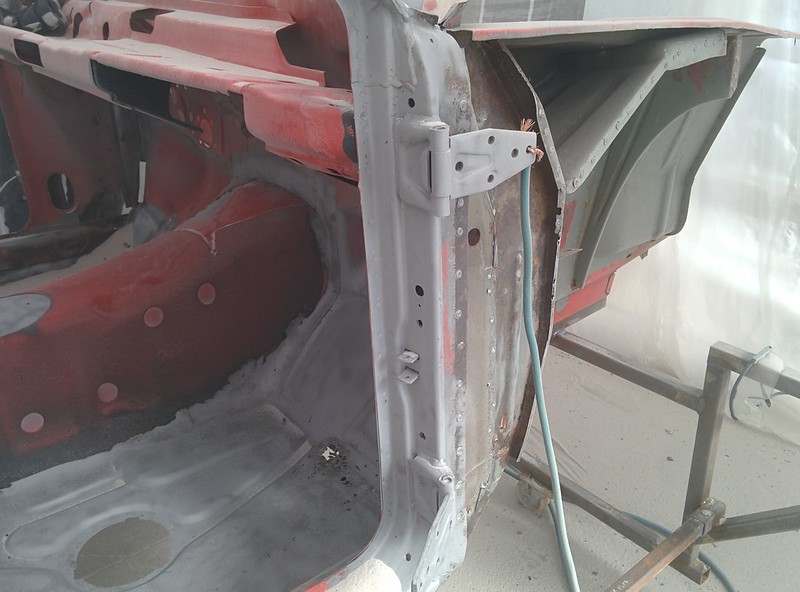
I also removed the rest of the old A pillars and the flat piece of sheet metal on the C pillar.

Also get everything that needs to get blasted ready and masked the surfaces that don't need to be blasted.
Struts, shafts, suspension bits..
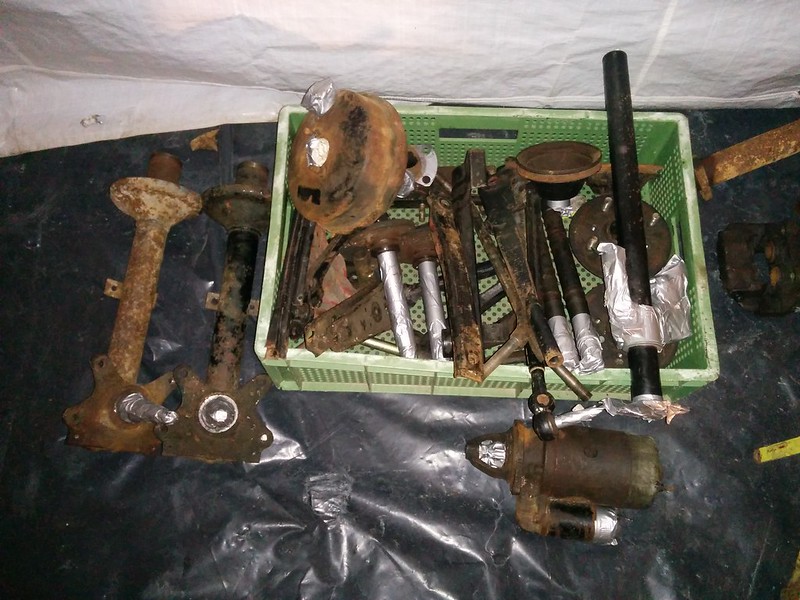

Exhaust manifold, pedal box, brakes and some sheet metal parts..
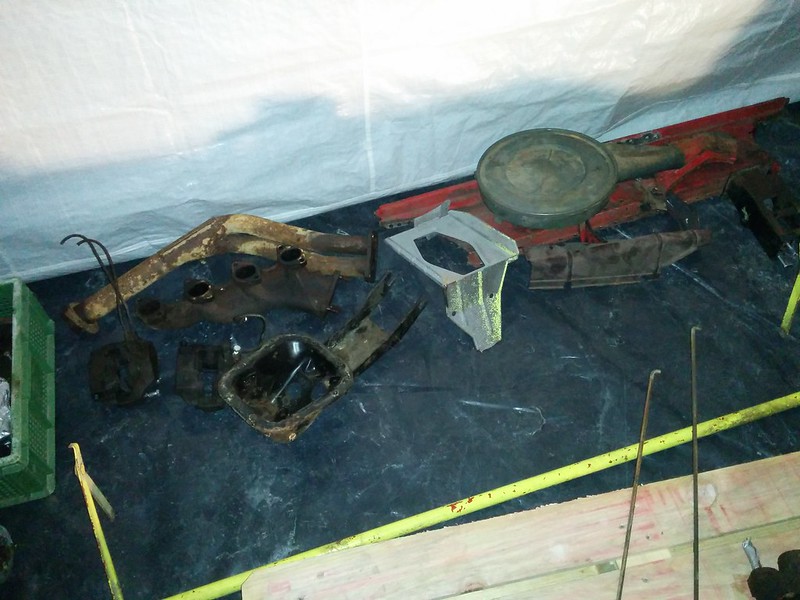
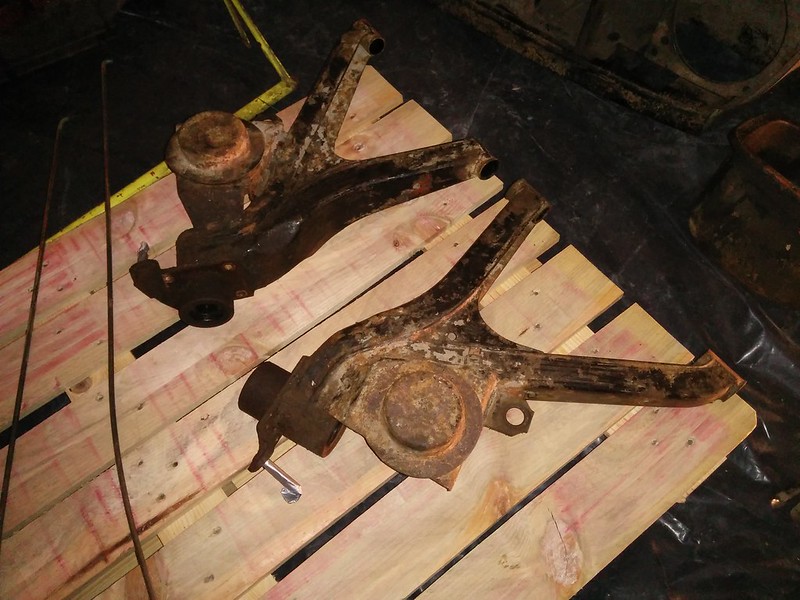
Real trailing arms
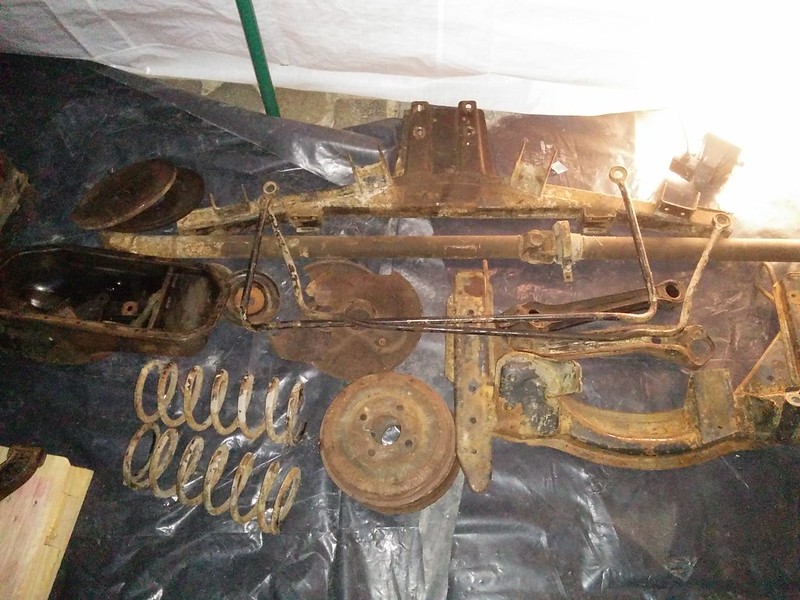
Front & rear subframe, rear springs, brake parts & sway bar..

Front nose panel

Last edit: by D_Martijn
Posted
Old Timer
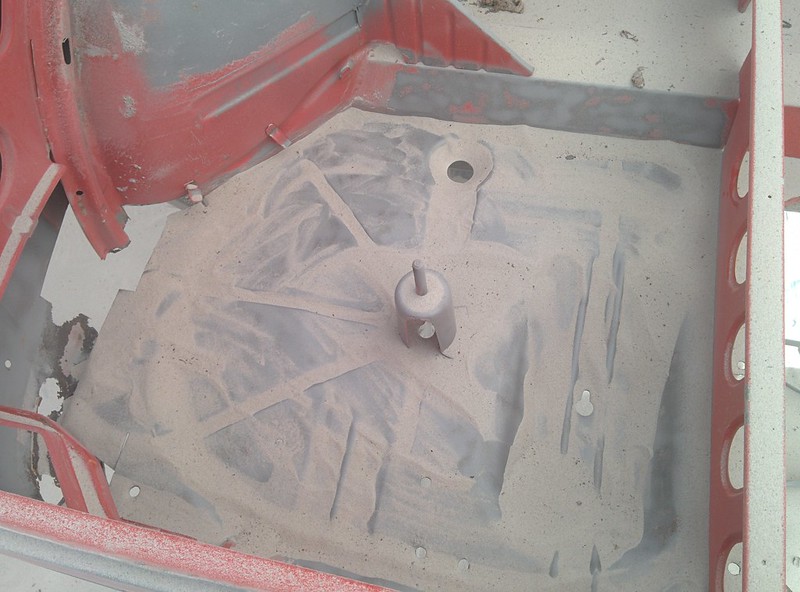
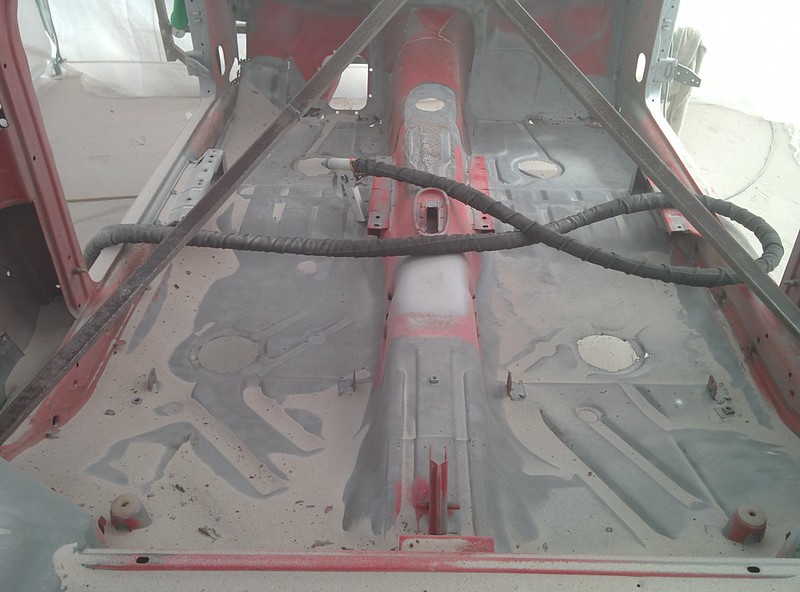
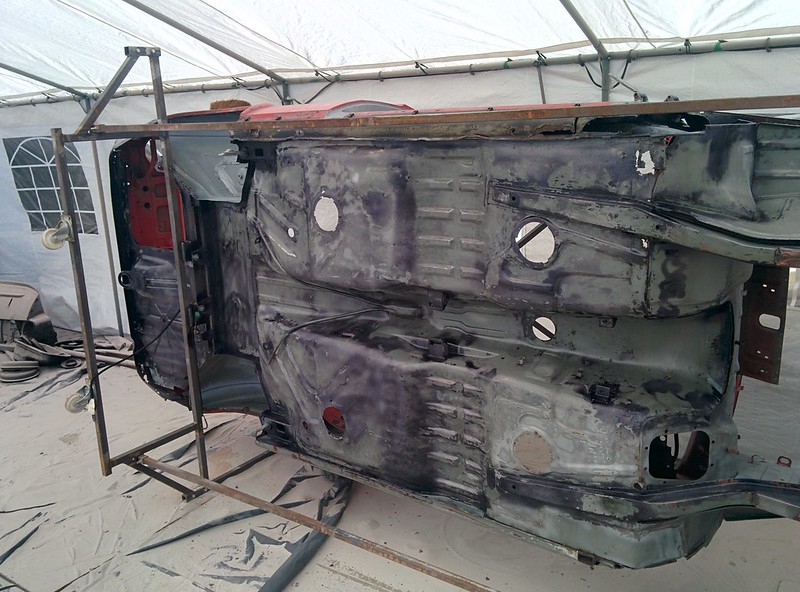
Most nooks and crannies got sandblasted. We didn't sandblast the big flat panels to avoid warpage.
When blasted I went over the whole car with compressed air to remove all of the sand and rubbed the car down with white spirit to remove the last bit of dust.
Then I sprayed Brunox on the places where there was some pitted rust. Finally everything for a coat of epoxy primer.
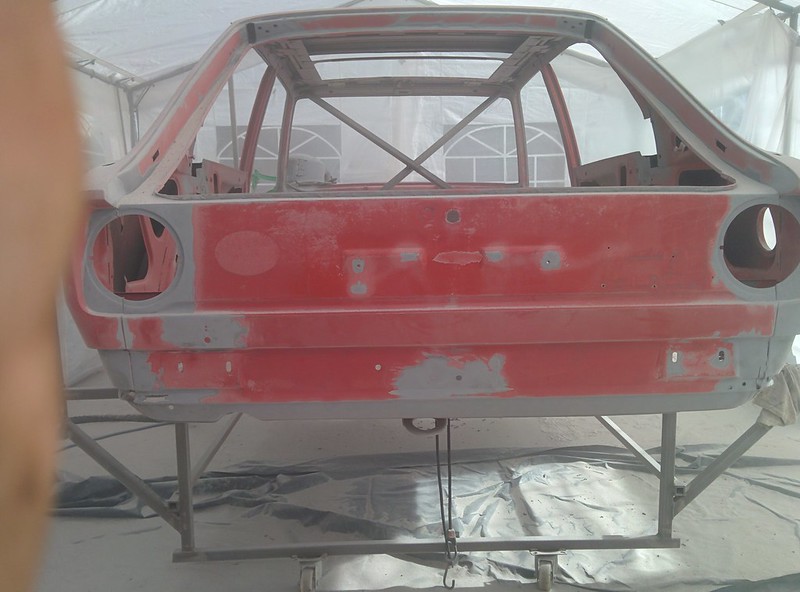
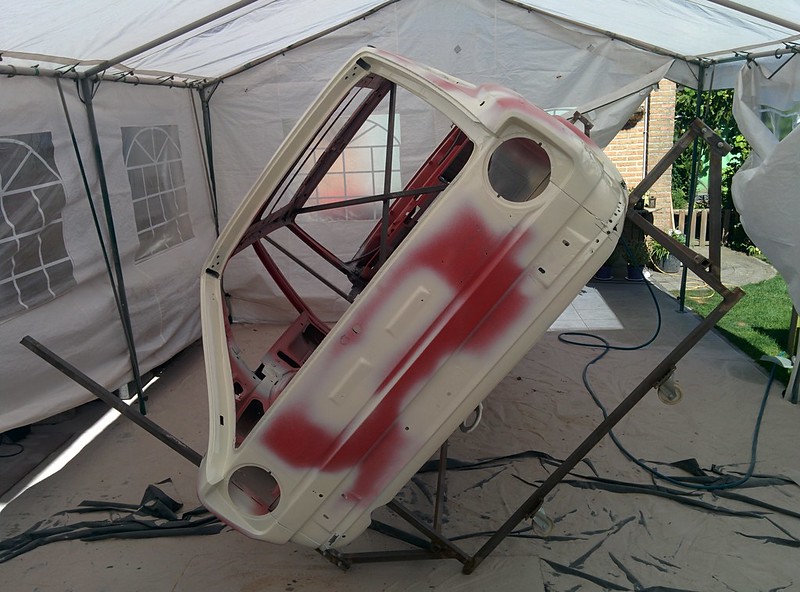
First time ever using a spray gun, painting the car went pretty good. I first started with the bottom of the floor to get the hang of it.
Sandblaster didn't have time to blast the part too, he'll pick them up with his trailer tomorrow and blast them next week on Tuesday and Wednesday.
I'll just post pictures now


�
Last edit: by D_Martijn
Posted
Settling In

Posted
Old Timer
stichill99 said
Painting looks excellent for a first attempt! Well done
Thanks!
Posted
Settled In
BMW 2002 Touring '74 Full restoration project
stichill99 said
Painting looks excellent for a first attempt! Well done
Have to agree, great job!
Sent from my iPhone using Tapatalk
Posted
Old Timer
MikeBott93 said
stichill99 said
Painting looks excellent for a first attempt! Well done
Have to agree, great job!
Sent from my iPhone using Tapatalk
Thank you!
Posted
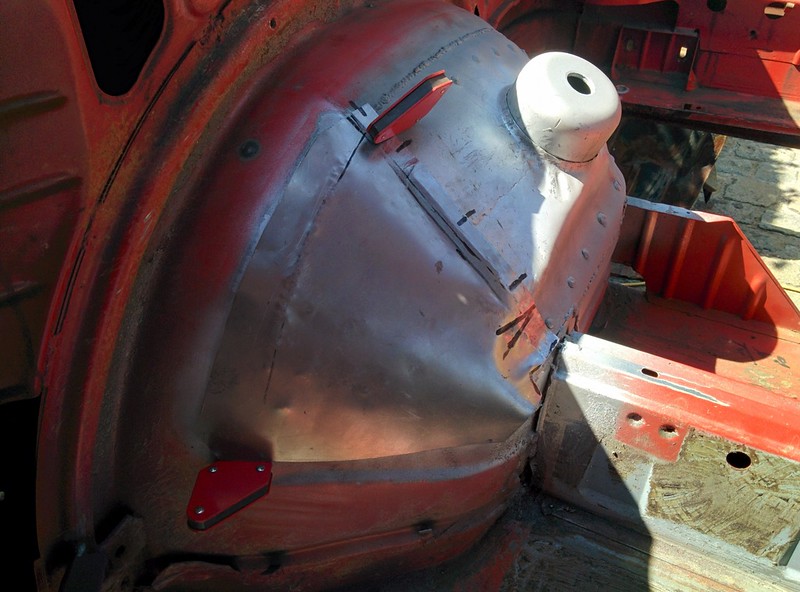
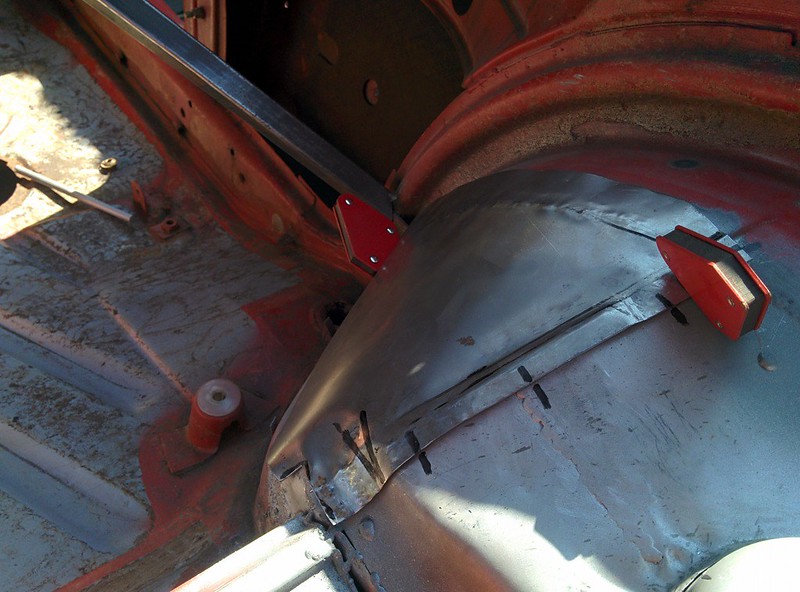
Old Timer
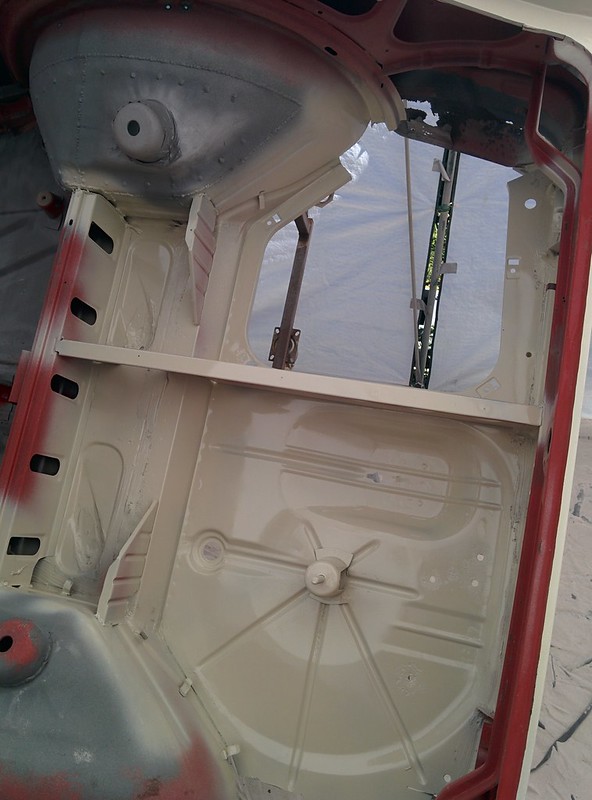
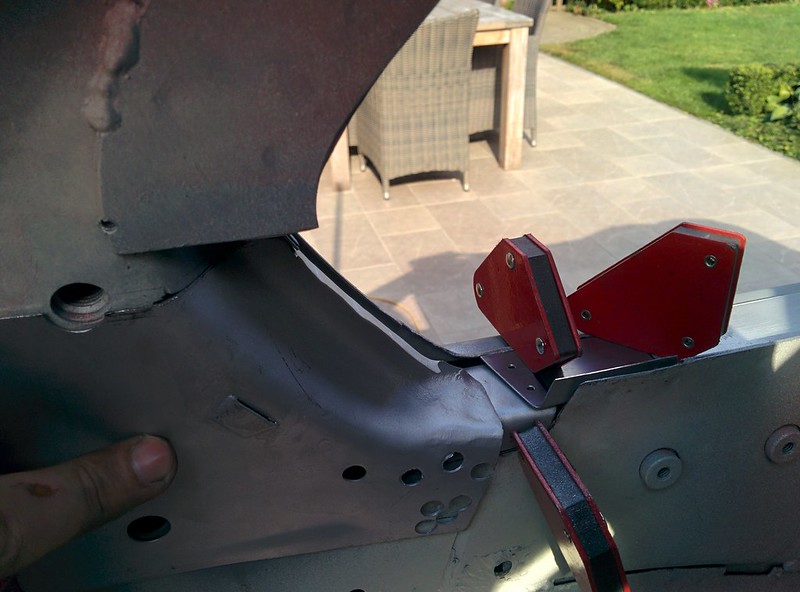
I started with cleaning up the epoxy primer on the edge where I'm going to weld. I also coated the inside again with some Brunox then some zinc primer.
Making sure the piece fits, these handy little magnets make it much easier.
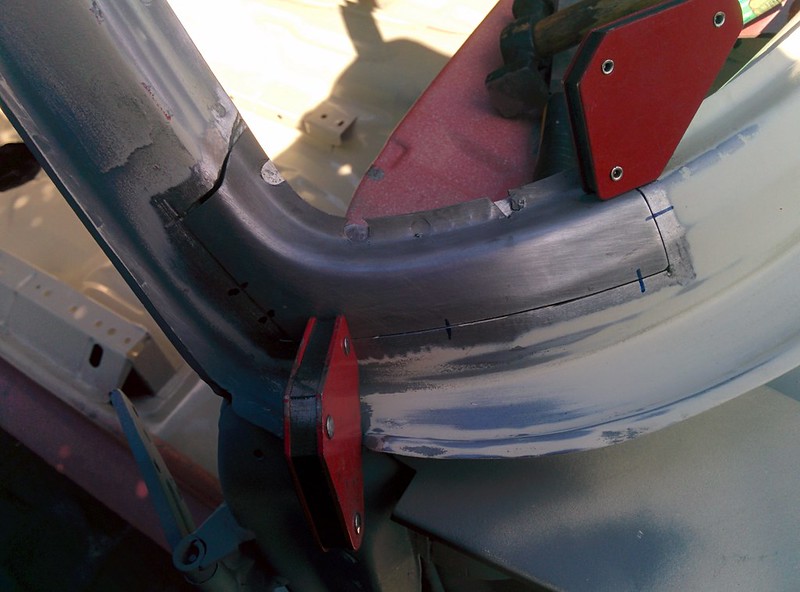
Tacking the piece in place, had to do some fiddeling on the right side as the weld shrunk the metal pretty hard on that side.

Hard to get this on picture but both edges are nice and flush
Ground all the tacks flat.

Ground the spot welds too
Wasn't happy with the little flange so I filled it up and ground it smooth again, looks much better now.

I pulled the flange from the firewall where it meets the tunnel when we sandblasted the car since there was some slight rust forming in there. I now hammered it flat again and gave it a coat of zinc primer.

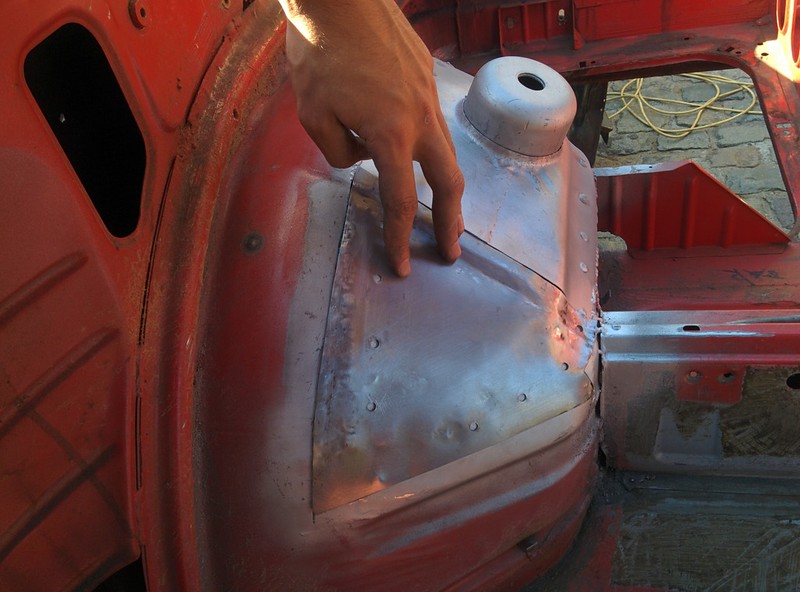
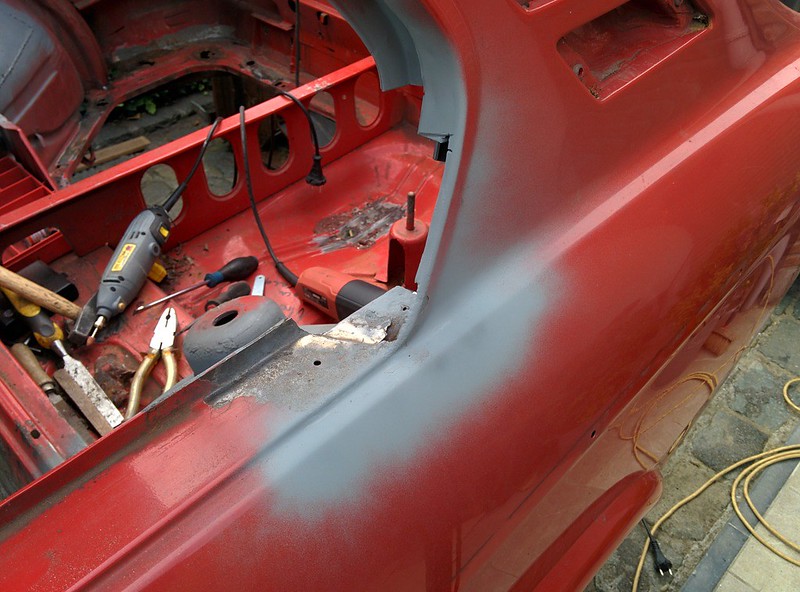
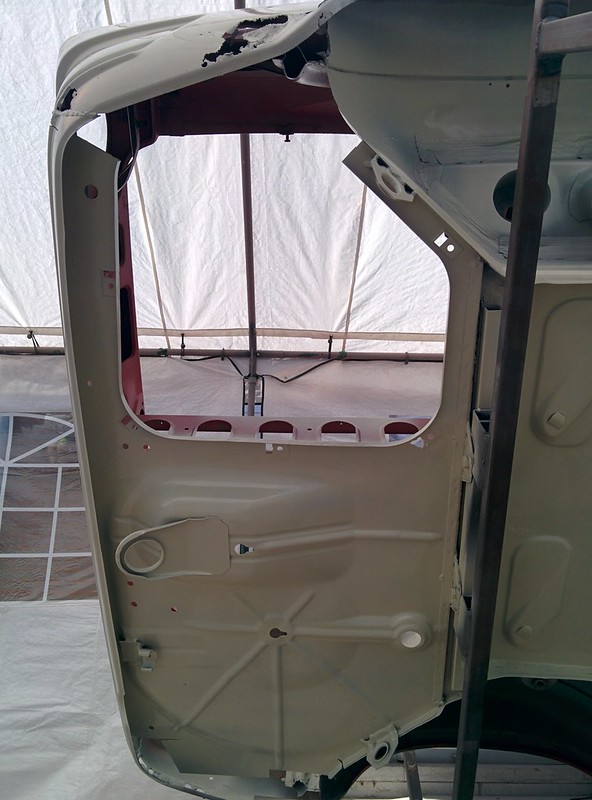
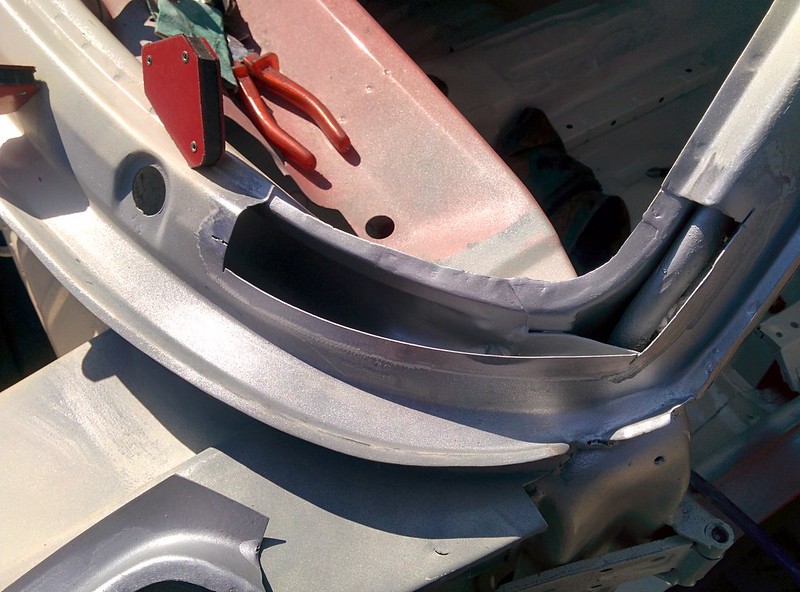
I also got started on the other A pillar. I have to fabricate some new metal on the backside of the corner since it's rotted there too. Pretty hard shape to make so I'll have to make it from 2 pieces.
Last edit: by D_Martijn
Posted
Old Timer
Today I got started with the left A pillar.
I first had to patch the backside of the pillar since it was rotted pretty bad. I gave the whole inner section a liberal amount of Brunox too.
Pretty hard to bend such a patch from a single sheet of 1.2 thick metal so I decided to make it from 2 smaller pieces.

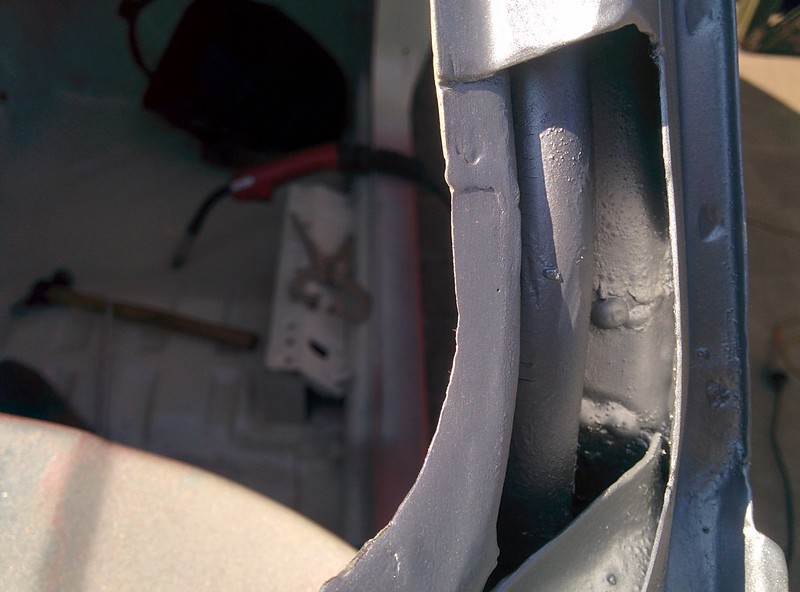
Fully welded

Ground smooth, still have to clean it up some more.
I think this will be pretty easy when I receive my pneumatic angle die grinder and power file.
Cleaned up the epoxy on the side and coated the inside with zinc spray
Here you can see the upper patch panel. I also welded it from the inside (like it came from the factory)

Replacement panel welded in. I had to make a small patch panel too because my replacement panel was just too short.

Welds ground flat. It looks pretty good, although I had a hard time fitting the panel on this side.
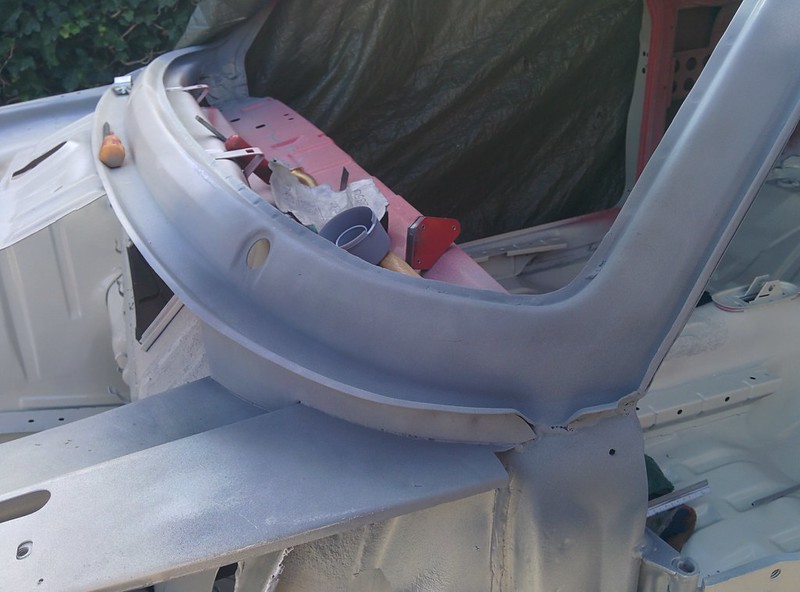
Also coated the backside with some zinc primer.

Last edit: by D_Martijn
Posted
Local Hero

Andy
LINCOLNSHIRE REGION -�https://www.facebook.com/groups/467122313360002/
1983 MK1 Golf GTI Campaign Model - Under (looooong) resto!
1962 Rover P4 80
2002 BMW 745i
2008 BMW Z4 2.5Si
LINCOLNSHIRE REGION -�https://www.facebook.com/groups/467122313360002/
1983 MK1 Golf GTI Campaign Model - Under (looooong) resto!
1962 Rover P4 80
2002 BMW 745i
2008 BMW Z4 2.5Si
Old Timer
Hairyarse said
You should do this for a living Martijn, great work - again!
I feel quite honored now

I would love to do something like this though. Love fiddling with metal.
Posted
Local Hero
Andy
LINCOLNSHIRE REGION -�https://www.facebook.com/groups/467122313360002/
1983 MK1 Golf GTI Campaign Model - Under (looooong) resto!
1962 Rover P4 80
2002 BMW 745i
2008 BMW Z4 2.5Si
LINCOLNSHIRE REGION -�https://www.facebook.com/groups/467122313360002/
1983 MK1 Golf GTI Campaign Model - Under (looooong) resto!
1962 Rover P4 80
2002 BMW 745i
2008 BMW Z4 2.5Si
Old Timer
A few posts ago I showed some pictures of the rotted bits I removed. Time for some fresh metal!
I started with carefully taking the replacement pillar apart.
I was able to save the reinforcement pieces


I sandblasted both pieces and gave them a coat of zinc primer

To repair the C pillar, I have to repair the panel where the trim rivets onto. This was a simple 90deg bend.
Great having a crude sheet metal brake on each corner of our car thanks to the tilting jig �

Next was making another 90deg piece, this one needed a stepdown on one side.
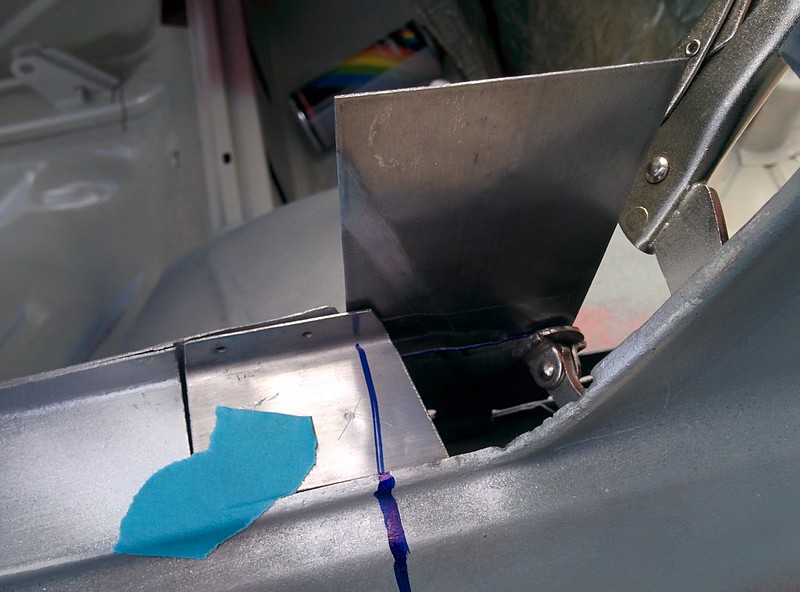
Bended stepdown piece in place, both pieces will be plug welded together

After making sure the 2 smaller pieces would fit, I tried fitting the reinforcement piece of the pillar.
Luckily it was easy to line it up thanks to the hole for the rear seat belts and another hole.

When I was sure it would fit, I welded the little pieces in place and grounded the welds carefully smooth, making sure that I didn't touch the edge.

I then cleaned up the epoxy primer off of the sheet metal for the reinforcement piece. As I was grinding, a screwdriver fell from the roof right on to my can of zinc primer. What a coincidence that the point hit the rim of the can. The can lost all it's pressure..
As it was an almost full can, I took an old jar and poured the zinc primer into it. I'll apply the primer from now on with a brush..

Gave both the top and underside a coat of zinc primer. The brush actually made applying the primer on the underside very easy.

It took some time but also the reinforcement piece fitted nicely. it too got a coat of zinc primer.
Welded in, had a hard time welding the plug welds, not sure why.


Everything got ground flat.

And finally a good coat of zinc primer.

Tomorrow I'll finish the pillar by welding in the smaller reinforcement piece and then the top plate.
Last edit: by D_Martijn
Old Timer
Hairyarse said
After this see if you can get paid to do a resto for someone in your spare time - once you've got one, I'm sure you wont struggle to get more
Recently, I actually got asked by a friend of my brother if I was willing to repair something on his old Mercedes w124.
They have a tendency to rot at the rear subframe mounts
0 guests and 0 members have just viewed this: None.