


BMW 2002 Touring '74 Full restoration project

Posted
Old Timer


Old Timer
watson said
amazing work going on there. Your skills never fail to impress.
Thanks, Dave! Now that this is sorted hopefully we can start welding some more.
I might invest in a TIG next year for when I need to do the arches so I can planish the welds better.
Old Timer
He still needs to find some time to make a post on the forum about his restoration.. lol
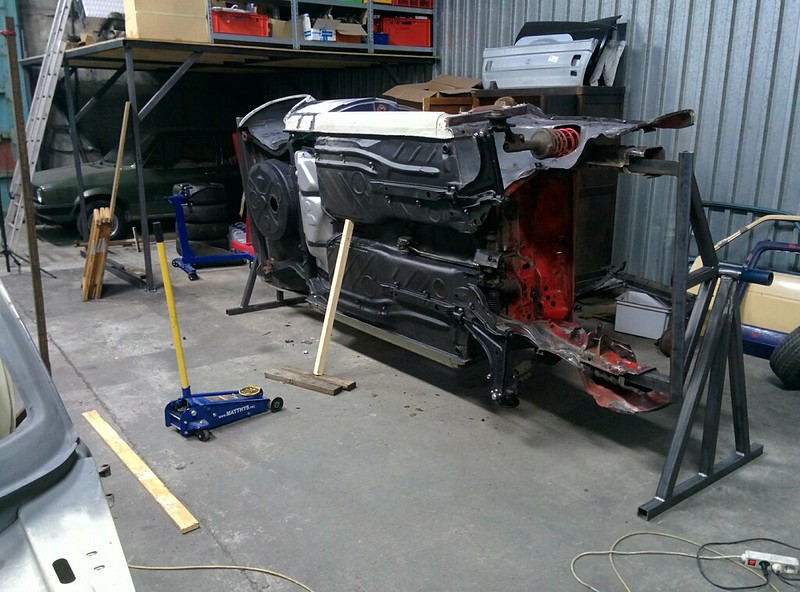
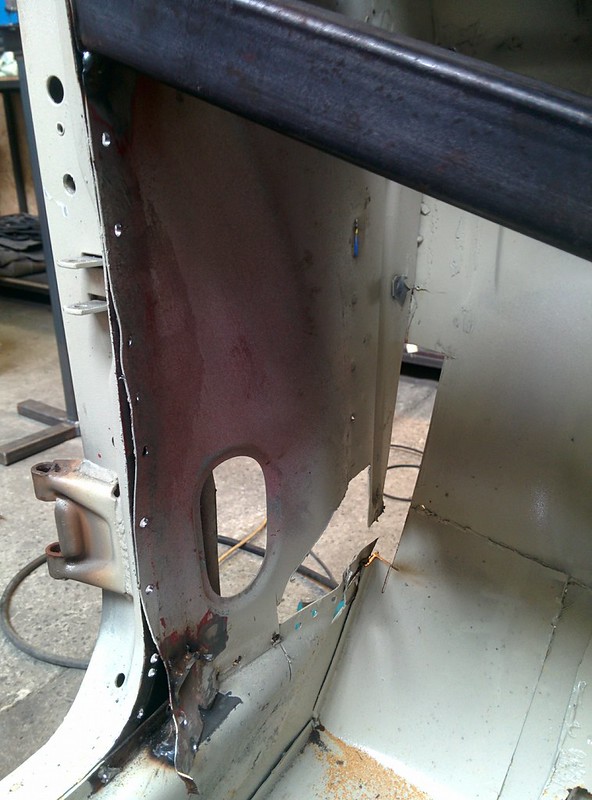
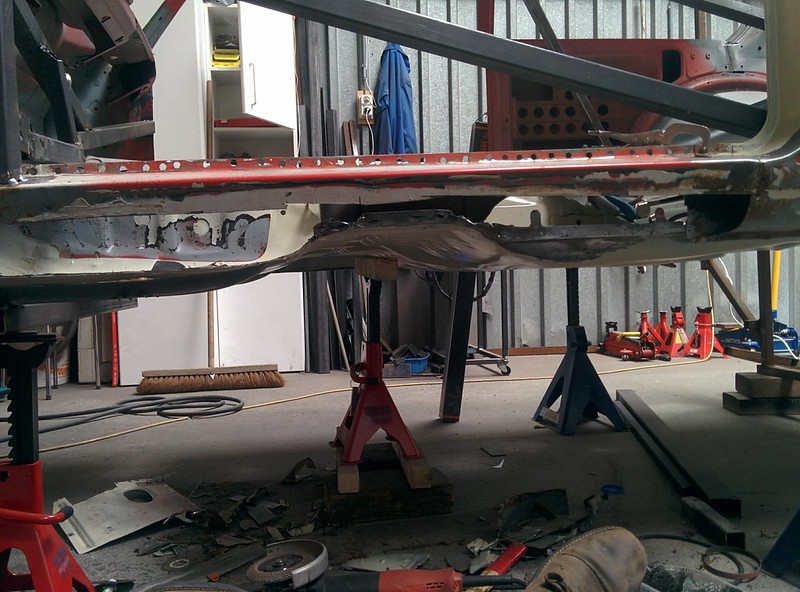
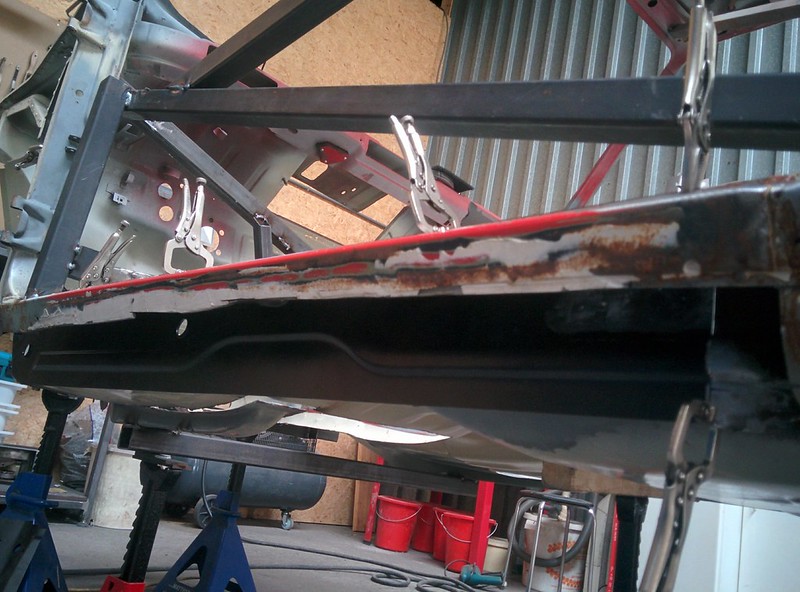
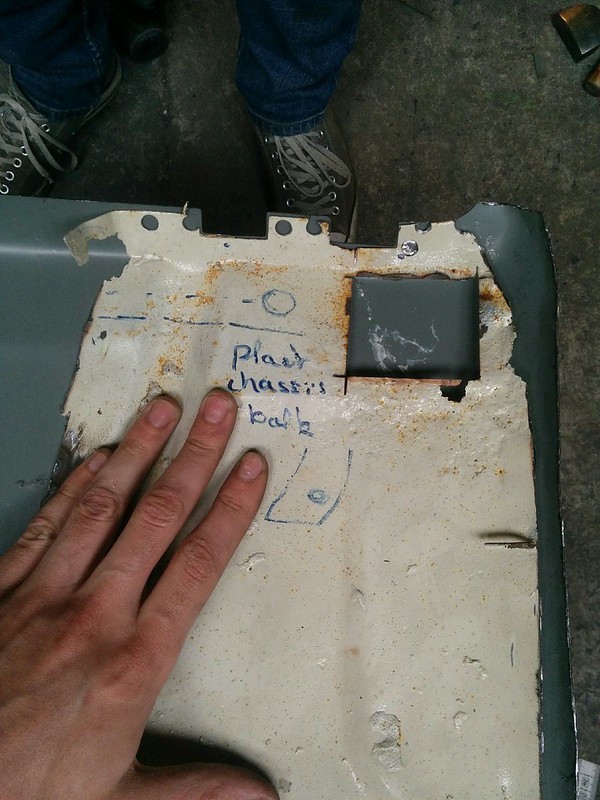
I found some time to remove the section of floor that was still attached to the left front frame rail. I didn't think it would still look this great. Only some surface rust inside.
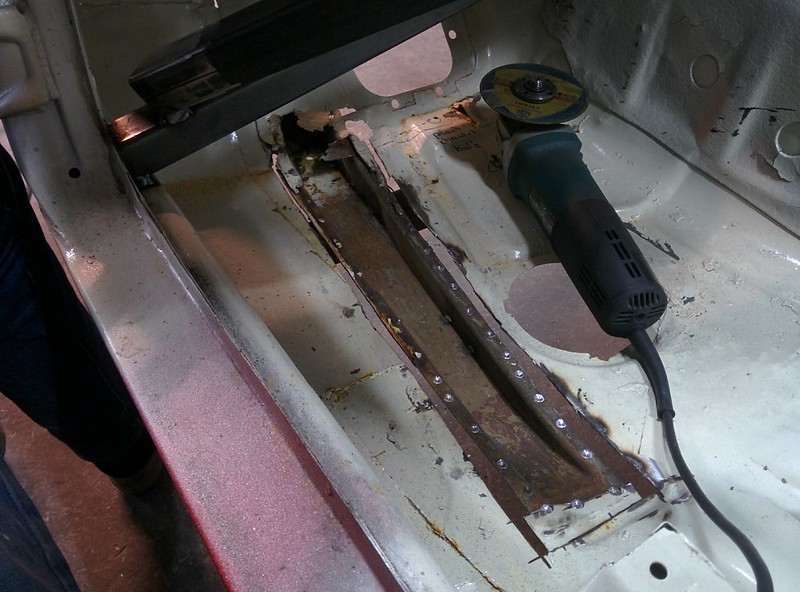
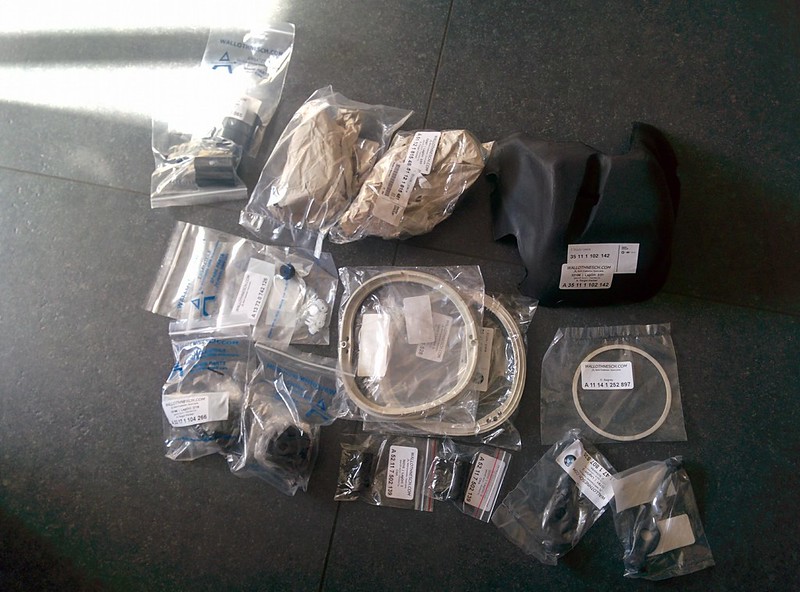
I also received the floor plugs from a guy I found on Instagram who makes these again like the original ones. As you no longer can get them with the square in the middle.�
Posted
Old Timer
Not a lot has happened on the 2002 over the last few months. I was busy with replacing my uncles transfercase on his 325ix Touring. + it was also pretty cold to do anything in the workshop especially welding since the zinc primer wouldn't dry anyway.
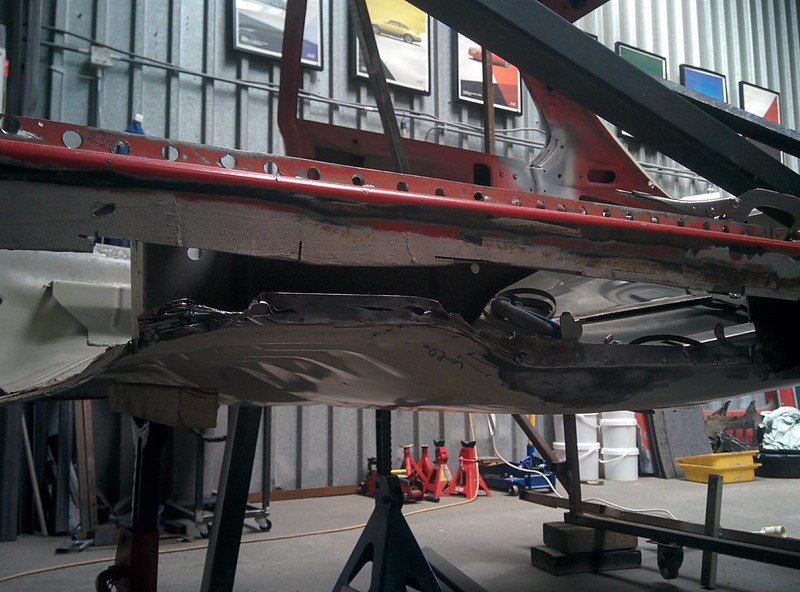
So since it's getting warmer, we got started again this weekend. The front left inner sill needs to be fixed, I thought we might be able to get a section from our donor car but it turns out the inside of the sill is rusted badly.
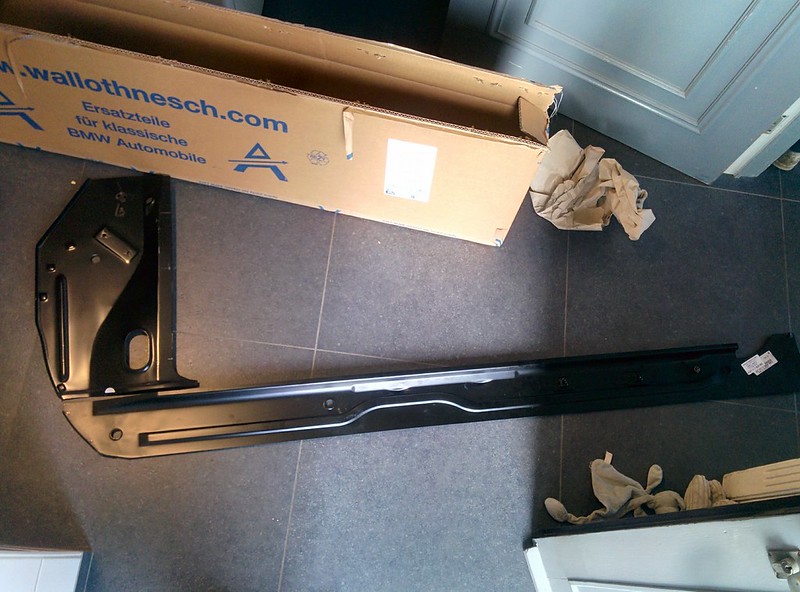
After considering making a panel on my own, we decided it would be the fasted to just order a new inner sill and cut the section off that we needed. I also ordered the inner A post panel. Hopefully it will arrive before the next weekend so we can get started again.
I also ordered some plugs for the transmission so we can get that one assembled again.
Old Timer
Looking great. Hopefully we can get some work done this weekend and maybe even on Monday as it is a holiday here in Belgium.
Old Timer
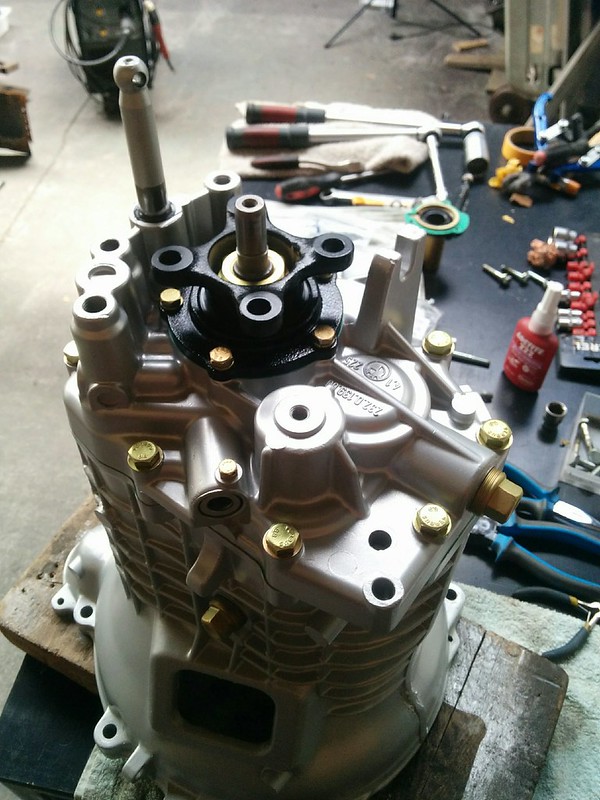
Anyway, while making the order for the inner sill I also ordered a small aluminium plug cap and a plastic plug for the transmission, this way we could begin the assembly again of the transmission.
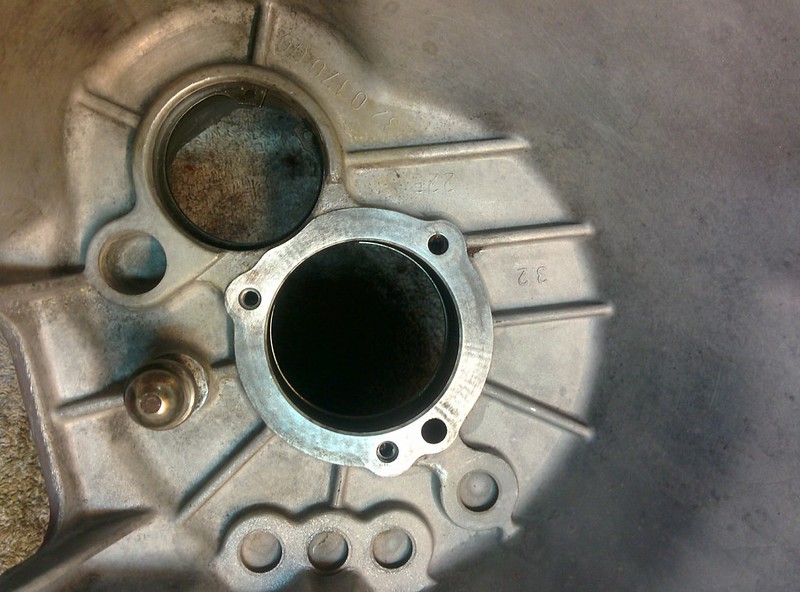
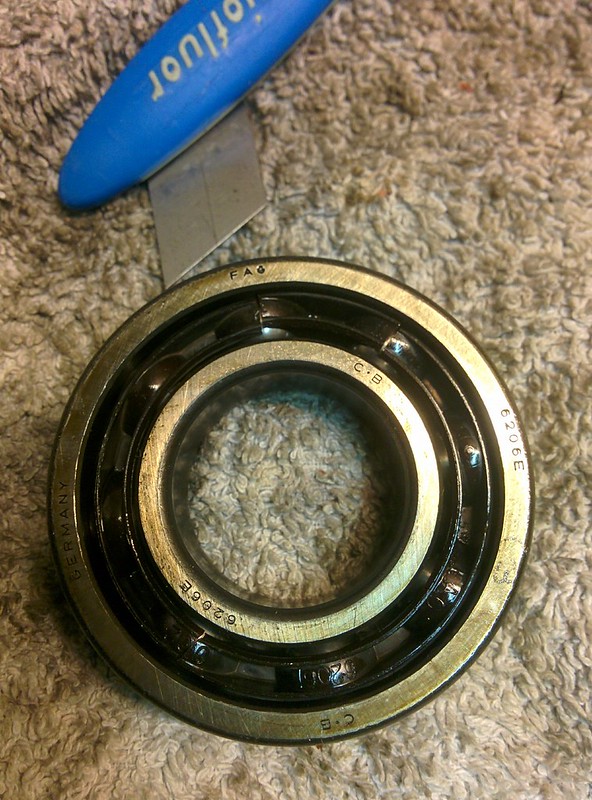
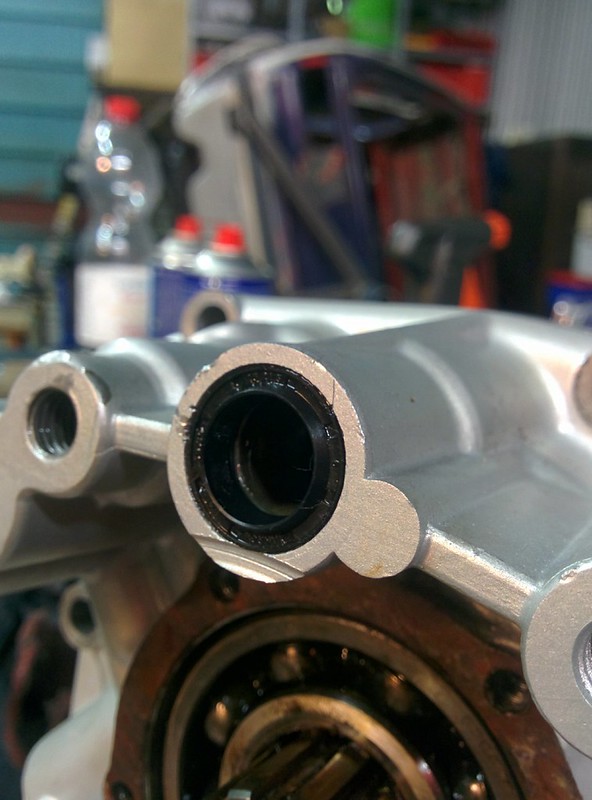
Yesterday evening, we first removed the old gaskets and dirty oil, while doing so I noticed the cage of the input shaft bearing was broken, it also felt gritty.
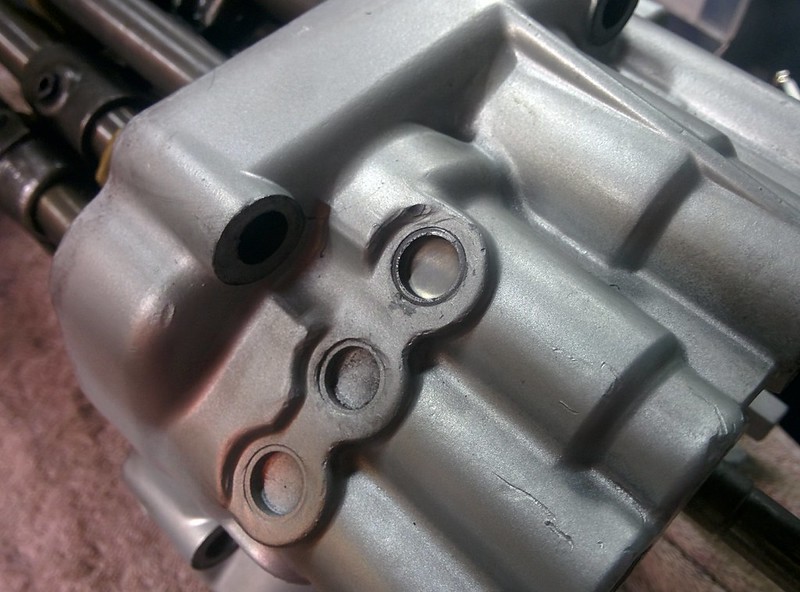
Inside cleaned up again.

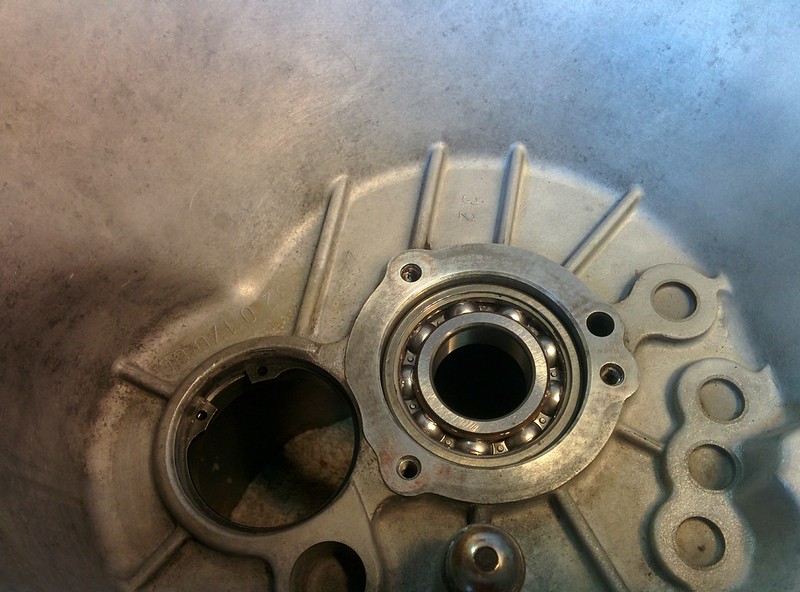
Removed bearing and cleaned up bell housing.
Broken bearing cage, it's plastic so very brittle
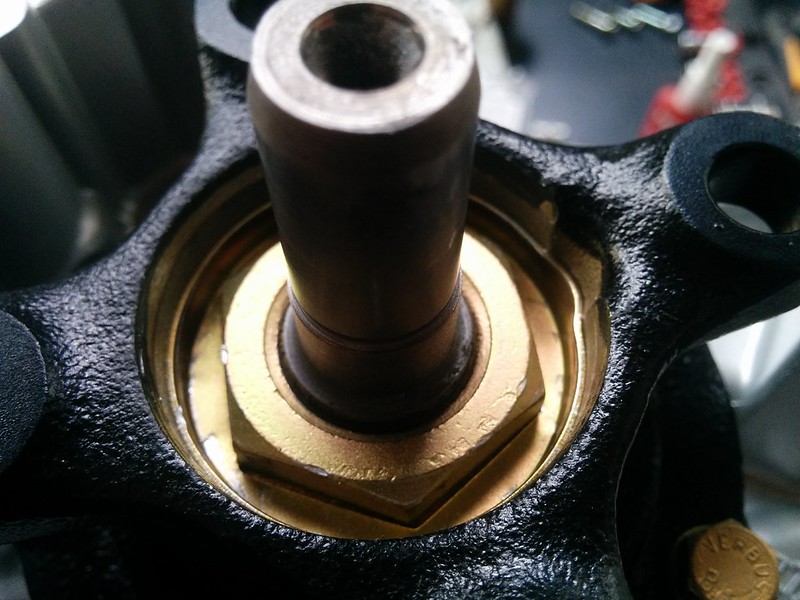
New selector shaft seal tapped in place
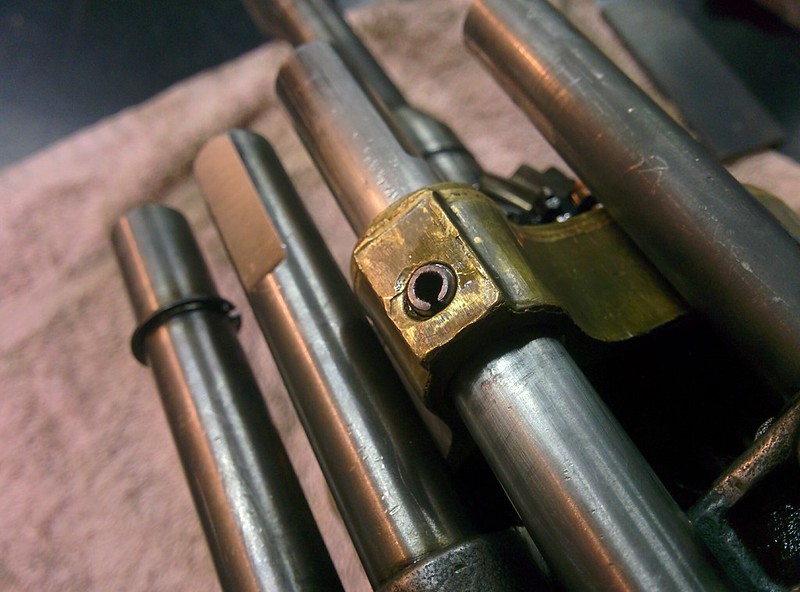
And the little aluminium plug, on the inside of this plug sits the shaft for the fork, it's kept in place by a ball and a spring. After some fiddling we got it in place.
And new roll pin tapped in the shaft and fork.
First thing on the list today was to order a new bearing at the local autopart shop. Luckily he had an SKF bearing in stock so we already tapped it in the housing.
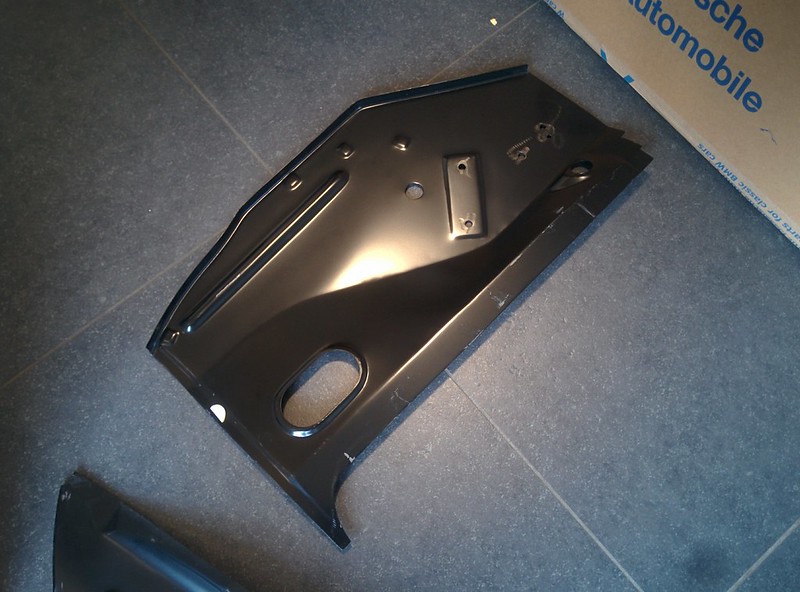
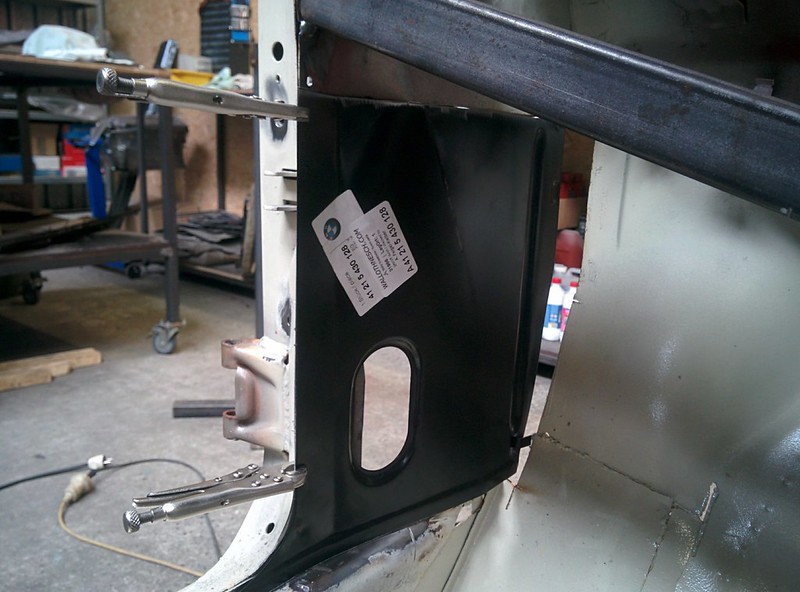
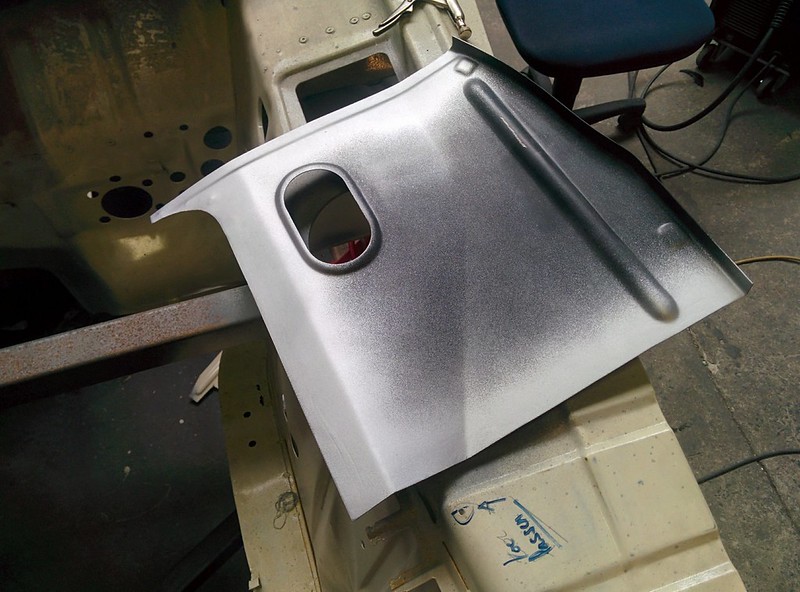
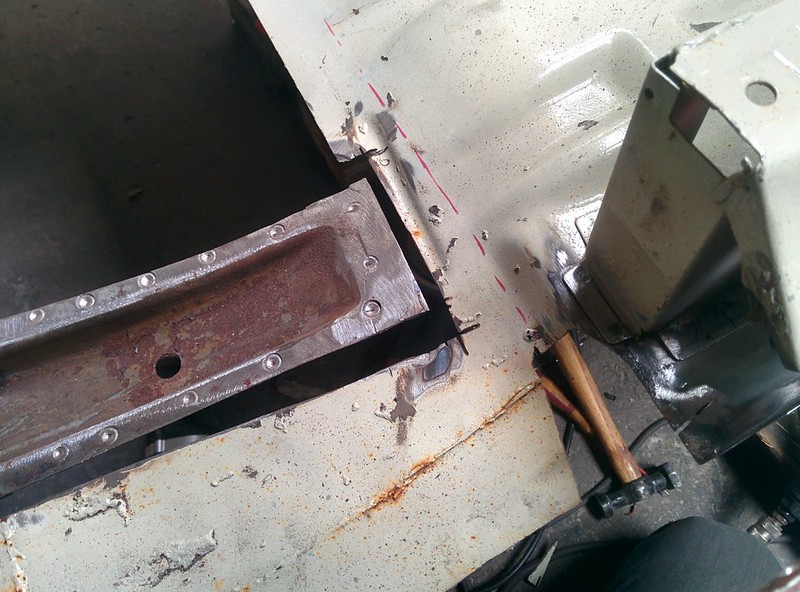
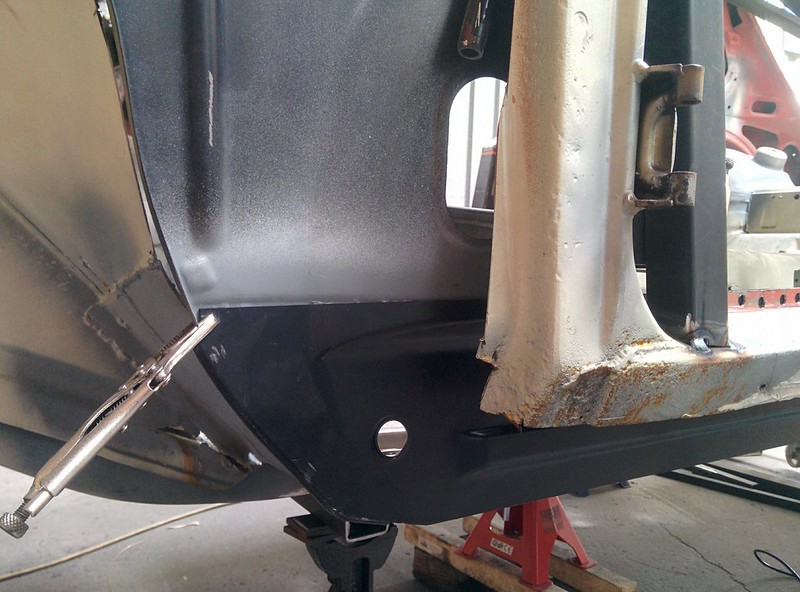
We then started on fitting the inner A pillar panel. We decided to cut the old panel halfway through because there was some heavily pitted rust on the original panel. We can later on replace the upper section of the panel when we replace the flange of the firewall.
By laying the old panel on the new one we were able to scribe a line and cut it off.
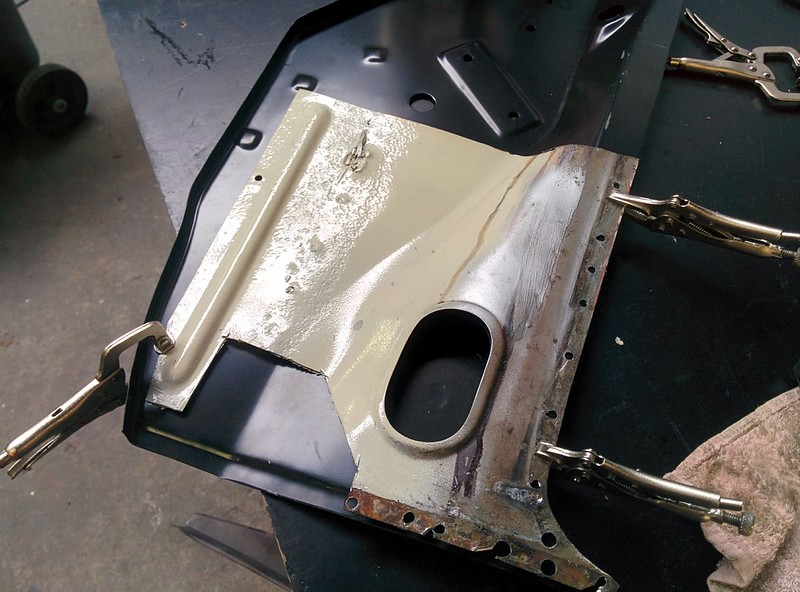
First test fit was pretty good, although some fiddling will be required on the inside, the original panel has a slight different bend to it.
Left upper corner had the different bend. I was thinking of cutting a little section out of the original one and getting it more in shape and weld it back in.
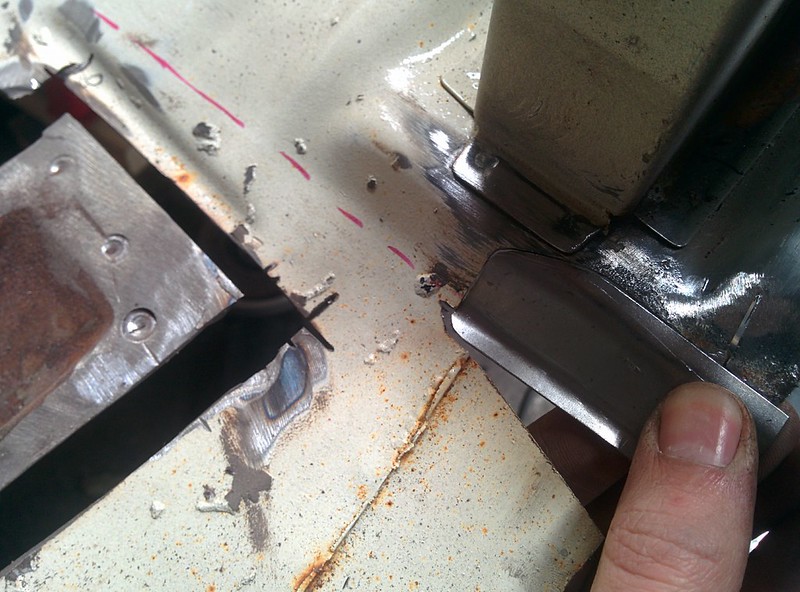
Cleaned up the edges and applied some zinc spray
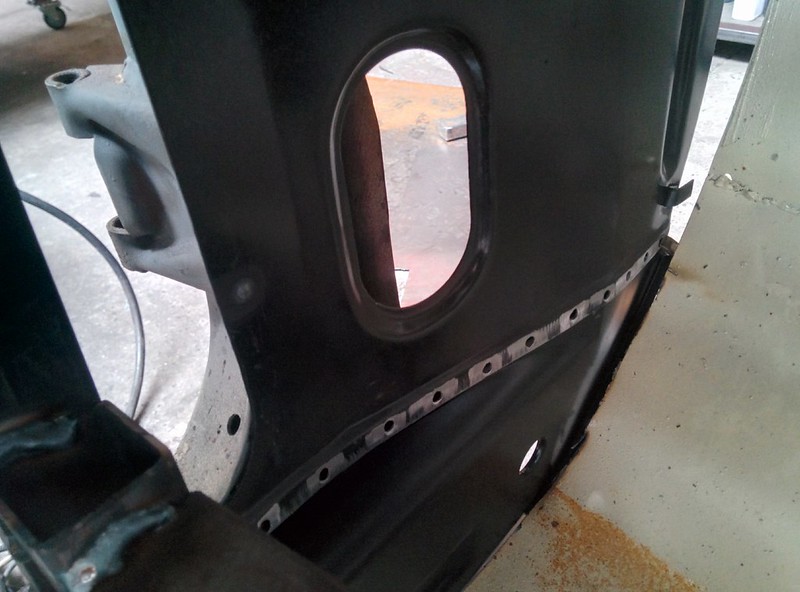
While letting it dry I welded some holes that were once drilled in the A post for applying Tectyl
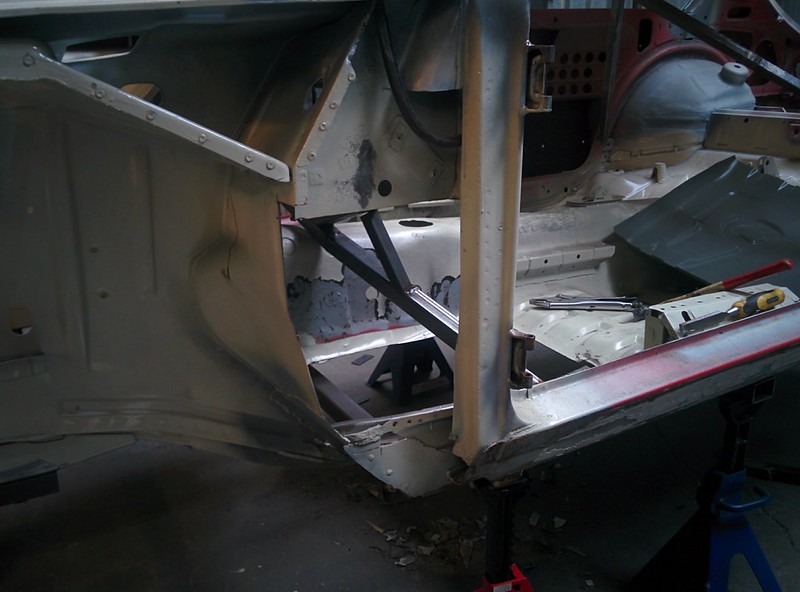
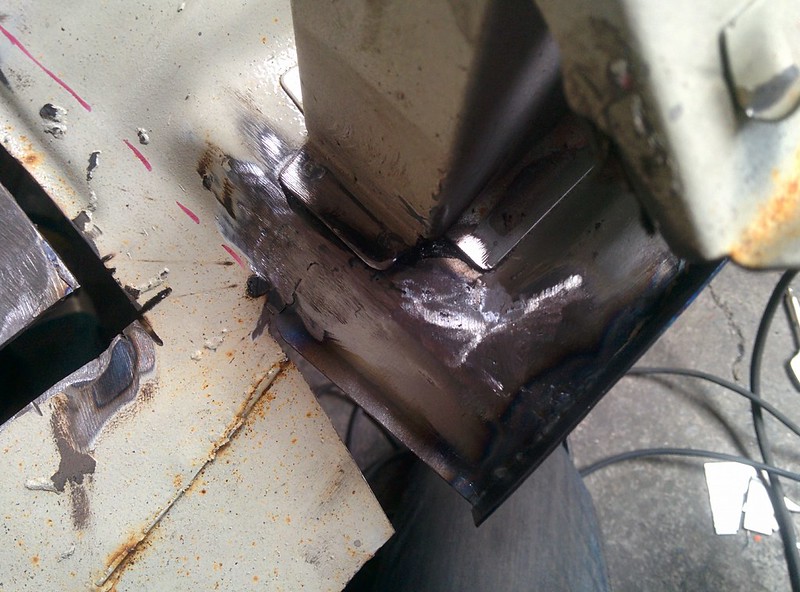
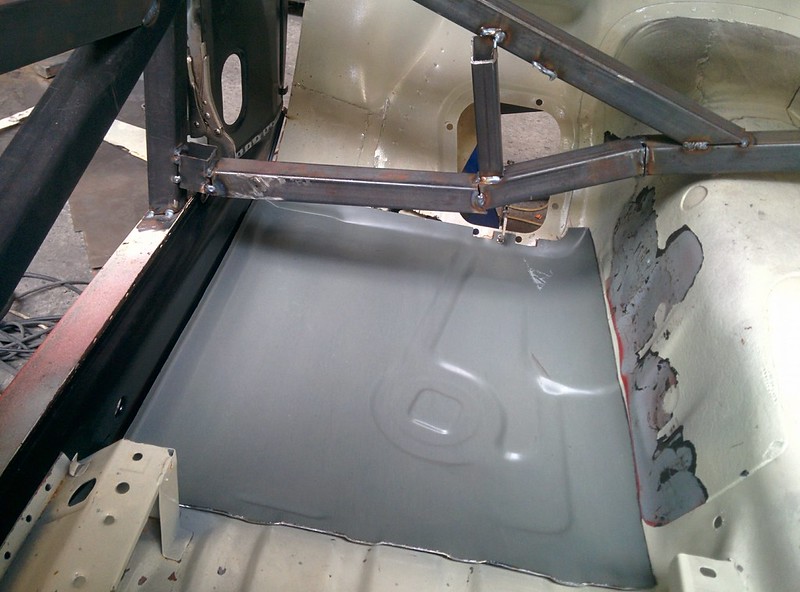
Panel fitted and welded in at a few places. We first have to fit this panel so we know how far the inner sill sits.
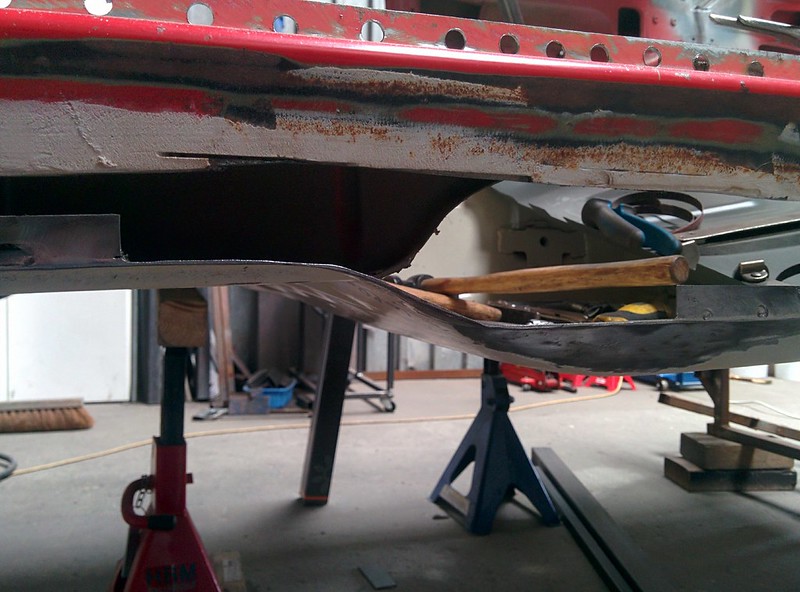
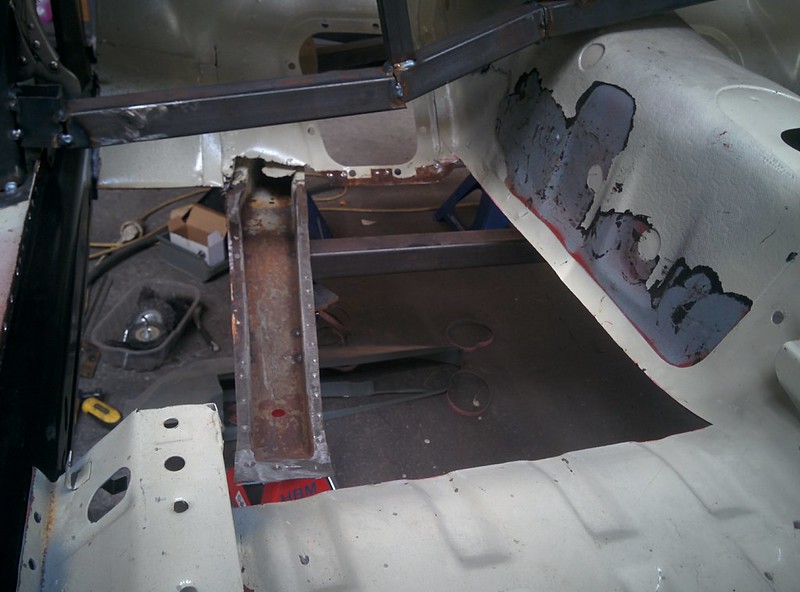
Next is removing the old inner sill. At first we thought it was just in front of the seat brackets but it turns out the previous owner welded a flat plate almost over the whole length�of the door gap.
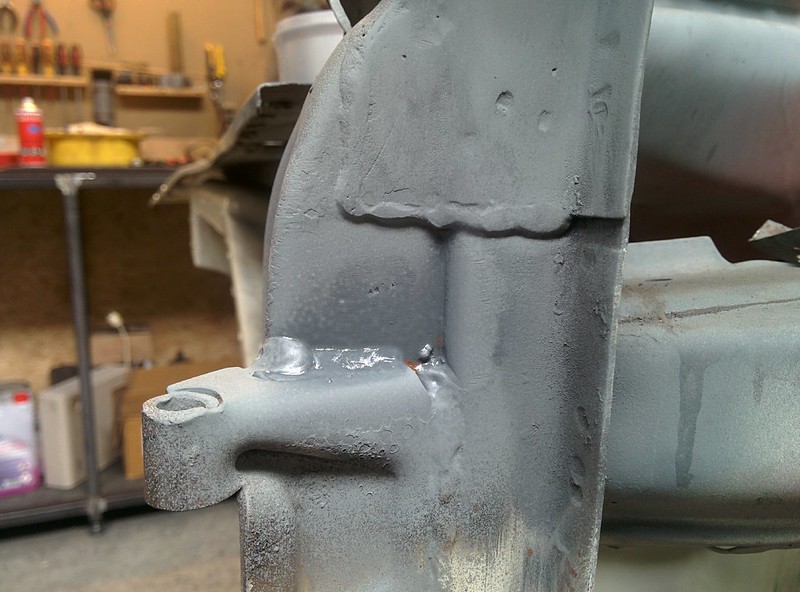
The plan is to remove�the old inner sill, clean up all the edges of the original floors and weld in the new inner sill by lining it up with the A pillar panel we just fitted. This means, removing all the spotwelds on the sills and floors. Before doing to I first welded in some more tubes to give the shell some more strength.
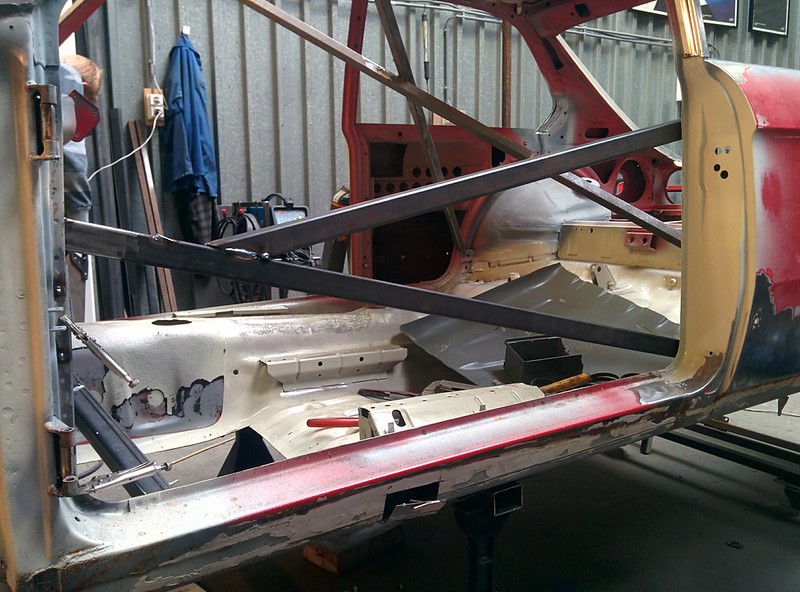
I also removed the spotwelds of the front seat bracket that sits against the inner sill.
Posted
Moderator


Sent from my Smartphone
Sent by a smartphone and not a smartperson!
Play Guess the Asking Price 'SEASON 4' as of Sunday the 29th of October 2017.
https://vwgolfmk1.org.uk/forum/index.php?page=topicview&id=chat%2Fmk1-golf-chat_2%2Fguess-the-asking-price_2
OLD.
https://vwgolfmk1.org.uk/forum/index.php?page=topicview&id=chat%2Fmk1-golf-chat_2%2Fold-guess-the-asking
Ever wondered who's behind the scenes of this forum?
https://vwgolfmk1.org.uk/index.php?page=committee
Mike
There's me building mine 28 years ago, almost finished!

Be proud of your VW Golf Mk1, it's very special!
Play Guess the Asking Price 'SEASON 4' as of Sunday the 29th of October 2017.
https://vwgolfmk1.org.uk/forum/index.php?page=topicview&id=chat%2Fmk1-golf-chat_2%2Fguess-the-asking-price_2
OLD.
https://vwgolfmk1.org.uk/forum/index.php?page=topicview&id=chat%2Fmk1-golf-chat_2%2Fold-guess-the-asking
Ever wondered who's behind the scenes of this forum?
https://vwgolfmk1.org.uk/index.php?page=committee
Mike
There's me building mine 28 years ago, almost finished!
Be proud of your VW Golf Mk1, it's very special!
Posted
Old Timer
Golf Cabrio said
Fantastic my friend and as always going the extra mile or two in your case!
Sent from my Smartphone
Thank you Mike, feels great to start working again on the 02. It's been way too long.
Posted
Old Timer
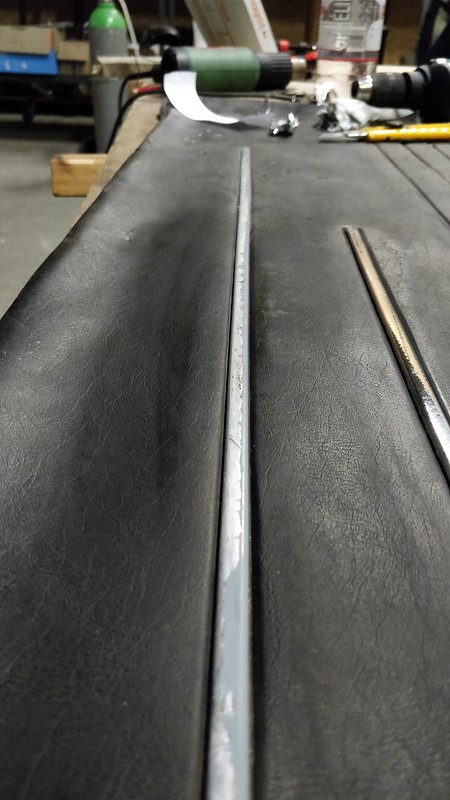
After cutting a horizontal line across the rocker, I was able to bend it over and have a look inside. The previous owner welded a flat piece over almost the whole length.
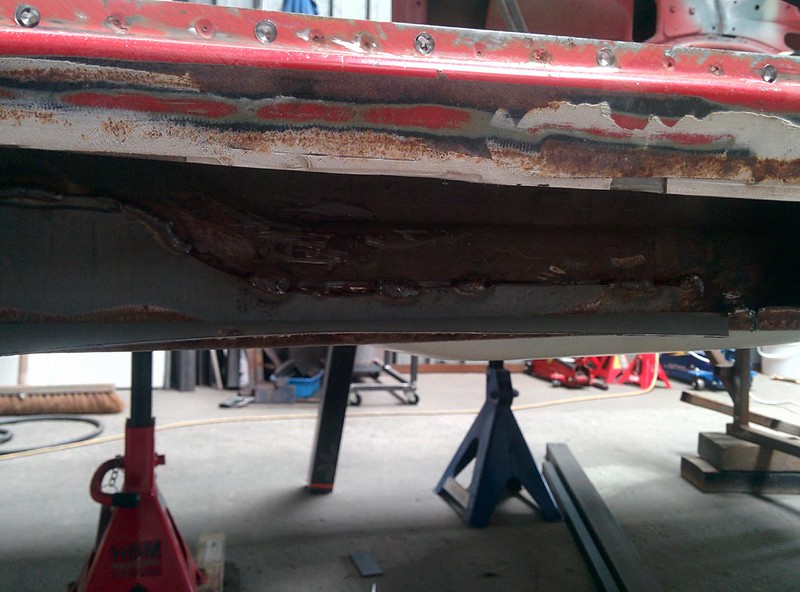
After removing the flat pieces and drilling out the original spot weld that sat under this panel, I also drilled all the ones on top of the rocker through.
After some fiddling and wiggling I got the old inner rocker�out.
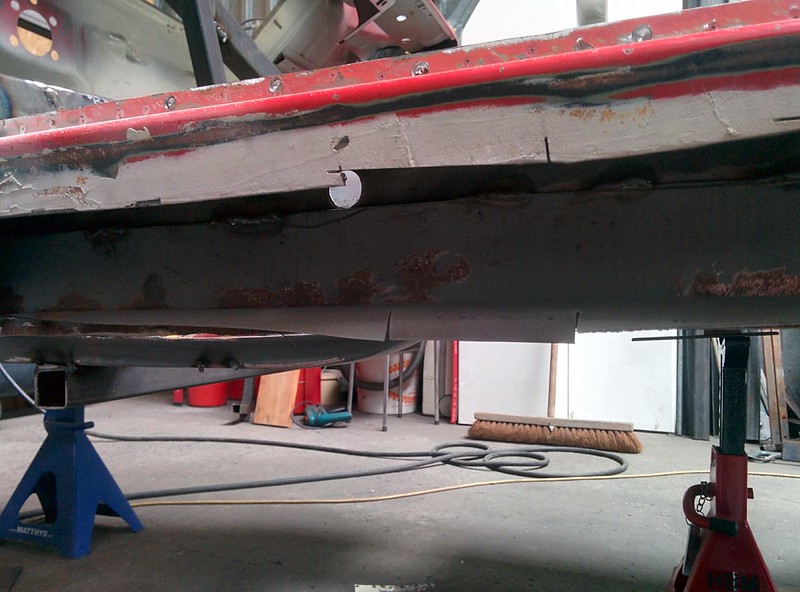
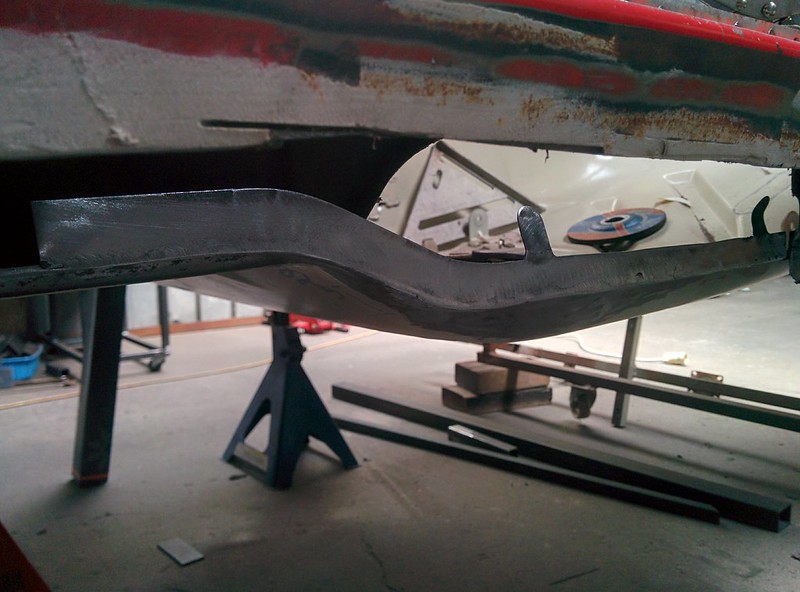
While removing some of the spot welds and stitch welds at the floor seam under the seat post, I cut some of the floor flanges into pieces. Turns out there was a section heavily pitted anyway so I decided to remove it. I'll later on weld on a new flange so I can plug weld it to the inner sill.
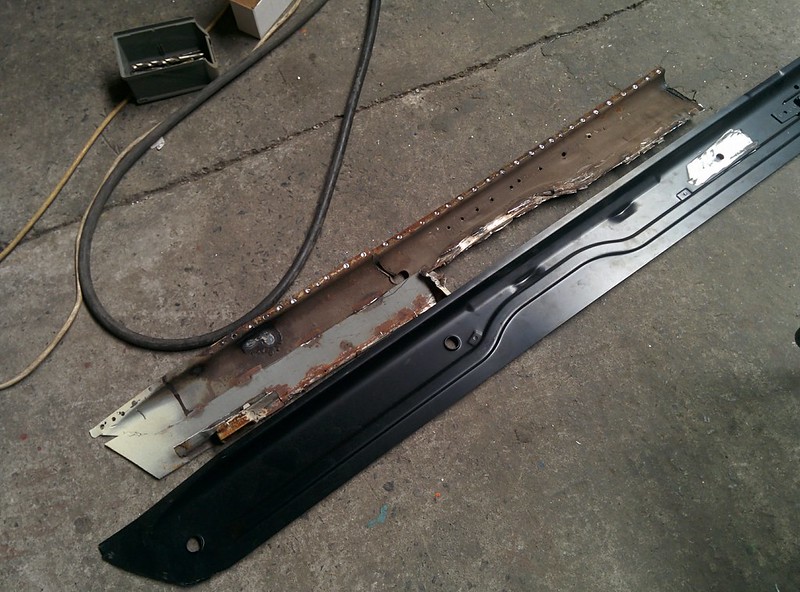
New and old piece pictured together. I'm glad we bought that new inner sill because forming/bending such a long thick piece would take ages.
I might try and go this week after work to the workshop to weld on the new flanges and clean up some other sections although I'm not sure how tired I will be after work. :p
Posted
Old Timer
Old Timer
Today I made some more progress on the drivers side inner sill and floor.
I started with repairing a small section of the floor, I'll later cut the floor on the red dotted line I drew;
Small patch panel made, fairly easy one this time
Welded in and ground smooth.
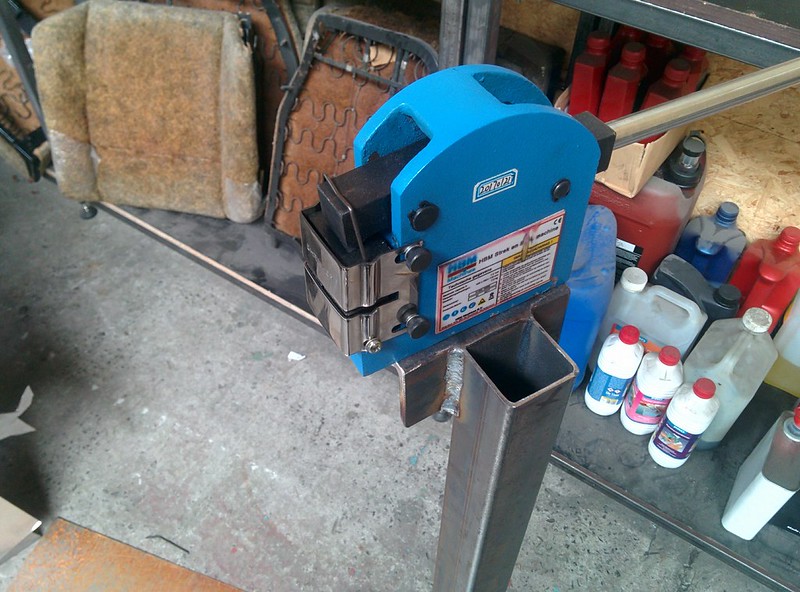
Next I made some new flanges for the floor panels, I started with cutting a long strip of metal and shrunk it with the shrinker, I got around Christmas,�to get the appropriate bends. I made it in two parts

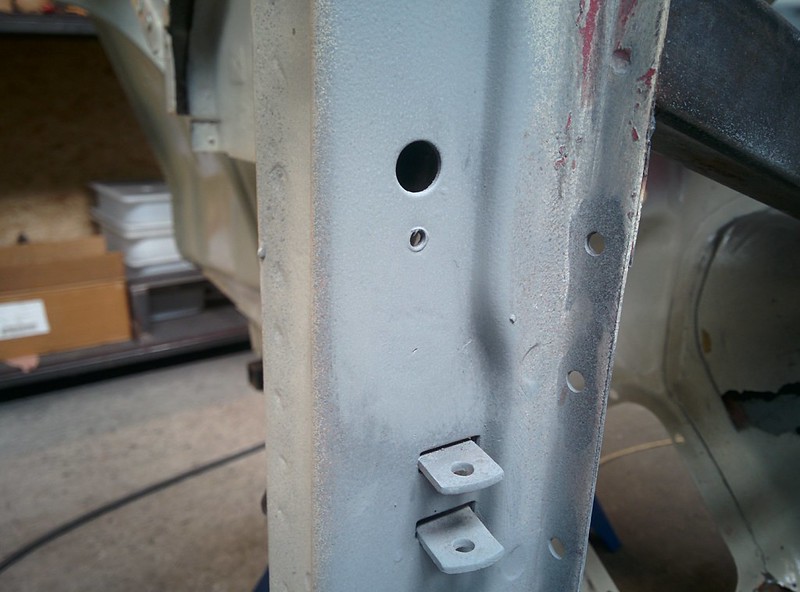
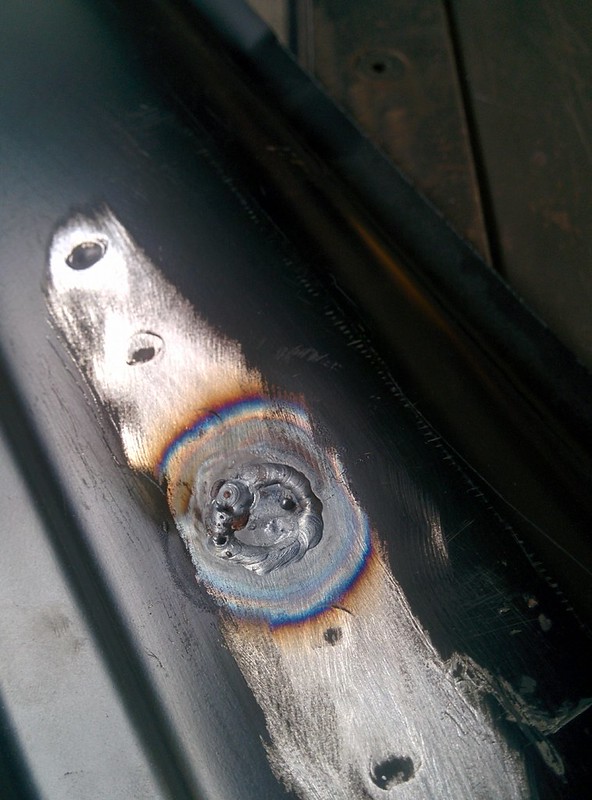
Next I welded a hole in the new inner sill shut, it had two different captive nuts welded on to it. I removed the one that the original sill did not have.
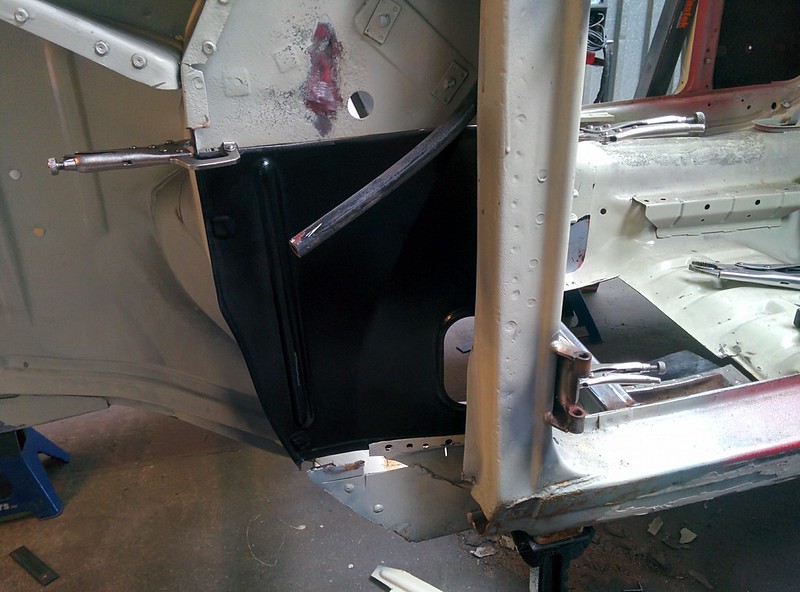
Next was time to cut the new inner sill & first time fitting it. Length wise it was pretty much spot on
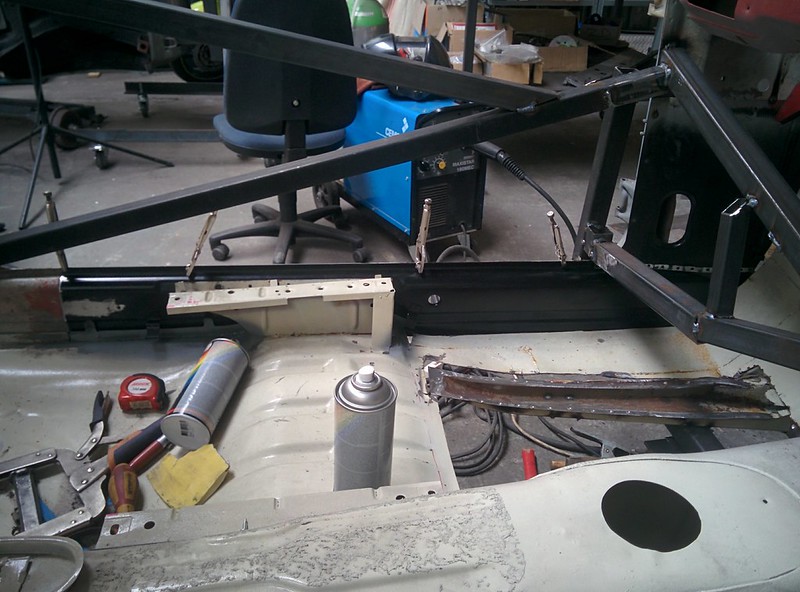
Front side at the inner A panel
inside shot
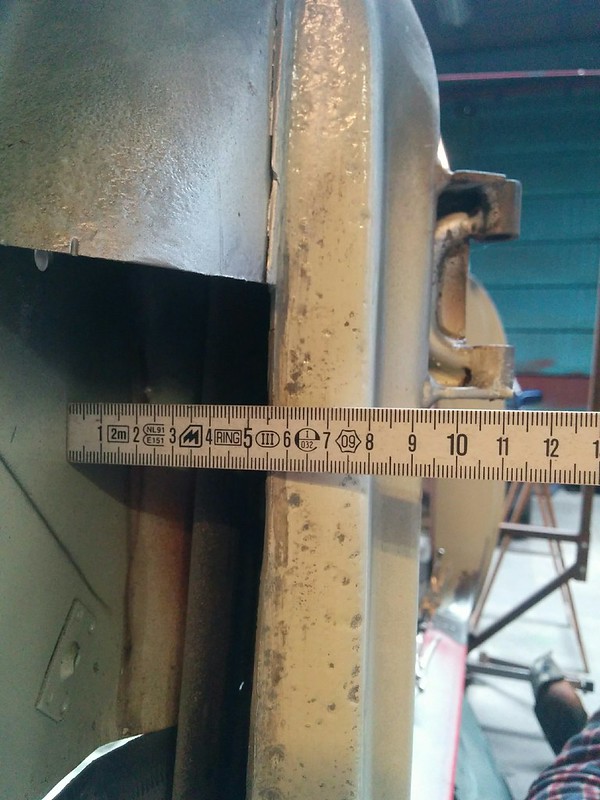
Next I wanted to try and fit the floor to make sure everything else was still ok. Turns out it's not close yet. Floor is still a bit too big (5-ish mm)
The problem I'm having is that the sill and inner a pillar panel�is not sitting flat.
When I push on the underside of the inner sill I can get them nice and flush.
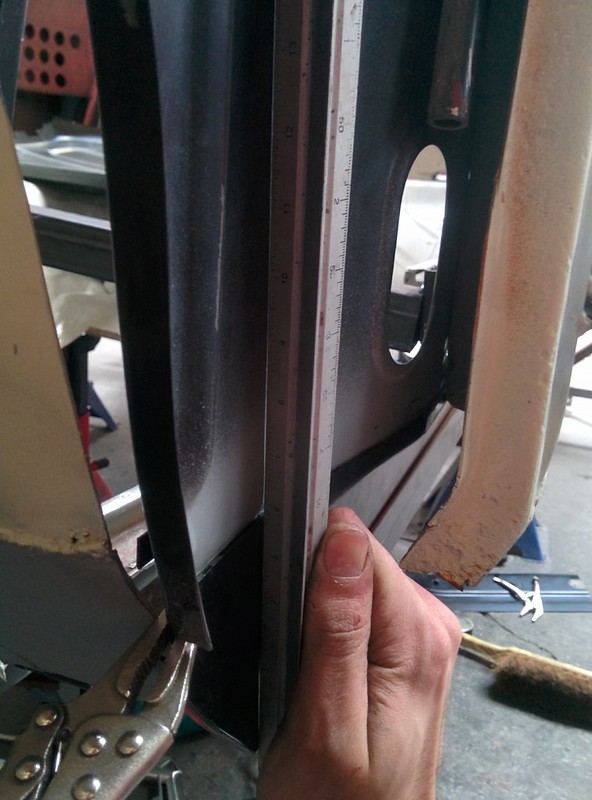
The problem I'm having it that the floor seems too wide and pushes the inner sill even more slanted. Because of that I can't push it flat again. I'll now try and measure the overall width from the underside of the passenger side to the drivers side front and rear and compare. This will let me know if the floor panel I got is to wide or the rocker is somehow pushed in?
Posted
Old Timer
watson said
Nice work as always Martijn. I like your workshop - so clean and tidy.
Thanks, Dave!
Still need to do some storage improving though

Posted
Old Timer
I'm currently busy with replacing the fuel tank of my BMW E30 325ix Touring and because it's my daily, it gets my priority over the 02.
I did buy some very nice rear interior panels for the Touring since we only had one with the chrome trim, all the others we have have no chrome. Both are in excellent condition considering their age. There is a company in Belgium that repairs cracks/tears in vinyl. We might get the doorcards�painted black again when we send our our dashboard in to get repaired and painted as it's quite faded and has a few small cracks.

Because the the chrome on most 02 door cards has or is falling off by now, we tested applying some aluminium tape to an extra card we have laying around and polished it. This gives a very nice result.
"before"
"after"

Old Timer
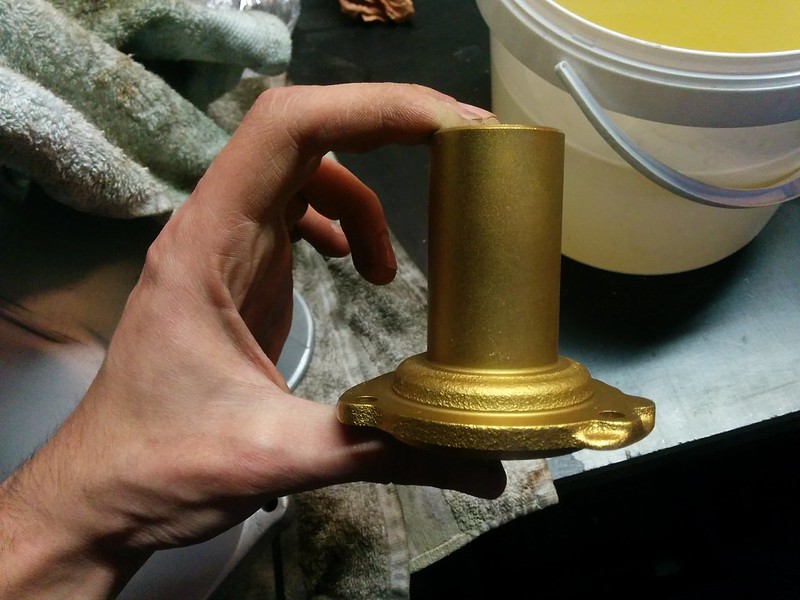
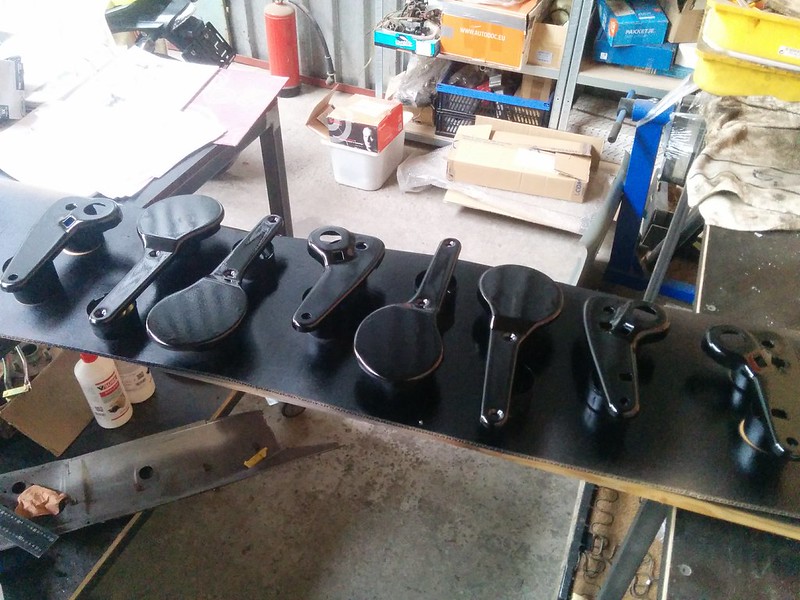
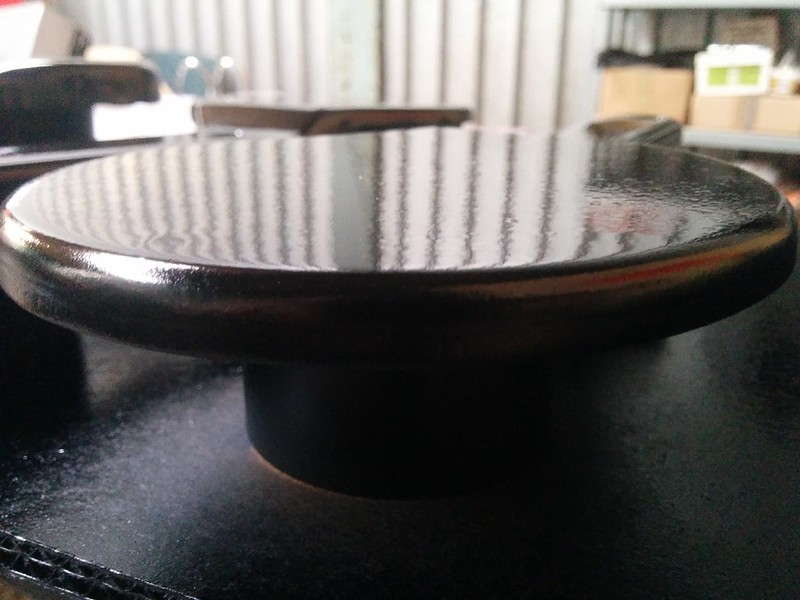
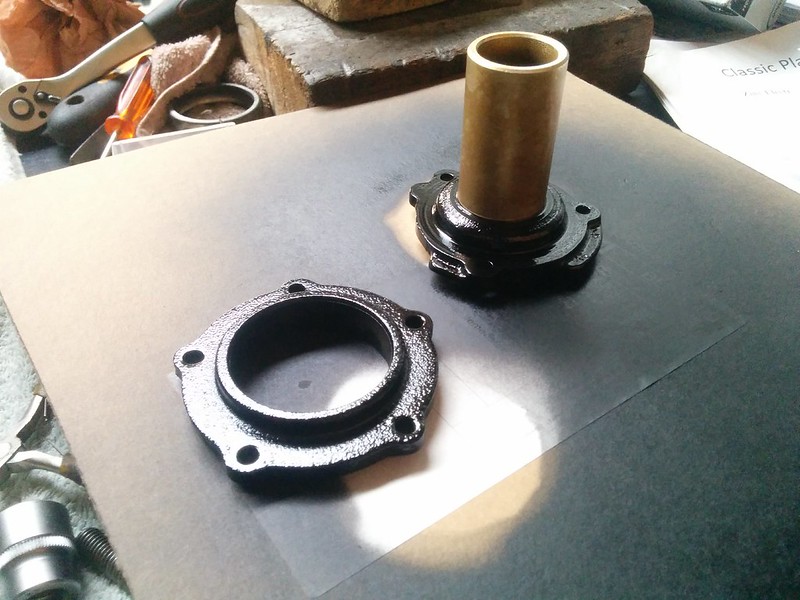
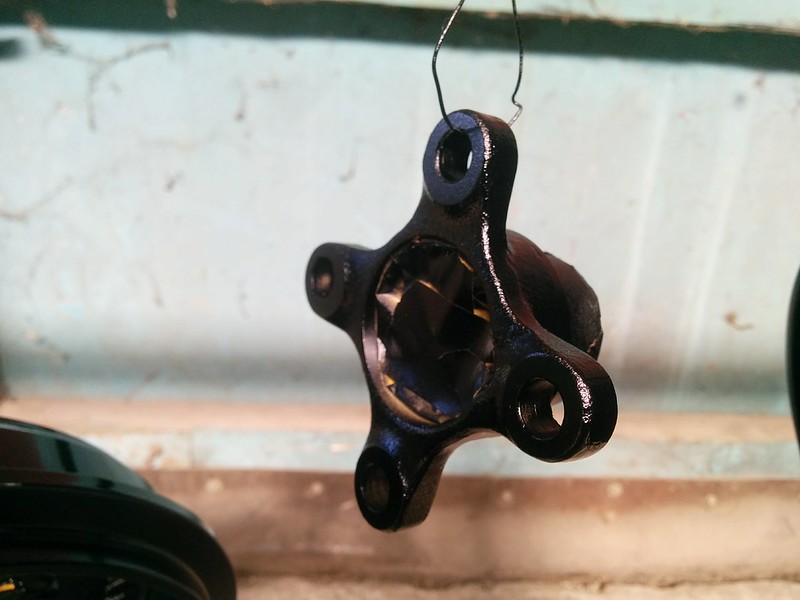
Release bearing guide (this one is a bit darker than the other ones as I let it sit just a bit too long it the yellow passivation bath)
Output shaft pieces
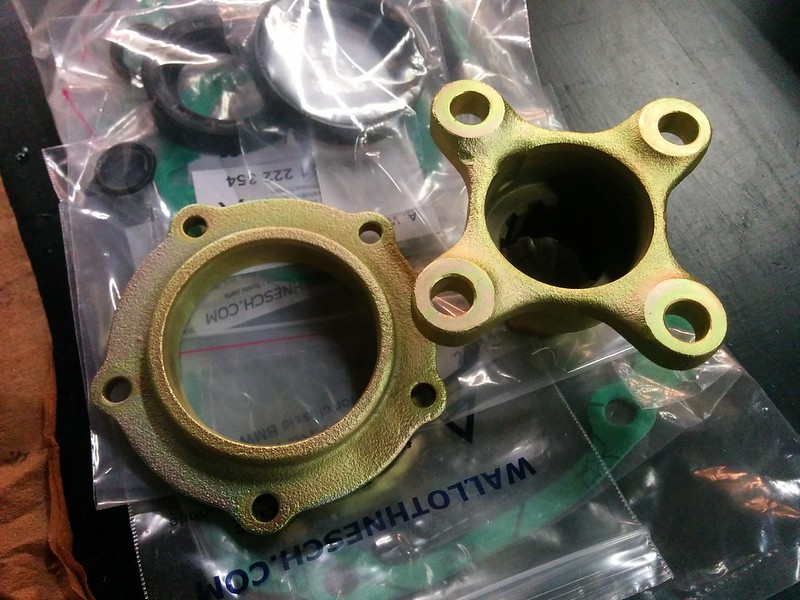
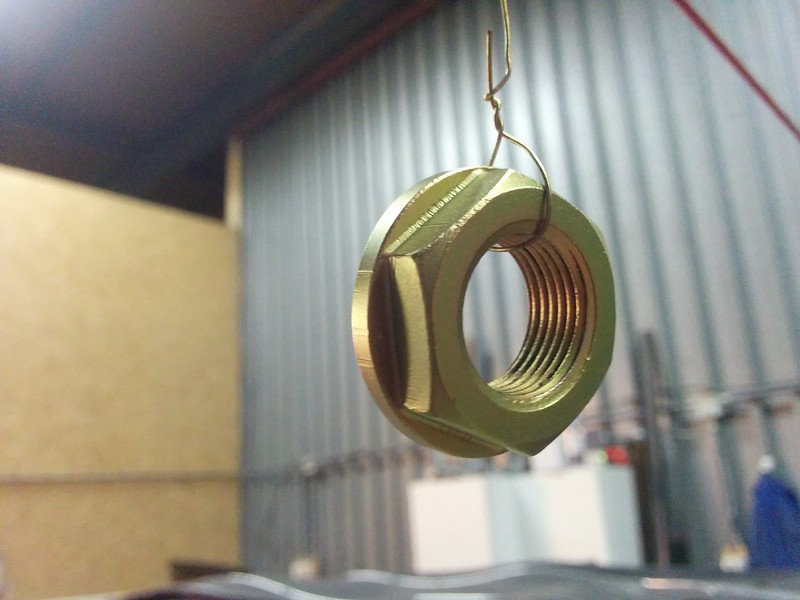
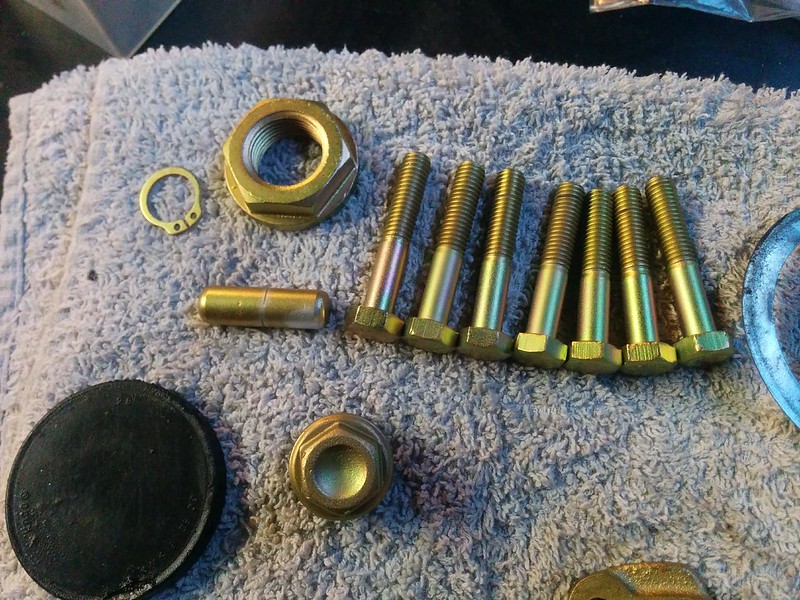
Some hardware, bolts are for the transmission, washer and circlip for the diff and alternator as we forgot them last time.
Diagnostic plug bracket

Overall very pleased with the results. We also got two new warmes for the electrolyte tank and passivation tank.
Posted
Moderator
To be honest I'm getting tired of writing how good all of your work is, it's simple exceptional!

So just to remind me and many of your followers.
If we take just the few parts above as an example, have you done all the work on them yourselves, such as the preparation right now to the finished product we see here?
Or do you need to farm out some or parts of the overall process?
Mike
Sent from my Smartphone
Sent by a smartphone and not a smartperson!
Play Guess the Asking Price 'SEASON 4' as of Sunday the 29th of October 2017.
https://vwgolfmk1.org.uk/forum/index.php?page=topicview&id=chat%2Fmk1-golf-chat_2%2Fguess-the-asking-price_2
OLD.
https://vwgolfmk1.org.uk/forum/index.php?page=topicview&id=chat%2Fmk1-golf-chat_2%2Fold-guess-the-asking
Ever wondered who's behind the scenes of this forum?
https://vwgolfmk1.org.uk/index.php?page=committee
Mike
There's me building mine 28 years ago, almost finished!
Be proud of your VW Golf Mk1, it's very special!
Posted
Old Timer
Golf Cabrio said
Fantastic work once again.
To be honest I'm getting tired of writing how good all of your work is, it's simple exceptional!
So just to remind me and many of your followers.
If we take just the few parts above as an example, have you done all the work on them yourselves, such as the preparation right now to the finished product we see here?
Or do you need to farm out some or parts of the overall process?
Mike
Sent from my Smartphone
Haha thanks Mike! Appreciate it.
We have done all of the work ourselves on the parts pictured above, cleaning/degreasing, sandblasting and then the plating itself.
However we did get a lot of other parts and a ton of bolts/nuts plated here locally. The parts we plate ourselves are things that were still assembled at the time we got everything plated or things we just plain forgot to get to the plater.
I hope that answers your question
Posted
Old Timer
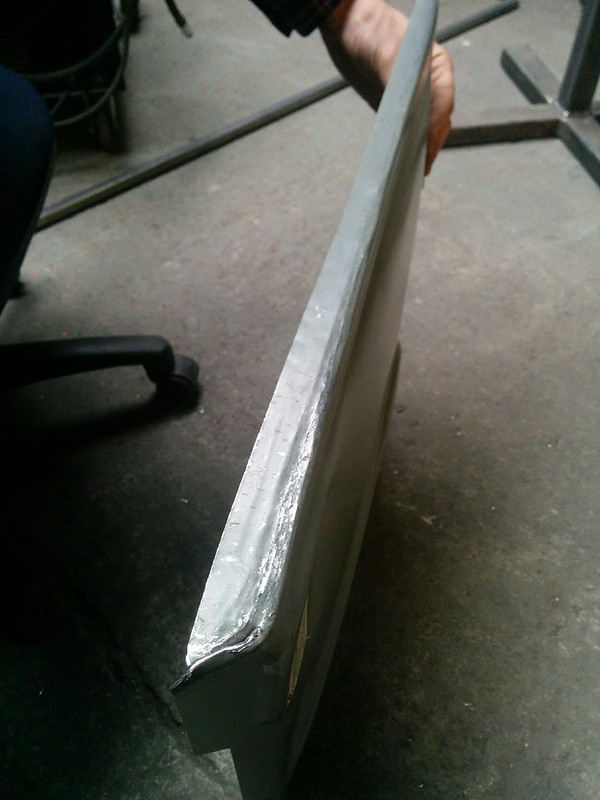
After making a post on the forum about my fitting issue, a few people suggested to hammer the flange over.
I started with hammering the flange over and over, this is how far I got.
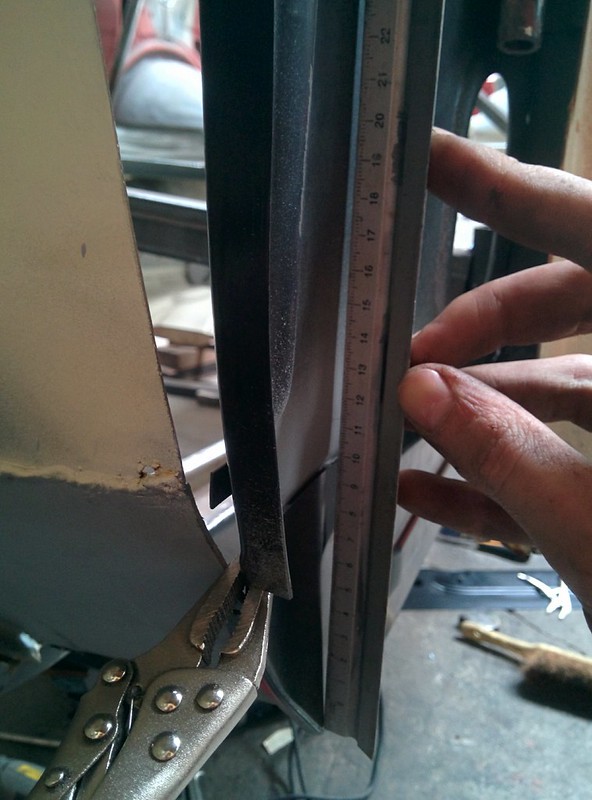
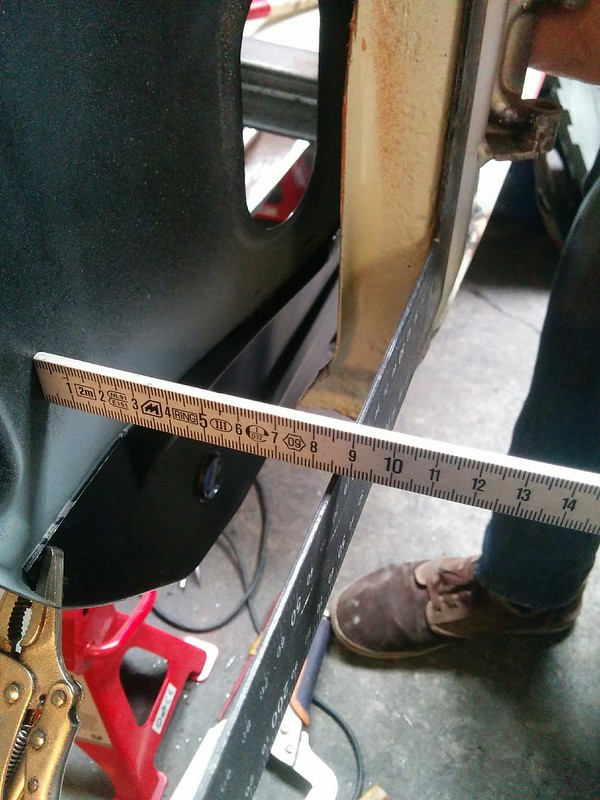
After fitting and dome more hammering, and fitting again it was still off.. Getting a bit frustrated, I decided to get the measuring tape out.
This is the width of the floor (from the flange to the little square tabs. roughly 32cm
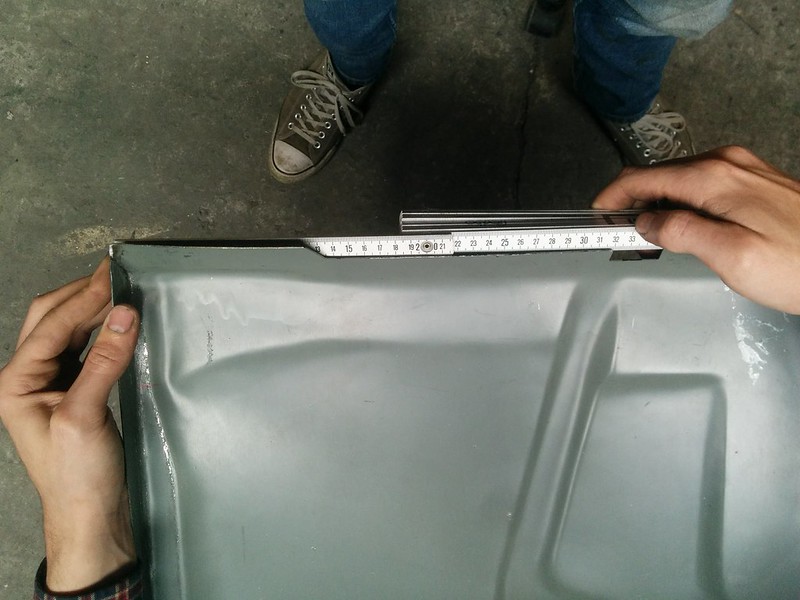
Since the old floor fits really good on the new one, we can assume these measurement are a good reference.
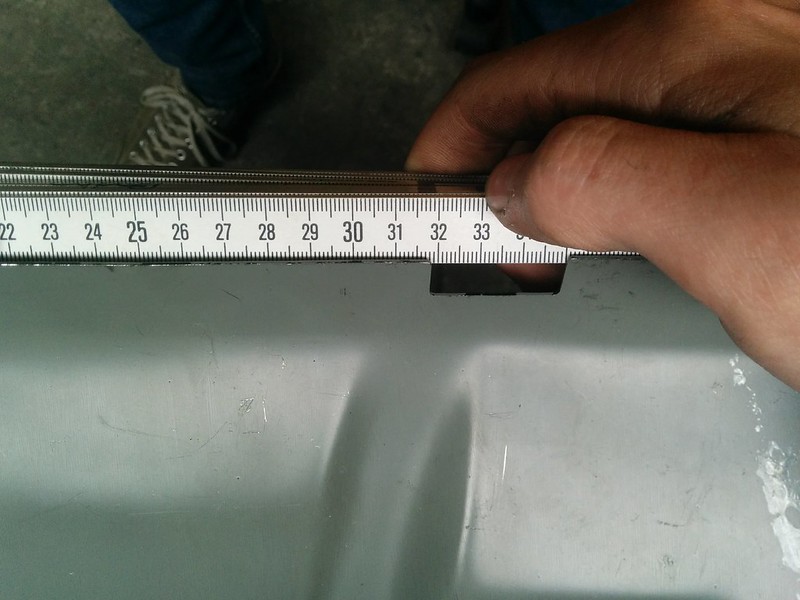
Now measuring this inside of the car, we get 30,5-30,7cm. That's a difference of 1,5cm that the floor is to wide from the flange to the metal tab..? that seems excessive�
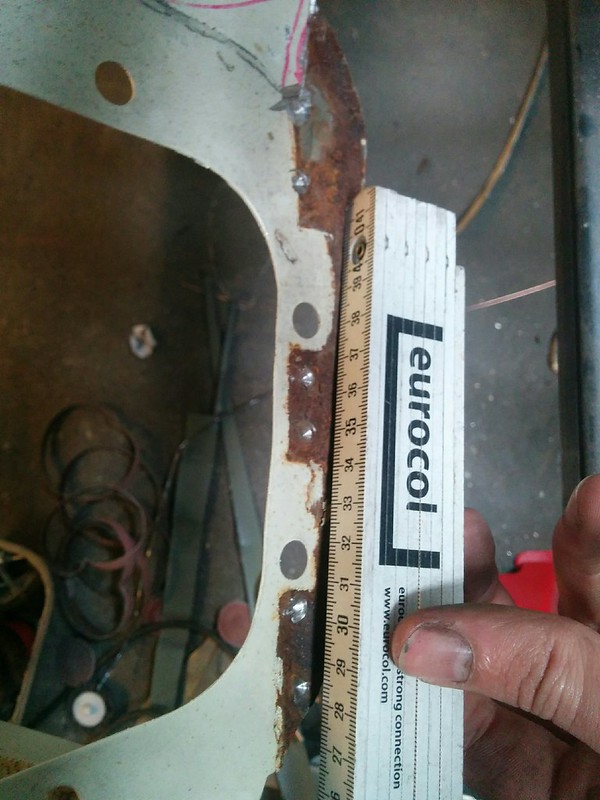
This is measured with the inner sill flat against the A pillar.

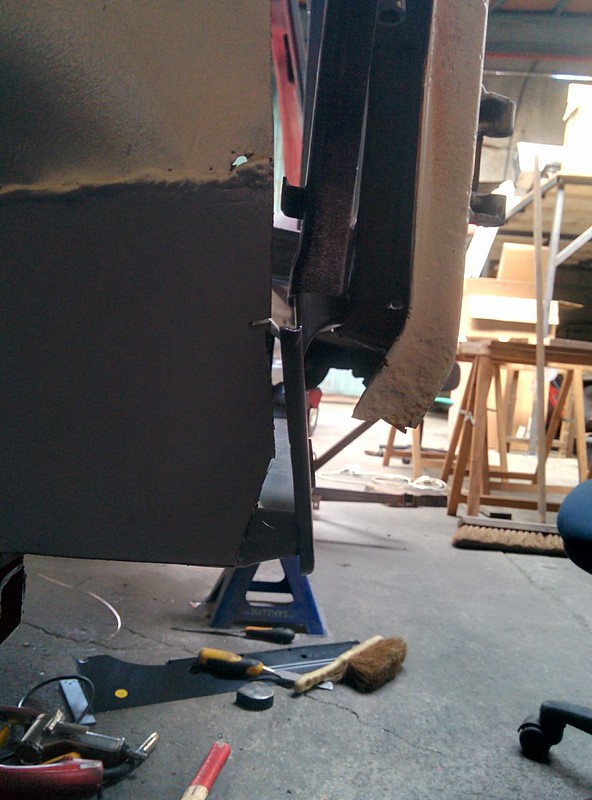
We then decided to check the inner A pillar panel by measuring the depth of the new A pillar panel (the other side fitted very nice so we should be able to trust these�measurements.
8cm at the top of the panel
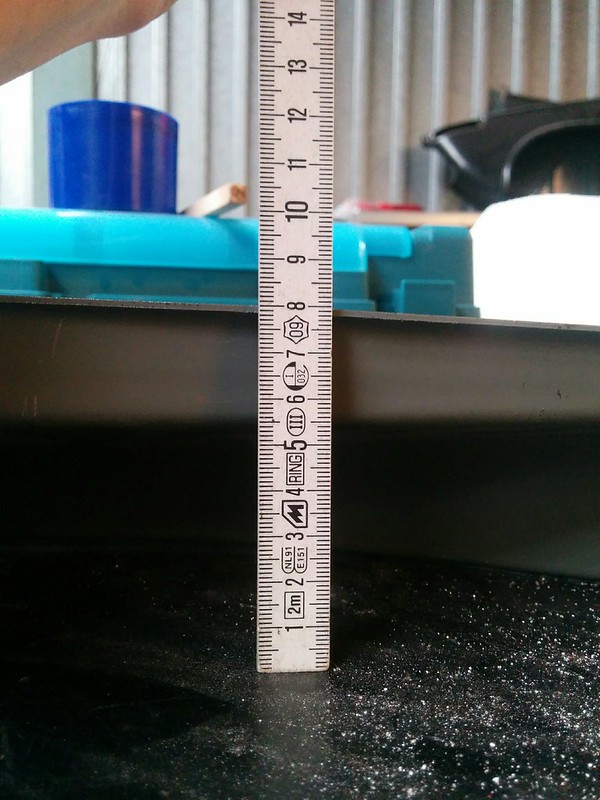
8,5cm at the bottom.
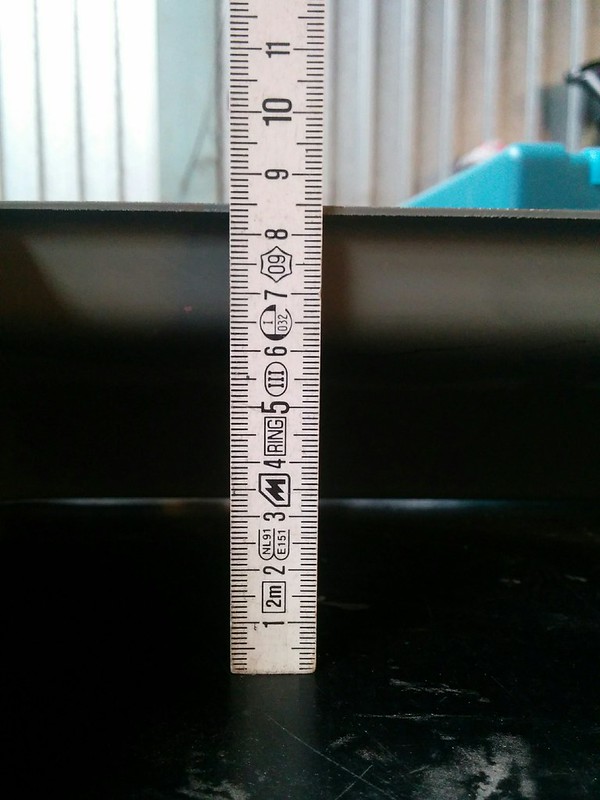
Now measuring the depth of the inner A panel, again with the inner sill flat against the A pillar. We also get 8cm at the top.
And 8,5 cm at the bottom.
This means that the inner sill it sitting correct, since we know that the A post that still needs to get welded in will fit nice and flush against the inner A post pannel. Thus I think we can concluded that the floor is too wide at the front of the car, it fit's fine at the rear.
Seeing this now, we should rather have cut a small portion out from the old floor and used sections of the new floor instead of completely cutting it out. No way back though. Should I just cut the floor in two? or try and cut a slice out of it to get it more in? this will however cause the front to be at an angle..
Moderator
Sent from my Smartphone
Sent by a smartphone and not a smartperson!
Play Guess the Asking Price 'SEASON 4' as of Sunday the 29th of October 2017.
https://vwgolfmk1.org.uk/forum/index.php?page=topicview&id=chat%2Fmk1-golf-chat_2%2Fguess-the-asking-price_2
OLD.
https://vwgolfmk1.org.uk/forum/index.php?page=topicview&id=chat%2Fmk1-golf-chat_2%2Fold-guess-the-asking
Ever wondered who's behind the scenes of this forum?
https://vwgolfmk1.org.uk/index.php?page=committee
Mike
There's me building mine 28 years ago, almost finished!
Be proud of your VW Golf Mk1, it's very special!
Play Guess the Asking Price 'SEASON 4' as of Sunday the 29th of October 2017.
https://vwgolfmk1.org.uk/forum/index.php?page=topicview&id=chat%2Fmk1-golf-chat_2%2Fguess-the-asking-price_2
OLD.
https://vwgolfmk1.org.uk/forum/index.php?page=topicview&id=chat%2Fmk1-golf-chat_2%2Fold-guess-the-asking
Ever wondered who's behind the scenes of this forum?
https://vwgolfmk1.org.uk/index.php?page=committee
Mike
There's me building mine 28 years ago, almost finished!
Be proud of your VW Golf Mk1, it's very special!
Old Timer
There are a few specs of dirt in the paint as it was a bit windy. I don't think that this will be a problem though because we are going to spray them with some splatter paint.
I also painted some of the parts for the transmission so hopefully we can get this one together this weekend.
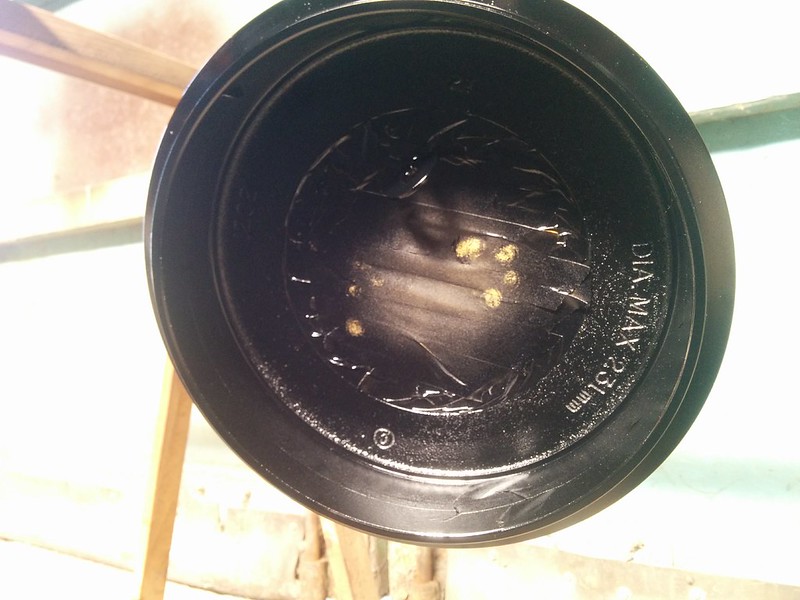
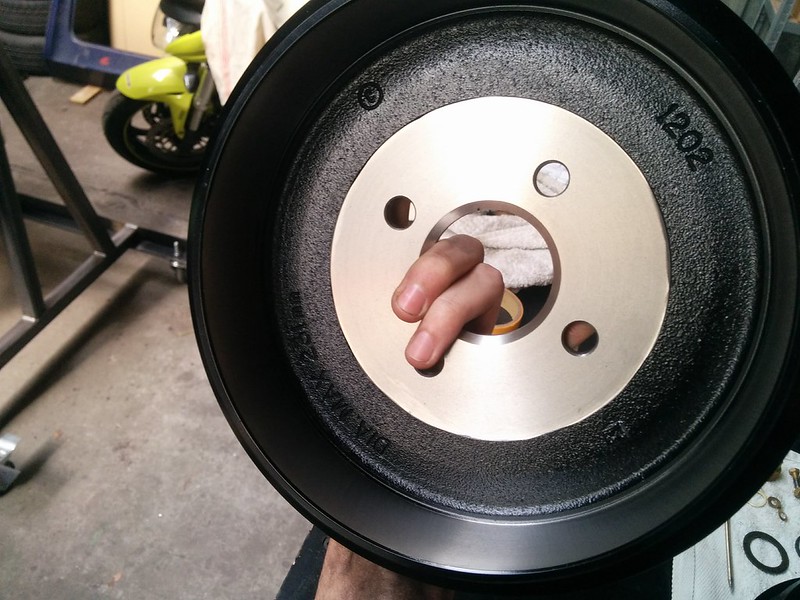
After painting those parts, I still had some paint left so I decided to already paint the rear brake drums too.
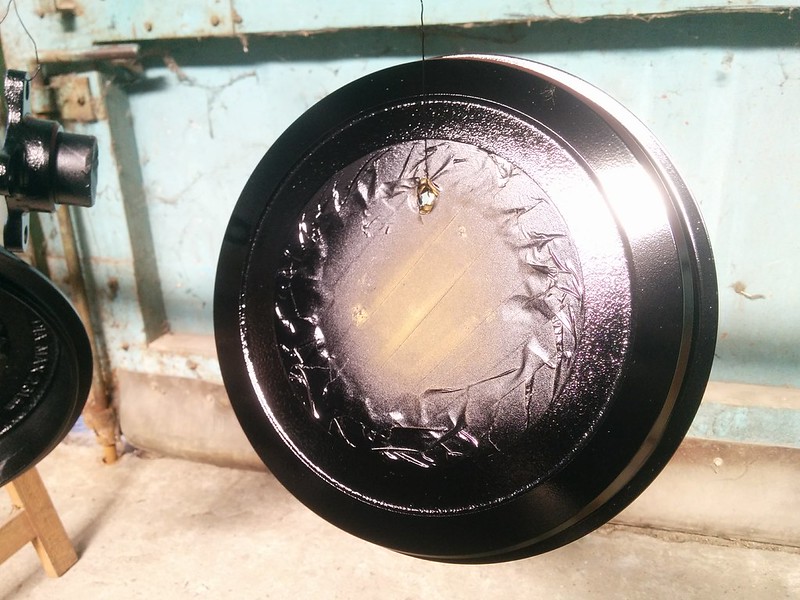
I even painted the inside too
Old Timer
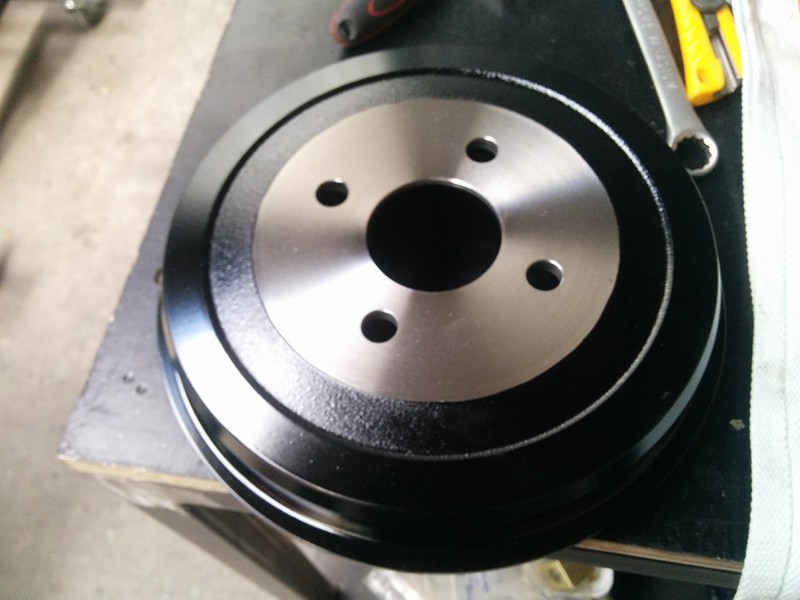
Started with removing the tape of the parts I painted yesterday. Turned out great!
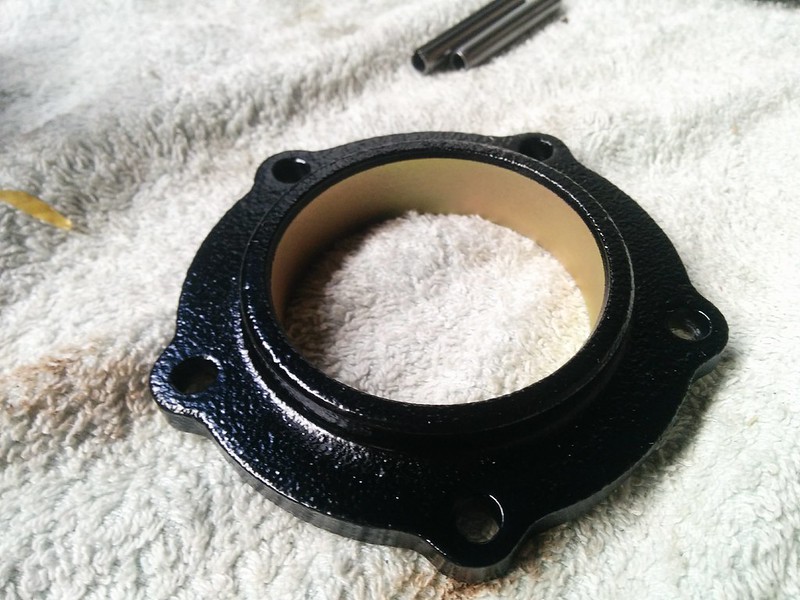
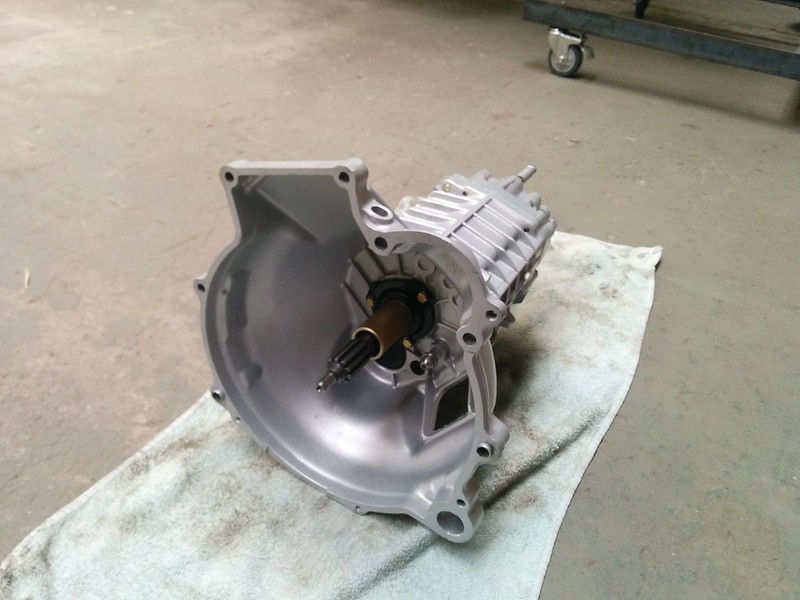
Rear sealing cover installed with a new oil seal and gasket. Using a L-profile bar with two holes in it so we are able to hold the flange while torquing the big nut of the output shaft. Added some cloth between both parts so we don't scratch the paint
Securing plate tapped into place.
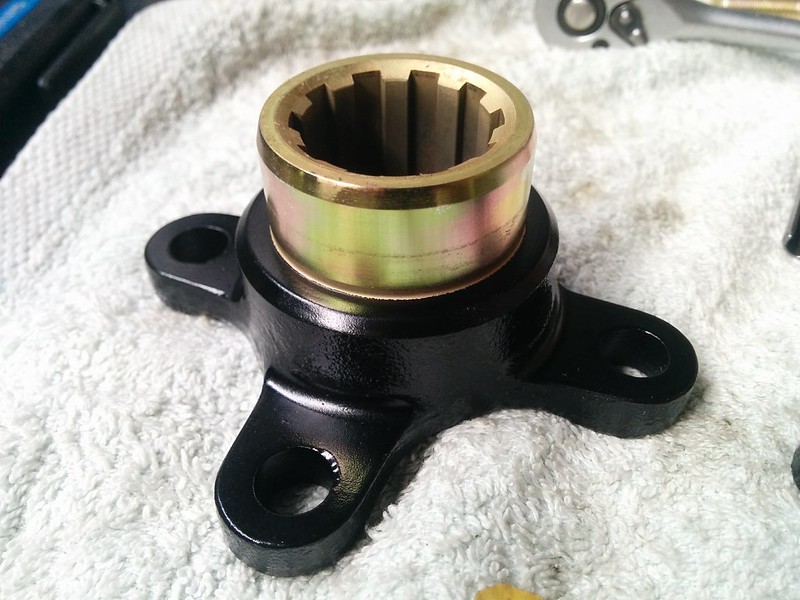
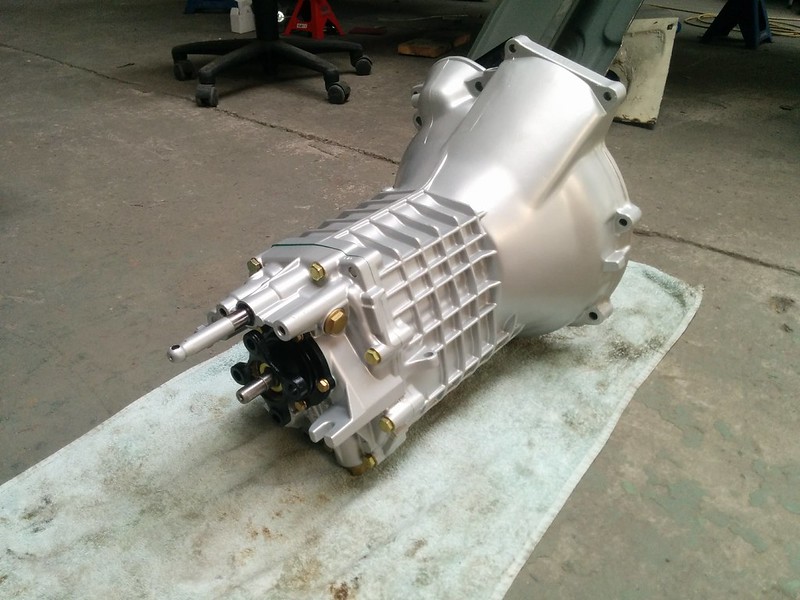
Then it was time to assemble the gear assembly into the bellhousing. After fiddling a bit and lining up all the shafts, it slit together. The last 15-20mm we forced the two halves together with the bolts.
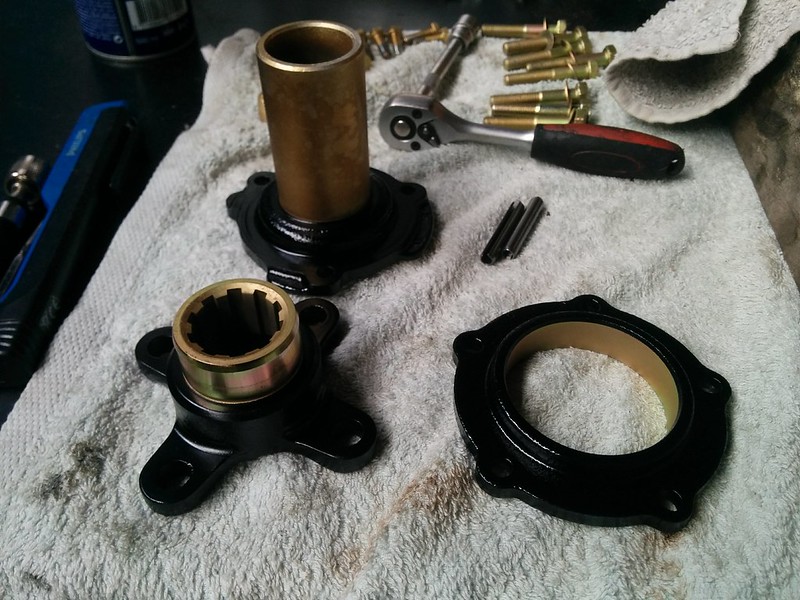
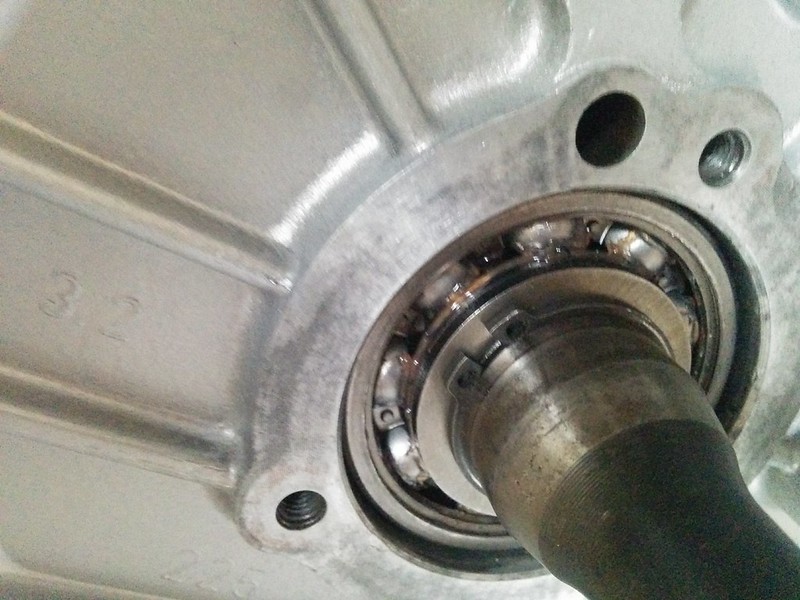
Because of the tight fit of the bearing and input shaft, the bearing slid out a bit.
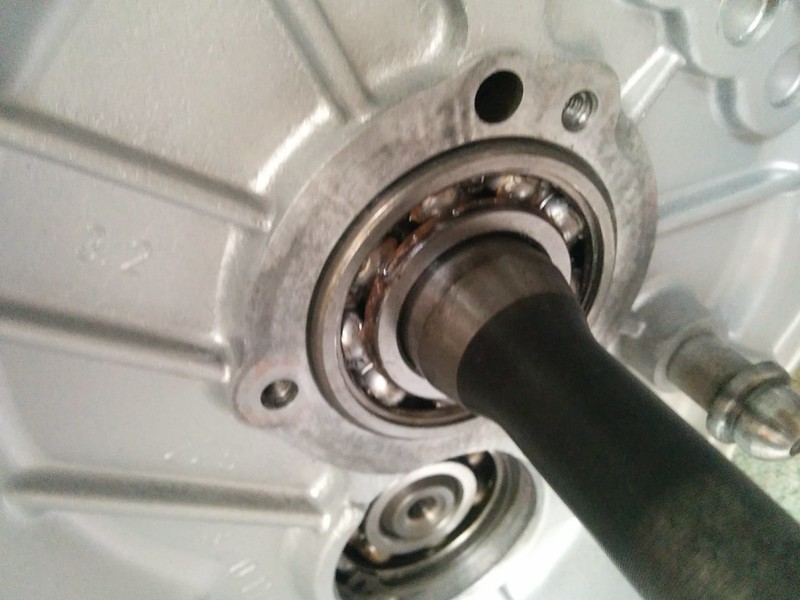
BMW advises to use their special tool to make sure the bearing doesn't slide out while putting the input shaft (and the gear assembly) into the bellhousing.
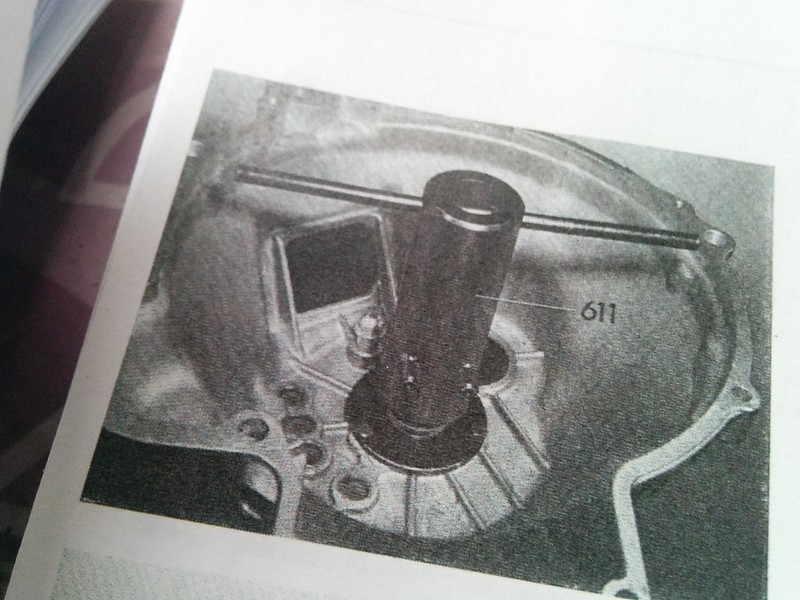
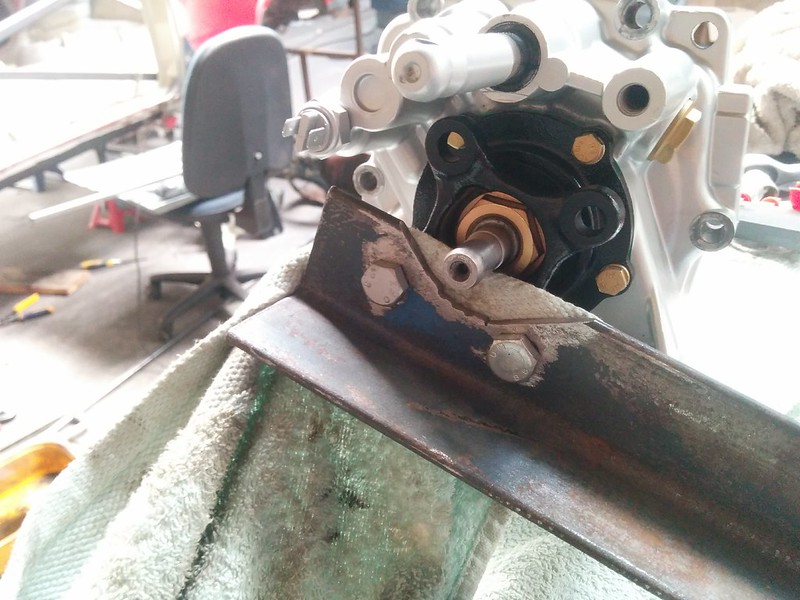
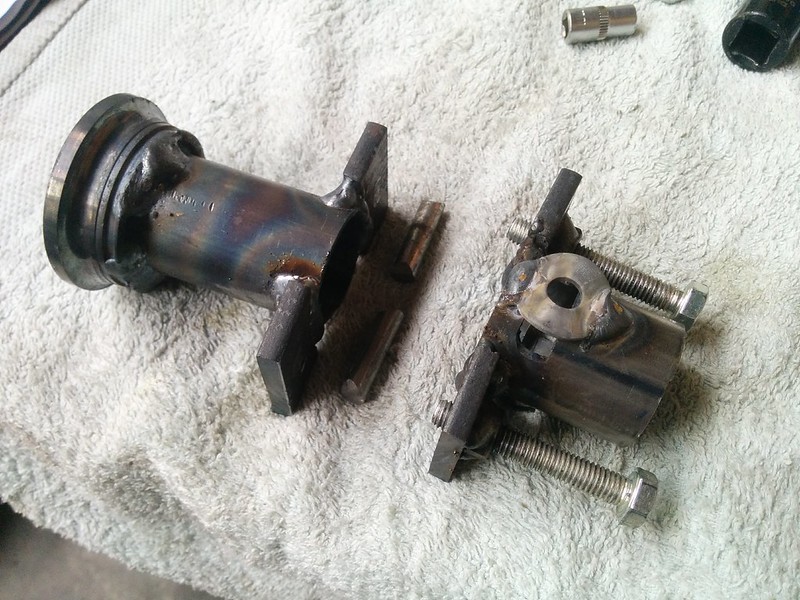
After tapping the bearing back into the housing, we started making our own tool. This is what we came up with. An old bearing race pressed against the bearing in the bellhousing while pulling the shaft through it.
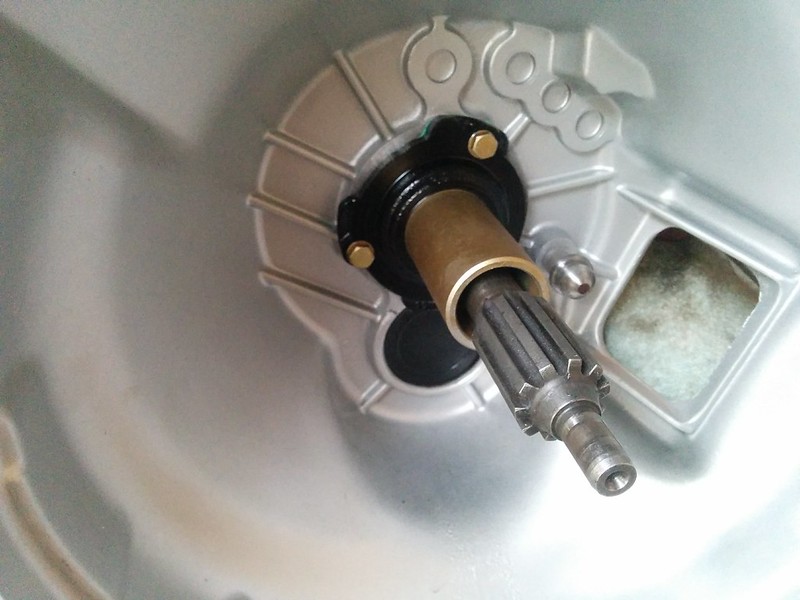
After it's all the way in, we can add the shims and circlips
And last thing to do was assembling the throwout bearing and a new seal cover below it.
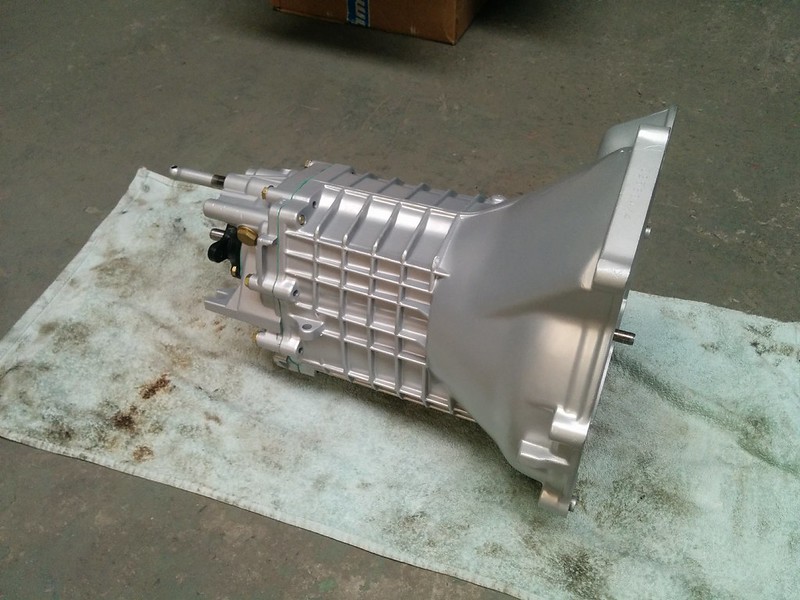
Very pleased with the end result. Meanwhile it's all packaged into a big box waiting to get assembled into the car
We also wanted to splatter paint the seat hinges but is was too windy outside. We decided to clean up the workshop instead.
The rear brake drums turned out nice too. The bare metal got oiled up again so it won't flash rust.
0 guests and 0 members have just viewed this: None.