


BMW 2002 Touring '74 Full restoration project


Old Timer

Golf Cabrio said
Simply awesome work guys but then how many times do I and everyone else have to say that! 😂
Keep this up and we'll run out of superlatives. 🤔😉👍🏼
Mike
Thank you, Mike!
Posted
Old Timer

Old Timer
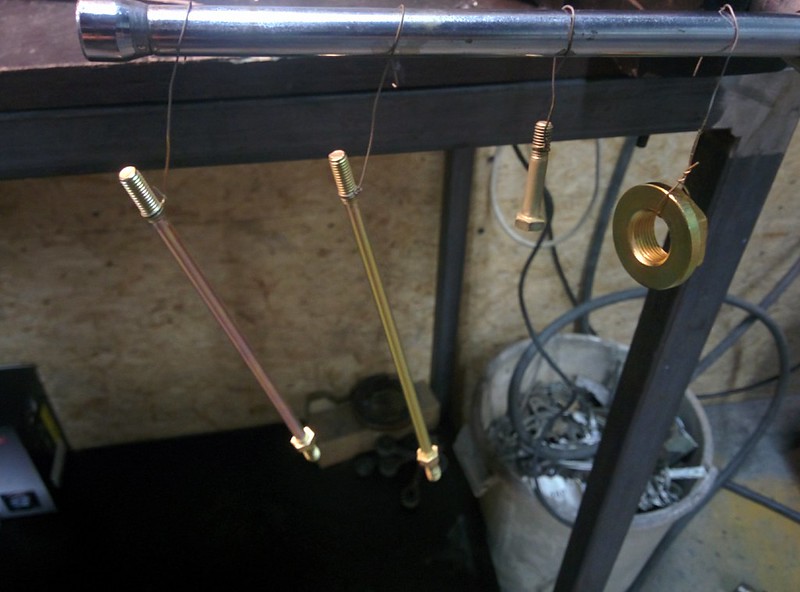
We got a plating kit from the UK a while ago and made our first plating test yesterday after work.
All the washing and dipping buckets in the correct order. I think 15 in total.
This is the zinc plating tank, by changing the amperage your can vary the thickness and speed of the process. The amperage also depends on the surface area of all of the parts.
The kit comes with a resistor wire for adjusting the amperage but I'm planning on switching this out with a potentiometer so it'll be easier to adjust�
Finished results after dipping it in the yellow passivation tank
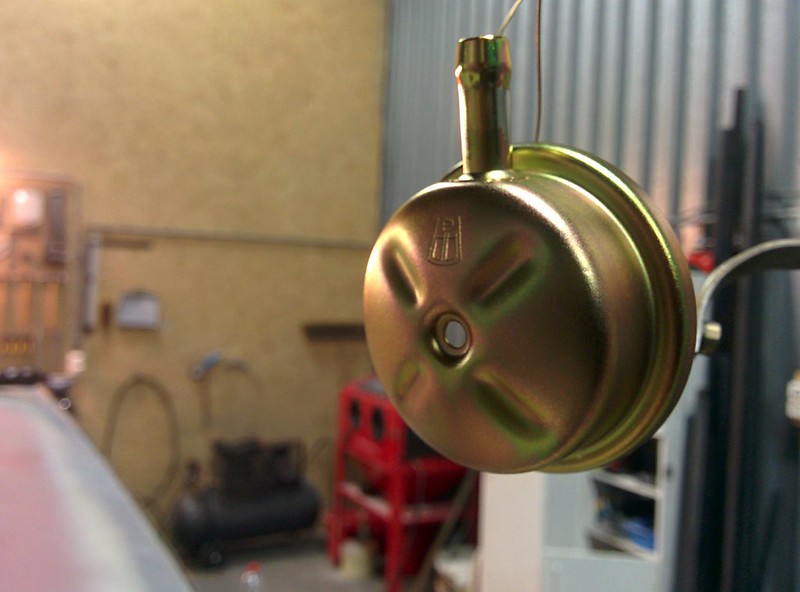
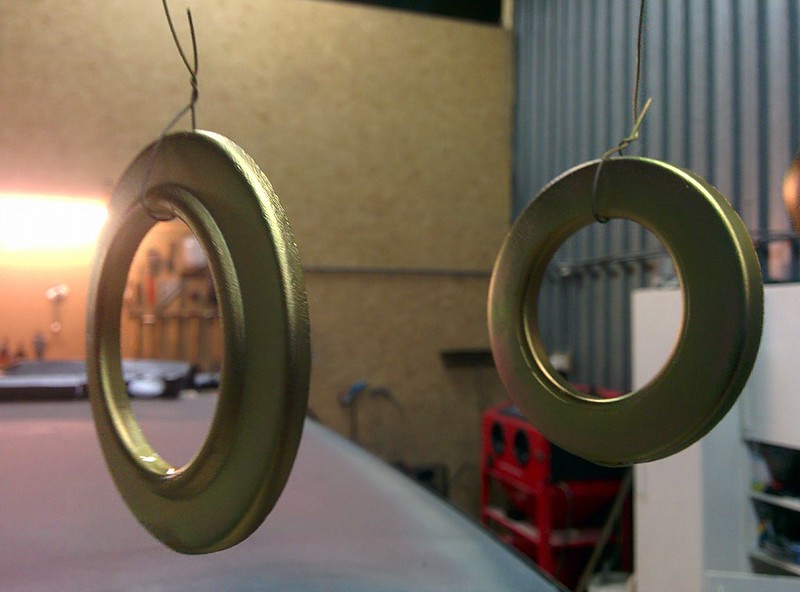
Very pleased with the results we got so far.

Moderator


Sent by a smartphone and not a smartperson!
Play Guess the Asking Price 'SEASON 4' as of Sunday the 29th of October 2017.
https://vwgolfmk1.org.uk/forum/index.php?page=topicview&id=chat%2Fmk1-golf-chat_2%2Fguess-the-asking-price_2
OLD.
https://vwgolfmk1.org.uk/forum/index.php?page=topicview&id=chat%2Fmk1-golf-chat_2%2Fold-guess-the-asking
Ever wondered who's behind the scenes of this forum?
https://vwgolfmk1.org.uk/index.php?page=committee
Mike
There's me building mine 28 years ago, almost finished!

Be proud of your VW Golf Mk1, it's very special!
Play Guess the Asking Price 'SEASON 4' as of Sunday the 29th of October 2017.
https://vwgolfmk1.org.uk/forum/index.php?page=topicview&id=chat%2Fmk1-golf-chat_2%2Fguess-the-asking-price_2
OLD.
https://vwgolfmk1.org.uk/forum/index.php?page=topicview&id=chat%2Fmk1-golf-chat_2%2Fold-guess-the-asking
Ever wondered who's behind the scenes of this forum?
https://vwgolfmk1.org.uk/index.php?page=committee
Mike
There's me building mine 28 years ago, almost finished!
Be proud of your VW Golf Mk1, it's very special!
Posted
Old Timer
Golf Cabrio said
Martin their's clearly no limit to your talents! 😉 👍🏼
Thank you, Mike!
Old Timer
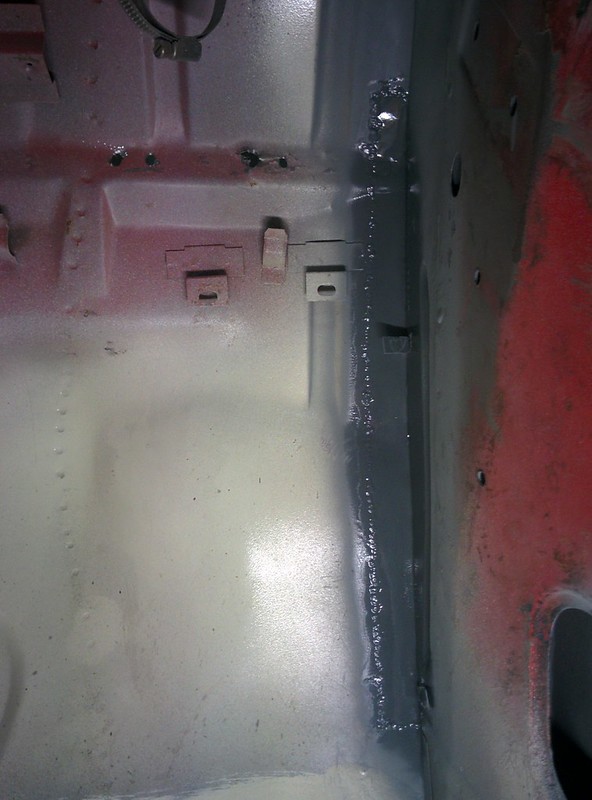
I started with cutting out some rot at the flange where the firewall was spot welded on to.
New piece welded in and ground smooth
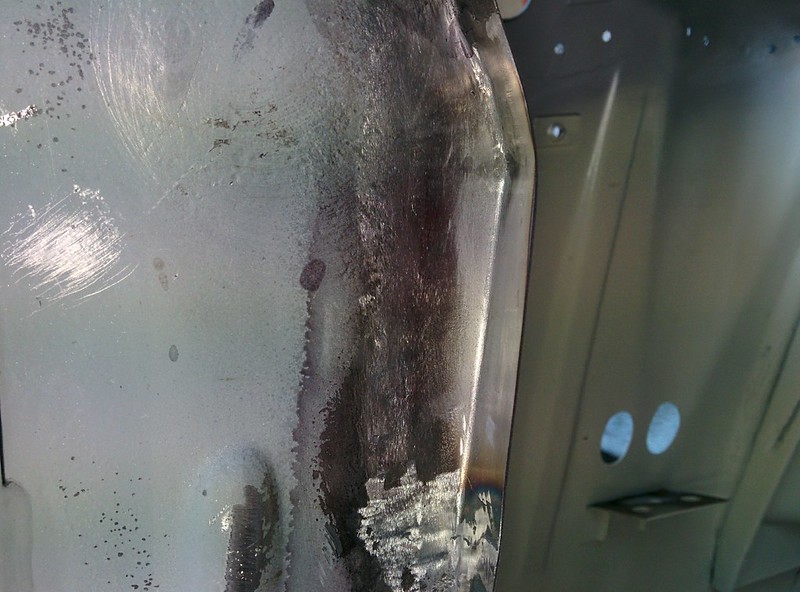
I also replaced a little piece of the flange itself as there was some heavy pitting
It took quite a while to get the new panel made and lined up nice and flush but it's in. I left the overhanging flange a little big, I'll grind this one back to the original size, roughly 5mm. I still need to grind the welds smooth though.
Same thing for the inside, also have to still grind them all smooth.
Old Timer
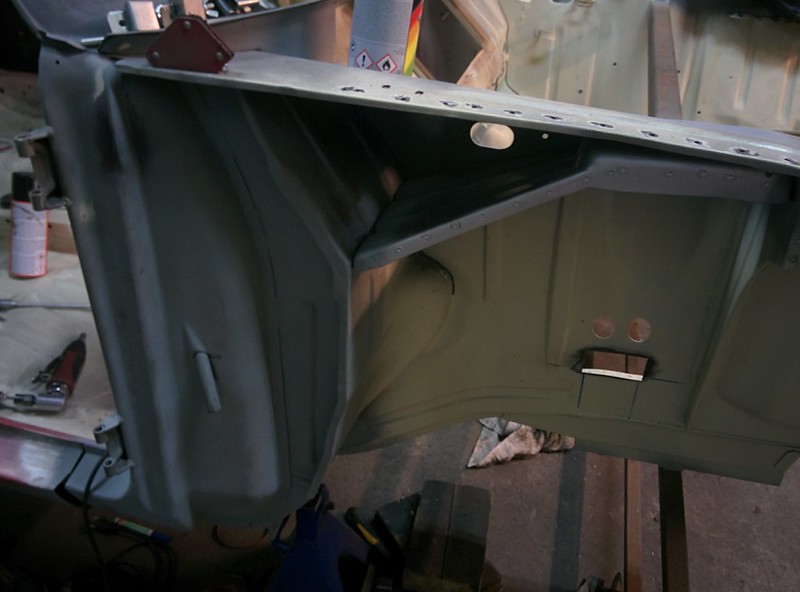
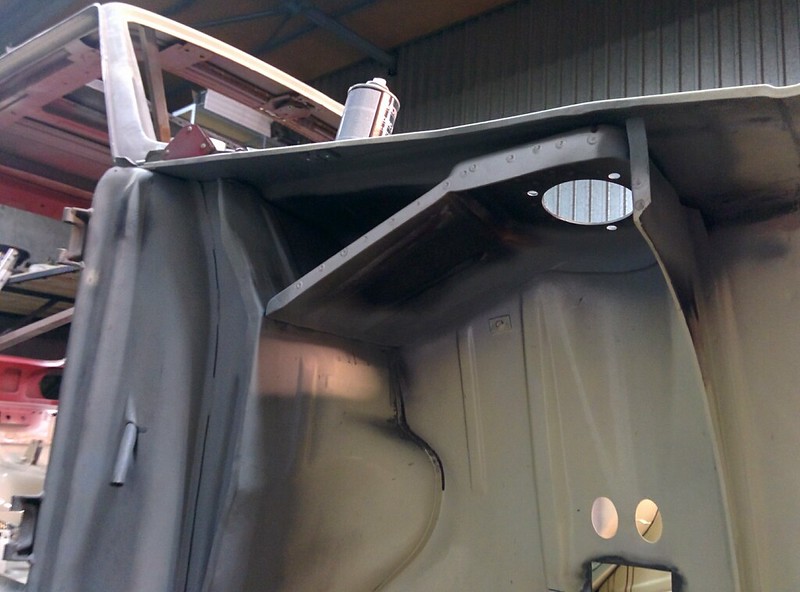
Before I was able to weld in the shock support piece I had to weld a new little piece on the firewall.
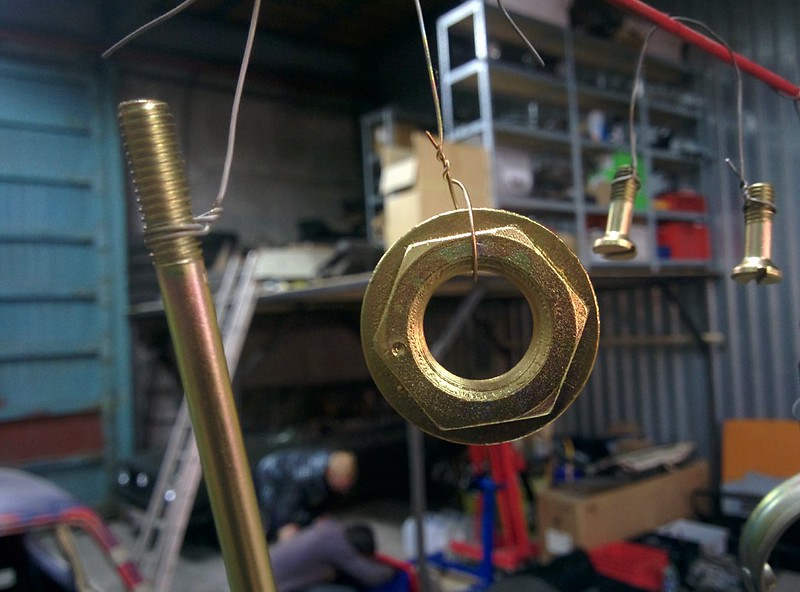
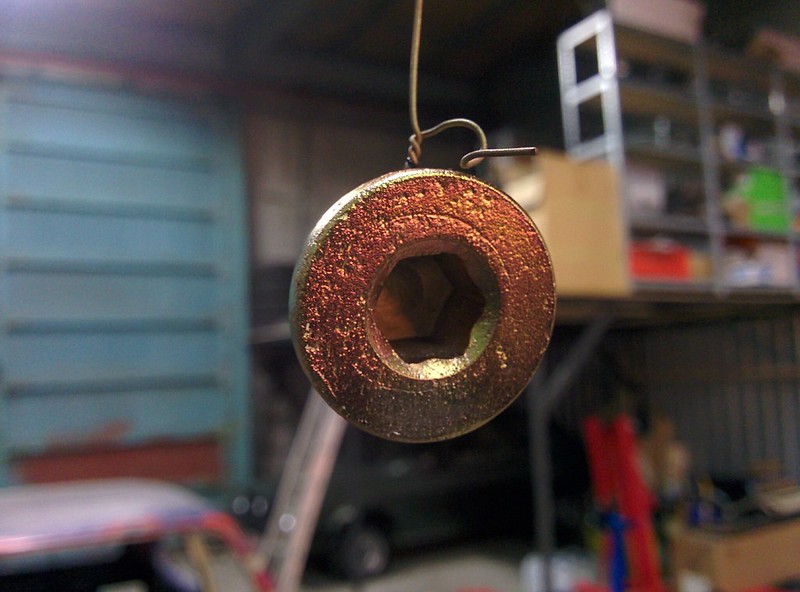
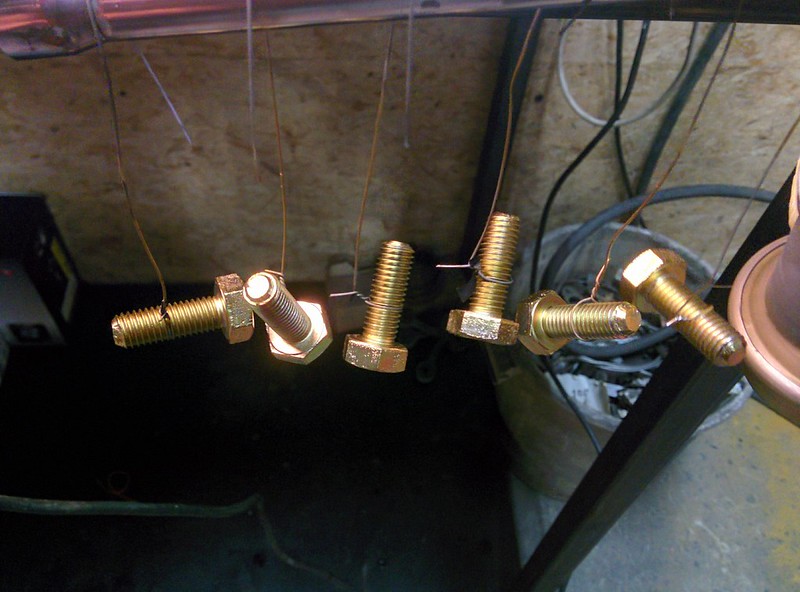
While I was welding, my brother finished the plating of the bolts. We had to fine tune a few things so we would get better results.
We'll rebuild the diff somewhere next week
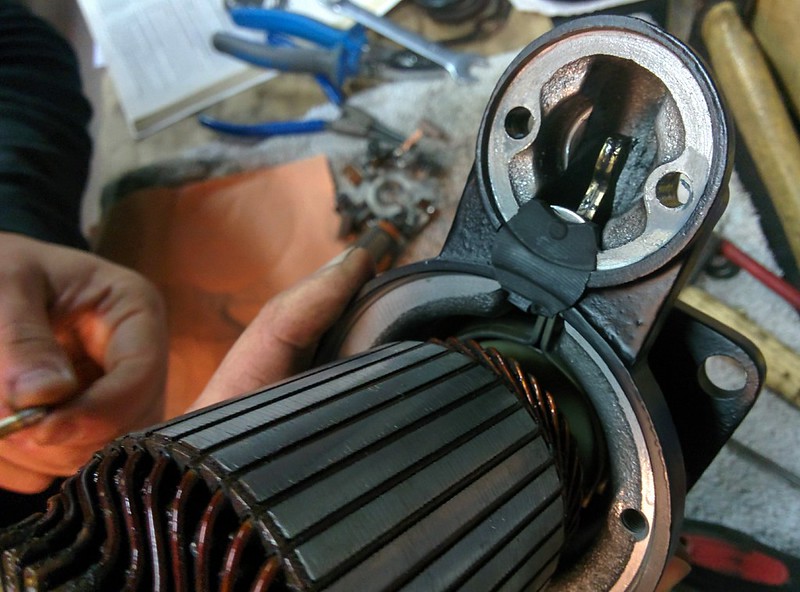
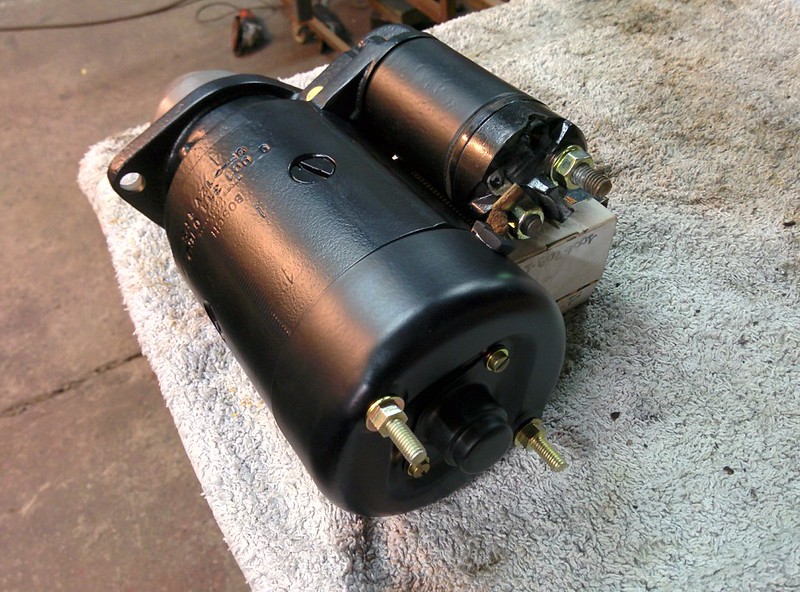
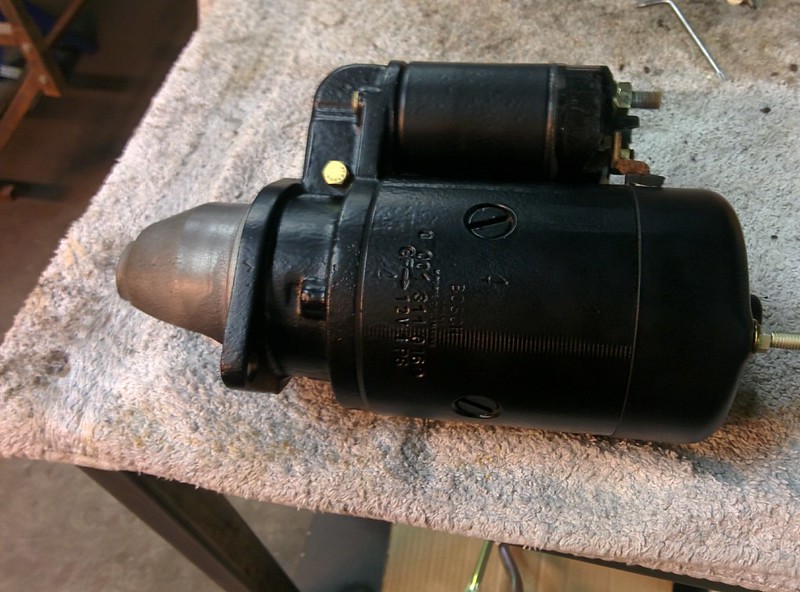
Also got the starter motor fully rebuild, stator and rotor were still good. Blasted the housing, re-plated the bolts with the DIY kit and new gear/bearing unit.

Local Hero

 )
)
Andy
LINCOLNSHIRE REGION -�https://www.facebook.com/groups/467122313360002/
1983 MK1 Golf GTI Campaign Model - Under (looooong) resto!
1962 Rover P4 80
2002 BMW 745i
2008 BMW Z4 2.5Si
LINCOLNSHIRE REGION -�https://www.facebook.com/groups/467122313360002/
1983 MK1 Golf GTI Campaign Model - Under (looooong) resto!
1962 Rover P4 80
2002 BMW 745i
2008 BMW Z4 2.5Si
Old Timer
We had a look at reassembling the differential but havent' gotten very far as we need a special loctite for the spines at the output shafts. Still need to order it so it'll take a while until we can fully get it back together.
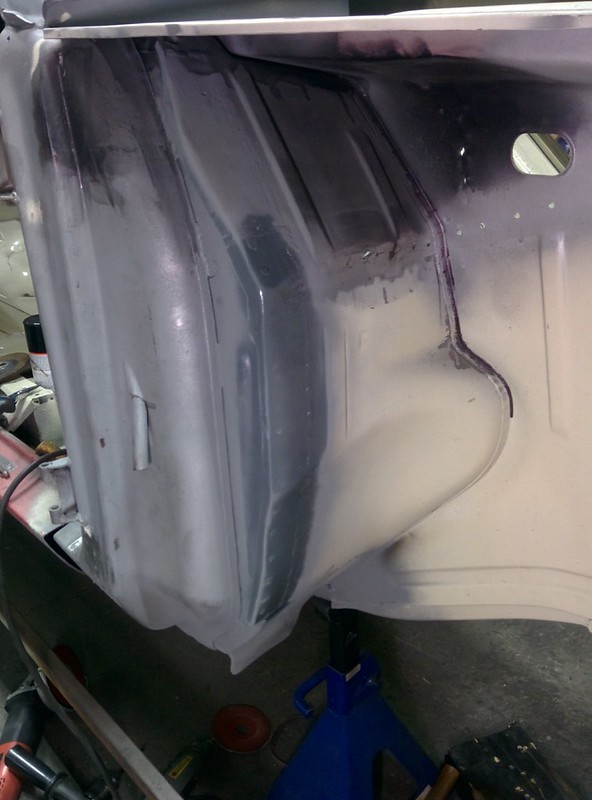
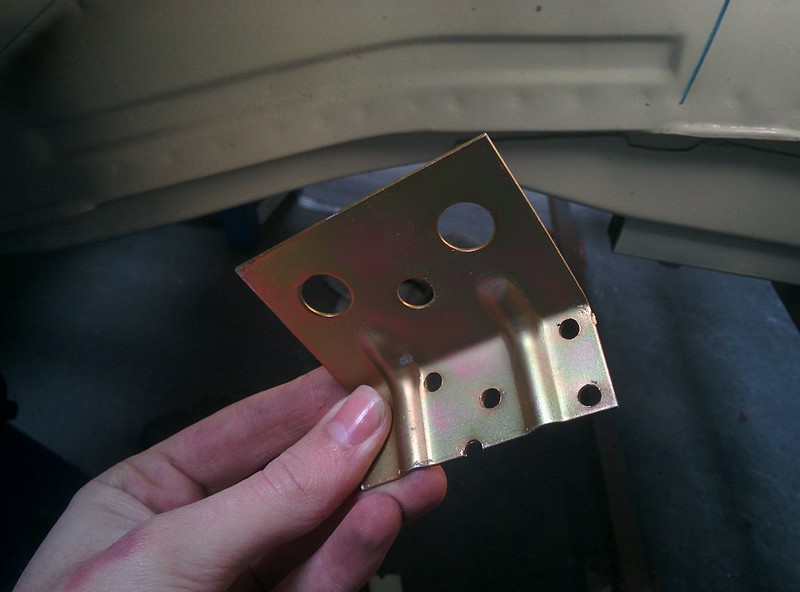
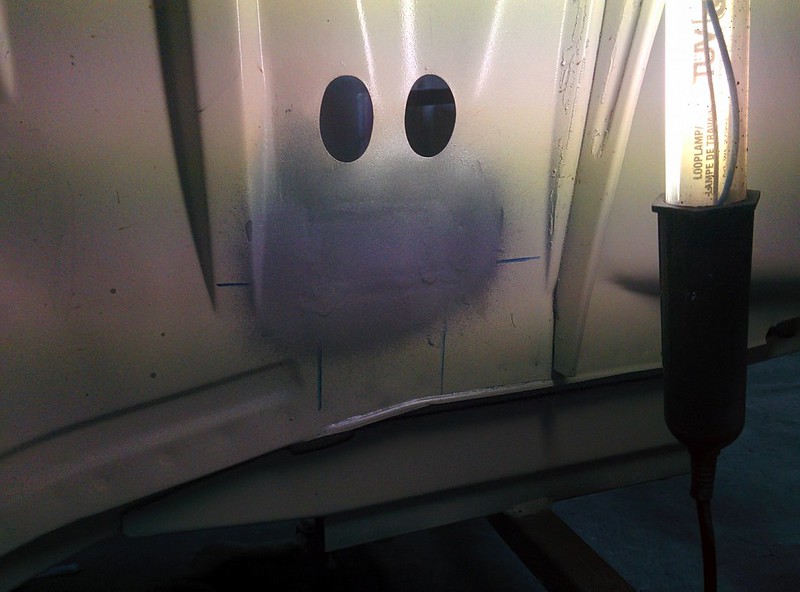
This Saturday I got started with removing the bracket for the front brake lines because�I noticed a little hole on the side of the engine compartiment. Rust was sitting between the bracket and the inner fender/panel of the engine compartiment.
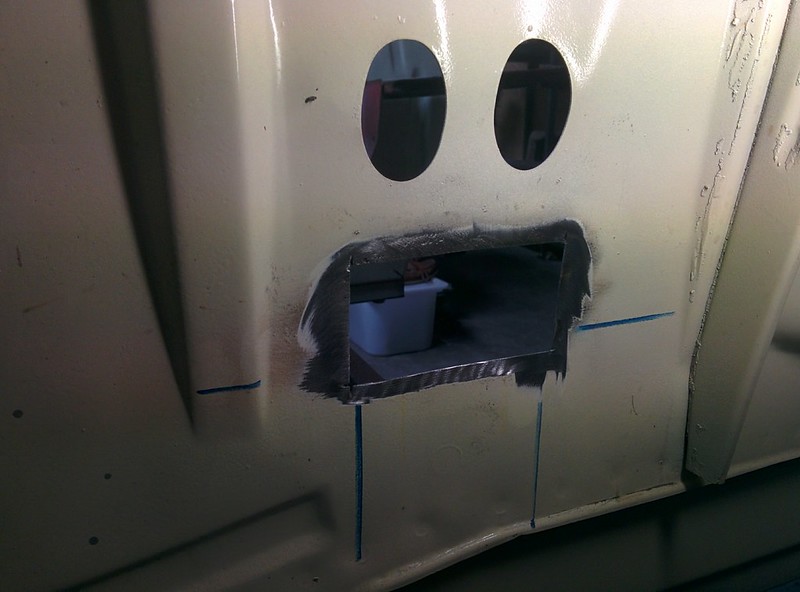
Here you can see the little hole/crack in the panel because of the rust.
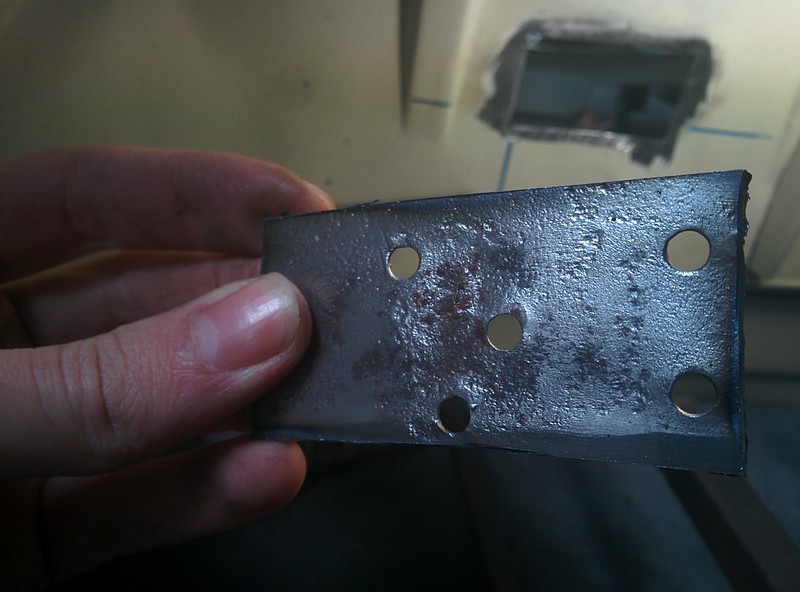
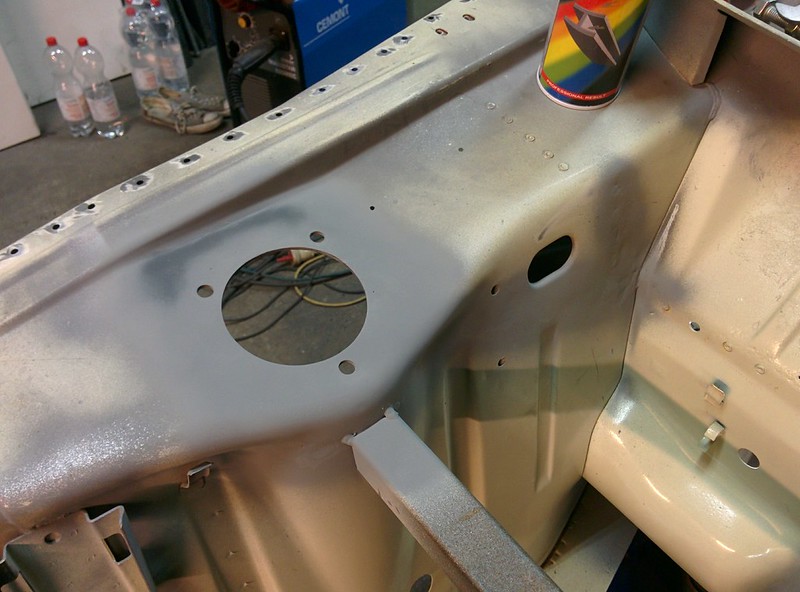
Brake line bracket sandblasted and zinc plated + passivated yellow.
New piece welded in and ground smooth. Protected with zinc spray for now. I still need to plug weld the bracket on but called it quits as the paint wasn't drying very weld since it's getting quite cold in the workshop.
Posted
Old Timer

Some incredible time and effort going into this.
Are you using the Frost plating kits?
Posted
Old Timer
Lhasa2008 said
Some incredible time and effort going into this.
Are you using the Frost plating kits?
Thank you!
No, I got it from classic-plating.co.uk
Old Timer
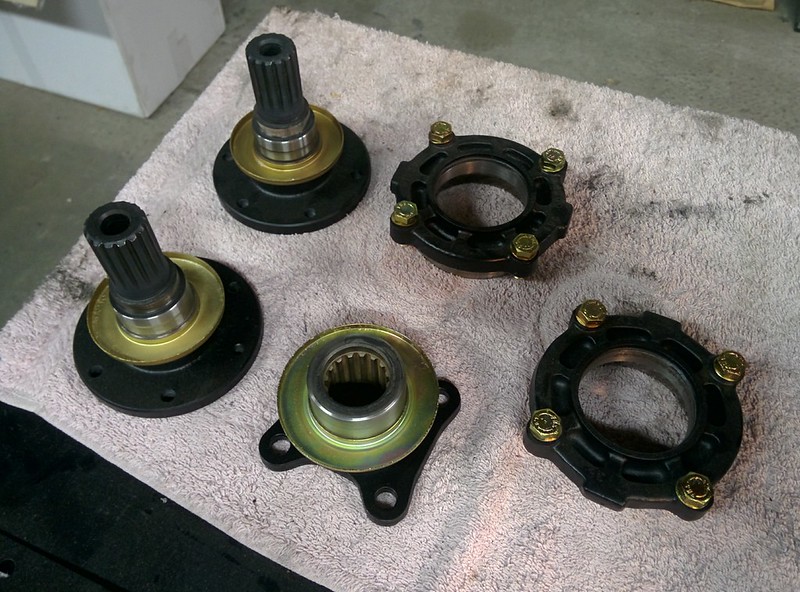
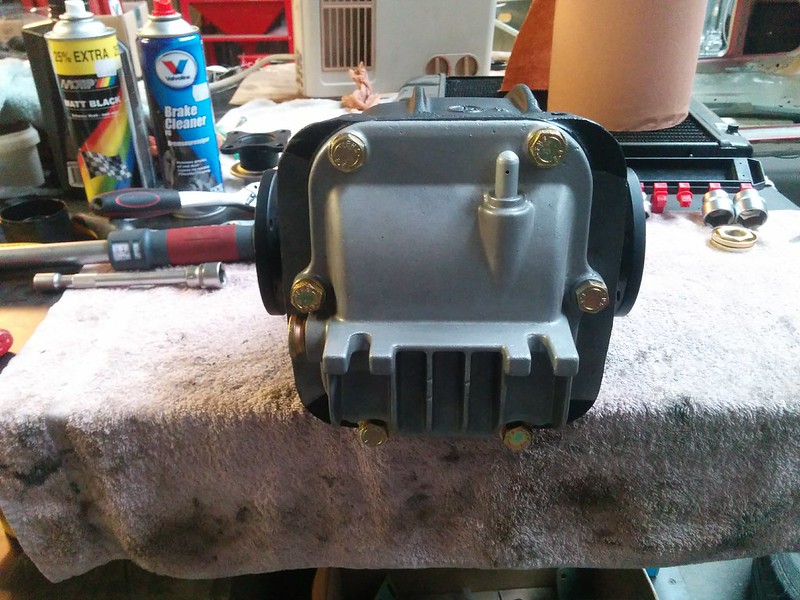
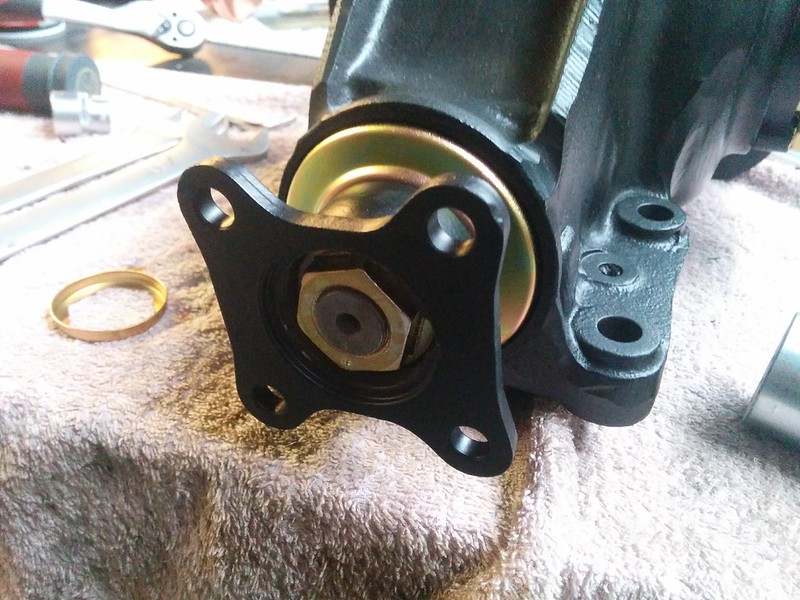
We started with getting some special Loctite for the spline connections of the input and output shafts.

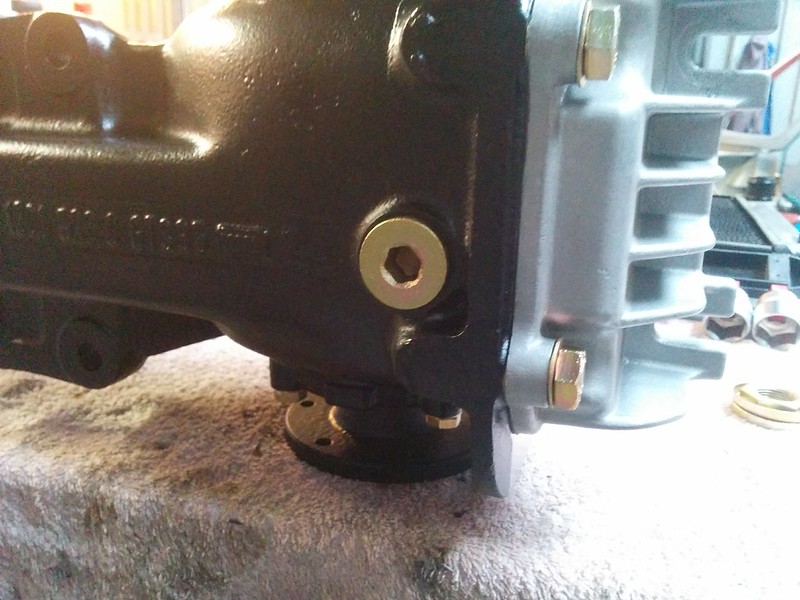
Diff output covers and shaft assembled with re-plated hardware.

This is how we torqued down the output shaft bolts of the diff. We didn't want to scuff up the painted sufraces, this method worked great.

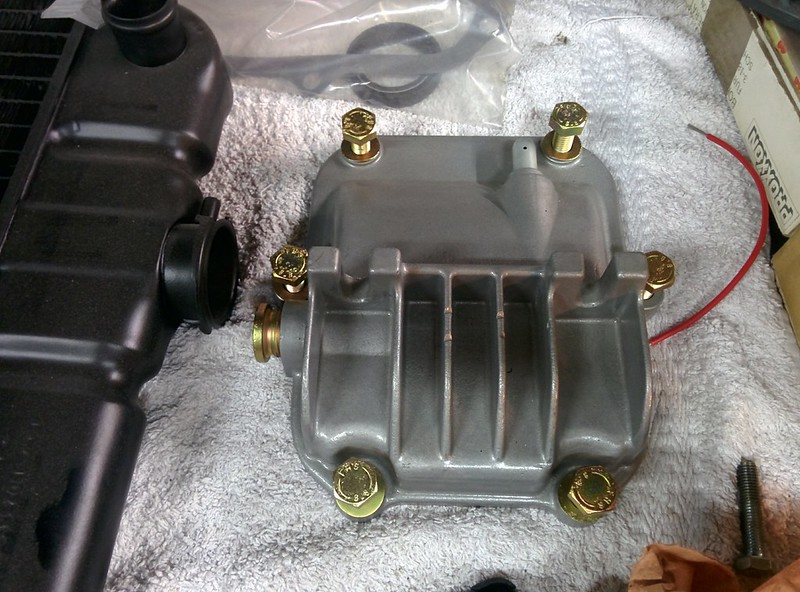
Blasted and clearcoated back cover with it's new gasket
Still need to get some new aluminium gasket rings for the drain and fill plugs
Before taking apart the diff, I punched a hole in both the input shaft and nut. This way I know how far to tighten the nut. As I got a pretty cheap impact gun I couldn't tighten it enough yet.
Moderator
Sent from my Smartphone ☃️
Sent by a smartphone and not a smartperson!
Play Guess the Asking Price 'SEASON 4' as of Sunday the 29th of October 2017.
https://vwgolfmk1.org.uk/forum/index.php?page=topicview&id=chat%2Fmk1-golf-chat_2%2Fguess-the-asking-price_2
OLD.
https://vwgolfmk1.org.uk/forum/index.php?page=topicview&id=chat%2Fmk1-golf-chat_2%2Fold-guess-the-asking
Ever wondered who's behind the scenes of this forum?
https://vwgolfmk1.org.uk/index.php?page=committee
Mike
There's me building mine 28 years ago, almost finished!
Be proud of your VW Golf Mk1, it's very special!
Posted
Local Hero
 lol
lol(So man-up, embrace the cold and get working!
 )
)
Andy
LINCOLNSHIRE REGION -�https://www.facebook.com/groups/467122313360002/
1983 MK1 Golf GTI Campaign Model - Under (looooong) resto!
1962 Rover P4 80
2002 BMW 745i
2008 BMW Z4 2.5Si
LINCOLNSHIRE REGION -�https://www.facebook.com/groups/467122313360002/
1983 MK1 Golf GTI Campaign Model - Under (looooong) resto!
1962 Rover P4 80
2002 BMW 745i
2008 BMW Z4 2.5Si
Old Timer
Golf Cabrio said
Great to see that the 'Master Class' continues even in the winter months! 😉 👍🏼
Sent from my Smartphone ☃️
Hhahha thank Mike!
Hairyarse said
Martijn, you need to make sure that you keep us entertained over winter
(So man-up, embrace the cold and get working!
I'll try my best lol.
Currently also busy with redoing me uncles Transfer case of his BMW E30 325ix touring. Plenty of things to do in these cold winter months :p
Old Timer
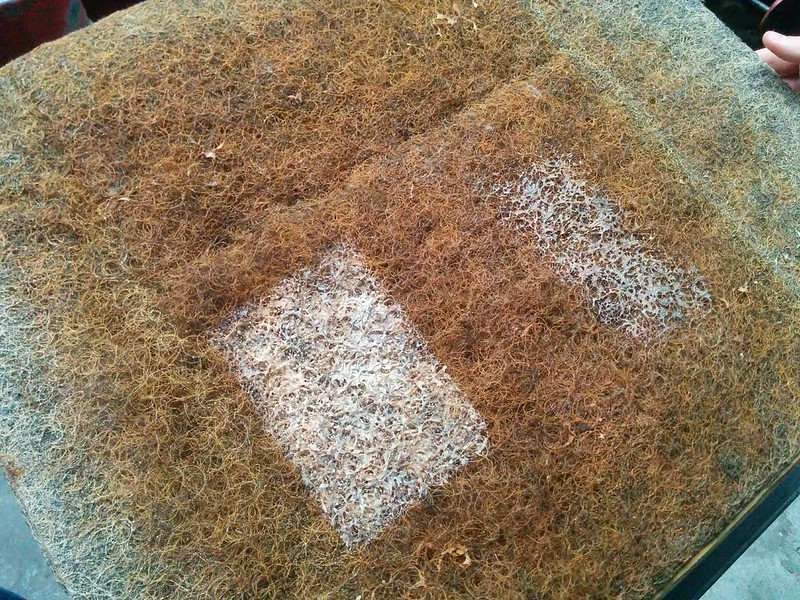
My brother got the idea to try and save some of the hose hair / coconut hair seat pads by applying some latex type spray on them. He tested it out on a spare seat we have and I must say turned out great. The hairs get some of their flexibility back and don't make the cracking noise anymore when applying pressure.
I'm sure that we will still need to apply some foam cushioning but atleast the original seat pads themselves won't break further down anymore.
The left patch is done by applying latex by a spray bottle and the right one with a brush. Although the left one is a lot more flexible, it does have a tendency to weight the hair down and make it sink in.
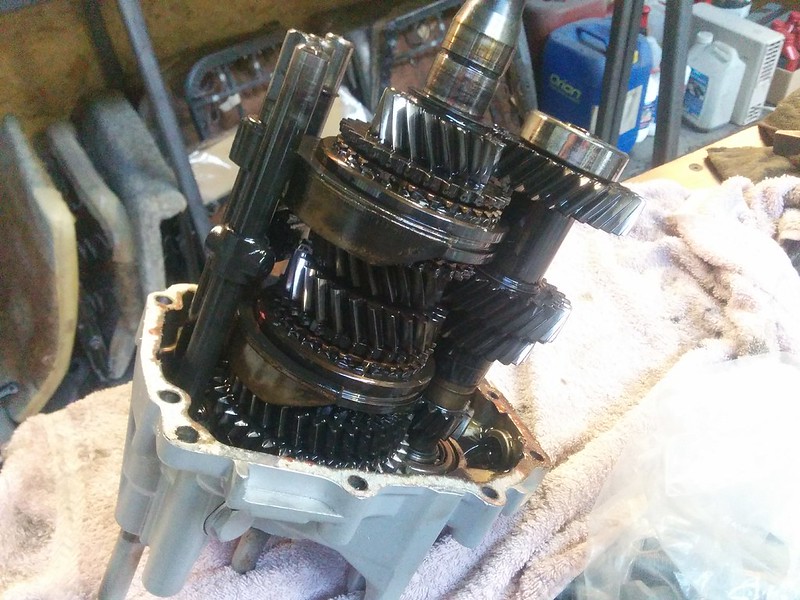
We also got started with the disassembly of the transmission. We first removed the sleeve for the�throwout bearing and then bolted some square tubing on the face of the housing. This gave us the possibility to use a bearing puller to apply pressure on the input shaft.�(Because we have a bearing with a plastic cage, the manual told us that we need to put some pressure on the input shaft and heat the housing around that black cover under the bearing). This is after removing the bolts that hold the two housing together of course.
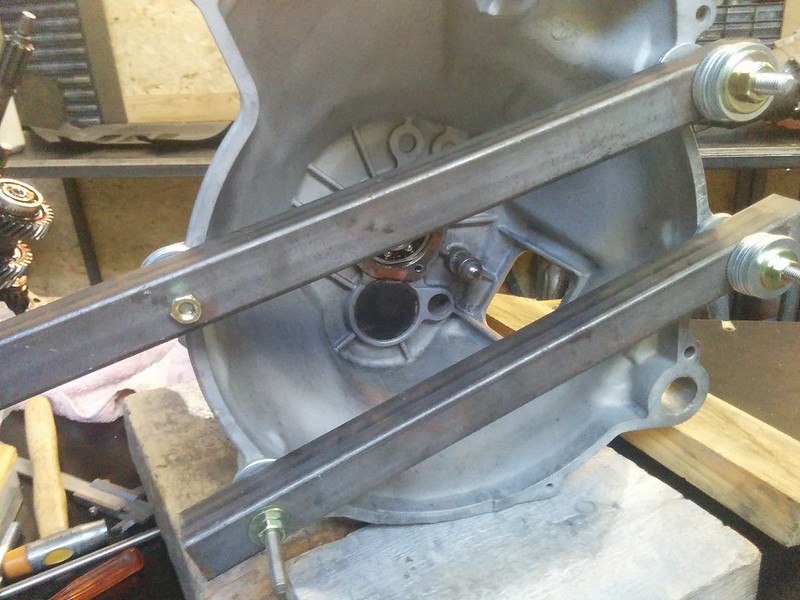
By then applying more pressure the whole assembly slides away from the housing.

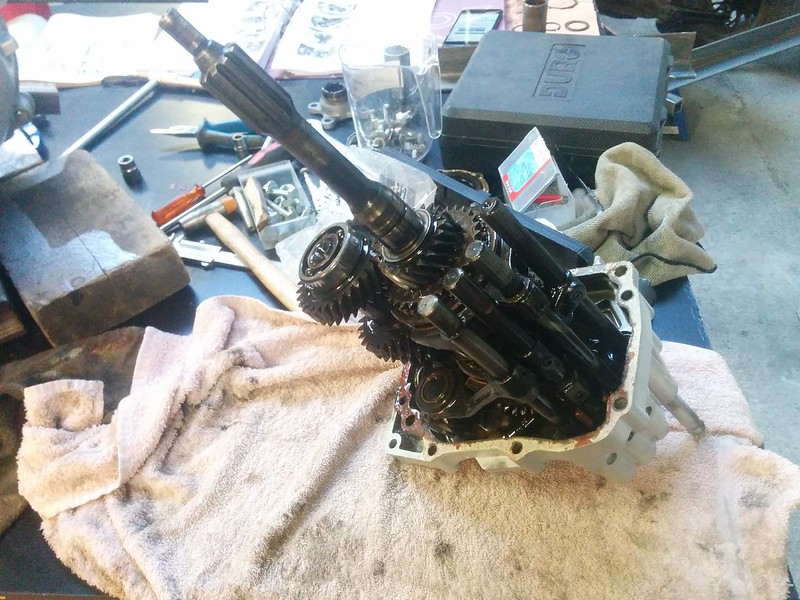
There is something that's very satisfying about looking at an open transmission

We noticed previously that the left front chassis rail of the 2002 was a bit crooked/pushed away. It has probably been in a light accident before. We had a local guy come and check the car out; he currently restores old Porsches but had a car body shop before. He said that it wasn't all that bad and we would be able to push and pull it straight again.
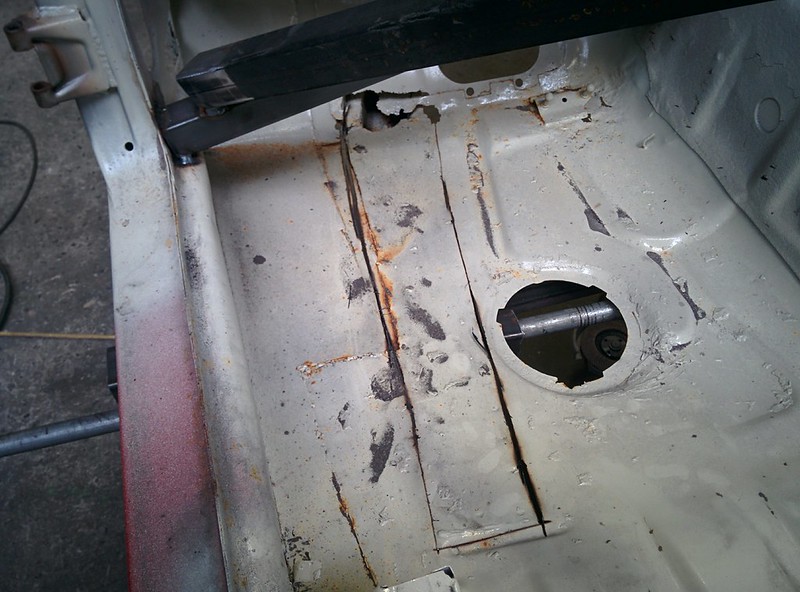
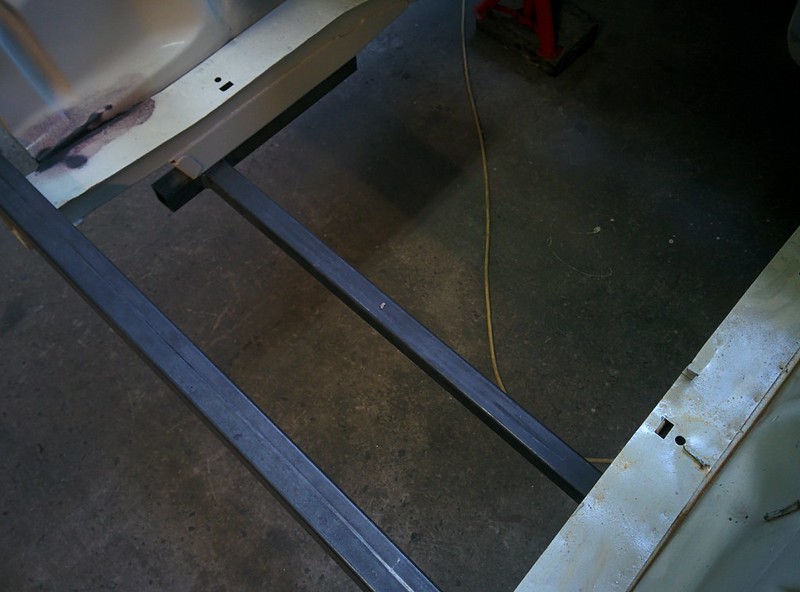
Here you can see the slanted chassis rail
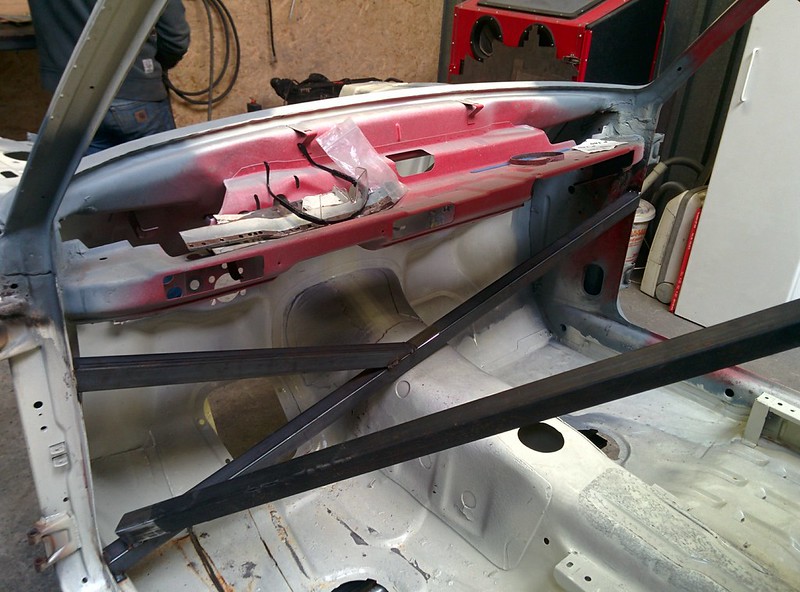
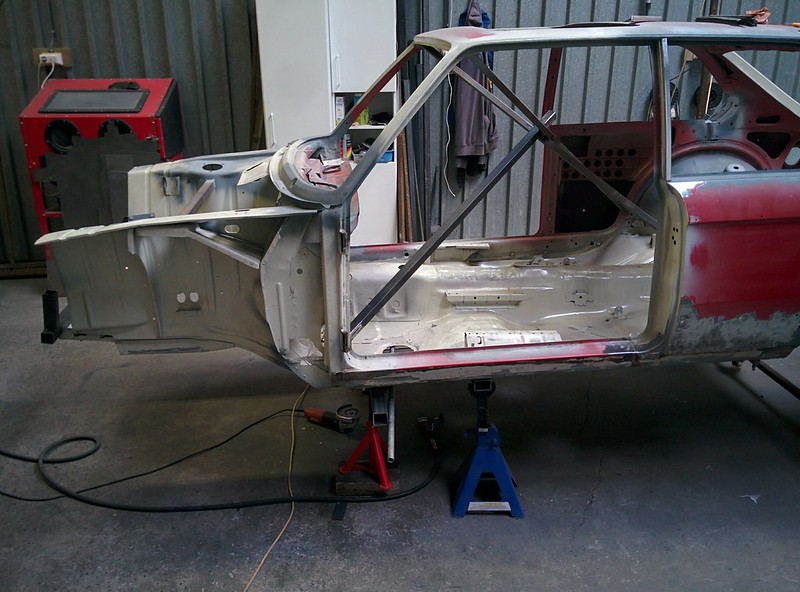
Before we attempted to push and pull it straight, we welded some more tubing in the car, especially to the left A-post. We also removed the front section of our roll over jig and let the body rest on a transverse beam where the rockers rest on.
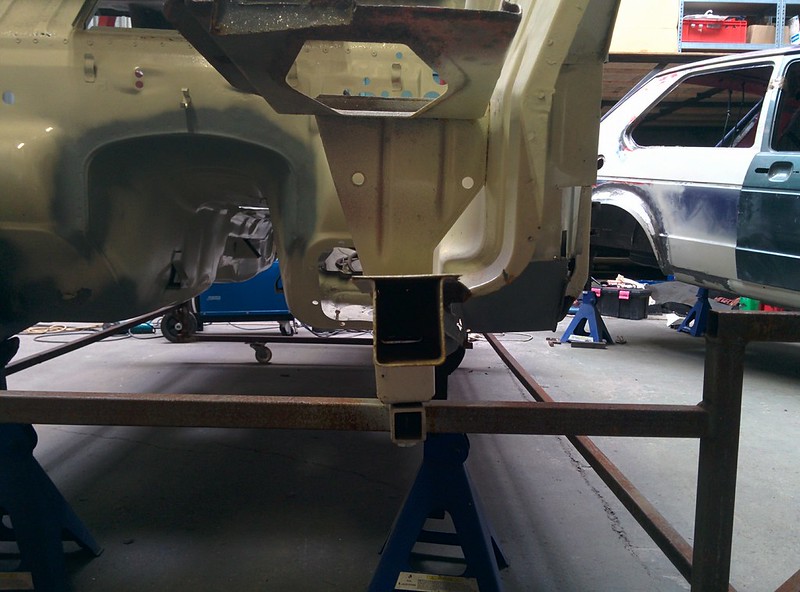
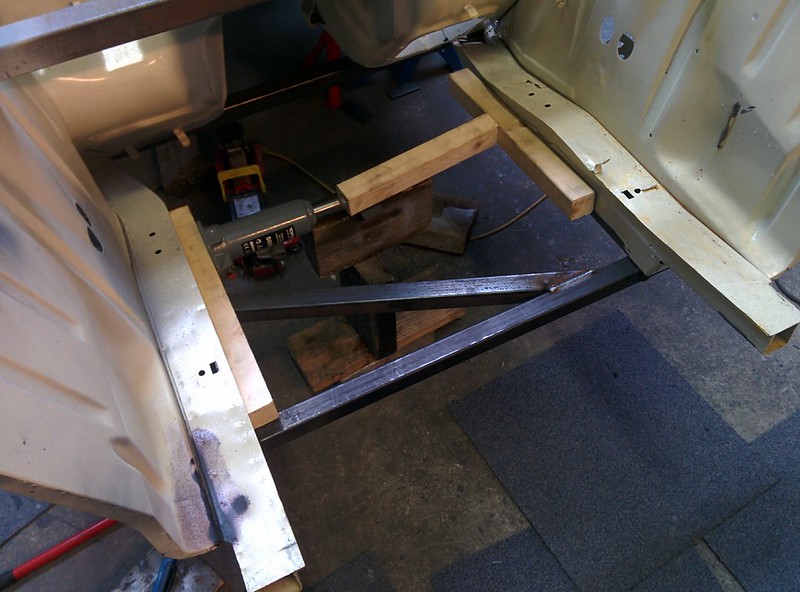
We then whipped up a little jig that bolts onto the rail, this made it possible to push the rail straight again.
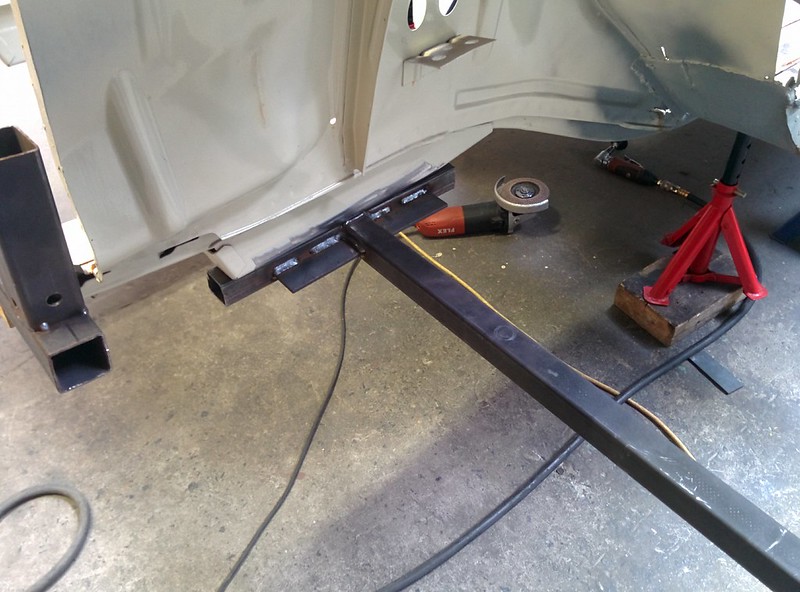
Turns out I was actually pushing it very little, the bolts took most of the force. The floor plays a big�role in structural rigidity of the car, because the floor also had seen a little bit of a nick, we cut the rail loose from the floor. After pushing on the beam, the frame rail was sitting nice and straight but we noticed that the rail at the end of the floor was slanted.
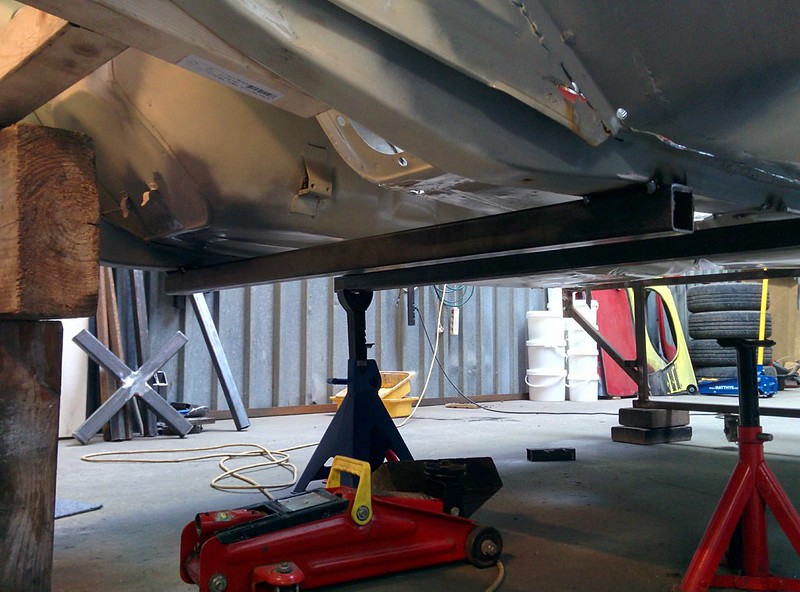
We decided to weld�a bit of square tubing on that section making it possible to twist it straight again by pushing on the front jog and pulling on the other one at the end of the rail.
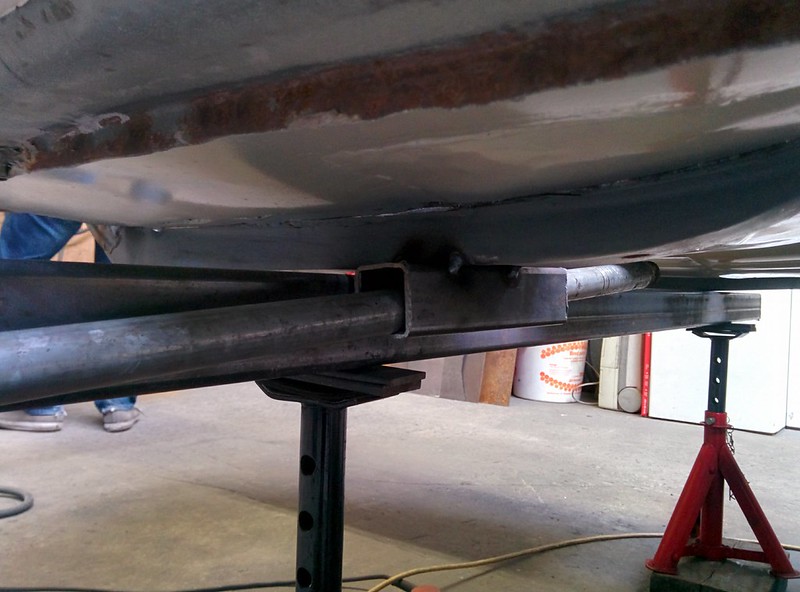
This is now the passenger frame rail vs the drivers side frame rail. As you can see, both are nice and flat.
We might be able to pull the drivers side one�a tiny bit�more straight but compared as to how it was it's day and night difference.

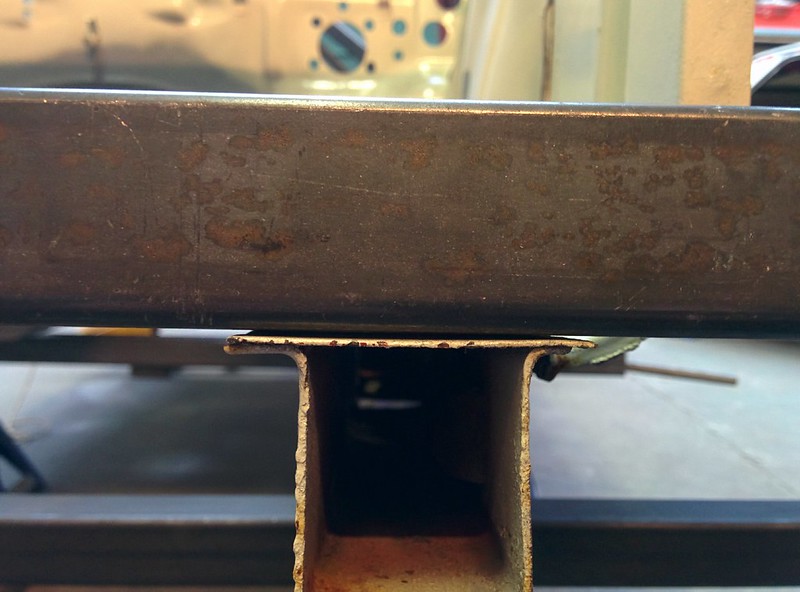
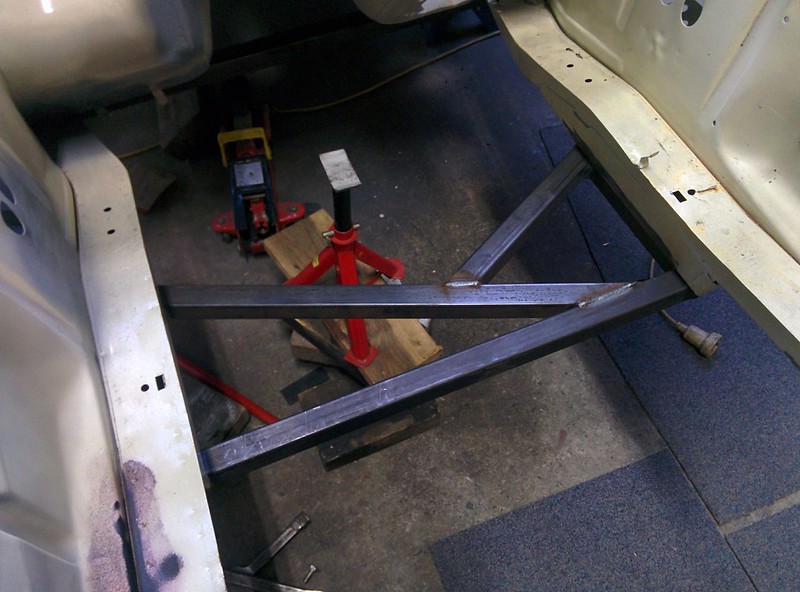
Now that the left frame rail is nice and parallel (hight wise)�to the other one, we wipped up another jig with the measurement from�the BMW body diagram. Because we pulled it straight the bolt holes are now shifted a bit inward.
We were able to push the frame rail a bit and bolt the jig on the car (we are only using the front bolt hole on this jig). the frame rail is also bent a little bit thus causing the bolt hole at the back to be shifted inwards, a�quick measurement showed it a 4mm difference between the front. we should be able to push it straight with the help of a little jack. But didn't have it with us at the workshop. We'll continue tomorrow or on Friday.
 Last edit: by D_Martijn
Posted
Local Hero
Andy
LINCOLNSHIRE REGION -�https://www.facebook.com/groups/467122313360002/
1983 MK1 Golf GTI Campaign Model - Under (looooong) resto!
1962 Rover P4 80
2002 BMW 745i
2008 BMW Z4 2.5Si
LINCOLNSHIRE REGION -�https://www.facebook.com/groups/467122313360002/
1983 MK1 Golf GTI Campaign Model - Under (looooong) resto!
1962 Rover P4 80
2002 BMW 745i
2008 BMW Z4 2.5Si
Old Timer
Hairyarse said
Nice setup to straighten that chassis leg
Thanks man, It took a while to figure out what was the best approach to get this thing straight again. All in all it went a lot smoother than I first had taught.
Moderator
Sent from my Smartphone ☃️
Sent by a smartphone and not a smartperson!
Play Guess the Asking Price 'SEASON 4' as of Sunday the 29th of October 2017.
https://vwgolfmk1.org.uk/forum/index.php?page=topicview&id=chat%2Fmk1-golf-chat_2%2Fguess-the-asking-price_2
OLD.
https://vwgolfmk1.org.uk/forum/index.php?page=topicview&id=chat%2Fmk1-golf-chat_2%2Fold-guess-the-asking
Ever wondered who's behind the scenes of this forum?
https://vwgolfmk1.org.uk/index.php?page=committee
Mike
There's me building mine 28 years ago, almost finished!
Be proud of your VW Golf Mk1, it's very special!
Play Guess the Asking Price 'SEASON 4' as of Sunday the 29th of October 2017.
https://vwgolfmk1.org.uk/forum/index.php?page=topicview&id=chat%2Fmk1-golf-chat_2%2Fguess-the-asking-price_2
OLD.
https://vwgolfmk1.org.uk/forum/index.php?page=topicview&id=chat%2Fmk1-golf-chat_2%2Fold-guess-the-asking
Ever wondered who's behind the scenes of this forum?
https://vwgolfmk1.org.uk/index.php?page=committee
Mike
There's me building mine 28 years ago, almost finished!
Be proud of your VW Golf Mk1, it's very special!
Old Timer
We first pushed the frame with a hydraulic jack so the front holes were 681mm apart like the measurements from BMW state. We then welded a reinforcement tube on the frame so the front holes couldn't shift anymore and�keep�their measurement.
We then welded the rails together at the back by connecting them with a square tube and welding them from underneath. Thinking this would cause the bend frame to rotate around the front bolt hole and pushing it back into place at the small kink.
We later on ground the tacks down, this ment the rail could move at the back where it meets the floor but since we were already so close to the 681mm (there was only a difference of 3-4mm and BMW states 681 +/-1) we didn't mind that it would shift just a tiny bit at the back.
By then pushing again with the hydraulic jack and loose frame rail at the floor, we managed to get to the 681mm measurement. We also checked the squareness of the rails by measuring diagonal and all was good.
We welded another square tube with a hole for the back hole and welded it to our jig, also included another reinforcement tube so it can't move. Final test was mounting the subframe and it fitted just fine.
Very happy with the result we got as we were a bit 'scared' and didn't know how to tackle it at first.
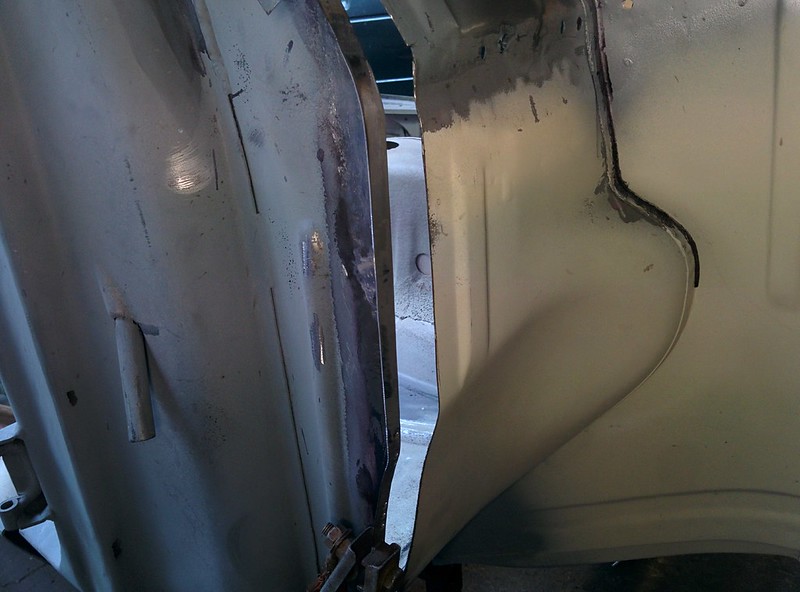
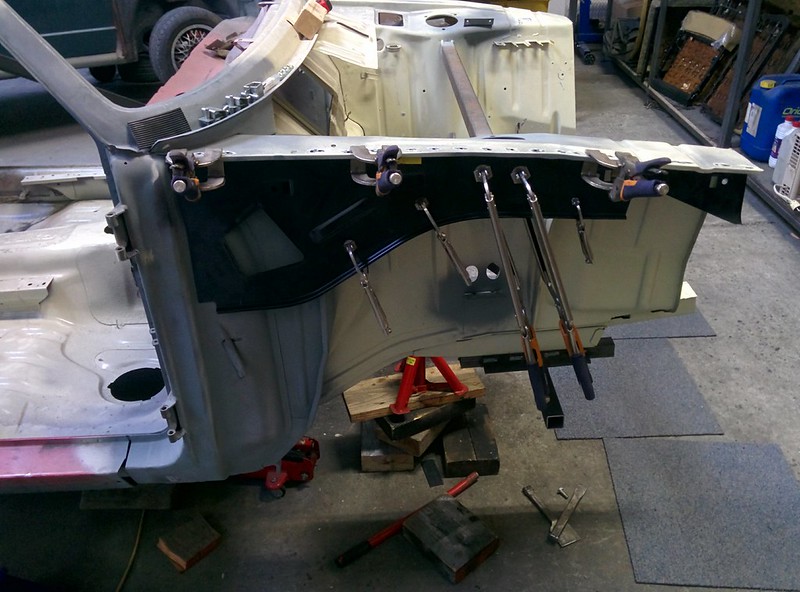
I also got myself a shrinker and stretcher and some longer welding clamps. We decided to test some of them out by placing the replacement panel on the right front wing. Everything lines up as it should too so the welding we did on the A pillar is good.
0 guests and 0 members have just viewed this: None.