


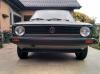
BMW 2002 Touring '74 Full restoration project


Old Timer

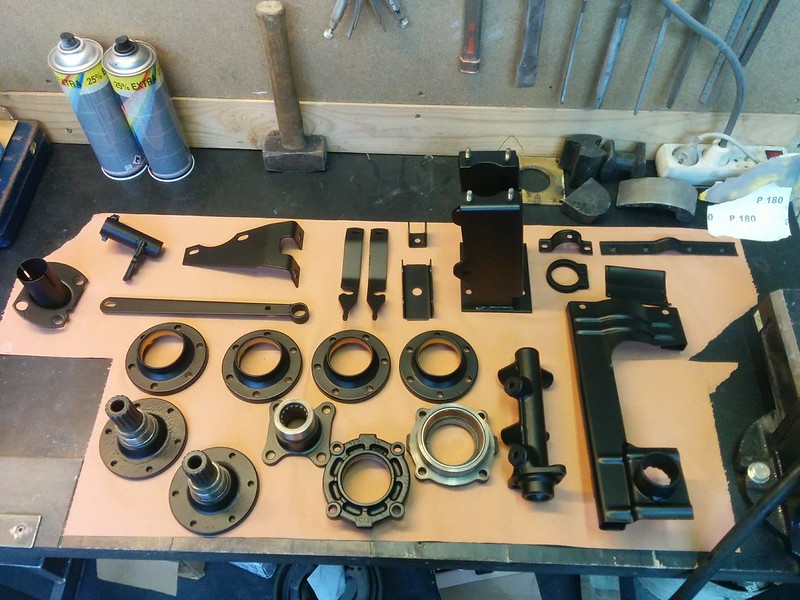
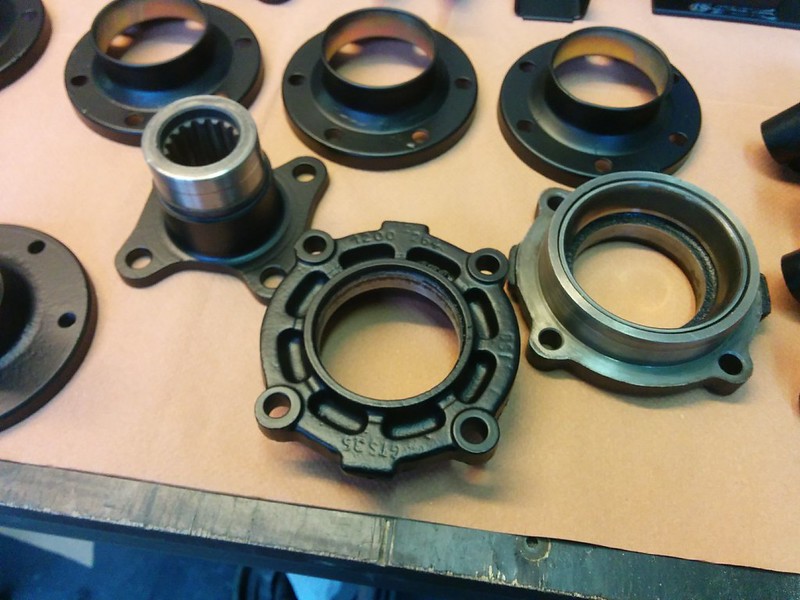
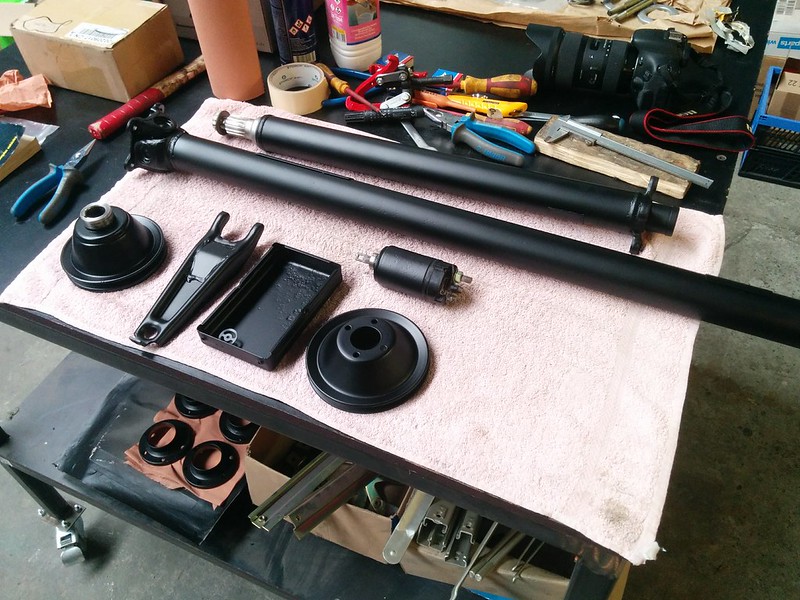
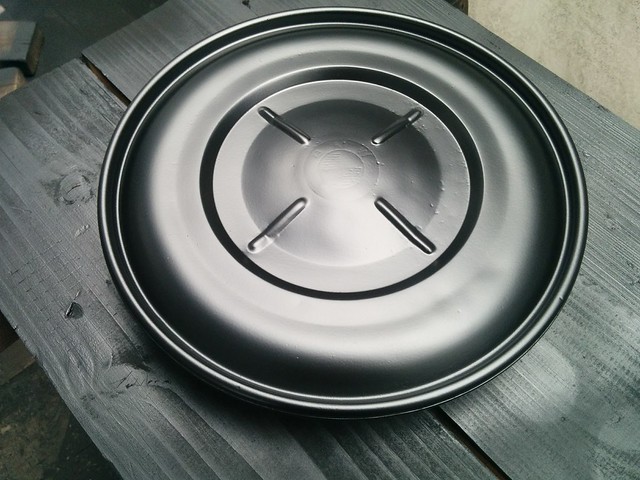
I painted the cv joint bearing races, the underside of the air filter housing, starter motor and gave the diff another coat.�I hope these turn out good as I my paint gun wasn't set correctly in the beginning, the paint went on a little too thick.. We'll see how it turns out.
These parts are all finished now:


I also too our radiator to a local radiator repair shop as I noticed after painting that there was a little crack right above the drain bolt. The guy said he'll also pressure test the radiator to make sure it's all right. He will bend the little fins also straight as there are a few that are bend inwards.
I then�order new cv bellows and a new Bosch starter drive/gear, new brushes�for the start motor too
Posted

Local Hero


Andy
LINCOLNSHIRE REGION -�https://www.facebook.com/groups/467122313360002/
1983 MK1 Golf GTI Campaign Model - Under (looooong) resto!
1962 Rover P4 80
2002 BMW 745i
2008 BMW Z4 2.5Si
LINCOLNSHIRE REGION -�https://www.facebook.com/groups/467122313360002/
1983 MK1 Golf GTI Campaign Model - Under (looooong) resto!
1962 Rover P4 80
2002 BMW 745i
2008 BMW Z4 2.5Si
Old Timer
Hairyarse said
Are you making the trip to the AGM again this year Martijn?
Yes, We are! My brother can't come so it'll be me and my 2 Golf mk2 friends
 Are you coming the whole weekend or just Sunday?
 Last edit: by D_Martijn
Old Timer
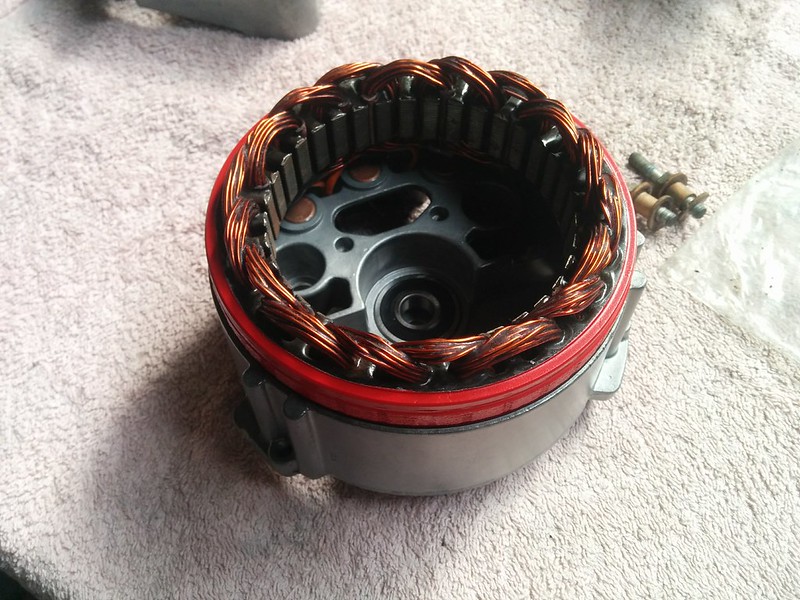
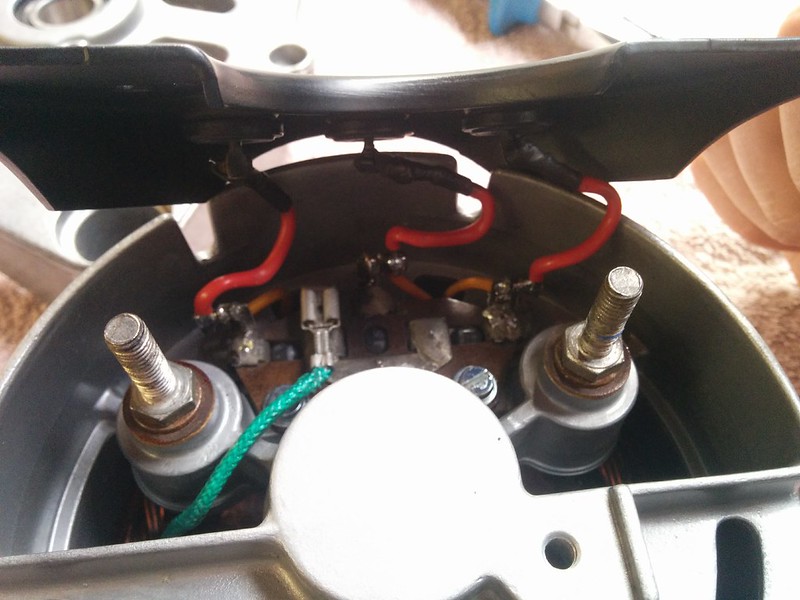
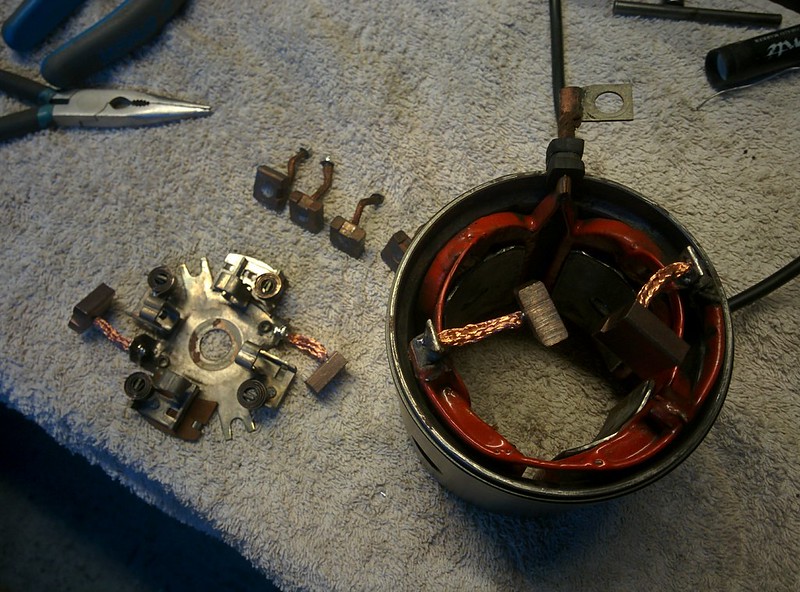
I started with mounting the new stator in the rear housing, feeding the wires through it.
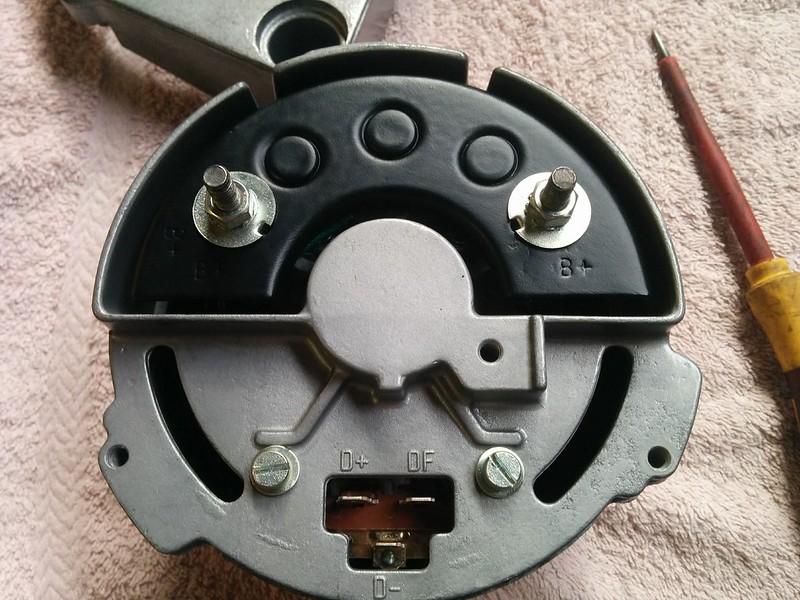
I then screwed the base plate with diodes? on the housing and bend the wires on to the contacts. the base plates connects the diodes on the housing and the black plate on the rear of the alternator together.
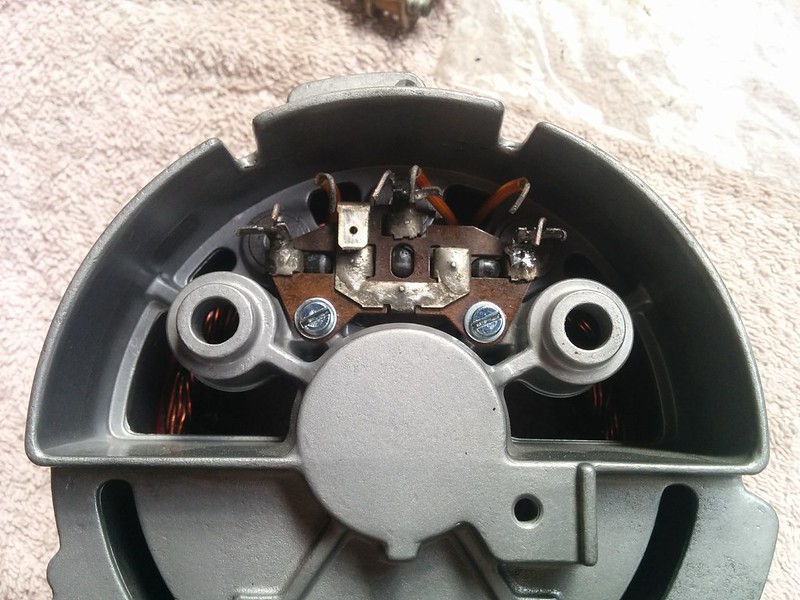
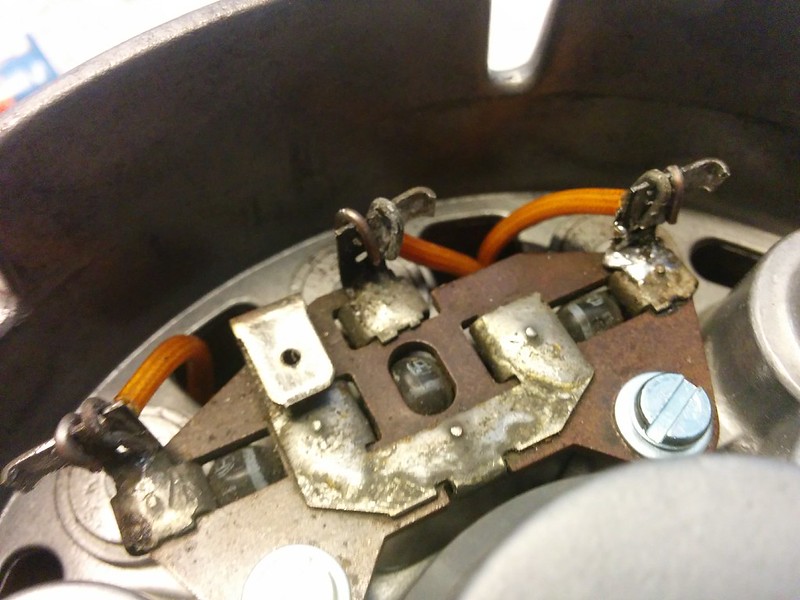
Since the original wires for the diodes on the black plate were too far gone, I soldered new wires on them.
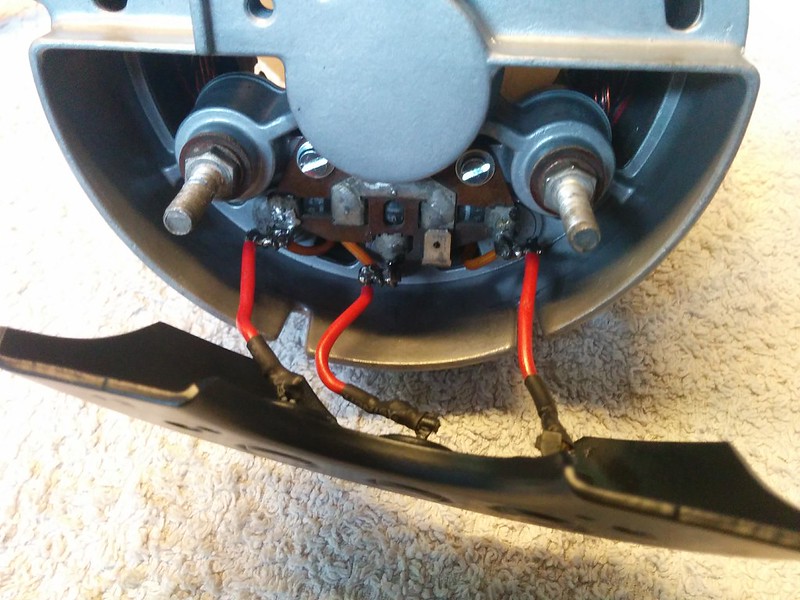
Then bolting it on the housing. By then I also mounted the brush plate on the housing as the green cable on this also connects to a spade plug on the base plate (where all the wires come together)
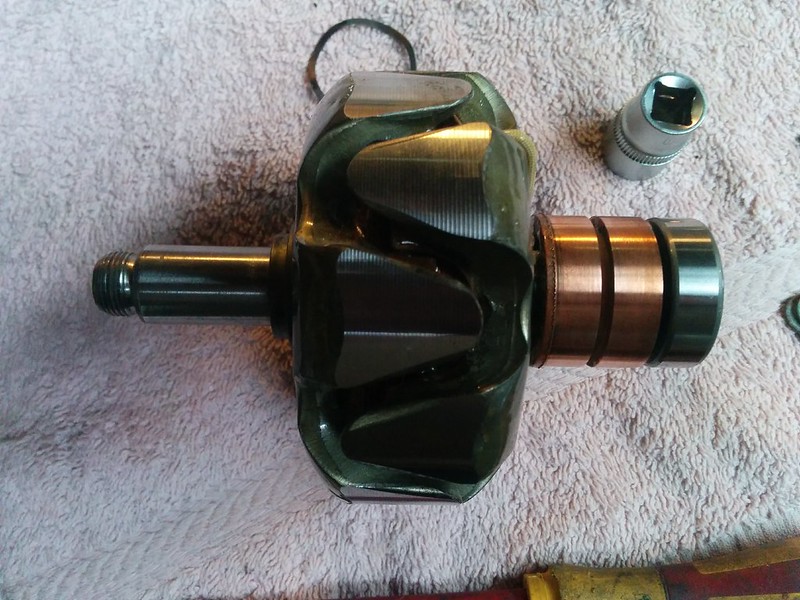
I then tapped the bearing on the rotor, make sure you don't forget to put the spring washer (pictured after the rotor) between the bearing and housing!
After mounting the rotor, the hard part is done. You then just screw on the front housing and mount the fan and pulley.
All done


I hope this helps some of you that are also considering refurbing their alternator. If you have any questions, feel free to PM me.
____
Also got the remaining parts out of our spray booth. Turned out great.

�
Posted
Local Hero
D_Martijn said
Hairyarse said
Are you making the trip to the AGM again this year Martijn?
Yes, We are! My brother can't come so it'll be me and my 2 Golf mk2 friends
Nice one!
 I'll be there all weekend
Andy
LINCOLNSHIRE REGION -�https://www.facebook.com/groups/467122313360002/
1983 MK1 Golf GTI Campaign Model - Under (looooong) resto!
1962 Rover P4 80
2002 BMW 745i
2008 BMW Z4 2.5Si
LINCOLNSHIRE REGION -�https://www.facebook.com/groups/467122313360002/
1983 MK1 Golf GTI Campaign Model - Under (looooong) resto!
1962 Rover P4 80
2002 BMW 745i
2008 BMW Z4 2.5Si
Posted
Local Hero
Andy
LINCOLNSHIRE REGION -�https://www.facebook.com/groups/467122313360002/
1983 MK1 Golf GTI Campaign Model - Under (looooong) resto!
1962 Rover P4 80
2002 BMW 745i
2008 BMW Z4 2.5Si
LINCOLNSHIRE REGION -�https://www.facebook.com/groups/467122313360002/
1983 MK1 Golf GTI Campaign Model - Under (looooong) resto!
1962 Rover P4 80
2002 BMW 745i
2008 BMW Z4 2.5Si
Old Timer
Hairyarse said
…and I love your updates! So much attention just on the alternator - good man
It'll be fun to meet you again and catch up!
And thank you, it's all in the details
Old Timer
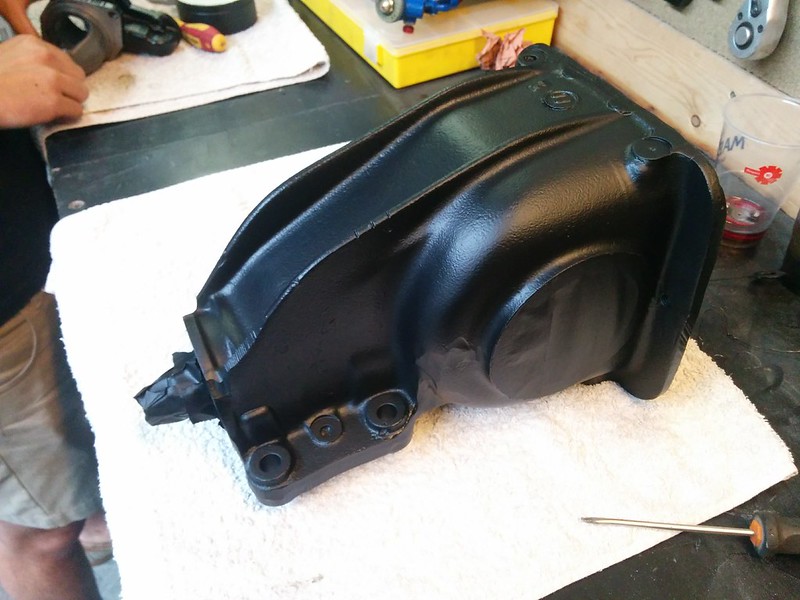
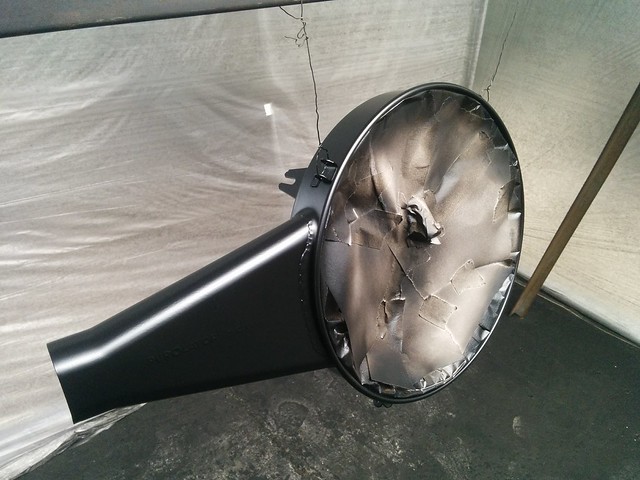
After finishing the Golf mk1 I got started on painting some of the left over parts.
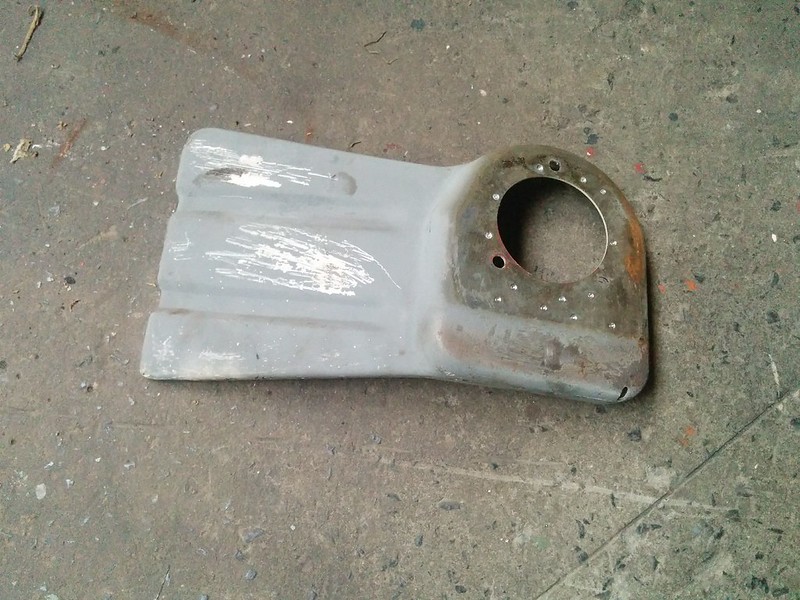
I still had to paint the startor housing of the starter motor, a few small parts and the radiator & air filter housing.
Turned out alright.
Here you can see the repair I had done on the radiator, the guy also bent the fins straight.
The radiator will look great once the paint is dry

I then got started on repairing the water scuttle panel as it's quite rotten..
I started with bending the two flanges and adding the little indentation in it with a chisel. Turned out I got the bends spaced to far apart to it didn't line up all that great.
Since I had spend quite some time already on the panel, I went home.. lol
The day after I tried to get the bend right, which I luckily did. Again, hammering the indentation in the panel with a chisel.


Welded and ground down partially, I still need to fabricate a few other bit's like the oval hole in the middle that's also rotten.

Still need to grind down the little weld but all my discs are completely used up. I should buy some new ones.
Turned out pretty good, will still need some filler though.
I am considering buying a sheet metal brake to get better 90� bends. I'm now using a big piece of angle iron but from hammering the flat sheet it gets wavy because of the slight stretching when hammering it against the angle iron..

Posted
Local Hero
It's worth buying the bending tool I think - maybe you find one second hand?
Andy
LINCOLNSHIRE REGION -�https://www.facebook.com/groups/467122313360002/
1983 MK1 Golf GTI Campaign Model - Under (looooong) resto!
1962 Rover P4 80
2002 BMW 745i
2008 BMW Z4 2.5Si
LINCOLNSHIRE REGION -�https://www.facebook.com/groups/467122313360002/
1983 MK1 Golf GTI Campaign Model - Under (looooong) resto!
1962 Rover P4 80
2002 BMW 745i
2008 BMW Z4 2.5Si
Posted
Old Timer
Hairyarse said
Nice repair that!
It's worth buying the bending tool I think - maybe you find one second hand?
Thanks, Andy!
Yeah, I think so too. I should have a look for a used one.
Although, there is a shop in my area that sells everything for classic cars (workshop) they are selling a metal brake for 130€, width is 790mm and it clamps the work piece already so no need for vice clamps. I might get that one.
Posted
Local Hero
Andy
LINCOLNSHIRE REGION -�https://www.facebook.com/groups/467122313360002/
1983 MK1 Golf GTI Campaign Model - Under (looooong) resto!
1962 Rover P4 80
2002 BMW 745i
2008 BMW Z4 2.5Si
LINCOLNSHIRE REGION -�https://www.facebook.com/groups/467122313360002/
1983 MK1 Golf GTI Campaign Model - Under (looooong) resto!
1962 Rover P4 80
2002 BMW 745i
2008 BMW Z4 2.5Si
Old Timer
Last week I removed the hinges from the chassis. It took quite some heat, penetrating oil and some hammering but finally I got them all out.

Still need to clean up the hinge points.

I also got a new drive gear for the start motor as the one way bearing on the old one didn't work anymore.
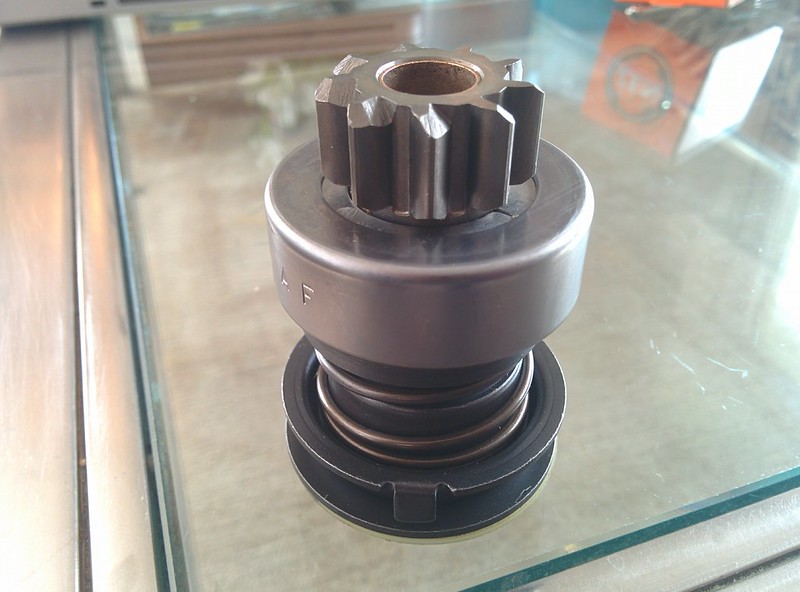
I soldered new brushes on as well
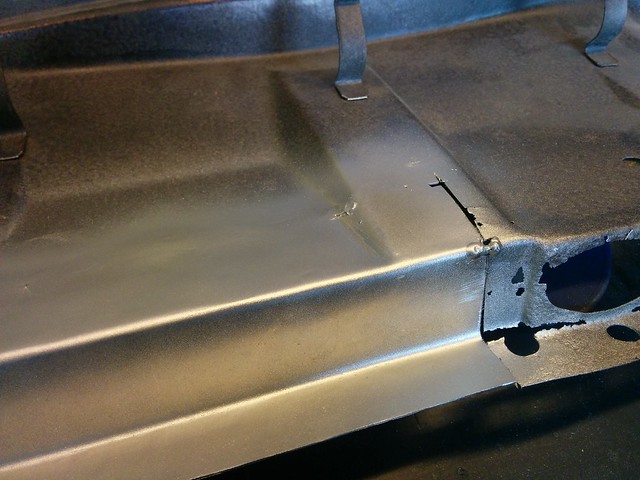
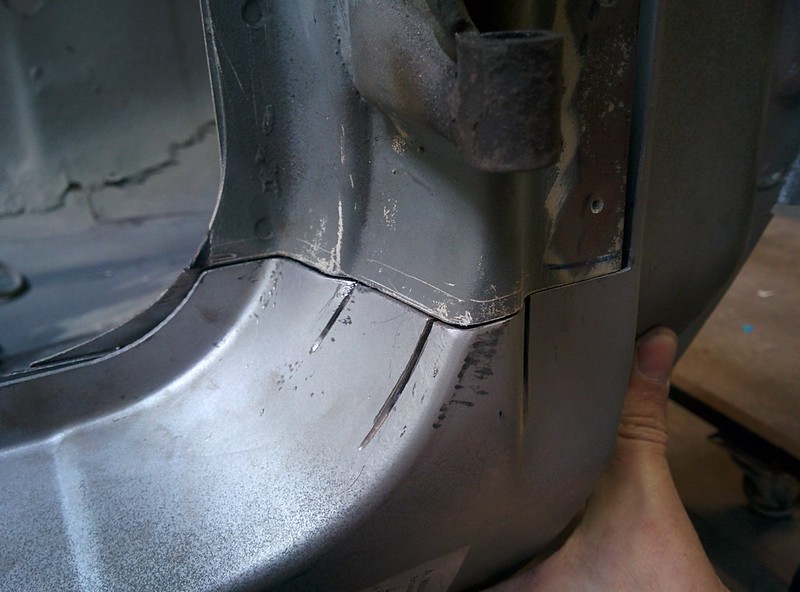
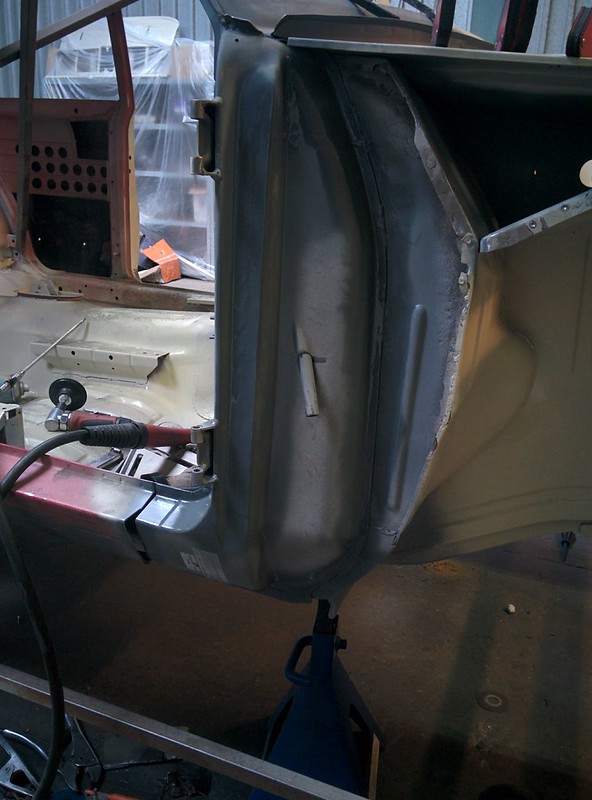
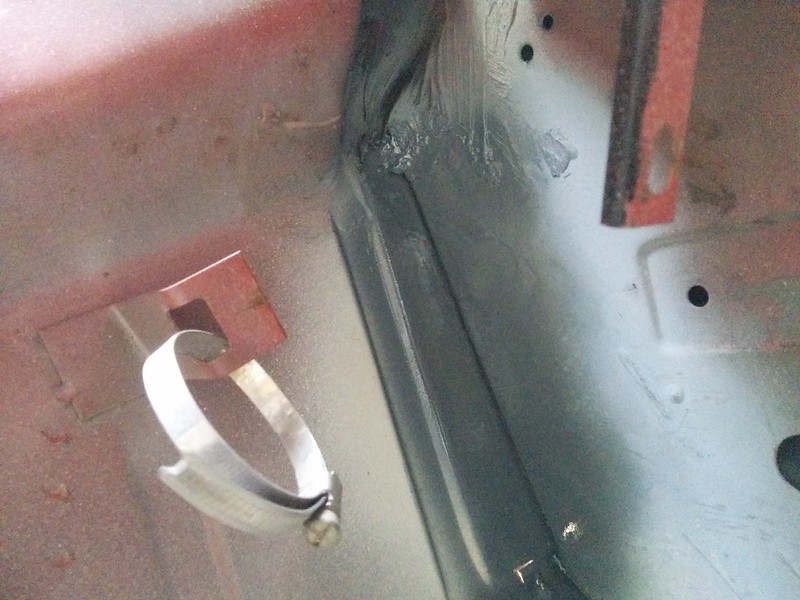
Today we started on some rust repair on the A pillar.
I started with removing some of the left over pieces on the sill

After quite a bit of fiddling and trimming the panel fitted pretty well. but I found that the curves of the replacement panel didn't line up all that good.
So I decided to make a slice on top to get the bend more inboard.
I did the same thing on the lower side of the panel.
the left cut was to get the little notch bigger/more defined. and the 2 other ones on the right to get the piece flat against to the original sheet metal.
After that we tacked the panel in place and removed the pitted flange in the middle.


I spaced out the plug welds like original and also added the full welds. Turned out great.

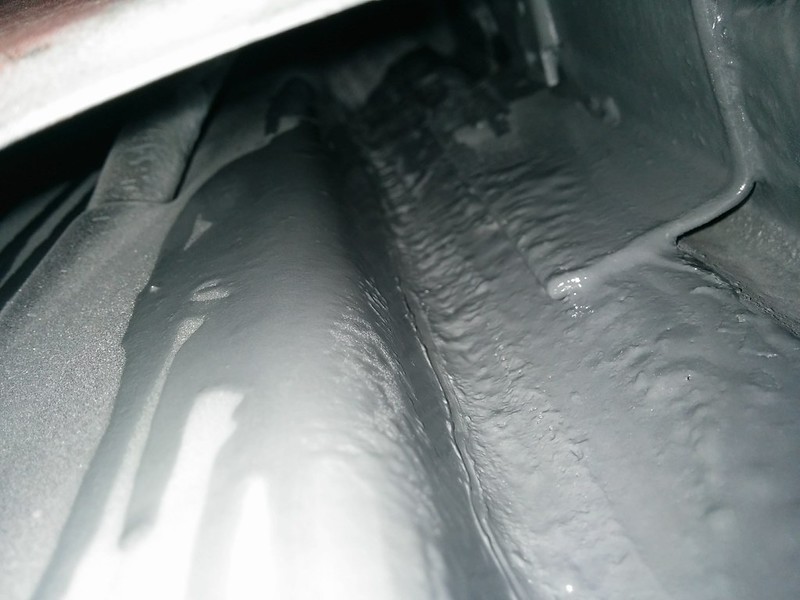
Picture I took when welding, almost there
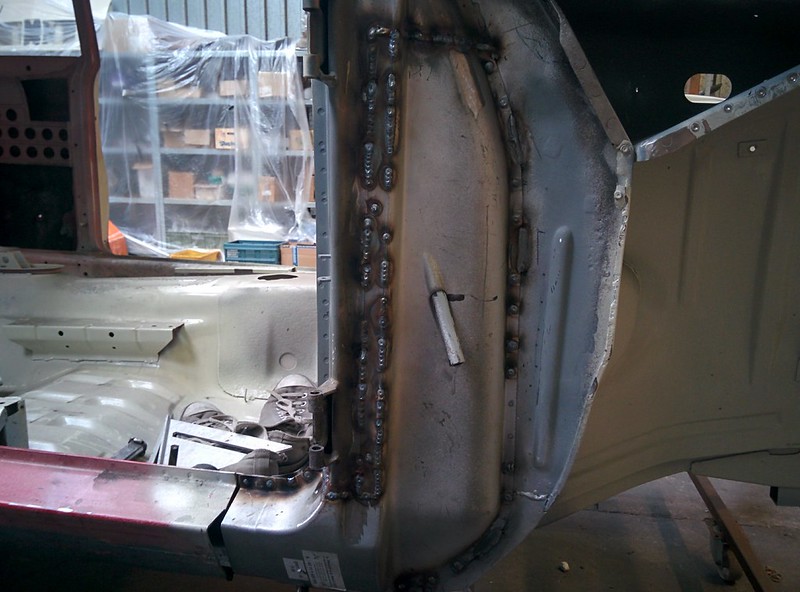
I got good penetration on the backside of the inner panel
All done

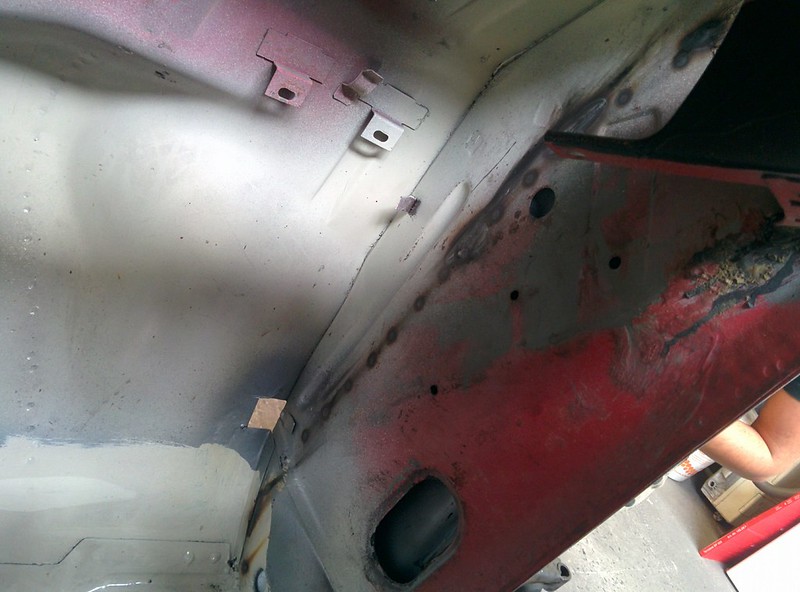
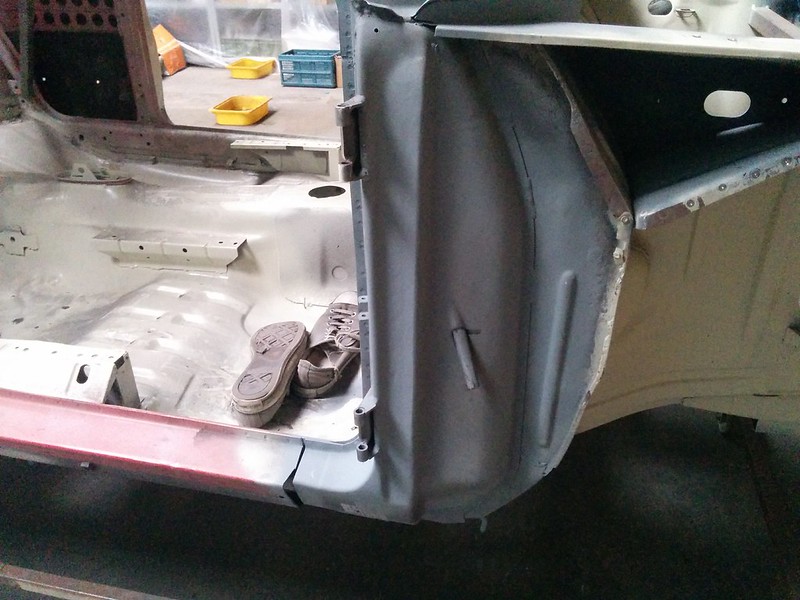
After a lot of welding, it's mostly finished. I still need to get some new sandpaper belts for my powerfile to get into the little corners.

After we were finished with grinding, I sprayed some zincspray to protect the bare metal.
I also tried to cover the inside where I welded but wasn't able to get to it with the normal spraycan.
I used the plastic spray nozzle/tube from a old can of wax
Posted
Settled In

List of past and present cars ive owned
1997 corsa 1.2 poop
2003 Ibiza 130 tdi hybrided to 240bhp
1991 Mk 2 jetta calypso green 1.6td
2001 MG ZT 190+ v6 in trophy blue…. Sold to my brother
2003 Golf GTI TDI 150 black leather heated recaros the
1997 corsa 1.2 poop
2003 Ibiza 130 tdi hybrided to 240bhp
1991 Mk 2 jetta calypso green 1.6td
2001 MG ZT 190+ v6 in trophy blue…. Sold to my brother
2003 Golf GTI TDI 150 black leather heated recaros
the
Posted
Old Timer
PhilipMcTDI said
Again unreal work matey, I do love your attention to detail 😉
Thank you, Philip!
Old Timer
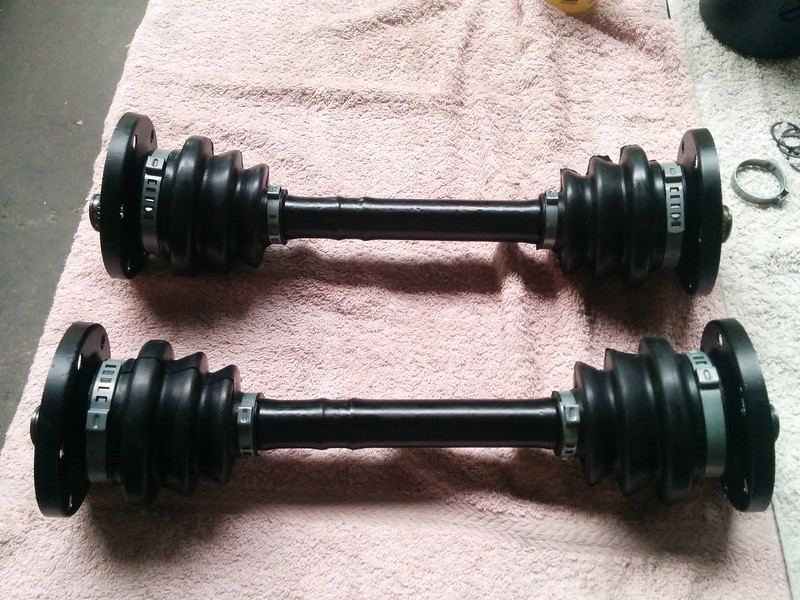
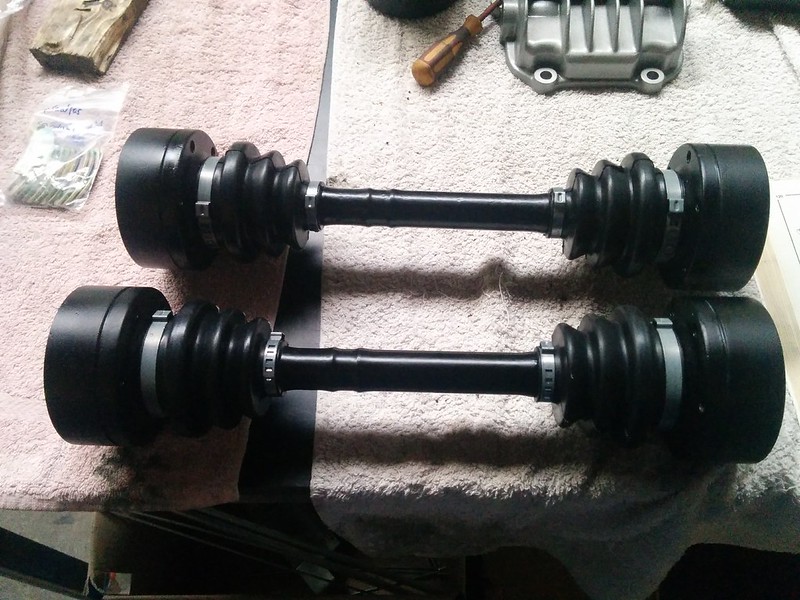
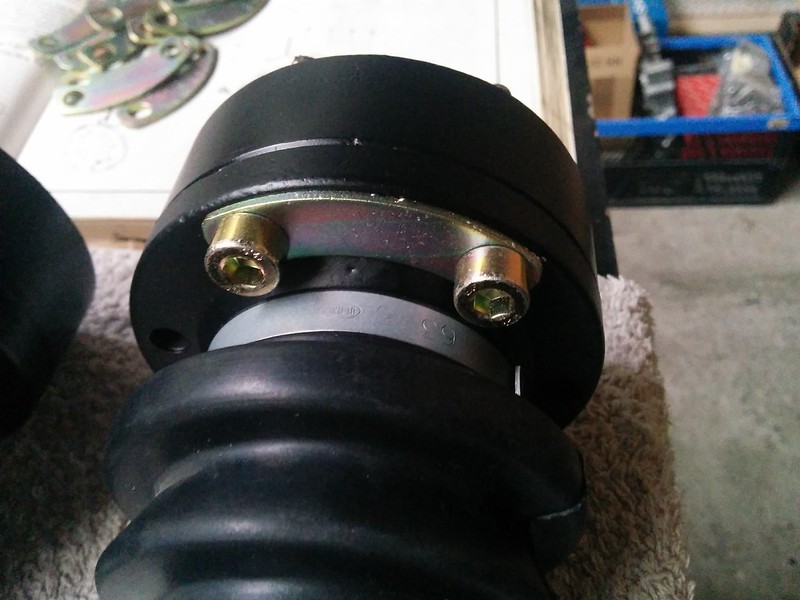
Today I received my new CV boots. After ordering 2 other sets I finally got the right ones.
I didn't want to get a cheap set with regular hose clamps or a set from a brand I had never heard of. I'm not planning on replacing these anytime soon.
I found a set of Spidan boots that fit a Alfa Romeo. a few sites also stated these should fit the BMW E21.
After making sure the dimensions were good, I went ahead and ordered them.
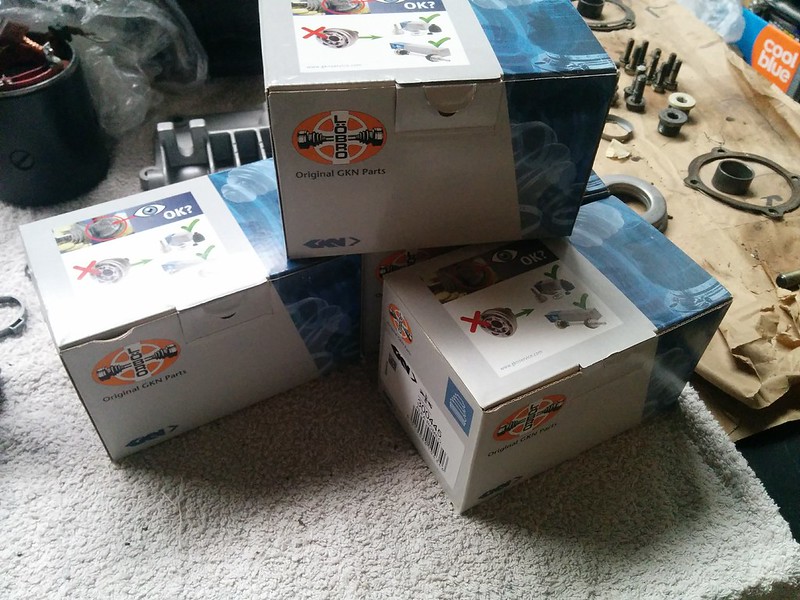
Part no, if someone's interested

Boot's fitted pretty good
I only had time to do one axle this evening. Fitted with the replaced discs. I also added a thin bead of sealant.�


Old Timer
He also got demineralized�water for the yellow plating/passivation kit we bought to plate a few of the remaining bolts/parts we forgot. We still need to sandblast the bolts for the diff and starter motor. So after that, expect some rebuild posts
 �
�
Little preview of what to expect when it'll be on the car..
Old Timer
We already painted it silver grey so the pores of the aluminium aren't going to pick up any oil/dirt when we replace the seals.�
We'll also replate �the hardware and covers when disassembling it. Turned out great so far.

We're now looking for some plastic buckets so we can plate the hardware for the differential and starter motor so we can begin re-assembling those.
Local Hero
Andy
LINCOLNSHIRE REGION -�https://www.facebook.com/groups/467122313360002/
1983 MK1 Golf GTI Campaign Model - Under (looooong) resto!
1962 Rover P4 80
2002 BMW 745i
2008 BMW Z4 2.5Si
LINCOLNSHIRE REGION -�https://www.facebook.com/groups/467122313360002/
1983 MK1 Golf GTI Campaign Model - Under (looooong) resto!
1962 Rover P4 80
2002 BMW 745i
2008 BMW Z4 2.5Si
Old Timer
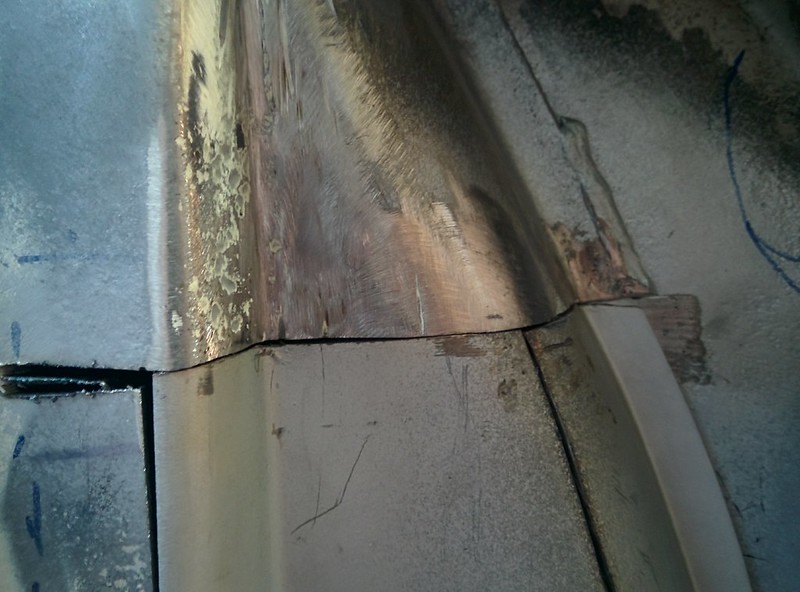
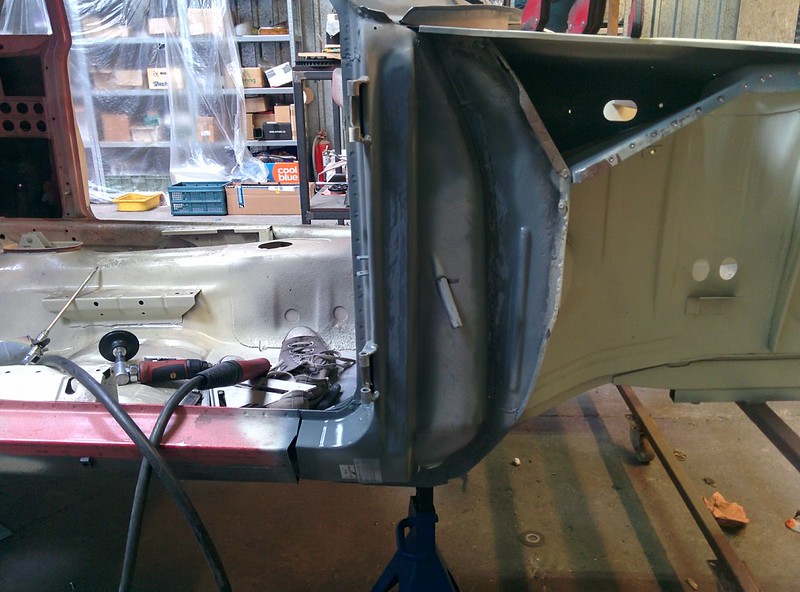
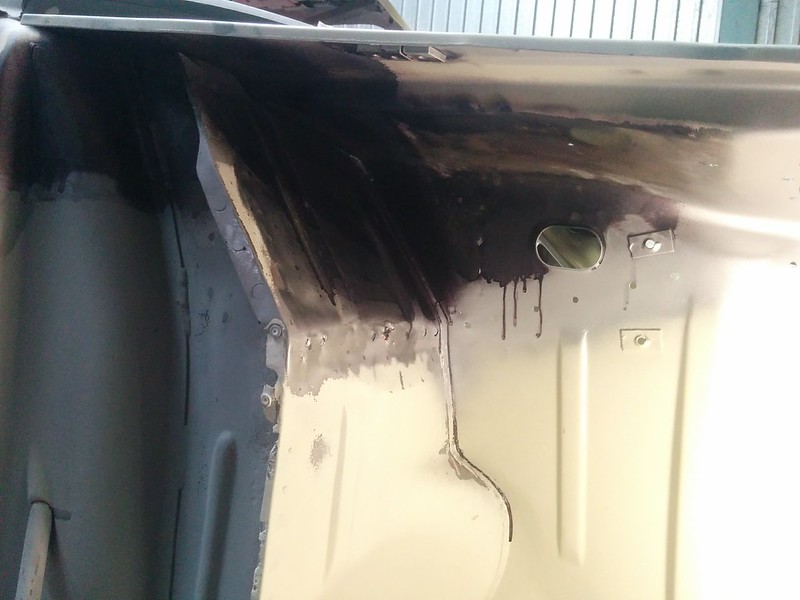
I had already removed the inner support piece of the front inner wing to make sure there wasn't any rust creeping between the seems.
After drilling out all of the spot welds, it was finally out!
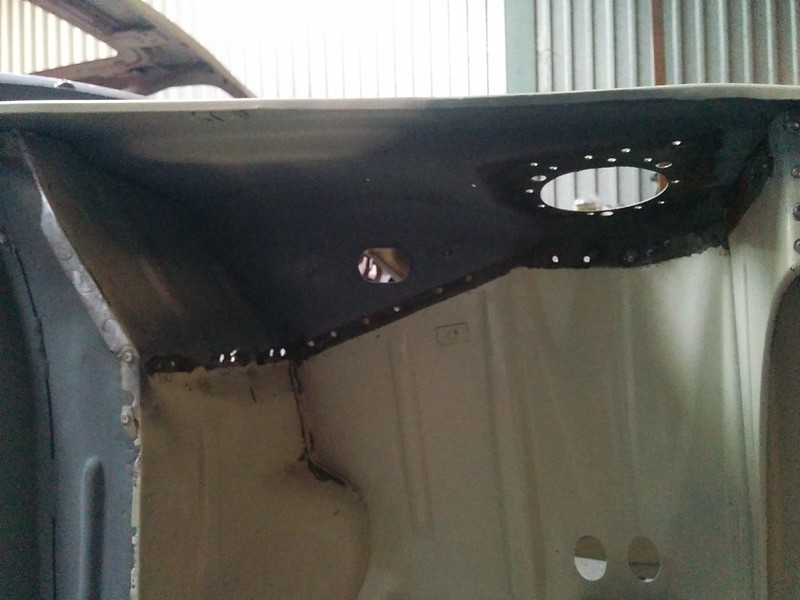
As you can see there was some rust forming between the triangulair piece, that site at the front, and the support piece.
Because we removed the inner support piece, it was much easier to repair some of the rust on the flanges of the A pillar. We first sandblasted the surfaces to see how much rotted metal we had to remove, it wasn't that bad actually.
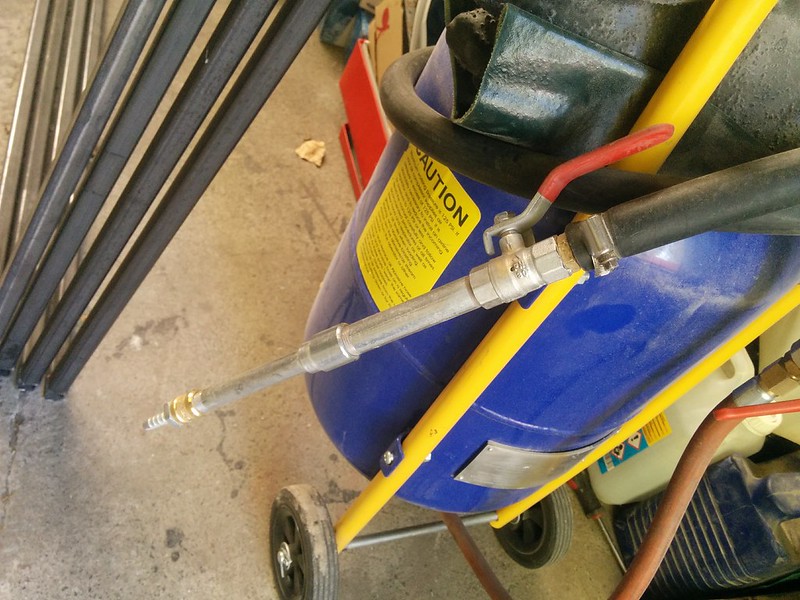
Our sandblasting gun had already seen quite a bit of abuse and wasn't closing very well so we were losing quite a bit of pressure because we couldn't close it off fully.
We decided to make our own gun from some water pipes and valves. The fince nozzle is a compressor connection. Works pretty good!
After sandblasting I covered the blasted surfaces with some Brunox, we'll later on cover them again with 2k epoxy.
I then removed a little section of the triangulair piece since it was badly pitted.

It was then time to remove the inner fender flange. I ground the spot welds down with the pneumatic powerfile as there is no way to use a drill as there is very little space.

After making/bending 2 new pieces they were welded in and ground smooth.

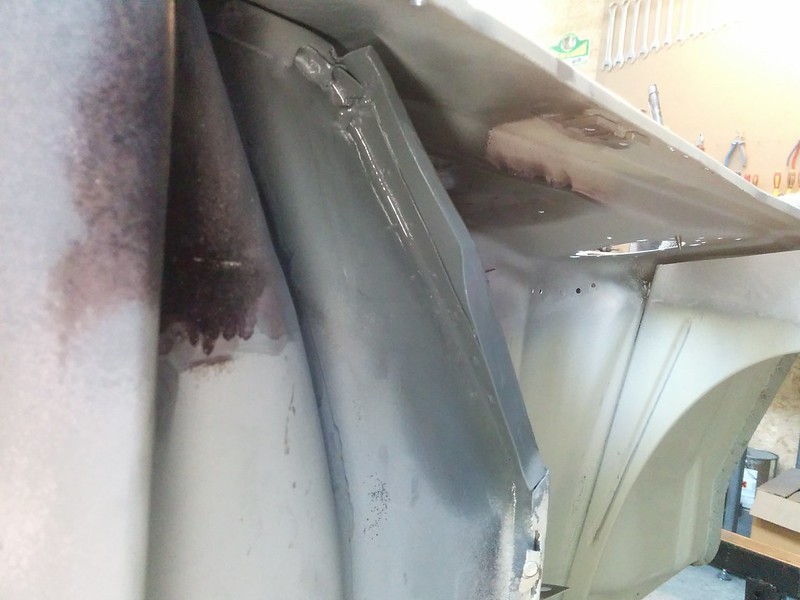
Backside of the repair also looking good.
I also cleaned up the support piece with a strip&clean disc and blasted the pitted areas.
I sprayed zinc spray on the flanges where I'll have to weld, the other sides with Brunox.
Before we're able to weld in this piece again we have to repair the lower section of the inner fender as that flange is also very corroded.
Posted

Moderator
Keep this up and we'll run out of superlatives. 🤔😉👍🏼
Mike
Sent by a smartphone and not a smartperson!
Play Guess the Asking Price 'SEASON 4' as of Sunday the 29th of October 2017.
https://vwgolfmk1.org.uk/forum/index.php?page=topicview&id=chat%2Fmk1-golf-chat_2%2Fguess-the-asking-price_2
OLD.
https://vwgolfmk1.org.uk/forum/index.php?page=topicview&id=chat%2Fmk1-golf-chat_2%2Fold-guess-the-asking
Ever wondered who's behind the scenes of this forum?
https://vwgolfmk1.org.uk/index.php?page=committee
Mike
There's me building mine 28 years ago, almost finished!

Be proud of your VW Golf Mk1, it's very special!
Play Guess the Asking Price 'SEASON 4' as of Sunday the 29th of October 2017.
https://vwgolfmk1.org.uk/forum/index.php?page=topicview&id=chat%2Fmk1-golf-chat_2%2Fguess-the-asking-price_2
OLD.
https://vwgolfmk1.org.uk/forum/index.php?page=topicview&id=chat%2Fmk1-golf-chat_2%2Fold-guess-the-asking
Ever wondered who's behind the scenes of this forum?
https://vwgolfmk1.org.uk/index.php?page=committee
Mike
There's me building mine 28 years ago, almost finished!
Be proud of your VW Golf Mk1, it's very special!
0 guests and 0 members have just viewed this: None.