


GarytheGolf

Posted
Old Timer

GarytheGolf
Posted

Old Timer

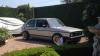
Space ! it's a problem!
It's an old Paddy Hopkirk roof rack I used to use on my mk 2 roof bars, It has come in very handy.
Also ran the engine today, apart from charging the battery, it started first time.
Posted

Moderator


Posted
Old Timer
Posted
Old Timer
Posted
Settled In

Can i ask which primer, silver, black and gold paint you are using for engine component detailing??
Cheers
Posted
Old Timer
mk1_Dips said
As said before malcolm, great work.
Can i ask which primer, silver, black and gold paint you are using for engine component detailing??
Cheers
Hi, I have used a variety of paints, however for the engine detailing I have used Simoniz Engine enamel in Satin, Gloss or Matt Black and Silver.
Prior to painting and where possible, I have soaked and wire brushed various items in buckets of citric acid / BILT HAMBER - DEOX-C RUST REMOVER POWDER solution to remove rust.
The enamel can be painted onto clean bare metal.
For the Gold I have used smooth hammerite. A variety of heat resistant paints for the exhaust, manifolds, etc have been used.
Halfords brake caliper paint for the calipers.
Where primer has been used, Upol Acid 8 Etch Primer or similar., and filler primer where necessary.
Finally I have also used POR 15 on many items, that are not exposed to sunlight or heat. POR 15 is a complete paint process, pretty expensive but provided a very much chip resistant finish.
Hope this helps.
Posted
Old Timer
Continuing with the MOT preparations, I have been doing the handbrake and the front brakes.
As usual, nothing is easy, with the handbrake you seem to need four pair of hands in setting up the lever from scratch.
I seem to have a hybrid again, according to the Haynes Manual it is neither an American or an English handbrake configuration, more a combination of both.
Here are the bits laid out

The cables, note one seems to be longer than the other, one must have been changed in the past.

The handbrake switch

Fitted

A bit of a fiddle to fit, mole grips came handy. The handbrake is OFF. i.e. pressing the switch.

ON, releasing the switch, that turns on the handbrake warning light.

Finally adjusted and set up, generally equal tension on both sides.

I got new front discs and pads from Eurocarparts for the reasonable �36.
When it came to fit them , I noticed a subtle difference between the original ATE pads and the Pagid Pads supplied, in that the original ATE spring retainers do not fit with the Pagid pads. Note the slight cut out on the old ATE pads. New Pagid retainers were supplied.


Pagid Pads installed with the new spring retainers. Don't forget the copper grease on the back of the pads.

Full set up, probably last a lifetime.

Finished for another day.
Posted
Moderator


Posted
Newbie

Posted
Old Timer
Jim89 said
brilliant work. spurs me on to get on with mine.�
smudger1980 said
Nice skills there matey. A job well done by the looks of it
Thanks for the comments, looking forward to this weekend.
Posted
Old Timer
I had a radiator leak from the smallest crack in the plastic at the top of the radiator.

It would only show up after the engine was warm.

So I prepared a little sheet plastic (Railway Modellers) and roughed up both sides.

And glued it using Evostick pipe weld.

I am pleased to say no leaks!.

Posted
Old Timer
For some reason with my 1500cc engine. I have the loom for both the oil pressure switches 0.3 bar and 1.8 bar normally found on the GTI engines.
Having purchased another set of dials, I set about trying to find the route of the problem.
My set of dials, everything worked except the oil pressure. No oil light on ignition ON. Engine running, No oil light.
New set of dials, everything worked except the oil pressure and clock. No oil light on ignition ON. Engine running, Oil light illuminated! WRONG WAY AROUND!!
Solution with new dials installed, I had the pressure switches installed the wrong way around. The 1.8 bar should be by the filter (black and blue lead) and the 0.3 bar connected to the head (yellow lead).
So with the new dials installed, ignition on, oil light illuminated, engine running, oil light extinguished. Oil system working.
PROBLEM: no clock and speedo reading incorrect.
Having found the problem with the switches, I assumed that the red LED bulb in my dials had blown.
So I replaced it with the bulb from the new set and hoped that I had cured the problem.
WRONG!! Ignition on, no oil light. The problem is with the printed circuit.
START AGAIN: to be continued.
Posted
Old Timer
The back of the dials: all bulbs (twist 90 deg to remove), nuts and screws removed.

Disconnect the main connector. Note the labels.

Printed circuit removed.


Removing the LED bulb retainer.


Removing the bulb, note the bent leg, this shows the polarity of the LED bulb.

Complete removal of the printed circuit.

Note the delicate legs that fit into the back of the dash lights and clock.


Removing the clock


Fully assembled, do not forget the voltage regulator, top right.

Complete set of dials, before cleaning.

With the dials installed are instruments are now working including:
Clock, rev counter, and I assume for MOT:
speedo, fuel gauge, oil pressure, battery, indicators, main beam, flashing temperature bulb and lighting.
Posted
Moderator

Desired result achieved, good luck with the MOT

Posted

Old Timer

Posted

Secretary


I cant be bothered stripping it out again so its going to be a job for the winter.�
First Golf, lots of work. I've started so I'll finish!
Posted
Old Timer
smudger1980 said
Lovely work mate. Bet that took you a few hours to do
Desired result achieved, good luck with the MOT

browner01 said
awesome work pal.
Macca said
Well done with the clocks mate. I swapped my speedo into another binnacle, as the rev counter on my originals was knackered. �So once fitted I noticed that the mfa wasnt working�
I cant be bothered stripping it out again so its going to be a job for the winter.�
Thanks for the comments, unfortunately another weekend went by without any work done due to the weather.
However this week, I am having some wheels professionally refurbished and new tyres, hopefully they will be ready by Friday and I can fit them this weekend.
In addition, a Fog light switch, hopefully with a working warning lamp and a bulb for the Hazard switch will finalise the dash for the MOT.
My wife has told me I've got to take her to the hairdressers on Saturday. Hopefully Sunday will be OK.
Posted
Old Timer
 �
�
Posted
Old Timer
Dubbuds said
Top intricate work and good info. Much harder than it looks im guessing
It's just nuts and electrical connections, and a little care.
Great when it works.
0 guests and 0 members have just viewed this: None.