


GarytheGolf

Posted

Old Timer


GarytheGolf
Heater coil removed from the unit and hoses cleaned.


All the foam had deteriorated, just rubbed off with your fingers.
 ]
]Some new foam fitted:


Heater coil reinstalled in unit

Heater unit installed

and connected to the engine cooing system

Heater controls installed

remember to fit and locate the controls to the metal support

The other end of one of the controls

plus the ductwork


The heater system is working now, all three motor speed work and no leaks apparent on the coil and hoses.
This weekend, I took the opportunty to spend sometime removing the white paint specs that were contaminating my dash by giving it a really good spring clean.


More next time.
 Last edit: by Malcolm
Posted
Old Timer
With respect to the dash and interior, I have repaired the ashtray fittings today, the retaining springs generally fall off so I drilled some holes and riveted the springs back on. You need to file some off the formed rivets to allow the ashtray to move in and out.


Ashtray fitted, note the radio blank.
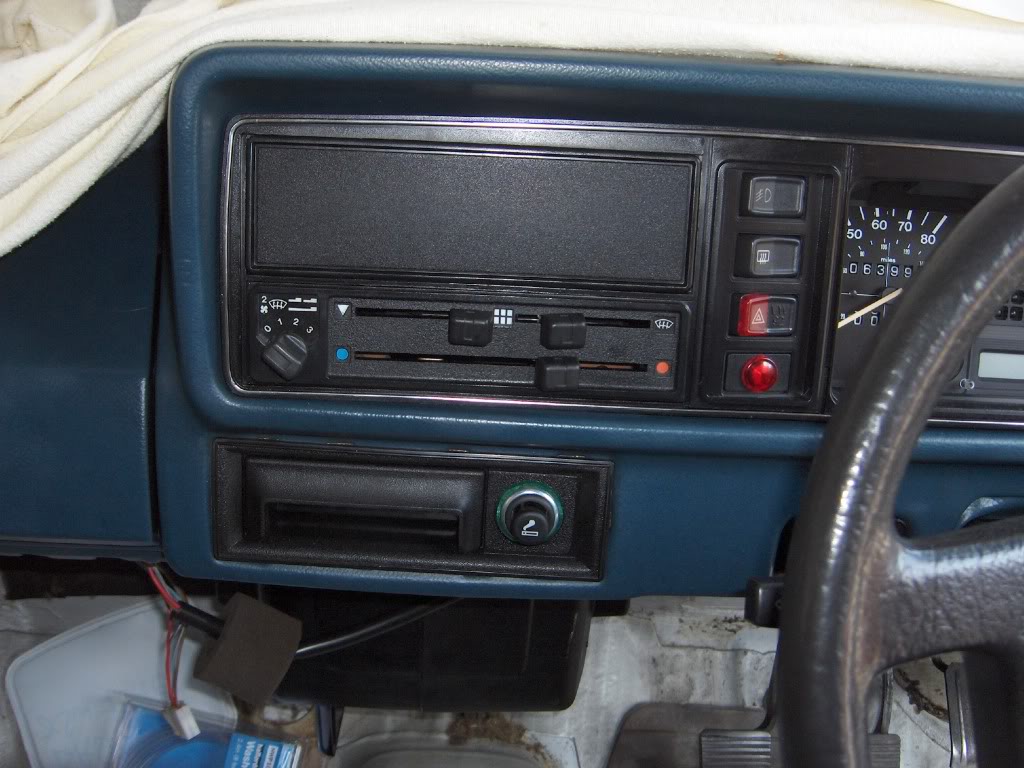
As I want to get an MOT before respray, I have decided to fit some external items:
I bought the seals and plastic ring for the fuel filler pipe some time ago. I have used stainless steel screws to attach it to the bodywork.


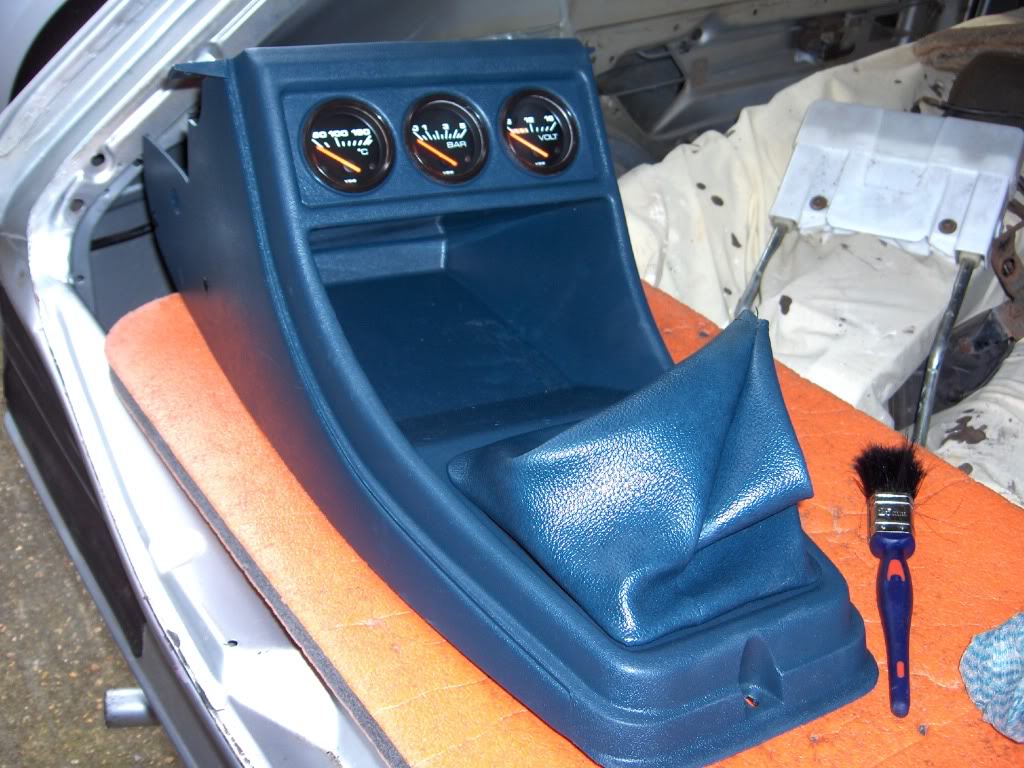
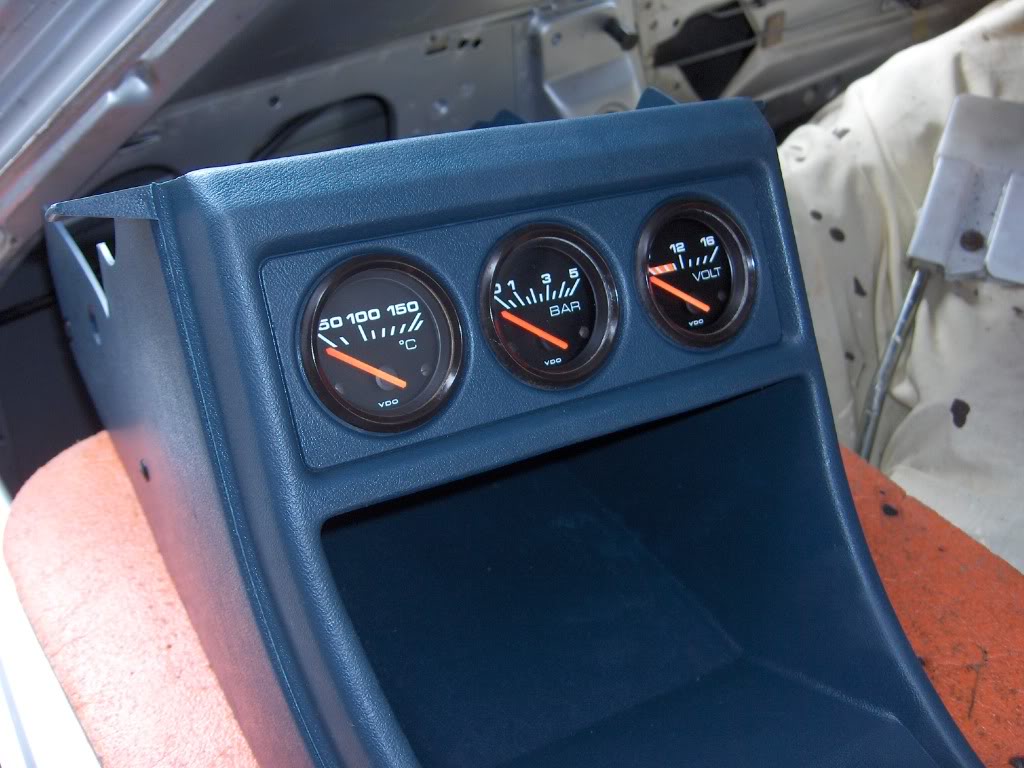
Finally, had a dabble with the center console, I am going to fit additional gauges, so here is what they might look like.
Before:

after:
I am gradually getting back into it, unfortunately though nothing will be happening for a couple of more weeks do to easter and familly commitments.
Posted
Old Timer
Posted
Old Timer
Posted
Old Timer
I have manged to do some work over the last month including: trying to find the parts i packed, checking oil pressure, wiring in extra gauges for the centre console, fitting temporary indicators and a horn.
It is my intention to get the car MOT'd before I strip for a full respray.
I have one issue, where the the horn fit, I cannot remeber!.
Posted
Settled In

Posted
Old Timer
that's the reason I could not find it.
I am not fitting the bumpers for MOT. I am fitting temporary indicators instead.
I have located a temporary horn in the grille area to th right of the radiator.
Posted
Old Timer
Posted
Old Timer
Posted
Old Timer
Posted
Old Timer


Old Timer
To be fair you should be able to make the foam one from a third party supplier, such as hobbycraft. The black one is hard plastic and you maybe able to recover one from your own car or another car and clean it up.
When you get them, use stainless steel countersunk screws to prevent future corrosion during assembly.
Hope this helps
Posted

Settling In

Lee Hartness
Posted
Old Timer
I have just looked at your project and you seem to have a good base to start. I am sure many on this site are envious. A GTI and red.
As per previous advice, get the car sorted out first and then the engine, much of which can be done when it is out. Much of the work during restoration can rectify faults that you knew or may not have known that you had.
Posted
Old Timer

The bonnet lock, while the wife is out.


Last edit: by Malcolm
Posted
Old Timer
Some welding done on original VW wings from another car:


Last edit: by Malcolm
Posted

Moderator


Posted
Old Timer
Just had a look at your project, I see that you have invested much time and effort into your project.
And technically more advanced than mine with not much more room left in that engine bay!.
Posted

COTM Team

Chris

Posted
Moderator
Malcolm said
Smudger, thanks,
Just had a look at your project, I see that you have invested much time and effort into your project.
And technically more advanced than mine with not much more room left in that engine bay!.
Thanks Malcolm,
It's a bit tight in there but it should be finished by the summer.

0 guests and 0 members have just viewed this: None.