


GarytheGolf

Posted
Old Timer

GarytheGolf
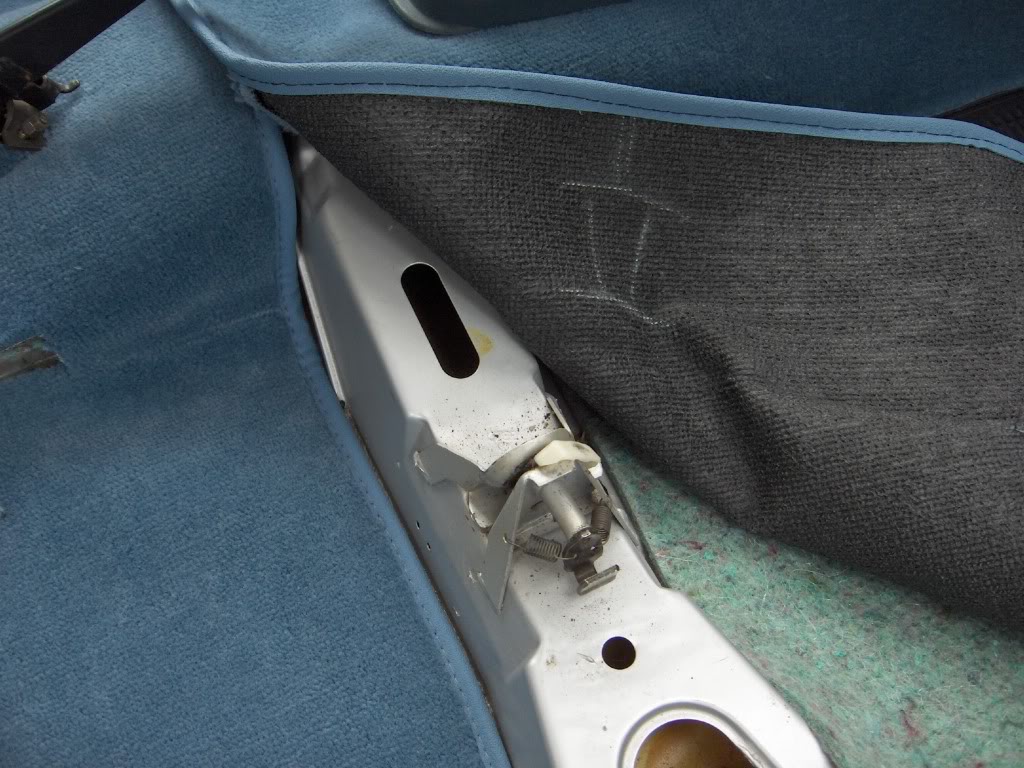
are you going to put the large fuel line that goes into the fuel pump through the holder above spark plug no.1?
I did this on mine because I believe it to be the original route, but I think there should be a rubber bung there to stop the fuel line rubbing which I haven't got.
Posted

Old Timer

If you have a look at the Haynes manual (blue) on the routine maintenance pages at the front you will see the the fuel pipe is supported by the heavy plastic clip on the cambelt cover as shown in my third photo.
I have also had a look at the Etka and cannot see any fuel line support grommet here.
Posted
Settled In


Posted
Old Timer
 Another mystery solved
Posted
Old Timer
AntF, glad to help, as you say, mystery solved.
Posted
Old Timer
Posted
Old Timer
Posted
Old Timer
Posted
Old Timer
Decided to do a test fit.
Underfelt, some pre cust holes, fitted pretty well.


Maybe a little trimming required here.


Fitting the carpet, the side piece

The rear footwell vertical:

Where they join:

Fitting the front and rear footwell prompted a phone call to Terry as they had no holes for the gear stick and handbrake.


But they did have holes marked on the under side for standard car fit. (remember some cars have different gearboxes and modifications to seat mounts, so these areas are left uncut).

With some of the holes cut: the front and rear footwell sections (particularly the front) fit pretty well.
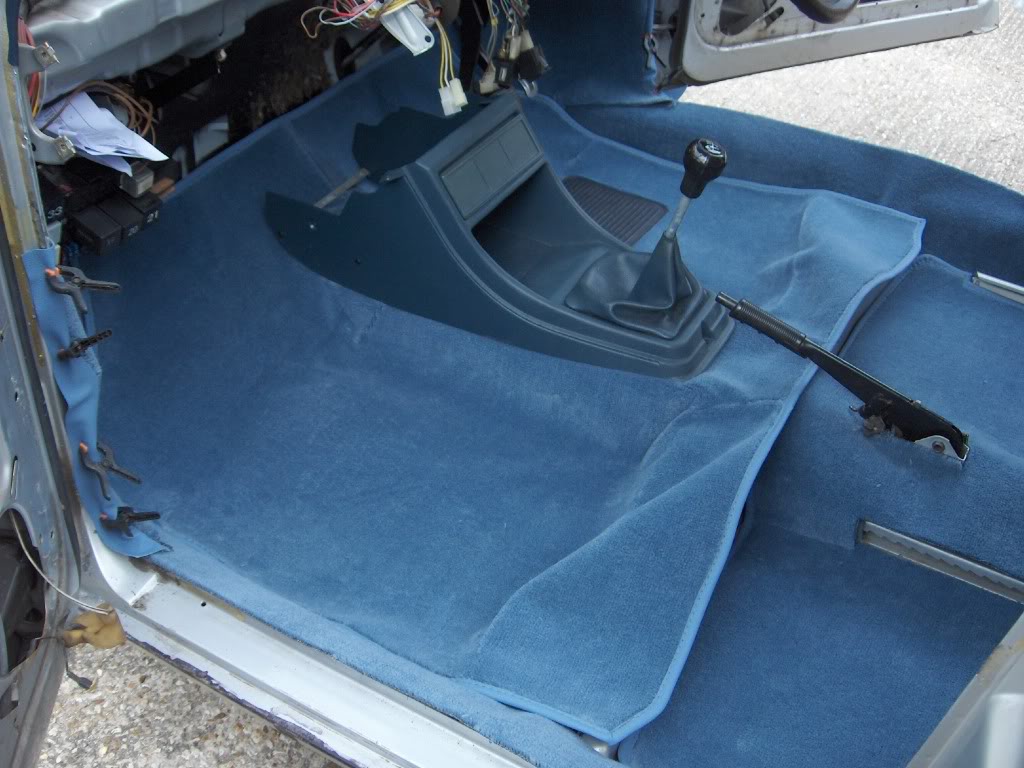


However, one shortfall, which I am sure I can sort out with Terry, the carpet does not cover the area by the side of the rear seat.

As stated before, this was a test fit, I did not do all the cutting I needed too, the car and me are not ready yet.
The carpet is flexible enough, without being too thin, to mould around corners. With a bit of sticky stuff here and there, they should stay in place OK
 Last edit: by Malcolm
Posted
Old Timer
Posted
Old Timer
I have had a few distractions getting a new daily driver, I decided to replace my Mk4 with a new Mk6. A big decision I know, but its lovely.
Any way a whole day today on the Mk1, I have decided to get my car through MOT to get some confidence that everything mechanically is sound with the car, maybe run it it for bit before I get it resprayed, I would hate to do some major work after respray.
So I decided to fit the dash today with the dials and the switches. I am starting to like the blue, bit it's taken some time!
You might think the pictures are bad, but I discovered today that I have some white flecks, probably paint, scattered on some the vinyl and plastic. I shall be carefully removing them in time.


Last edit: by Malcolm
Posted

Old Timer

might keep an eye out for one in the diesel to match the blue interior
good work

Posted
Settled In
Posted
Old Timer
Spent most of the time trying to find them!! At the moment, I have isolated the headlamp washer circuit by installing a body grommet in the washer bottle.
Still need to find the cap for the washer bottle.
A few pictures:


Last edit: by Malcolm
Posted
Settled In

Posted
Old Timer
Though I can probably do the spraying myself, I did have some training and experience in my Army aviation days, I do not have all the resources to do it myself so I will probably use a bodyshop.
Thanks for the comments.
Posted
Settled In
engine re build
Posted
Old Timer
I used simoniz satin and gloss engine paint on various parts of the engine. Gloss on the rocker cover. Satin on the block.
In addition, I used gold smooth hammerite on the water pipe and engine brackets, silver hycote exhaust paint on the exhaust downpipe and back box.
Posted

Settling In

regards, Max
http://www.vwgolfmk1.org.uk/modules.php?name=Forums&file=viewtopic&p=736555#736555
Posted
Old Timer
For example I had previously purchased a GTI box only to find that my new 5th gear was exactly the same gearing ratio as my original gearbox 4th gear. It would mean doing the same max speed but using 5 gears.
I chose a 4T box which came from a Mk2 4+E car. The 5th gear being an economy / overdrive gear.
If you have a look at the Gear Ratio guide on this site forum you will see what I mean.
I had the gearbox professionally overhauled and I did fit a new clutch assembly as well.
Hope this helps.
There are too many online users to list.