GarytheGolf
Posted
Old Timer


GarytheGolf
A picture of the starting point:

A bit of a jigsaw puzzle this, here are the items stripped down ready for painting:

Just noted that the top left item is the wrong way around.
 Last edit: by Malcolm
Posted
Old Timer


The starter motor reassembled after cleaning and checking all parts and lubricating the bearings.


 Last edit: by Malcolm
Posted
Old Timer


Before:

Stripped, though I cannot get the front bearing off the shaft, no need to really.

 Last edit: by Malcolm
Posted
Old Timer


The alternator refurbished and reassembled.


 Last edit: by Malcolm
Posted
Settled In

Posted
Old Timer


Posted
Old Timer

Keep up the good work; can't wait to see more pics!!
Posted
Old Timer


The alternator fitted:
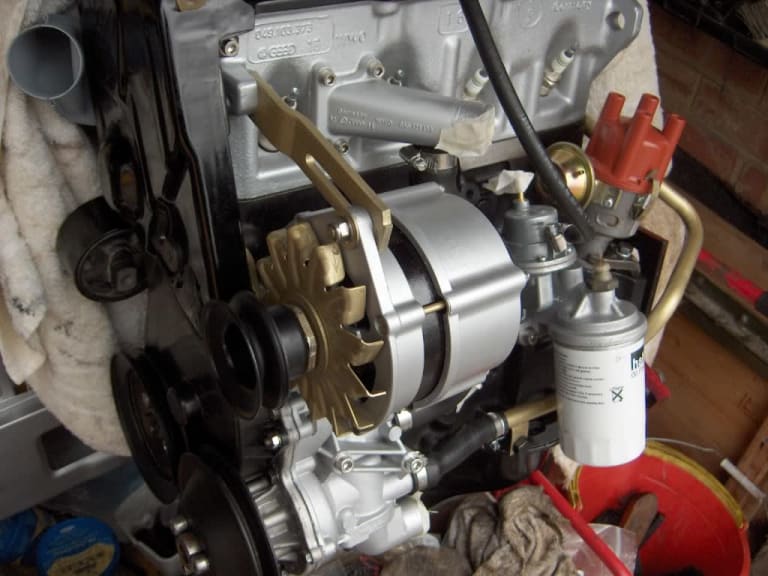
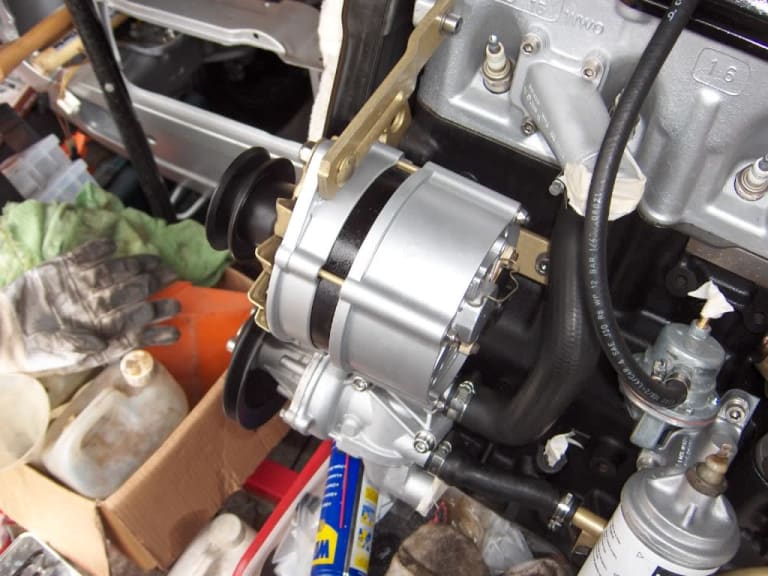
Starting to sort out the gearbox, I have aquired another 5 / 4 + E speed box from a Mk2 with a longer 5th gear which I am going to get reconditioned.
As much as I would like to do it myself, I have never stripped a gearbox, I would not like to put it into the car and find it was not good. I have found a gearbox reconditioning place in Salisbury via a couple of recommendations.
Original 4 speed on left, FM Code Close ratio 5 speed from Mk1 in middle, 4T Code 5 / 4+E speed from Mk2 on right.

The Mk1 & Mk2 gearboxes side by side, notice the differences in the attachments around the diff:
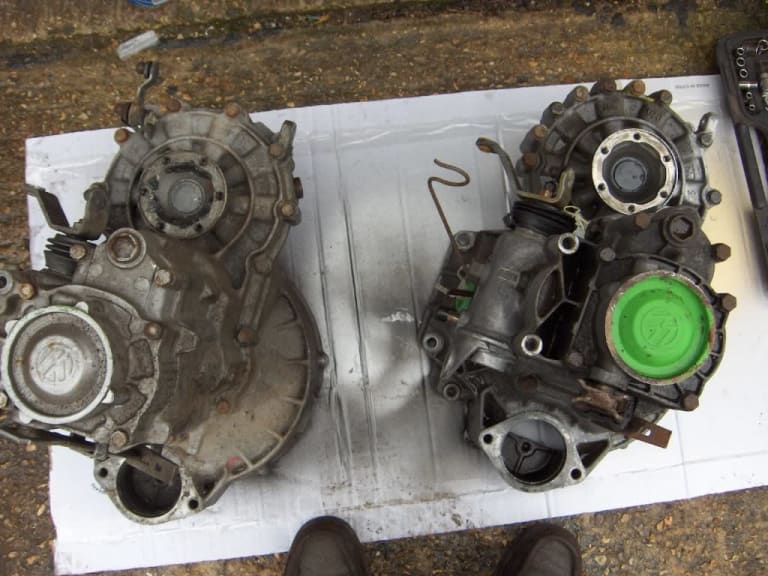


Off to the gearbox reconditioners in the wifes Lupo, which I think will be the next VW classic in years to come.
Unfortunately the gearbox is rattling in idle after only 20K on the clock, its a Polo gearbox, so I am also getting that checked out as well.


 Last edit: by Malcolm
Posted
Old Timer


Picked up the gearbox from the reconditioners on Friday, saw it in final assembly.

Removed the engine off the engine stand.

The gearbox connection plate installed.

The NOS clutch pressure plate installed.
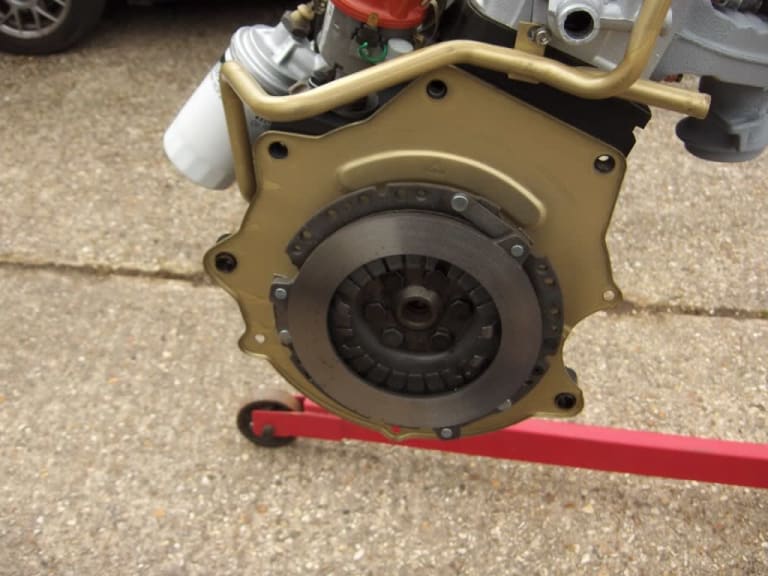
Had a problem with the new clutch assembly, it seems my 1983 car originally had the 200mm pressure plate installed but only a 190mm friction disc fitted.
The new VW pressure plate and friction disc were 190mm, unfortunately my original release plate for a 200mm did not fit the new pressure plate for a 190mm. Hopefully you can see the difference in the retaining tang position between to the two different sizes. Original 200mm on left, new 190mm on right
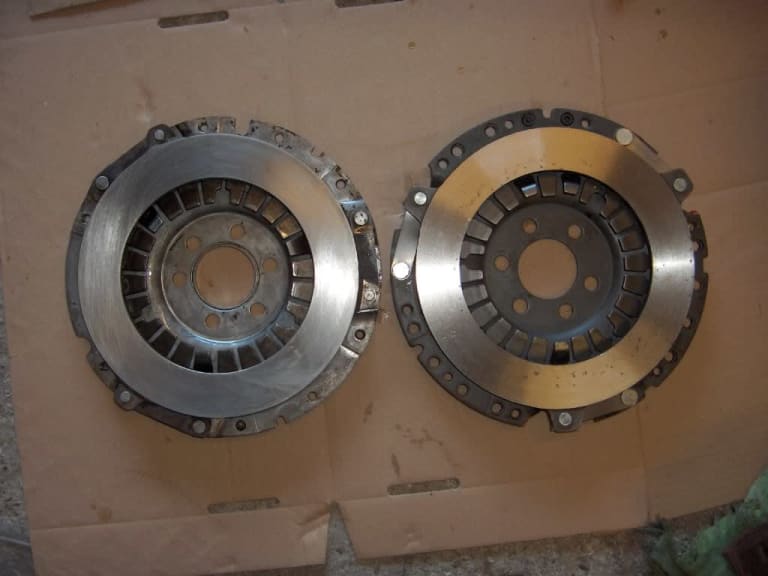
So I cleaned my old pressure plate and fitted the new friction disc. It seems, stamped on the pressure plate, it will take a 200 or 190mm friction disc.
Flywheel and clutch friction disc installed.

The gearbox fitted with starter motor, engine and gearbox mounts, everything eventually nice and tight.

The clutch lever will new a coat of paint.

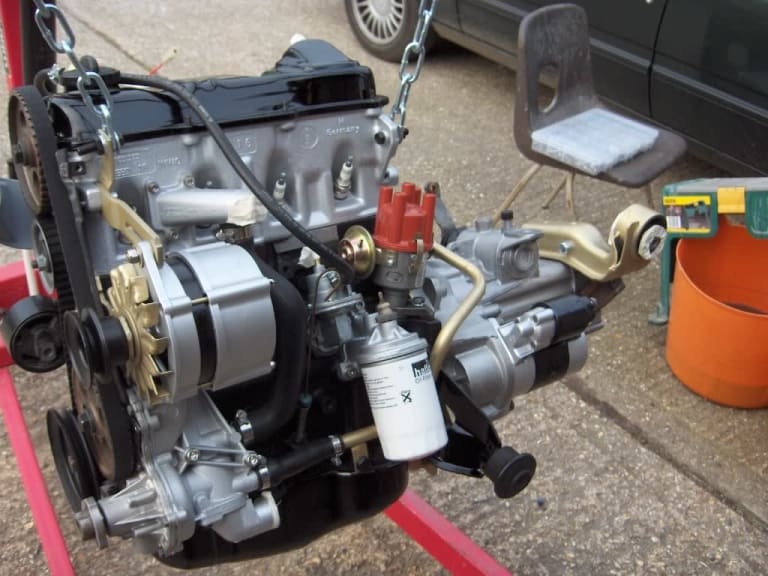

Hopefully tomorrow the engine and gearbox will be going in.
 Last edit: by Malcolm
Posted
Settling In

looking forward to the next installment.
1990 Clipper
1991 GTI Sportline
1991 GTI Sportline
Posted
Old Timer


Unfortunately, I cannot fit the engine today due to unscheduled activities and I am away next weekend. It will be a few weeks until the next installment.
Posted
Old Timer

Posted
Old Timer


Gobsmacked with the price of oil nowadays!
Been advised to but part synthectic 10/40 for engine and gearbox. Best for low annual mileage cars.
Posted
Old Timer


Before putting the engine in I had a few issues to address, flywheel bolts, CV driveshafts and cambelt timing.
I had forgotten to loctite the Flywheel attachment bolts, so the gearbox and clutch came off again to loctite them. Note the gearbox code that nobody can find when it is dirty.

Thought I would clean the CV joints and replen with new grease. Well that went wrong, as I managed to have 4 ball bearings fall out, so I parked the job for another day.
I found that the cambelt timing issue was related to fitting the camshaft sprocket the wrong way around.
For info, both sprockets on the camshaft and intermediate shaft are the same part number and have a dot on each side of the sprocket. The dot in line with the top of the cylinder head should have both the inlet and exhaust valves closed on the compression stroke when the engine is @ TDC.
Having addressed that I was ready to put the engine in.


On the way in.

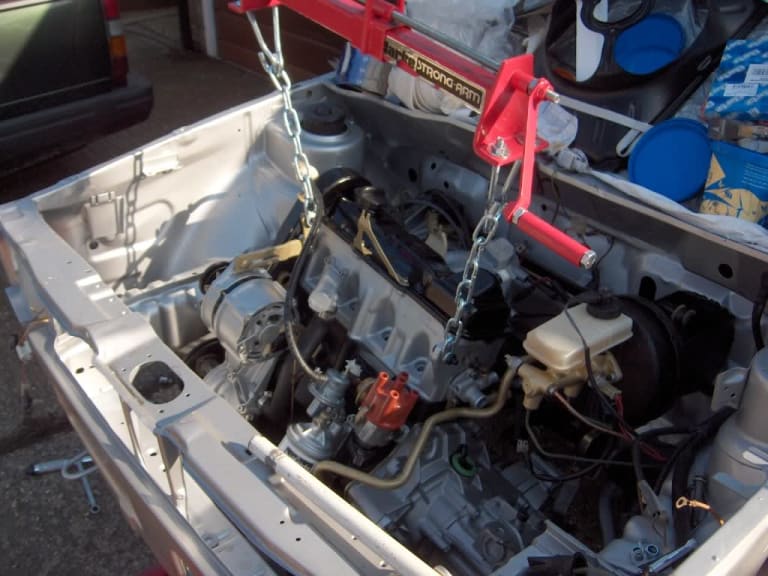
A few scratches on the way in, which can be rectified later.

Engine in.

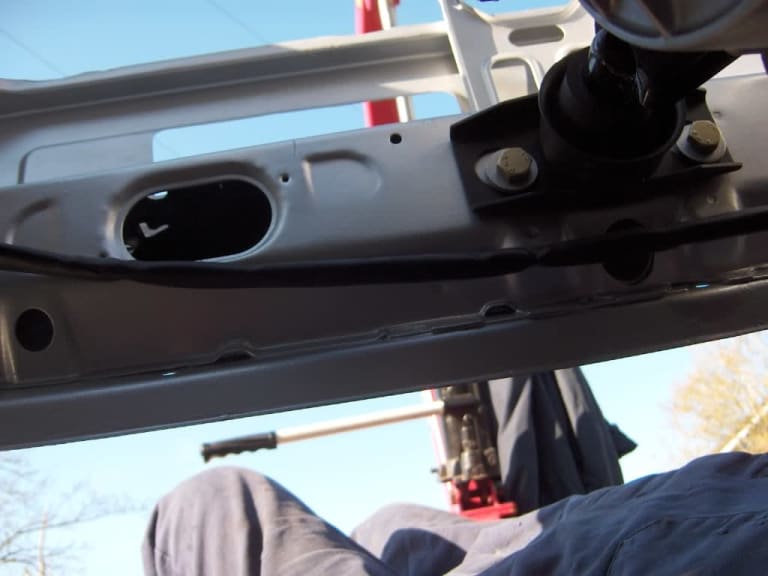
Bottom gearbox mount. Still missing an attachment nut, I seemed to have lost it for now, for some reason a fine metric thread.

Offside engine mount.

Nearside gearbox mount

Front engine mount.
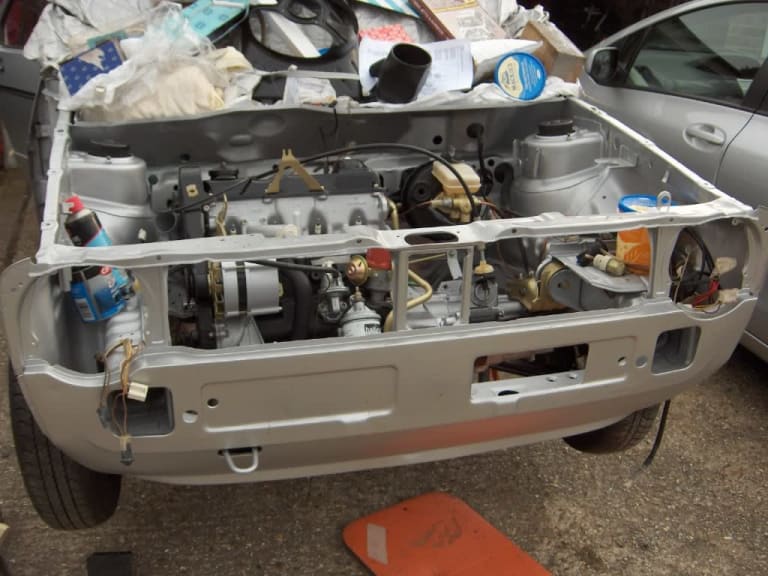
Engine covered up.

Finished for the day, it's there somewhere, honest !!

 Last edit: by Malcolm
Posted
Old Timer


Posted
Old Timer


jellybelly said
stunning
what gearbox have you ended up fitting??
i need a 5 speed for my diesel but i'm unsure of the code that i need
Hi, a 4T from a Mk2 1.8 GL, I believe that it is also fitted to a 1.6 driver. There were 2 4T gearboxes on ebay at the time. I purchased one, here is a link to the other, still a current ebay listing:
http://cgi.ebay.co.uk/ws/eBayISAPI.dll?ViewItem&item=320659590493&ssPageName=STRK:MEWAX:IT
I will send you a pm on the correspondance I had with the seller on its details.
Posted
Old Timer


Apologies for some of the photographs, camera went a bit dicky, or maybe me. Lost the macro setting for a day.
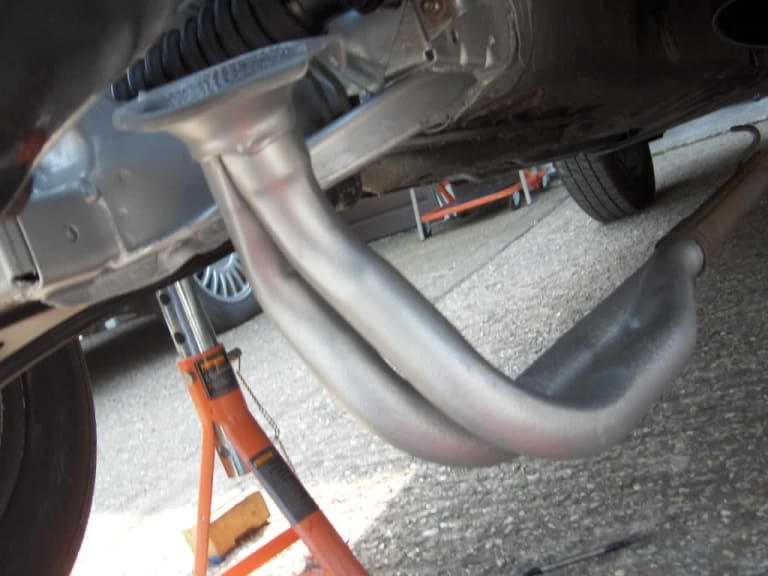
Car up in the air. My favorite position!
Fitted the exhaust system.
New metal seal and clamps with sealant.

Came across an idea to fit the exhaust spring clamps using a couple of exhaust clamps, works quite well.


The middle box might have to be changed at a later date. Finally found the bottom gearbox mount large fine metric threaded nut, thought I might have to but a new one.

Connected the gearbox linkage, remember 5 speed to replace the 4 speed.

Remember to change the speedo gearbox cog from White to RED, extra tooth for 5 speed, most of them anyway.
Note the little retaining circlip / spring at the end of the drive, this prevents the cog falling into the gearbox when fitting / removing.

Also fitted the clutch cable.


I was able to get my inner CVs cleaned and regreased. Not for the feint hearted this one, thought I was not going to get the bearings back in.
Mucky job, this link really helped me out
Tom's VW Pages - CV Joint Maintenance

Reassembled correctly, notice thin inner race web to fat outer race web.

Lubricated with plenty of grease.


Extra grease in the boot

Glove comes in handy to keep clean.

CVs Ready to fit in the car, just a few bands to fit. Drove me to drink!

 Last edit: by Malcolm
Posted
Old Timer


In addition, I am retro-fitting anti roll bars from a GTI to stiffen up the ride. Front brackets installed:


 Last edit: by Malcolm
Posted
Old Timer

Posted
Local Hero

Alex
There are too many online users to list.


