


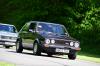
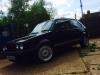
G60 16V Tin Top GTi


Local Hero


Andy
LINCOLNSHIRE REGION -�https://www.facebook.com/groups/467122313360002/
1983 MK1 Golf GTI Campaign Model - Under (looooong) resto!
1962 Rover P4 80
2002 BMW 745i
2008 BMW Z4 2.5Si
LINCOLNSHIRE REGION -�https://www.facebook.com/groups/467122313360002/
1983 MK1 Golf GTI Campaign Model - Under (looooong) resto!
1962 Rover P4 80
2002 BMW 745i
2008 BMW Z4 2.5Si
Old Timer

Have you trial fitted your serpentine belt yet? When I was messing about with mine I read concerns elsewhere about getting enough purchase on the water pump pulley if the belt just runs over it, and others talking about wrapping the belt over the top of it and spinning the pump in reverse (or finding a pump that spins the other way). I can't remember where the dsicussion led to though!
Posted
Settled In

Tidiest solution I've seen is to run a tdi needle roller between the water pump pulley and the alternator to give the belt more purchase. Think I'm going to use a toothed belt setup to bypass the whole issue

Posted
Old Timer
Laughingboy said
I remember suggesting that on the dubforce forum. Think the conclusion was no as the impeller is designed to spin one way.
Tidiest solution I've seen is to run a tdi needle roller between the water pump pulley and the alternator to give the belt more purchase. Think I'm going to use a toothed belt setup to bypass the whole issue
That's the post I was talking about �

Mine is a hybrid mixture of Bartek brackets mounting the alternator at the back with a bespoke solid tensioner with ribbed 5v belt
I think the alternator tucked down below at the front looks much better but it wouldn't fit with my intercooler setup
Posted
Settled In
Got to say, never been a fan of wrinkly paint but that rocker cover has made me a convert! Looks cracking.
Posted

Settled In

bye bye 8 valve..
Posted
Settled In


Settled In
But she's in and sitting pretty!


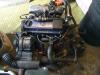
Now the first problem that we hit was the stainless steel manifold was hitting on the steering knuckle. so much so you couldn't even turn left to right without hitting it… So out came the grinder!
The double joiner part �(its the one on the right in the picture below) We cut out a section and turned 180 so it was flat, then added a piece of pipe and welded it in! Sounds easy but it wasnt.. But its donr the job!


All sorted and lots of clearance

�
 Last edit: by GeeBee
Settled In
Posted
Settled In


Looks the business!
next problem was notching out the front chassis to take the alternator.. Easy for JMR…

Last edit: by GeeBee
Posted
Settled In


Had these two alloy tanks made and joined by a breather system at the top mounted to the same shape as my battery tray.. VHT painted and looks the part..

Hit a problem the the breather pipe along the top was to high so a quick trim and repainted…she's in..

Posted
Settled In
Needed to change the intercooler outlet pipes�to fit..
bought some 63mm alloy pipe and made it work..


Next on JMRs advice a Volvo oil cooler was purchased and modified to fit


next polo alloy radiator painted and slim line fan added


Now the fun part! making the supercharger outlet work!
bought an RS outlet pipe


lets hope its works!!
Last edit: by GeeBee
Posted
Settled In

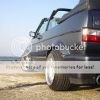
nicely hidden in back side area..
Wilwood calipers and 285mm disc going on at the front


Good old flee bay
Posted
Settled In


Love the craftsmanship JMR has done on the injector rail. such a neat job!


So there you are… if only it was that easy! I can't thank JMR enough.. they've been superb throughout
Now to put 2000 miles on and then get it tuned to its full power..
Last edit: by GeeBee
Posted
Settled In
Settling In

1983 mk1 golf gti�
Posted
Settled In
Settling In
1983 mk1 golf gti�
Posted
Settled In

Moderator


0 guests and 0 members have just viewed this: None.