


AL's (not so) mini build... August 2015 - Paint!

Posted

Moderator

AL's "Mini Build" *04/12 - 6 months later...*


Posted
Local Hero
smudger said
Nice work buddy. Keep the updates coming
Hopefully it won't be another 2 months before I make further progress, eh!
My Build Thread
All My Build Photos - https://www.flickr.com/photos/pix-al/albums/72157622794406840
My other hobby - www.pix-al.co.uk
All My Build Photos - https://www.flickr.com/photos/pix-al/albums/72157622794406840
My other hobby - www.pix-al.co.uk
Posted
Local Hero
One has been ordered and progress will continue once recieved!
My Build Thread
All My Build Photos - https://www.flickr.com/photos/pix-al/albums/72157622794406840
My other hobby - www.pix-al.co.uk
All My Build Photos - https://www.flickr.com/photos/pix-al/albums/72157622794406840
My other hobby - www.pix-al.co.uk
Posted
Local Hero
Well, the welding bit, any way!
Few more pics for you…
Got my inner arch piece the other day which was an awful pressing.
Cut it down to fit my hole which took a while, but got something that fitted OK in the end.
I drilled some hoes in the panel and my partly fitted outer arch ready to plug weld it in to place then gave a quick coat of weld-through and let it dry before clamping the piece in place and starting to attach:
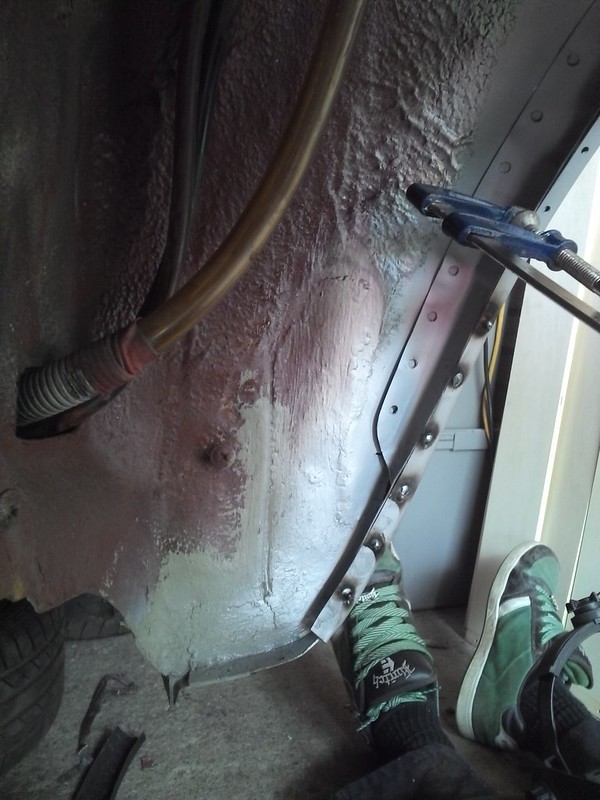
Untitled by www.pix-al.co.uk, on Flickr
Untitled by www.pix-al.co.uk, on Flickr
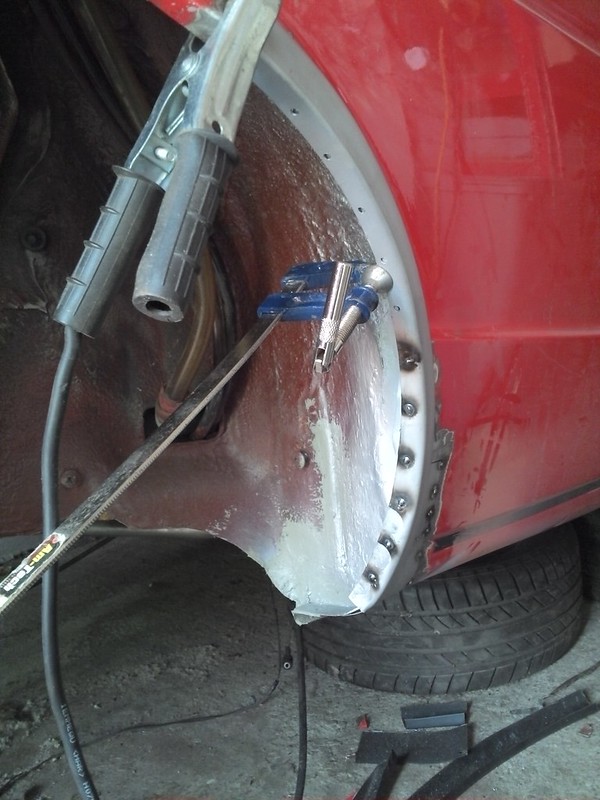
Once all the holes were plugged, I grouns back flat:
Untitled by www.pix-al.co.uk, on Flickr
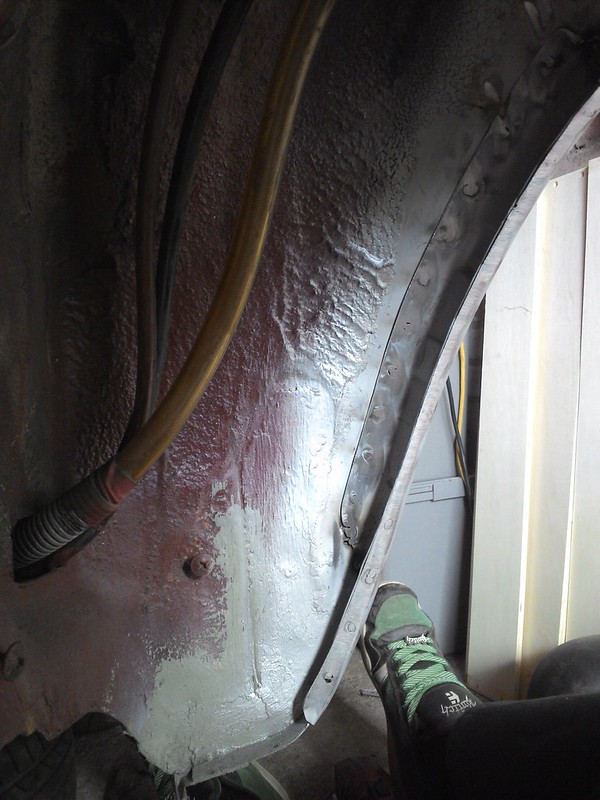
After going over with the flap wheel and wire brush, I gave it a nice coat of acid etch and when dry applied a healthy dolloping of sealer:
Untitled by www.pix-al.co.uk, on Flickr
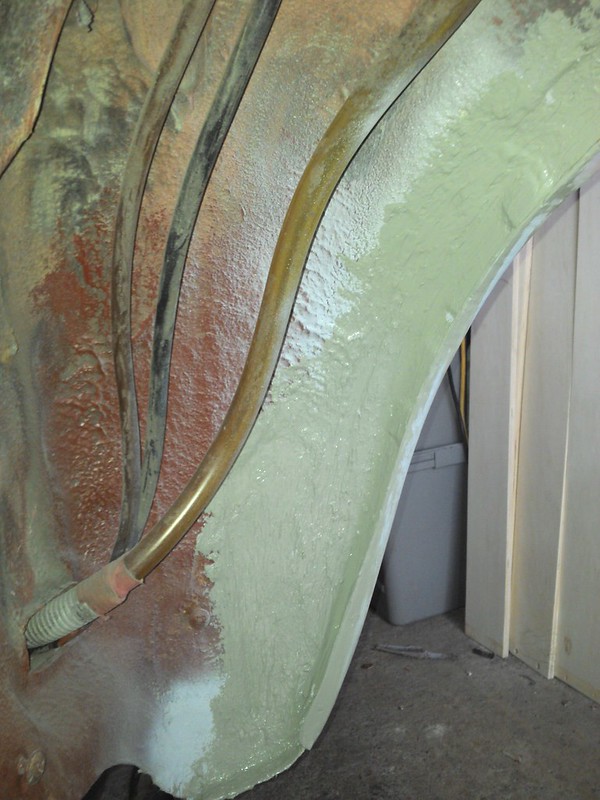
Happy with the fit and finish, I moved on to the outer arch too and finished off the welding on that.
Ground back all of the welds and gave a good coating of acid etch. Applied plenty so that it would properly sink into the "gaps" around the weld area.:
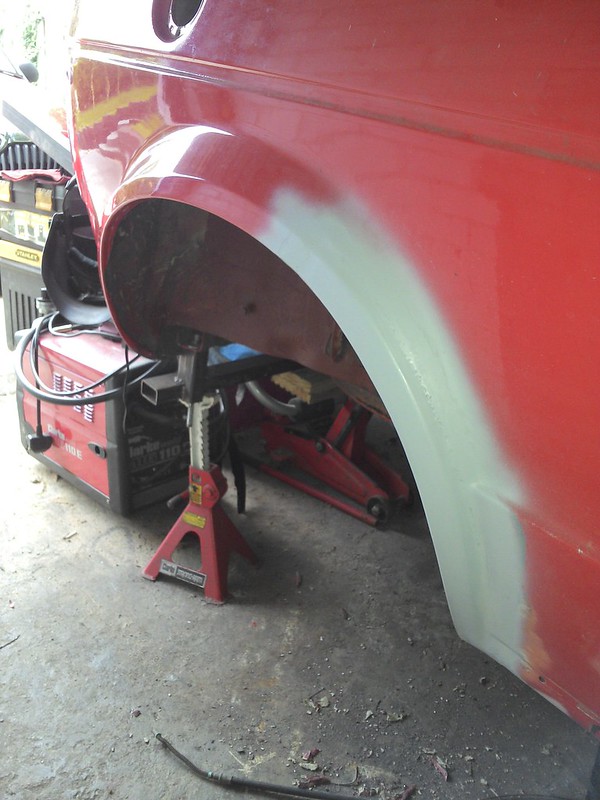
Untitled by www.pix-al.co.uk, on Flickr
Need to spend some time with the filler now to get the arch nice and smooth again.
It is not as good as I had hoped it would be after just grinding the welds, but I think my expectations were a bit out of whack considering this was my first attempt at any real body work welding!
My Build Thread
All My Build Photos - https://www.flickr.com/photos/pix-al/albums/72157622794406840
My other hobby - www.pix-al.co.uk
All My Build Photos - https://www.flickr.com/photos/pix-al/albums/72157622794406840
My other hobby - www.pix-al.co.uk
Posted

Moderator


Andy.
Posted
Local Hero
Melteddrummer said
Nice job Al, looks really neat!!
Andy.
Cheers Andy.
Quite pleased with how it is coming on to be honest!
My Build Thread
All My Build Photos - https://www.flickr.com/photos/pix-al/albums/72157622794406840
My other hobby - www.pix-al.co.uk
All My Build Photos - https://www.flickr.com/photos/pix-al/albums/72157622794406840
My other hobby - www.pix-al.co.uk
Posted

Local Hero

Andy
LINCOLNSHIRE REGION -�https://www.facebook.com/groups/467122313360002/
1983 MK1 Golf GTI Campaign Model - Under (looooong) resto!
1962 Rover P4 80
2002 BMW 745i
2008 BMW Z4 2.5Si
LINCOLNSHIRE REGION -�https://www.facebook.com/groups/467122313360002/
1983 MK1 Golf GTI Campaign Model - Under (looooong) resto!
1962 Rover P4 80
2002 BMW 745i
2008 BMW Z4 2.5Si
Posted
Local Hero
Hairyarse said
Looks very good Al, a very tidy job indeed
Thanks for the comment Andy.
As I said above, I am pleased with how the repairs are coming along.
It won't be long and I'll be moving on to the other side!
My Build Thread
All My Build Photos - https://www.flickr.com/photos/pix-al/albums/72157622794406840
My other hobby - www.pix-al.co.uk
All My Build Photos - https://www.flickr.com/photos/pix-al/albums/72157622794406840
My other hobby - www.pix-al.co.uk
Posted
Moderator
Posted
Local Hero
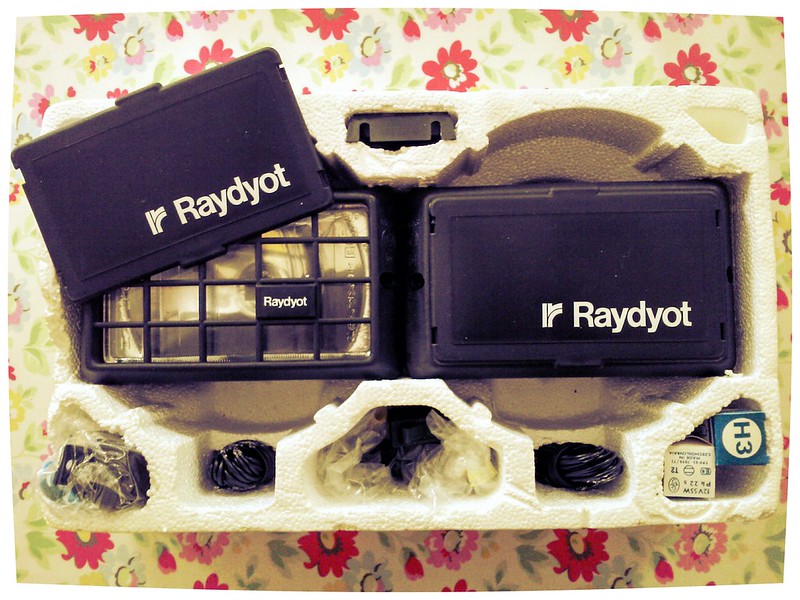
Untitled by www.pix-al.co.uk, on Flickr
I have a very vivid idea of how the car will look in this latest incarnation.
One of the things I want is a nice pair of "period" looking spot lights, but they had to be black and have black covers.
Found these on Ebay and had to have them. They are unused, never fitted to anything, complete with bulbs, wiring, relay etc.
Even retroficated the pic a bit thanks to these clever smart phone apps that take all the agony out of photoshop!
Hope you like them!
My Build Thread
All My Build Photos - https://www.flickr.com/photos/pix-al/albums/72157622794406840
My other hobby - www.pix-al.co.uk
All My Build Photos - https://www.flickr.com/photos/pix-al/albums/72157622794406840
My other hobby - www.pix-al.co.uk
Posted

Old Timer

Will be interesting to see what you have planned?
Good work on your welding, esp' as you haven't done it before! You've made a nice job of it.
Like many things, prep is everything, take you time, don't rush, get in a comfortable position, and if in doubt of your settings once welding, stop and adjust, don't plough on.
Glad you've got the argon mix now.
Look forward to more

Posted
Local Hero
I was previously seeing this work as a chore, however now the tricky bit under the car is done I am actually enjoying it. Seeing the progress, especially when it is made quickly is very rewarding and I am looking forward to the next time I can go and spend time on the car!
The Argon mix has deffinitely helped.
I am now off work for the next ten days, but I don't think I'll get to spend a lot of that time on the car - Supposed to be doing things with the Kids!

My Build Thread
All My Build Photos - https://www.flickr.com/photos/pix-al/albums/72157622794406840
My other hobby - www.pix-al.co.uk
All My Build Photos - https://www.flickr.com/photos/pix-al/albums/72157622794406840
My other hobby - www.pix-al.co.uk
Posted
Local Hero
Finished the welding where the arch meets the sill and also made another small repair to the rear of the arch.
Finally got some filler on the repair too. Should start to get this arch back in to shape some time soon!
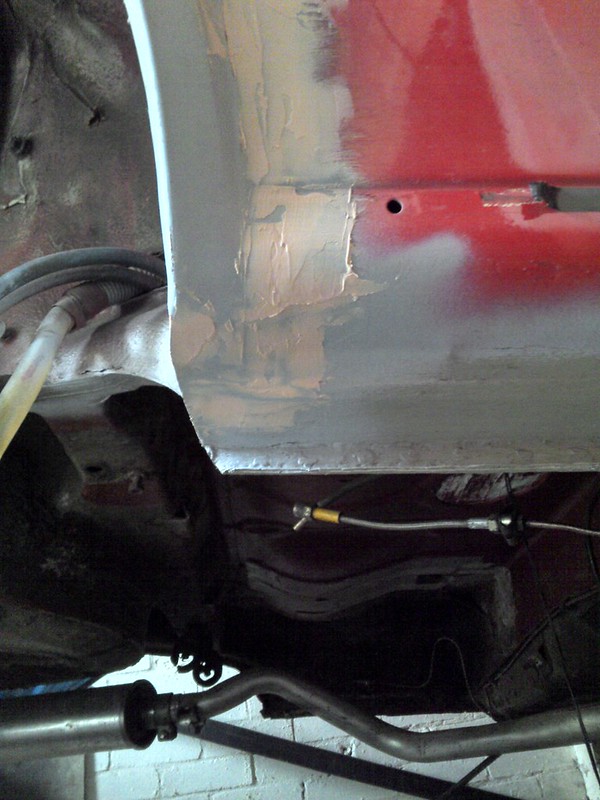
Untitled by www.pix-al.co.uk, on Flickr
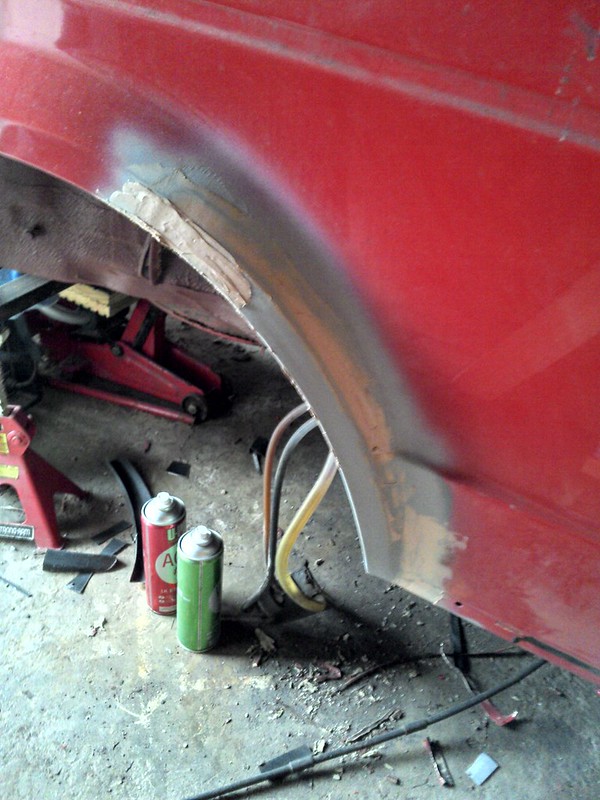
Untitled by www.pix-al.co.uk, on Flickr
My Build Thread
All My Build Photos - https://www.flickr.com/photos/pix-al/albums/72157622794406840
My other hobby - www.pix-al.co.uk
All My Build Photos - https://www.flickr.com/photos/pix-al/albums/72157622794406840
My other hobby - www.pix-al.co.uk
Posted
Local Hero
Well - After another cold, wet, dark winter of absolutely no work on the car whatsoever, I have suddenly found some inspiration and am determined to get the car back together THIS SUMMER!
Over the past couple of weekends of good weather, I have been back down the garage and been over the underside of the car to sus out how much more work needs doing.
I finally finished drilling out the old snapped stud and dropped the replacement bolt in place.
I haven't tacked it into place yet. I was hoping to be able to get a socket on the top of it to do it up but it sits way back up inside the chassis leg, not directly underneath the hidden access slot inside the car. I don't know if I can get the end of the welder up into position…
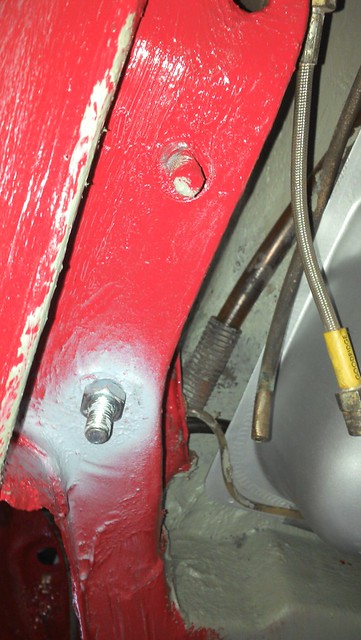 stud by www.pix-al.co.uk, on Flickr
I thought that the passenger side axle mount point was also going to need some repair work however after taking the wire wheel to the area, it was all nice and solid.
I can't say the same for the spare wheel well though which, after poking at it with a screwdriver, looks like a sieve…
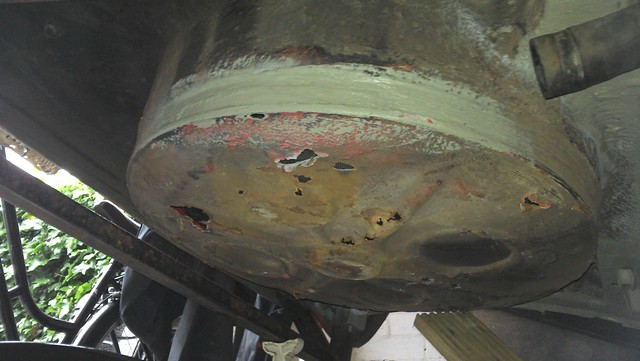 seive by www.pix-al.co.uk, on Flickr
Is this an MOT fail? Non structural part, well away from any mount points…
 I have also strapped a new tank into place and have a new filler neck to go on next
It doesn't look too tidy under there with lots of different colours of primer, hammerite, old underseal, new underseal etc, but it is solid:
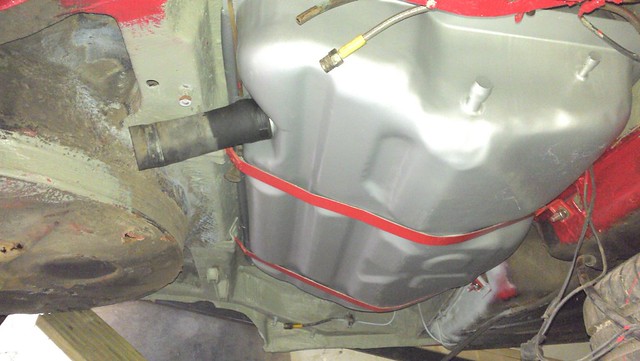 new tank by www.pix-al.co.uk, on Flickr
The old tank was very rusty at the seams and had a piece of tubing epoxy'd to the tank where the smaller breather attaches.�Seemed like the best thing to do was replace.
The mounting ring at the top of of the filler also disintegrated when I removed it from the car, so a new one of those was required too!
The accumulator and hoses are pretty screwed too. Been keeping an eye on ebay but the only ones that seem to come up are just as bad as mine and poeple want a lot of cash for them.
I have read that the car will run OK without the accumulator. Anyone tried this?
A possible alternative that I think I will probably try is one of these:
�

It is a one-way check valve for Bosch 044 910 fuel pumps. Supposed to stop built up pressure in the lines forcing fuel back the wrong way through the pump when ignition is switched off. Pretty much what the accumulator does, no?
It is listed as suitable for a Cosworth. I figure it certainly won't harm the Golf…
Going to use some AN fittings to make up a new fuel feed line too. Not cheap, but cheaper than the alternatives!
So - here's to yet another spurt of posts. Lets see if I can get a bit more done this time, EH!
AL.
My Build Thread
All My Build Photos - https://www.flickr.com/photos/pix-al/albums/72157622794406840
My other hobby - www.pix-al.co.uk
All My Build Photos - https://www.flickr.com/photos/pix-al/albums/72157622794406840
My other hobby - www.pix-al.co.uk
Posted
Local Hero
Might be hangover from the last forum?
My Build Thread
All My Build Photos - https://www.flickr.com/photos/pix-al/albums/72157622794406840
My other hobby - www.pix-al.co.uk
All My Build Photos - https://www.flickr.com/photos/pix-al/albums/72157622794406840
My other hobby - www.pix-al.co.uk
Posted
Local Hero

Any rot/holes must be at least 300mm away from any mounting point, such as axle, seat belts, suspension etc. If you're ok dimensionally I'm not sure where you sit though for a collection of holes?
Will you have it ready for the AGM?? I take it you're coming??
Ref your title of the thread, are you editing it in the very first post of the thread? If not, that's why you can't do it
Andy
LINCOLNSHIRE REGION -�https://www.facebook.com/groups/467122313360002/
1983 MK1 Golf GTI Campaign Model - Under (looooong) resto!
1962 Rover P4 80
2002 BMW 745i
2008 BMW Z4 2.5Si
LINCOLNSHIRE REGION -�https://www.facebook.com/groups/467122313360002/
1983 MK1 Golf GTI Campaign Model - Under (looooong) resto!
1962 Rover P4 80
2002 BMW 745i
2008 BMW Z4 2.5Si
Posted
Local Hero
Hairyarse said
Will you have it ready for the AGM?? I take it you're coming??
Possibly running, but not in a finished/painted state!
Hairyarse said
Ref your title of the thread, are you editing it in the very first post of the thread? If not, that's why you can't do it
Yes - Trying in the very first post, but the title doesn't show as displayed on the thread itself?!?
My Build Thread
All My Build Photos - https://www.flickr.com/photos/pix-al/albums/72157622794406840
My other hobby - www.pix-al.co.uk
All My Build Photos - https://www.flickr.com/photos/pix-al/albums/72157622794406840
My other hobby - www.pix-al.co.uk
Posted
Local Hero
Andy
LINCOLNSHIRE REGION -�https://www.facebook.com/groups/467122313360002/
1983 MK1 Golf GTI Campaign Model - Under (looooong) resto!
1962 Rover P4 80
2002 BMW 745i
2008 BMW Z4 2.5Si
LINCOLNSHIRE REGION -�https://www.facebook.com/groups/467122313360002/
1983 MK1 Golf GTI Campaign Model - Under (looooong) resto!
1962 Rover P4 80
2002 BMW 745i
2008 BMW Z4 2.5Si
Posted
Local Hero
Hairyarse said
Oh weird. I can try it if you let me know what you want it changed to
Just see if you can get rid of the bit that says "AL's "Mini Build" *04/12 - 6 months later…*"
Ta.
My Build Thread
All My Build Photos - https://www.flickr.com/photos/pix-al/albums/72157622794406840
My other hobby - www.pix-al.co.uk
All My Build Photos - https://www.flickr.com/photos/pix-al/albums/72157622794406840
My other hobby - www.pix-al.co.uk
Posted
Local Hero
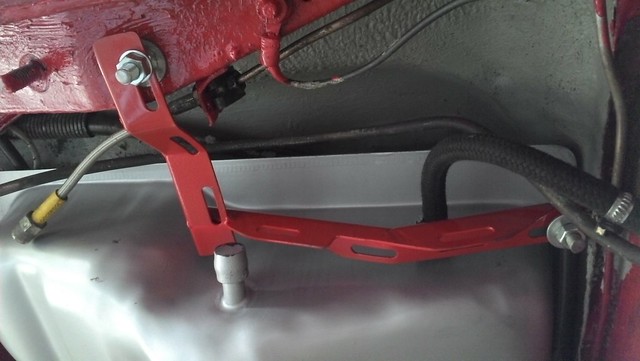
Got the underside looking a bit better with a bit more red hammerite.
 Untitled by www.pix-al.co.uk, on Flickr
Also fitted the new filler neck. That was a pain as I had to drop the tank again to get the hose on the end as there was not enough room to move it all into position!
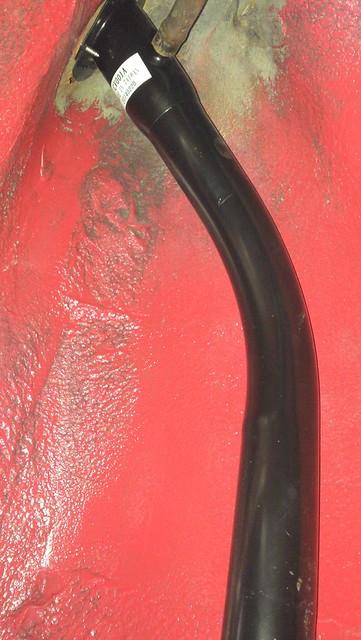 Untitled by www.pix-al.co.uk, on Flickr
Had to do some head scratching with the fuel pump too.
As mine was not originally a Gti, I kind of bodged it when I installed all the fuelling bits and pieces and cable tied the pump into place…
 Not having a fuel pump bracket and having no idea how it was supposed to mount, I started making my own. Only really need something that the pump can attach to and hold it in place.
Not too bothered about positioning as I am going to try the check valve (above post) in place of the nasty/rusty accumulator, so the routing of the feed pipe will be a little different anyway.
 Untitled by www.pix-al.co.uk, on Flickr
Also thought I'd start on some of the cosmetic repairs that are needed too so started by glueing a support piece into my busted end cap for the bumper. Will fill and smooth the cap and give it a nice coat of black to go back on the car…
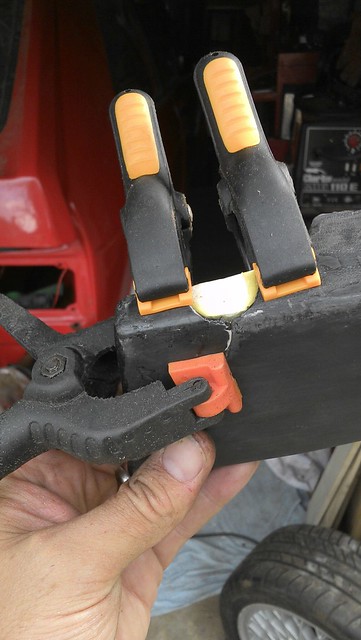 Untitled by www.pix-al.co.uk, on Flickr
I am hoping to get the rear axle back on next weekend which means that the car will be properly mobile again for the first time in about 3 years!
Need to get the bits I need for the fuel feed and make that up before I can consider starting it�

My Build Thread
All My Build Photos - https://www.flickr.com/photos/pix-al/albums/72157622794406840
My other hobby - www.pix-al.co.uk
All My Build Photos - https://www.flickr.com/photos/pix-al/albums/72157622794406840
My other hobby - www.pix-al.co.uk
0 guests and 0 members have just viewed this: None.