


AL's (not so) mini build... August 2015 - Paint!

Posted

Settled In

AL's "Mini Build" *04/12 - 6 months later...*

Restored 1961 Mk1 Mini Misses drives a 10 plate bmw mini cooper d sports pack Me drives a 61 plated C220 CDI Restored 1960\'s forecourt petrol pump 1964 P4 Rover 110 resorted by my dad 23 years ago On the look out for LBD 376Y
Posted
Local Hero

Mortz said
oohh the joys……the joys of restoration
What's up dude…
Your cabby on the road yet then?
My Build Thread
All My Build Photos - https://www.flickr.com/photos/pix-al/albums/72157622794406840
My other hobby - www.pix-al.co.uk
All My Build Photos - https://www.flickr.com/photos/pix-al/albums/72157622794406840
My other hobby - www.pix-al.co.uk
Posted
Settled In
AL_Mk1 said
Mortz said
oohh the joys……the joys of restoration
What's up dude…
Your cabby on the road yet then?
Alright mucker?
No not yet…..not far off though….got some issues with my power roof….got some issue's with electrics…..replace anti roll bar bushes…..fitted new outer hood once power hood issue is sorted….should be ready for MOT then butt !
Restored 1961 Mk1 Mini Misses drives a 10 plate bmw mini cooper d sports pack Me drives a 61 plated C220 CDI Restored 1960\'s forecourt petrol pump 1964 P4 Rover 110 resorted by my dad 23 years ago On the look out for LBD 376Y
Posted
Local Hero
Well, small update (No pics though)… The tank/pump/accumulator are now off!
What a pain removing the tank was when you can only get the car about a foot off the floor!
Tank - Going to give it a rub down and paint it up. Bit of rust around the edges, but it looks ok.
Pump - Has only done about 3.5K miles so is good. Quite a lot of crap caught in the little thimble filter though!
Accumulator - This look like it came off the titanic! Suprised it/pipes are still going - very rusty etc. Outer braiding of the pipes is rotten and falling apart!
Also had to take the filler neck off as I couldn't disconnect it from the tank while on the car!
Pipe itself is good, though the mounting lugs wjere it bolts to the rear quarter all snapped off! Going to have to improvise there, I think!
With all of the above out, I can see what I am up against with the shell. It isn't actually too bad!
Few areas of light rusting that should brush up OK.
The rusty axle mount looks quite bad now and I can't believe I hadn't spotted it before it got to this state!
Anyway, hope to make some real progress over the next couple of weeks - lots of Pics to come!
AL.
My Build Thread
All My Build Photos - https://www.flickr.com/photos/pix-al/albums/72157622794406840
My other hobby - www.pix-al.co.uk
All My Build Photos - https://www.flickr.com/photos/pix-al/albums/72157622794406840
My other hobby - www.pix-al.co.uk
Posted
Settled In
mk1 golf - resto
mk3 polo breadie - daily banger
mk3 polo breadie - daily banger
Posted
Local Hero
boyle_sbd said
you got that mount in yet al?
Ah mate, I have been really slack…
:roll:
I haven't touched it in weeks. Been really busy in work recently which has meant I have been looking forward to just chilling at the weekends, meaning no work on the golf! I really need to pull my finger out and get some work done.
My Build Thread
All My Build Photos - https://www.flickr.com/photos/pix-al/albums/72157622794406840
My other hobby - www.pix-al.co.uk
All My Build Photos - https://www.flickr.com/photos/pix-al/albums/72157622794406840
My other hobby - www.pix-al.co.uk
Posted
Settled In
need to get your weld on dude.
mk1 golf - resto
mk3 polo breadie - daily banger
mk3 polo breadie - daily banger
Posted
Local Hero
Unfortunately I had a bit of a disaster…. The car fell of the "Skate" I made for it and the passenger rear quarter fell against the garage door frame. leaving a nice prominent crease, right across the swage line, in front of the rear arch!!!

The driver side sill took a bit of weight, deforming it slightly, but that I can cope with, as I have to do a repair to the end anyway, so can likely straighten it out, but the rear quarter… :dontknow:
I can get at the back of the dent as it is under the window, though how well I can knock it out is another thing…
There is no way I can afford to get it painted, so a full on repair is out of the question.
Was too upset to take any pics so will do so next time it comes out.
Good news is, I did manage to cut out some of the sections I needed to, so I can make up some templates, cut some steel and start welding!
My Build Thread
All My Build Photos - https://www.flickr.com/photos/pix-al/albums/72157622794406840
My other hobby - www.pix-al.co.uk
All My Build Photos - https://www.flickr.com/photos/pix-al/albums/72157622794406840
My other hobby - www.pix-al.co.uk
Posted
Local Hero
Been out between rain showers this PM and popped the rear side window out so that I could get to both sides of the panel while outside the car.
Gave it a bit of a beating with the palm of my hand and got some of it back into shape, though it is still visible.
Wondering if someone like "dentwise" paintless dent removal would be able to sort it? Anyone had any experience of this sort of company?
Still no pics, sorry…
:cry:
My Build Thread
All My Build Photos - https://www.flickr.com/photos/pix-al/albums/72157622794406840
My other hobby - www.pix-al.co.uk
All My Build Photos - https://www.flickr.com/photos/pix-al/albums/72157622794406840
My other hobby - www.pix-al.co.uk
Posted
Old Timer


Chin up, it'll work out for you! Just be thankfull it didn't fall on you and you didn't get hurt.

Posted
Local Hero
bouchay said
Just be thankfull it didn't fall on you and you didn't get hurt.
Yes - that did go through my mind!
TBH, its show and shine days are over and I just want to enjoy driving it again!
For a 28 year old motor, it isn't doing too bad, even with the dent! Perhaps a dent doctor can sort it out. I think I'll get it running and MOT'd first, eh!
My Build Thread
All My Build Photos - https://www.flickr.com/photos/pix-al/albums/72157622794406840
My other hobby - www.pix-al.co.uk
All My Build Photos - https://www.flickr.com/photos/pix-al/albums/72157622794406840
My other hobby - www.pix-al.co.uk
Posted
Old Timer
Posted
Local Hero
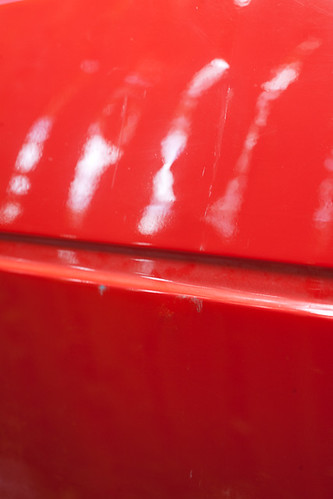
The only thing that really bothers me is that the rustoleum that suits this approach doesn't come in proper mars red - I wouldn't want to put any other red on the car…
My Build Thread
All My Build Photos - https://www.flickr.com/photos/pix-al/albums/72157622794406840
My other hobby - www.pix-al.co.uk
All My Build Photos - https://www.flickr.com/photos/pix-al/albums/72157622794406840
My other hobby - www.pix-al.co.uk
Posted
Local Hero
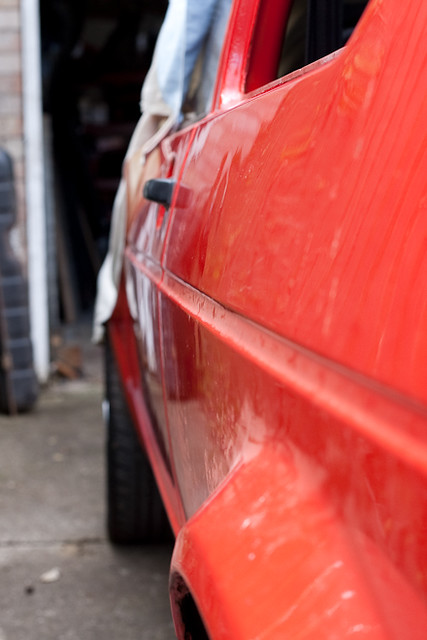
Damage to drivers sill:
Got to cut a small section out where the grommett is, so should be able to pull that back into shape.
Passenger rear quarter - You can see the crease in the middle of the pics:
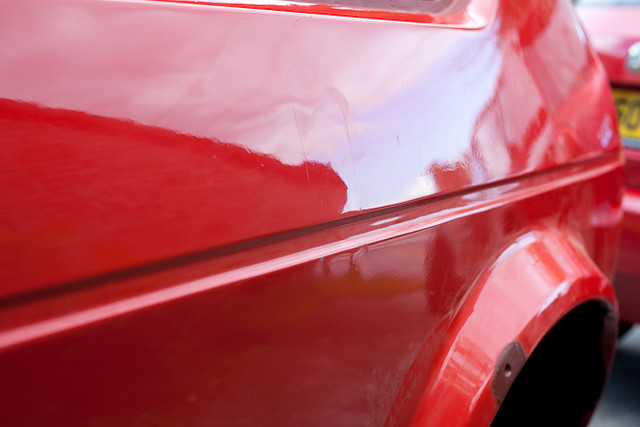
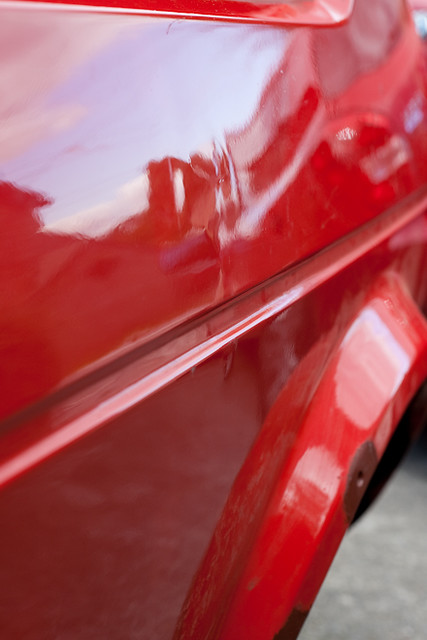
IMG_4363 by www.pix-al.co.uk, on Flickr
Not as bad as it was when it happened. will probably not even notice it from some angles, but it will be one of those that really stands out once you do notice it!
On a more positive not, I have started cutting out the rotten parts.
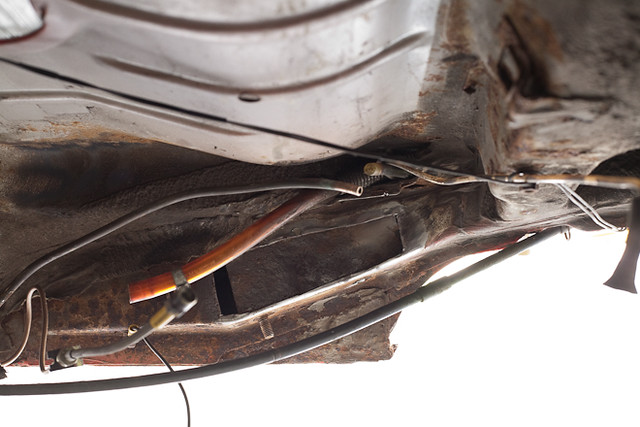
You can see the hole I have cut in the chassis section below - this was really bad. The other strengthening section beneath it is still solid, though you can see that the surface is really pitted:
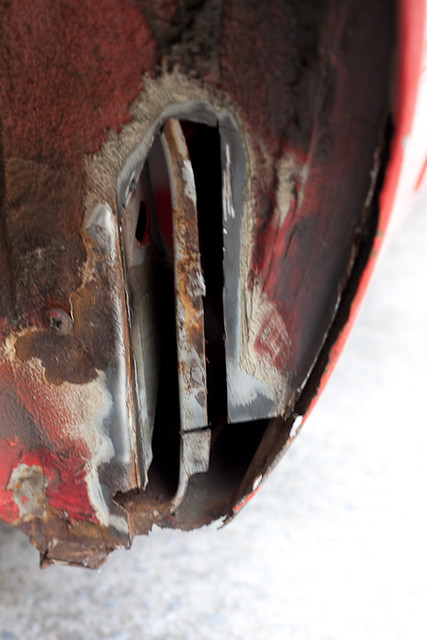
This is the drivers side rear wheel well. What looked like a very small hole turned into a six inch strip needing to be cut out!
You can see the end of the sill here too - this needs to be cut out though hopefully, there is enough on the arch repair panel to cover what I need.
Not got the arches yet, so leaving that as it is for now!
IMG_4362 by www.pix-al.co.uk, on Flickr
AL.
My Build Thread
All My Build Photos - https://www.flickr.com/photos/pix-al/albums/72157622794406840
My other hobby - www.pix-al.co.uk
All My Build Photos - https://www.flickr.com/photos/pix-al/albums/72157622794406840
My other hobby - www.pix-al.co.uk
Posted

Settling In

Jack.

1983 Driver.
Posted

Old Timer
 But keep up the good work!
Really enjoy this build
Posted
Old Timer
Posted
Local Hero
First welds!
Was actually a lot trickier than the square section stuff I have been practicing on!
A few pics:
This was the hole at the front of the driver side rear arch after poking around and finding a little rust.
IMG_4362 by www.pix-al.co.uk, on Flickr
I cut a section to fit and had a go at welding it in. It took a lot longer thatn I thought it would and the metalwork is so thin, I was blowing holes quite a lot! Got there in the end though. Not the neatest, but for a first time, not too bad. It is going to be covered in underseal anyway…
A little more to do bottom left of the repair too:
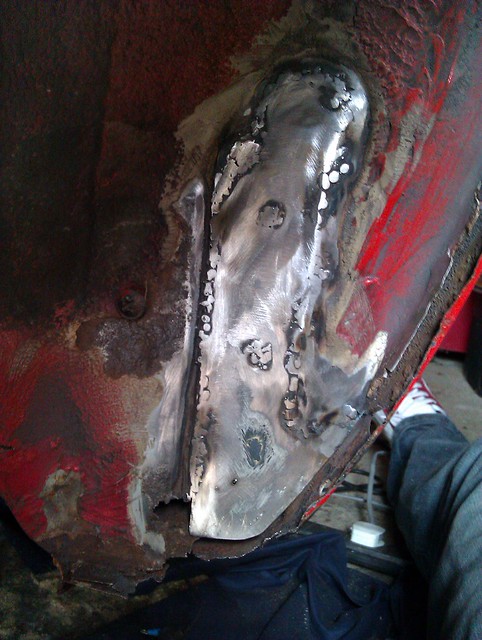
Weld1 by www.pix-al.co.uk, on Flickr
And a bit of acid etch:

Weld2 by www.pix-al.co.uk, on Flickr
Also took another look under the car at the hole I cut where the axle mount had gone rusty.
Think I might need to do the lower triangular section that meets the sill as that looks a bit too pitted too:
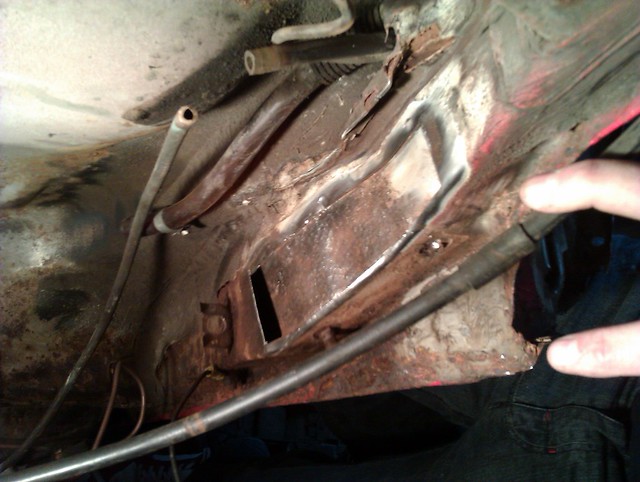
Hole1 by www.pix-al.co.uk, on Flickr
Cut the piece to fit:
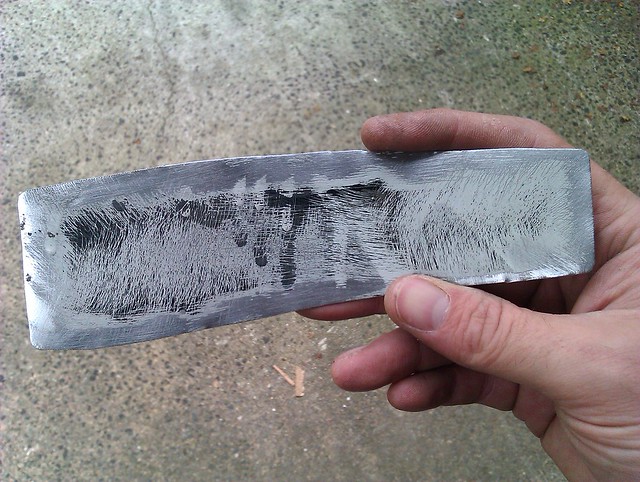
Plate1 by www.pix-al.co.uk, on Flickr
I have tacked this in place, but not welded it in properly yet - Maybe tomorrow…
Pretty tricky to do this while lying on your back holding your head up with the weight of the welding helmet too!
My Build Thread
All My Build Photos - https://www.flickr.com/photos/pix-al/albums/72157622794406840
My other hobby - www.pix-al.co.uk
All My Build Photos - https://www.flickr.com/photos/pix-al/albums/72157622794406840
My other hobby - www.pix-al.co.uk
Posted
Settled In
mk1 golf - resto
mk3 polo breadie - daily banger
mk3 polo breadie - daily banger
Posted
Local Hero
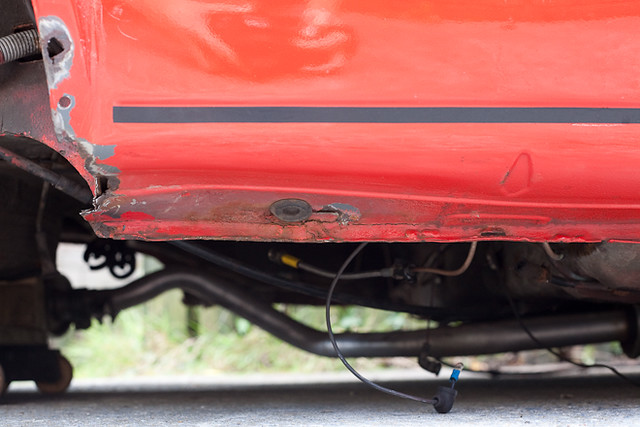
Did run the drill with wire cup over the rear axle though. Was quite crudded up 'n rusty!
Wanted to take the ARB off and do it properly, but after realising I couldn't take the outer clips off without fubar'ing them, id did it as one!
Also fitted a set of poly bushed that I have had lying around for about 10 years!

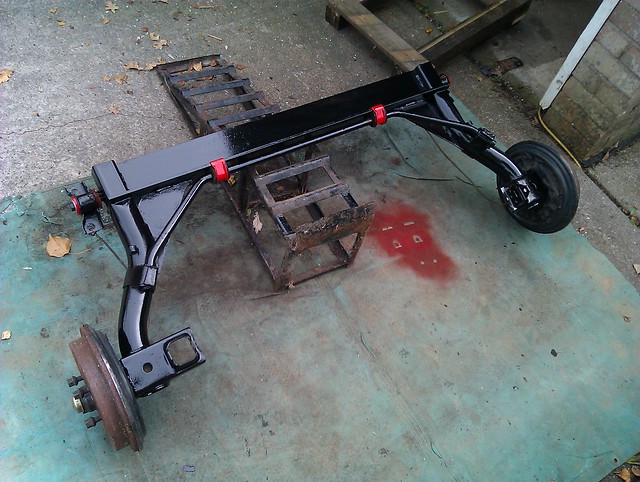
Axle 1 by www.pix-al.co.uk, on Flickr
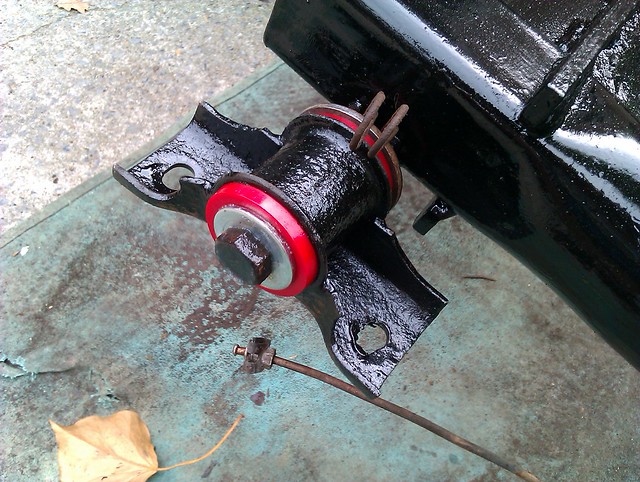
Axle 2 by www.pix-al.co.uk, on Flickr
Got to do the fuel tank and straps next…

My Build Thread
All My Build Photos - https://www.flickr.com/photos/pix-al/albums/72157622794406840
My other hobby - www.pix-al.co.uk
All My Build Photos - https://www.flickr.com/photos/pix-al/albums/72157622794406840
My other hobby - www.pix-al.co.uk
0 guests and 0 members have just viewed this: None.