


AL's (not so) mini build... August 2015 - Paint!

Posted
Settled In

AL's "Mini Build" *04/12 - 6 months later...*
mk1 golf - resto
mk3 polo breadie - daily banger
mk3 polo breadie - daily banger
Posted
Local Hero

Clarke MIG 110E - will do 30 - 100 Amps.
Should be ok for the work I need to do. this will be the first welding I have done, so I don't have ambitions of building a rollover spit yet. If I do, then perhaps I'll upgrade in the future!
There is a body shop next door to my mates garage that (I am reliably informed) has a skip outside where all of the old rusty body panels go. I am goimg to swing by tomorrow and see if I can find a front wing or something so that I can power up the new MIG and do a little practice on!
My Build Thread
All My Build Photos - https://www.flickr.com/photos/pix-al/albums/72157622794406840
My other hobby - www.pix-al.co.uk
All My Build Photos - https://www.flickr.com/photos/pix-al/albums/72157622794406840
My other hobby - www.pix-al.co.uk
Posted
Local Hero
Not as easy as it looks!
Clarke 110E.
Amps set at 2/Min or 1/Max (the middle two of four settings).
Wire speed around 6 ish.
Gas (Disposable) reg set at about 3.
Metal is quite thin so I struggled to get penetration on the lower of the two settings, but blew through easily on the higher, so found my self going quite quickly…?
First buzz - forgot to turn the gas on! (Dirty looking ones on the left):

Weld1 by www.pix-al.co.uk, on Flickr
Then I did a couple of short runs to tune the Amps/Wire Speed etc and came up with welds like this:

Weld2 by www.pix-al.co.uk, on Flickr
Cut the section in half to check penetration and saw this.
One of them seemed to penetrate well, though one seems to be built up on one side…

Weld4 by www.pix-al.co.uk, on Flickr
Then had a go at cutting a piece in two and welding back together again.
Put it on the floor over a block of wood and jumped on it and it didn't budge…

Weld5 by www.pix-al.co.uk, on Flickr
Did the stright joint first, then did the (roughly) 90 degree joint:

Weld7 by www.pix-al.co.uk, on Flickr
Used a flap wheel and ground back the joint on two sides - looks nice like this!

Weld8 by www.pix-al.co.uk, on Flickr
Next up - I have an old gti door which has a fair dent in it which might be donating it's outer skin. That way I'll be able to practice on the right thickness and quality of steel and have some OEM steel panel to use for patches! :mrgreen:
My Build Thread
All My Build Photos - https://www.flickr.com/photos/pix-al/albums/72157622794406840
My other hobby - www.pix-al.co.uk
All My Build Photos - https://www.flickr.com/photos/pix-al/albums/72157622794406840
My other hobby - www.pix-al.co.uk
Posted

Old Timer


with thin panels its a case of sort bursts else you'll end up blowing holes


Posted
Local Hero
jellybelly said
with thin panels its a case of sort bursts else you'll end up blowing holes
Yeah - I am going to try a slightly different technique on the door skin when I get it off.
Currently waiting on thin grinding discs from the postman which have failed to arrive this week!
My Build Thread
All My Build Photos - https://www.flickr.com/photos/pix-al/albums/72157622794406840
My other hobby - www.pix-al.co.uk
All My Build Photos - https://www.flickr.com/photos/pix-al/albums/72157622794406840
My other hobby - www.pix-al.co.uk
Posted
Local Hero
Cars looking good, the red looks great.
Nice one again for lending me the wheels.
Ill chuck some beer money your way when I drop them back down.
Posted
Newbie

how did you move the shifter?
Posted
Local Hero
jack4mk1 said
nice job on everything, especially the polo 6n dash. seemed like quite a job to get it in.. well done!
how did you move the shifter?
Cheers Jack.
Shifter is not standard - It is a cable shifter that I made adaptors for to get working on the original gearbox. See This Thread
This makes it easy to mount where ever you want as the cables are quite flexible. I could stick it between my legs if I wanted!
My Build Thread
All My Build Photos - https://www.flickr.com/photos/pix-al/albums/72157622794406840
My other hobby - www.pix-al.co.uk
All My Build Photos - https://www.flickr.com/photos/pix-al/albums/72157622794406840
My other hobby - www.pix-al.co.uk
Posted
Old Timer
and try out on different metals. I used to go buy wings from various cars real cheap and cut them up and weld back together, worth doing before working on your golf.
Madone with the two Cabs 82 (UK RHD) and 85 (US LHD) (92 sold)
�
�
Posted
Local Hero
I had an old dented spare door for a Mk1 golf lying around, so took the grinder to it.
Cut out the outer skin off to keep as patching material.
Cut out some of the inner panel to attempt to weld it back in again, for practice!
So, this is what I started with:

Door by www.pix-al.co.uk, on Flickr
Cleaned up some of the areas to weld and tacked in place.
This was one of the better joints:

1 by www.pix-al.co.uk, on Flickr
Originally, the dirty/rusty bit didn't look like that, until I welded the lower spots. Why is that? Contaminants from the back surface?
Ground it back with a flap wheel. Could probably have gone more as you can see some outline from the spots still:

2 by www.pix-al.co.uk, on Flickr
Rear view shows that the spots were penetrating ok too. Not the prettiest, but seemed solid!

3 by www.pix-al.co.uk, on Flickr
This was much trickier than the other stuff I practised with.
Very easy to just blow through the material.
Gap between the panels is very important too.
Too big and they just wouldn't fuse - the weld wouldn't jump the gap.
This has shown me how fine the tolerances needs to be when cutting out new panels to fit!
My Build Thread
All My Build Photos - https://www.flickr.com/photos/pix-al/albums/72157622794406840
My other hobby - www.pix-al.co.uk
All My Build Photos - https://www.flickr.com/photos/pix-al/albums/72157622794406840
My other hobby - www.pix-al.co.uk
Posted
Settled In
mk1 golf - resto
mk3 polo breadie - daily banger
mk3 polo breadie - daily banger
Posted
Local Hero
This is going to be a nightmare….
My Build Thread
All My Build Photos - https://www.flickr.com/photos/pix-al/albums/72157622794406840
My other hobby - www.pix-al.co.uk
All My Build Photos - https://www.flickr.com/photos/pix-al/albums/72157622794406840
My other hobby - www.pix-al.co.uk
Posted
Local Hero
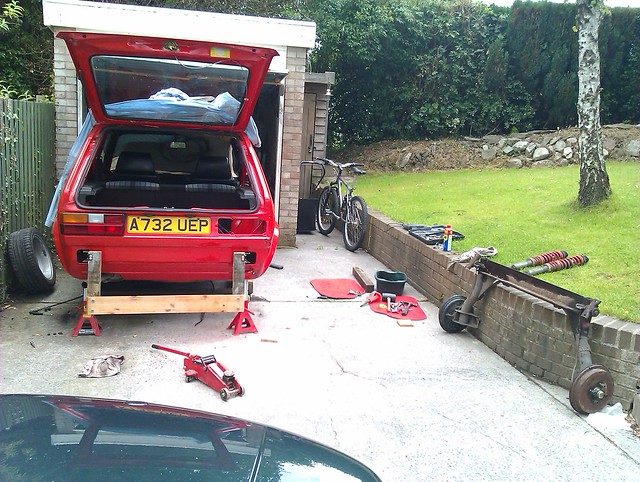
Knocked together a sort of "Trolley" for the car. Used some 4x4 fence post and routed a channel to fit the sills. This helps spread the load so that the sill doesn't buckle! Tied them together with a cross brace and then slapped the bottoms of my old in-line skates underneath!
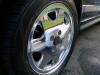
Car now moves without rear wheels (Tried my painted P slot on - can't believe how battered and chipped it has gotten!), in readiness to drop the rear axle once I manage to grind through the weld!
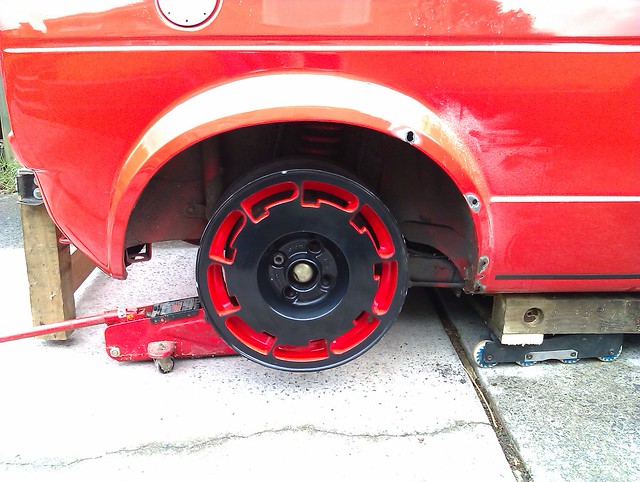
RedP by www.pix-al.co.uk, on Flickr
My Build Thread
All My Build Photos - https://www.flickr.com/photos/pix-al/albums/72157622794406840
My other hobby - www.pix-al.co.uk
All My Build Photos - https://www.flickr.com/photos/pix-al/albums/72157622794406840
My other hobby - www.pix-al.co.uk
Posted
Settled In
get sum piks up.
mk1 golf - resto
mk3 polo breadie - daily banger
mk3 polo breadie - daily banger
Posted
Local Hero
boyle_sbd said
how is it welded on? if its where the stud should be could u not drill it out rather then grinding? if its welded on the sides i gess youd have to get a slitting dic on a grinder onit. mite have to sacrafice the mount!!!
get sum piks up.
I plan on drilling it mate, but there is a big, ugly, uneven lump of weld there at the moment, so I'd never get the drill centered. (The weld is on the end of the snapped stud)
It is also too tight for me to get my grinder in which has seriously hampered my efforts so far!
Don't really want to sacrifice the mount. If I spend time on it and I am careful, it should come off… :roll:
My Build Thread
All My Build Photos - https://www.flickr.com/photos/pix-al/albums/72157622794406840
My other hobby - www.pix-al.co.uk
All My Build Photos - https://www.flickr.com/photos/pix-al/albums/72157622794406840
My other hobby - www.pix-al.co.uk
Posted
Settled In
mk1 golf - resto
mk3 polo breadie - daily banger
mk3 polo breadie - daily banger
Posted
Local Hero
boyle_sbd said
if you cant get the grinder in there maby try file it down or sumin. get it a bit flatter then center punch it an get a pilot hole drilled init as centrall as poss the you could drill it out. if you get a big enuf hole might be able to get a chisel behind it to break it off. youlll have to drill the stud out anyway to replace it if its snapped.
Yep - That is pretty much what I need to do!
No progress over the last couple of days though.
Weather been crap down here and need to pull car out of garage to get the room to do this….
My Build Thread
All My Build Photos - https://www.flickr.com/photos/pix-al/albums/72157622794406840
My other hobby - www.pix-al.co.uk
All My Build Photos - https://www.flickr.com/photos/pix-al/albums/72157622794406840
My other hobby - www.pix-al.co.uk
Posted
Local Hero
Axle off by www.pix-al.co.uk, on Flickr
Took a bit of work to grind/drill that damn weld off, but it is now done!
Pic of the offending area:
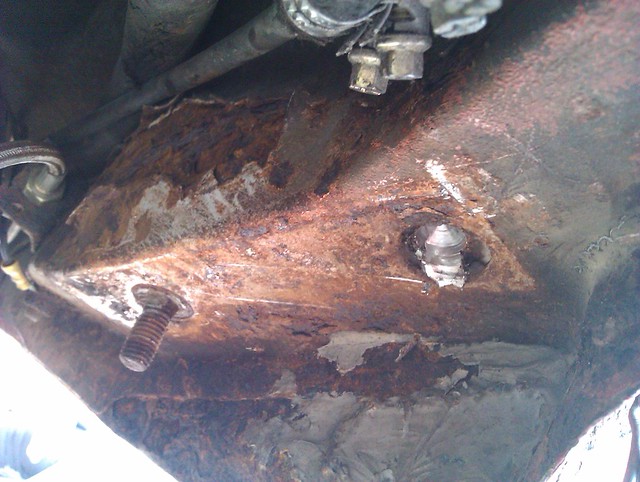
Rusty by www.pix-al.co.uk, on Flickr
You can see the rust - It looks like the outer thinner panel has just completely fallen apart. Inner supporting structure seems fin though, so does the bottom of the panel where the studs are. Should be quite as easy patch up!
Oh - and I have to replace that stud of course!
My Build Thread
All My Build Photos - https://www.flickr.com/photos/pix-al/albums/72157622794406840
My other hobby - www.pix-al.co.uk
All My Build Photos - https://www.flickr.com/photos/pix-al/albums/72157622794406840
My other hobby - www.pix-al.co.uk
Posted
Settled In
mk1 golf - resto
mk3 polo breadie - daily banger
mk3 polo breadie - daily banger
Posted
Local Hero
boyle_sbd said
now for the fun part haha…..
Yeah…
- Fuel Pump/accumulator off
Tank out
Wire brush the underside of the entire rear end
Weld patch over axle panel
Weld new stud in
Underseal and paint rear end
Repair back of sills on both sides
Repair rear arches on both sides
Repair hole in lower righ rear corner
Repair hole under righ hand side rear light
Wire brush and paint fuel tank
Re-fit fuel tank
Clean up and paint rear axle/anti roll bar/drums
Fit Poly bushes while axle is off (had them lying around for ages)
Re-fit axle assembly
Re-fit coilovers
Re-attacht handbrake cables
Re-fit rear brake pipes
Bleed brake system (hadn't banked on doing this - forgot I had to diconnect the rear lines!)[/list:u]
Then it should hopefully sail through an MOT!
Jees - Now I have written that out, it looks like a lot of work! Bound to find other issues too!
My Build Thread
All My Build Photos - https://www.flickr.com/photos/pix-al/albums/72157622794406840
My other hobby - www.pix-al.co.uk
All My Build Photos - https://www.flickr.com/photos/pix-al/albums/72157622794406840
My other hobby - www.pix-al.co.uk
0 guests and 0 members have just viewed this: None.