"TAG" - 1983 Campaign restoration blog
Posted
Old Timer


Malcolm said
Hi, I still have Gary.
Firstly a happy new year to you. I have been monitoring much of yours and other projects. I have been responding to a few issues on the website.
Unfortunately for me much of the last eighteen months or so has been taken up with other issues.
I retired from work in March 20 just before the Covid lockdown with the intention to relocate from Romsey, Hants to West Sussex to be closer to family. It took eighteen months to the day to complete in Jul 21.
This time was further impacted by the lost of my youngest brother (61) in Nov 20 due to Covid. If you ever watched the "Bad Lads Army" programmes on TV some years ago, he played the Sgt.
At the same time my 2 year old grandson who had previously been diagnosed with a tumour behind his left eye on the optic nerve in the previous Jul suffered near fatal intestinal damage following 6 months of hospitalisation and chemo treatment.
On the positive:
He has recovered, he got home for Xmas 20 and is back at nursery. He is still clear after 12 months. The sight in that eye is lost for now.
We are settled in Angmering between my two daughters families, 10_15 mins each way, providing and receiving support when required.
My focus currently is addressing issues with our 4 year old house and to maintain Gary who is now stored in my new 20 x 9ft garage along with many other parts, some of which need to be moved on.
After some 7 years of faultless driving, the oddmeter has stopped working, so needs to be repaired. Looking forward to getting involved.
Sent from my H3113 using Tapatalk
Malcolm, Good to hear from you.
You have certainly had a hell of an 18 months! I can only hope that things improve greatly through 2022.
Very glad to you still have Gary the Golf. Maybe get to see him and you at the AGM Stratford this year.
In the meantime take care and keep safe.
1983 Golf GTi Campaign Edition, Diamond Silver
http://vwgolfmk1.org.uk/forum/index.php?page=topicview&id=projects%2Fyour-mk1-golfs_2%2F-tag-1983-campaign&redirected=1#post_1551531
http://vwgolfmk1.org.uk/forum/index.php?page=topicview&id=projects%2Fyour-mk1-golfs_2%2F-tag-1983-campaign&redirected=1#post_1551531
Posted
Old Timer


I can assure I have been pretty bust lately on TAG - so here are some updates.
After the installation of the headlining, I tackled the sunroof.
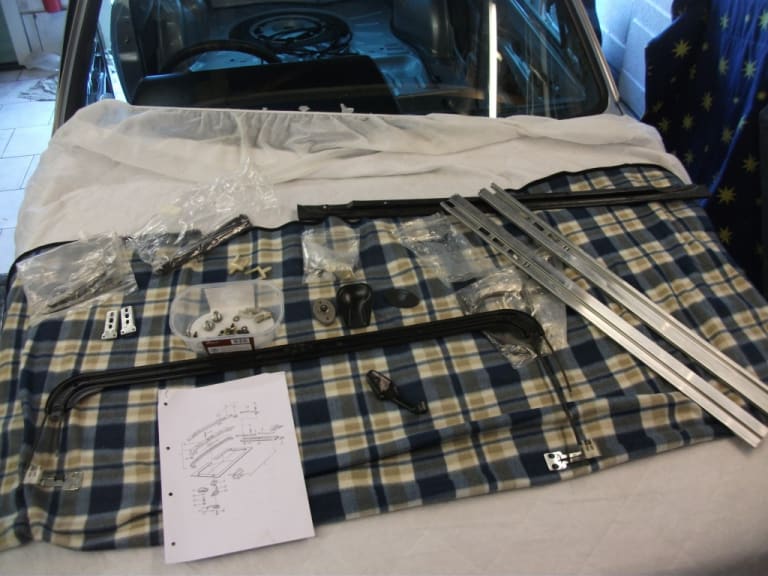
It's uprising the number of parts involved - all of which needed cleaning, some repairing and some replacing. I had previously dehisced the polish up the stainless runners - I know they should be black but think they look rather better natural.
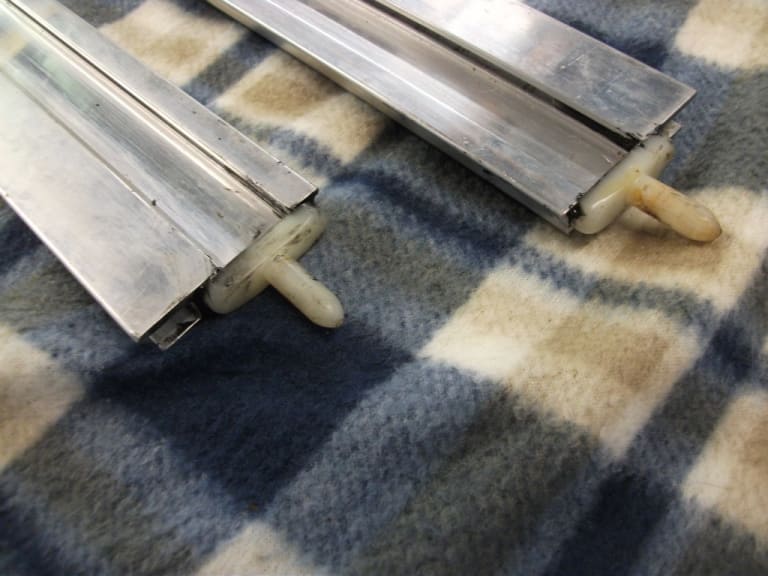
Seam sealed in the end cap pins which locate in plates at the rear of the sunroof slot. Make sure they are bonded to the metal otherwise they have a habit of dropping off as you try and locate them.
The rain tray that located on the rear of the sliding panel should have a black rubber "flag" to keep any water in the channel - to guide it the sides and then the drain tubes. Mine was long perishes so I used some old rubber (that fits along the top edge of the door usually) to make a new one. I had already restored the rain guide which was badly corroded - when I did these replacements weren't available - but I believe they are now.
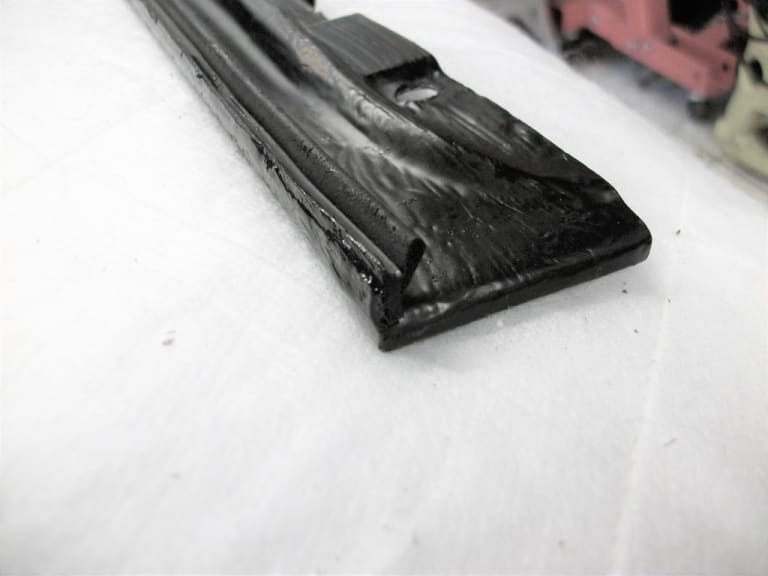
Installing the runners and guides - everything replated/painted.
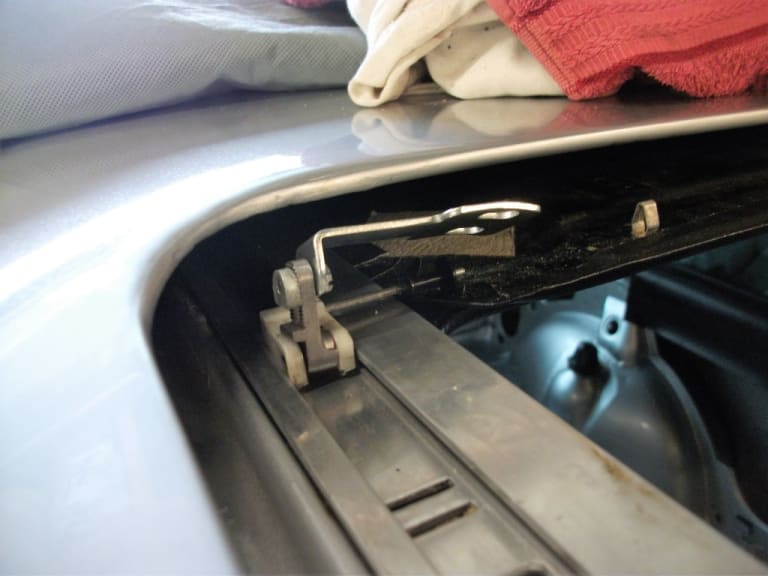
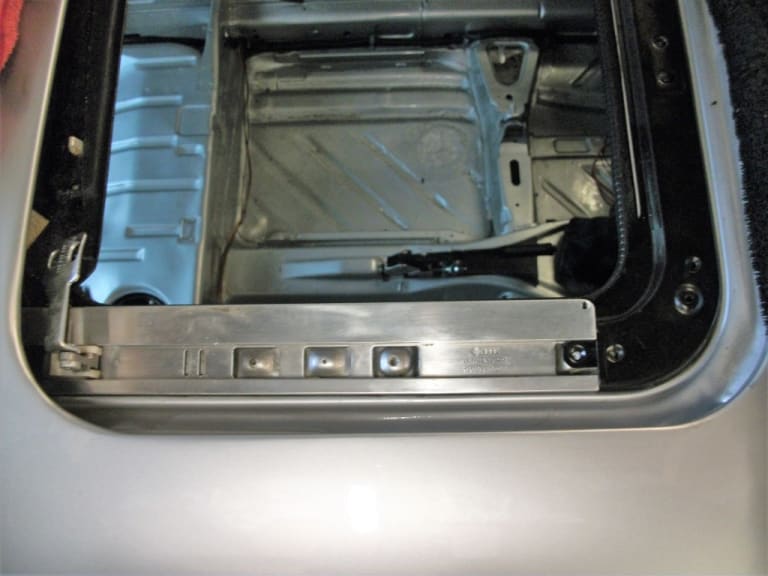
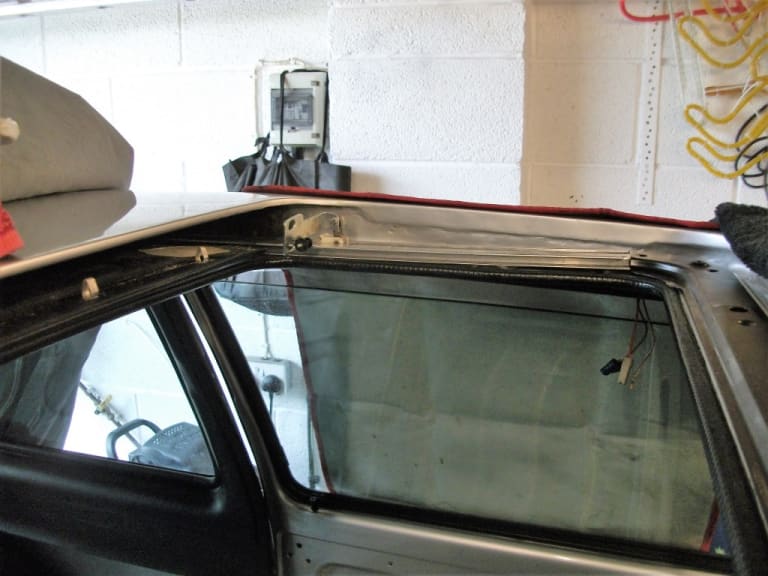
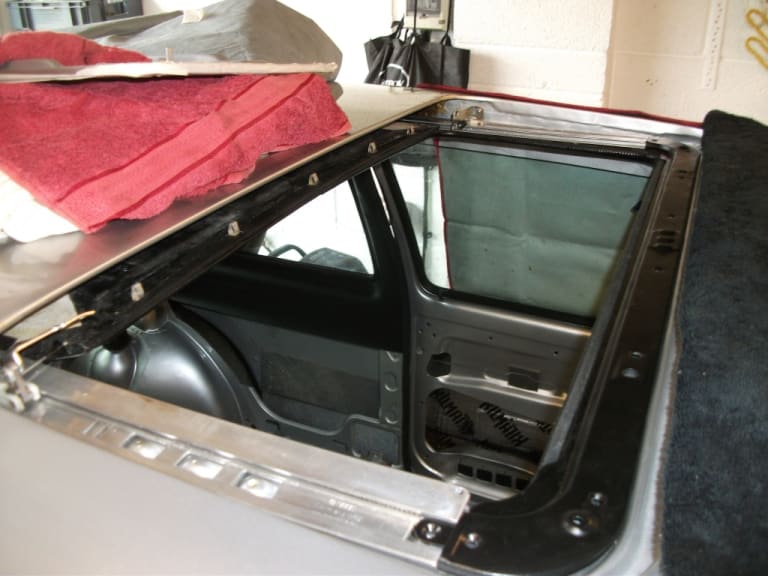
Wind deflector arms
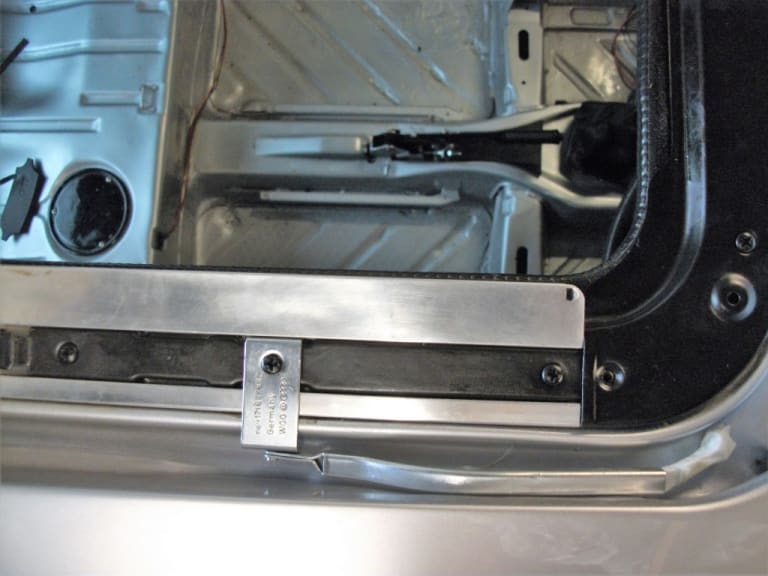
Wax proofed the sunroof panel well.
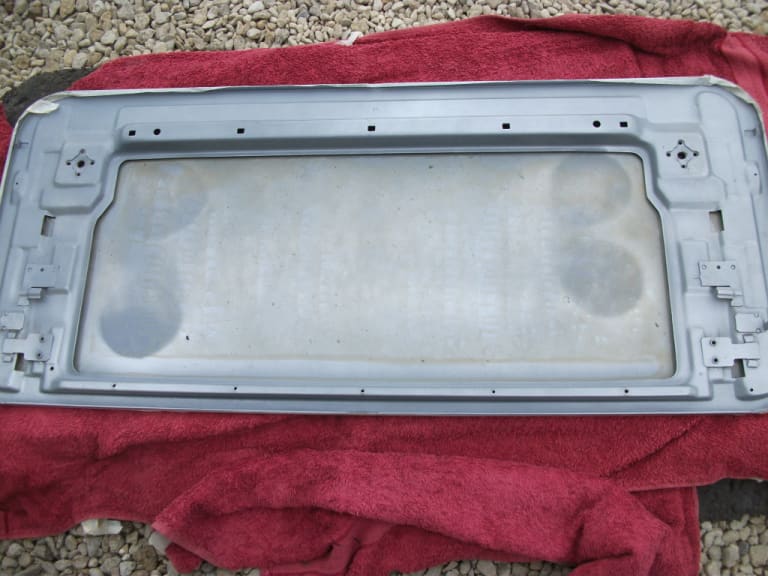
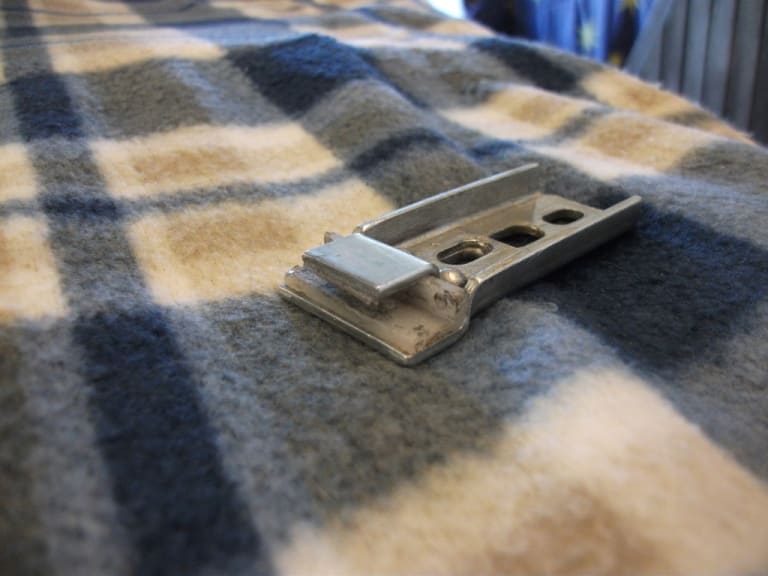
The guide blocks have nylon inserts. Mine had worn/torn badly so made some new ones from plastic ice cream tubs.
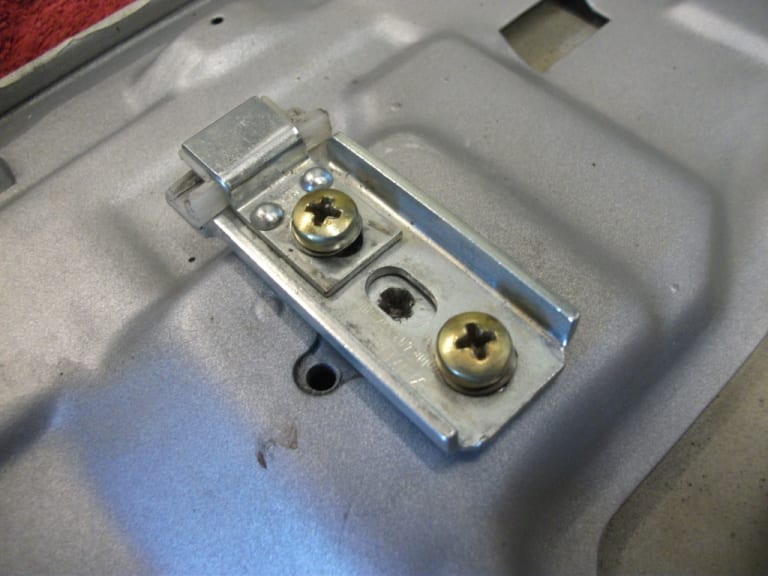
Made new felt pads
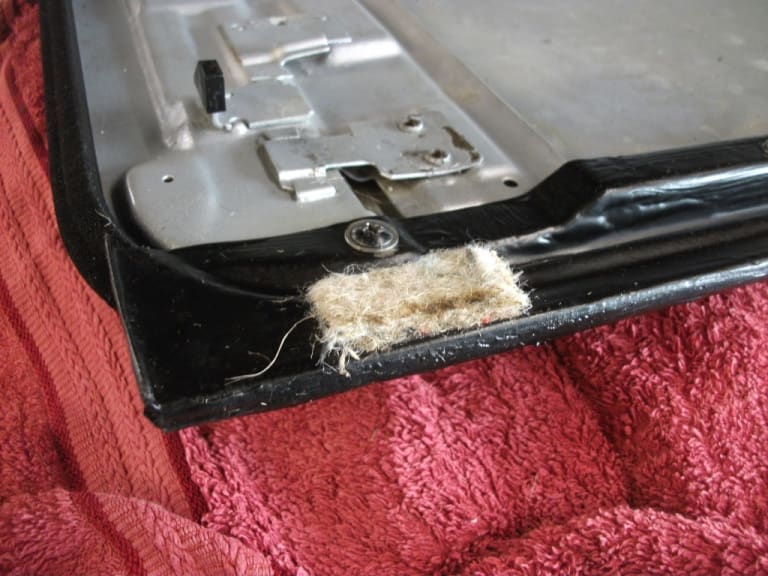
Spring attached
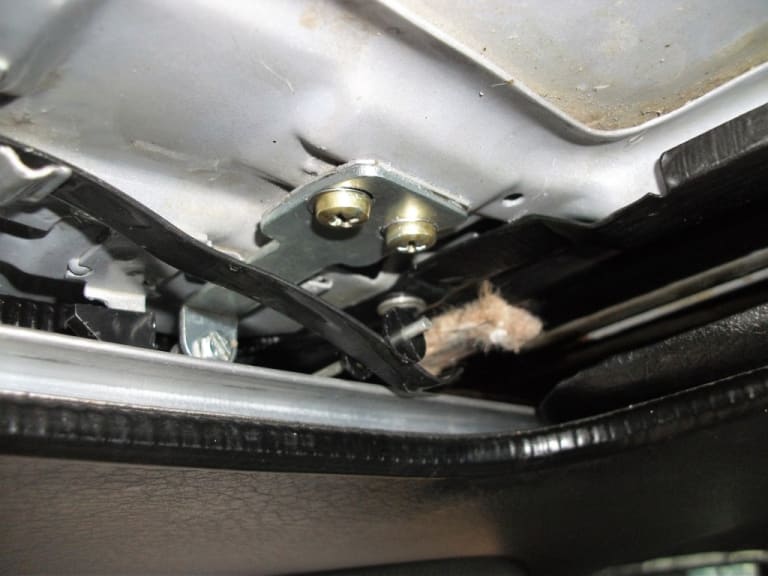
Front guides attached
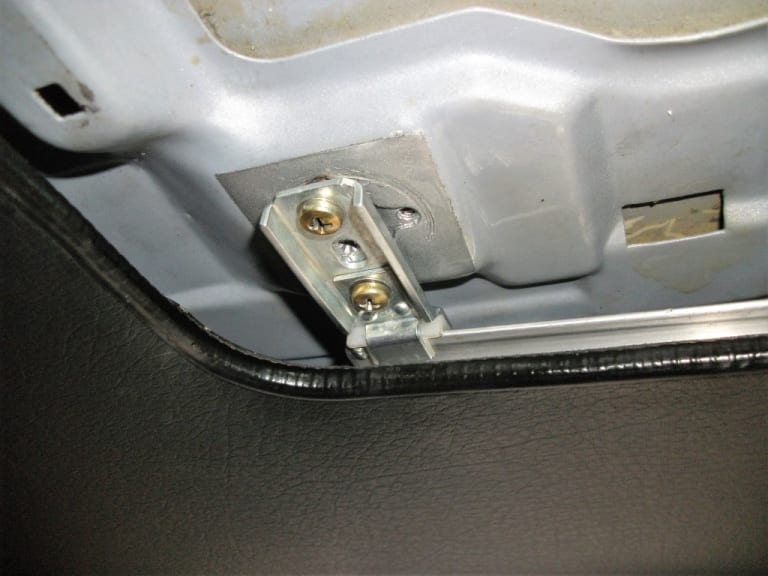
Had to buy a replacement 2nd hand wind deflector from Slovakia as mine was badly corroded and holed. Cleaned up, painted and replated springs.
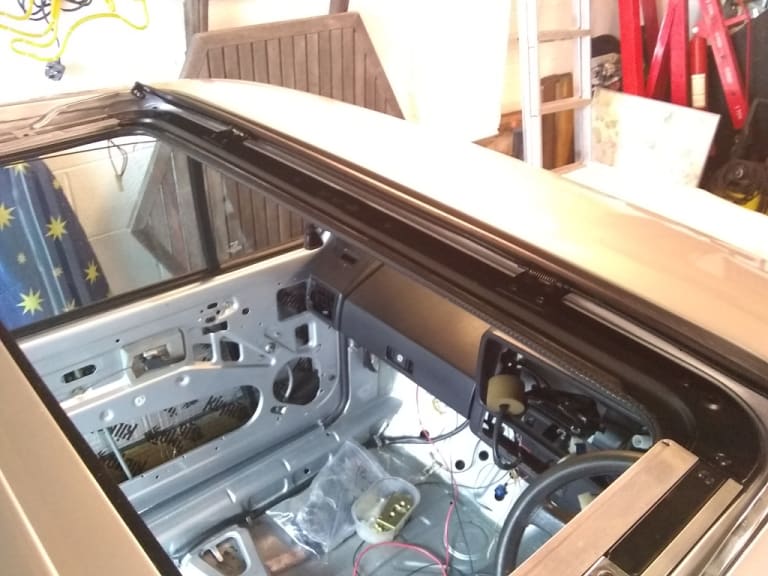
I found the end of the guide arms for the deflector were very loose. I therefore "nipped" the rivets tighter in a vice and then added two stainless washers to take up the slack when I refitted them.
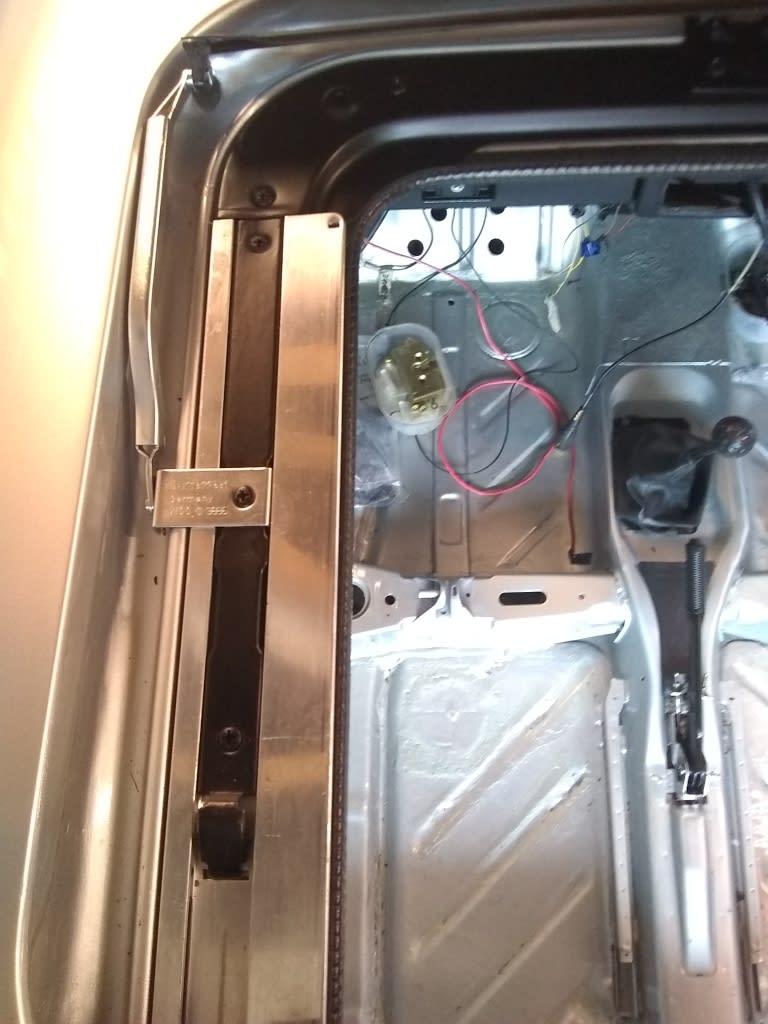
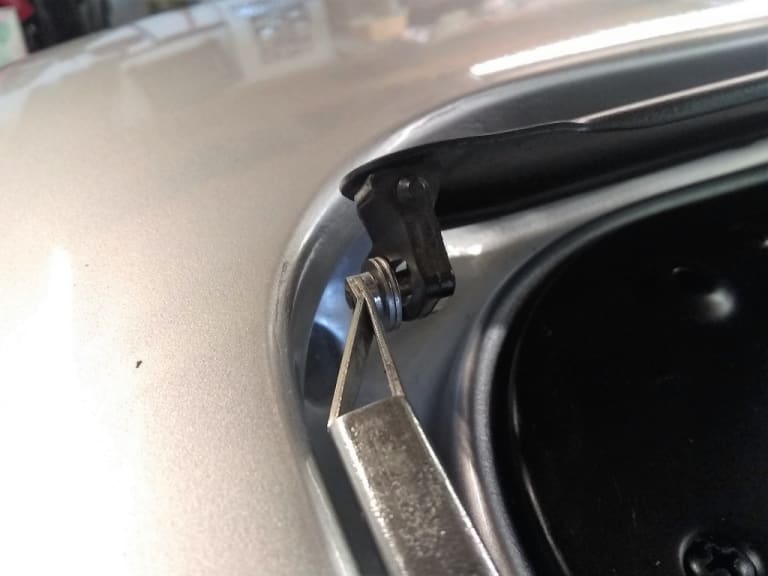
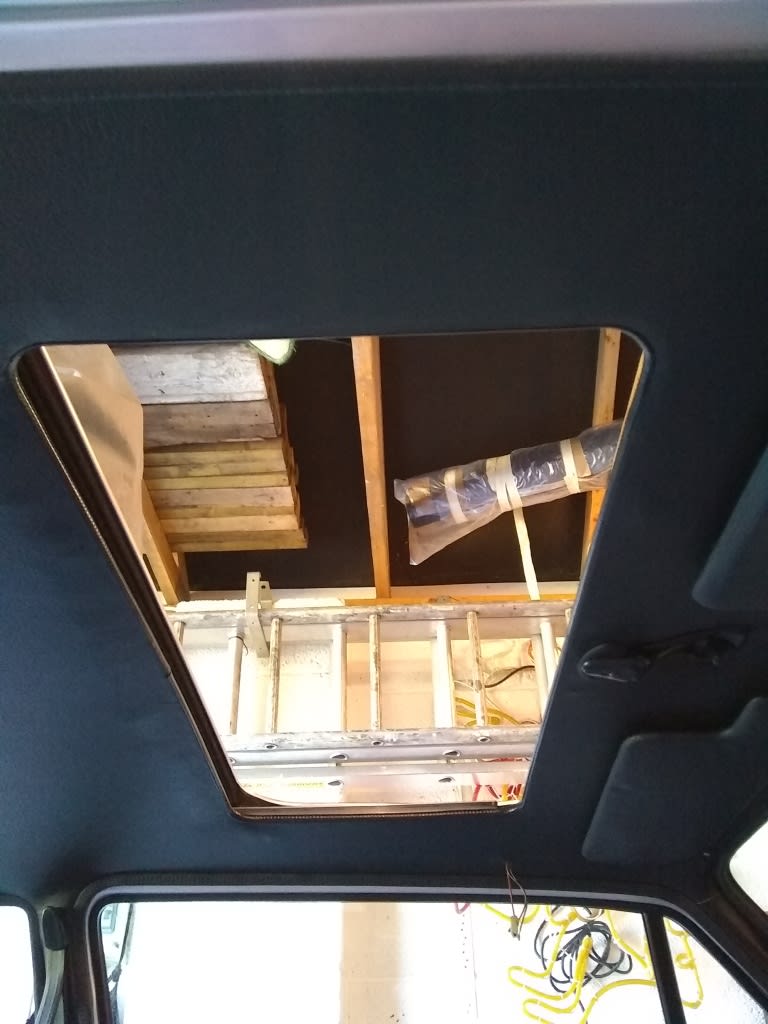
All fitted, working well. May need some slight height adjustment but glad to have it all back in finally.
1983 Golf GTi Campaign Edition, Diamond Silver
http://vwgolfmk1.org.uk/forum/index.php?page=topicview&id=projects%2Fyour-mk1-golfs_2%2F-tag-1983-campaign&redirected=1#post_1551531
http://vwgolfmk1.org.uk/forum/index.php?page=topicview&id=projects%2Fyour-mk1-golfs_2%2F-tag-1983-campaign&redirected=1#post_1551531
Posted
Old Timer


Posted
Old Timer


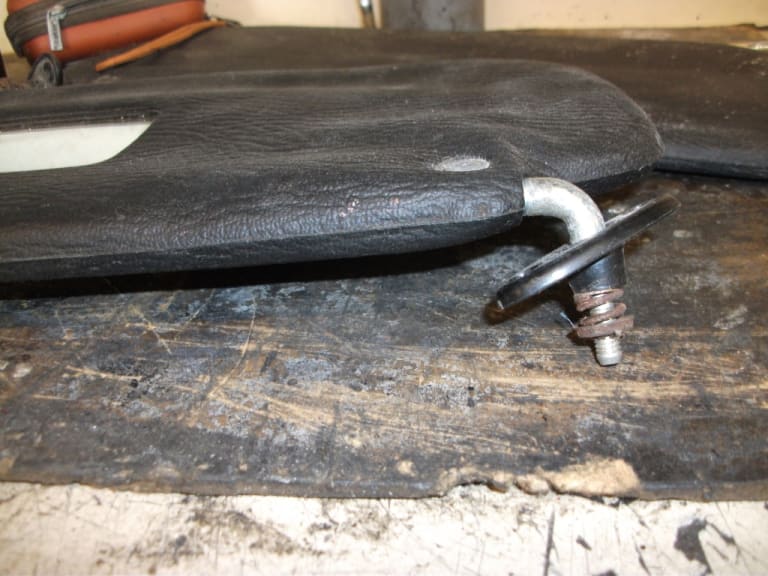
I found it you undid the screw on the visor you could wiggle out the bar. Remove the starlock washer and then the various parts, spring etc can be separated, cleaned and painted.
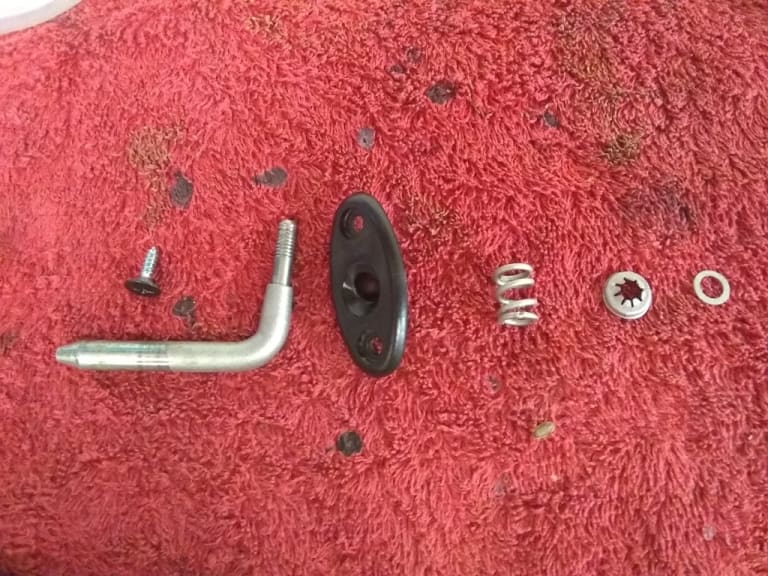
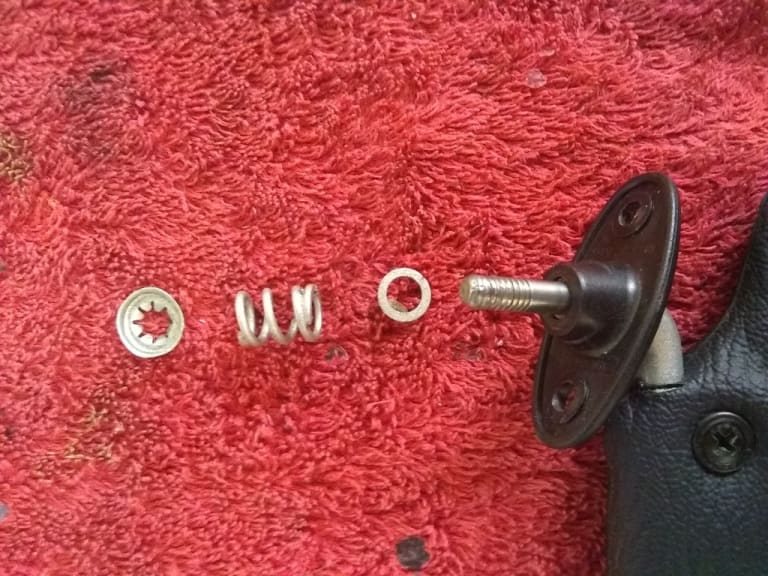
Looking rather better
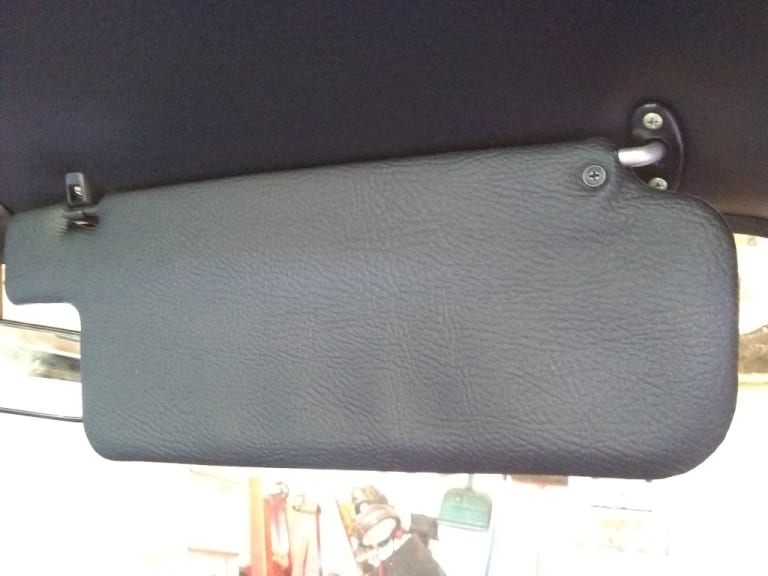
1983 Golf GTi Campaign Edition, Diamond Silver
http://vwgolfmk1.org.uk/forum/index.php?page=topicview&id=projects%2Fyour-mk1-golfs_2%2F-tag-1983-campaign&redirected=1#post_1551531
http://vwgolfmk1.org.uk/forum/index.php?page=topicview&id=projects%2Fyour-mk1-golfs_2%2F-tag-1983-campaign&redirected=1#post_1551531
Posted
Old Timer
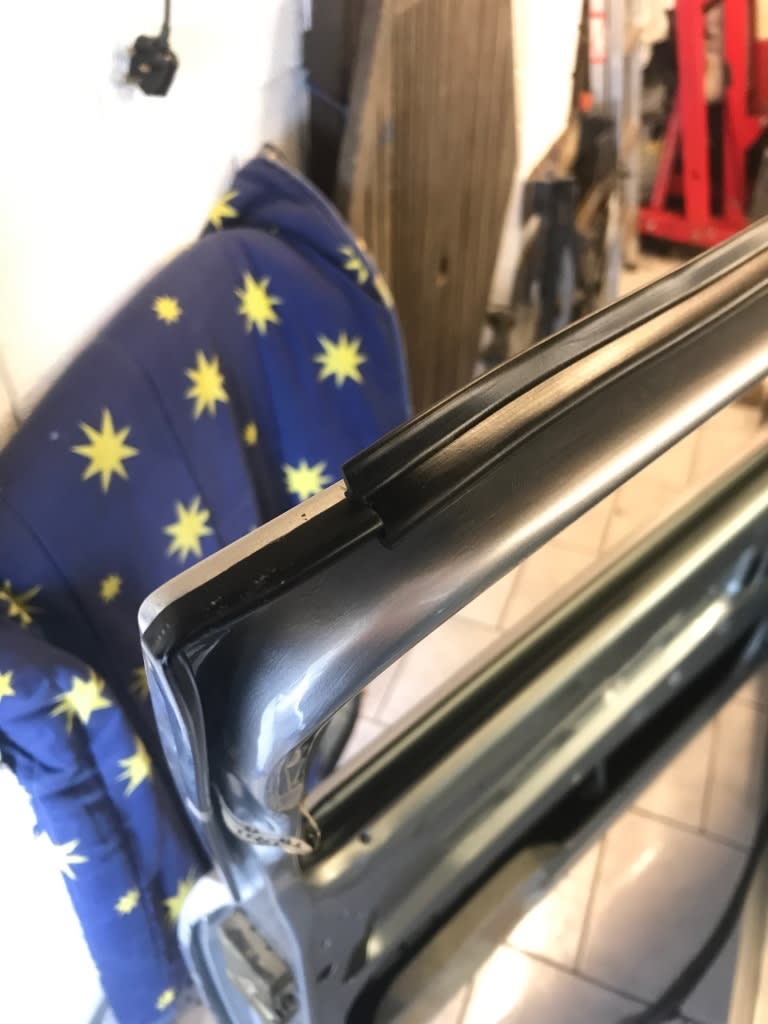
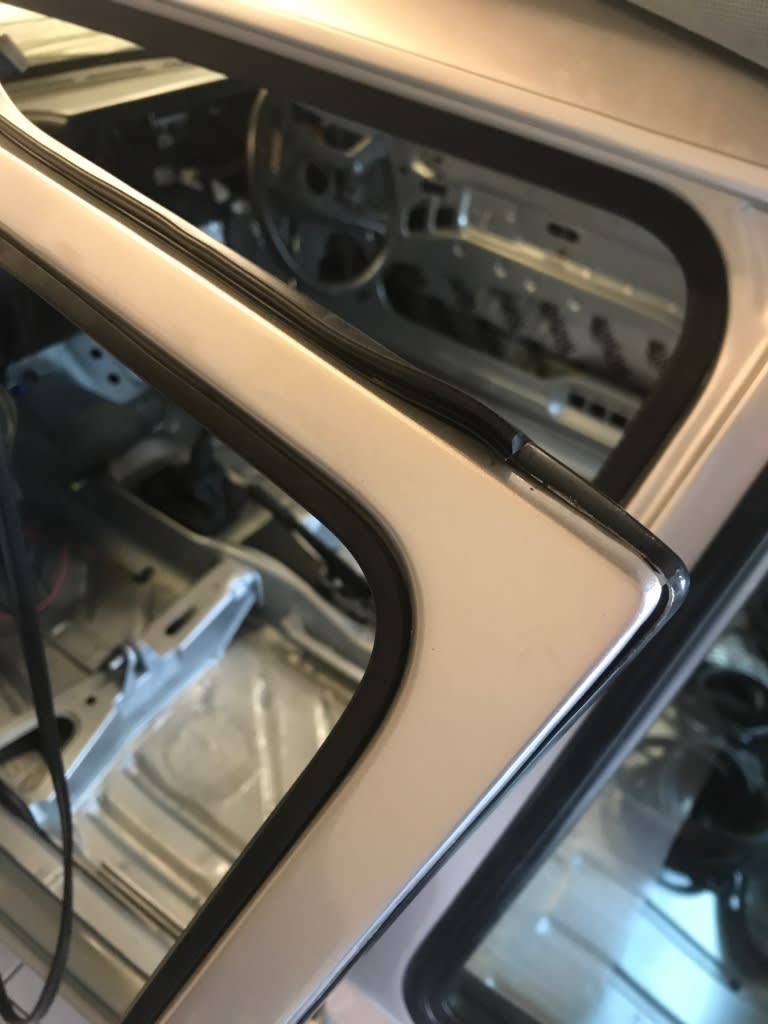
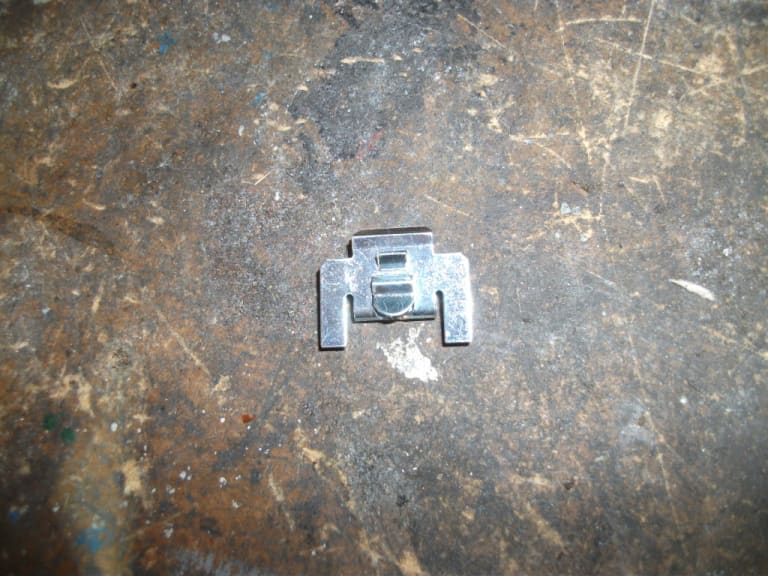
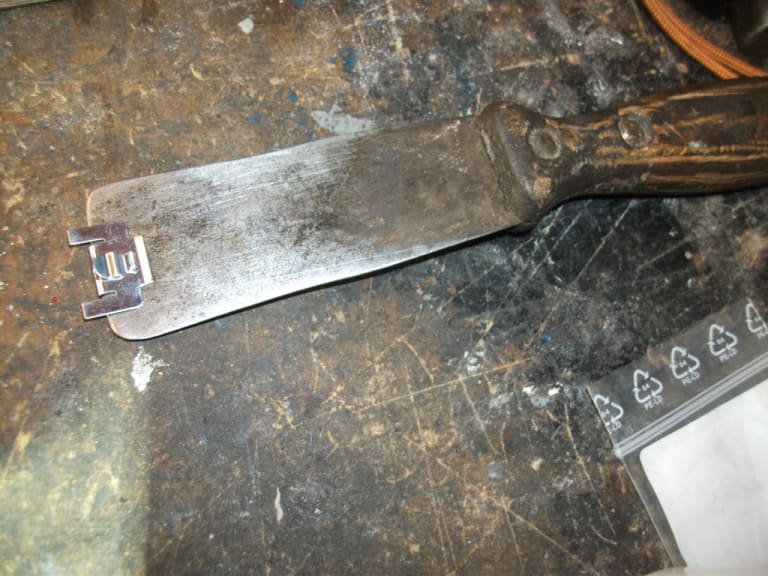
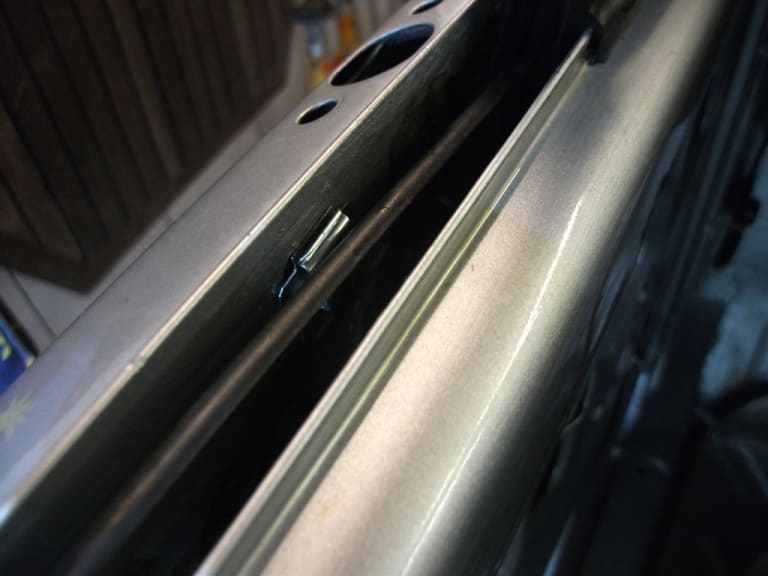
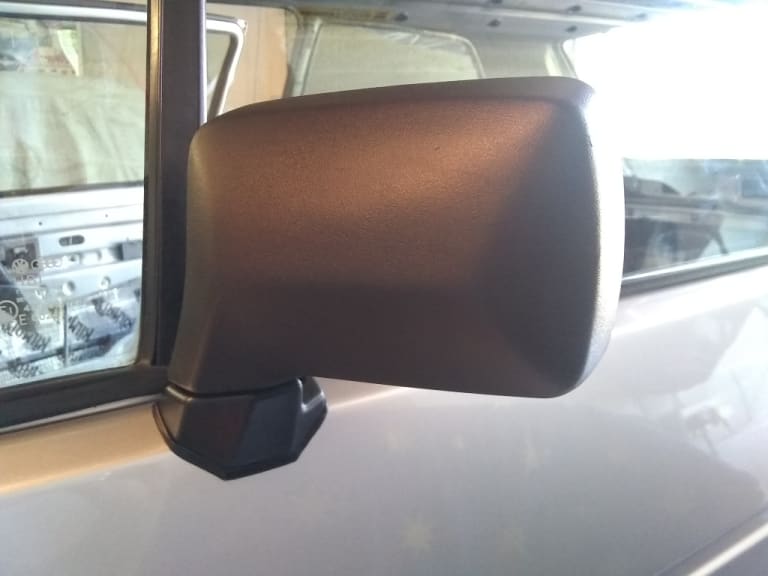
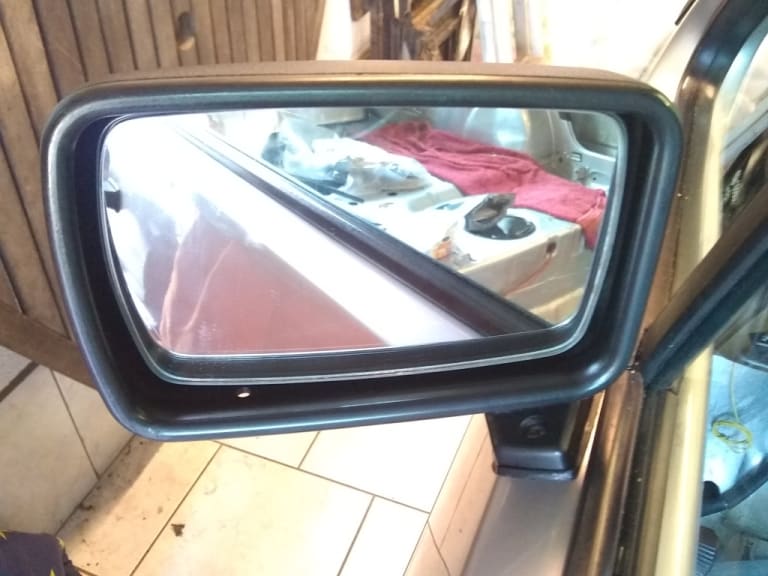


Rubbed them down and sprayed them Mars Red.
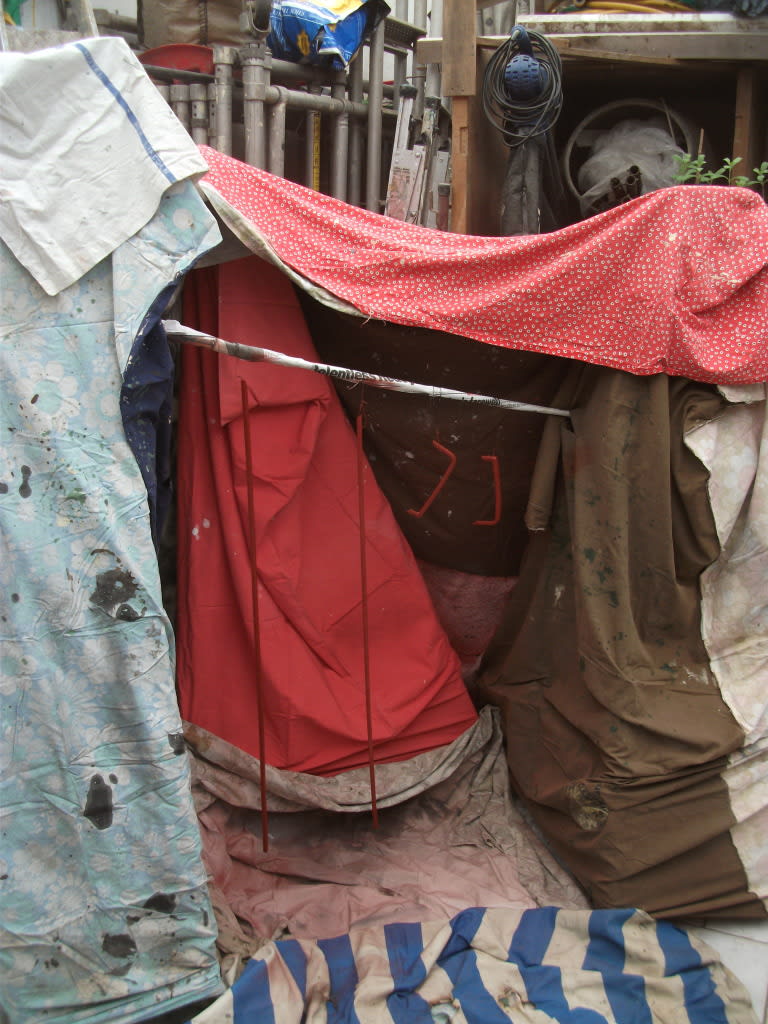
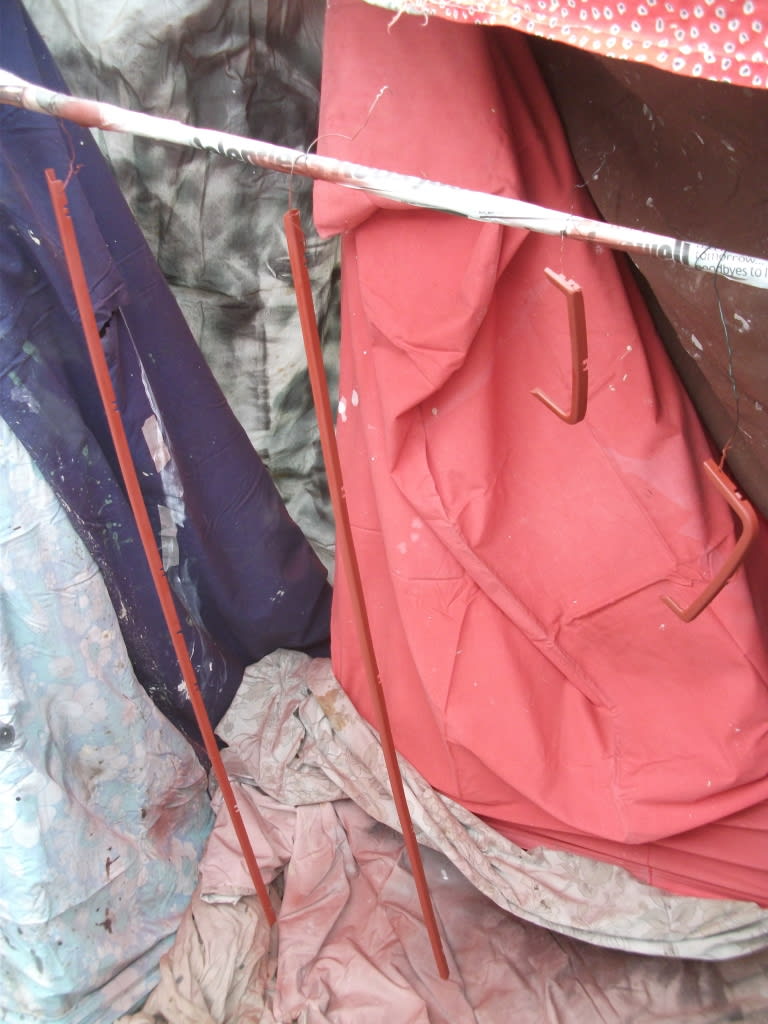
1983 Golf GTi Campaign Edition, Diamond Silver
http://vwgolfmk1.org.uk/forum/index.php?page=topicview&id=projects%2Fyour-mk1-golfs_2%2F-tag-1983-campaign&redirected=1#post_1551531
http://vwgolfmk1.org.uk/forum/index.php?page=topicview&id=projects%2Fyour-mk1-golfs_2%2F-tag-1983-campaign&redirected=1#post_1551531
Posted
Old Timer


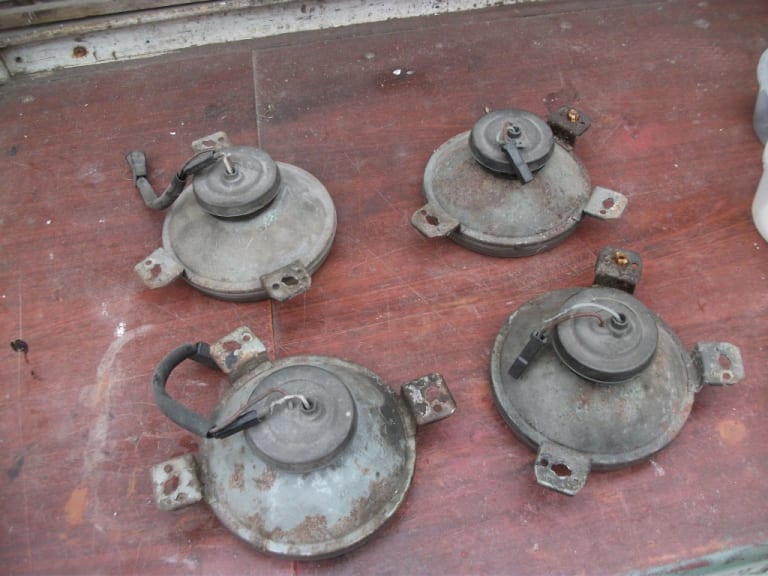
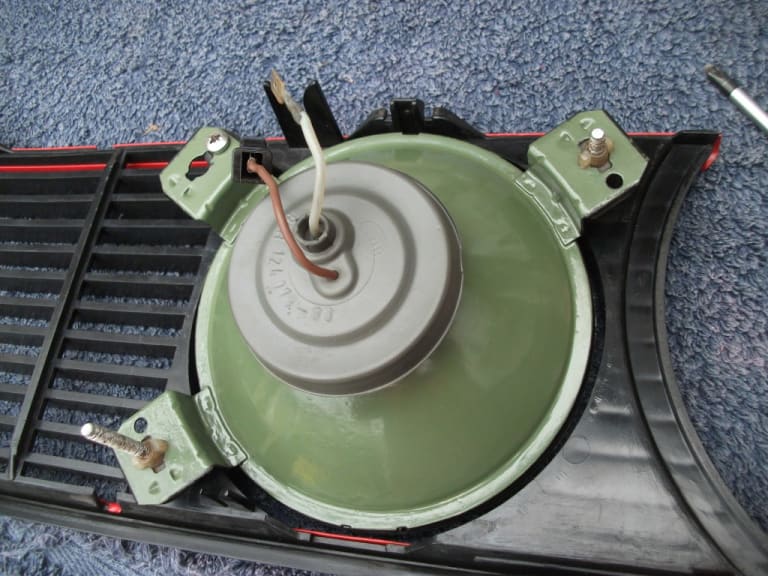
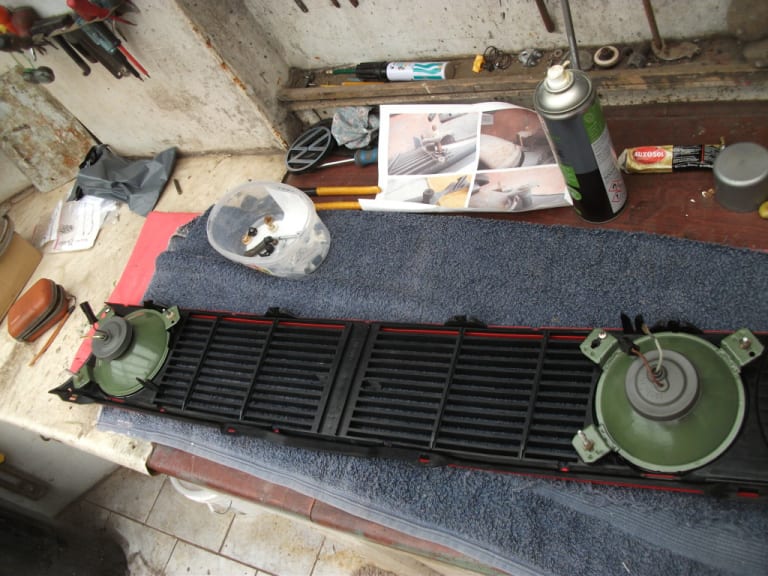
I therefore bought a 2nd hand set of spots which cleaned up really well.
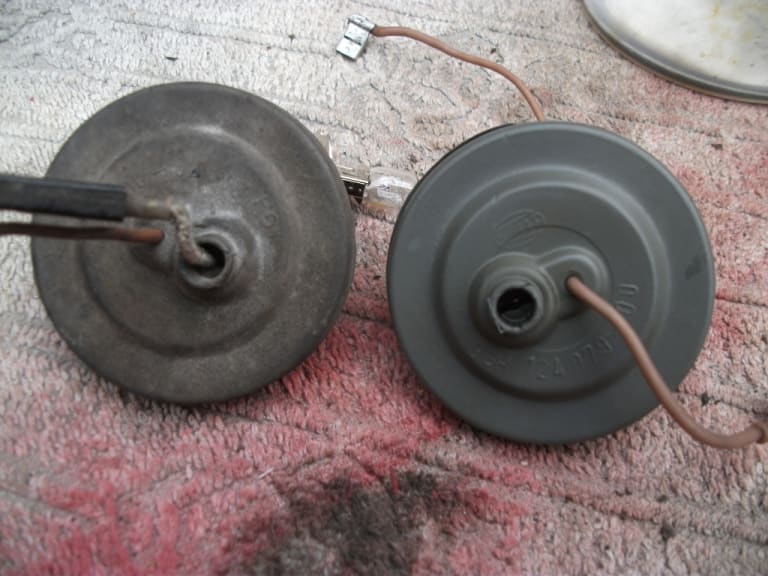
I gave them a coat of Vauxhaul Leaf Green which a Club member stated was pretty close to the original colour.
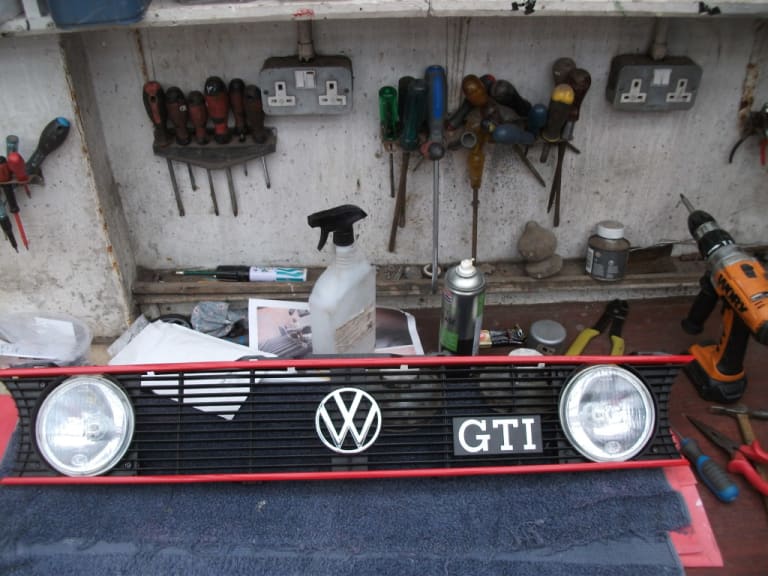
With new badges the car now has a nice fresh looking front end.

1983 Golf GTi Campaign Edition, Diamond Silver
http://vwgolfmk1.org.uk/forum/index.php?page=topicview&id=projects%2Fyour-mk1-golfs_2%2F-tag-1983-campaign&redirected=1#post_1551531
http://vwgolfmk1.org.uk/forum/index.php?page=topicview&id=projects%2Fyour-mk1-golfs_2%2F-tag-1983-campaign&redirected=1#post_1551531
Posted
Old Timer


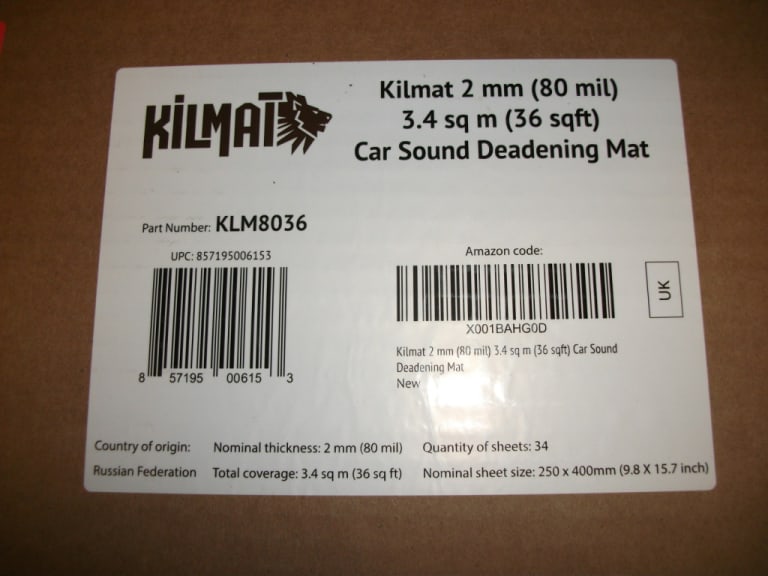
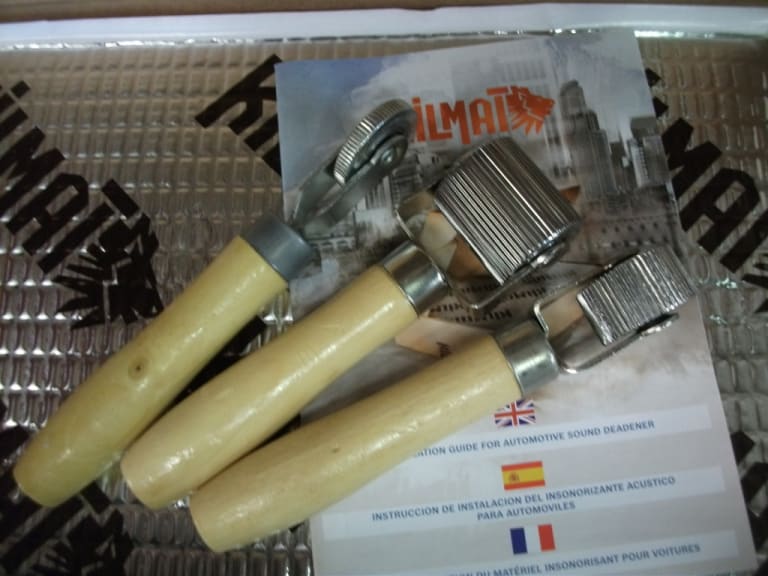
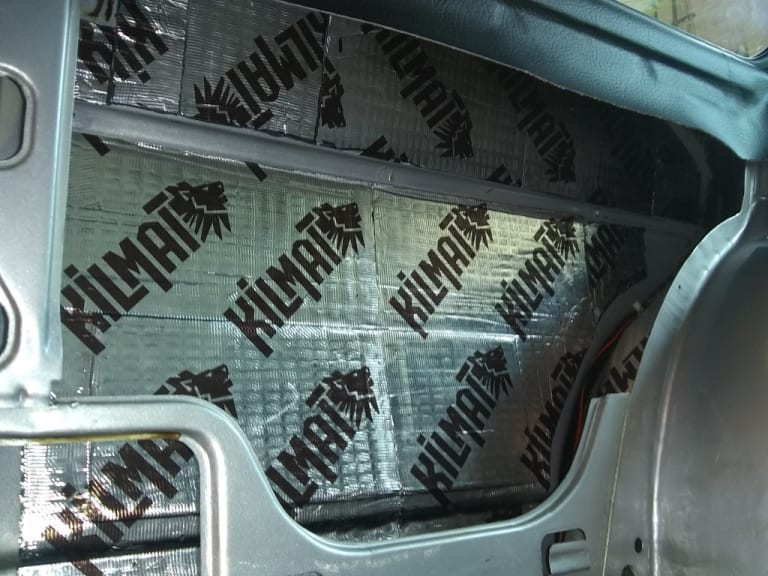
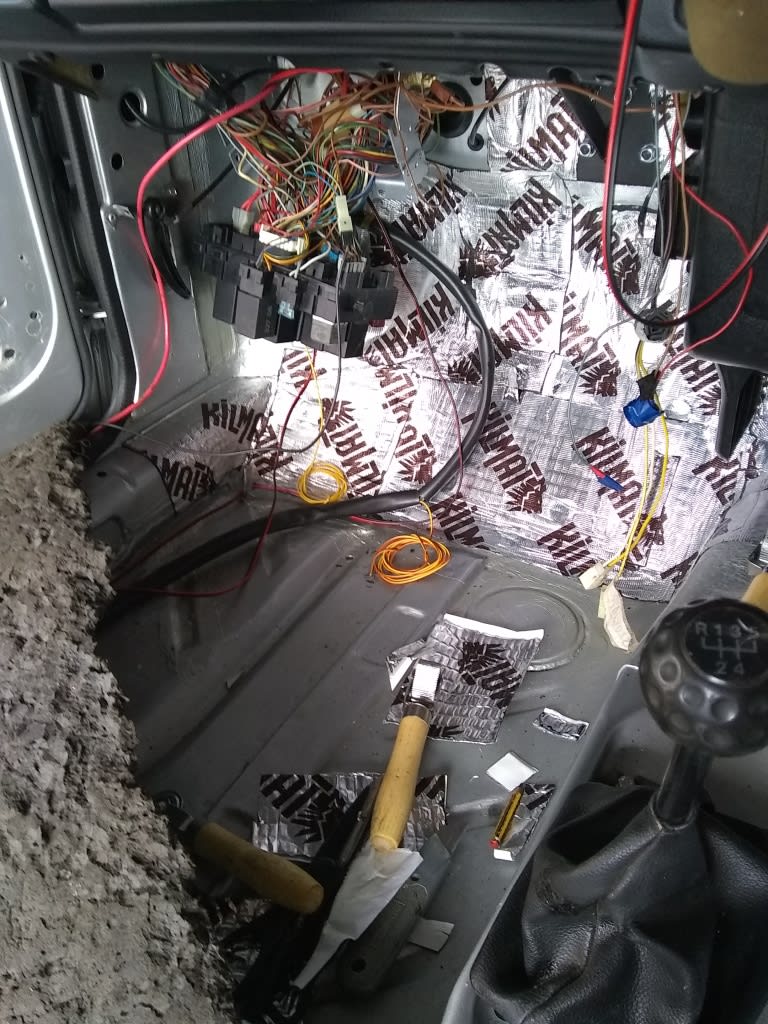
The Kilmat was easy to install - if rather time consuming due to the awkward locations it is needed in. I cleaned each area with IPA alcohol, then after cutting the sheet to size I warmed the mat with a hot airgun to make it nice and sticky. Once applied to the panel I used the rollers to get a good tight bond with the metal. Kilmat is covered in raised lumps which are flattened by the roller to show you it has been pressed onto the metal.
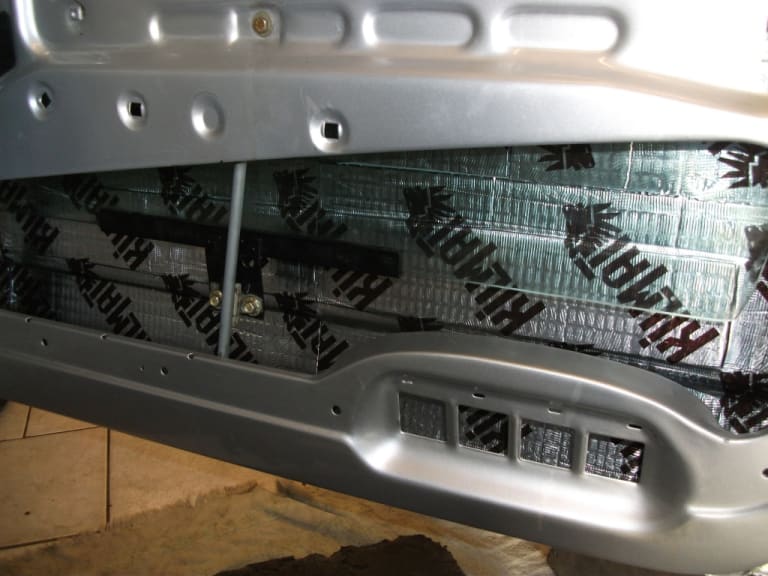
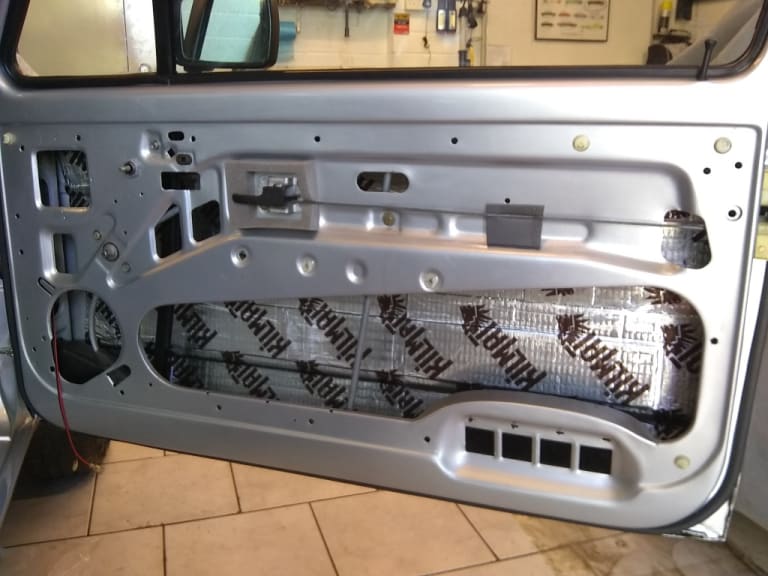
Inside rear.
Working on the front bulkhead

1983 Golf GTi Campaign Edition, Diamond Silver
http://vwgolfmk1.org.uk/forum/index.php?page=topicview&id=projects%2Fyour-mk1-golfs_2%2F-tag-1983-campaign&redirected=1#post_1551531
http://vwgolfmk1.org.uk/forum/index.php?page=topicview&id=projects%2Fyour-mk1-golfs_2%2F-tag-1983-campaign&redirected=1#post_1551531
Posted
Old Timer


Impossible to hide the splits entirely but at least they are sound now
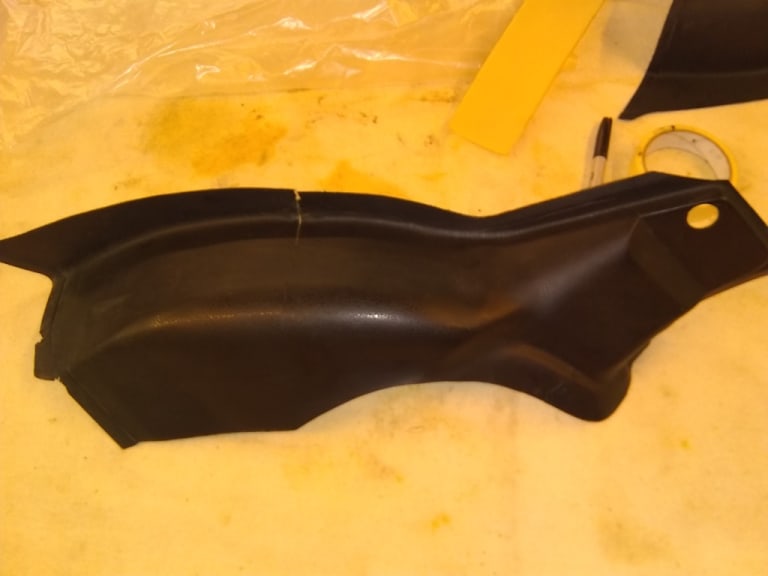
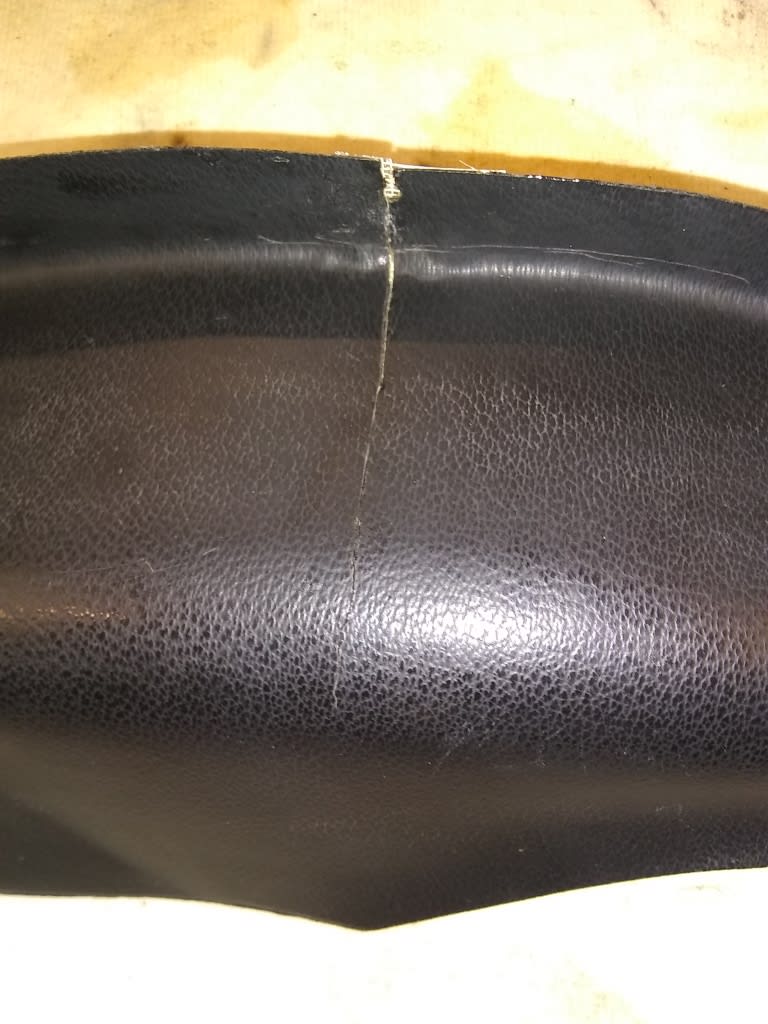
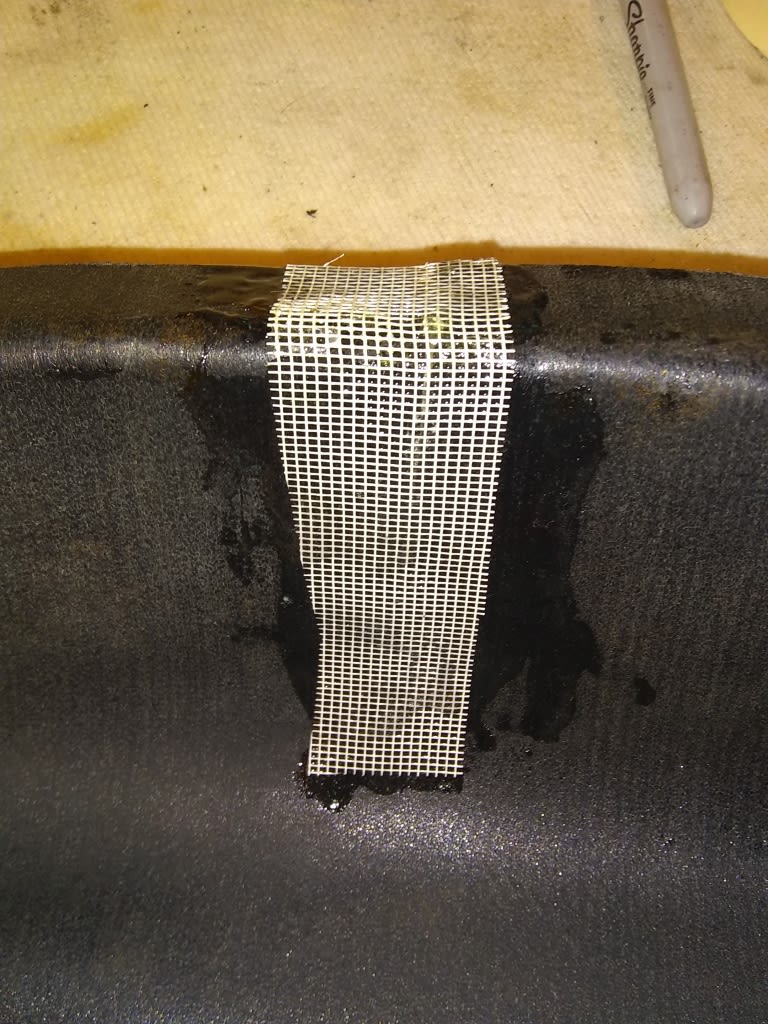
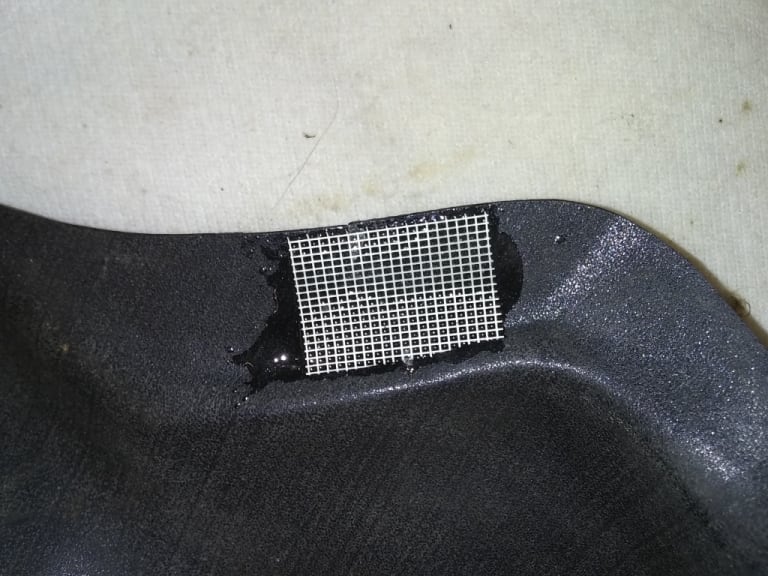
I used some thin scrim and araldite on the back which did a good job to give it some strength.

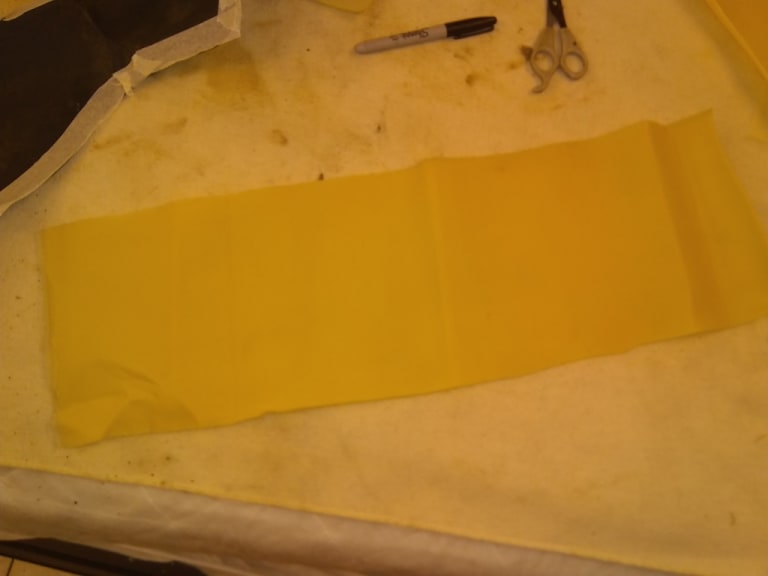
Before refitting I lined the back of them with old foam backed headlining material to replace the thin layer of original foam that had perished.
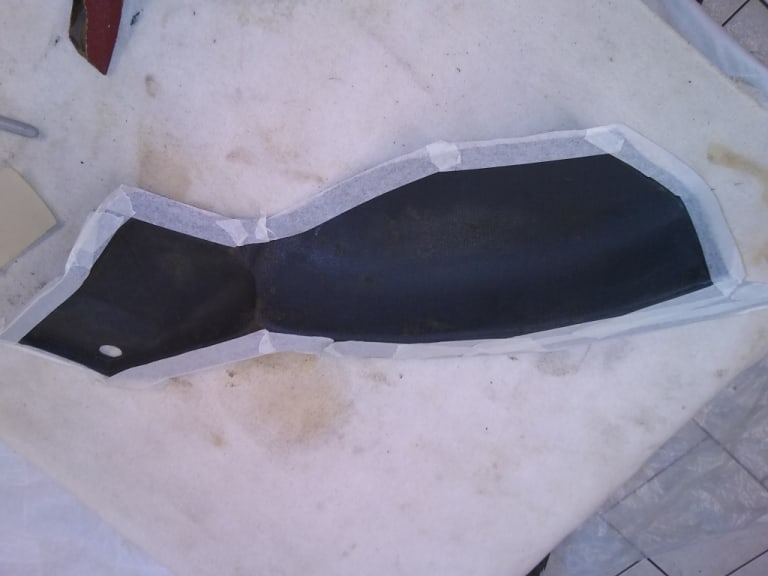
Masked the edges to keep the glue/foam off these to help it adhere to the metal when refitting.
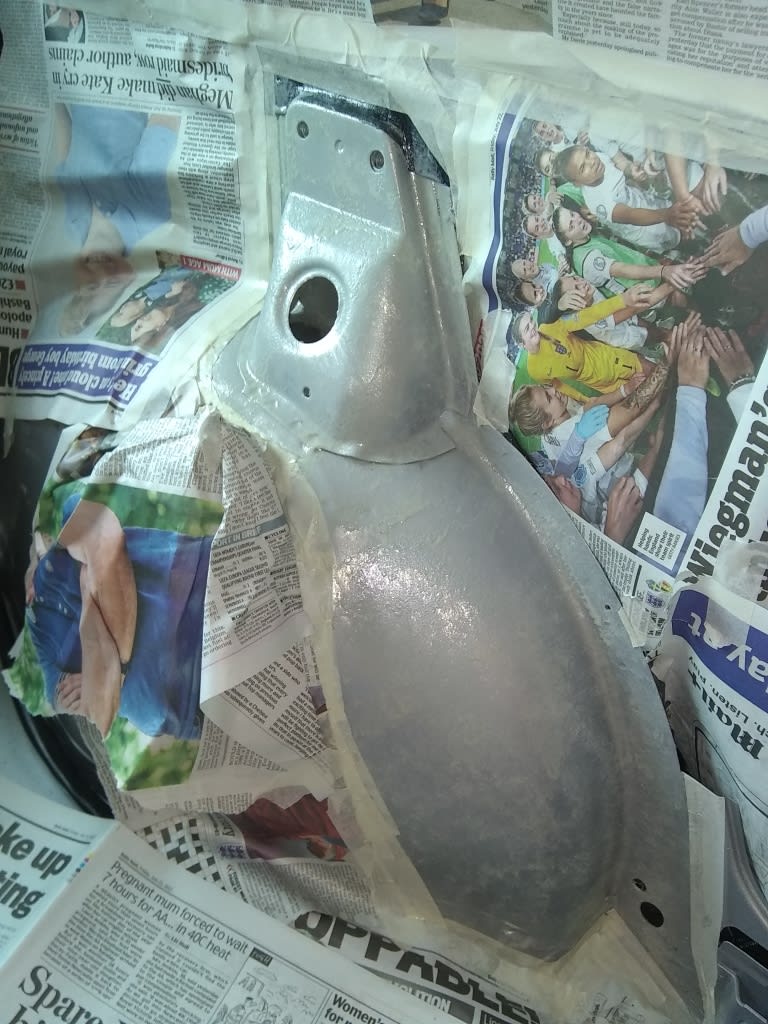
Spray glued back onto the arch - well masked as I have found that spray glue has a tendency to go much further than intended!
1983 Golf GTi Campaign Edition, Diamond Silver
http://vwgolfmk1.org.uk/forum/index.php?page=topicview&id=projects%2Fyour-mk1-golfs_2%2F-tag-1983-campaign&redirected=1#post_1551531
http://vwgolfmk1.org.uk/forum/index.php?page=topicview&id=projects%2Fyour-mk1-golfs_2%2F-tag-1983-campaign&redirected=1#post_1551531
Posted
Old Timer


Impossible to hide the splits entirely but at least they are sound now
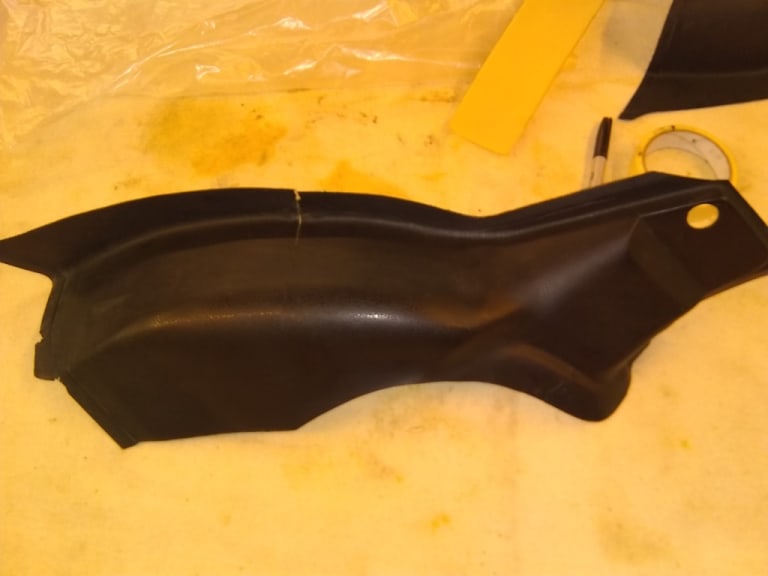
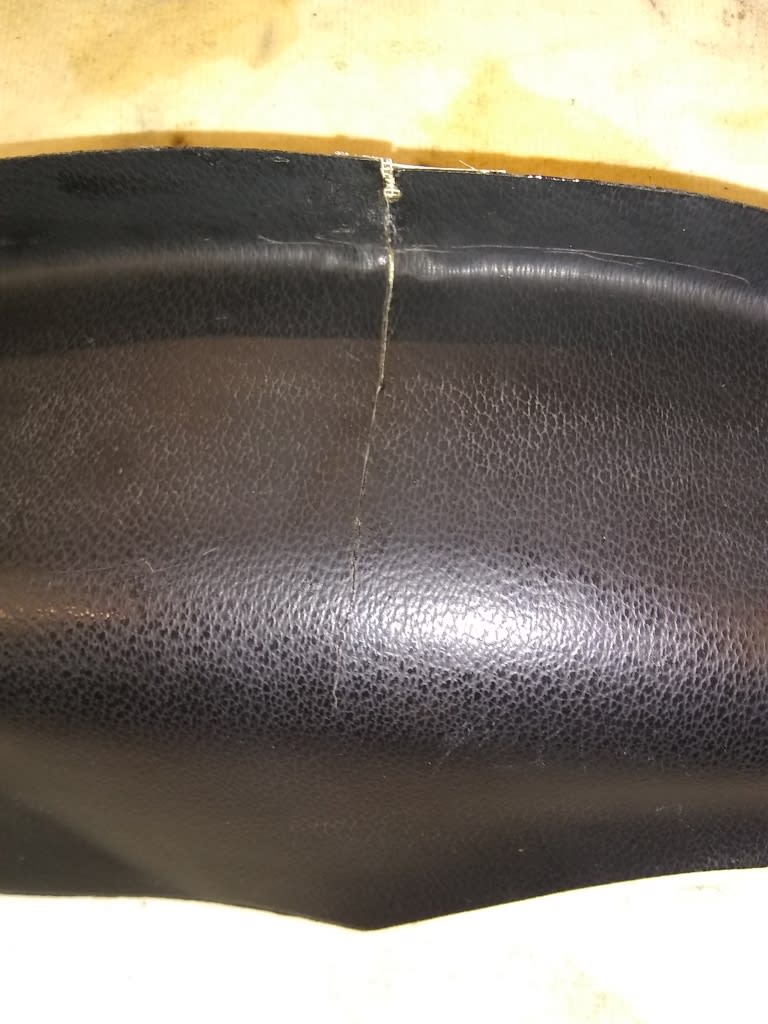
I used some thin scrim and araldite on the back which did a good job to give it some strength.
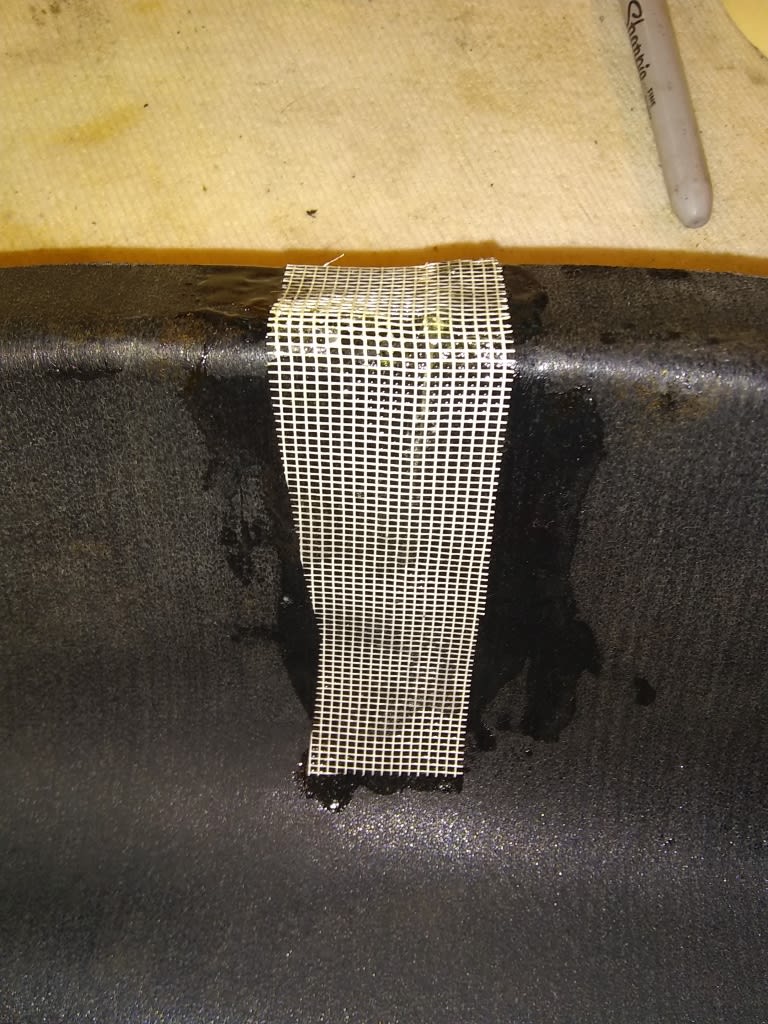
Before refitting I lined the back of them with old foam backed headlining material to replace the thin layer of original foam that had perished.
Masked the edges to keep the glue/foam off these to help it adhere to the metal when refitting.
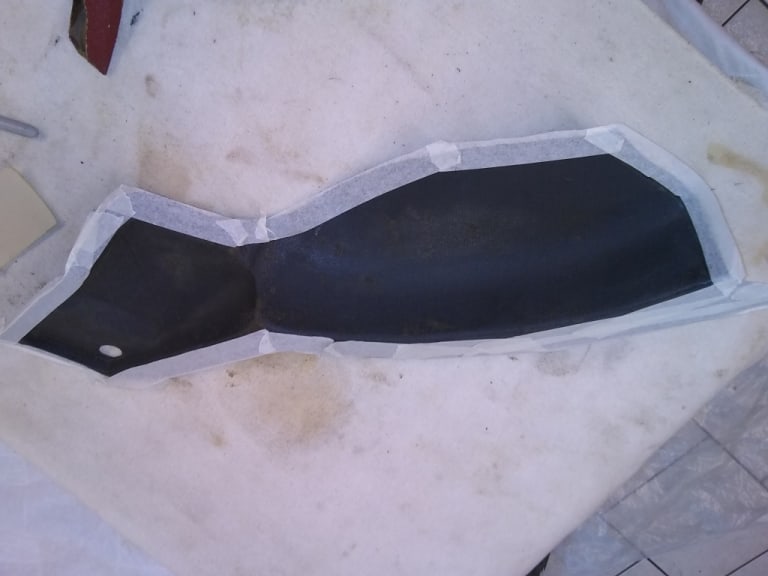
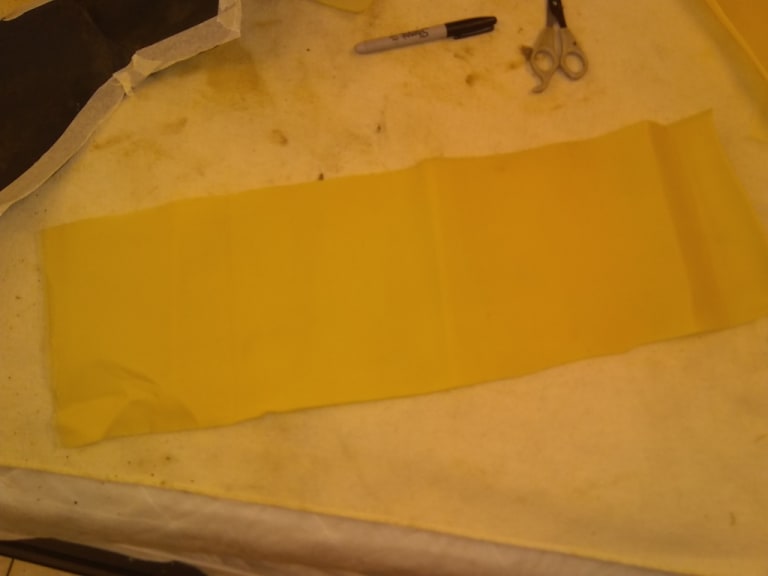
Spray glued back onto the arch - well masked as I have found that spray glue has a tendency to go much further than intended!
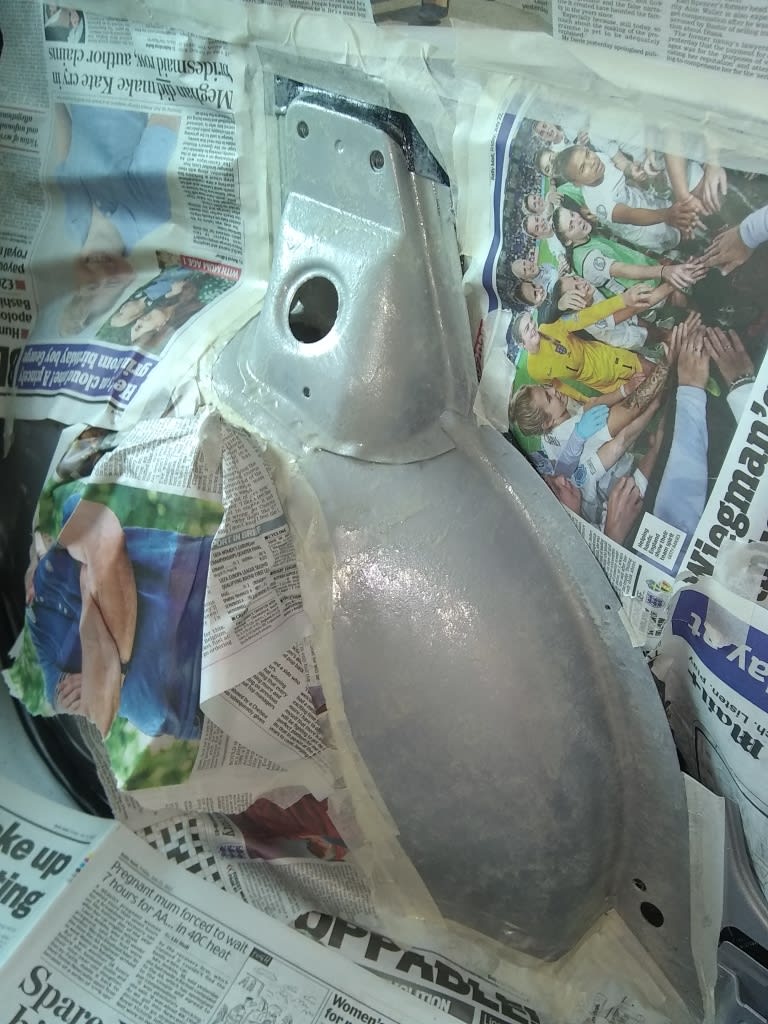
1983 Golf GTi Campaign Edition, Diamond Silver
http://vwgolfmk1.org.uk/forum/index.php?page=topicview&id=projects%2Fyour-mk1-golfs_2%2F-tag-1983-campaign&redirected=1#post_1551531
http://vwgolfmk1.org.uk/forum/index.php?page=topicview&id=projects%2Fyour-mk1-golfs_2%2F-tag-1983-campaign&redirected=1#post_1551531
Posted
Old Timer


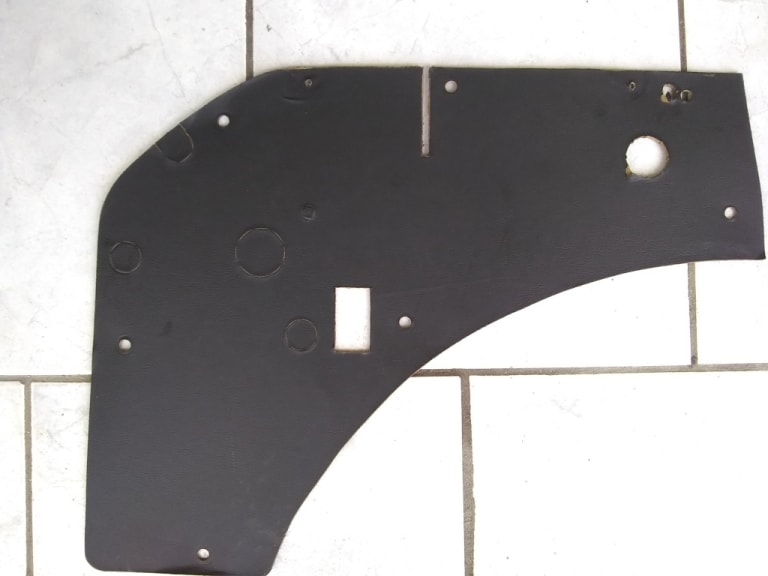
Having added Kilmat soundproofing in the rear quarters I noticed than there is a punched hole in the metal - exactly the same size as the boot light fitted to the cabrio. As far as I know they never fitted the light as standard in any models. I therefore decided to cut a hole in the black side panel that cover the rear quarter and install a light (with built-in switch) I managed to find at this year's AGM.
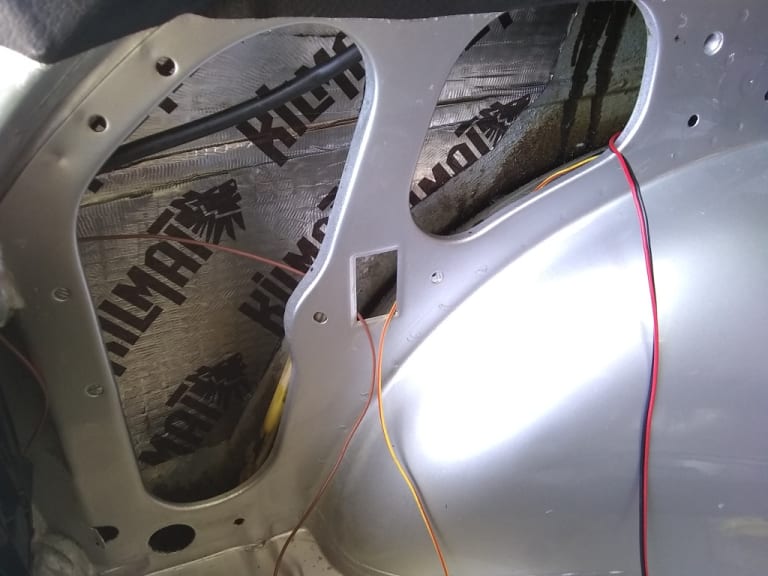
I ran a new 12v supply from the fuse box - managing to get the wire inside the existing loom, and a new earth to the earth point in the corner of the boot floor.

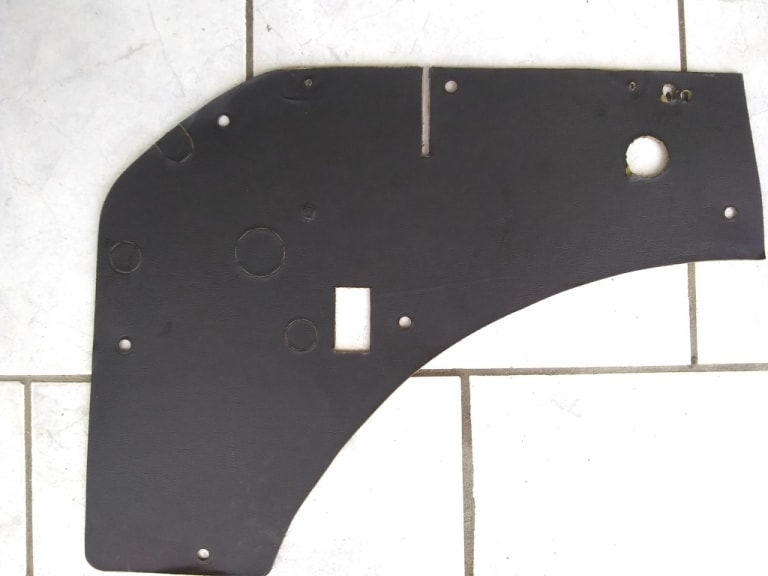
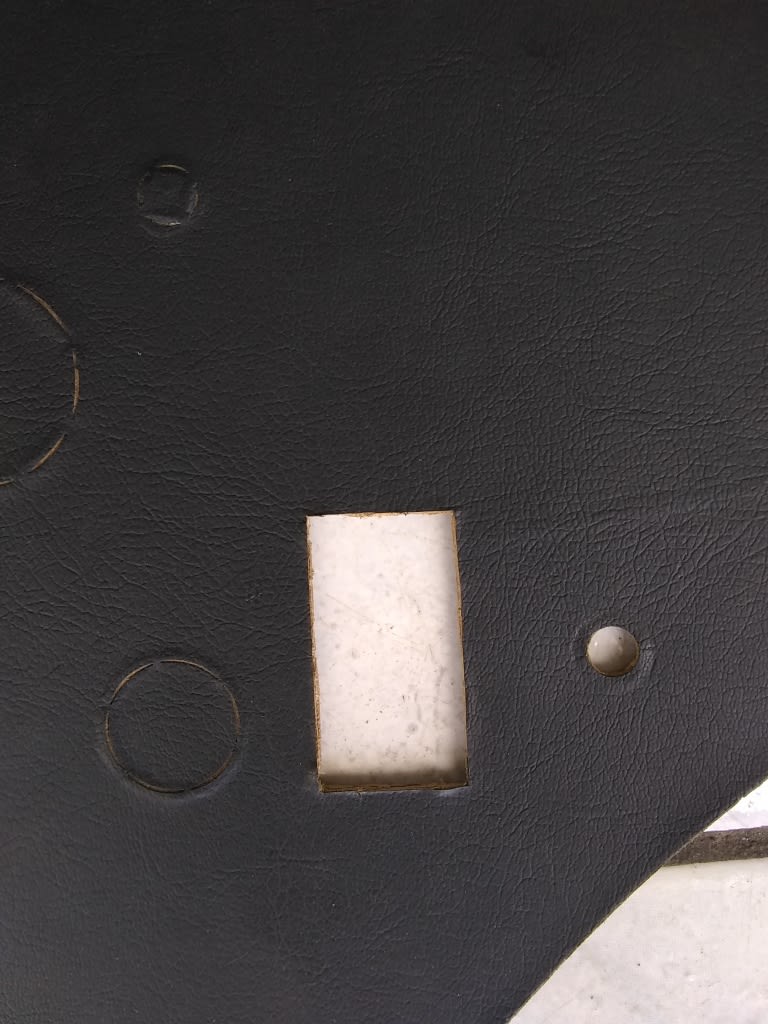
Looks OE now
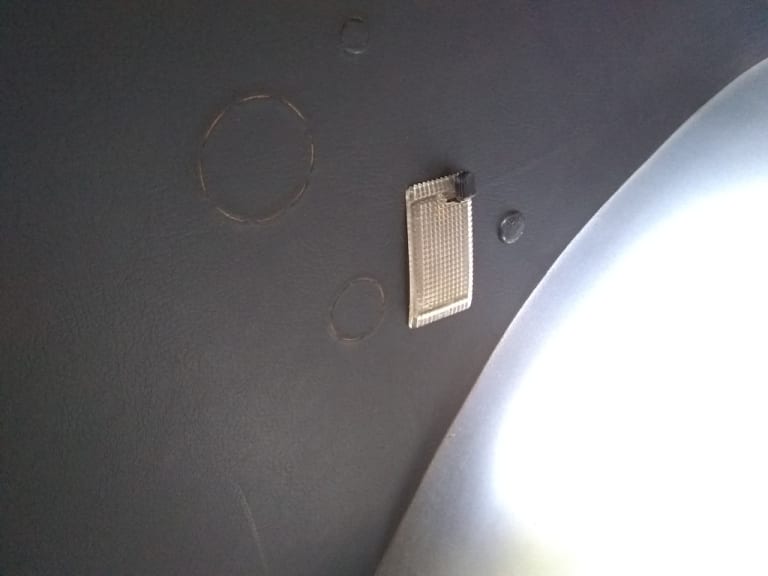
1983 Golf GTi Campaign Edition, Diamond Silver
http://vwgolfmk1.org.uk/forum/index.php?page=topicview&id=projects%2Fyour-mk1-golfs_2%2F-tag-1983-campaign&redirected=1#post_1551531
http://vwgolfmk1.org.uk/forum/index.php?page=topicview&id=projects%2Fyour-mk1-golfs_2%2F-tag-1983-campaign&redirected=1#post_1551531
Posted
Old Timer


Having added Kilmat soundproofing in the rear quarters I noticed than there is a punched hole in the metal - exactly the same size as the boot light fitted to the cabrio. As far as I know they never fitted the light as standard in any models. I therefore decided to cut a hole in the black side panel that cover the rear quarter and install a light (with built-in switch) I managed to find at this year's AGM.
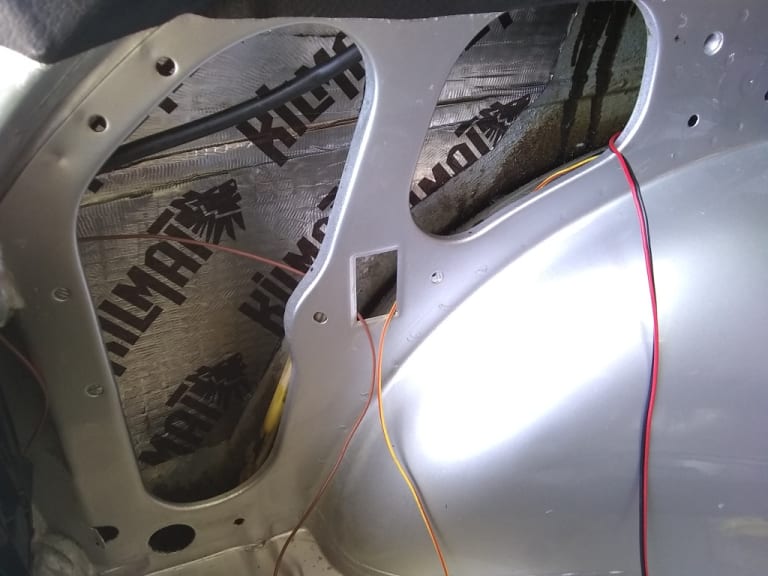
I ran a new 12v supply from the fuse box - managing to get the wire inside the existing loom, and a new earth to the earth point in the corner of the boot floor.

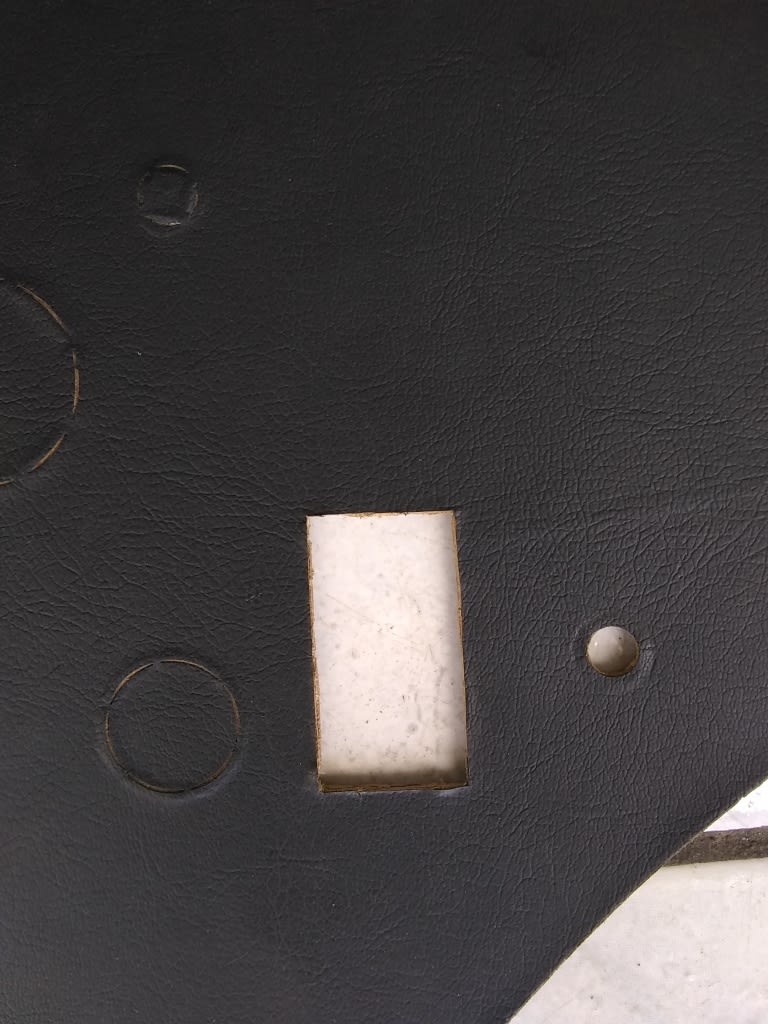
Looks OE now
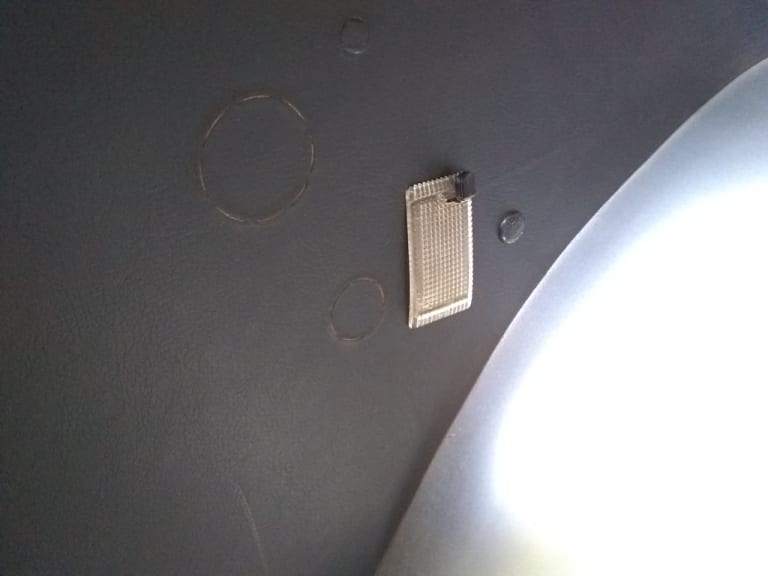
1983 Golf GTi Campaign Edition, Diamond Silver
http://vwgolfmk1.org.uk/forum/index.php?page=topicview&id=projects%2Fyour-mk1-golfs_2%2F-tag-1983-campaign&redirected=1#post_1551531
http://vwgolfmk1.org.uk/forum/index.php?page=topicview&id=projects%2Fyour-mk1-golfs_2%2F-tag-1983-campaign&redirected=1#post_1551531
Posted
Old Timer


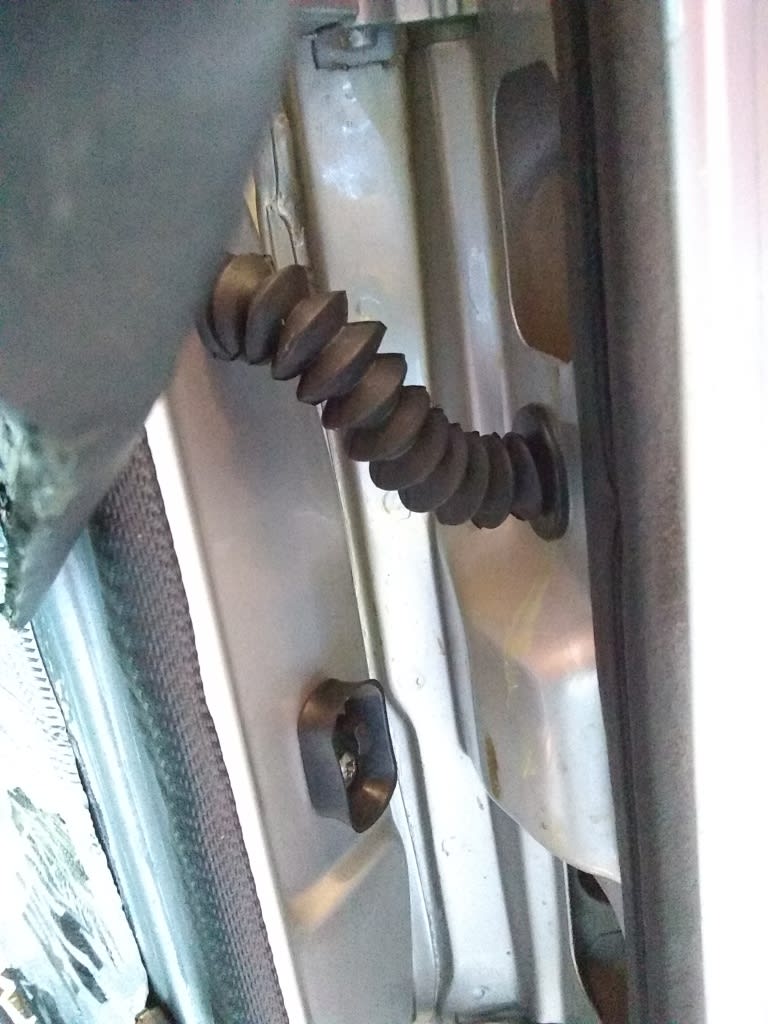
I don't like the speaker wires "hanging" between the door pillar and the door. I know there are mods that can be done using MK2 rubbers/Cabrio rubbers which involve "opening" out the hole in the A-pillar. They are also rather pricey! I therefore decided to make my own.
I bought some 16mm and 25mm grommets. The 25mm (which fits in the door is a tad slack fitting) and found a "rubber cable cover bellow" at Car Builder Solutions.
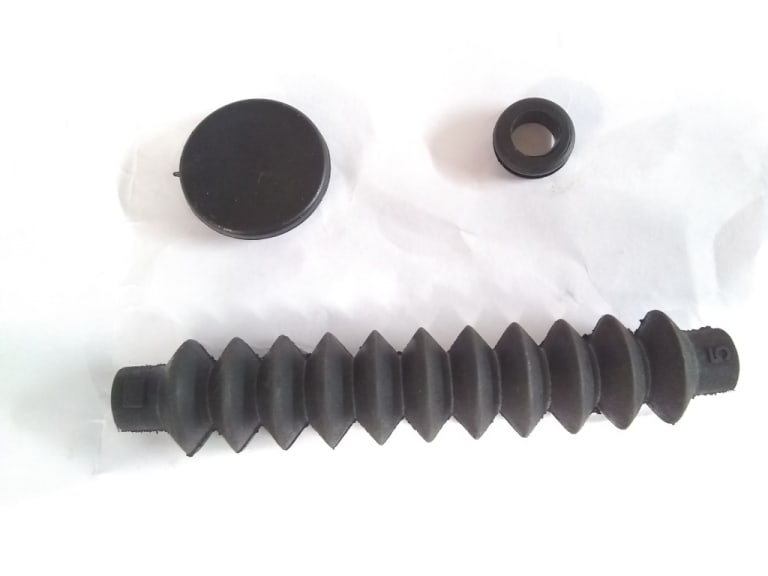
I made suitable side holes in the grommets and then pushed them over the ends of the bellows.
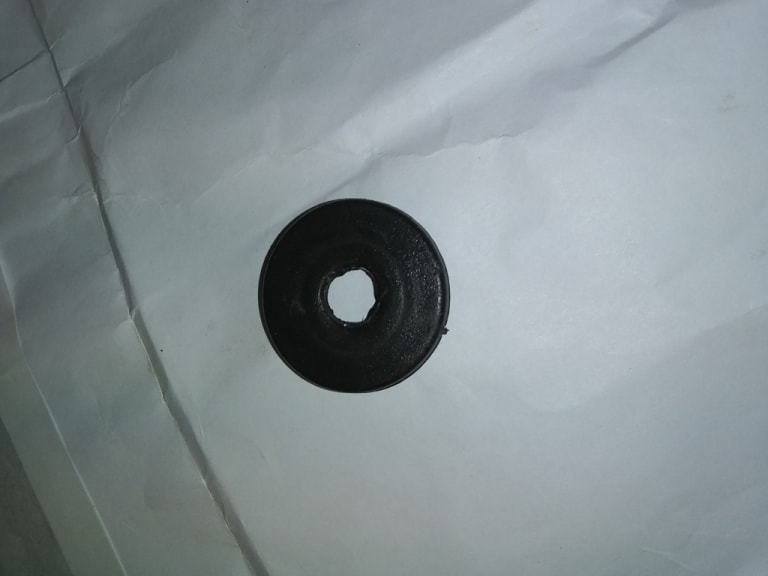
A dot or two of super glue and hey presto!
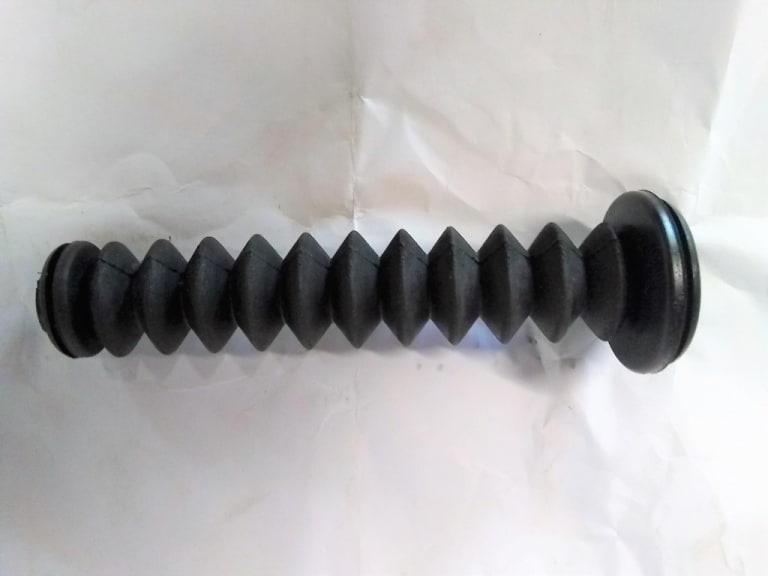
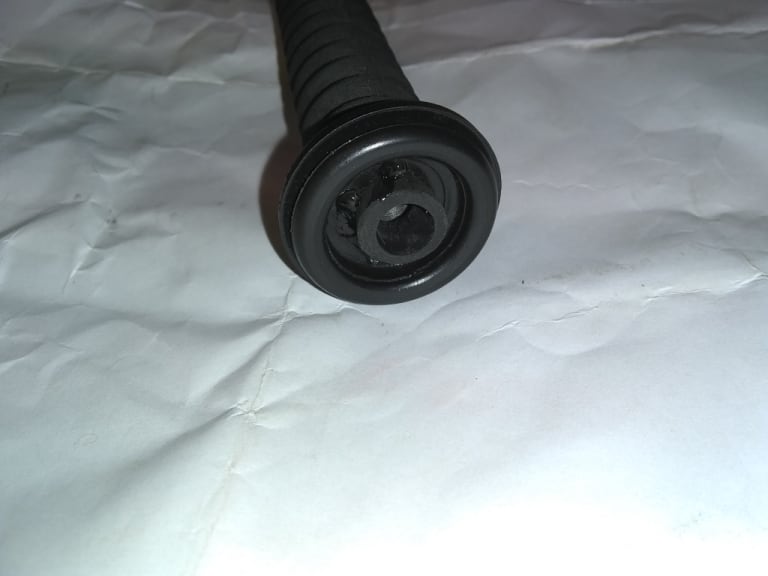
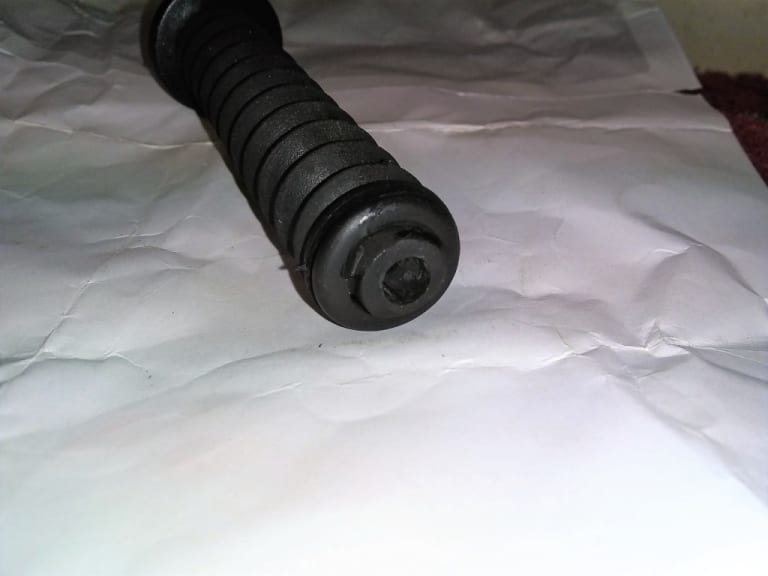
Worked really well - pleased with the result - and a fraction of the price of those advertised and with no body modifications.
1983 Golf GTi Campaign Edition, Diamond Silver
http://vwgolfmk1.org.uk/forum/index.php?page=topicview&id=projects%2Fyour-mk1-golfs_2%2F-tag-1983-campaign&redirected=1#post_1551531
http://vwgolfmk1.org.uk/forum/index.php?page=topicview&id=projects%2Fyour-mk1-golfs_2%2F-tag-1983-campaign&redirected=1#post_1551531
Posted
Old Timer


Looking much better
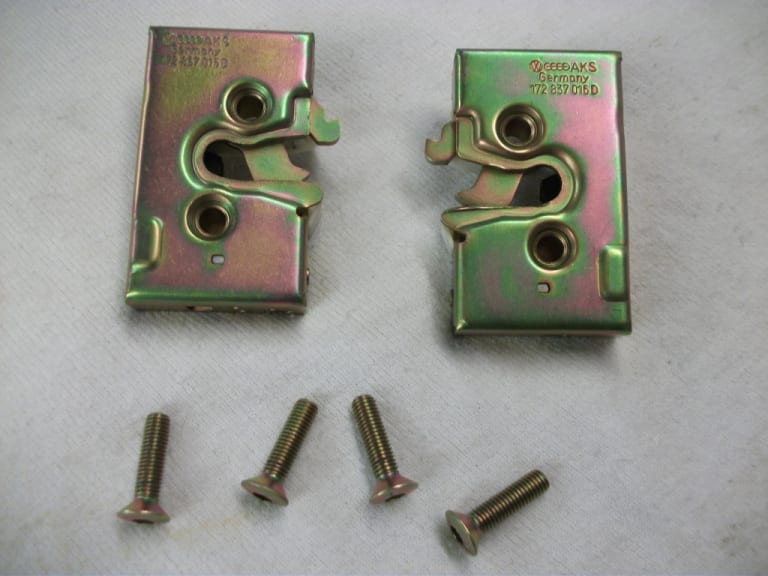
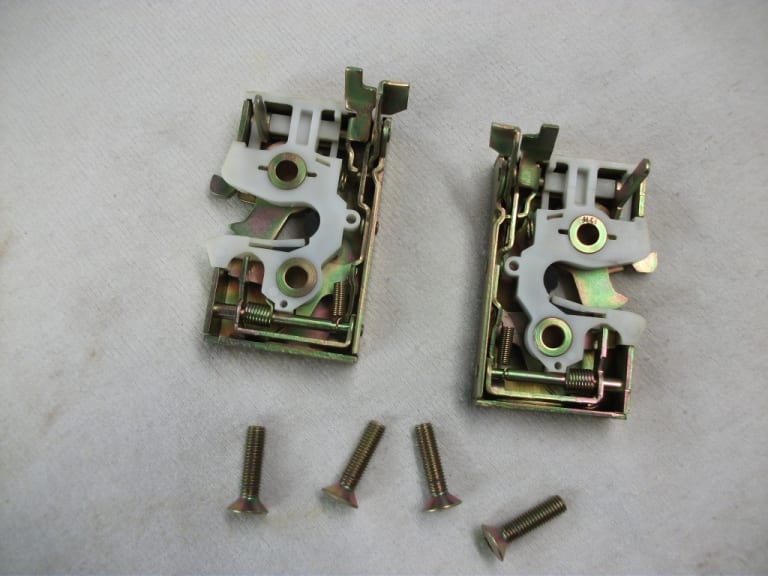
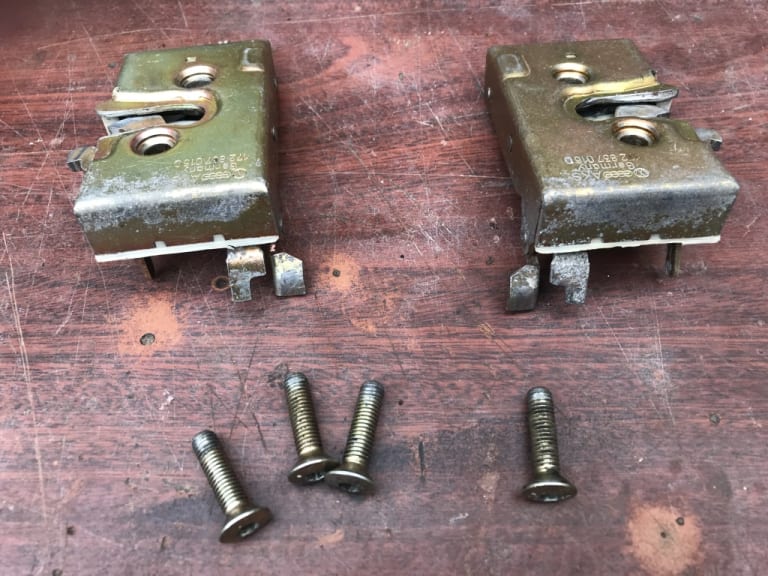
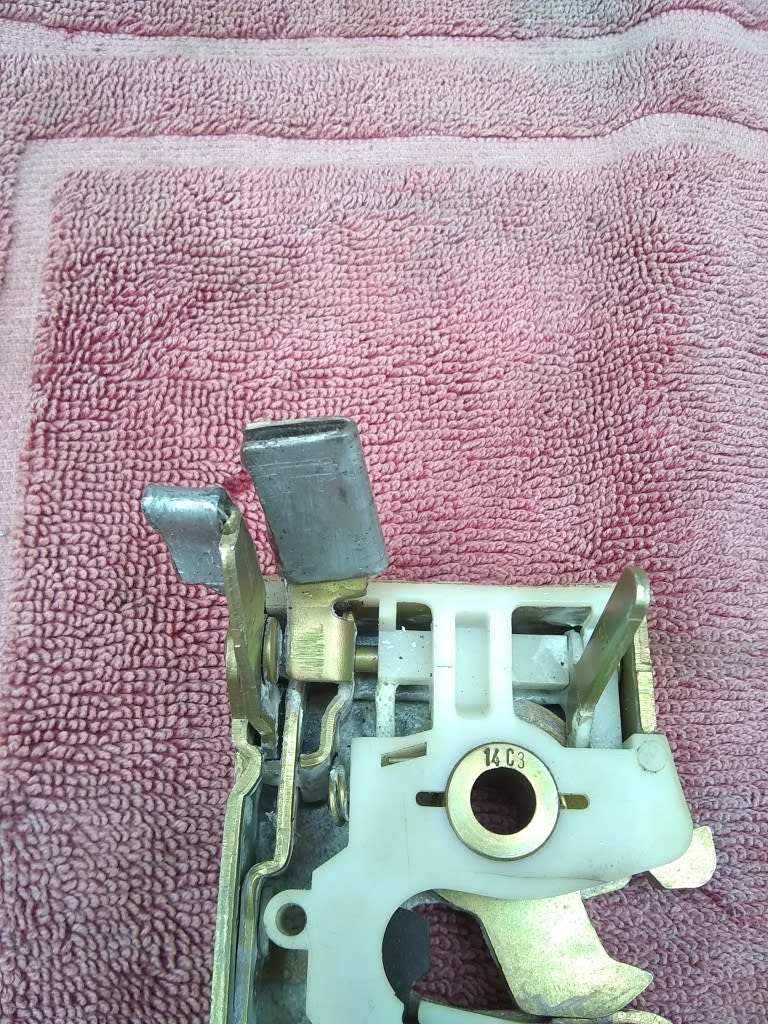
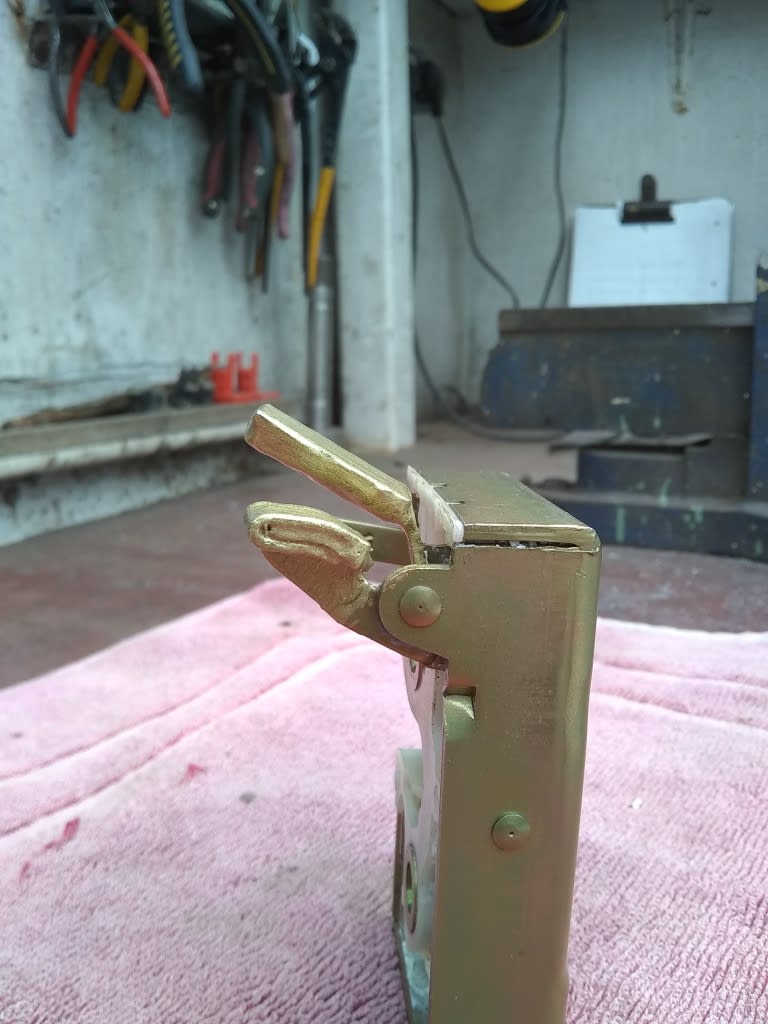
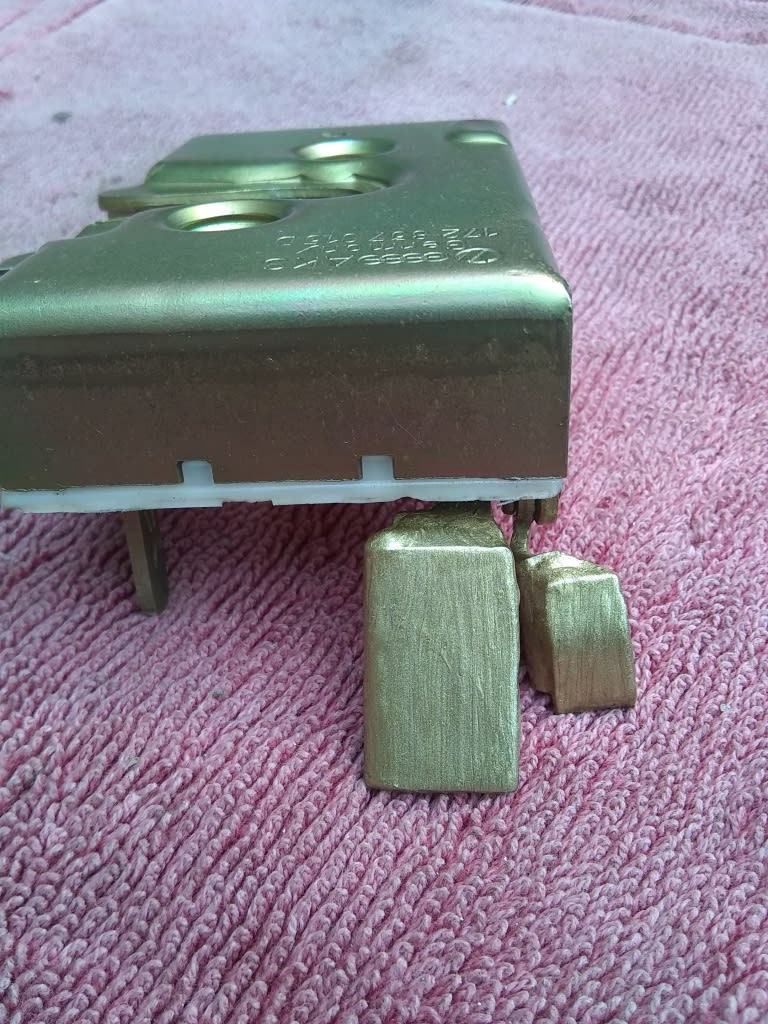
I decided to fit Armor door plates as I had a set anyway, and it is a known weak point for thieves breaking into the Golf. I found that having fitted them the door handles didn't press adequately on the lock lever and the opening lever. I have read on here of other people adding screws to the door handle lever to help with this issue.
I therefore made some metal pads that enlarged the contact area - araldited them on and painted them gold. Looking inside the door when operating the lock, the enlarged contact area clearly helps.

 Last edit: by cdgthreesalmons
1983 Golf GTi Campaign Edition, Diamond Silver
http://vwgolfmk1.org.uk/forum/index.php?page=topicview&id=projects%2Fyour-mk1-golfs_2%2F-tag-1983-campaign&redirected=1#post_1551531
http://vwgolfmk1.org.uk/forum/index.php?page=topicview&id=projects%2Fyour-mk1-golfs_2%2F-tag-1983-campaign&redirected=1#post_1551531
Posted
Old Timer
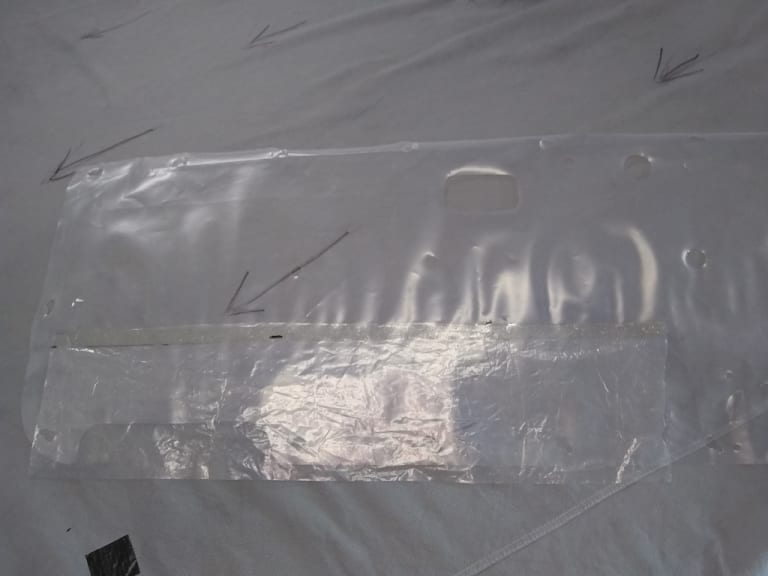
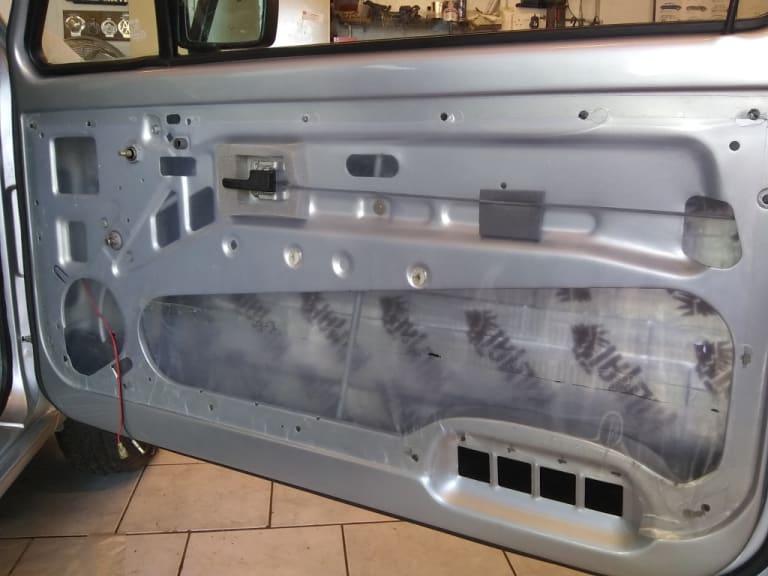


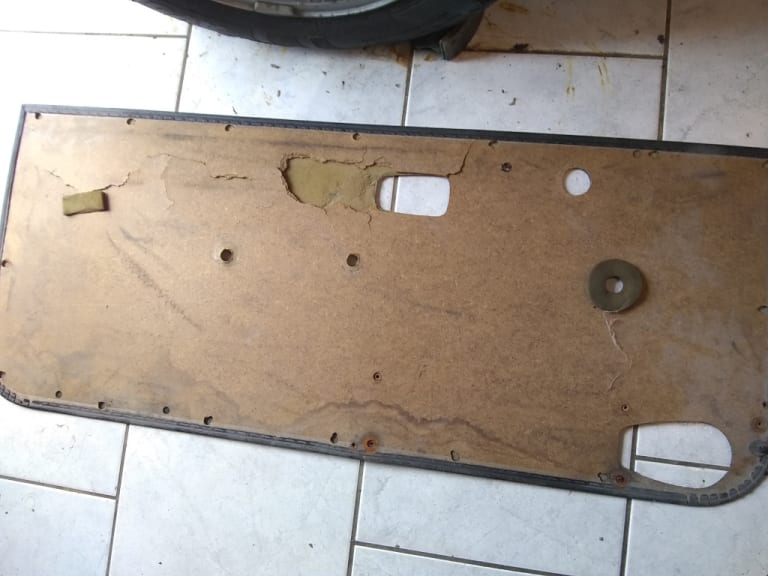
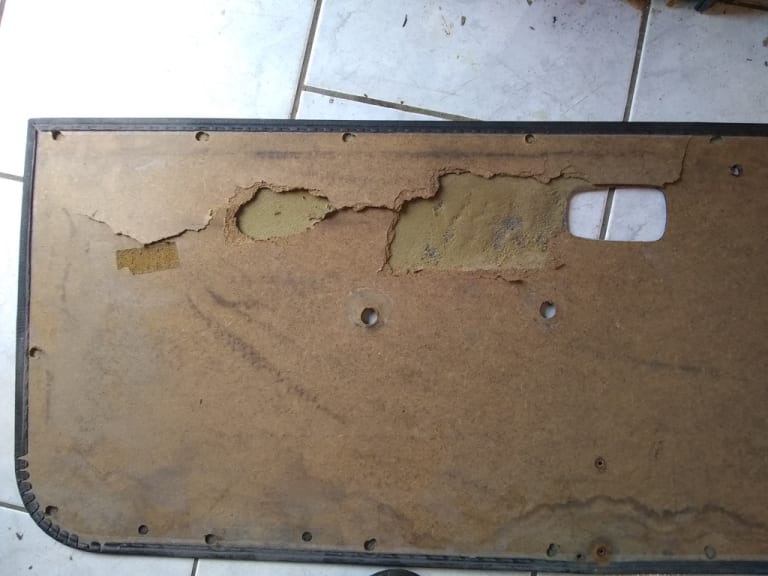
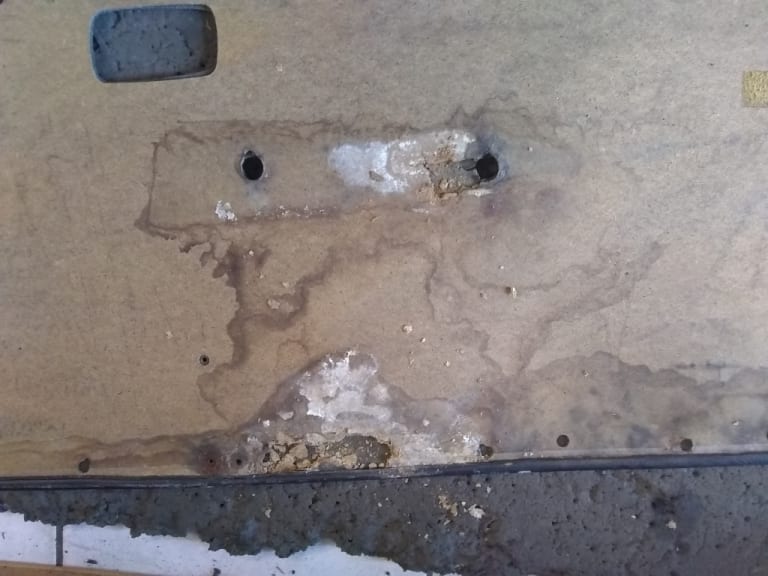
The water had caused the board to disintegrate away and in some areas had gone completely. The price of new panels is very expensive - so I thought I may as well have a go at making my own.

I found using a palette knife I could work around the edge and carefully separate the vinyl from the board.
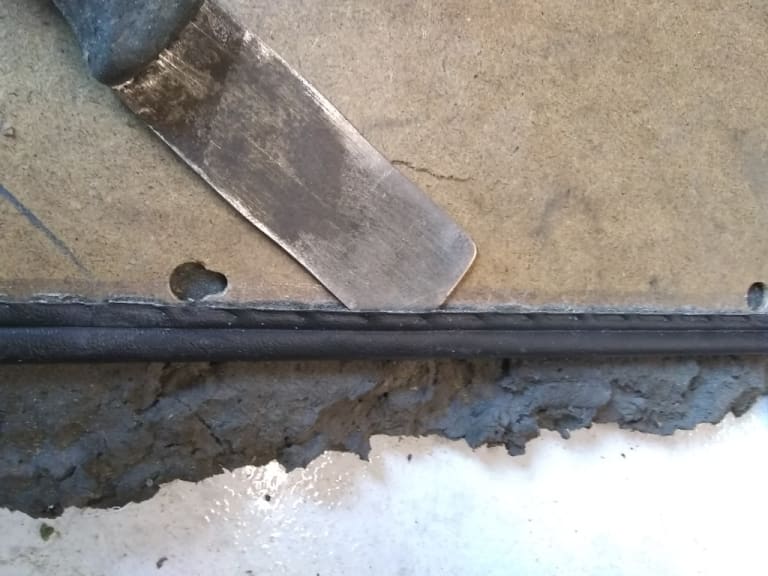
Then I could rest my foot on the board and very gently "ease/pull" the vinyl at a shallow angle so as not to crease/tear it. Where the "stitch" lines on the outer surface are bonded to board I had to extra careful and needed the palette knife again to help.
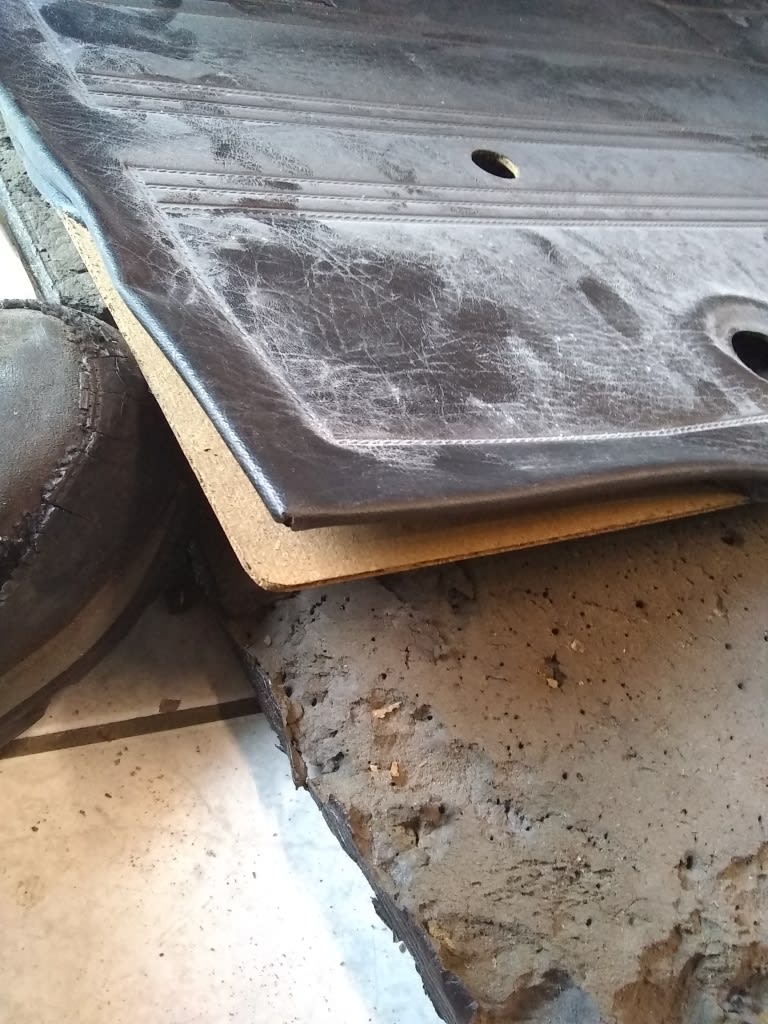
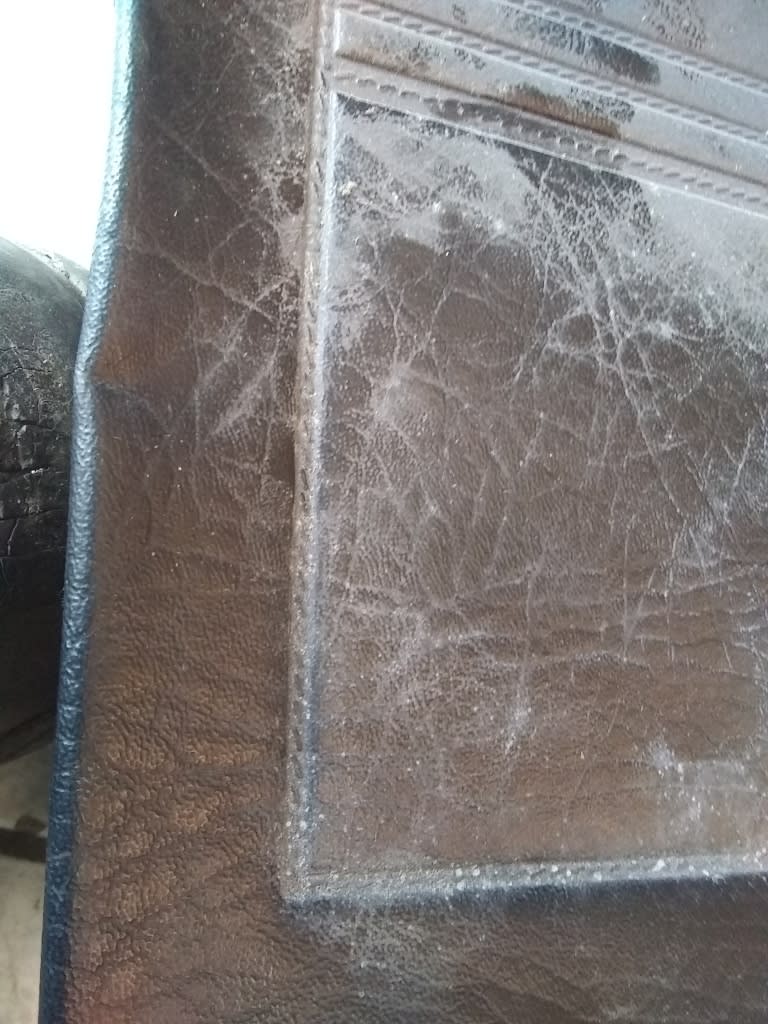
The rear of the vinyl was covered in a very thin layer of foam. Again, due to the water damage and where the board had been missing, this had rubbed away completely. So, I took the palette knife and some old sandpaper and went over the back of the vinyl to remove the old foam.
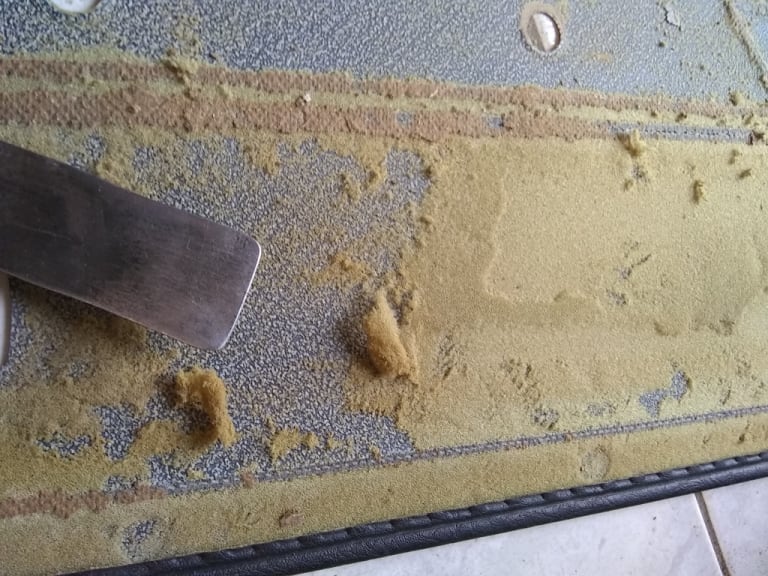
The back of the vinyl all cleaned up
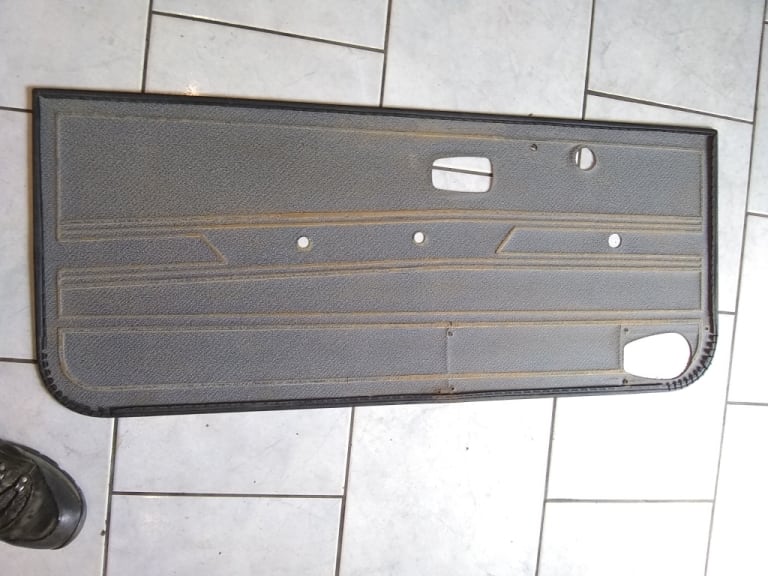
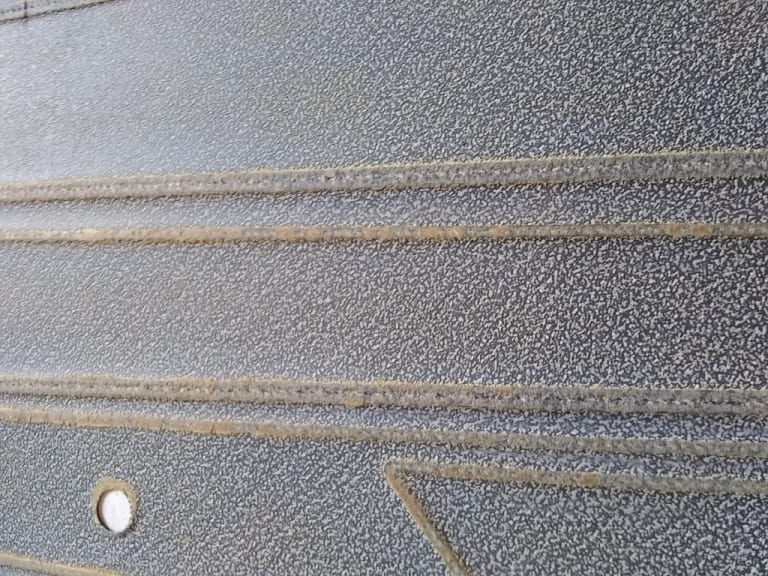
To make the new boards I bought some 3mm hardboard. Using the old panels as templates I marked out all the various holes/cut outs.
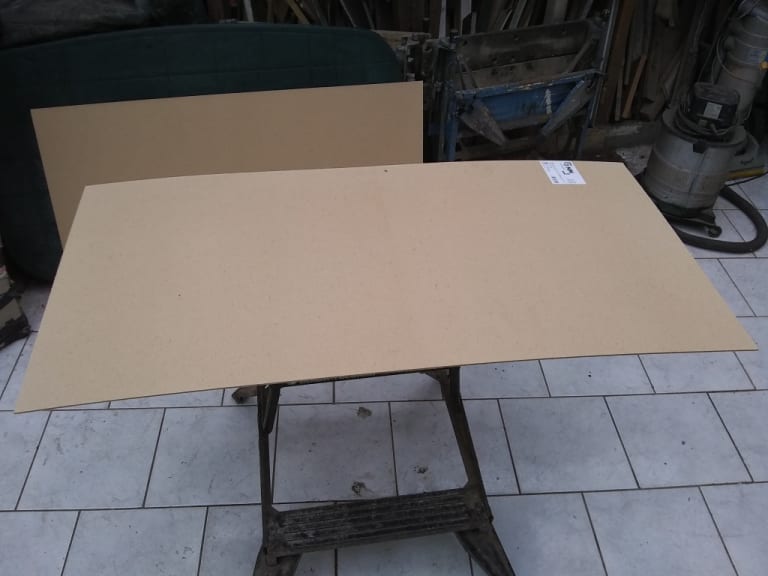
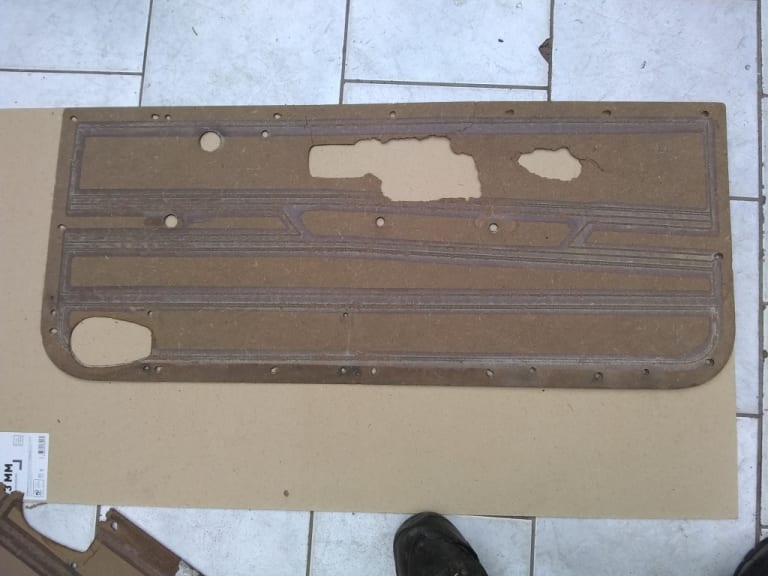
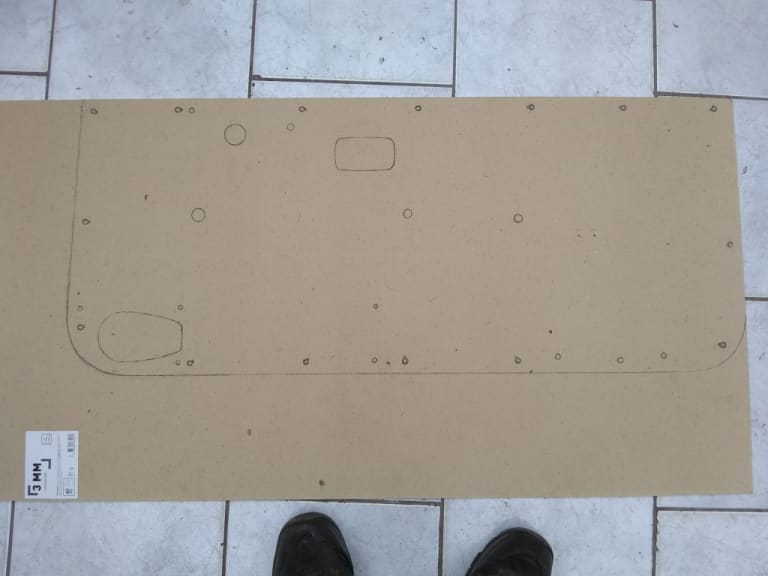
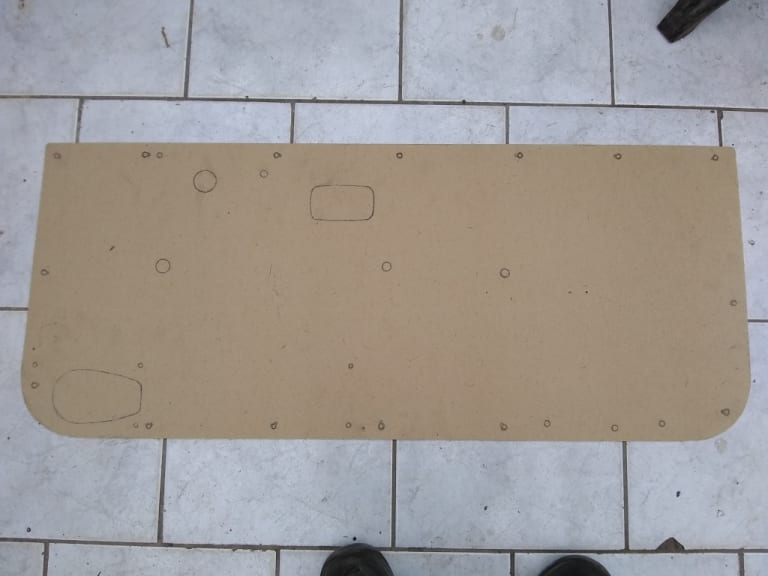
Then cut the main shape to size
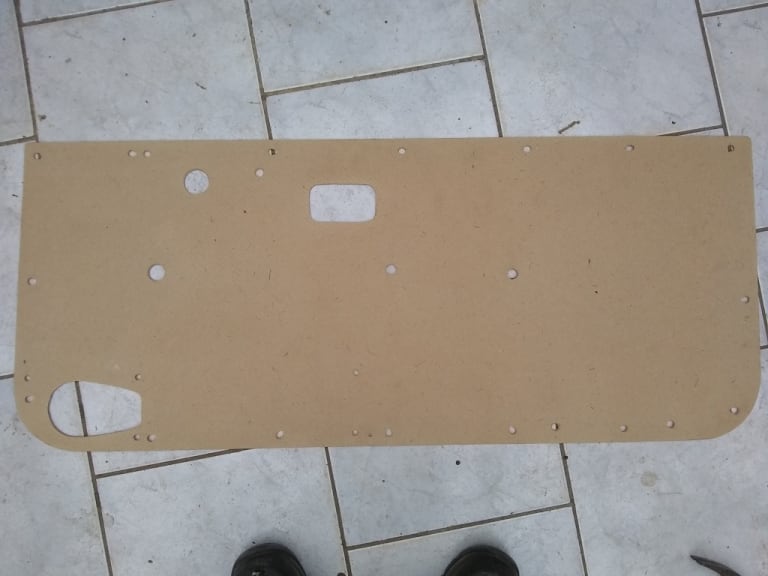
Then using a variety of drill sizes, files and jigsaw made all the openings/holes required.
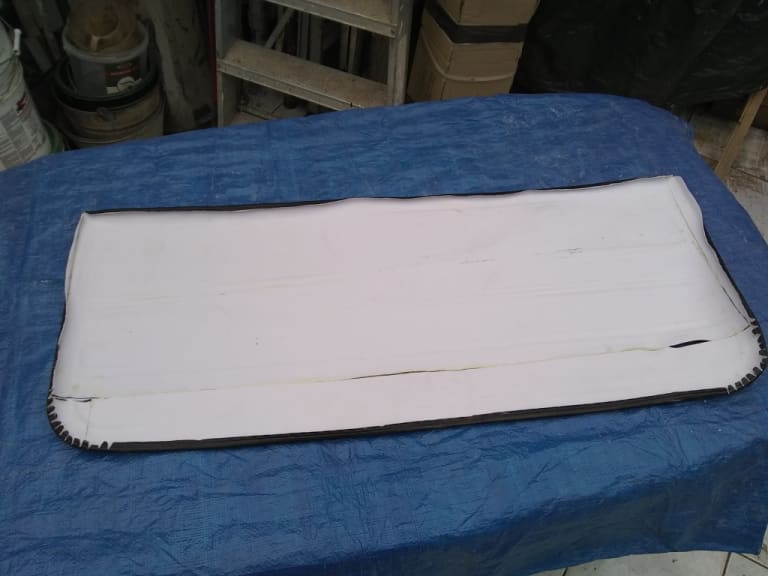
I bought some 1mm foam - surprisingly tricky to locate. Using contact adhesive, I stuck this all over the rear of the vinyl - making sure to press it well into all the shapes and also not getting any lumps/creases in it which would print through

I then stuck the top outer lip onto the board using contact adhesive. Then working section by section, I used spray adhesive and attached the vinyl to the board - again being very careful to ensure no lumps/creases in the vinyl.
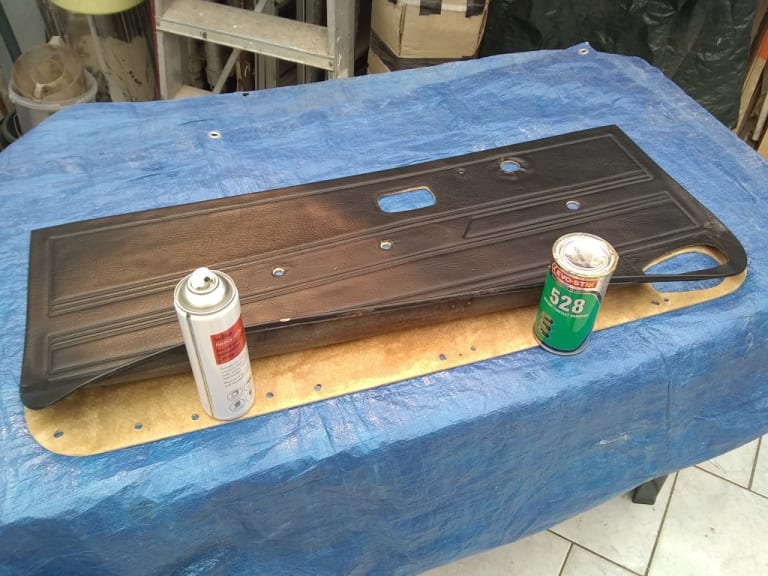
The finished article! Having glued it all into place I left the two panels on top of each other with several bags of compost on them to get them nice and flat whilst the glue set.
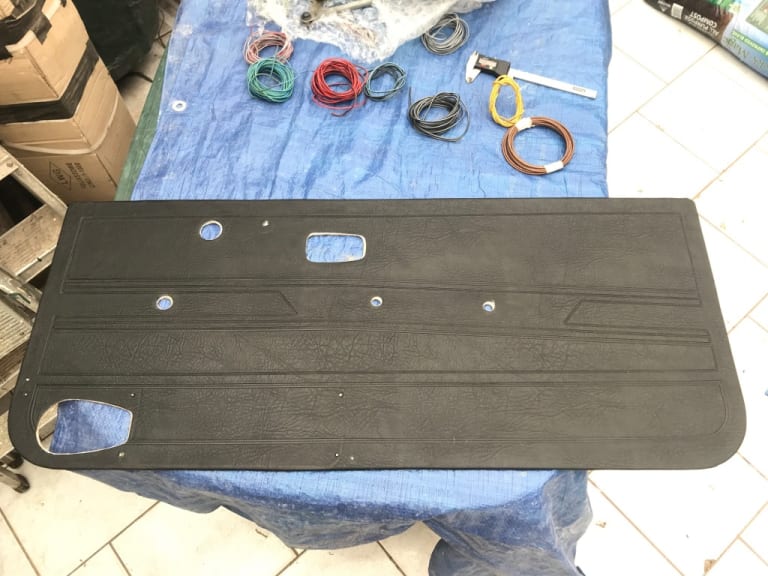
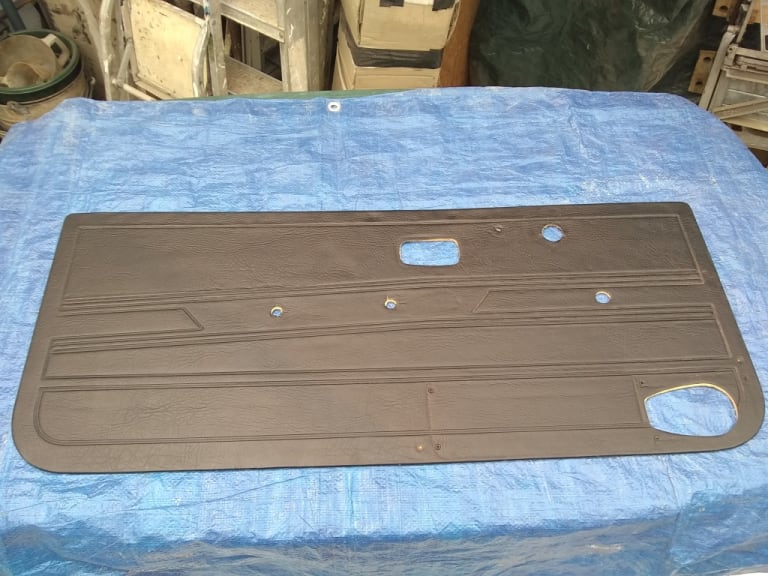
1983 Golf GTi Campaign Edition, Diamond Silver
http://vwgolfmk1.org.uk/forum/index.php?page=topicview&id=projects%2Fyour-mk1-golfs_2%2F-tag-1983-campaign&redirected=1#post_1551531
http://vwgolfmk1.org.uk/forum/index.php?page=topicview&id=projects%2Fyour-mk1-golfs_2%2F-tag-1983-campaign&redirected=1#post_1551531
Posted
Old Timer


Note the lean of the air vent aperture down to the left.
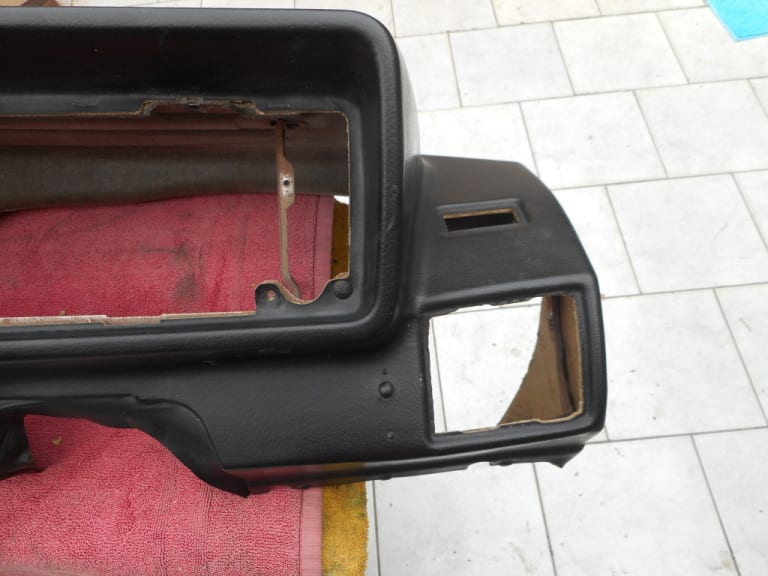
Previous repair work I carried out prior to fitting the dashboard

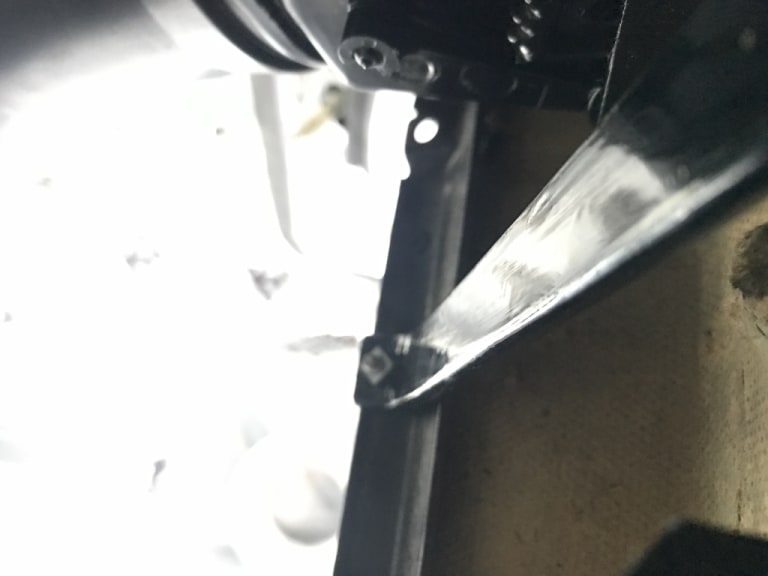
I had previously repaired the back of the dash with metal/glue but had waited until the dash was in the car to make a final support. I fashioned this from some thick steel strip - with a thinner metal pad on the top. This now goes between the top right inside corner of the dash binnacle housing down to the bottom of the dash. Here I removed one of the original rivets and used this hole to attach the support bar with a nut and bolt. In time I will use a black bolt head to hide it further.
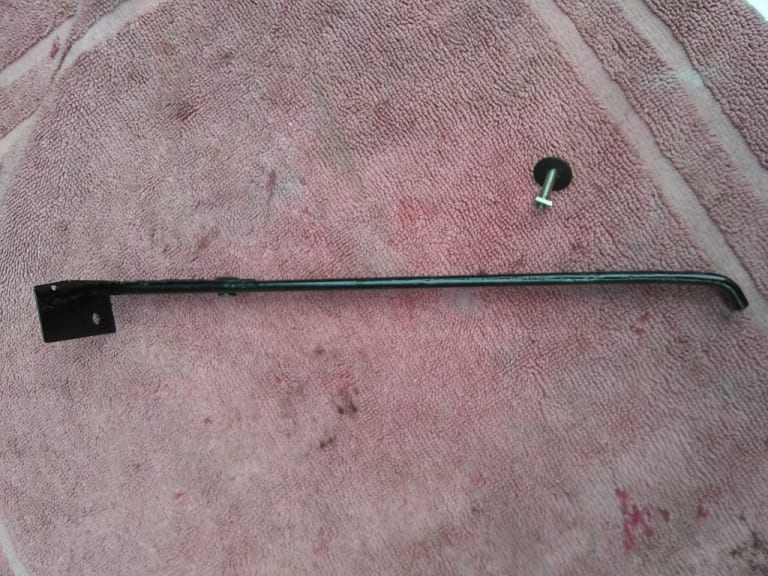
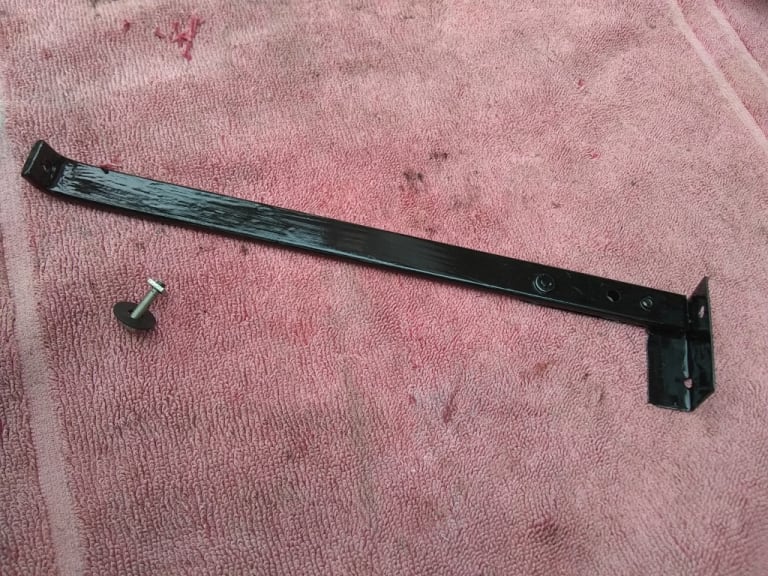
Top
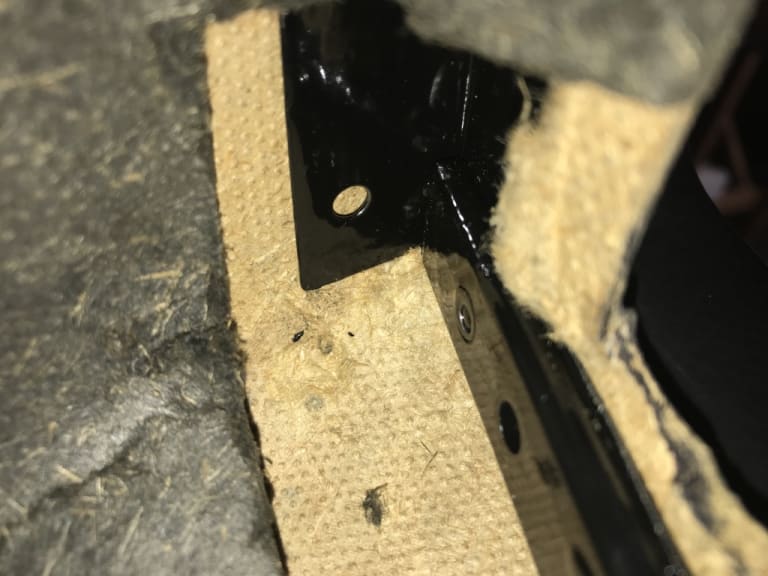
Bottom- note bolt head
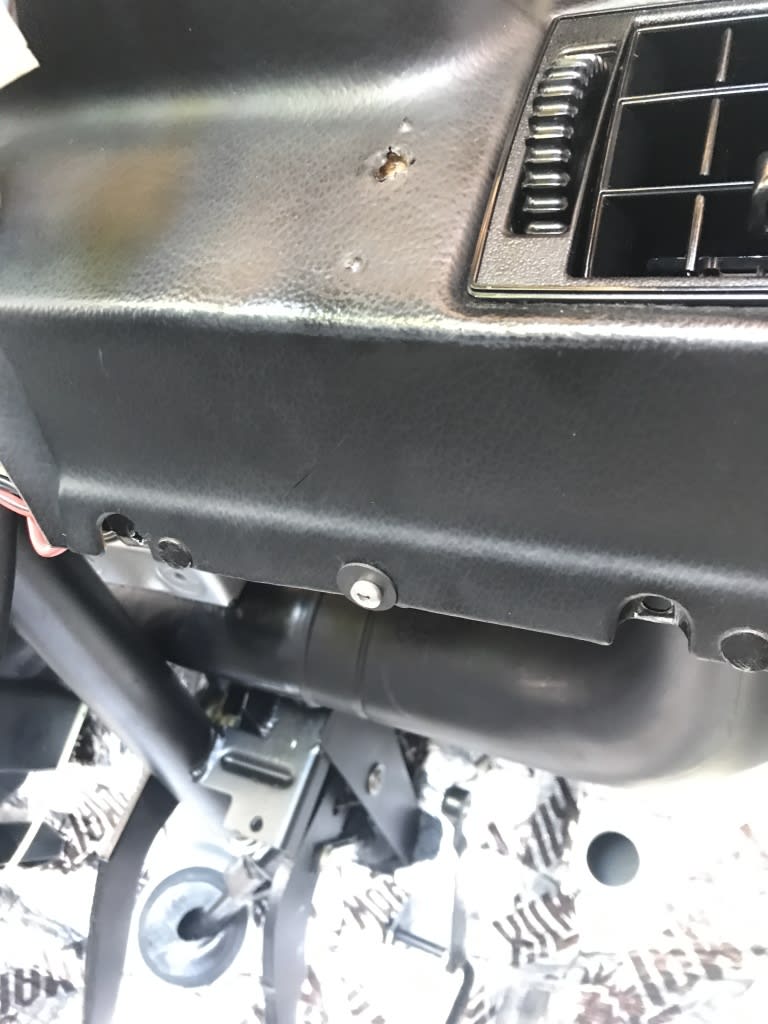
Not a very clear image - looking down the
new support
A much "squarer" looking air vent!

1983 Golf GTi Campaign Edition, Diamond Silver
http://vwgolfmk1.org.uk/forum/index.php?page=topicview&id=projects%2Fyour-mk1-golfs_2%2F-tag-1983-campaign&redirected=1#post_1551531
http://vwgolfmk1.org.uk/forum/index.php?page=topicview&id=projects%2Fyour-mk1-golfs_2%2F-tag-1983-campaign&redirected=1#post_1551531
0 guests and 0 members have just viewed this: None.


