


"TAG" - 1983 Campaign restoration blog

Posted
Regional Host NE


Re:
Merry Christmas from the North East of England memberscdgthreesalmons said
Just to wish you all a very Happy Christmas and a healthy 2022.

Sent from my SM-G960F using Tapatalk
Do not know a lot but willing to help if possible
1989 Sapphire Blue Mk1 Cabriolet KR
1985 Atlas Grey Mk2 GTI 2.0 ABF
1989 Sapphire Blue Mk1 Cabriolet KR
1985 Atlas Grey Mk2 GTI 2.0 ABF
Posted

Old Timer

Here are some updates to works at the end of last year.
The dashboard needed quite a bit of attention. Not only was it filthy dirty but it the outer vinyl layer was peeling away around most of the edges and around the top slit ai rvents. The internal metal structure was rusty and the drivers side air vent hole was quite badly distorted.
After a good clean I used impact adhesive to reattach the lifting vinyl around the edges, held with numerous clamps and pieces of wood/hardboard to prevent marking.


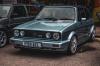
1983 Golf GTi Campaign Edition, Diamond Silver
http://vwgolfmk1.org.uk/forum/index.php?page=topicview&id=projects%2Fyour-mk1-golfs_2%2F-tag-1983-campaign&redirected=1#post_1551531
http://vwgolfmk1.org.uk/forum/index.php?page=topicview&id=projects%2Fyour-mk1-golfs_2%2F-tag-1983-campaign&redirected=1#post_1551531
Posted
Old Timer
I have noted at various Club meets how many drivers side air vents have a noticeable lean to the left….. so I think this is a common problem.

You will note the downward angle of the vent surround compared to the horizontal top of the instrument binnacle. If I pressed on the top right corner of the binnacle you could see the movement in the dash area between the vent hole/binnacle hole. There is very little "meat" in that area of the dash.
The dash is not the strongest structure - being made mostly of thick a fibre "card" outer glued/bonded to an inner fibre "card" structure - together with a lightweight metal supporting structure. I found the inner and outer "card" sections had separated due to the flexing caused by pressure on the dash. I re-attached this with structural sealant.

To the left of the clamp you can actually see the "fold" in the brown fibre card where it had been flexing.
Once the dash is back in the car I will look to make a metal support to brace this area and prevent it from happening again. But until the dash is in I don't know where air ducting etc runs which may interfere with any support.
1983 Golf GTi Campaign Edition, Diamond Silver
http://vwgolfmk1.org.uk/forum/index.php?page=topicview&id=projects%2Fyour-mk1-golfs_2%2F-tag-1983-campaign&redirected=1#post_1551531
http://vwgolfmk1.org.uk/forum/index.php?page=topicview&id=projects%2Fyour-mk1-golfs_2%2F-tag-1983-campaign&redirected=1#post_1551531
Posted
Old Timer


The central pair were fairly easy to re-glue using impact adhesive, reaching through the central air duct hole. �I used small clamps to hold it in place whilst setting. �Whether the glue will hold up to hot air only time will tell!


You can see the "pale" area where the vinyl was once attached and has peeled away from.
The outer vents were more tricky - but using a small paintbrush I could apply adhesive and then again used small clamps to hold it in place.
 Last edit: by cdgthreesalmons
1983 Golf GTi Campaign Edition, Diamond Silver
http://vwgolfmk1.org.uk/forum/index.php?page=topicview&id=projects%2Fyour-mk1-golfs_2%2F-tag-1983-campaign&redirected=1#post_1551531
http://vwgolfmk1.org.uk/forum/index.php?page=topicview&id=projects%2Fyour-mk1-golfs_2%2F-tag-1983-campaign&redirected=1#post_1551531
Posted
Old Timer

Surface rust


1983 Golf GTi Campaign Edition, Diamond Silver
http://vwgolfmk1.org.uk/forum/index.php?page=topicview&id=projects%2Fyour-mk1-golfs_2%2F-tag-1983-campaign&redirected=1#post_1551531
http://vwgolfmk1.org.uk/forum/index.php?page=topicview&id=projects%2Fyour-mk1-golfs_2%2F-tag-1983-campaign&redirected=1#post_1551531
Posted
Old Timer
My original rear window had been badly scratched by the wiper blade over the years and the heated element had several breaks in it. I therefore chose to fit a new one.

I gave the new seal a good spray of Bilt Hamber rust prevention, using the fine nozzle tube to spray into the rubber slot - to not only prevent rust but aid as a lubricant.

I had bought some cord from a local discount supermarket which proved to be just the right size.

This was laid into the rubber slot

Crossing over at the bottom

With some assistance from a willing helper it proved remarkably easy to pop back in with not too much pressure required. Slow and steady removed the cord worked wonders.

1983 Golf GTi Campaign Edition, Diamond Silver
http://vwgolfmk1.org.uk/forum/index.php?page=topicview&id=projects%2Fyour-mk1-golfs_2%2F-tag-1983-campaign&redirected=1#post_1551531
http://vwgolfmk1.org.uk/forum/index.php?page=topicview&id=projects%2Fyour-mk1-golfs_2%2F-tag-1983-campaign&redirected=1#post_1551531
Posted
Old Timer
The method I found that worked very was this.
1. Wrapped the support bar in paper tape

2. Lay some thin cloths in the door window opening


3. From the top (not from underneath!) I slid the support bar into the gap carefully. Note: I did this with the slots for the window guides in the bar facing across the door - NOT in line with the door. It is narrower that way and easier to slide in the gap.
4. A assistant then helped ease the gap open as I twisted the bar so that was now orientated the correct way.
5. It was then just a matter of sliding it along carefully into position before removing the masking tape.

1983 Golf GTi Campaign Edition, Diamond Silver
http://vwgolfmk1.org.uk/forum/index.php?page=topicview&id=projects%2Fyour-mk1-golfs_2%2F-tag-1983-campaign&redirected=1#post_1551531
http://vwgolfmk1.org.uk/forum/index.php?page=topicview&id=projects%2Fyour-mk1-golfs_2%2F-tag-1983-campaign&redirected=1#post_1551531
Posted
Old Timer
Only the windscreen left to do…………..
I bought a new seal, lubed it well with the was rust protection, laid in the rope, gathered my assistant….. and we started.
Compared to the other windows this was a whole different beast…… We got the bottom in and then worked out way around the sides - me easing the cord around inside and my assistant pressing on the glass outside. Once we were about 2/3 way up both sides it was already proving almost impossible to get the glass/rubber into the hole….
…. and them there was a click………….

Broken……….
We hadn't used excessive force but none the less the screen had broken.
In some ways I wasn't too disappointed. Like the old rear screen, it was quite badly scratched from the wipers and had a few small stone chips. But is was a genuine VAG one sadly.
I contacted my insurance who confirmed I only had to pay a small excess and they would arrange for another to be supplied and fitted.

It took 5 weeks for them to locate one!!!! As my GTI is a Campaign model the screen is green tinted - plenty of clear screens available - not tinted.
Day of fitting arrived. Youngish chap arrived - to inform me he had never fitted a non-bonded screen before………….. So even with help - after 2 hours he had to admit defeat!!!!


In the end a week later two other chaps arrived and even thought they had fitted quite a few screens like this they still struggled as well. Took nearly 2 hours to get in. Thankfully all installed and looking good.

1983 Golf GTi Campaign Edition, Diamond Silver
http://vwgolfmk1.org.uk/forum/index.php?page=topicview&id=projects%2Fyour-mk1-golfs_2%2F-tag-1983-campaign&redirected=1#post_1551531
http://vwgolfmk1.org.uk/forum/index.php?page=topicview&id=projects%2Fyour-mk1-golfs_2%2F-tag-1983-campaign&redirected=1#post_1551531
Posted
Settling In

Posted

Old Timer
"TAG" - 1983 Campaign restoration blog
I had a similar front windscreen issue, it was an original with a stone chip not in the field of view. It was installed successfully. However, within two weeks of passing the MOT and driving the stone chip propagated into a full crack across the screen. I also claimed off my insurance and got it replaced at my place of work car park.
Hope your remaining activities go well.
Sent from my H3113 using Tapatalk
Posted
Old Timer
Quick Q - where did you get your windscreen seal from, I'm in need of a new one, but have read lots of posts about poor fit from certain suppliers - although that may just be a cabby issue.
J
Posted
Old Timer
paceman said
Coming on nicely that! Good work.
Quick Q - where did you get your windscreen seal from, I'm in need of a new one, but have read lots of posts about poor fit from certain suppliers - although that may just be a cabby issue.
J
I bought mine on eBay - Febi OE spec it said!! - BUT it is a different exterior profile finish from the original. The original has a slight raised section on the outer face - matching the rear/side window rubbers. The new one is totally smooth - no raised section. After the original screen breaking I decided to clean up and re-use the original one instead.
So depends partly on originality and how you feel about that. Not sure if you can get the same original prolife rubber or not. Hope that helps - happy to post a photo of the difference if you need it.
1983 Golf GTi Campaign Edition, Diamond Silver
http://vwgolfmk1.org.uk/forum/index.php?page=topicview&id=projects%2Fyour-mk1-golfs_2%2F-tag-1983-campaign&redirected=1#post_1551531
http://vwgolfmk1.org.uk/forum/index.php?page=topicview&id=projects%2Fyour-mk1-golfs_2%2F-tag-1983-campaign&redirected=1#post_1551531
Posted
Old Timer
Malcolm said
A Happy New Year to you. This is really coming together now.
I had a similar front windscreen issue, it was an original with a stone chip not in the field of view. It was installed successfully. However, within two weeks of passing the MOT and driving the stone chip propagated into a full crack across the screen. I also claimed off my insurance and got it replaced at my place of work car park.
Hope your remaining activities go well.
Sent from my H3113 using Tapatalk
Thanks Malcolm - haven't heard from you for a while.� Do you still have GarytheGolf?
1983 Golf GTi Campaign Edition, Diamond Silver
http://vwgolfmk1.org.uk/forum/index.php?page=topicview&id=projects%2Fyour-mk1-golfs_2%2F-tag-1983-campaign&redirected=1#post_1551531
http://vwgolfmk1.org.uk/forum/index.php?page=topicview&id=projects%2Fyour-mk1-golfs_2%2F-tag-1983-campaign&redirected=1#post_1551531
Posted
Old Timer
"TAG" - 1983 Campaign restoration blog
Firstly a happy new year to you. I have been monitoring much of yours and other projects. I have been responding to a few issues on the website.
Unfortunately for me much of the last eighteen months or so has been taken up with other issues.
I retired from work in March 20 just before the Covid lockdown with the intention to relocate from Romsey, Hants to West Sussex to be closer to family. It took eighteen months to the day to complete in Jul 21.
This time was further impacted by the lost of my youngest brother (61) in Nov 20 due to Covid. If you ever watched the "Bad Lads Army" programmes on TV some years ago, he played the Sgt.
At the same time my 2 year old grandson who had previously been diagnosed with a tumour behind his left eye on the optic nerve in the previous Jul suffered near fatal intestinal damage following 6 months of hospitalisation and chemo treatment.
On the positive:
He has recovered, he got home for Xmas 20 and is back at nursery. He is still clear after 12 months. The sight in that eye is lost for now.
We are settled in Angmering between my two daughters families, 10_15 mins each way, providing and receiving support when required.
My focus currently is addressing issues with our 4 year old house and to maintain Gary who is now stored in my new 20 x 9ft garage along with many other parts, some of which need to be moved on.
After some 7 years of faultless driving, the oddmeter has stopped working, so needs to be repaired. Looking forward to getting involved.
Sent from my H3113 using Tapatalk
Posted
Settling In
Posted
Old Timer
My wife and I are looking forward to a better 2022.
0 guests and 0 members have just viewed this: None.