"TAG" - 1983 Campaign restoration blog
Posted
Old Timer


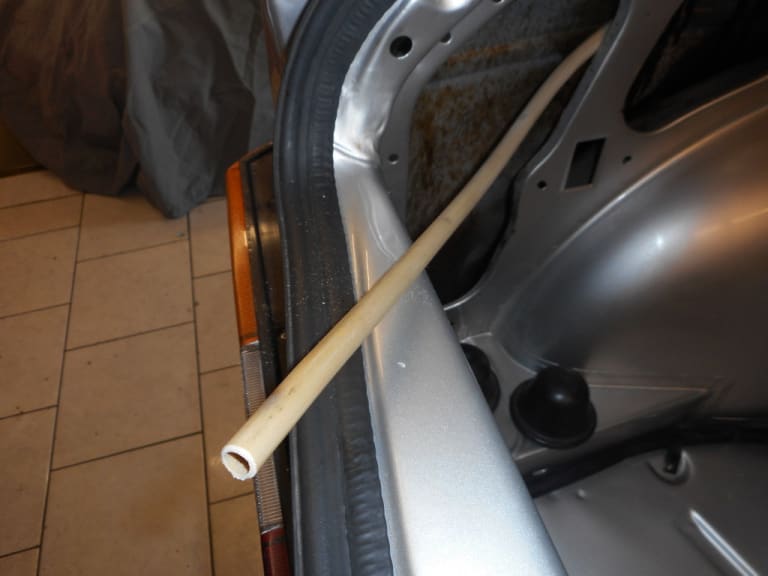
They finish in the void behind the rear wheel arch - just dangling there. Water therefore runs out of them and collects in the blind void - rotting it! This must have happened from new - very un VW like!! I think there may have been a very small drain hole - but asking a lot!!
I wasn't happy with this so decided to drill a new drain hole from under the car into the void. Very tricky job!!
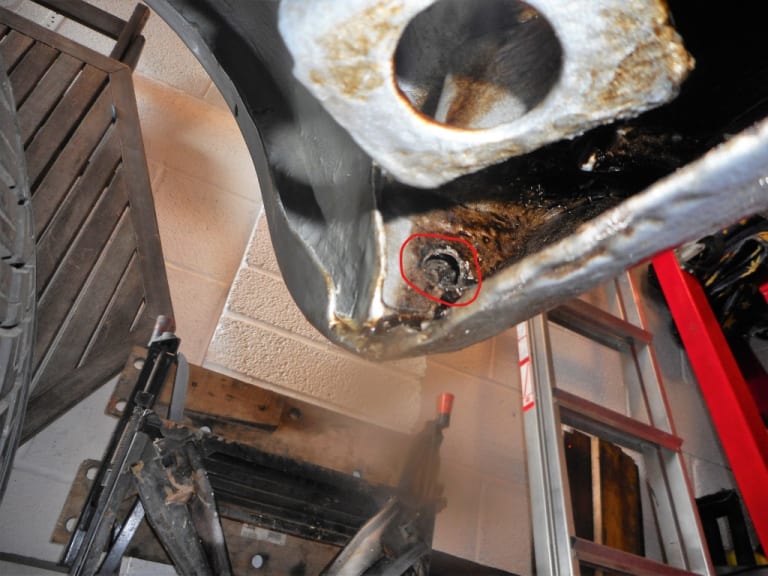
I then found some clear fairly rigid plastic tubing that pushed tightly over the end of the existing drain tubes.
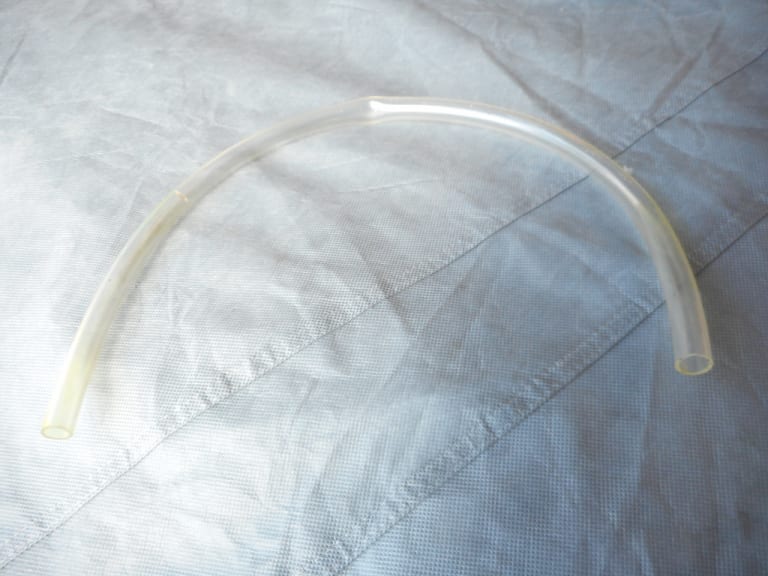
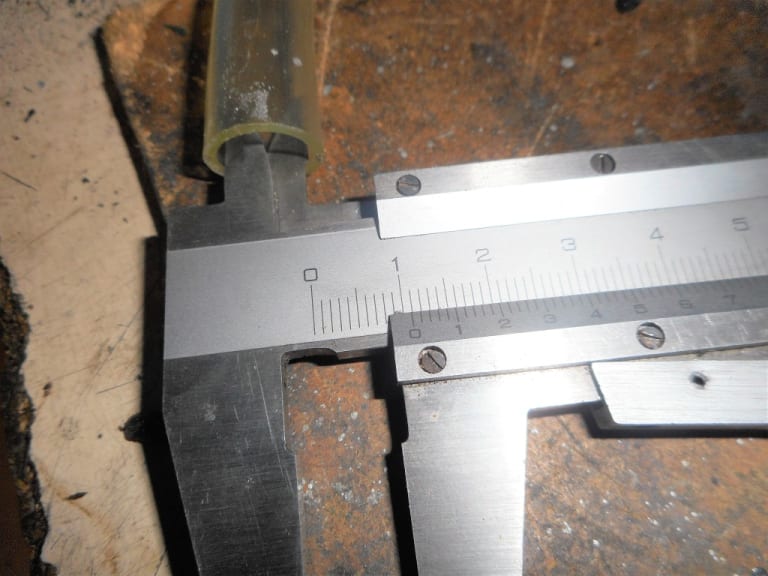
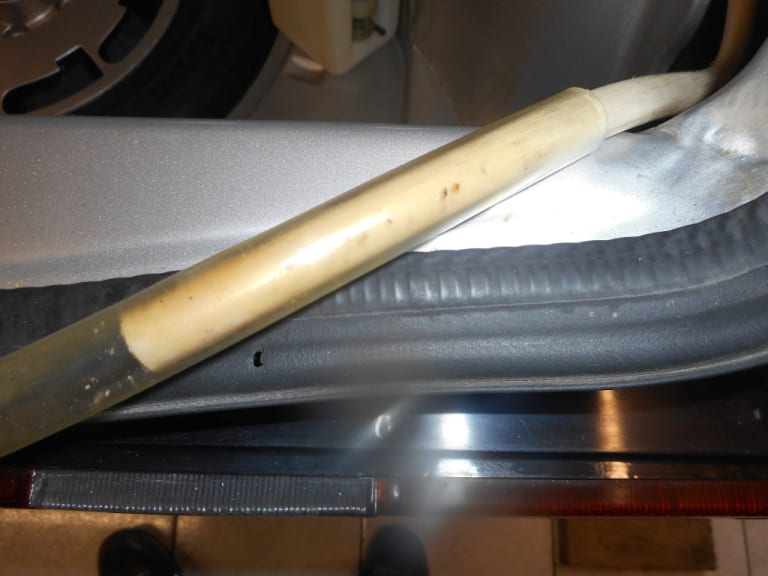
I could then feed this out through my new drain hole
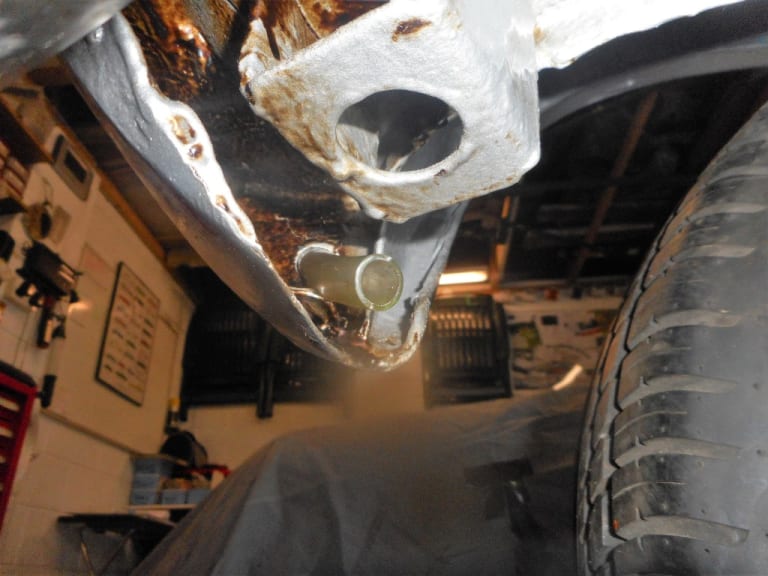
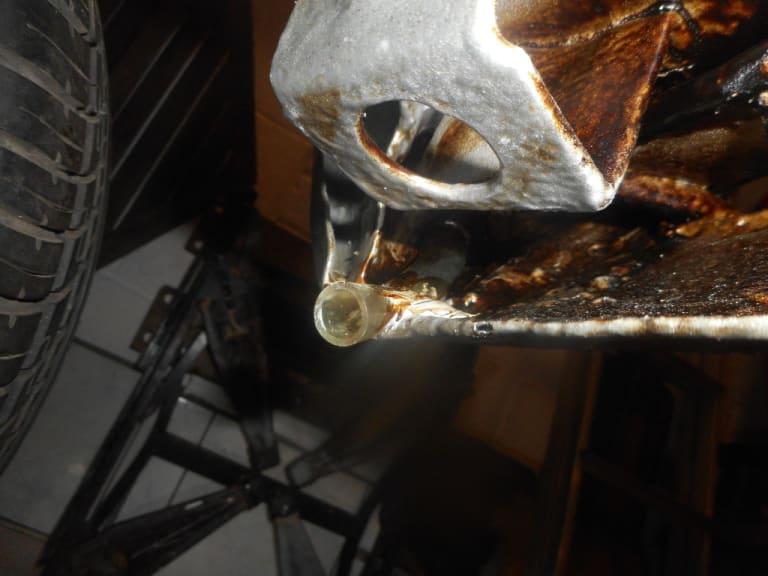
I then used some PU seam sealer to hold the pipe ends in position.
1983 Golf GTi Campaign Edition, Diamond Silver
http://vwgolfmk1.org.uk/forum/index.php?page=topicview&id=projects%2Fyour-mk1-golfs_2%2F-tag-1983-campaign&redirected=1#post_1551531
http://vwgolfmk1.org.uk/forum/index.php?page=topicview&id=projects%2Fyour-mk1-golfs_2%2F-tag-1983-campaign&redirected=1#post_1551531
Posted
Old Timer


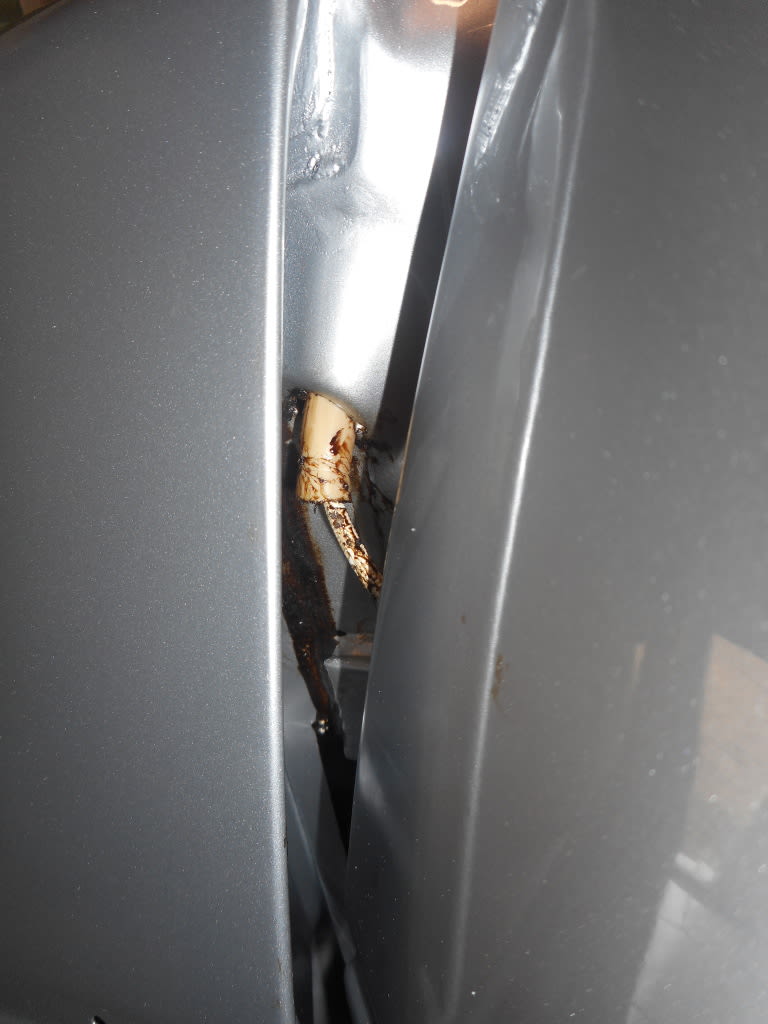
I found that by feeding a length of old curtain spring down first and out through the hole - I could push the drain tube over the curtain spring and slide it down much more easily.
1983 Golf GTi Campaign Edition, Diamond Silver
http://vwgolfmk1.org.uk/forum/index.php?page=topicview&id=projects%2Fyour-mk1-golfs_2%2F-tag-1983-campaign&redirected=1#post_1551531
http://vwgolfmk1.org.uk/forum/index.php?page=topicview&id=projects%2Fyour-mk1-golfs_2%2F-tag-1983-campaign&redirected=1#post_1551531
Posted
Old Timer


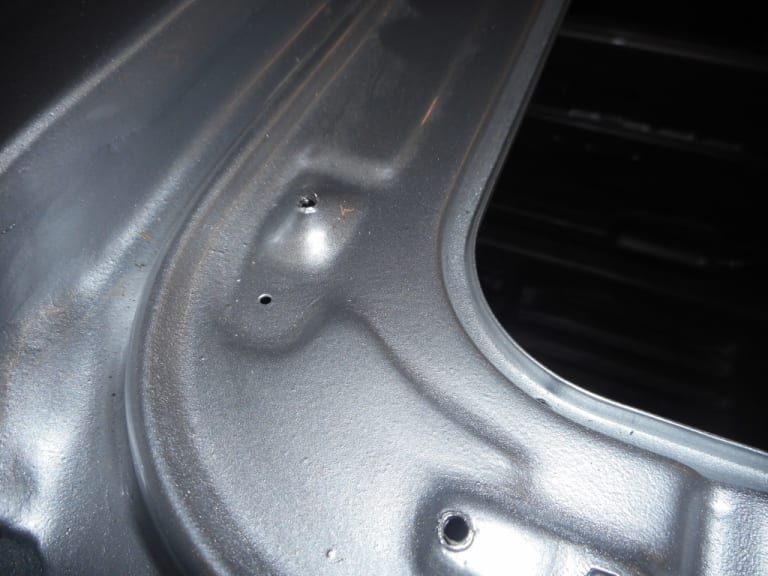
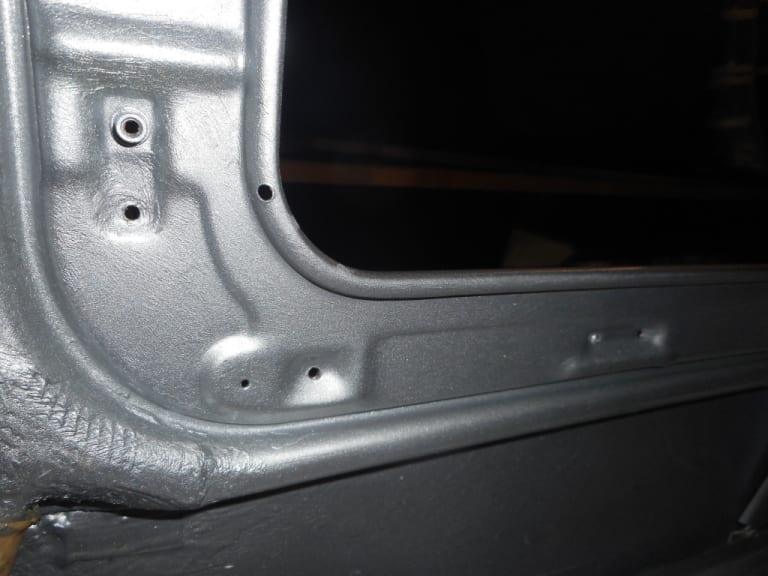
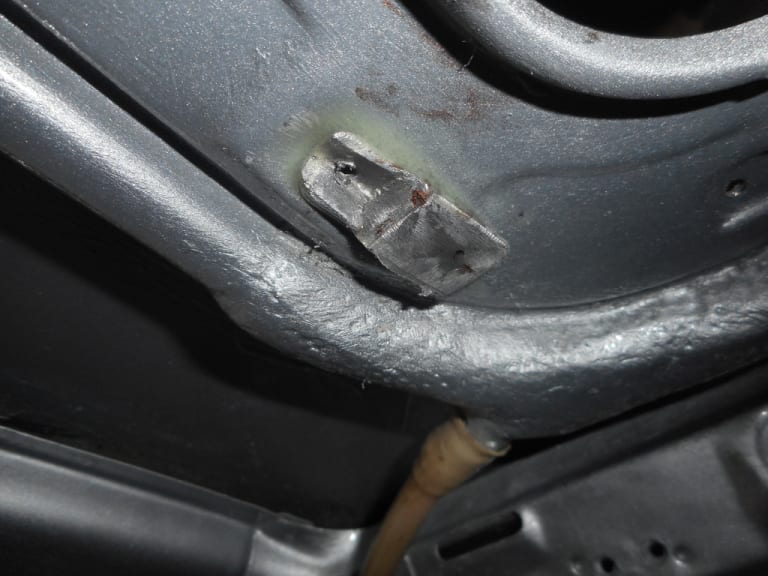
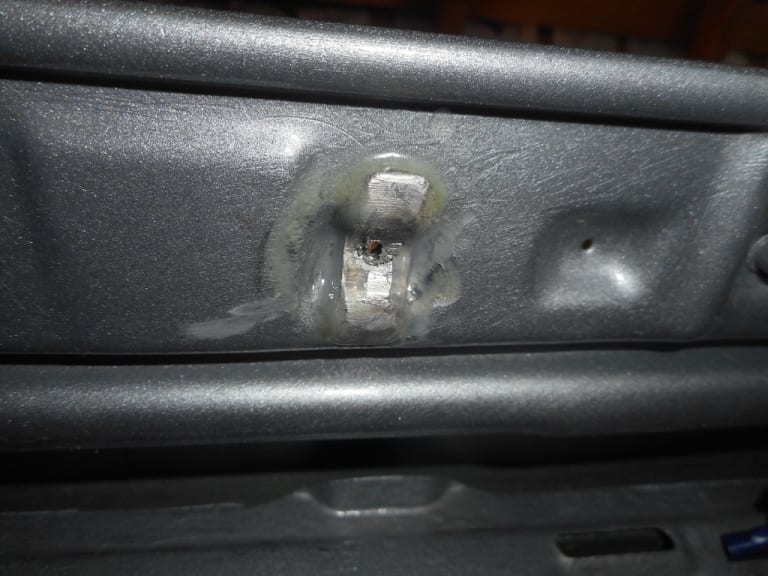
I wasn't happy with screws fixing into just a thin sheet of steel anyway so using some thick alloy I made some sections to fit under the existing holes. Very time consuming due to the curves of the underside of the sunroof surround and the recesses where I had to fit the new pieces.
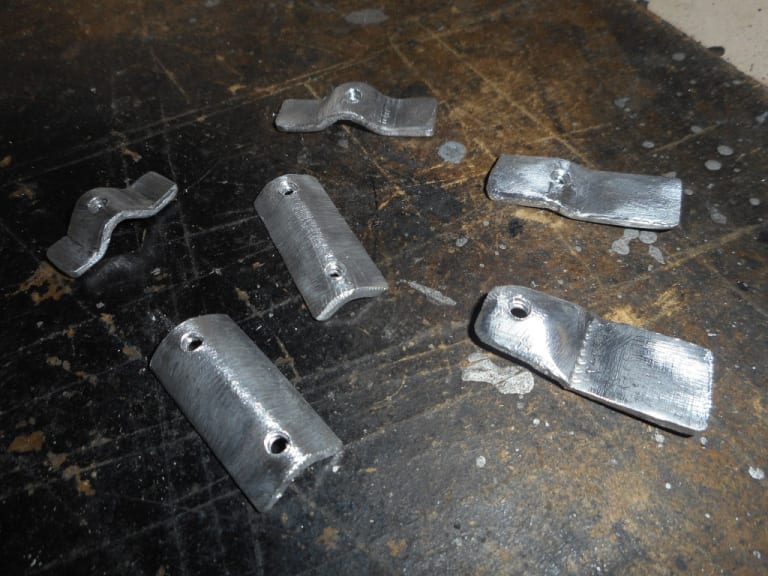
Once drilled I used araldite to fix them in position.
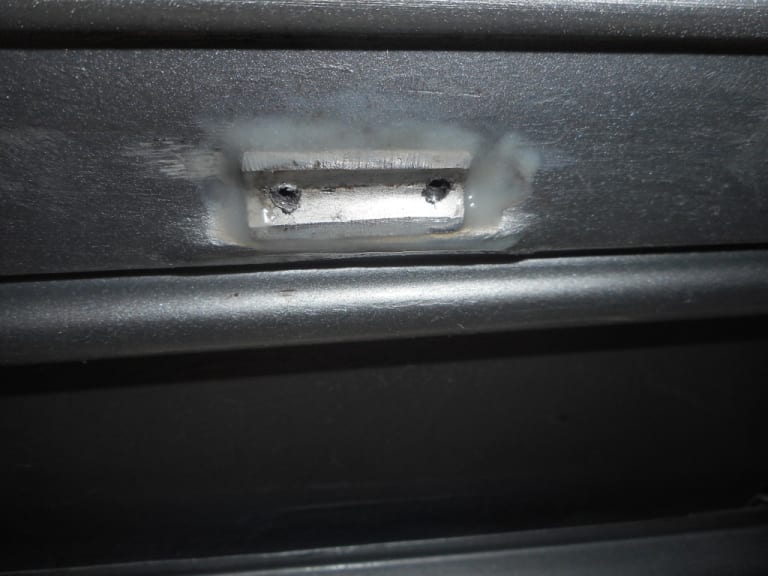
1983 Golf GTi Campaign Edition, Diamond Silver
http://vwgolfmk1.org.uk/forum/index.php?page=topicview&id=projects%2Fyour-mk1-golfs_2%2F-tag-1983-campaign&redirected=1#post_1551531
http://vwgolfmk1.org.uk/forum/index.php?page=topicview&id=projects%2Fyour-mk1-golfs_2%2F-tag-1983-campaign&redirected=1#post_1551531
Posted
Old Timer


The old
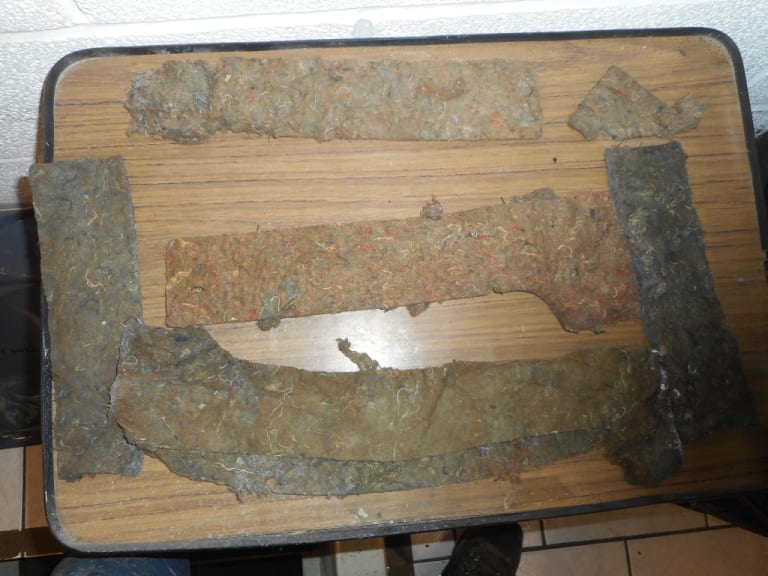
Bought some new felt online.
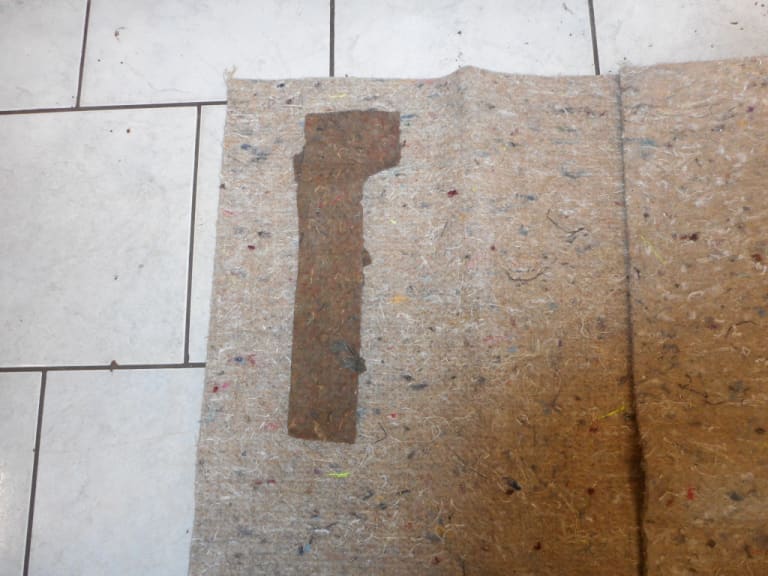
All fixed in place
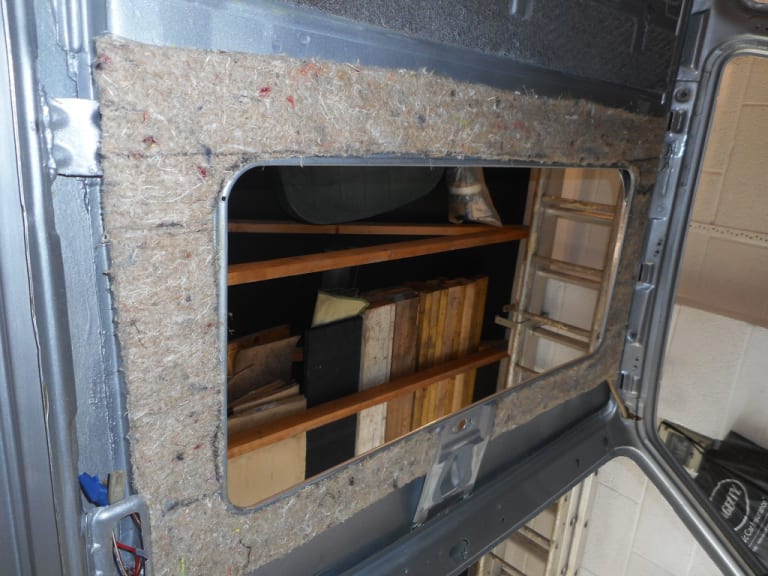
1983 Golf GTi Campaign Edition, Diamond Silver
http://vwgolfmk1.org.uk/forum/index.php?page=topicview&id=projects%2Fyour-mk1-golfs_2%2F-tag-1983-campaign&redirected=1#post_1551531
http://vwgolfmk1.org.uk/forum/index.php?page=topicview&id=projects%2Fyour-mk1-golfs_2%2F-tag-1983-campaign&redirected=1#post_1551531
Posted
Old Timer


First the rear bumper
I had no idea if this was possible - and I didn't want to damage plastic covers….. Some people had suggested there was adhesive/seam sealer used so I did warm the plastic with a hot air gun first.
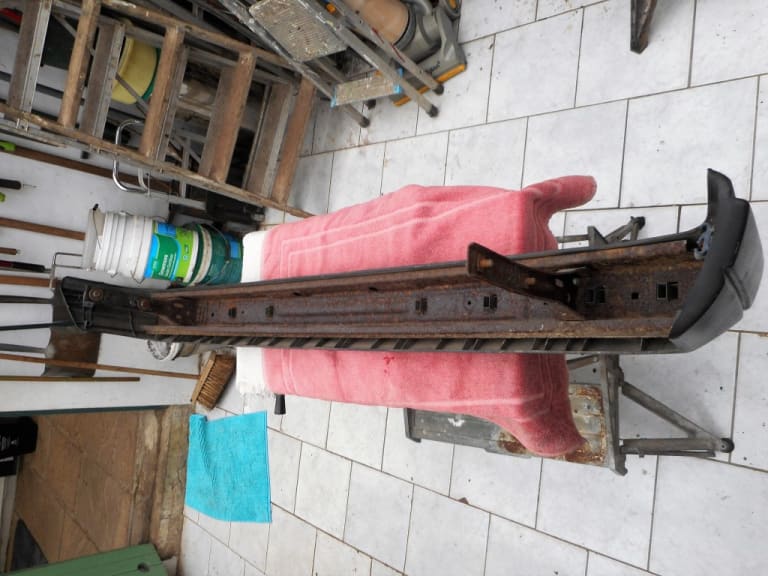
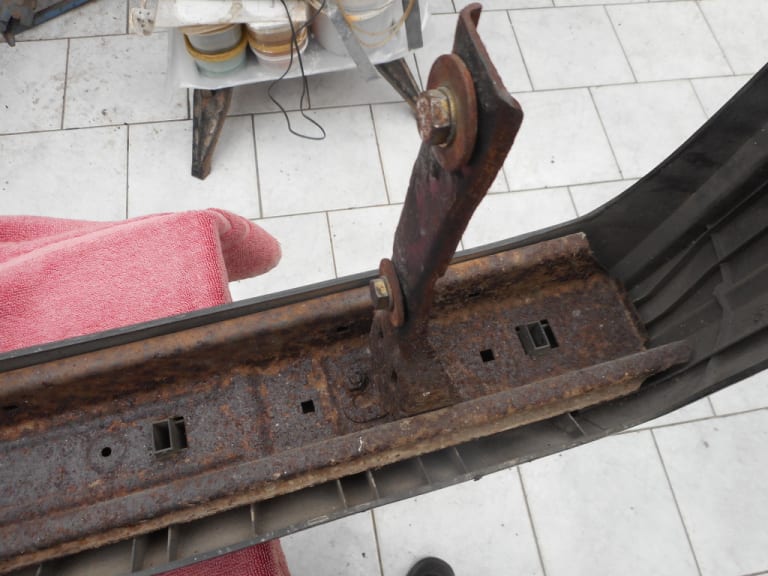
I could see on the wrong side of the bumper that there were plastic "blocks" that had snapped thought the metal beam. I carefully used grips to "squeeze" them so they could pass back through the metal beam.
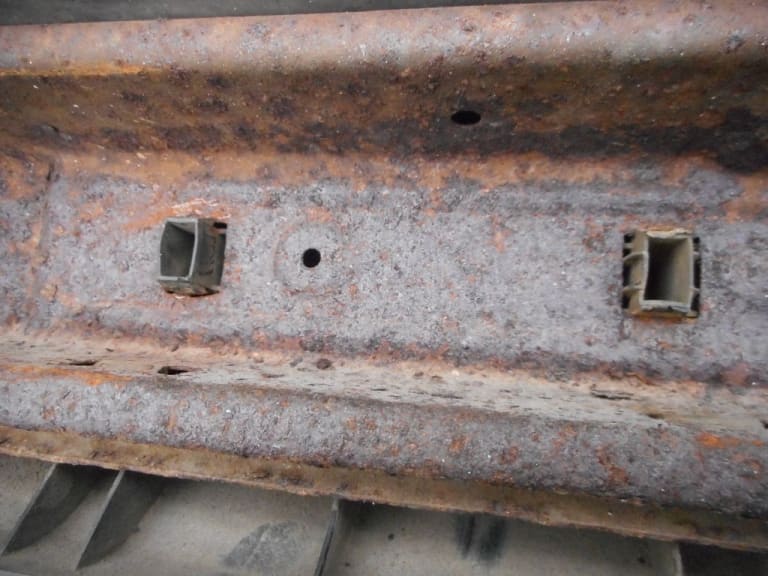
Then carefully using screwdrivers and plenty of squeezing, pushing and shoving they finally separated.
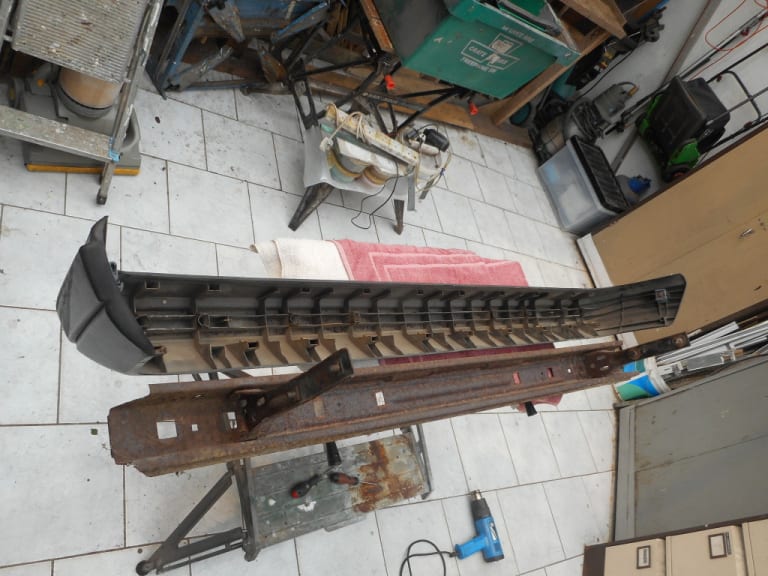
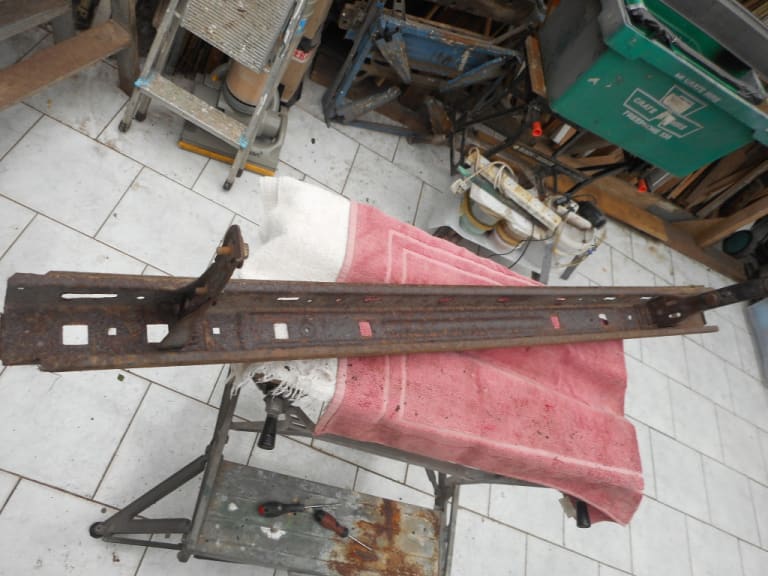
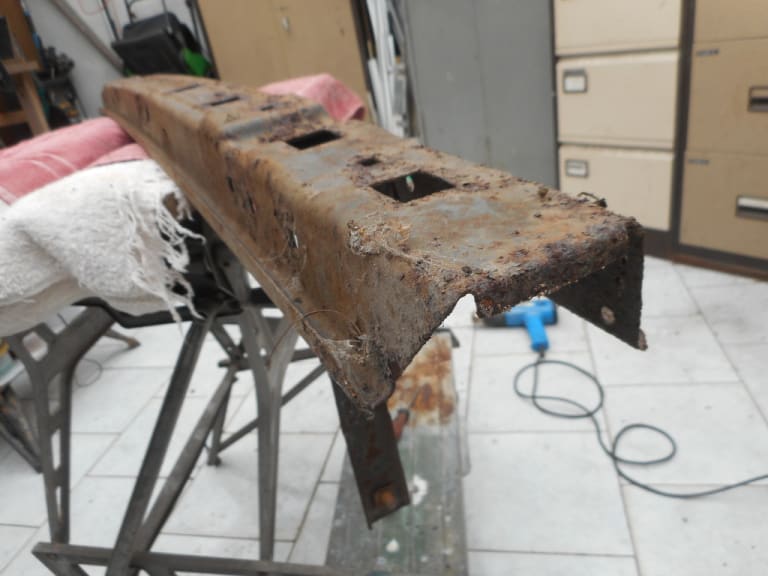
It was only then that I could see how they were fixed together. No sealants/glues used at all! Al dry snapped together.
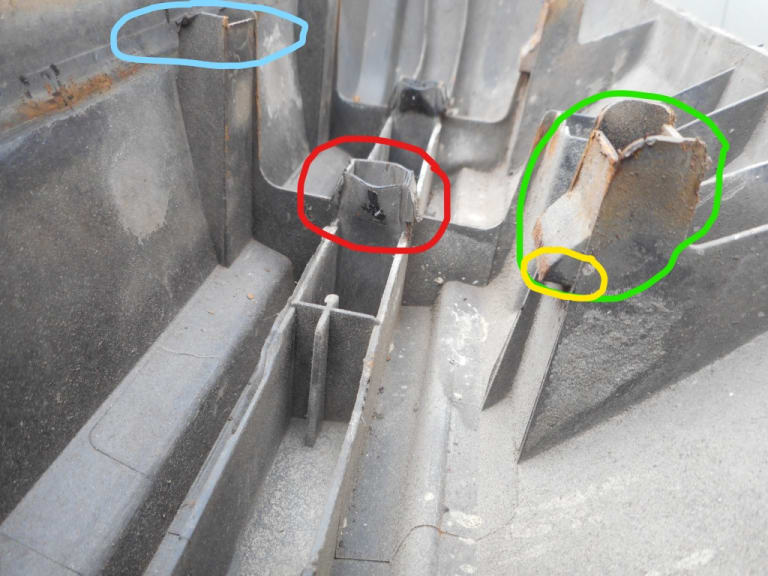
On the image below you can see the fixings. The part ringed in blue was merely a guide - with no latches. The part ring in red had to be squeezed to get the latching sections through the beam. The part in green had latches ringed yellow.
1983 Golf GTi Campaign Edition, Diamond Silver
http://vwgolfmk1.org.uk/forum/index.php?page=topicview&id=projects%2Fyour-mk1-golfs_2%2F-tag-1983-campaign&redirected=1#post_1551531
http://vwgolfmk1.org.uk/forum/index.php?page=topicview&id=projects%2Fyour-mk1-golfs_2%2F-tag-1983-campaign&redirected=1#post_1551531
Posted
Old Timer


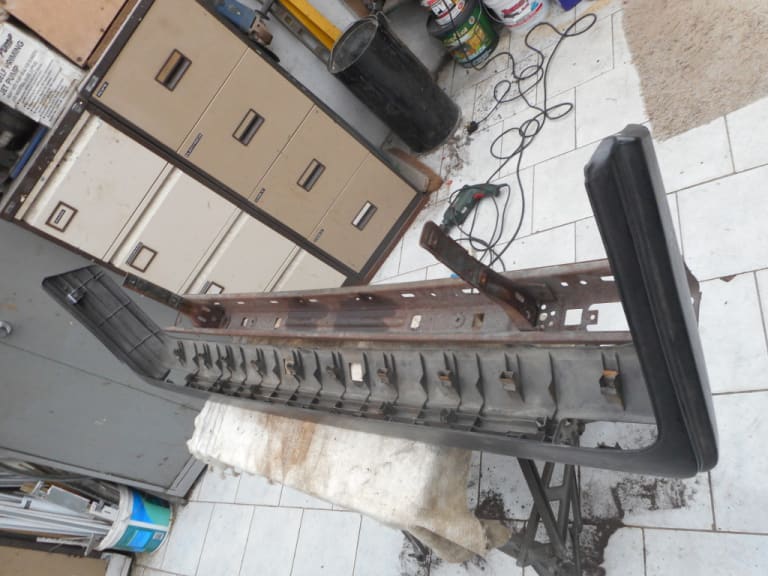
Again same process used - warmed it using a hot air gun; squeezed the middle plastic blocks and "carefully" persuaded the rest to separate. Not easy !!!
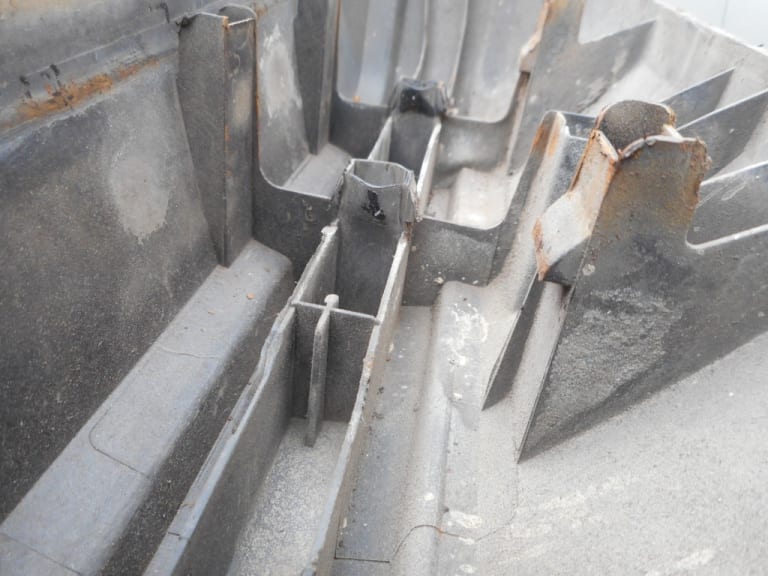
I then had the beams and brackets galvanised and powedercoated.
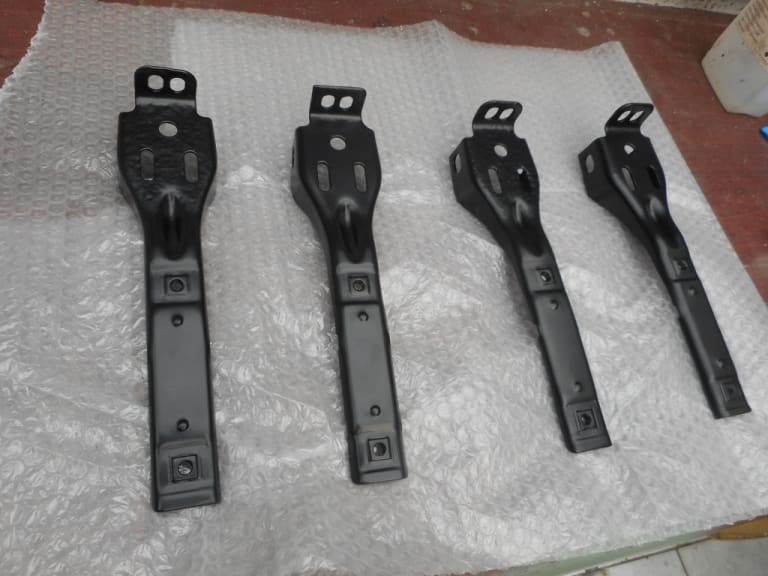
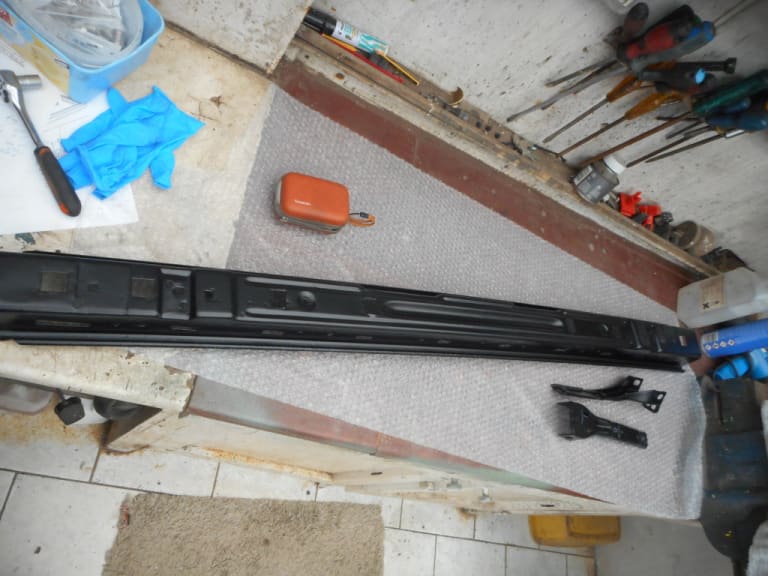
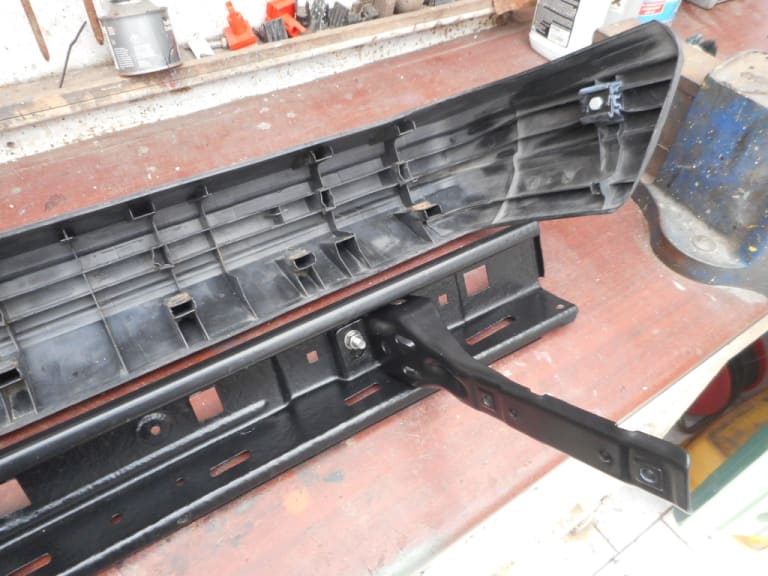
Refitted the brackets with stainless fittings.
Then a reversal of the separation procedure.
Having reformed the "squeezed" blocks to shape I gently clamped the beam and the cover together - taking care not to damage the plastic - and by using plenty of pressure evenly along the bumper - lots of sweat, cursing and shoving - it all clicked back together!
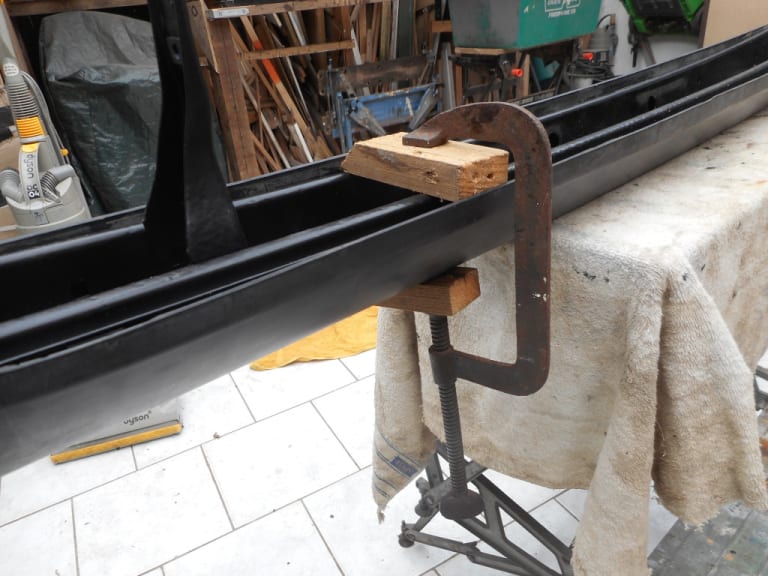
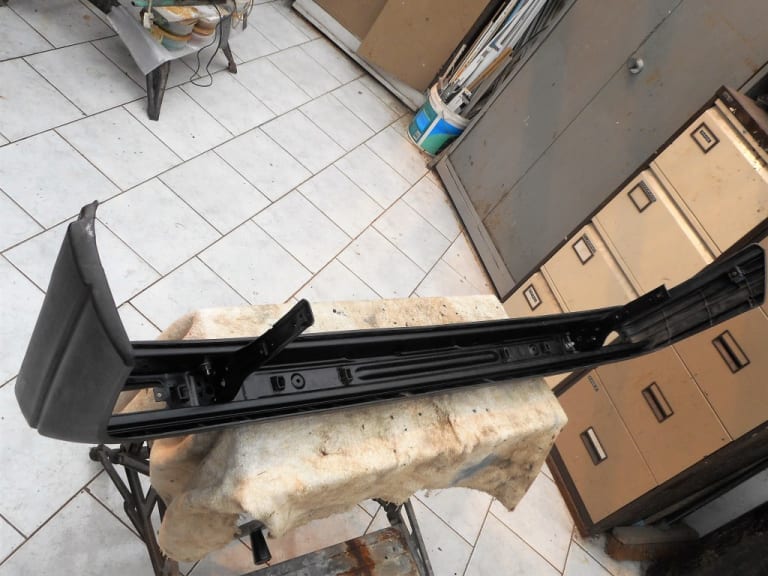
1983 Golf GTi Campaign Edition, Diamond Silver
http://vwgolfmk1.org.uk/forum/index.php?page=topicview&id=projects%2Fyour-mk1-golfs_2%2F-tag-1983-campaign&redirected=1#post_1551531
http://vwgolfmk1.org.uk/forum/index.php?page=topicview&id=projects%2Fyour-mk1-golfs_2%2F-tag-1983-campaign&redirected=1#post_1551531
Posted
Newbie

Posted
Old Timer


I'm assuming that you have the original number plate plinth thingy, if you do, would you mind snapping a few pictures as I need to make one up. Be good to see what an original one looks like as I must have binned mine!
Posted
Old Timer


paceman said
Good work there mate. Always thought they looked easy to remove but clearly looks aren't everything!
I'm assuming that you have the original number plate plinth thingy, if you do, would you mind snapping a few pictures as I need to make one up. Be good to see what an original one looks like as I must have binned mine!
If you need any more pics/measurements get back to me.
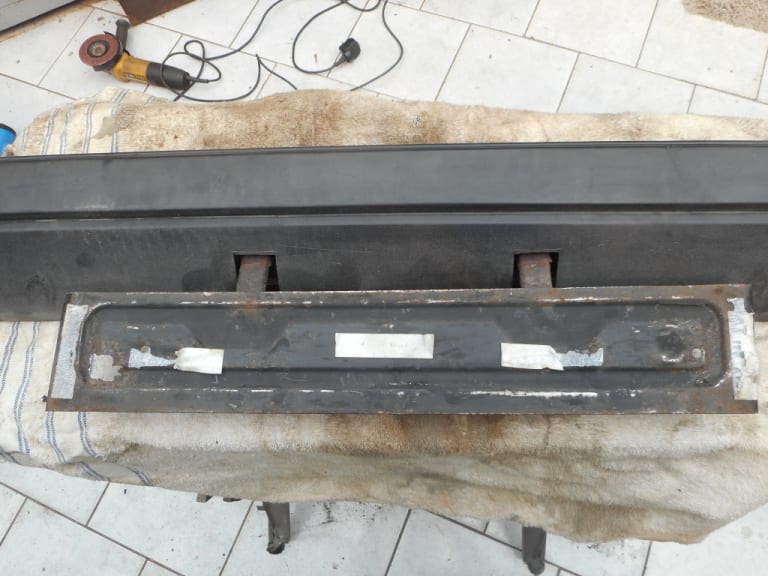
Will take some pics for you. Mine wasn't in great shape - big hole in it and also pretty rotten supports. Rather than lots of fiddly metal bending/welding I bought a replacement stainless version from CrazyQuiffs.
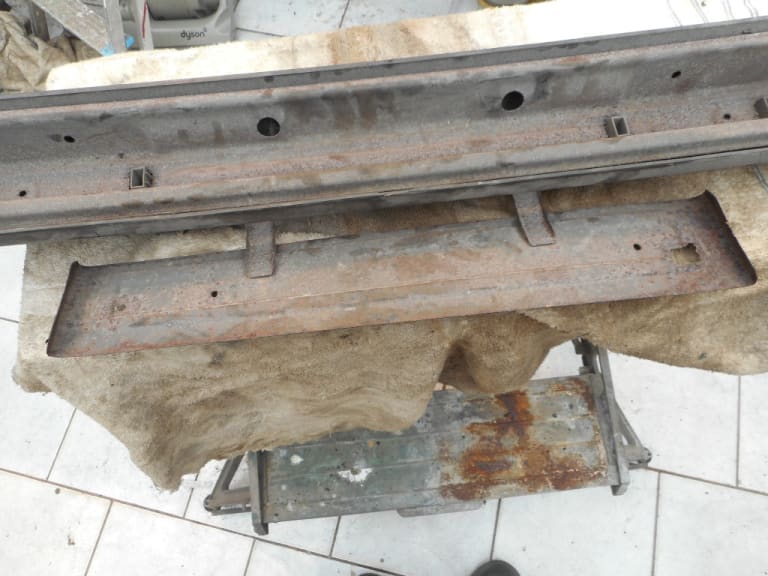
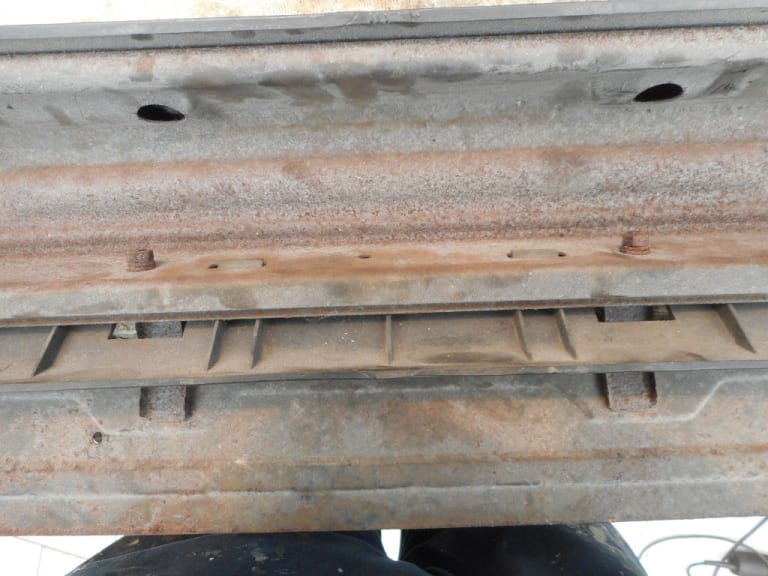
1983 Golf GTi Campaign Edition, Diamond Silver
http://vwgolfmk1.org.uk/forum/index.php?page=topicview&id=projects%2Fyour-mk1-golfs_2%2F-tag-1983-campaign&redirected=1#post_1551531
http://vwgolfmk1.org.uk/forum/index.php?page=topicview&id=projects%2Fyour-mk1-golfs_2%2F-tag-1983-campaign&redirected=1#post_1551531
Posted
Old Timer


However when I received the replacements I realised I could swap the internals from the new to the old - and try and repair the one broken unit so keeping the originals - which were fat better quality than the replacements.
Old and new. Note the broken fixing points on the old
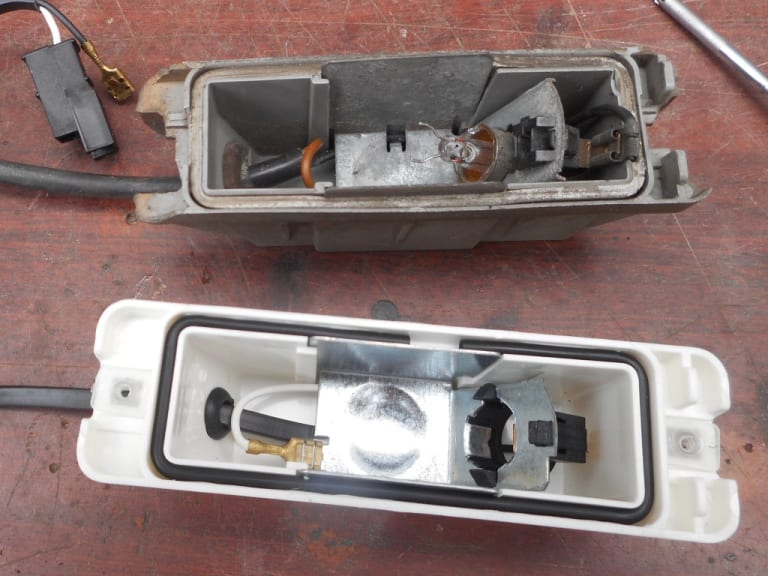
I sawed off the fixing points from the new fitting and cut off the remains of the old ones.
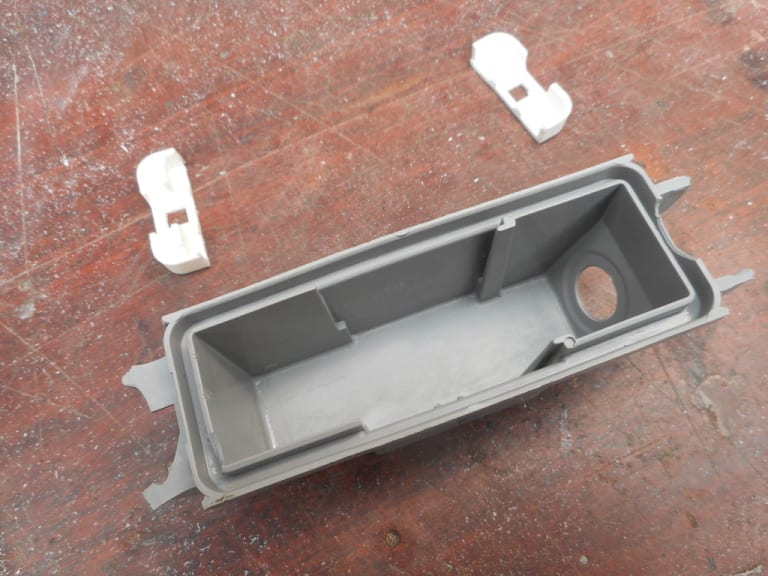
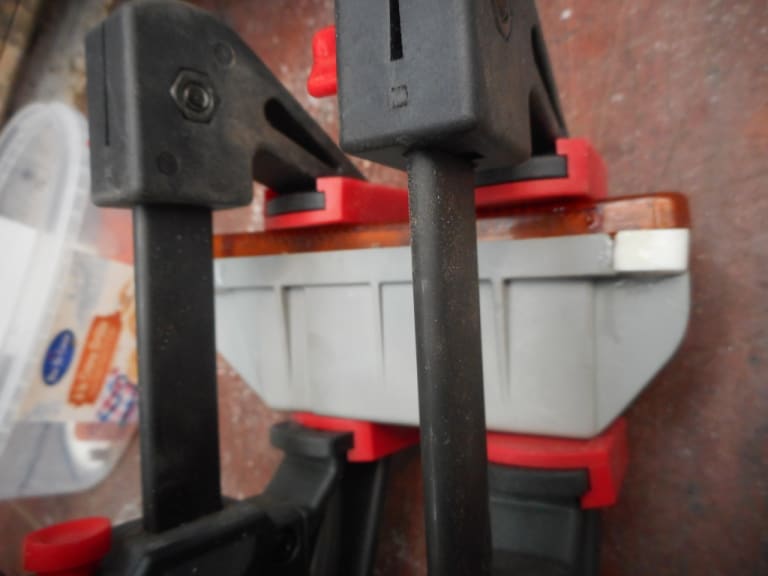
Glued the new parts to the old unit - clamping it in place using the old lens
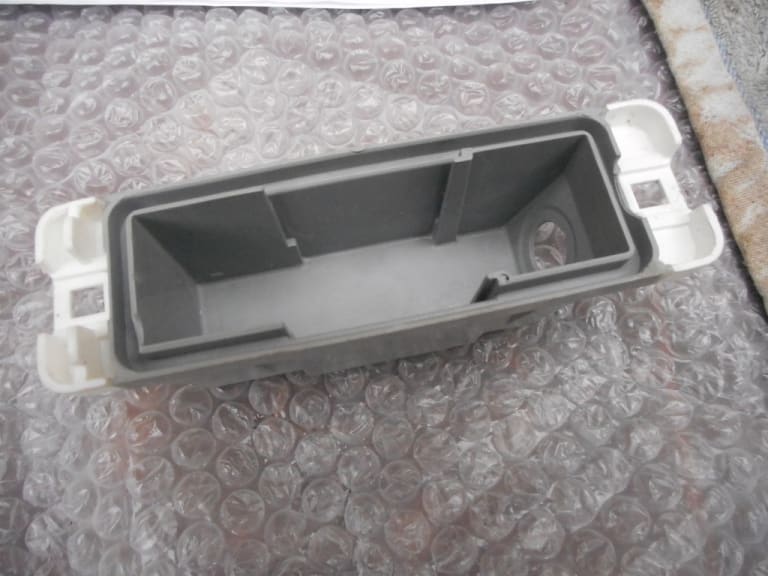
Pretty good result after a bit of filing and cleaning up
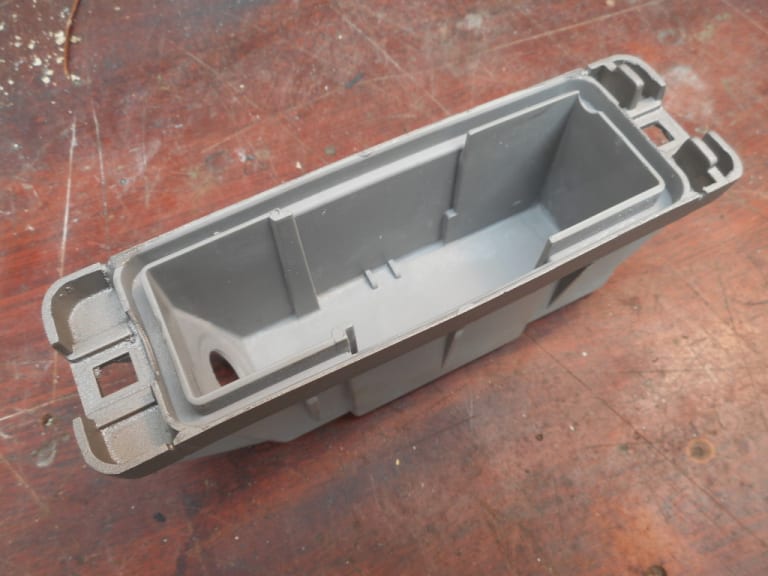
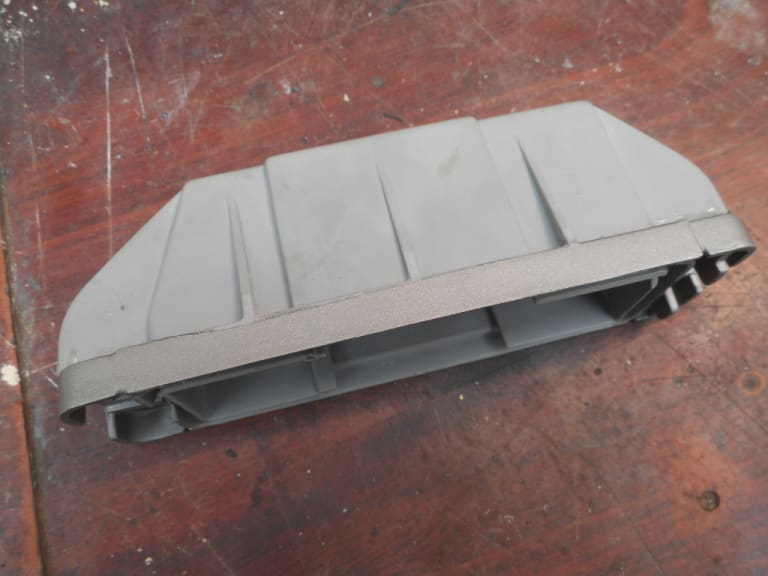
Quick waft of silver paint - and although not prefect I'm pretty pleased with the result
1983 Golf GTi Campaign Edition, Diamond Silver
http://vwgolfmk1.org.uk/forum/index.php?page=topicview&id=projects%2Fyour-mk1-golfs_2%2F-tag-1983-campaign&redirected=1#post_1551531
http://vwgolfmk1.org.uk/forum/index.php?page=topicview&id=projects%2Fyour-mk1-golfs_2%2F-tag-1983-campaign&redirected=1#post_1551531
Posted
Old Timer


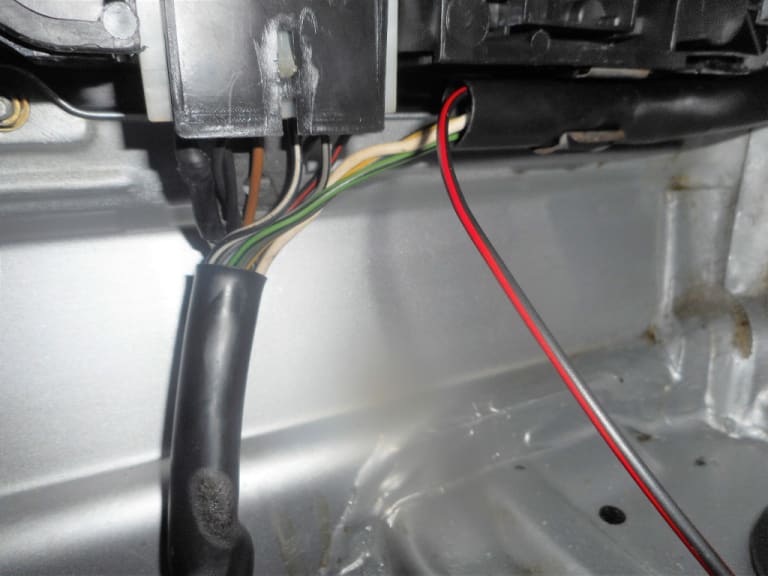
I ran a new red/black wire as per original brake wiring from the rear light cluster, where I will join it to the brake light, through the sleeving and out through the little grommet with the heated rear window wire.
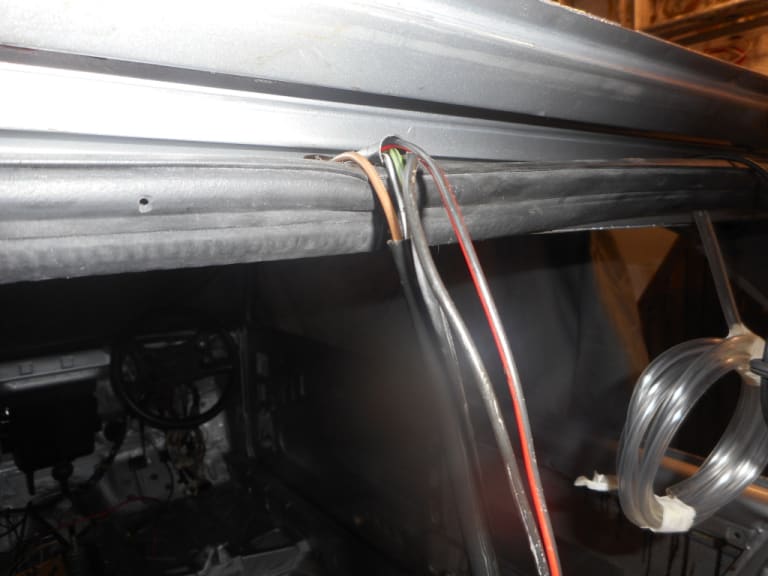
For the negative I ran a new earth wire from the earth point above the headlining above the tailgate again through the heated rear window grommet.
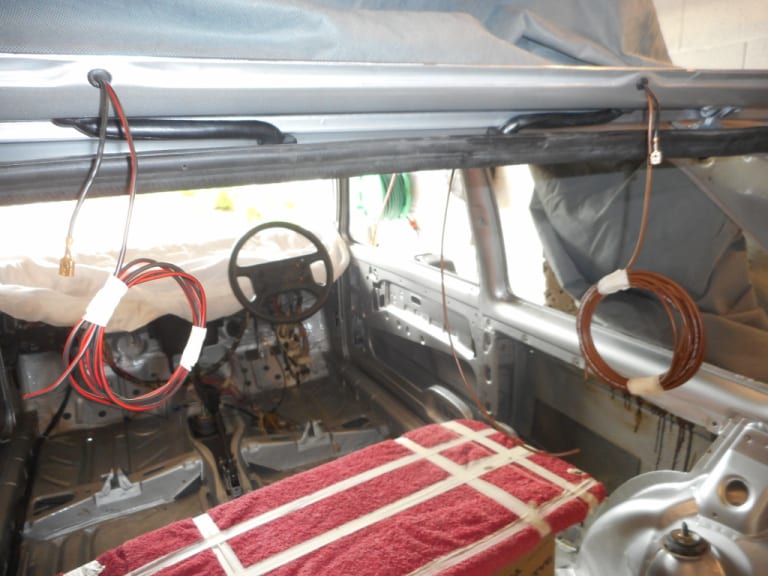
1983 Golf GTi Campaign Edition, Diamond Silver
http://vwgolfmk1.org.uk/forum/index.php?page=topicview&id=projects%2Fyour-mk1-golfs_2%2F-tag-1983-campaign&redirected=1#post_1551531
http://vwgolfmk1.org.uk/forum/index.php?page=topicview&id=projects%2Fyour-mk1-golfs_2%2F-tag-1983-campaign&redirected=1#post_1551531
Posted
Old Timer


cdgthreesalmons said
Will take some pics for you. Mine wasn't in great shape - big hole in it and also pretty rotten supports. Rather than lots of fiddly metal bending/welding I bought a replacement stainless version from CrazyQuiffs.
Thank you sir!
I'm too cheap to be buyng a new one - I've got some metal and know a man with a welder, so I'll see how I get on!
Be interested to know what high-level brake light you go with as I think they are a good idea these days - people are so used to seeing them, the absence of one is only going to heighten the liklihood of being rear ended! How did you get on with feeding the wire through the existing sleeving? Tried doing something similar when fitting my immobiliser and it was impossible!
Also, on your CV joints - I've seen this mentioned a few times - doesn't seem right to me that they can say they are the right part when clearly they aren't. I replaced a few CV joints on mk1's back in the mid 90's and never had an issue. Good to know you found some that fit properly.
Cheers,
J
Posted
Old Timer


paceman said
cdgthreesalmons said
Will take some pics for you. Mine wasn't in great shape - big hole in it and also pretty rotten supports. Rather than lots of fiddly metal bending/welding I bought a replacement stainless version from CrazyQuiffs.
Thank you sir!
I'm too cheap to be buyng a new one - I've got some metal and know a man with a welder, so I'll see how I get on!
Be interested to know what high-level brake light you go with as I think they are a good idea these days - people are so used to seeing them, the absence of one is only going to heighten the liklihood of being rear ended! How did you get on with feeding the wire through the existing sleeving? Tried doing something similar when fitting my immobiliser and it was impossible!
Also, on your CV joints - I've seen this mentioned a few times - doesn't seem right to me that they can say they are the right part when clearly they aren't. I replaced a few CV joints on mk1's back in the mid 90's and never had an issue. Good to know you found some that fit properly.
Cheers,
J
I'm looking at this sort of brake light. Needs to be "sealed" to the glass to prevent the glare on the glass.
https://www.ebay.co.uk/itm/283969476182
As you say I think its a good idea as that is where most people look nowadays for brakelights!!
Was tricky feeding the wire through the sleeving but not impossible - worst part was the sleeving below the passenger side rear light - once through that section it was easy.
Yeh the CV joints were a major headache. I totally agree with you but cannot get a response from teh company. As I had fitted them as well I dont suppose they would take them back anyway - BUT - I want to help stop any other poor b****r going through the hassle I went through!!
As I say just let me know if you want any further pics/dimensions of the numberplate holder
1983 Golf GTi Campaign Edition, Diamond Silver
http://vwgolfmk1.org.uk/forum/index.php?page=topicview&id=projects%2Fyour-mk1-golfs_2%2F-tag-1983-campaign&redirected=1#post_1551531
http://vwgolfmk1.org.uk/forum/index.php?page=topicview&id=projects%2Fyour-mk1-golfs_2%2F-tag-1983-campaign&redirected=1#post_1551531
Posted
Old Timer


I had a look and you can get one that has an angled shroud: https://www.ebay.co.uk/itm/353213379311 guess it depends on the angle as to whether it would be any good.
All good with the number plate bracket. I made one up. (Ahh I see you have seen that!).
J
Posted
Old Timer


Two jobs I really wasn't looking forward to were up next…. headlining and rear tailgate GTI decal around the rear window.
GTI decal first.
Having purchased an online kit I thoroughly cleaned the metal surface with IPA. I had read up about fixing the decals and decided to try the "wet method". This involves mixing a very weak soapy water solution in a spray bottle to wet the metal and reverse of the decal. Lay the decal in place and then "squeegee" out the water from underneath with a credit card.
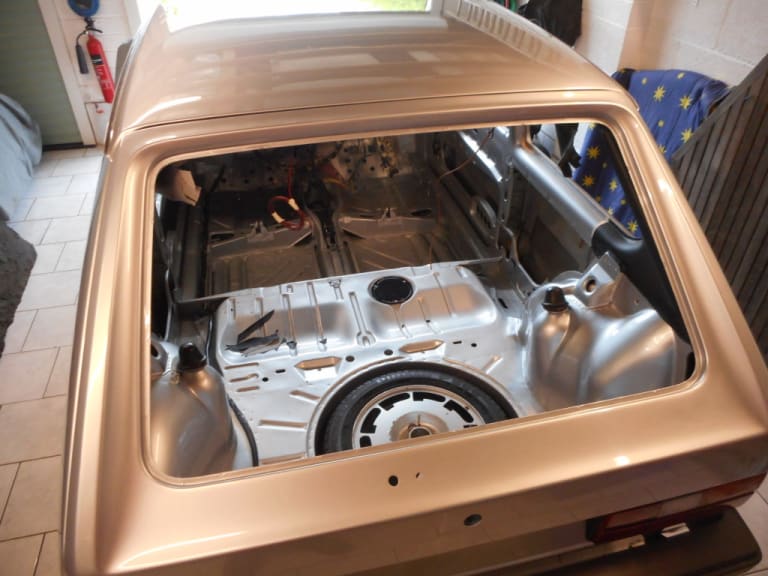
Having dry trial fitted the decals to make sure they aligned correctly I started with the bottom and largest section.
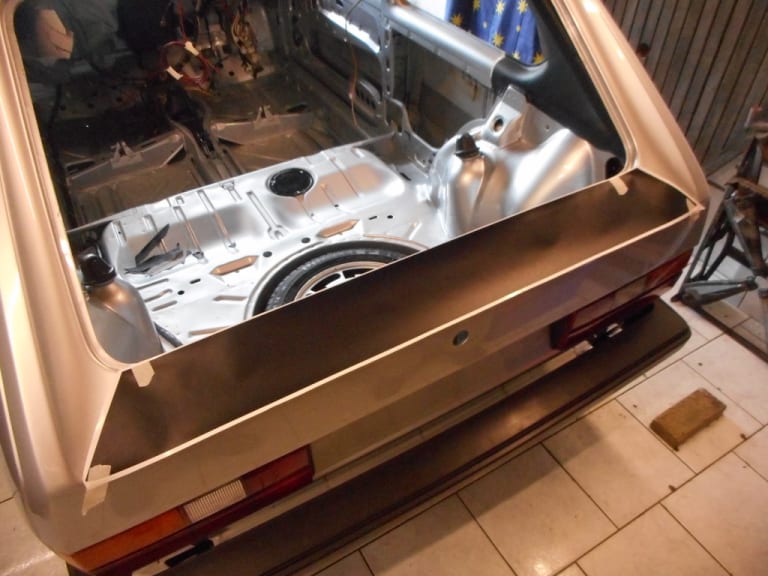
Removing the water from under it proved almost impossible……. I was chasing bubbles all over the place. Having persevered for some time I was not happy with the finish so gently lifted the decal up, dried under and reapplied - which good success.
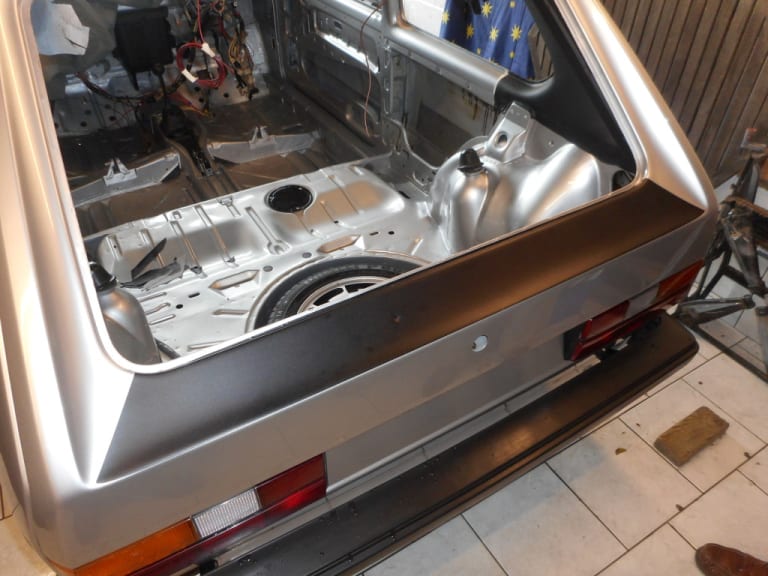
I decided that from there on I would apply the remaining section "dry" With another person helping I lined up the ends and gently applied them to the body, then the other person used a credit card to smooth the rest of it onto the metalwork. This proved far easier and gave a good result.
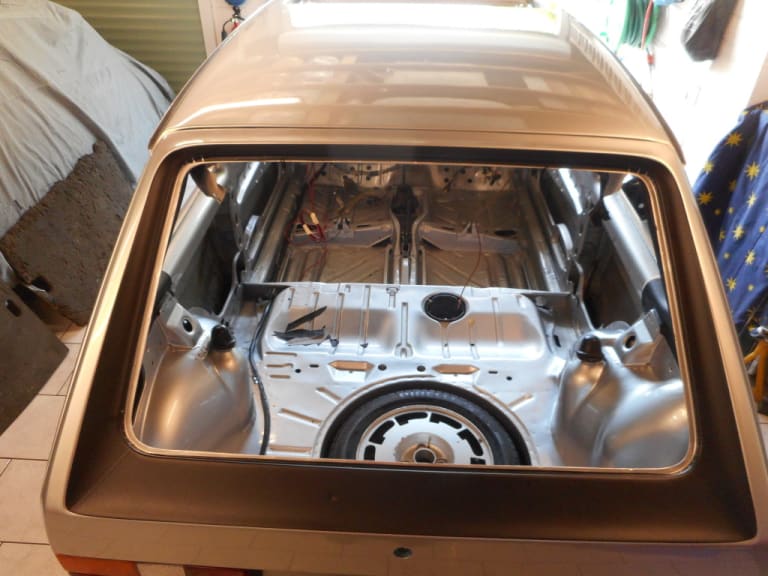
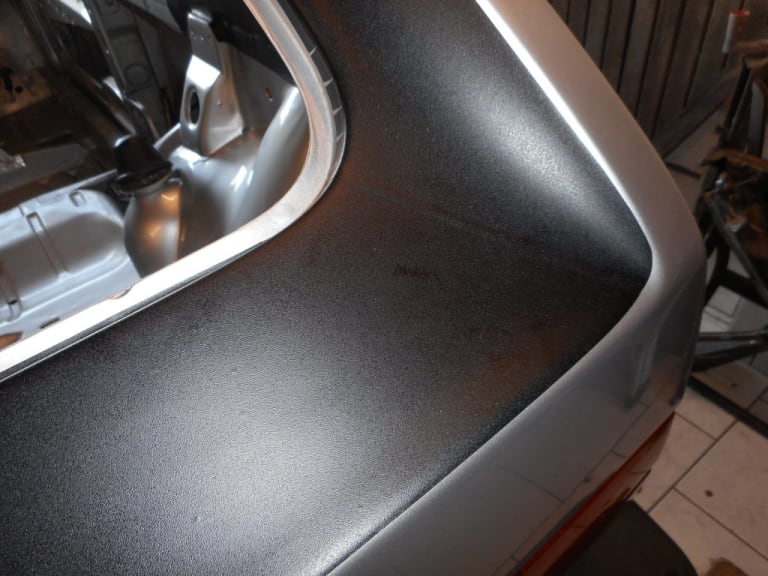
Really pleased with the finish - and a nice texture like the original.
1983 Golf GTi Campaign Edition, Diamond Silver
http://vwgolfmk1.org.uk/forum/index.php?page=topicview&id=projects%2Fyour-mk1-golfs_2%2F-tag-1983-campaign&redirected=1#post_1551531
http://vwgolfmk1.org.uk/forum/index.php?page=topicview&id=projects%2Fyour-mk1-golfs_2%2F-tag-1983-campaign&redirected=1#post_1551531
Posted
Settled In

Posted
Old Timer


Posted
Old Timer


I bought the headlining kit from Newton Commercial
https://newtoncomm.co.uk/collections/vw-volkswagen-golf-mki/products/golf-mk-i-two-door-saloon-headlining-kit-sunroof-model
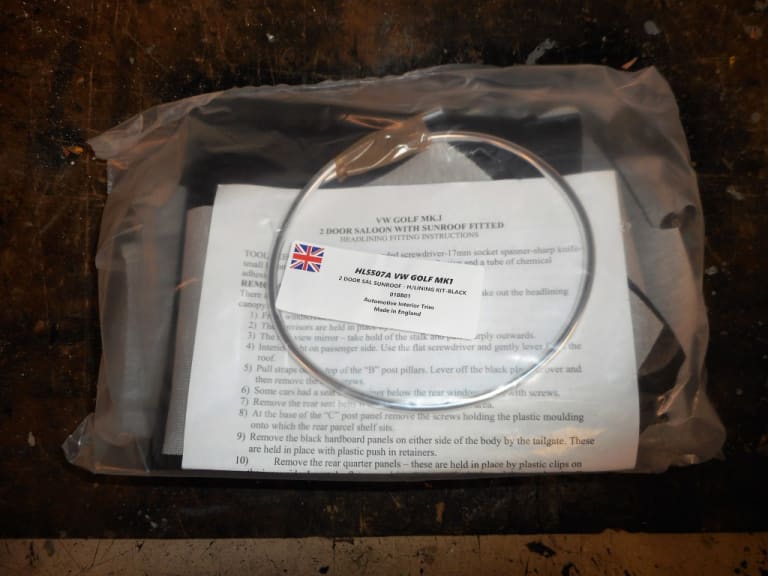
In fact I was on holiday in the area so popped into the factory to collect it. Sadly it was during covid which meant I was unable to go in for a look around the works.
The kit comprised the main headliner, A, B and C post pieces, a piece for the sunroof panel and their "Special" tool to help with installation.
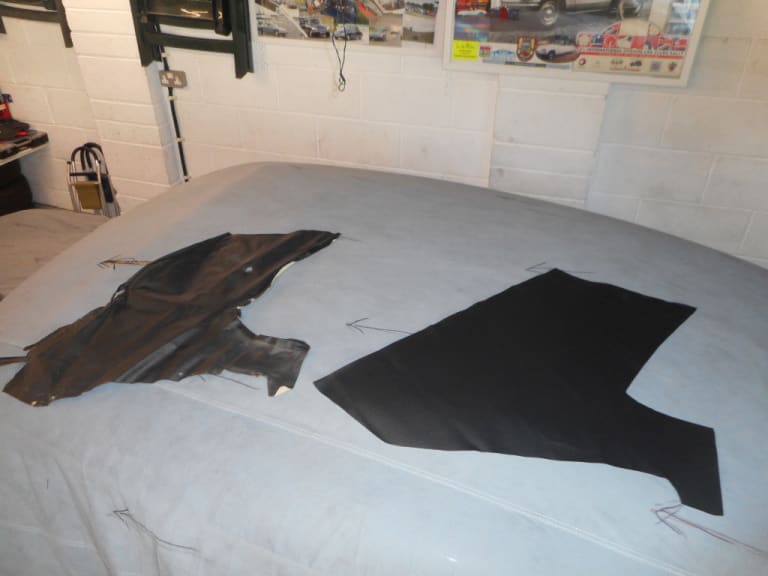
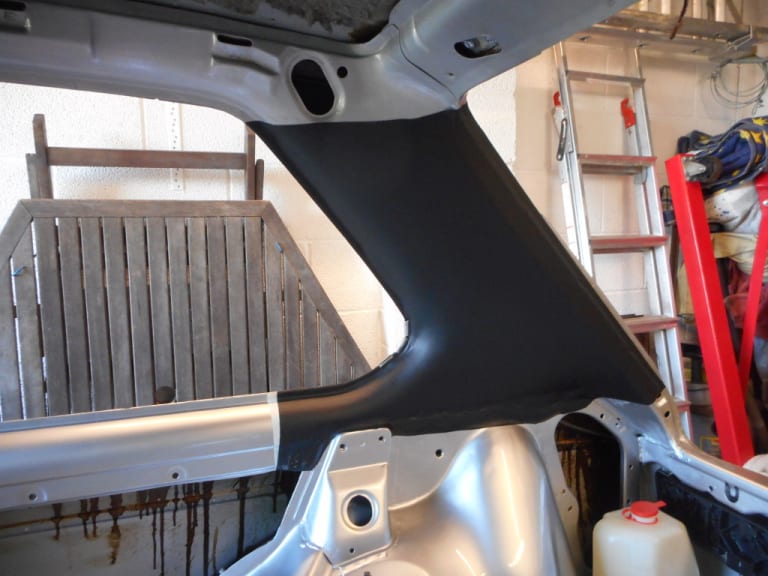
Old v new C pillar section
Quality was very good, and a very close match to original headlining texture.
Fist job was fixing the C pillar sections. These are fairly small so gave a good introduction to how to work with material/glue/fixings etc. I used the spray glue that I bought from Newton for the job (more of which later) - spraying into the lid and then using a paintbrush to coat both surfaces. Spraying it would would have made a hell of a mess! There was a good inch or more excess material which helped in positioning and pulling it into shape. This could be trimmed off afterwards.
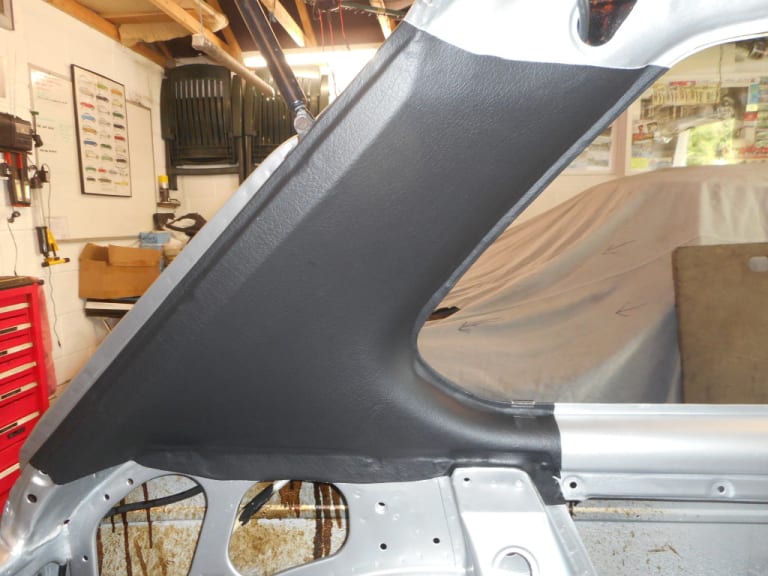
To hold the edges in place whilst the glue was drying I used the Newton "Special" tool. This was essentially a length of flexible "C" section plastic trim that could be cut into 1" lengths and clipped over the flange to hold the fabric. I must say I found it rather tight to get over the lip so in the end resorted to bulldog clips.
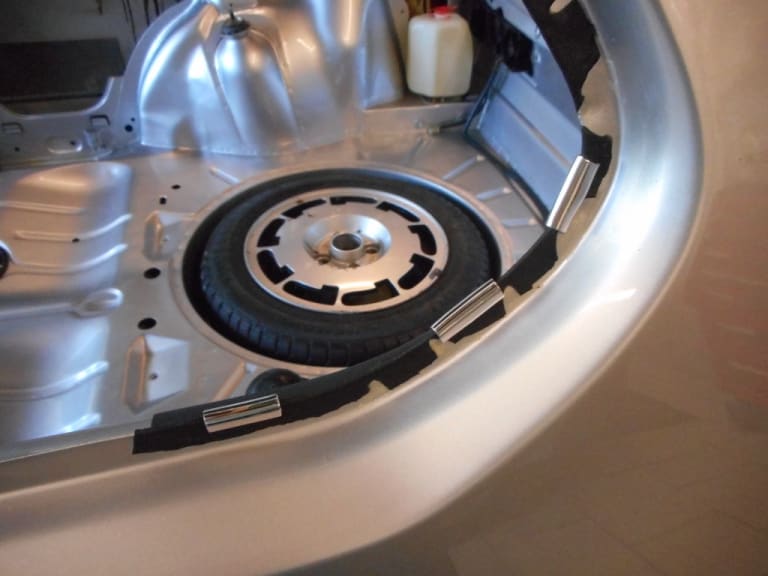
Even on a small section like this I found shaping it around the window reveals - without leaving creases/wrinkles was not easy!!
Then for the main section………
If you haven't seen it, Ed China, the TV mechanic, did a great online programme on a MK1 Golf. One of the jobs he tackled was fitting headlining - well worth watching!
watch
https://www.youtube.com/watch?v=IaW9Sg5NPyE
I marked the centre line of the car front and rear and the same on the fabric, installed the three metal bows (only three bows on a sunroof model), clipped those into the clips on the cant rail.
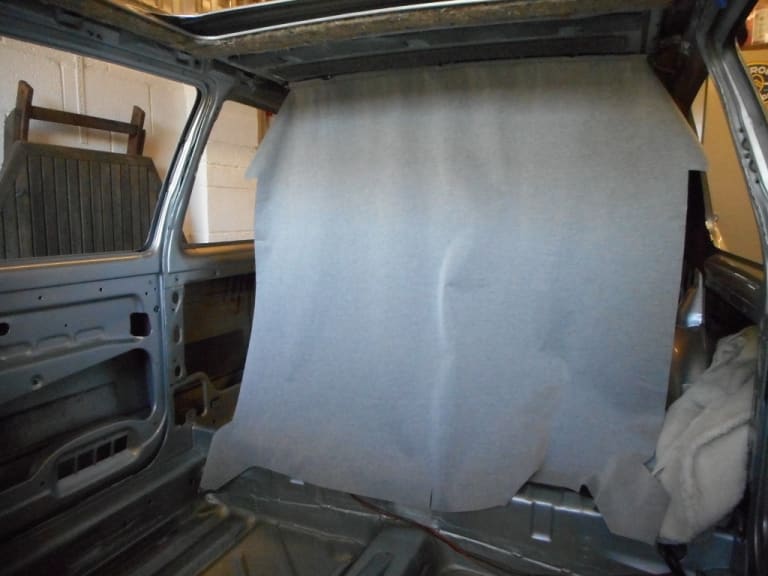
Next I centralised the fabric using the marks I made earlier. Using clips I clipped up the fabric along the windscreen and tailgate adding some tension as I went. The I did the same above the doors and windows.
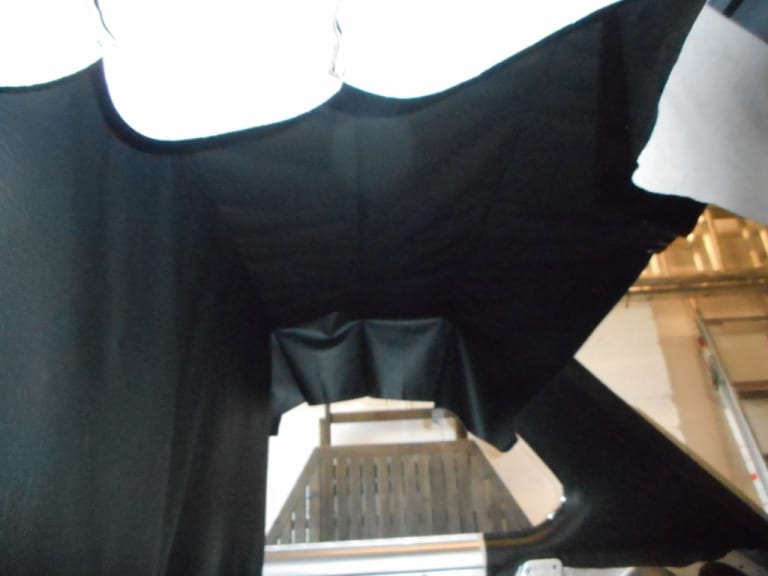
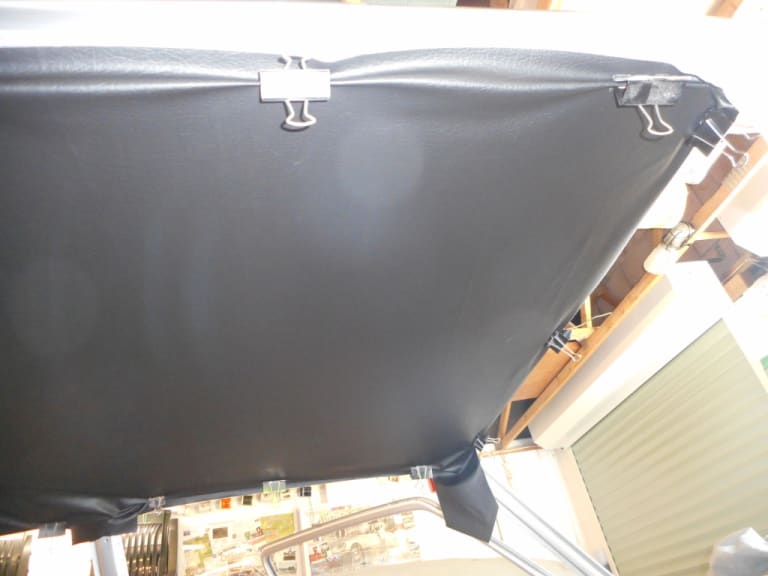
So far so good.
Then starting at the front (more of which later) I started fixing the fabric along the windscreen, then worked along the door opening tops, top of the b pillar and along to the c -pillars. Again it was tricky to avoid creases/wrinkles around the tight corners of the windscreen and b pillars. Making small cuts around the edge, which are hidden by the rubbers was essential.
It looked good - so I thought………..
I then came to fix the top of the C-pillar and above the rear window. This is when I realised I had a problem. I just had too much fabric. I just could not "loose" the excess without leaving great wrinkles/folds in the headliner. I was gutted to say the least. With my Dads help we tried and tried - no joy.
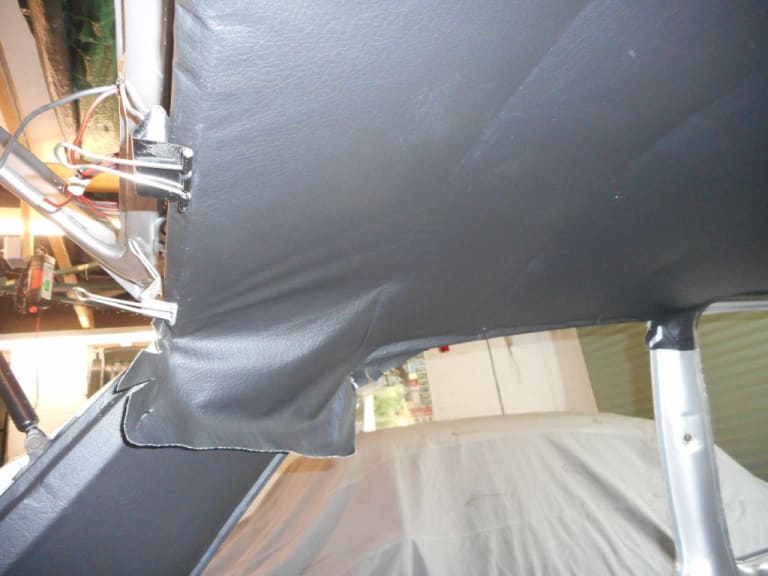
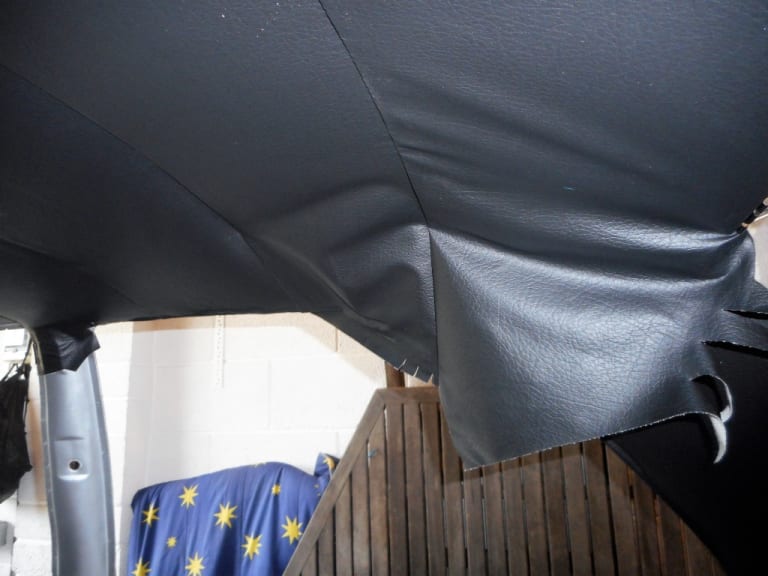
Sometimes I have learned you have admit when your talent/skills have reached their limits and professional help is required. I am not too proud to admit defeat and in this case had to admit it!
My problem was that the car is off the road - and I couldn't progress further - ie installing windows etc - until the headlining was sorted.
I contacted various car upholstery firms locally - but when I mentioned the word "headlining" they ran a mile. Eventually I came across Sew Good Upholstery in Newport, South Wales - not far at all from me
https://www.facebook.com/sewgood.upholstery/?ref=page_internal
Thankfully they understood my plight and were very kindly willing to come to my aid. They dont normally come out to customers cars but in this case they did.
Ian, the owner of the business, was clearly an expert in what he does. It took him a good four hours work but he miraculously rescued the headliner using great skill and judicious use of a hot air-gun. It was great to watcha pro and learn from him. He was impressed with what I'd achieved but I had made a few basic errors.
It was now that I learned to always start the job from the rear of the car. This is where you have the most fabric to deal with. He used a hot air gun - a lot - but always kept his thumb on the fabric where he was heating it - if his thumb was too hot - the fabric was at the limit of heat application. A careful balancing act was required and he was able to both shrink and stretch the fabric as required.
Finished article
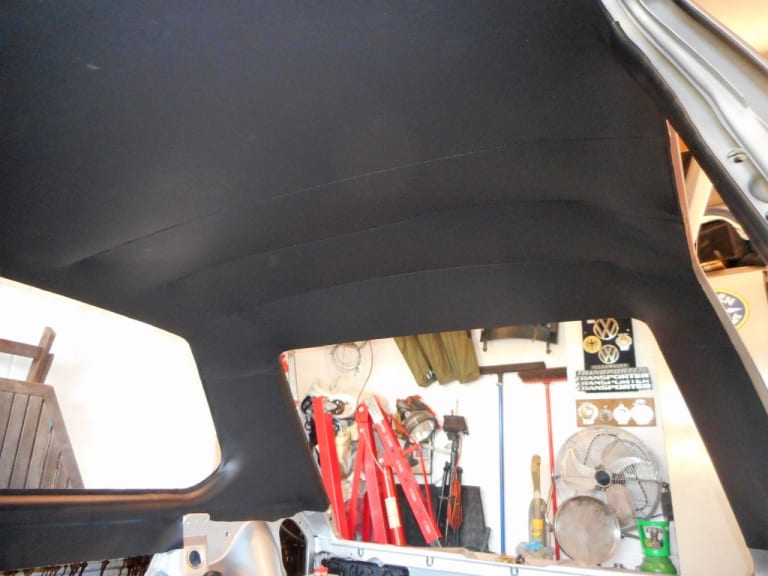
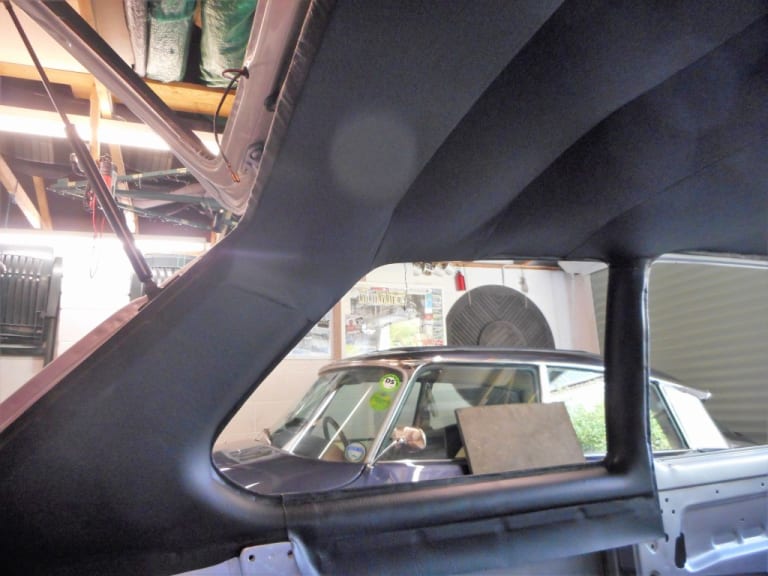
Then he saw the spray glue I was using……….. "Oh no he said…!"" Even though I had bought the can from the headlining supplier - on the back in small print were the words "Not suitable to use on plasticised PVC", which is what the trimer informed me my headlining was. I was amazed that the supplier had sold me it for this job. Ian went on to explain that this spray glue will react with the headliner and loose it adhesiveness over time. He said to always use paint on Evo Stik 528 contact adhesive. This chap knew his business, working for many major car suppliers including Porsche, Aston and BMW.
I contacted the supplier who commented", we have been using this exact type of glue for headlinings, seat and carpet fitting both fitted in house and for sale to our customers for a number of years now with no issue - I would say that the headlining material actually isn't a true PVC so this might be why it still works well for the job in hand but obviously completely up to the fitter in the end"
Fair enough.
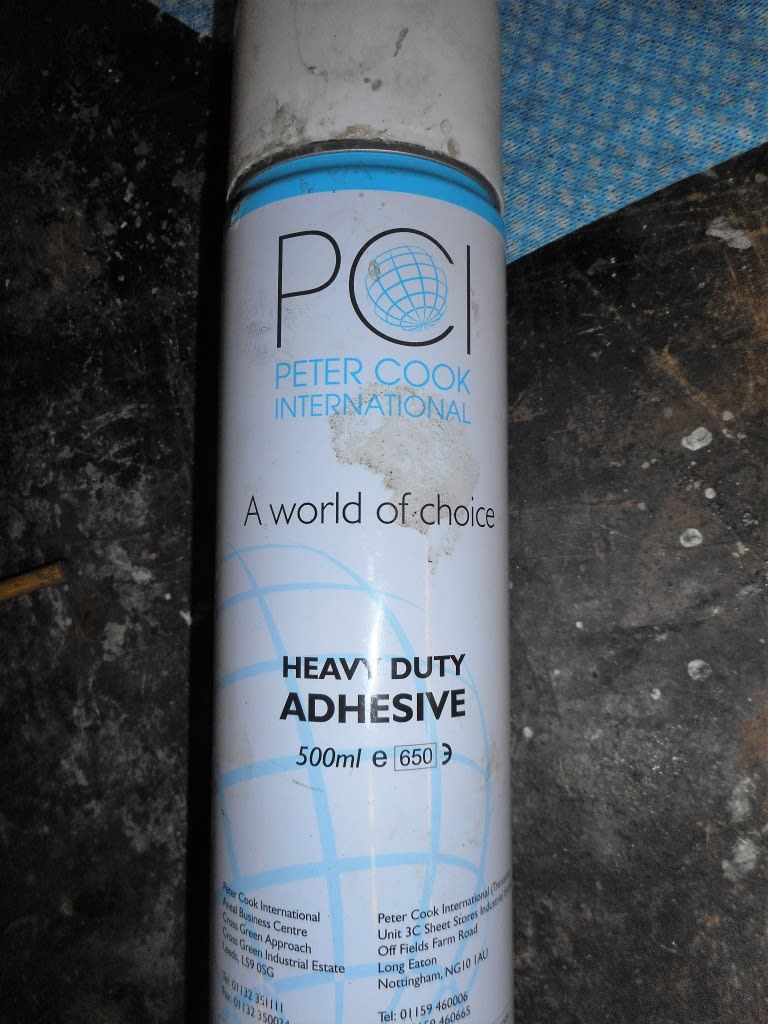
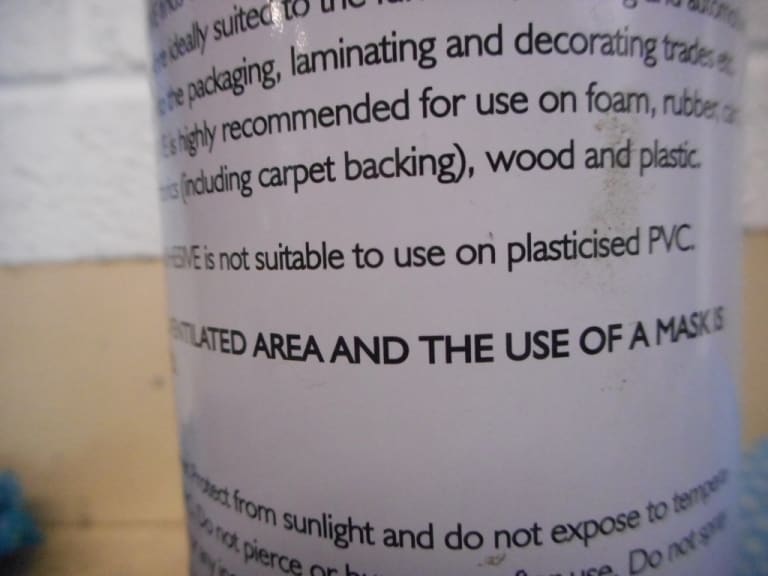
Well I'll know for next time I guess!
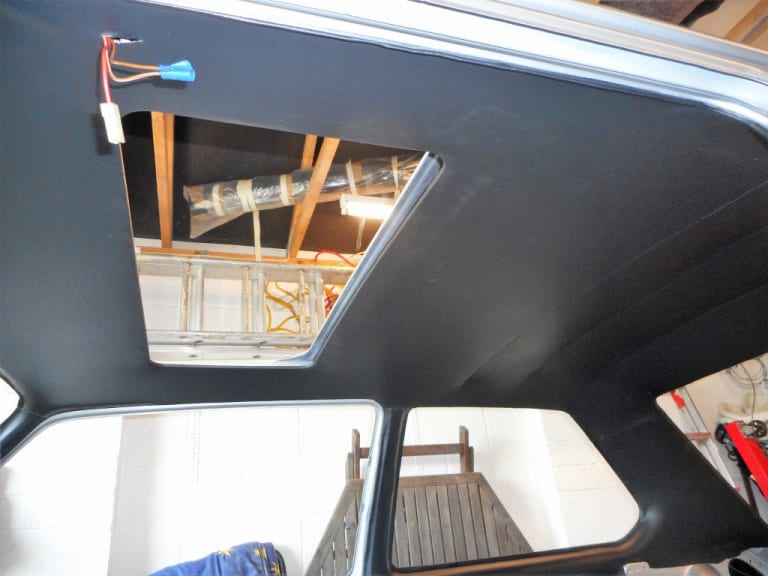
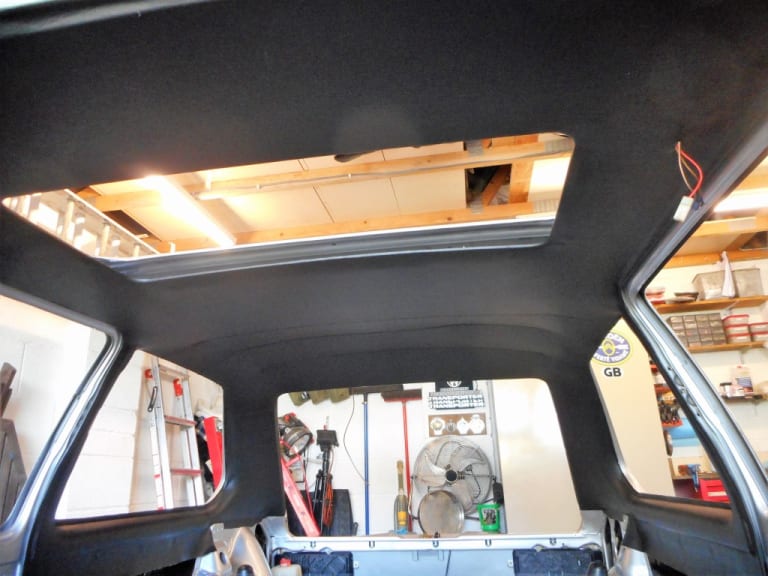
Finally the headlining was in place - I retrimmed the sunroof panel and am mostly delighted with the finish. One thing I did make a bit of a mistake on was the choice of padding material I used around the sunroof aperture. The original padding that was fixed to underside of the roof around had perished over the years. I therefore bought some replacement 7mm thick
Car underfelt. I glued this to the underside of the roof using the remains of the old sections and templates. It was only after the trimmer had finished the job that I found that the texture of the felt was obviously a bit too rough - and it caused lumps to appears in the headlining fabric around the sunroof. I think it will settle down - and used some wood to gently flatten the felt under the fabric.
1983 Golf GTi Campaign Edition, Diamond Silver
http://vwgolfmk1.org.uk/forum/index.php?page=topicview&id=projects%2Fyour-mk1-golfs_2%2F-tag-1983-campaign&redirected=1#post_1551531
http://vwgolfmk1.org.uk/forum/index.php?page=topicview&id=projects%2Fyour-mk1-golfs_2%2F-tag-1983-campaign&redirected=1#post_1551531
Posted
Settled In

Posted
Old Timer


1983 Golf GTi Campaign Edition, Diamond Silver
http://vwgolfmk1.org.uk/forum/index.php?page=topicview&id=projects%2Fyour-mk1-golfs_2%2F-tag-1983-campaign&redirected=1#post_1551531
http://vwgolfmk1.org.uk/forum/index.php?page=topicview&id=projects%2Fyour-mk1-golfs_2%2F-tag-1983-campaign&redirected=1#post_1551531
0 guests and 0 members have just viewed this: None.


