"TAG" - 1983 Campaign restoration blog
Posted
Old Timer


"TAG" - 1983 Campaign restoration blog
Sent from my iPhone using Tapatalk
Mars red 1.8 GTI tintop now MOT'd and on the road!
http://vwgolfmk1.org.uk/forum/index.php?page=topicview&id=projects%2Fyour-mk1-golfs_2%2Fwent-to-look-at-a-golf&kfs79=150
http://vwgolfmk1.org.uk/forum/index.php?page=topicview&id=projects%2Fyour-mk1-golfs_2%2Fwent-to-look-at-a-golf&kfs79=150
Posted
Newbie

I'll have to invest of that deox- looks to do the job really well
Posted
Old Timer

Madone with the two Cabs 82 (UK RHD) and 85 (US LHD) (92 sold)
Posted
Old Timer


Rubio said
Looking good!
I'll have to invest of that deox- looks to do the job really well
Yep - good stuff!!
1983 Golf GTi Campaign Edition, Diamond Silver
http://vwgolfmk1.org.uk/forum/index.php?page=topicview&id=projects%2Fyour-mk1-golfs_2%2F-tag-1983-campaign&redirected=1#post_1551531
http://vwgolfmk1.org.uk/forum/index.php?page=topicview&id=projects%2Fyour-mk1-golfs_2%2F-tag-1983-campaign&redirected=1#post_1551531
Posted
Old Timer


madone_si said
this is great build thread, loving the work.
Thanks very much
1983 Golf GTi Campaign Edition, Diamond Silver
http://vwgolfmk1.org.uk/forum/index.php?page=topicview&id=projects%2Fyour-mk1-golfs_2%2F-tag-1983-campaign&redirected=1#post_1551531
http://vwgolfmk1.org.uk/forum/index.php?page=topicview&id=projects%2Fyour-mk1-golfs_2%2F-tag-1983-campaign&redirected=1#post_1551531
Posted
Old Timer


Finding new inner/outer CV joints proved to a little tricky.
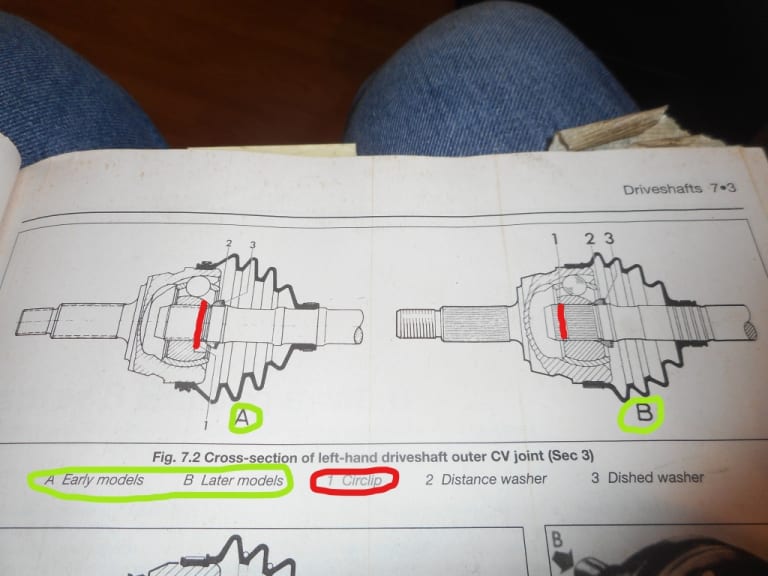
In adverts listing them for the MK1 GTI, they state: "without groove in internal component"… or "with groove"……. Asking on here and on the Facebook page gave no clues. BUT in Haynes there is a diagram showing early/late outer driveshaft joints………
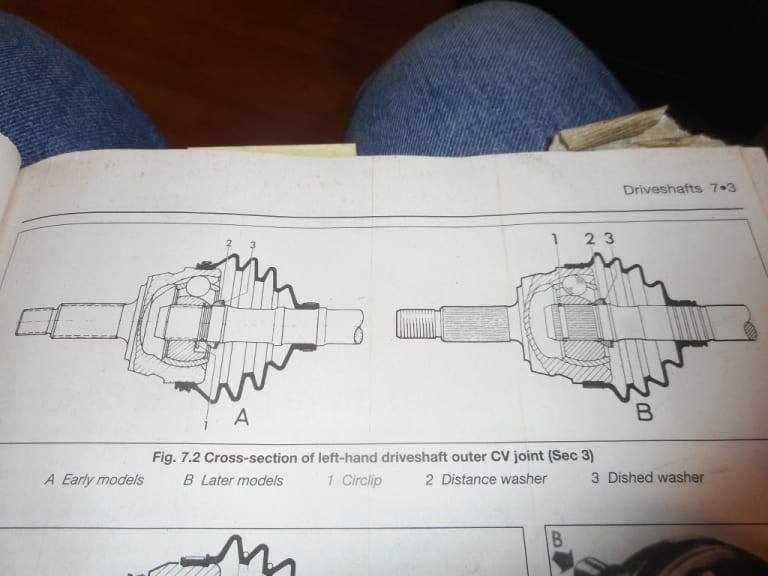
It appears that on early cars (not sure of dates) the circlip (snapring) on the driveshaft to retain the joint is BEHIND the joint accessed under the gaiter. On later cars the circlip (snapring) is fitted to the far end of driveshaft IN FRONT of the joint. As shown on the diagram below. This means there are two types of driveshaft as well, although only one listed on the parts list!
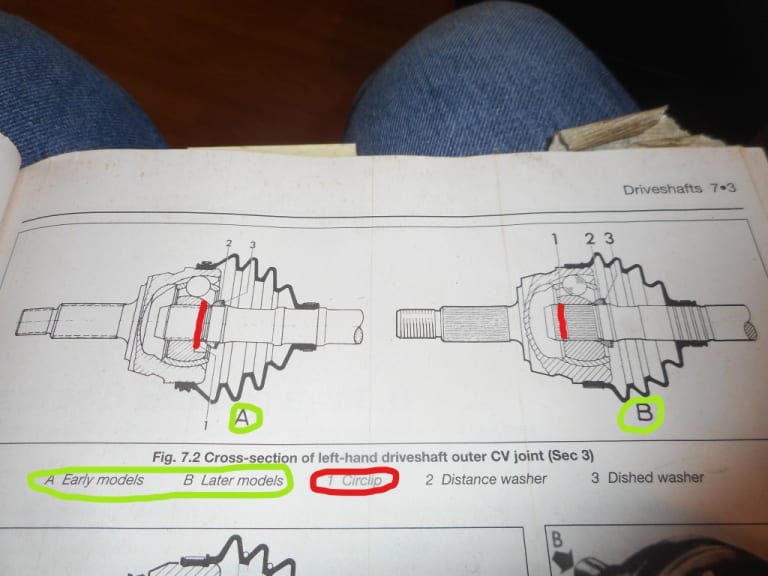
When I dismantled my driveshafts I found that I had a different type of joint on each shaft!!
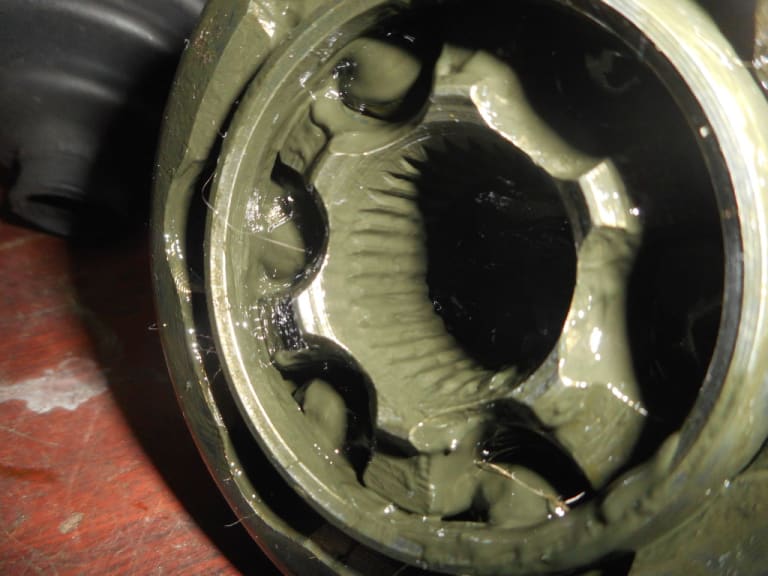
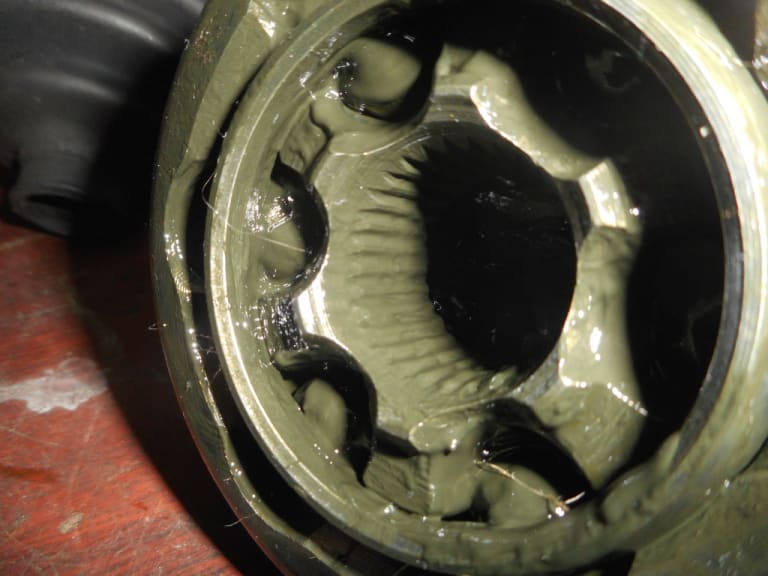
This one is without an internal groove:
This one is with ann internal groove!
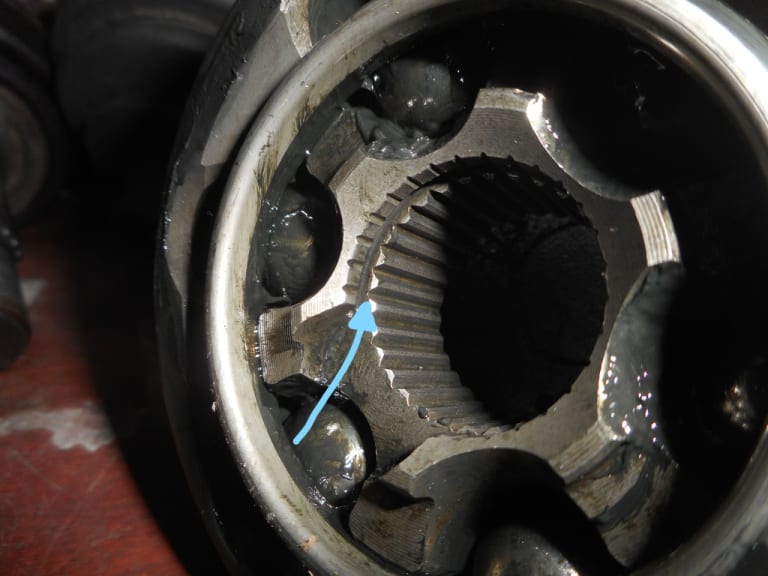
What this means is that either joint style will fit late driveshafts - as was demonstrated on my car, because they can push over the snapring to ensure a correct fitment.
BUT you can only fit a joint with an internal groove to the early driveshafts - otherwise you cannot fit a retaining circlip behind the joint……….
The things you learn!! I wonder if this has ever caught anyone out??
1983 Golf GTi Campaign Edition, Diamond Silver
http://vwgolfmk1.org.uk/forum/index.php?page=topicview&id=projects%2Fyour-mk1-golfs_2%2F-tag-1983-campaign&redirected=1#post_1551531
http://vwgolfmk1.org.uk/forum/index.php?page=topicview&id=projects%2Fyour-mk1-golfs_2%2F-tag-1983-campaign&redirected=1#post_1551531
Posted
Old Timer


Finding new inner/outer CV joints proved to a little tricky.
In adverts listing them for the MK1 GTI, they state: "without groove in internal component"… or "with groove"……. Asking on here and on the Facebook page gave no clues. BUT in Haynes there is a diagram showing early/late outer driveshaft joints………
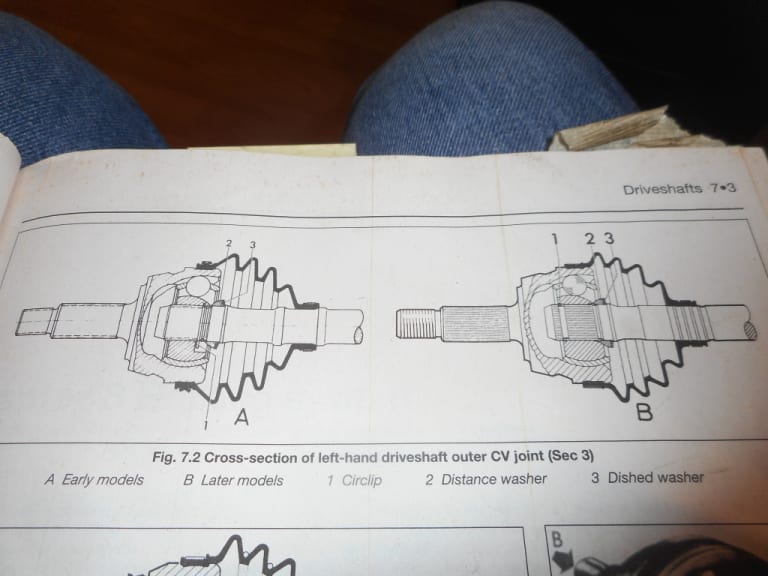
It appears that on early cars (not sure of dates) the circlip (snapring) on the driveshaft to retain the joint is BEHIND the joint accessed under the gaiter. On later cars the circlip (snapring) is fitted to the far end of driveshaft IN FRONT of the joint. As shown on the diagram below. This means there are two types of driveshaft as well, although only one listed on the parts list!
When I dismantled my driveshafts I found that I had a different type of joint on each shaft!!
This one is without an internal groove:
This one is with ann internal groove!
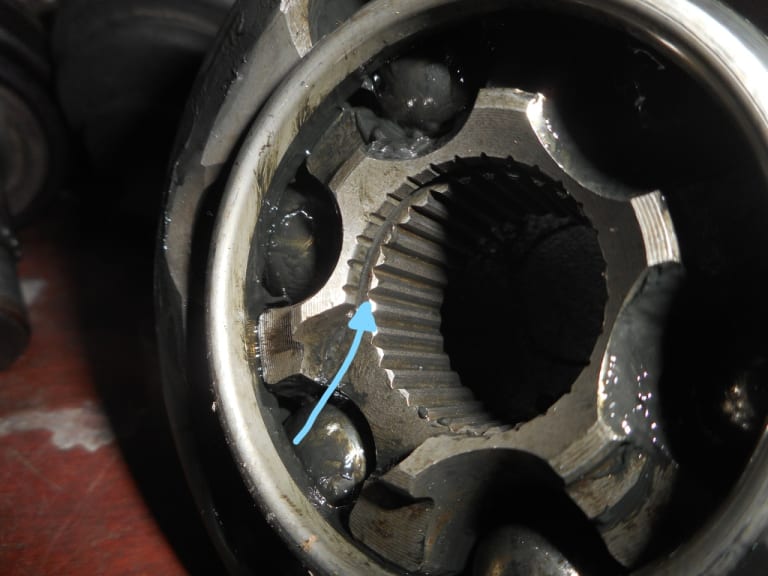
What this means is that either joint style will fit late driveshafts - as was demonstrated on my car, because they can push over the snapring to ensure a correct fitment.
BUT you can only fit a joint with an internal groove to the early driveshafts - otherwise you cannot fit a retaining circlip behind the joint……….
The things you learn!! I wonder if this has ever caught anyone out??
1983 Golf GTi Campaign Edition, Diamond Silver
http://vwgolfmk1.org.uk/forum/index.php?page=topicview&id=projects%2Fyour-mk1-golfs_2%2F-tag-1983-campaign&redirected=1#post_1551531
http://vwgolfmk1.org.uk/forum/index.php?page=topicview&id=projects%2Fyour-mk1-golfs_2%2F-tag-1983-campaign&redirected=1#post_1551531
Posted
Old Timer


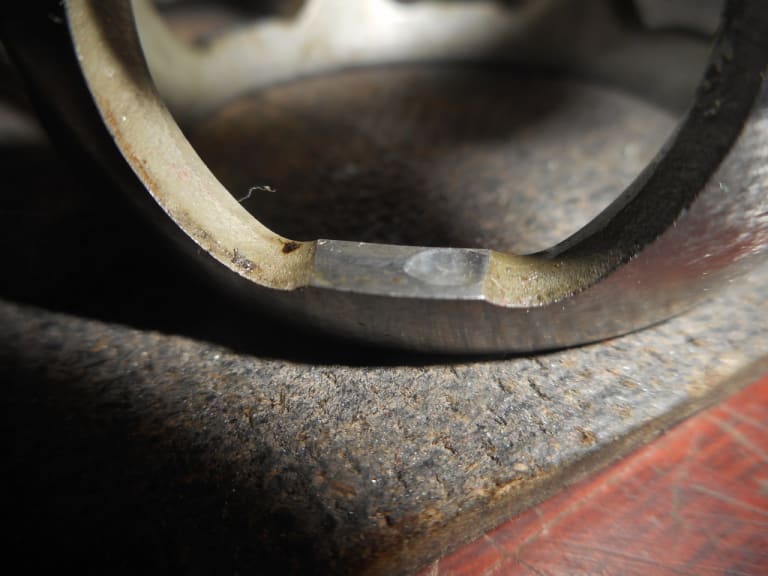
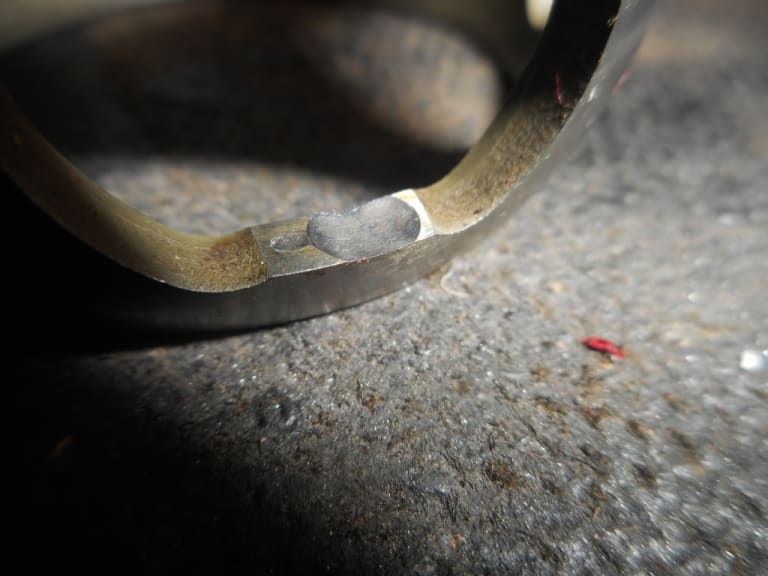
Considerable wear to the cages - deep dimples!
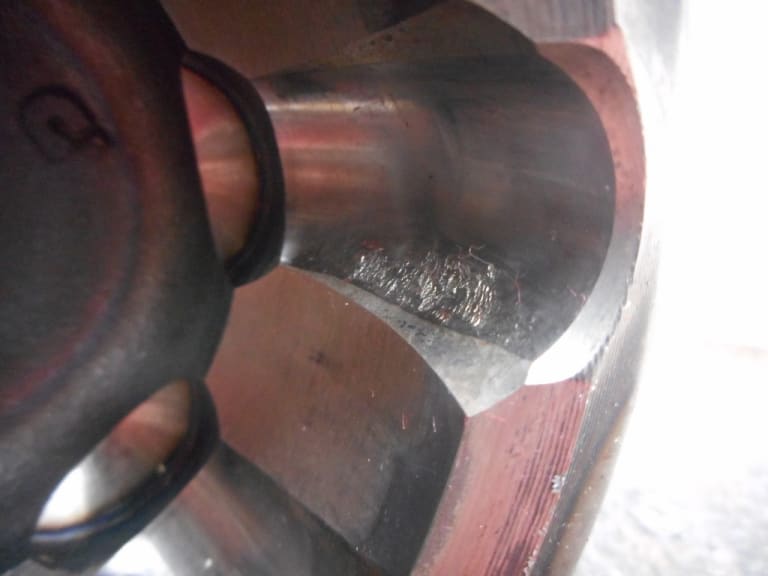
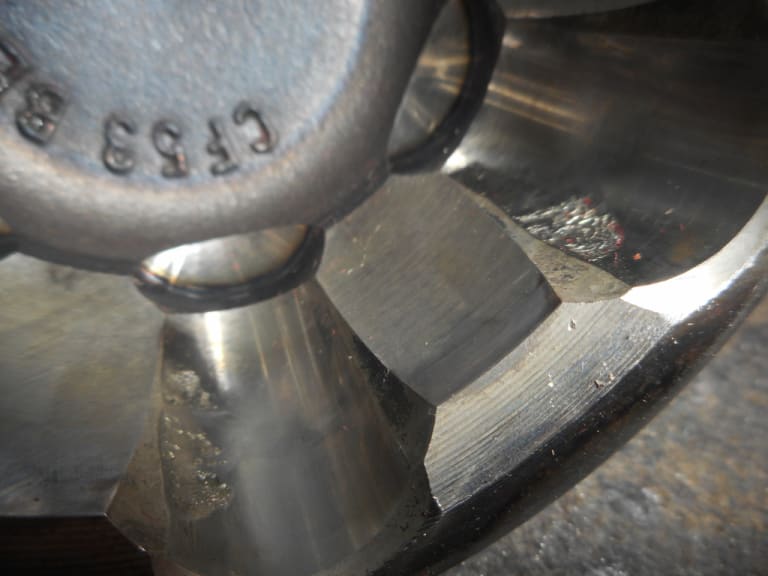
Some quite deep scoring to the inside of the joint….
1983 Golf GTi Campaign Edition, Diamond Silver
http://vwgolfmk1.org.uk/forum/index.php?page=topicview&id=projects%2Fyour-mk1-golfs_2%2F-tag-1983-campaign&redirected=1#post_1551531
http://vwgolfmk1.org.uk/forum/index.php?page=topicview&id=projects%2Fyour-mk1-golfs_2%2F-tag-1983-campaign&redirected=1#post_1551531
Posted
Old Timer


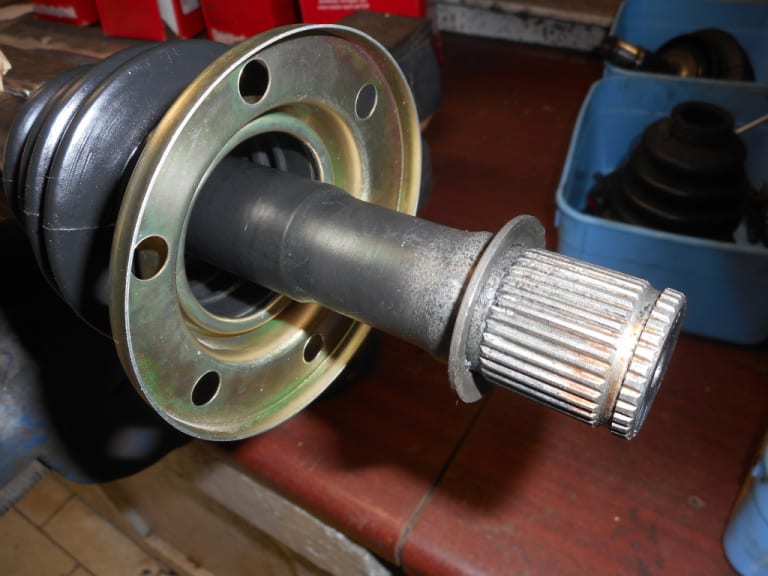
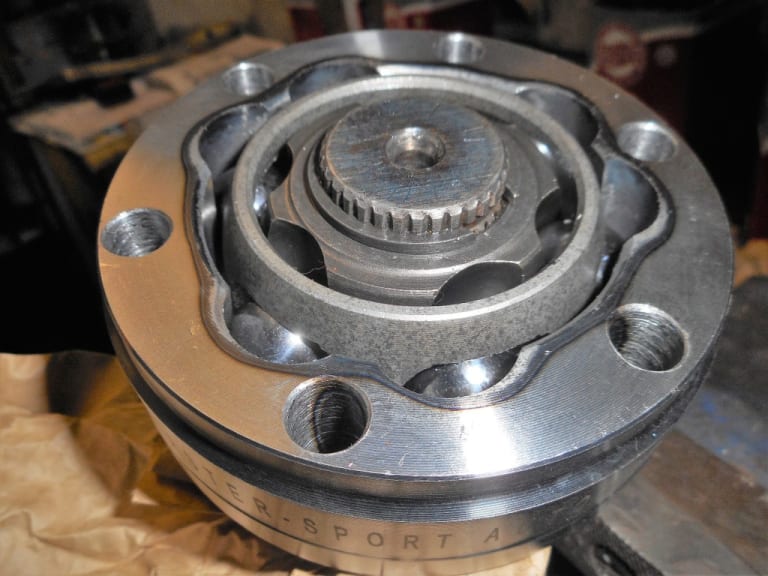
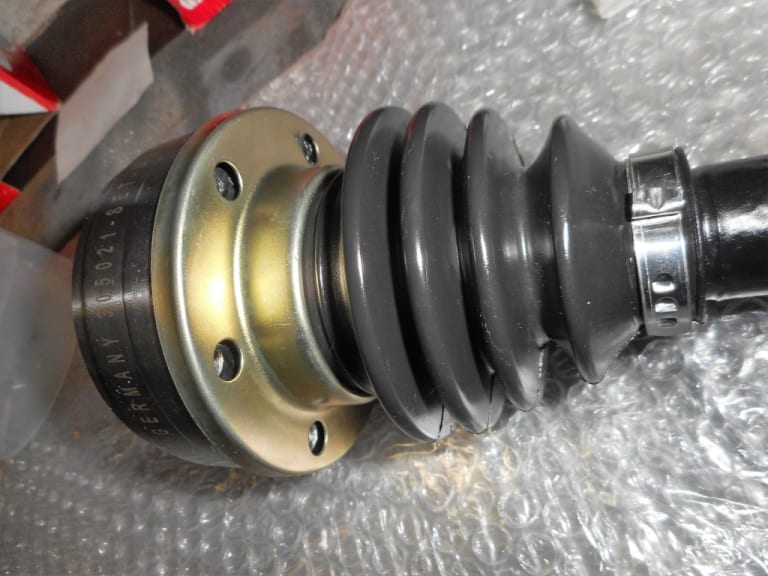
I found attaching the new joint first, then greasing it fully made it much easier & cleaner!!
1983 Golf GTi Campaign Edition, Diamond Silver
http://vwgolfmk1.org.uk/forum/index.php?page=topicview&id=projects%2Fyour-mk1-golfs_2%2F-tag-1983-campaign&redirected=1#post_1551531
http://vwgolfmk1.org.uk/forum/index.php?page=topicview&id=projects%2Fyour-mk1-golfs_2%2F-tag-1983-campaign&redirected=1#post_1551531
Posted
Old Timer


Snap ring
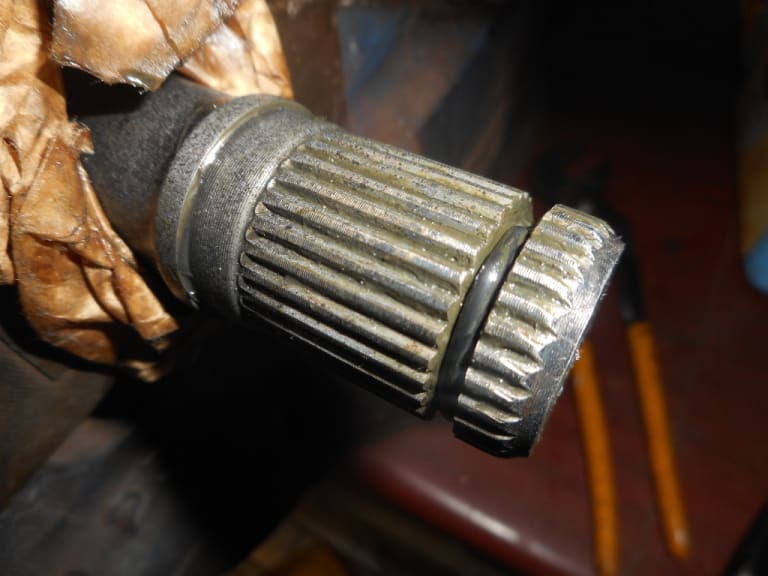
Dished washer and spacer washer
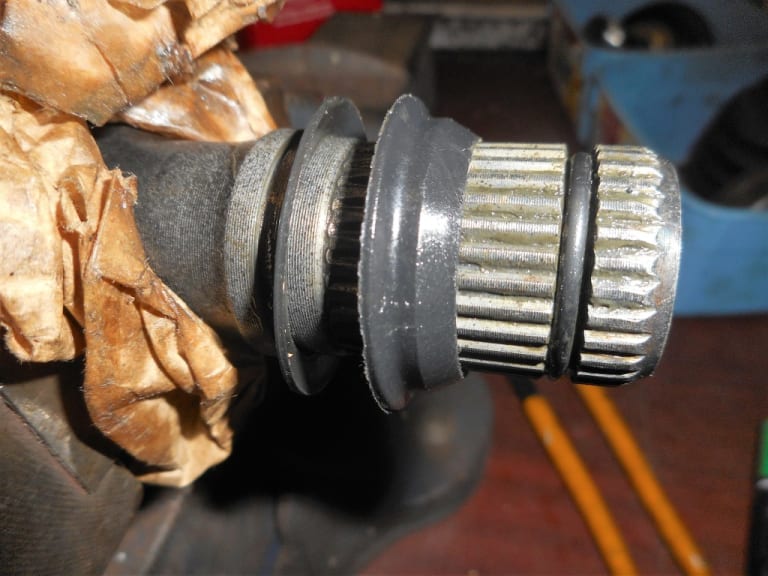
New joint seated ready for greasing
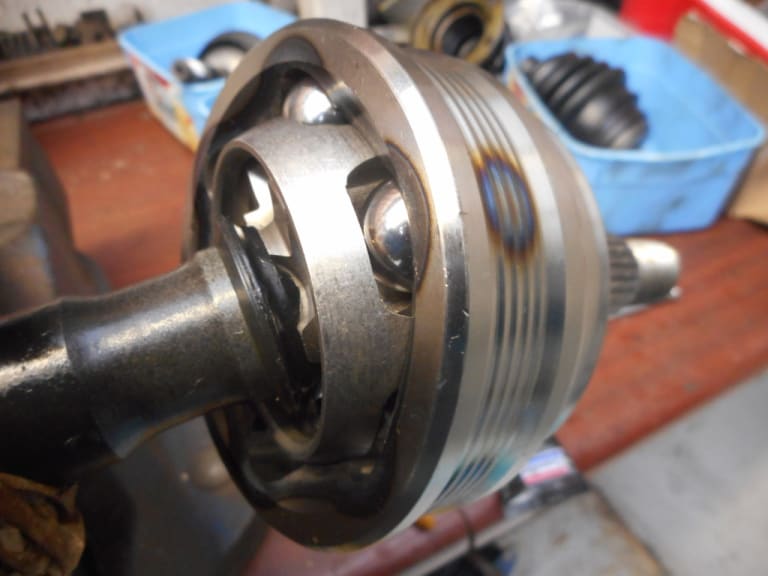
Voila!
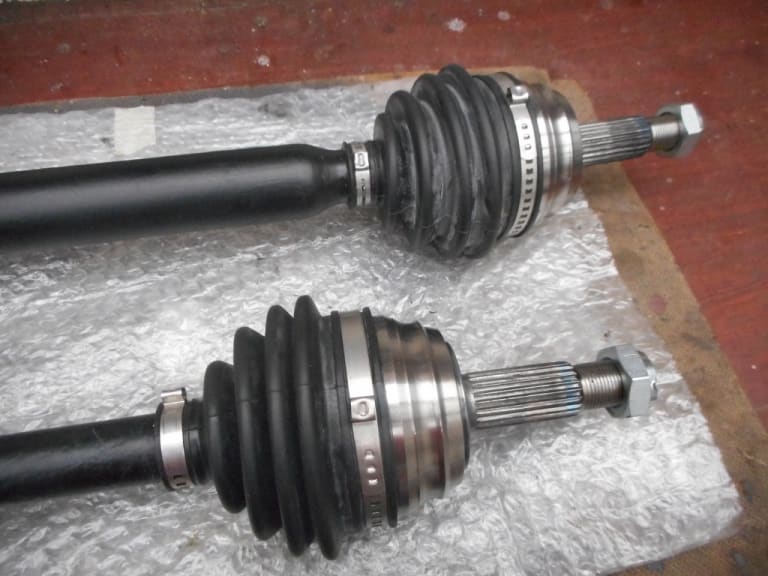
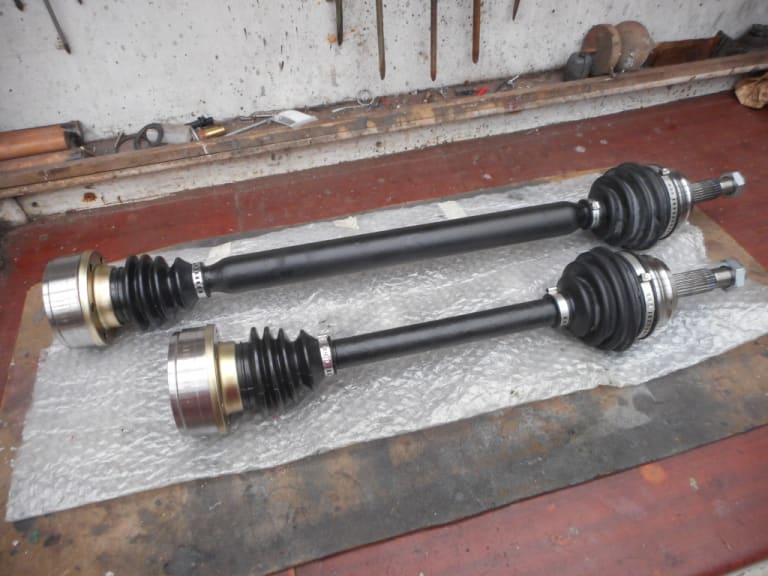
1983 Golf GTi Campaign Edition, Diamond Silver
http://vwgolfmk1.org.uk/forum/index.php?page=topicview&id=projects%2Fyour-mk1-golfs_2%2F-tag-1983-campaign&redirected=1#post_1551531
http://vwgolfmk1.org.uk/forum/index.php?page=topicview&id=projects%2Fyour-mk1-golfs_2%2F-tag-1983-campaign&redirected=1#post_1551531
Posted
Old Timer


Well much work had been going on over the last few months…. where to begin!
Fitting the driveshafts should have been a fairly quick and easy job…. but oh no!!!!!!!!!! Having fitted them to the car I came to tighten the central hub nut - which is highly torqued. As I began to tighten it I found I could no longer turn the wheel…! Not good.
I couldn't see any reason for this - everything was new - clean, lubricated……. I took it off numerous times to check it - every time it seized the wheel. I wondered if the circlip inside the front hub holding the wheel bearing was fouling things. I removed this and tried again - no luck.
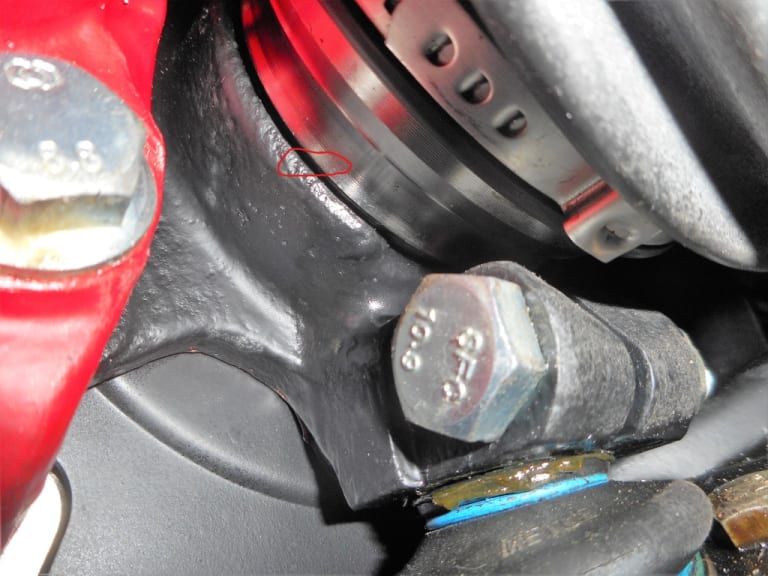
My Dad then had the idea of using some paper pushed over the joint as I fitted it to see where it was binding. Sure enough witness marks on the paper showed the shoulder of the new outer CV joint was binding on the rim of the front hub…….
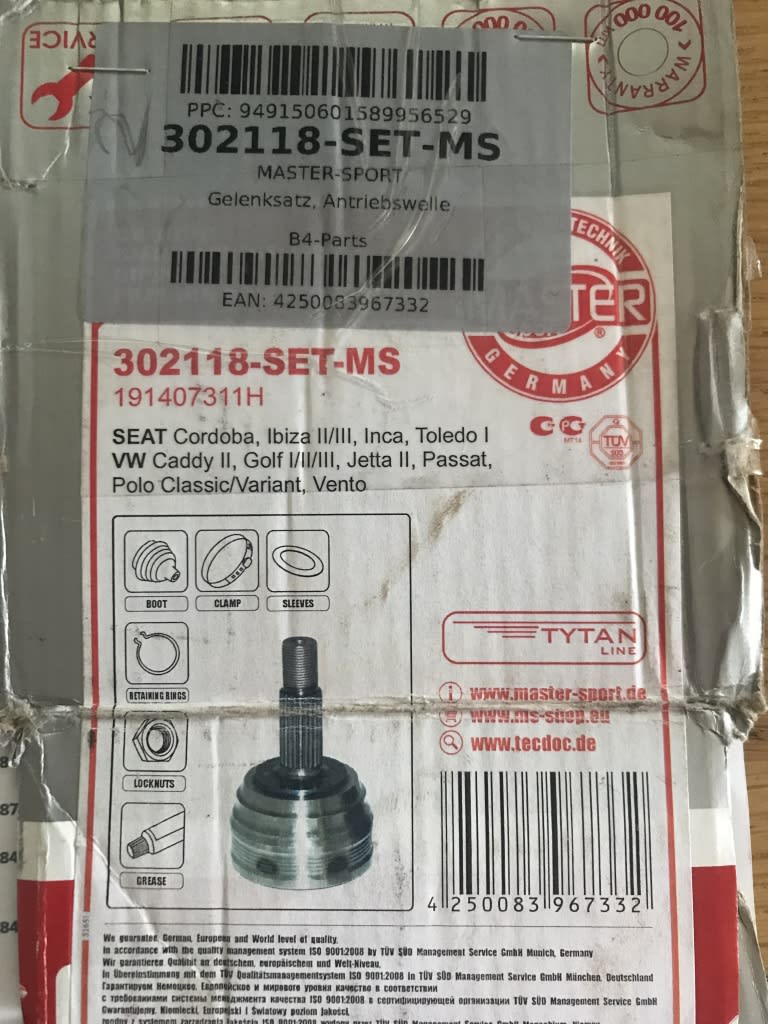
I bought these brand new - OE quality German parts from a large German parts supplier - having triple checked the part numbers.
Having sought advice from various sources I spoke to Mark at Classic VW - he had never come across this before. I therefore decided the only option was to purchase another new set of outer CV joints from him.
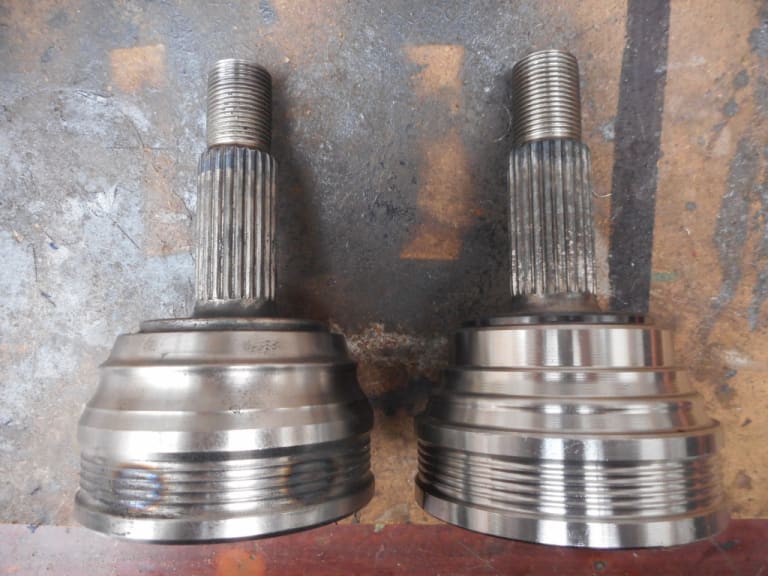
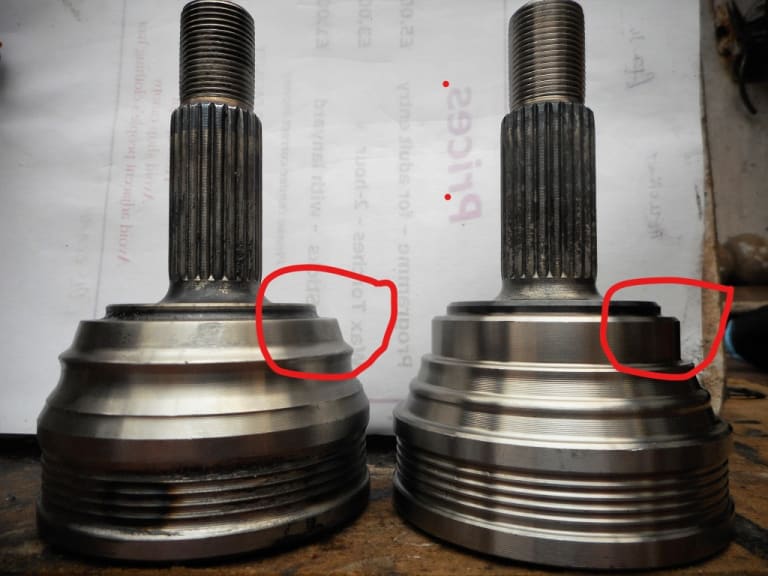
When they arrived the differences were obvious. The shoulder of the joints were a totally different profile…
Fitted the Classic VW joints - problem solved.
Moral of the story - buy parts from suppliers you can really trust. After several messages to the German supplier regarding the wrongly fitting items - I have yet to have a reply!!
The red circle shows where the German joints were binding on teh hub
German joint on the left - ClassicVW on the right. note the difference
Again see the differences highlighted in red
1983 Golf GTi Campaign Edition, Diamond Silver
http://vwgolfmk1.org.uk/forum/index.php?page=topicview&id=projects%2Fyour-mk1-golfs_2%2F-tag-1983-campaign&redirected=1#post_1551531
http://vwgolfmk1.org.uk/forum/index.php?page=topicview&id=projects%2Fyour-mk1-golfs_2%2F-tag-1983-campaign&redirected=1#post_1551531
Posted
Old Timer


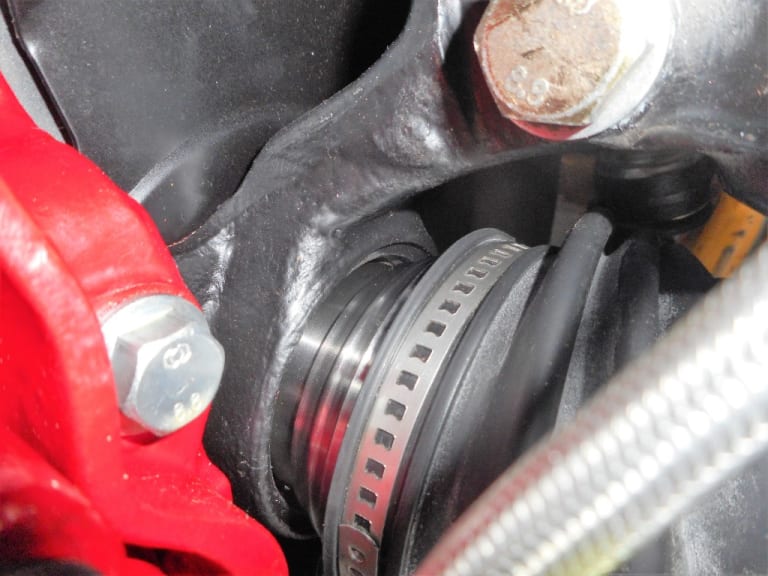
The newly fitted joint - note the difference where the joint enters the hub from the previous photos
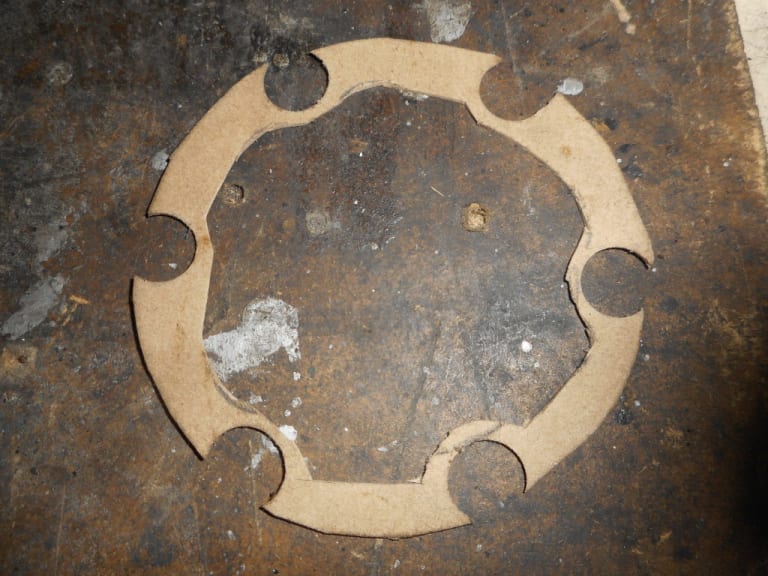
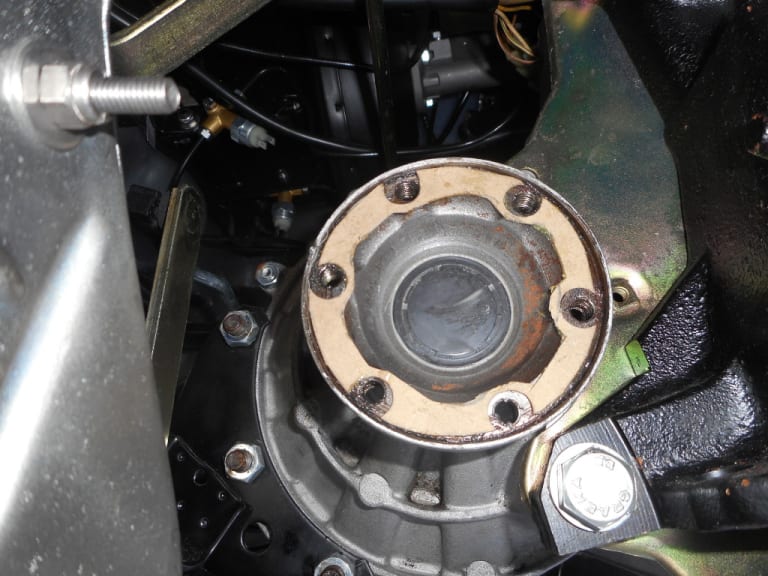
Final job on the driveshafts was fitting the inner joints to the drive flanges. There should be a gasket fitted here - most people dont fit them but they were intended to be fitted and should help keep the grease where it is meant to be - not on the garage floor!
Problem was that they are no longer available from anyone! I therefore used one of the mangled old ones and some gasket card to make some new ones - not perfect but should help.
1983 Golf GTi Campaign Edition, Diamond Silver
http://vwgolfmk1.org.uk/forum/index.php?page=topicview&id=projects%2Fyour-mk1-golfs_2%2F-tag-1983-campaign&redirected=1#post_1551531
http://vwgolfmk1.org.uk/forum/index.php?page=topicview&id=projects%2Fyour-mk1-golfs_2%2F-tag-1983-campaign&redirected=1#post_1551531
Posted
Old Timer
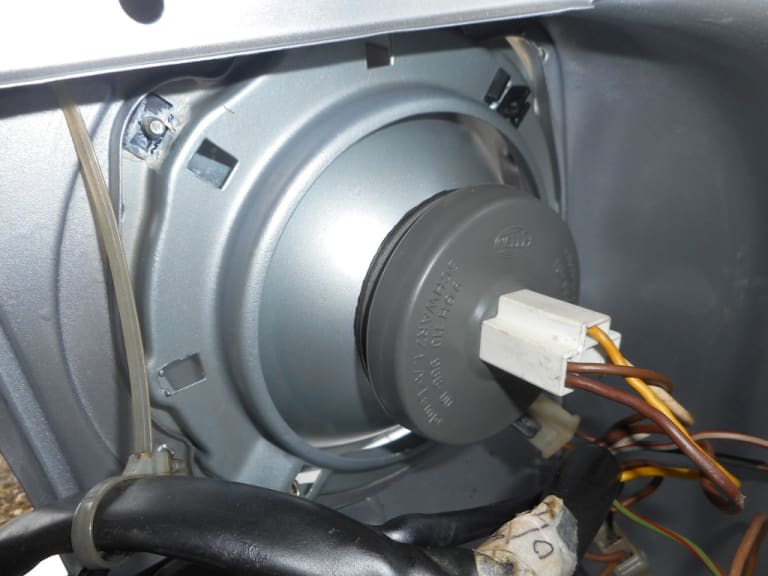


Before
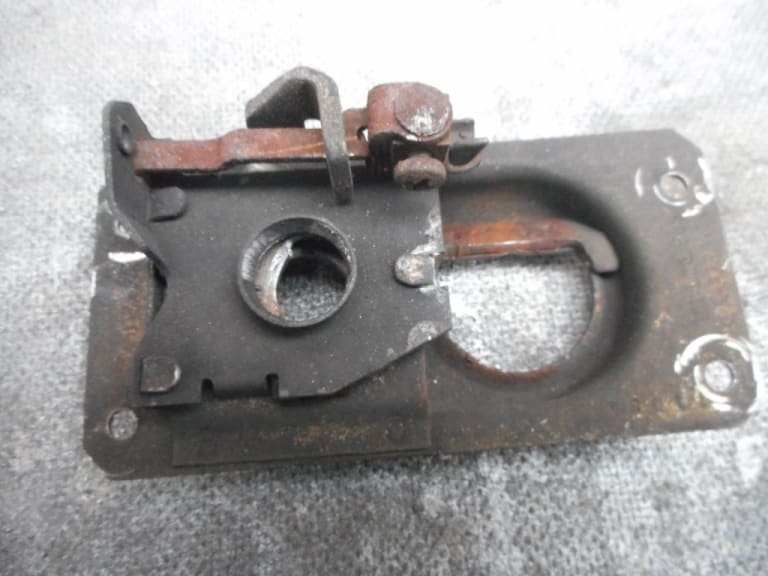
Before
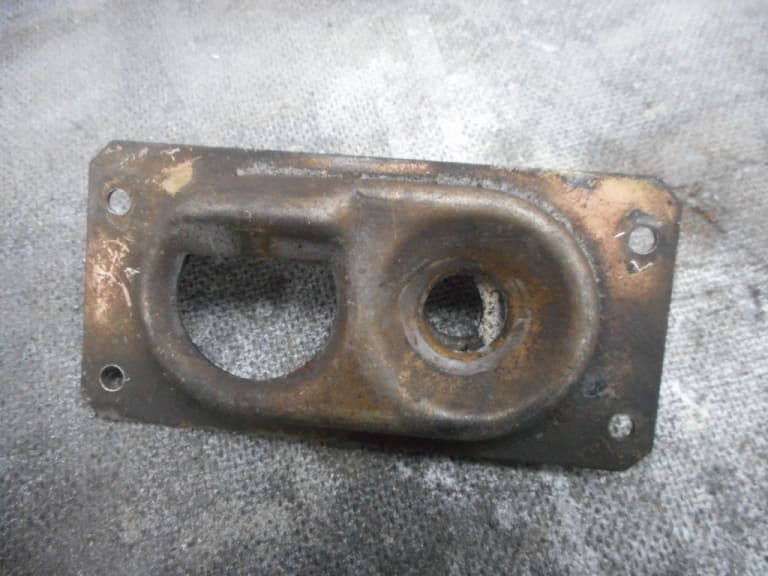
After
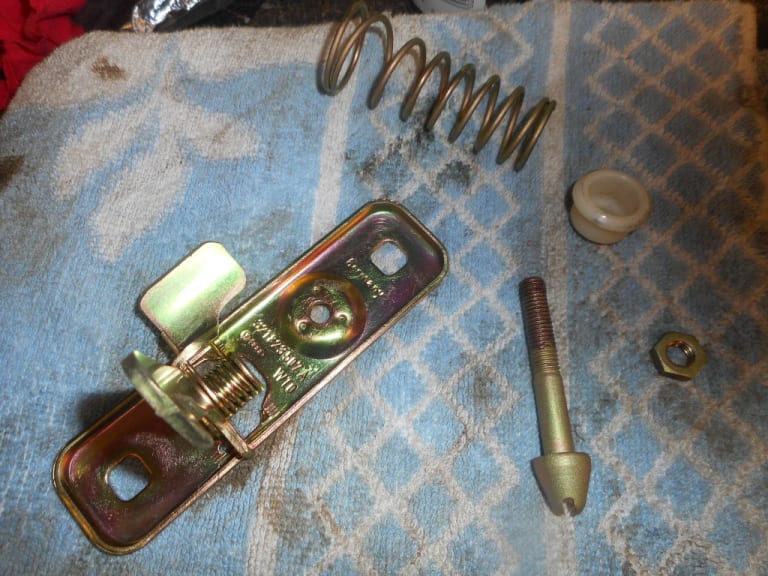
Fitted
1983 Golf GTi Campaign Edition, Diamond Silver
http://vwgolfmk1.org.uk/forum/index.php?page=topicview&id=projects%2Fyour-mk1-golfs_2%2F-tag-1983-campaign&redirected=1#post_1551531
http://vwgolfmk1.org.uk/forum/index.php?page=topicview&id=projects%2Fyour-mk1-golfs_2%2F-tag-1983-campaign&redirected=1#post_1551531
Posted
Old Timer


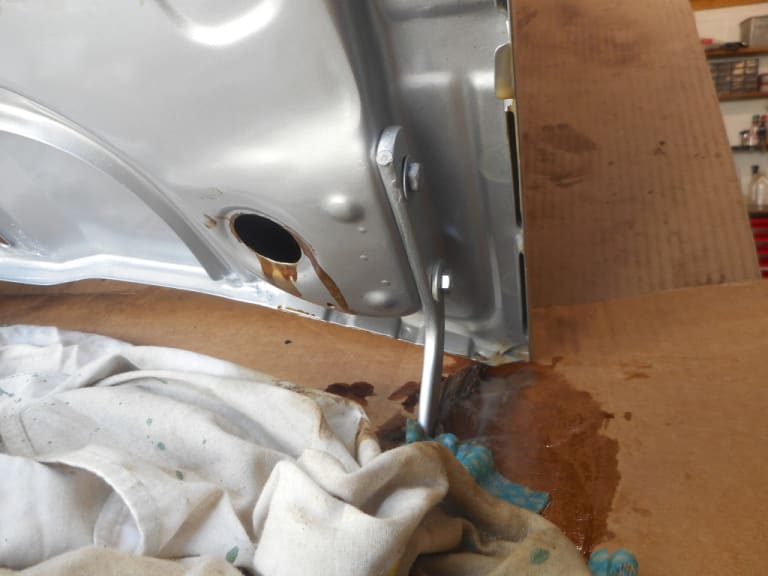
I masked up most of the holes in the bonnet - spraying the rust treatment is very messy so I covered up the engine etc.
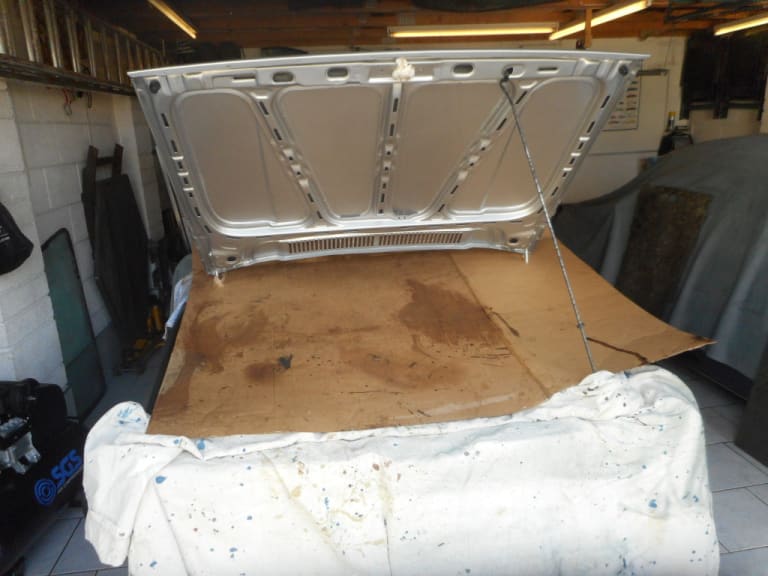
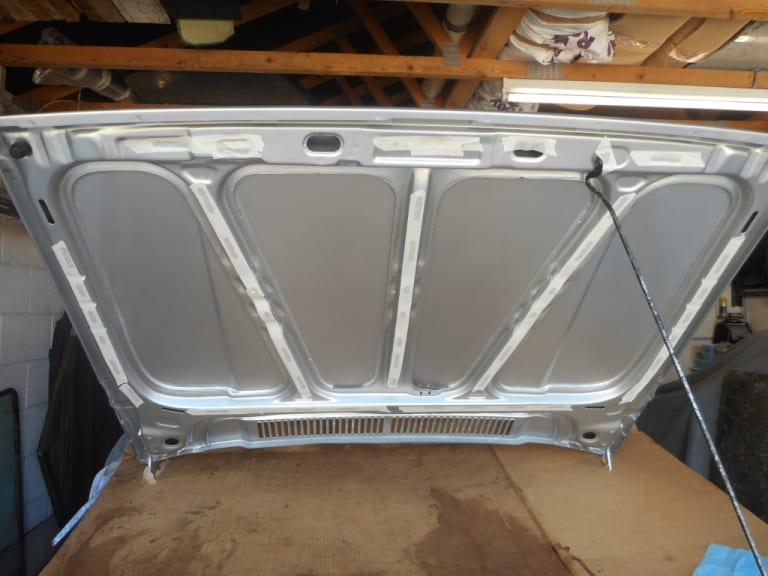
I used Bilt Hamber Dynax S50 in the cavities that you cant see - dark brown - and then the clear Bilt Hamber UC in teh cavities and areas that remain visible.
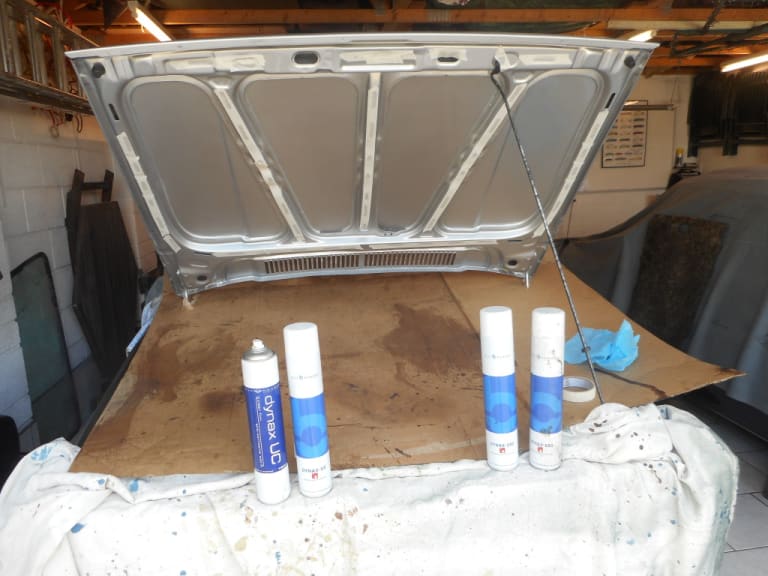
Lovely to see it dribbling out from the various holes.
1983 Golf GTi Campaign Edition, Diamond Silver
http://vwgolfmk1.org.uk/forum/index.php?page=topicview&id=projects%2Fyour-mk1-golfs_2%2F-tag-1983-campaign&redirected=1#post_1551531
http://vwgolfmk1.org.uk/forum/index.php?page=topicview&id=projects%2Fyour-mk1-golfs_2%2F-tag-1983-campaign&redirected=1#post_1551531
Posted
Old Timer
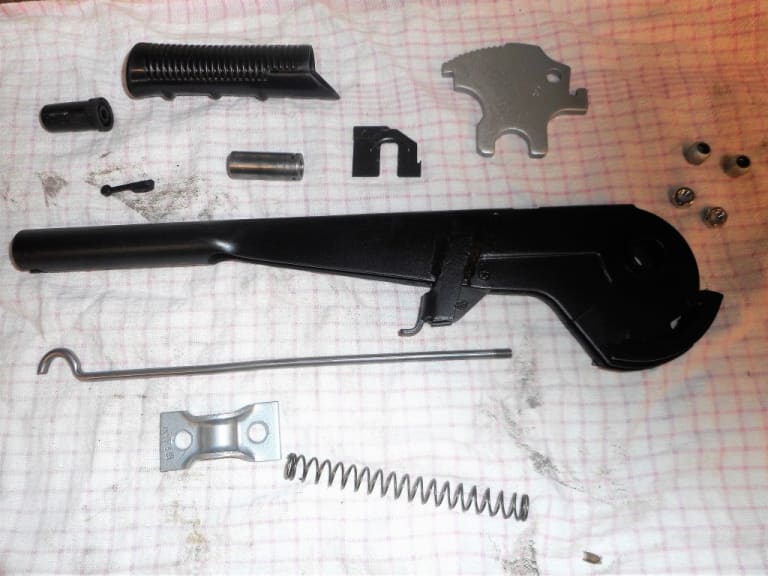


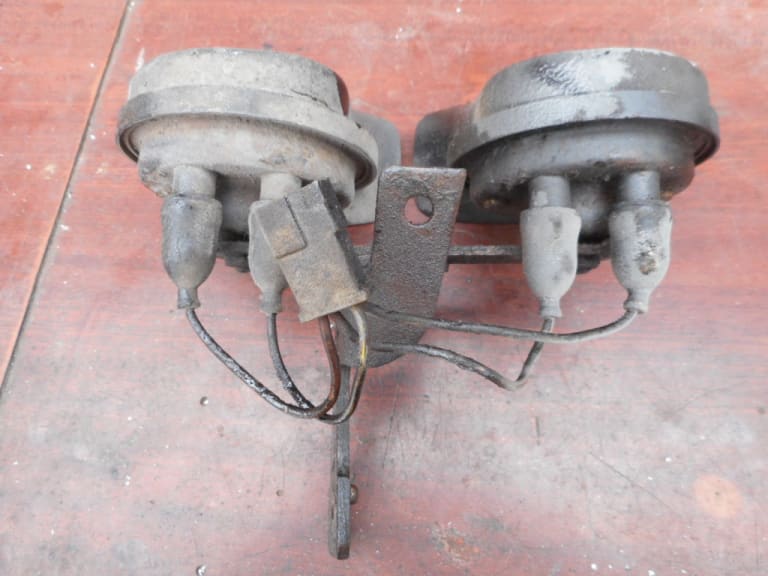
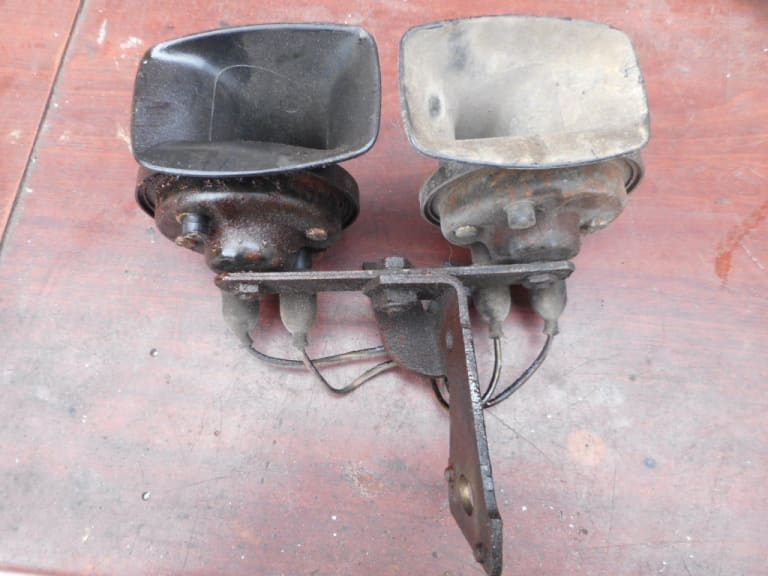
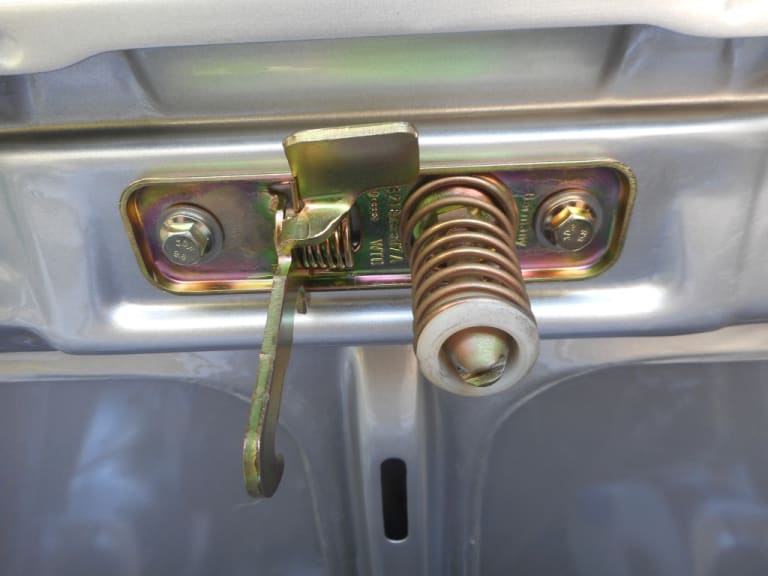
All cleaned up, painted and brackets plated
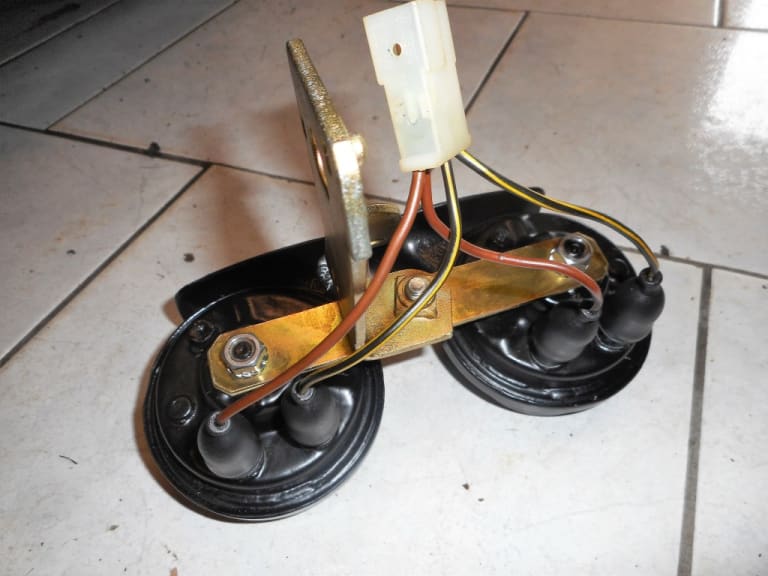
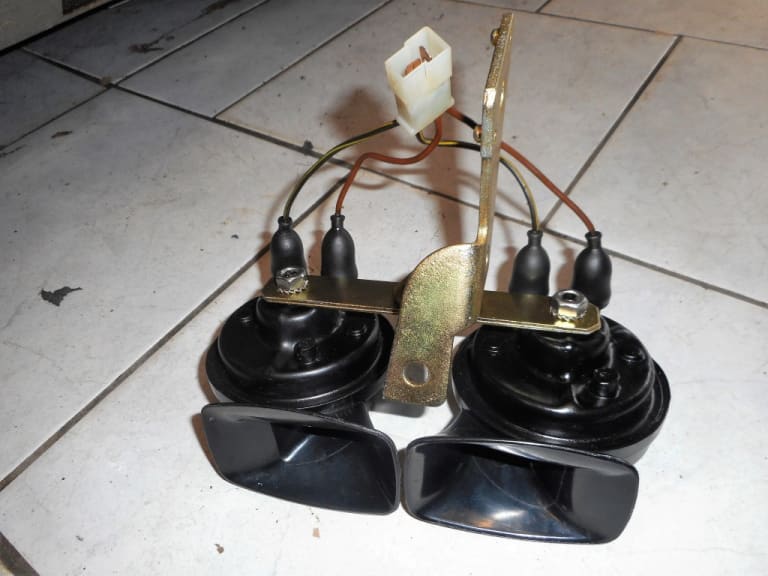
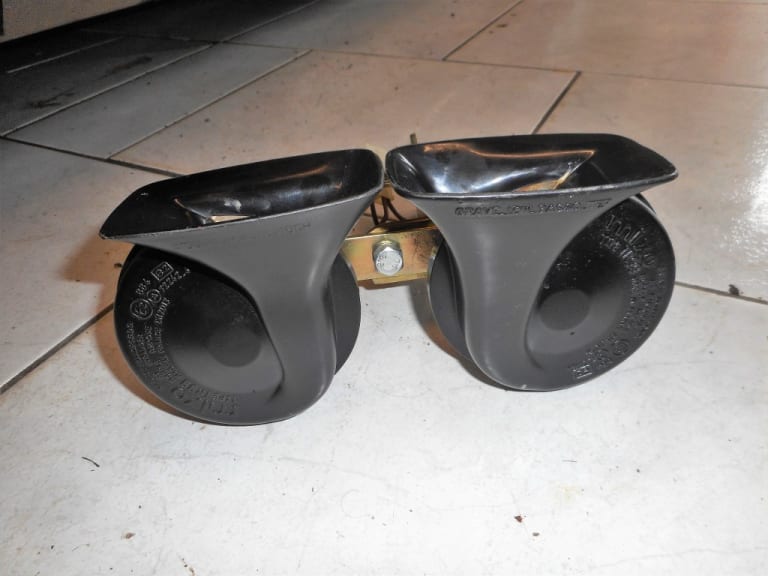
1983 Golf GTi Campaign Edition, Diamond Silver
http://vwgolfmk1.org.uk/forum/index.php?page=topicview&id=projects%2Fyour-mk1-golfs_2%2F-tag-1983-campaign&redirected=1#post_1551531
http://vwgolfmk1.org.uk/forum/index.php?page=topicview&id=projects%2Fyour-mk1-golfs_2%2F-tag-1983-campaign&redirected=1#post_1551531
Posted
Old Timer


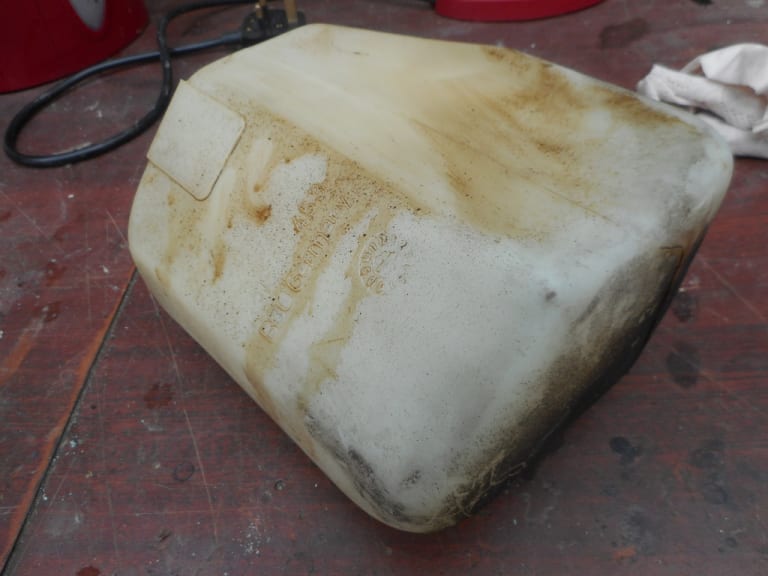
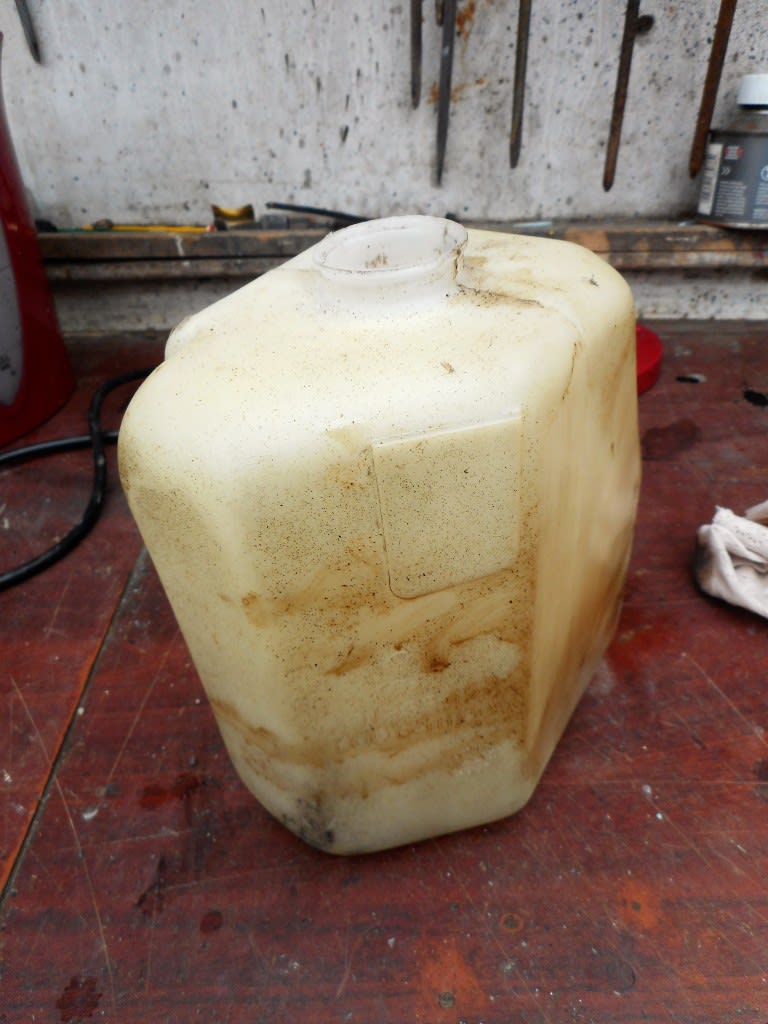
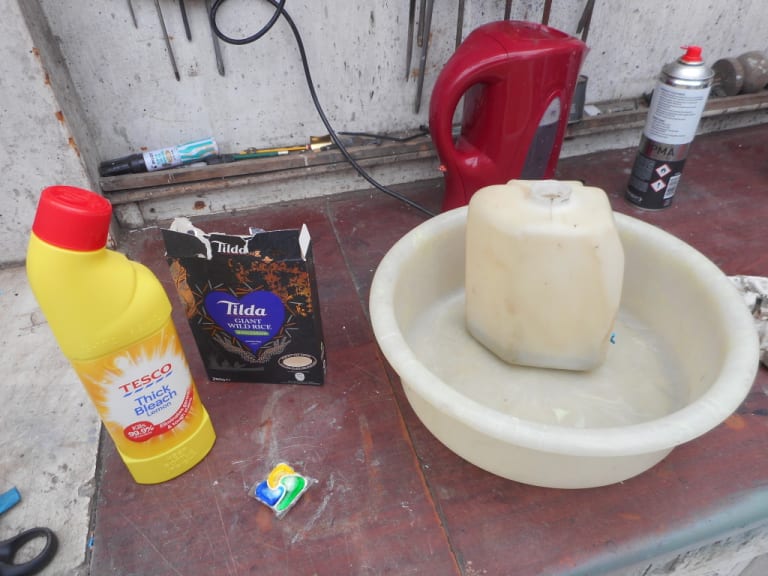
I used boiling water, a good dose of thick bleach, a dishwasher tablet and rice!!!! The rice helped to agitate the inside surface and create slight abrasion to aid cleaning.
Result!
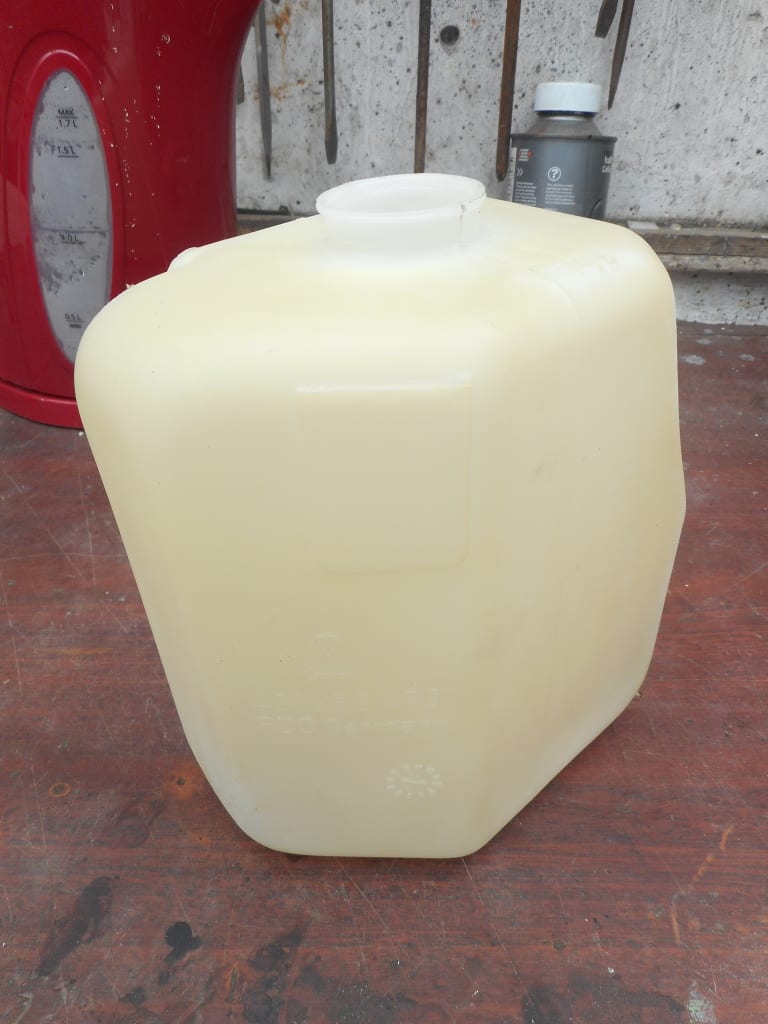
I must say I remarkably impressed!
And no I didn't eat the rice afterwards!!!!!!!!!!
1983 Golf GTi Campaign Edition, Diamond Silver
http://vwgolfmk1.org.uk/forum/index.php?page=topicview&id=projects%2Fyour-mk1-golfs_2%2F-tag-1983-campaign&redirected=1#post_1551531
http://vwgolfmk1.org.uk/forum/index.php?page=topicview&id=projects%2Fyour-mk1-golfs_2%2F-tag-1983-campaign&redirected=1#post_1551531
Posted
Old Timer


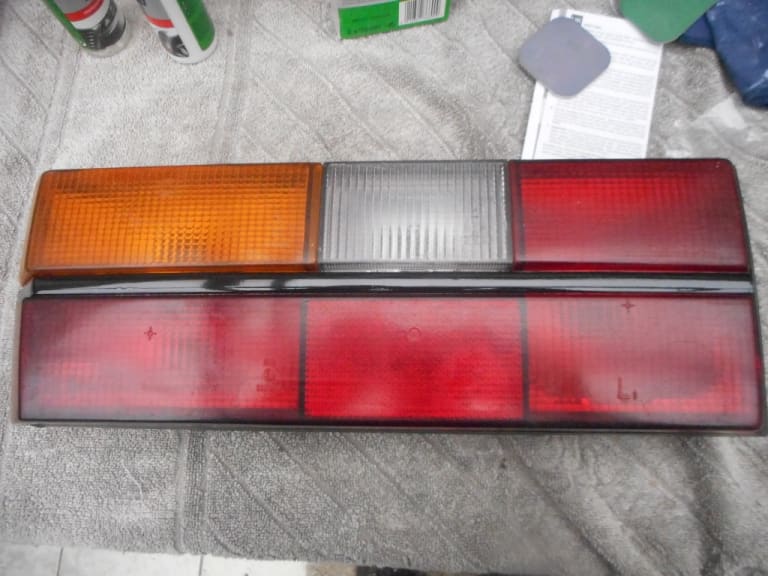
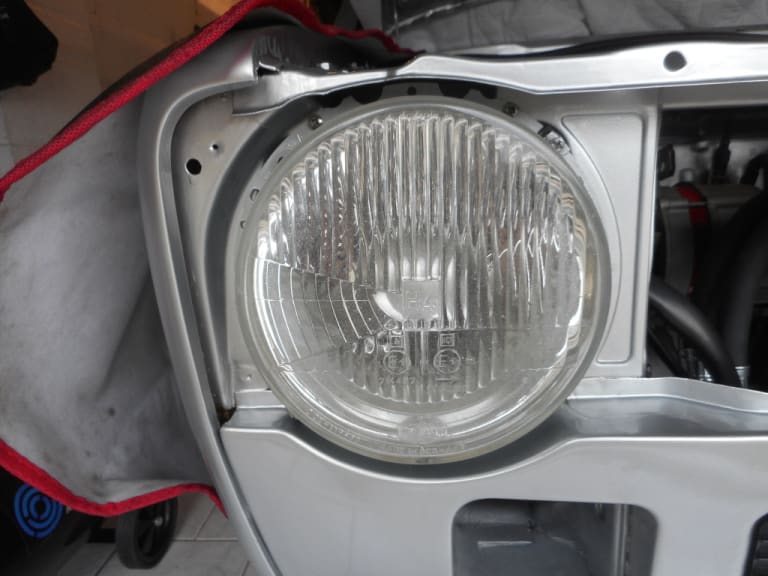
Again after some time investigating on the web I found this great product for cleaning up plastic headlights,
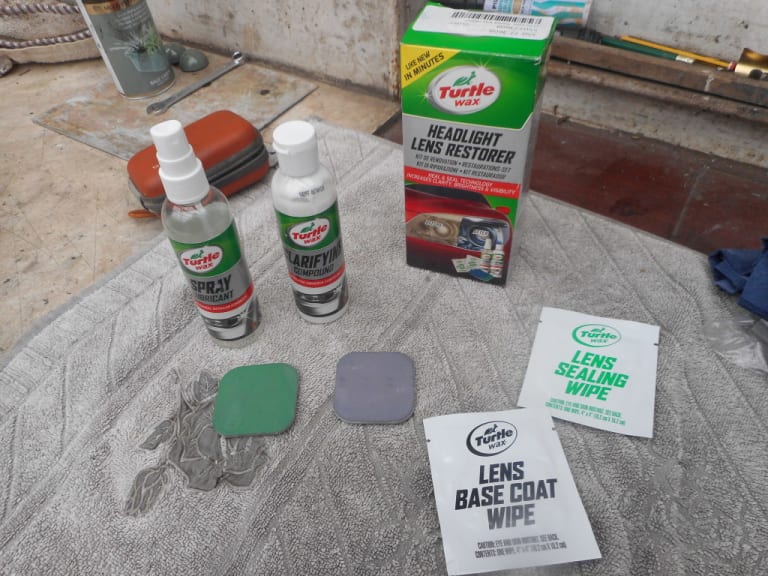
It consists of a mild cutting compound and varying degrees of abrasive pads - from gentle to very gentle. After a few hours hard rubbing the results were impressive.
Photos dont show the change too well - but before at the bottom and finished at the top
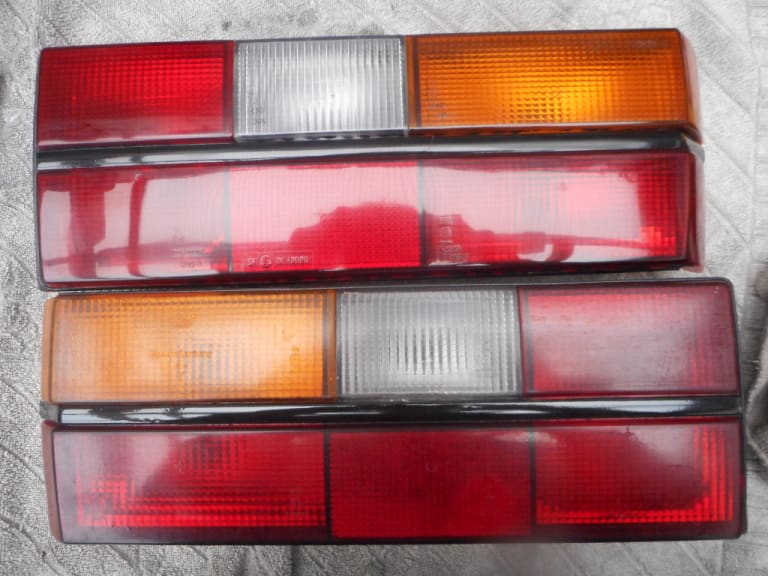
Before
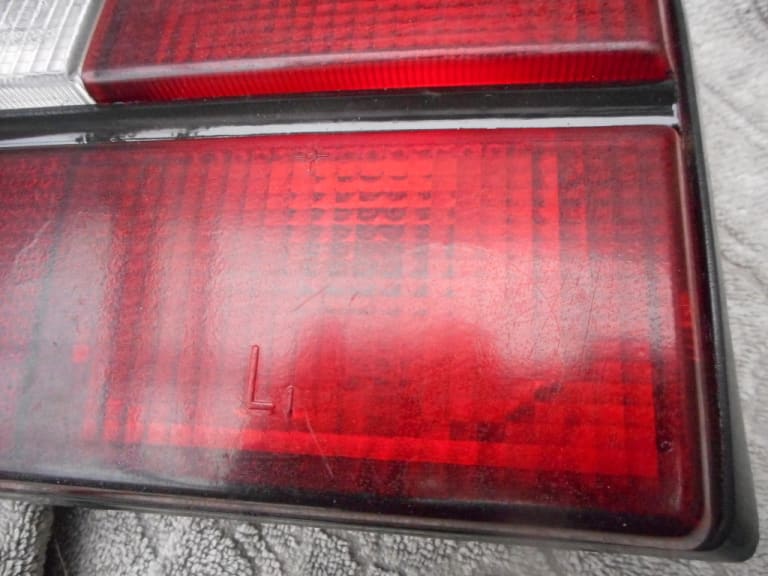
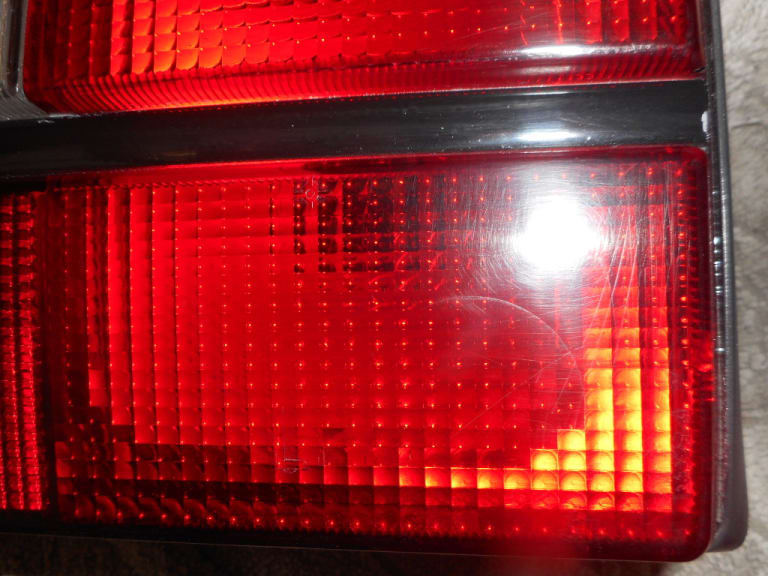
After. Clearly they are still scratched and the process does inevitably cause some minor scratching but they look so much better. I also repainted the black line along the middle of them that had faded.
1983 Golf GTi Campaign Edition, Diamond Silver
http://vwgolfmk1.org.uk/forum/index.php?page=topicview&id=projects%2Fyour-mk1-golfs_2%2F-tag-1983-campaign&redirected=1#post_1551531
http://vwgolfmk1.org.uk/forum/index.php?page=topicview&id=projects%2Fyour-mk1-golfs_2%2F-tag-1983-campaign&redirected=1#post_1551531
Posted
Old Timer


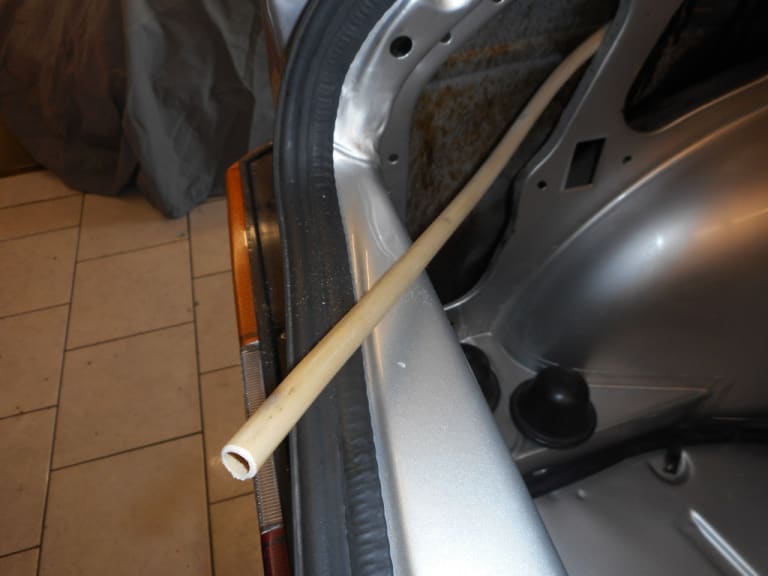
They finish in the void behind the rear wheel arch - just dangling there. Water therefore runs out of them and collects in the blind void - rotting it! This must have happened from new - very un VW like!! I think there may have been a very small drain hole - but asking a lot!!
I wasn't happy with this so decided to drill a new drain hole from under the car into the void. Very tricky job!!
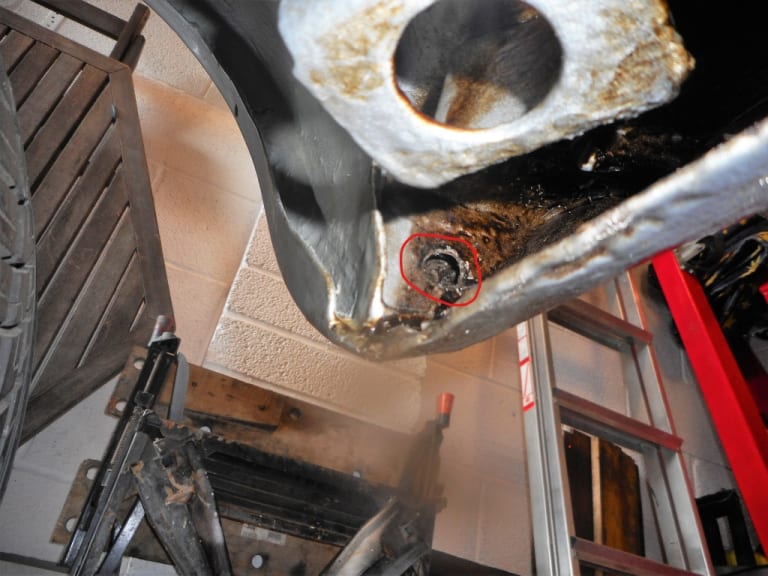
I then found some clear fairly rigid plastic tubing that pushed tightly over the end of the existing drain tubes.
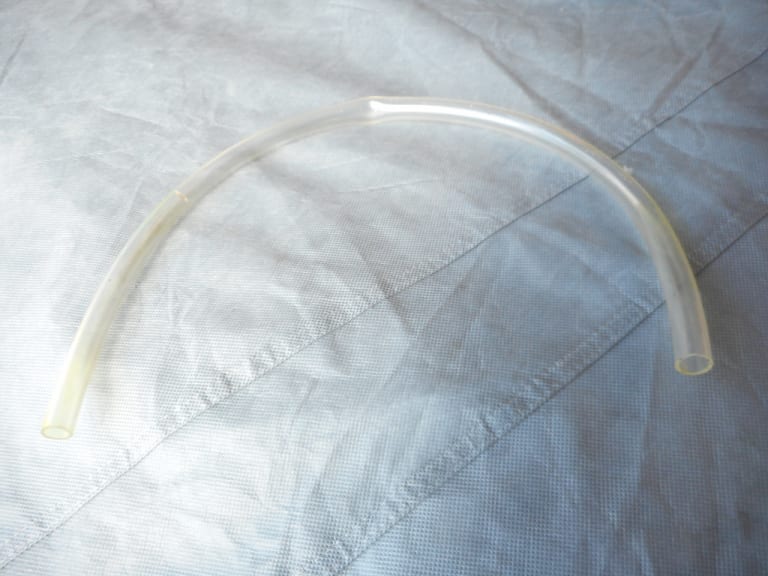
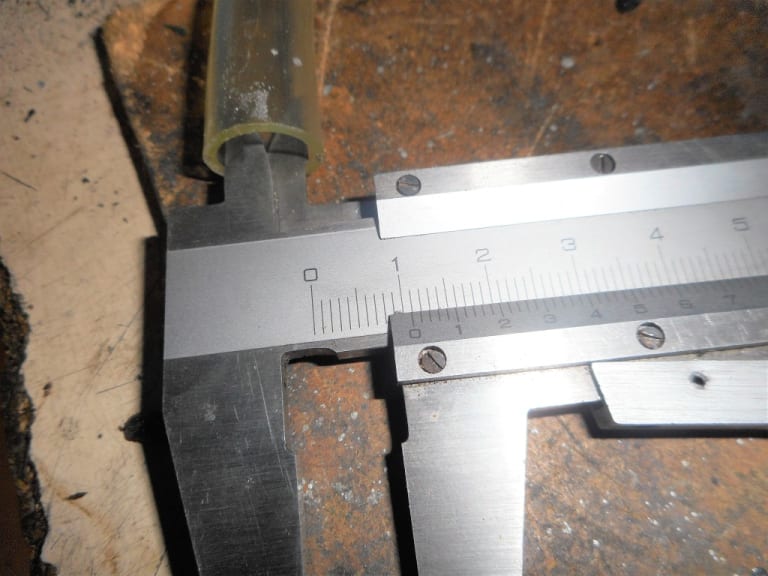
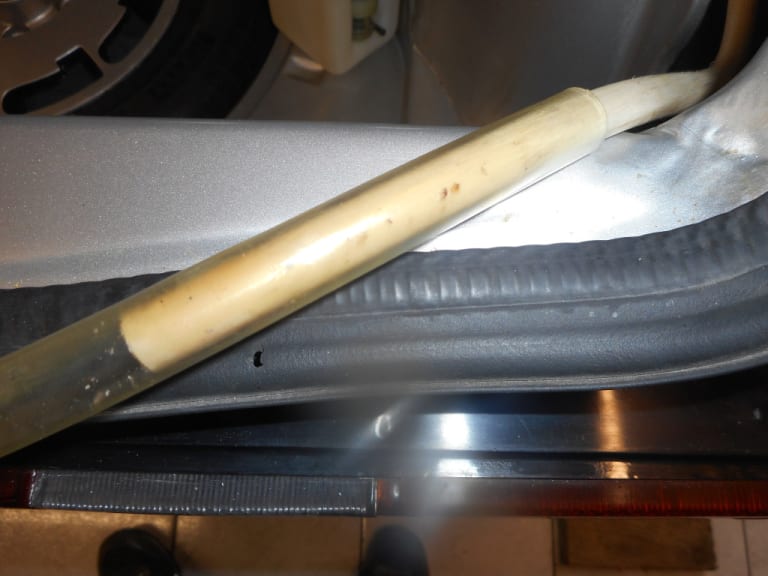
I could then feed this out through my new drain hole
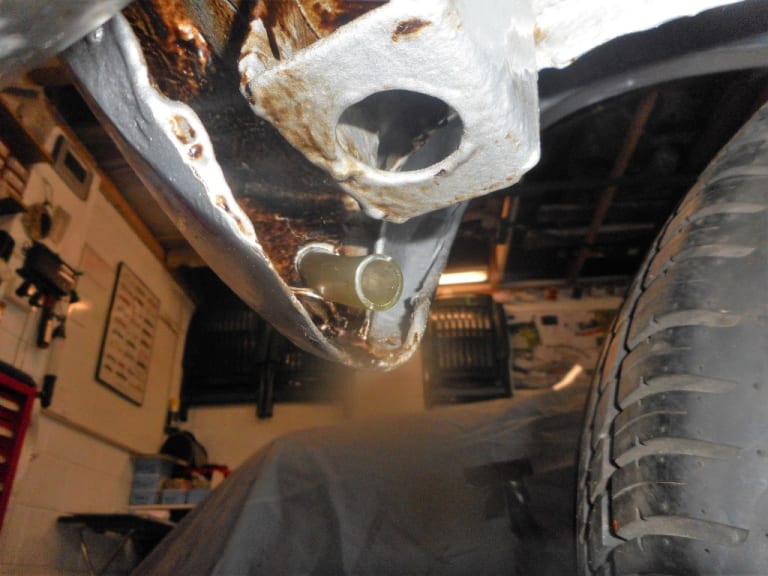
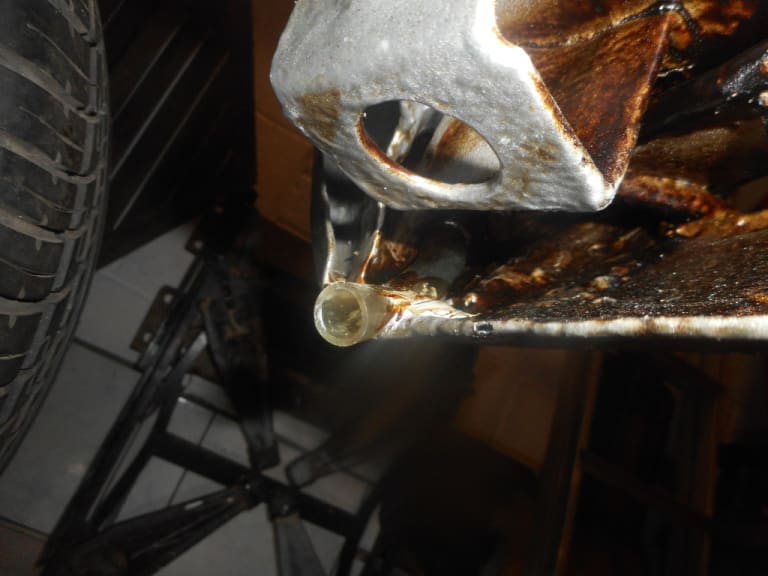
I then used some PU seam sealer to hold the pipe ends in position.
1983 Golf GTi Campaign Edition, Diamond Silver
http://vwgolfmk1.org.uk/forum/index.php?page=topicview&id=projects%2Fyour-mk1-golfs_2%2F-tag-1983-campaign&redirected=1#post_1551531
http://vwgolfmk1.org.uk/forum/index.php?page=topicview&id=projects%2Fyour-mk1-golfs_2%2F-tag-1983-campaign&redirected=1#post_1551531
0 guests and 0 members have just viewed this: None.


