"TAG" - 1983 Campaign restoration blog
Posted
Old Timer


1983 Golf GTi Campaign Edition, Diamond Silver
http://vwgolfmk1.org.uk/forum/index.php?page=topicview&id=projects%2Fyour-mk1-golfs_2%2F-tag-1983-campaign&redirected=1#post_1551531
http://vwgolfmk1.org.uk/forum/index.php?page=topicview&id=projects%2Fyour-mk1-golfs_2%2F-tag-1983-campaign&redirected=1#post_1551531
Posted
Old Timer


They certainly needed attention!
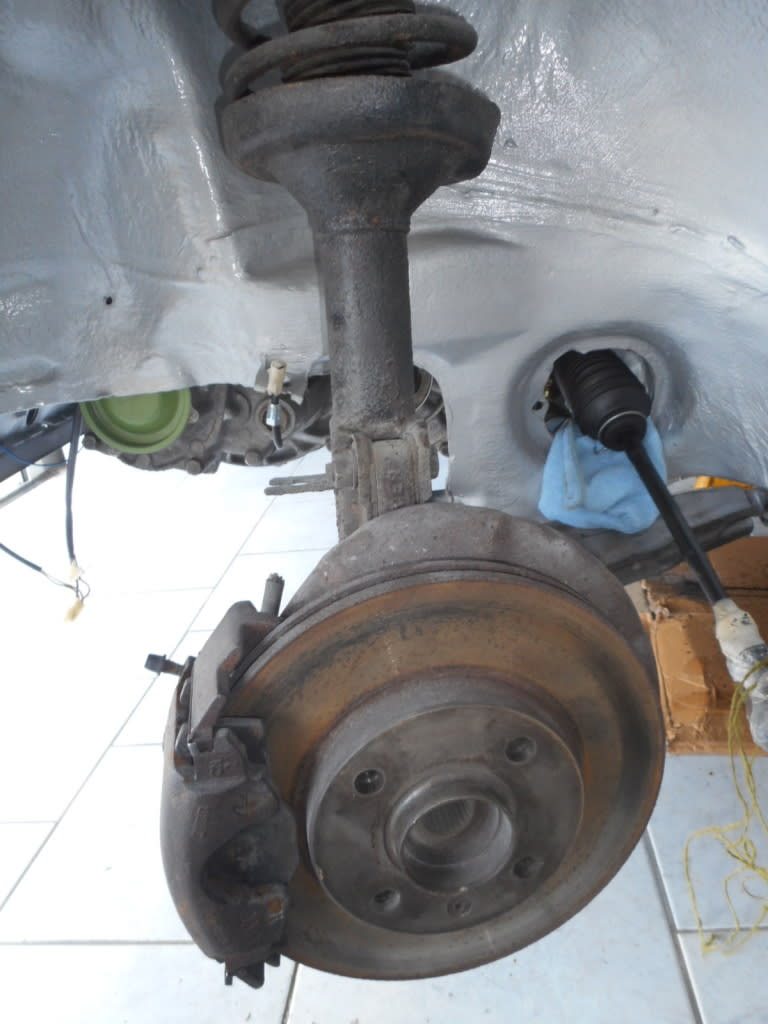
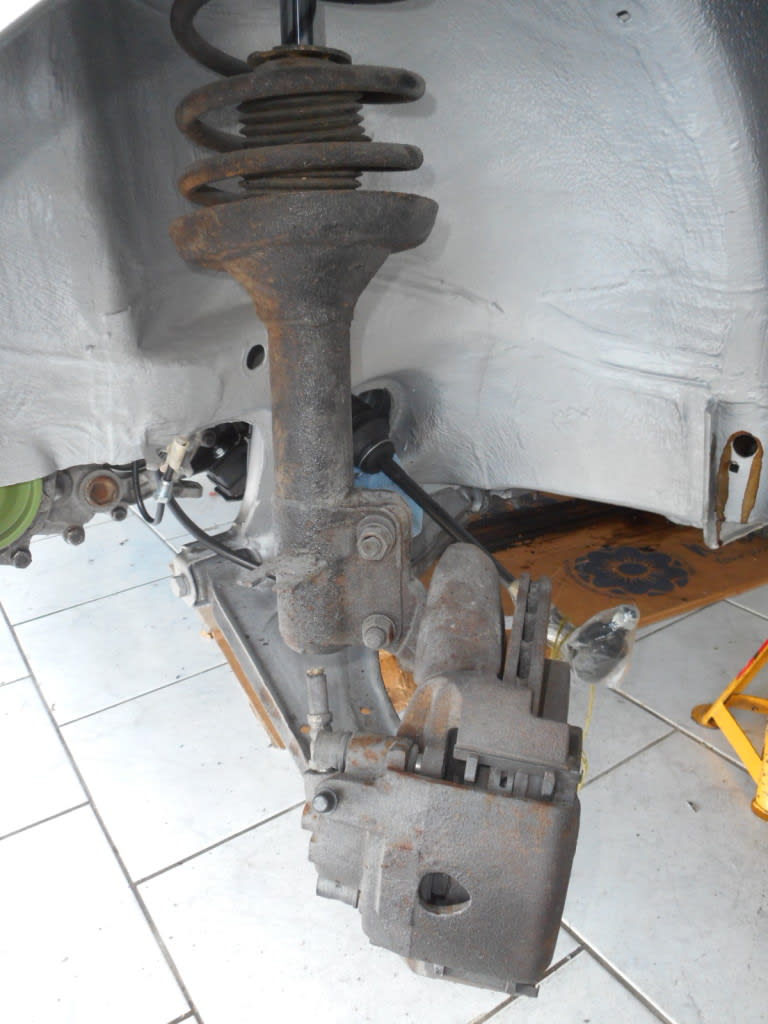
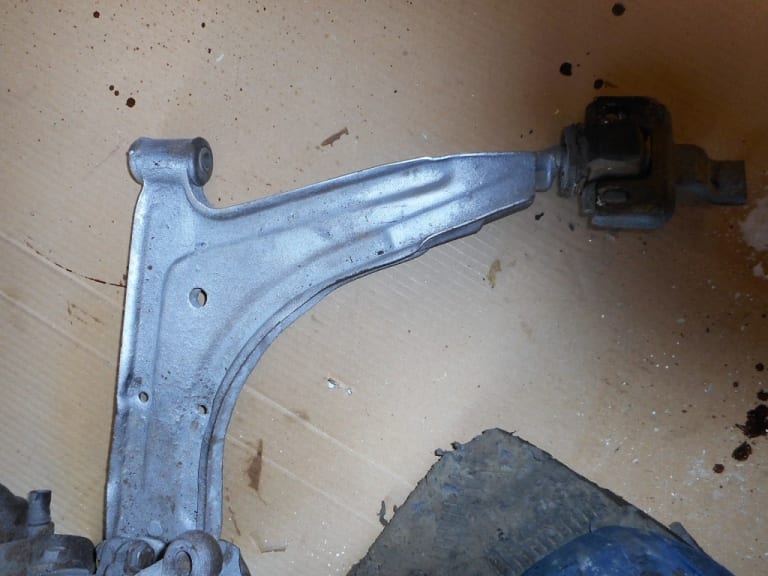
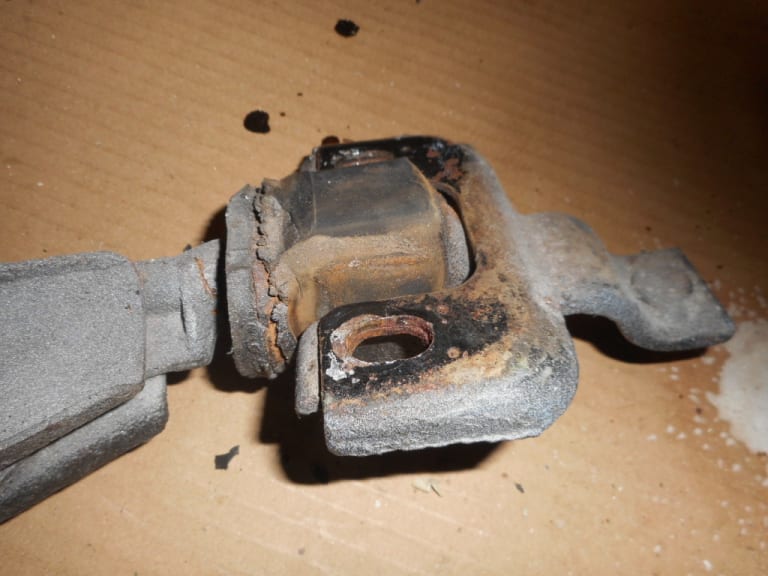
Front wishbones were badly corroded and had clearly had a lot of major knocks - they were far from true! so needed replacing. Same with the rear wishbone rubbers - badly deteriorated
1983 Golf GTi Campaign Edition, Diamond Silver
http://vwgolfmk1.org.uk/forum/index.php?page=topicview&id=projects%2Fyour-mk1-golfs_2%2F-tag-1983-campaign&redirected=1#post_1551531
http://vwgolfmk1.org.uk/forum/index.php?page=topicview&id=projects%2Fyour-mk1-golfs_2%2F-tag-1983-campaign&redirected=1#post_1551531
Posted
Old Timer


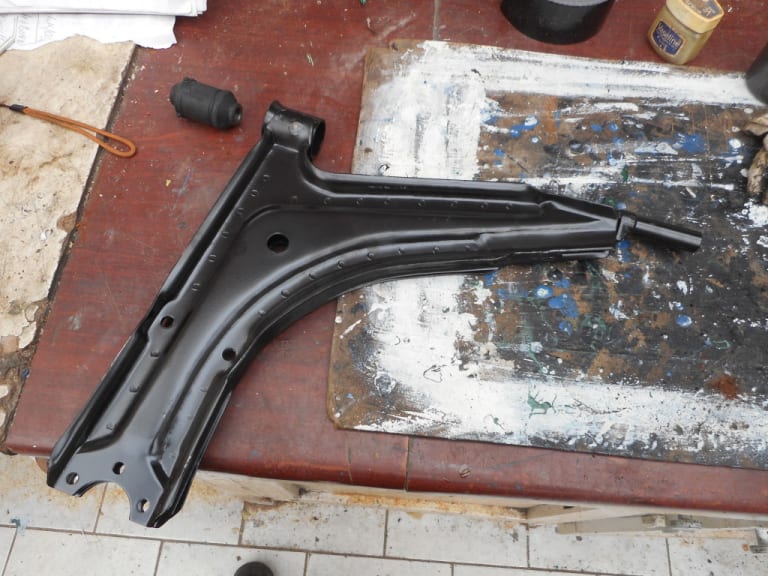
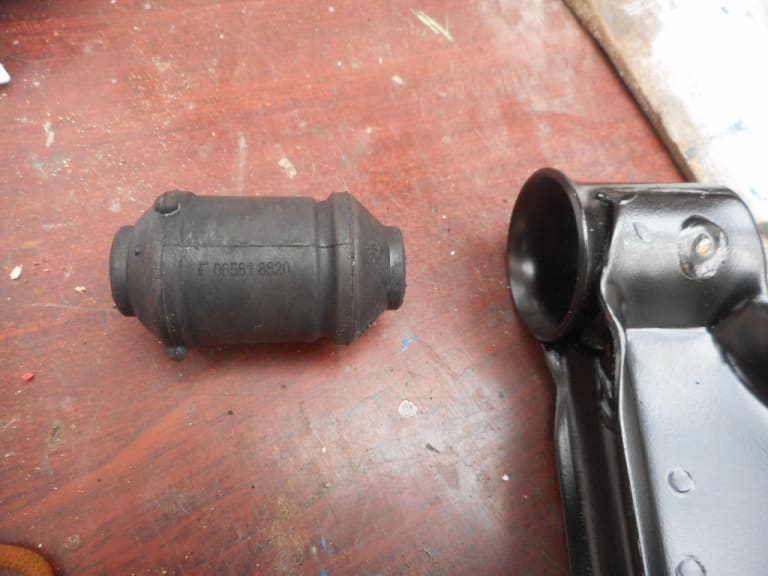
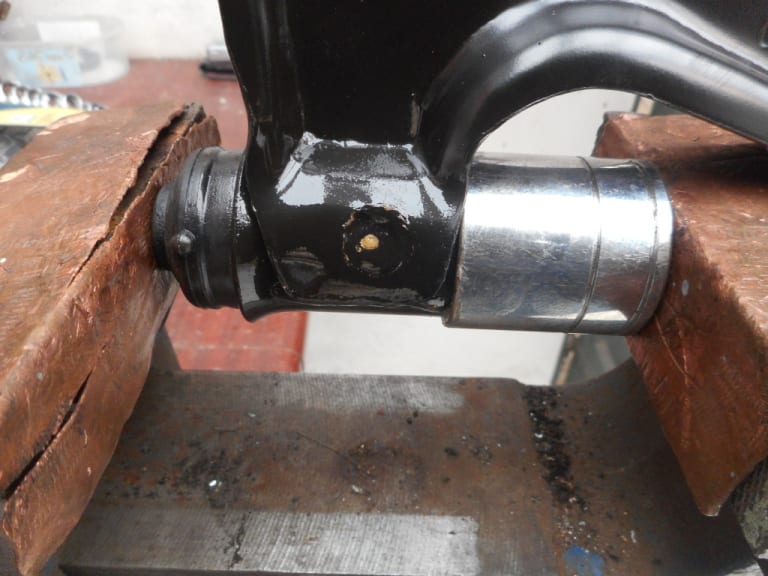
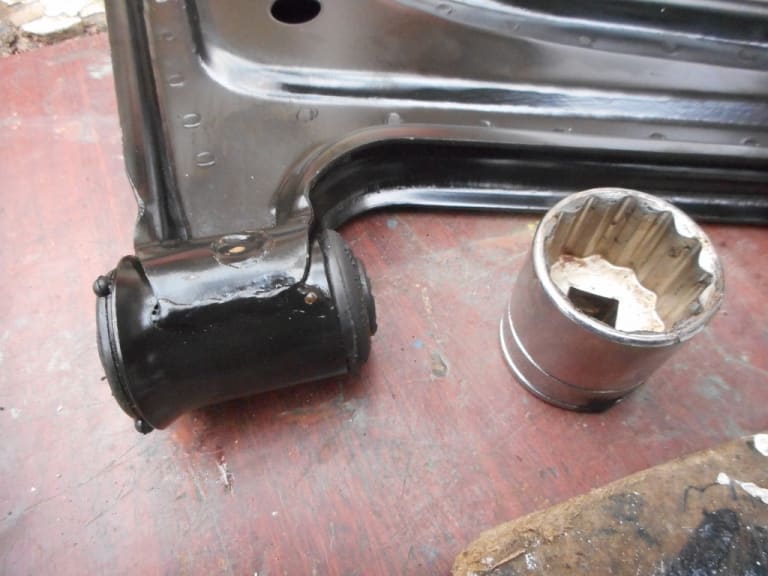
I found that I could do this using a large vice. Plenty of lubrication required.
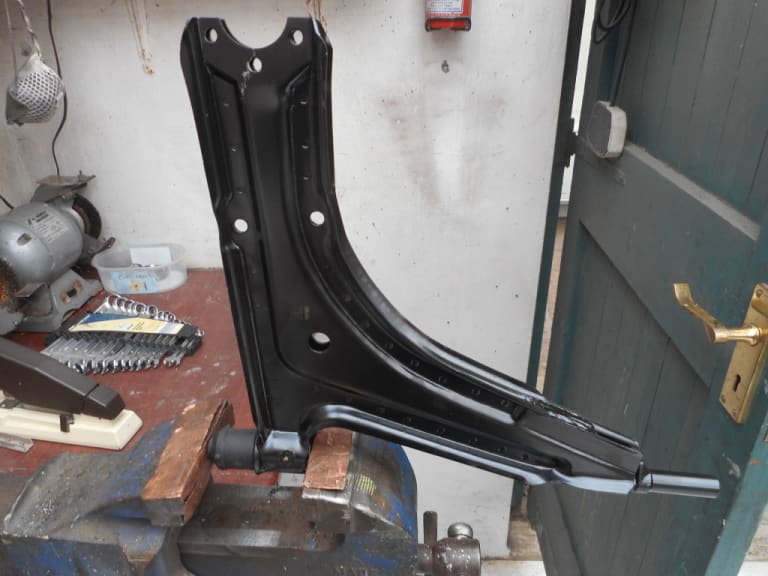

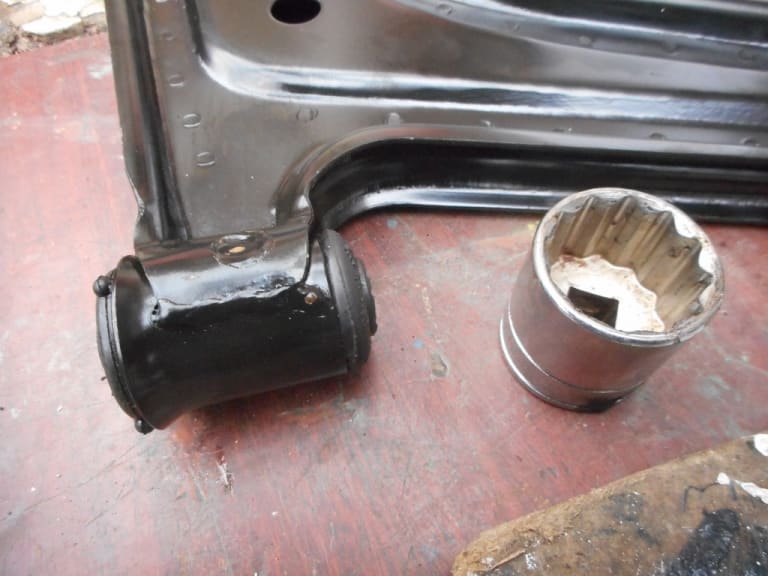
Once part way through I used a large diameter socket to enable the end of the bush to "pop" through.
Job done!
1983 Golf GTi Campaign Edition, Diamond Silver
http://vwgolfmk1.org.uk/forum/index.php?page=topicview&id=projects%2Fyour-mk1-golfs_2%2F-tag-1983-campaign&redirected=1#post_1551531
http://vwgolfmk1.org.uk/forum/index.php?page=topicview&id=projects%2Fyour-mk1-golfs_2%2F-tag-1983-campaign&redirected=1#post_1551531
Posted
Old Timer


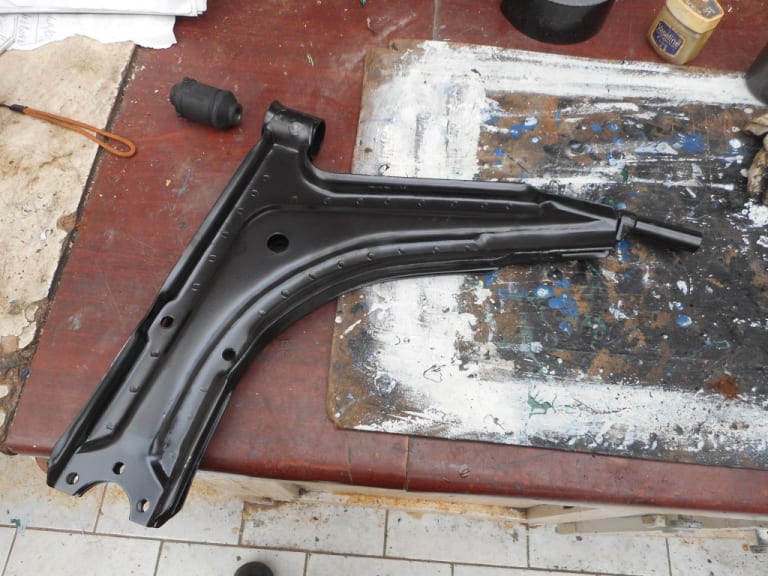
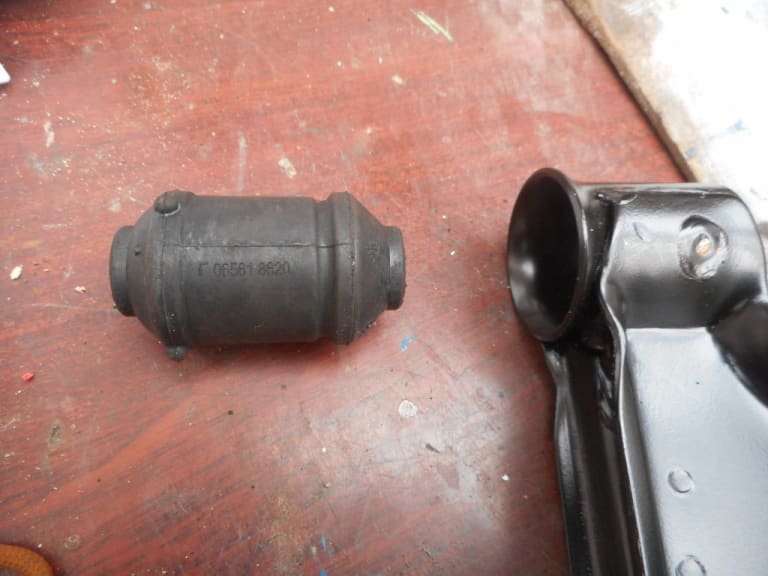
I found that I could do this using a large vice. Plenty of lubrication required.
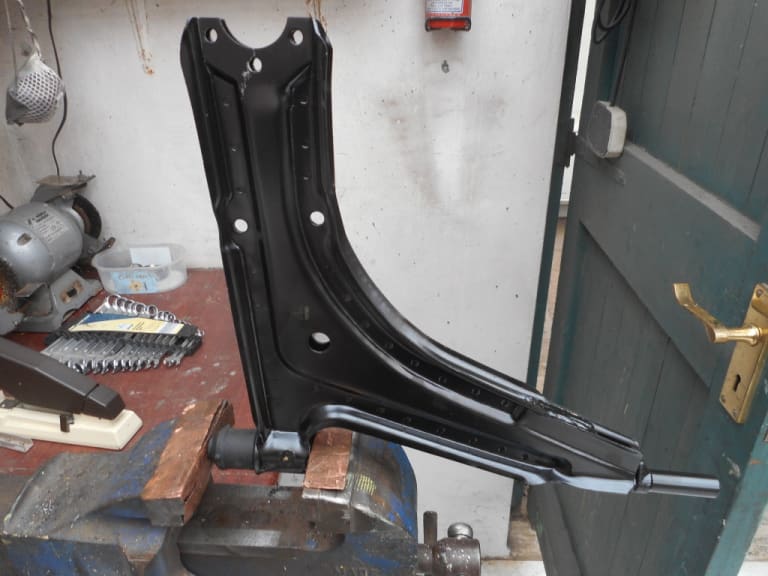
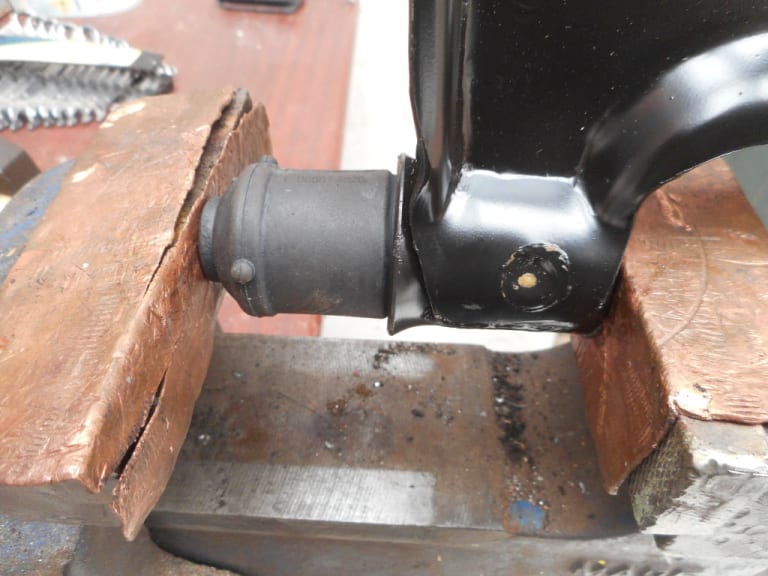
Once part way through I used a large diameter socket to enable the end of the bush to "pop" through.
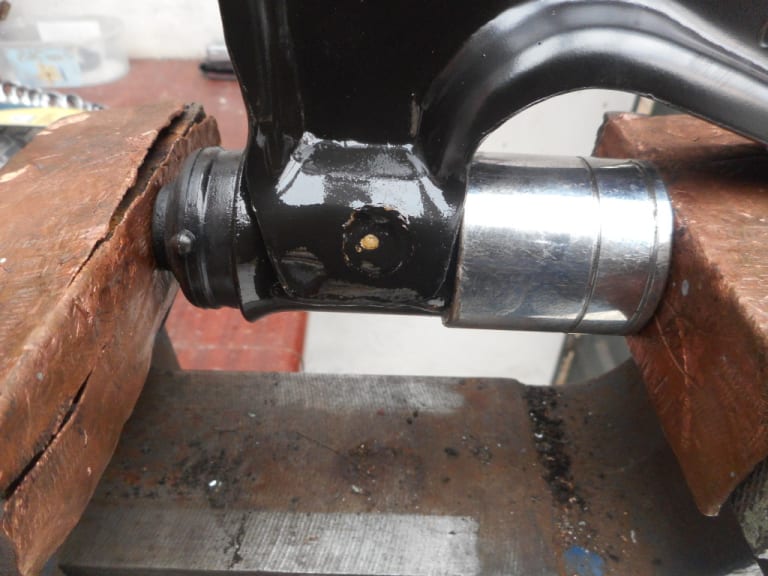
Job done!
1983 Golf GTi Campaign Edition, Diamond Silver
http://vwgolfmk1.org.uk/forum/index.php?page=topicview&id=projects%2Fyour-mk1-golfs_2%2F-tag-1983-campaign&redirected=1#post_1551531
http://vwgolfmk1.org.uk/forum/index.php?page=topicview&id=projects%2Fyour-mk1-golfs_2%2F-tag-1983-campaign&redirected=1#post_1551531
Posted
Old Timer
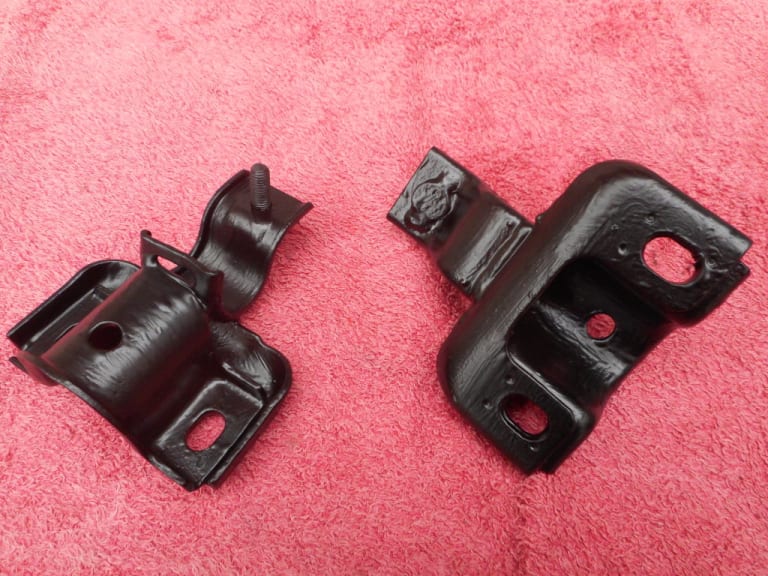


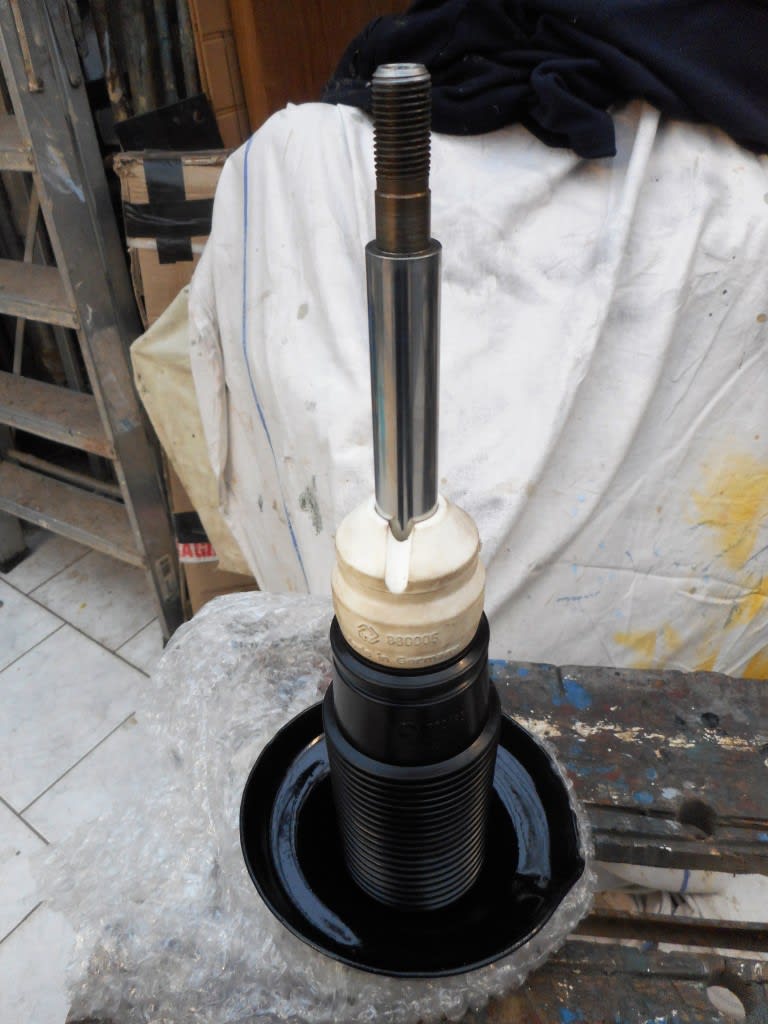
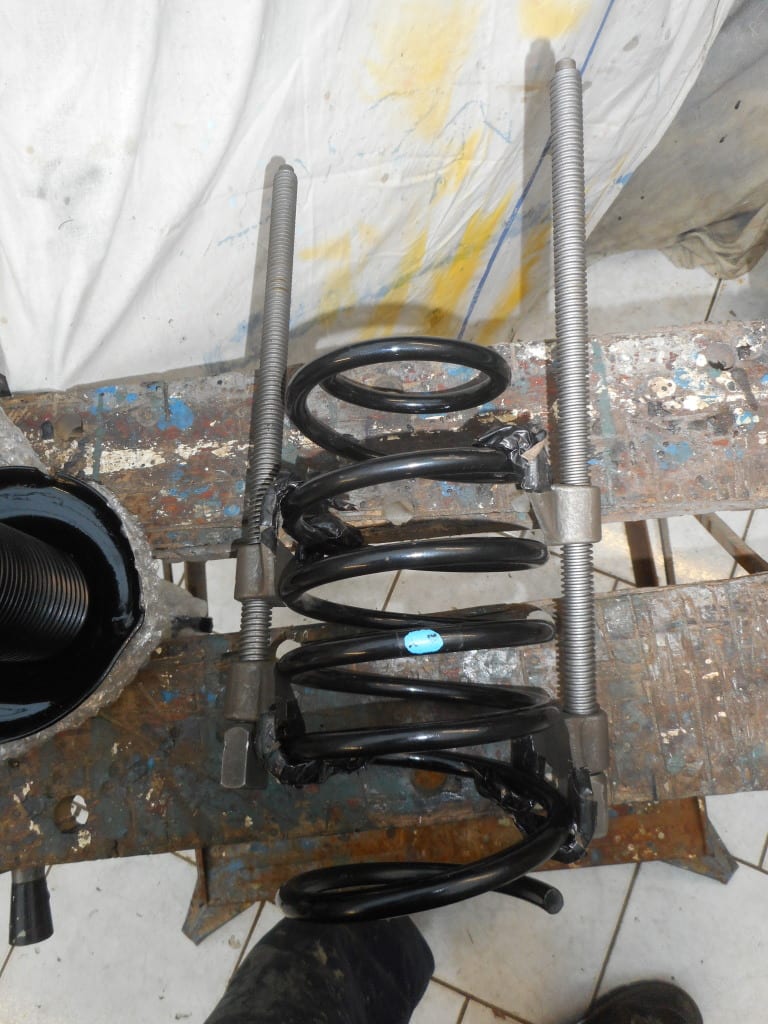
New top mounts
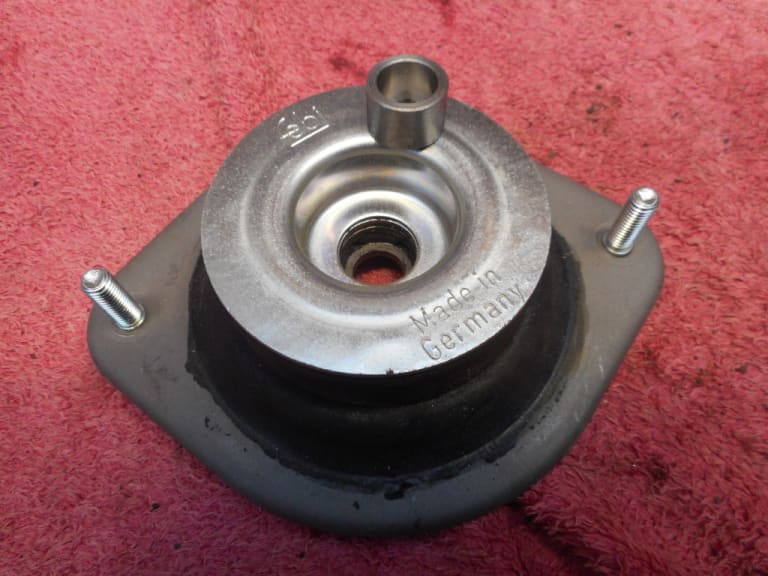
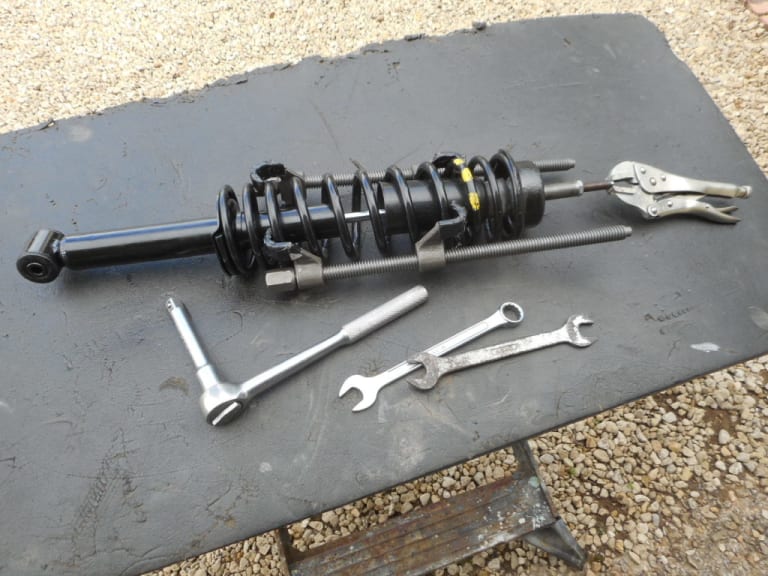
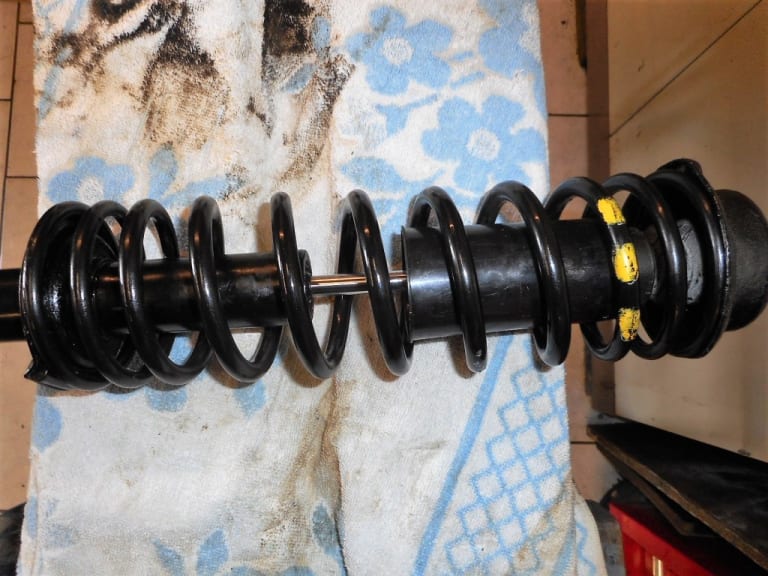
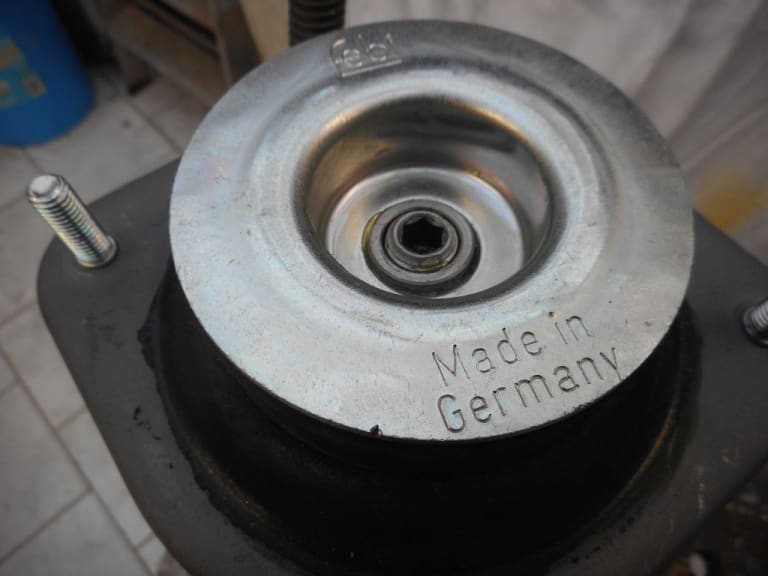
I have read some recent debates on the Facebook forum regarding movement in new top mounts. As can be seen clearly in the photo below, when the new spacer sleeve is fitted in to the new top mount - the spacer sleeve is proud of the mount. This will therefore allow a certain amount of movement once the top washer and nut is torqued up. I have to assume this is correct - as others have witnessed. Without this movement the bush in the strut would not have any movement and any movement from the strut would cause the engine compartment metal to flex. I have seen some people grind this sleeve flush with the mount and others pack it with washers to take up the slack. I am fitting these brand new parts as the manuals/parts list shows.
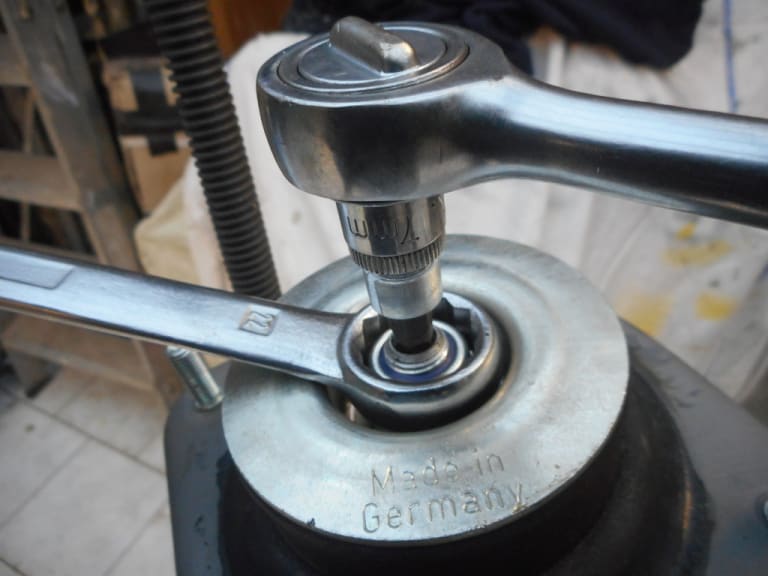
Tighening the top nut is quite tricky but with a 22mm ring spanner and 7mm hex bit it is okay.

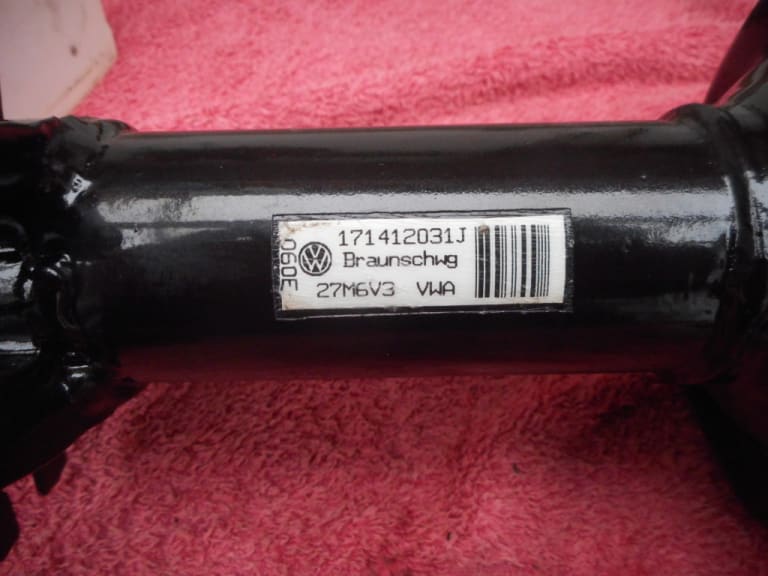
Finally I managed to salvage the original VAG sticker from the front struts that reattached after cleaning the struts.
1983 Golf GTi Campaign Edition, Diamond Silver
http://vwgolfmk1.org.uk/forum/index.php?page=topicview&id=projects%2Fyour-mk1-golfs_2%2F-tag-1983-campaign&redirected=1#post_1551531
http://vwgolfmk1.org.uk/forum/index.php?page=topicview&id=projects%2Fyour-mk1-golfs_2%2F-tag-1983-campaign&redirected=1#post_1551531
Posted
Old Timer


After removing the calliper I removed the calliper carrier.
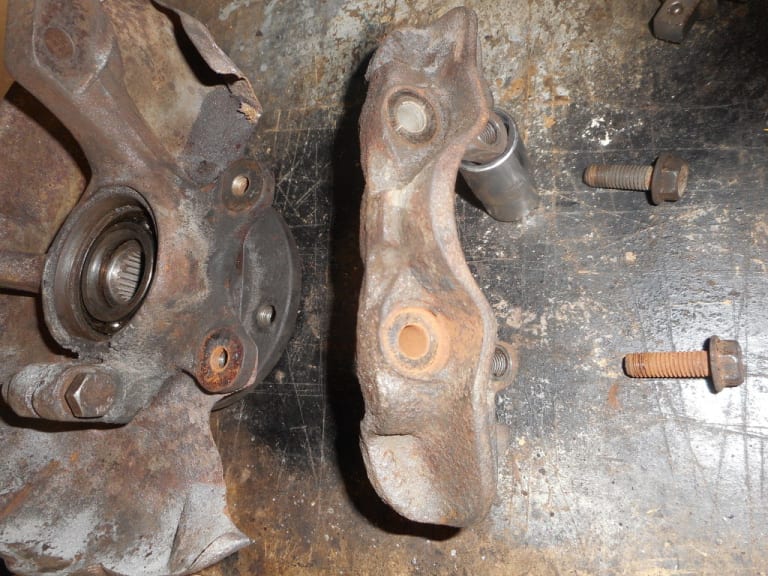
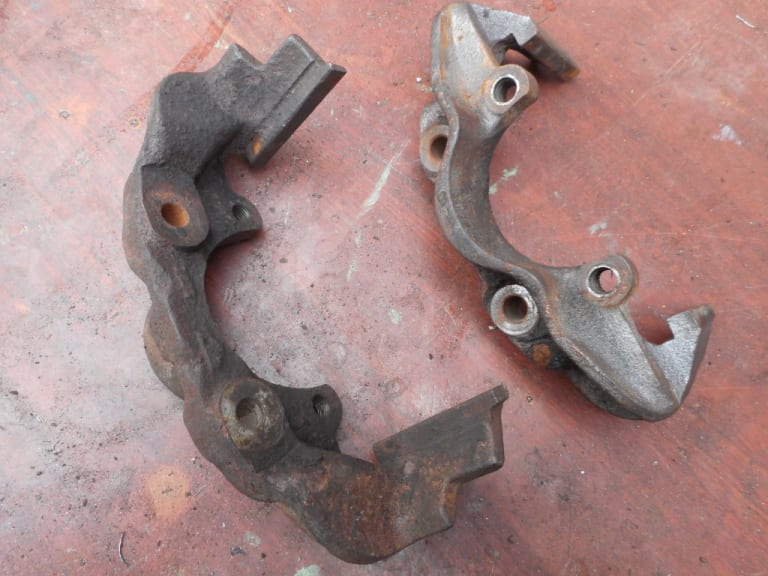
The callipers were now ready to strip down.
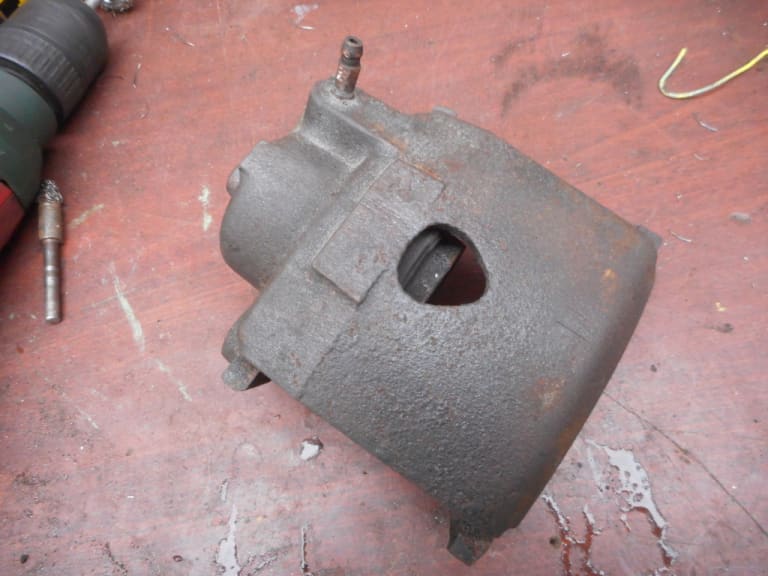
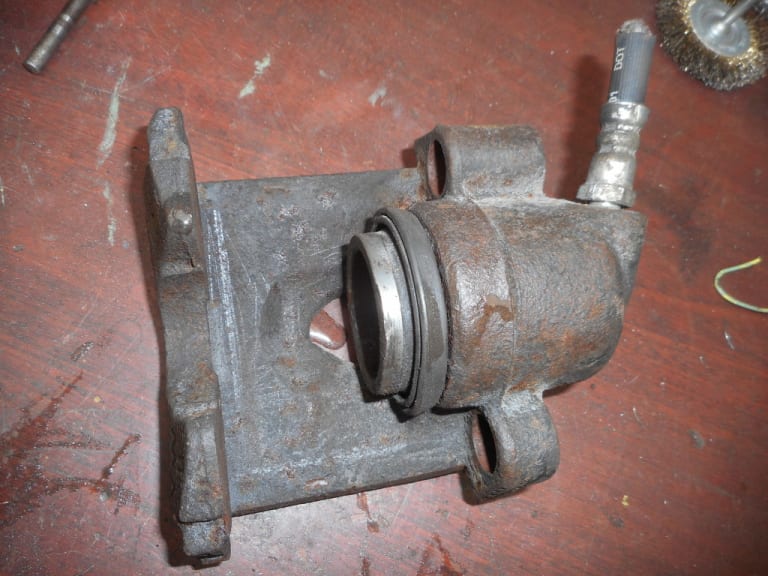
After removing the flexi brake line - I used a compressor and airline to "pop" the brake pistons out. I placed a thick cloth in front of the piston to prevent damage to the calliper. Only a very small amount of air was required to get them out.
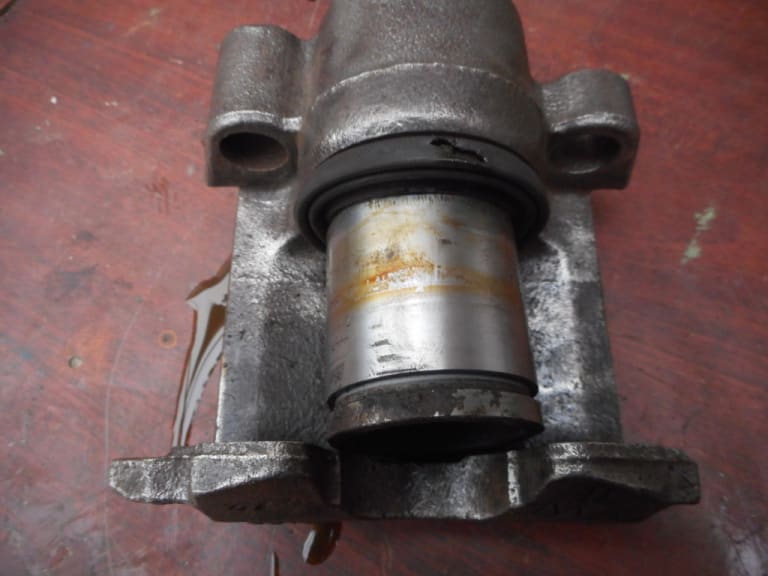
Not exactly in perfect clean condition!
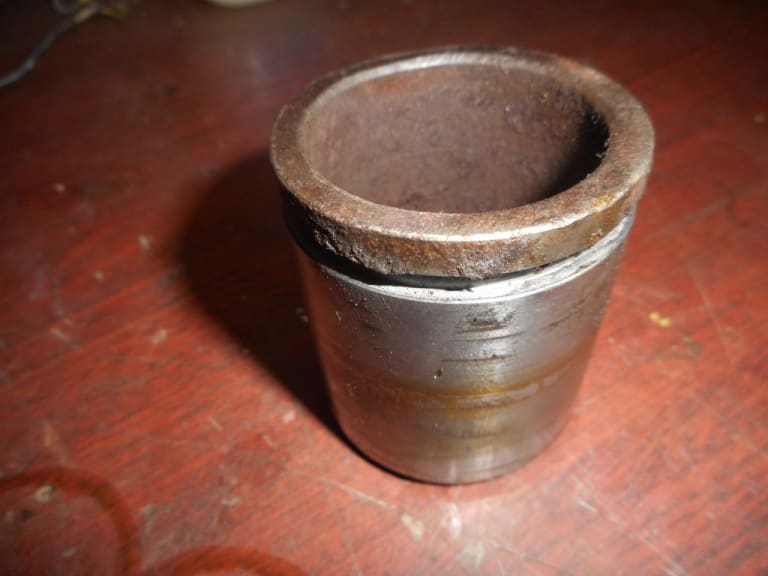
What I found in behind the piston was quite shocking. Considering it should be spotlessly clean the amount of gunge and flakes of rust was considerable!
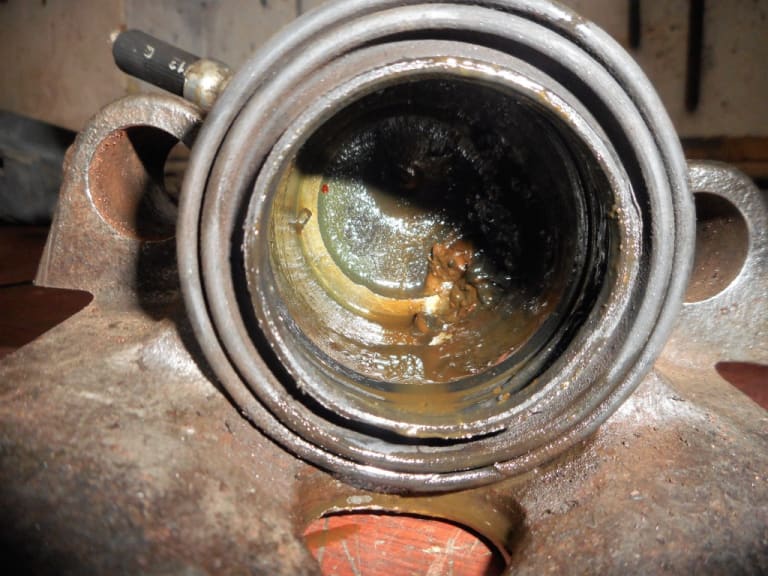
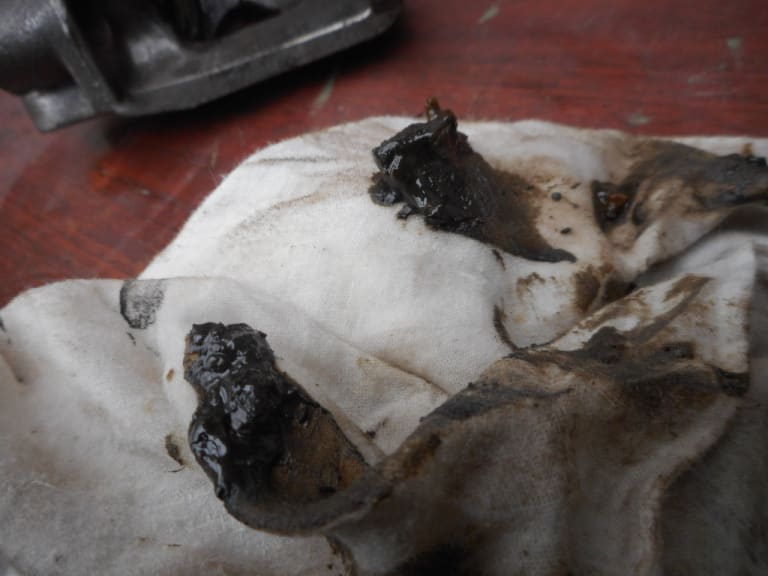
The dust seal was eased out next.
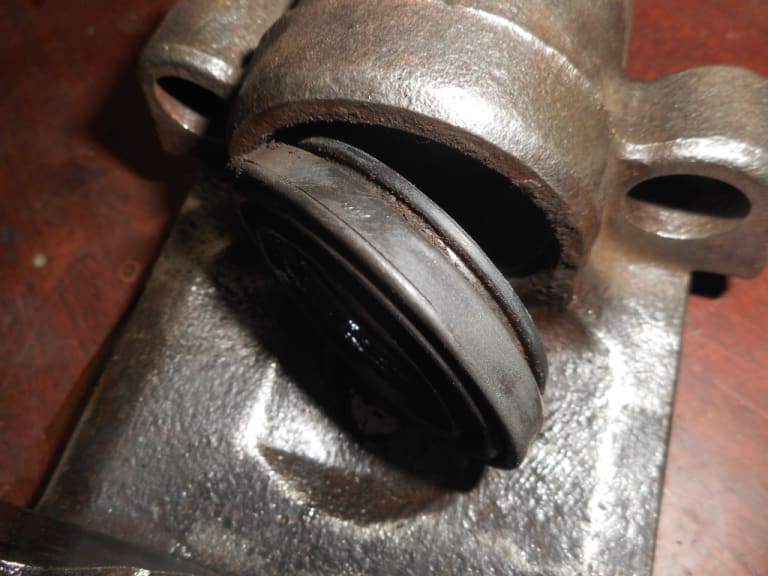
And finally the main piston seal

One stripped down brake calliper.

1983 Golf GTi Campaign Edition, Diamond Silver
http://vwgolfmk1.org.uk/forum/index.php?page=topicview&id=projects%2Fyour-mk1-golfs_2%2F-tag-1983-campaign&redirected=1#post_1551531
http://vwgolfmk1.org.uk/forum/index.php?page=topicview&id=projects%2Fyour-mk1-golfs_2%2F-tag-1983-campaign&redirected=1#post_1551531
Posted
Old Timer


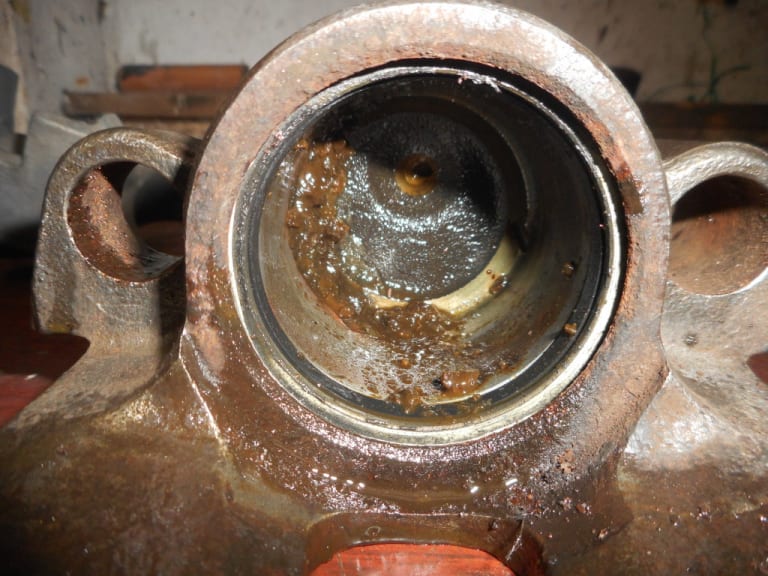
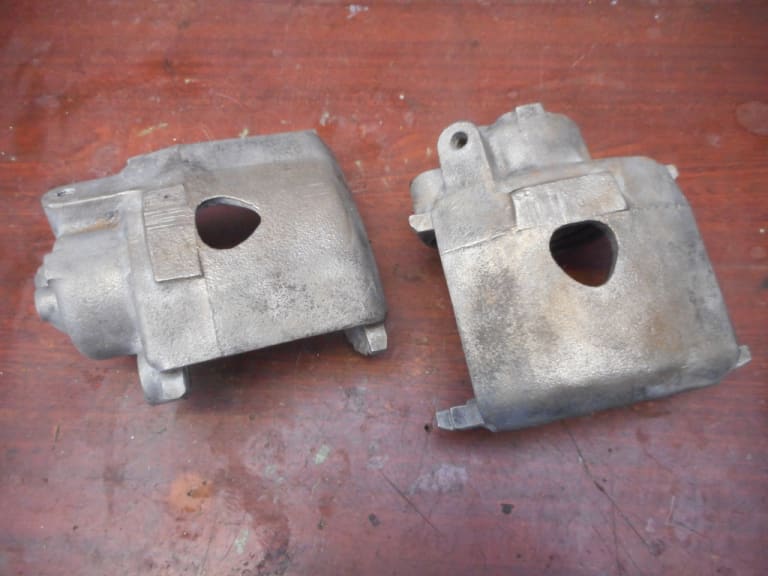
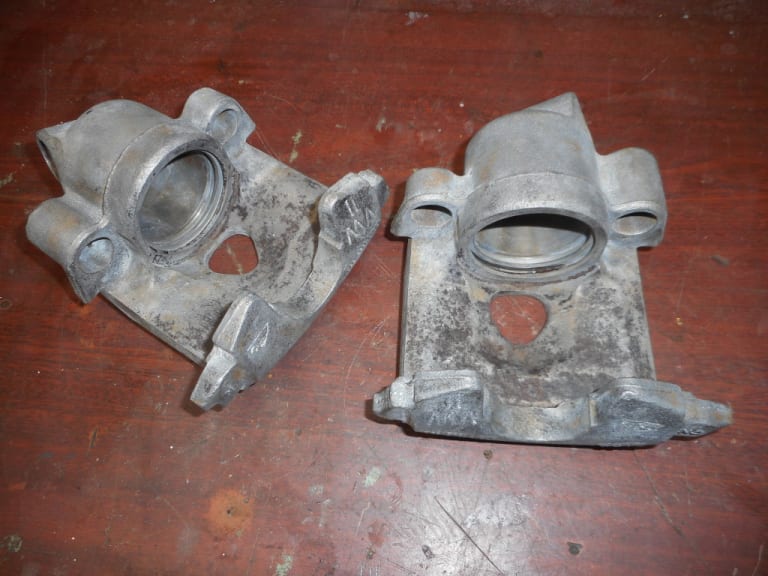
I didn't want to immerse the callipers in rust treatment for fear of damaging the cylinder linings. I therefore covered them in Bilt Hamber Deox Gel - that is applied in a thick layer - but not in the cylinder.
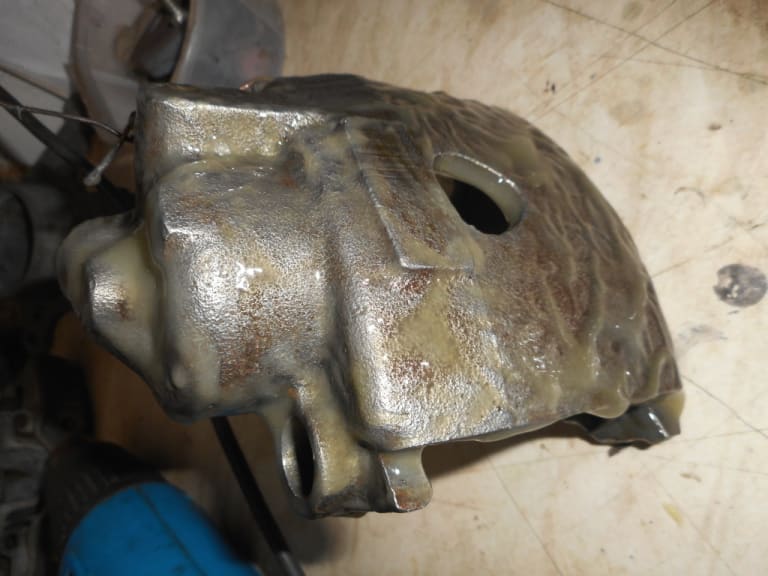
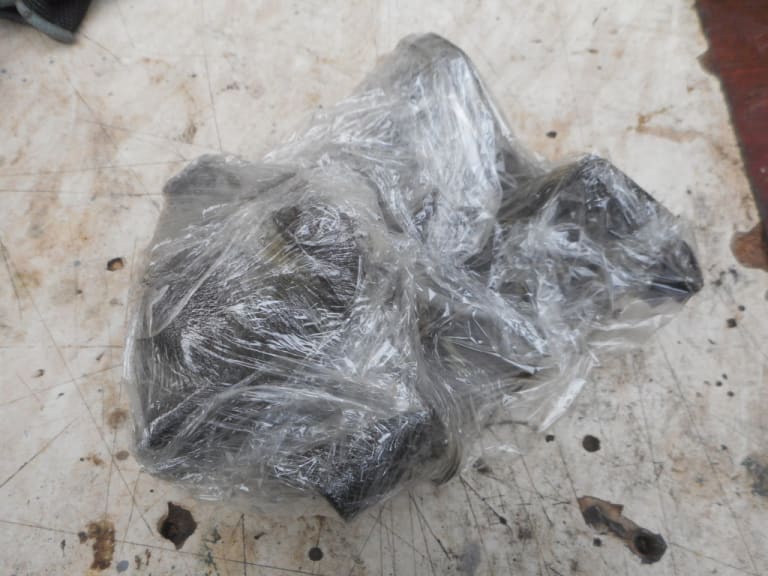
These were then wrapped in clingfilm to keep the gel from drying out.
After several sessions of adding more gel/washing they came up remarkably well.
1983 Golf GTi Campaign Edition, Diamond Silver
http://vwgolfmk1.org.uk/forum/index.php?page=topicview&id=projects%2Fyour-mk1-golfs_2%2F-tag-1983-campaign&redirected=1#post_1551531
http://vwgolfmk1.org.uk/forum/index.php?page=topicview&id=projects%2Fyour-mk1-golfs_2%2F-tag-1983-campaign&redirected=1#post_1551531
Posted
Old Timer


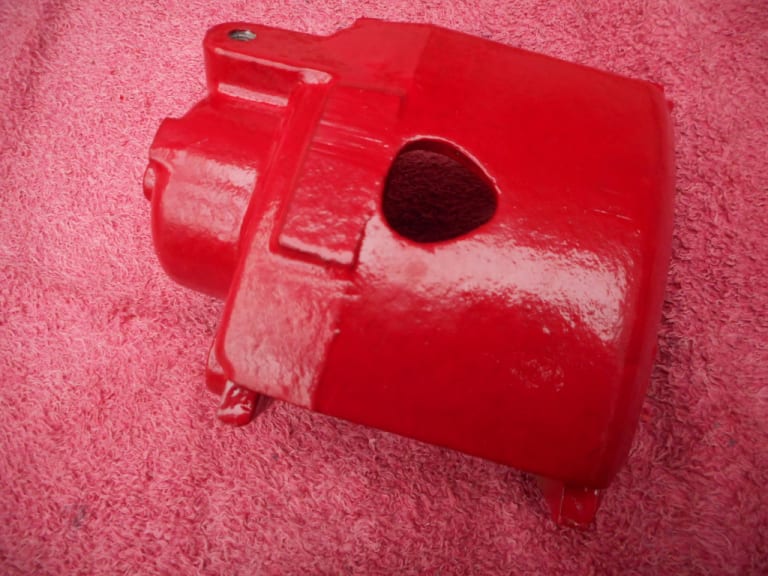
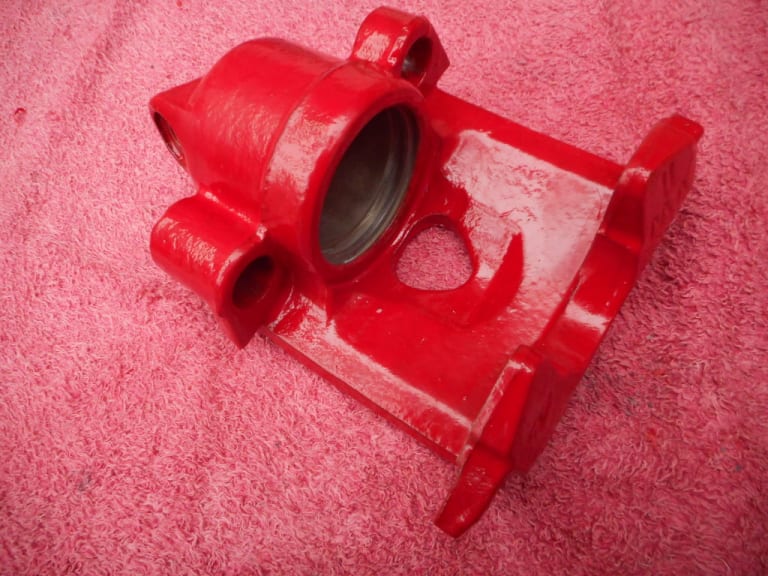
I chose to use Foliatec brake caliper paint. It was an excellent kit including everything you needed - gloves, wire brush, paintbrush, stirring stick, paint and hardener.
https://www.demon-tweeks.com/foliatec-brake-caliper-paint-and-engine-lacquer-243118/?sku=FOL2160&istCompanyId=a2904180-3a7d-4e56-b876-cf81c9512180&istFeedId=6fbc4b04-fd28-4ce1-8513-835c8f118690&istItemId=wptpiipxa&istBid=t&gclid=EAIaIQobChMI_YrczoCo7QIVT9PtCh1h4Q4GEAQYASABEgKlN_D_BwE&gclsrc=aw.ds
The hardener is poured into the paint tin and mixed - this gives you several workable hours before it cures. Having masked the areas I didn't want painted like the pad rubbing strips and especially the cylinder - I used a "dabbing" method of applying the paint rather than painting prevented brush marks. Results appear good - time will tell if it lasts.
1983 Golf GTi Campaign Edition, Diamond Silver
http://vwgolfmk1.org.uk/forum/index.php?page=topicview&id=projects%2Fyour-mk1-golfs_2%2F-tag-1983-campaign&redirected=1#post_1551531
http://vwgolfmk1.org.uk/forum/index.php?page=topicview&id=projects%2Fyour-mk1-golfs_2%2F-tag-1983-campaign&redirected=1#post_1551531
Posted
Old Timer


http://biggred.co.uk/brake-caliper-piston-repair-kit
This included the new seals, new piston, silicon grease, and new bolt rubbers.
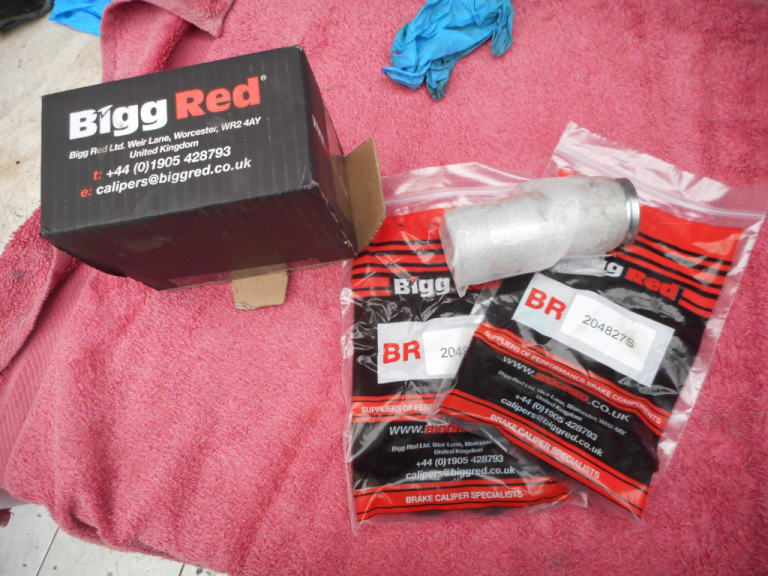
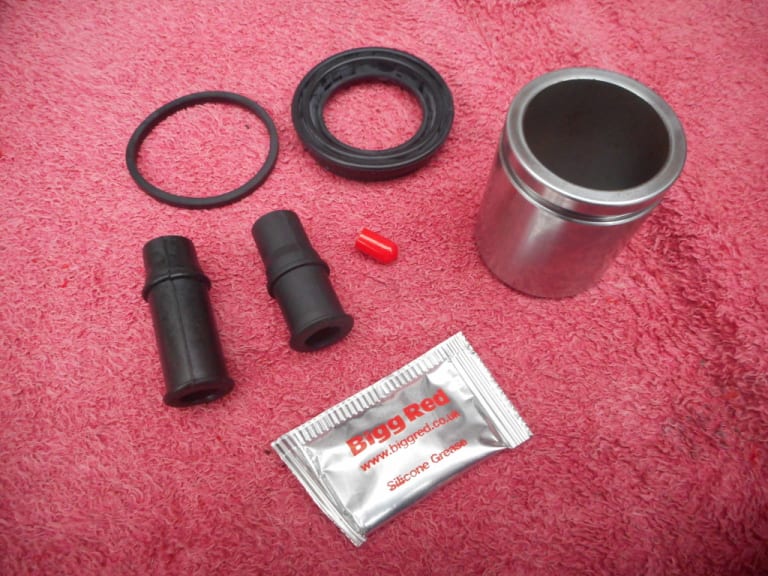
First fit the new piston seal into the cylinder - nice and easy. Then slightly more tricky to fit the new piston dust seal. Having watched online videos I found the easiest method was to push the seal right over the piston - to the far end, then gently (and a bit fiddly) ease the outer part of the seal into the groove in the cylinder mouth. With the aid of the silicone grease I could then gently push the piston into the cylinder.
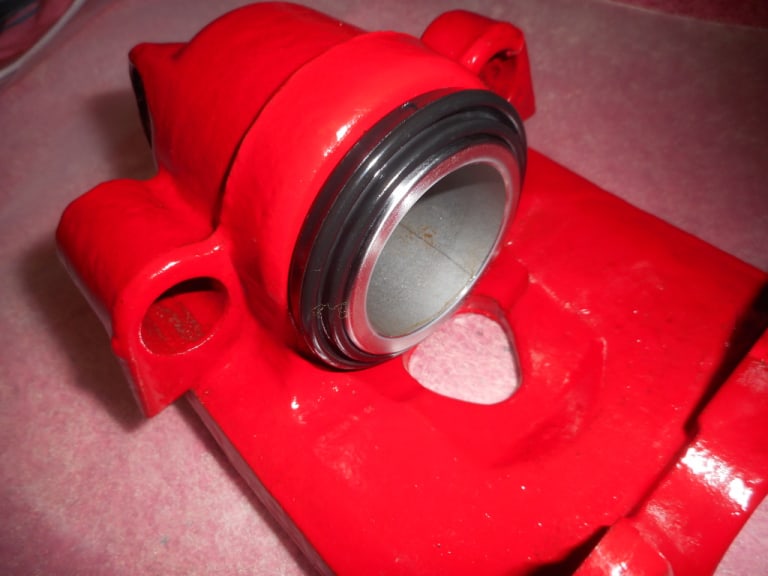
The push in the new bolt rubbers,
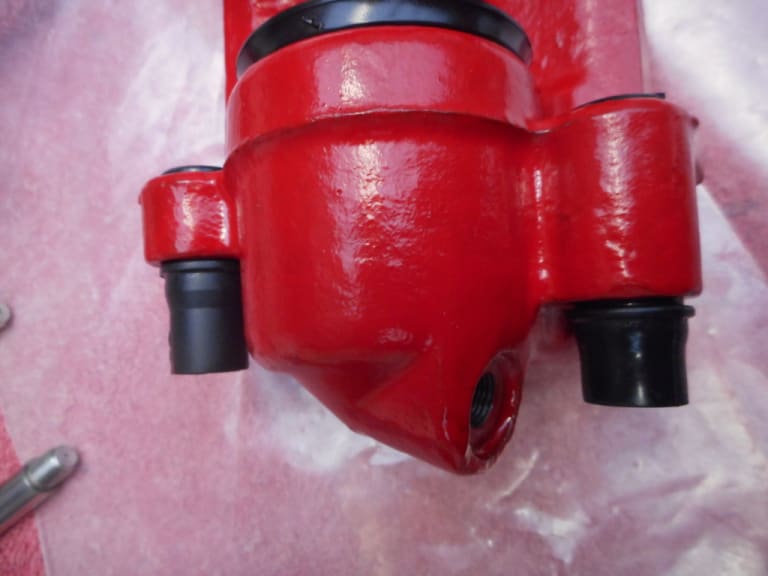
And reattach the calliper housing to the calliper,
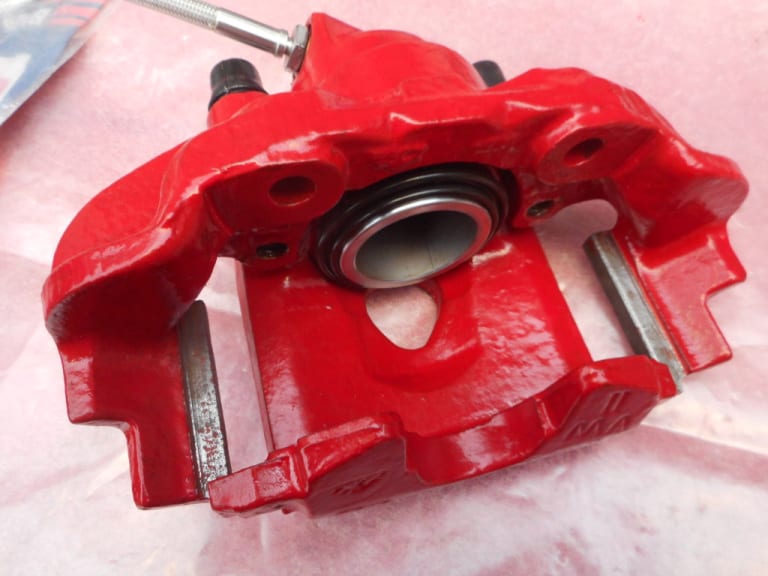
New bleed nipple - ready to go!!!
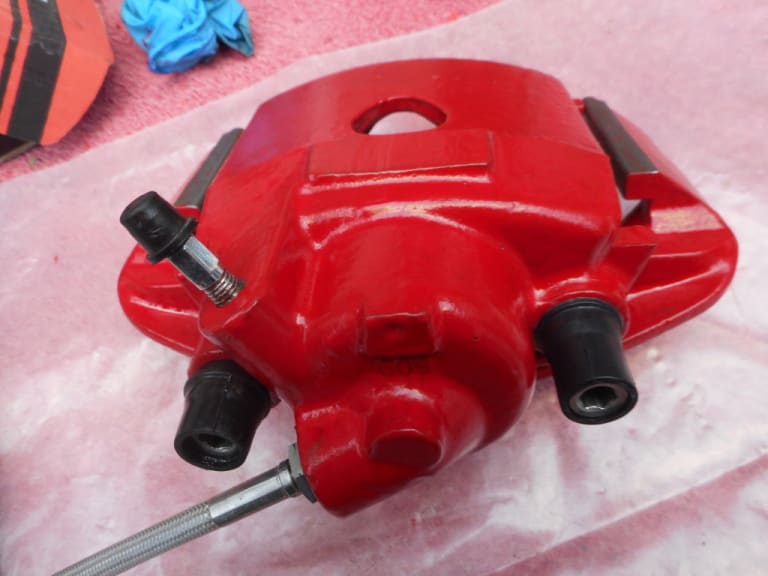
This is an excellent video on the process.
https://www.youtube.com/watch?v=iCMpI7Bl1Bc
1983 Golf GTi Campaign Edition, Diamond Silver
http://vwgolfmk1.org.uk/forum/index.php?page=topicview&id=projects%2Fyour-mk1-golfs_2%2F-tag-1983-campaign&redirected=1#post_1551531
http://vwgolfmk1.org.uk/forum/index.php?page=topicview&id=projects%2Fyour-mk1-golfs_2%2F-tag-1983-campaign&redirected=1#post_1551531
Posted
Old Timer


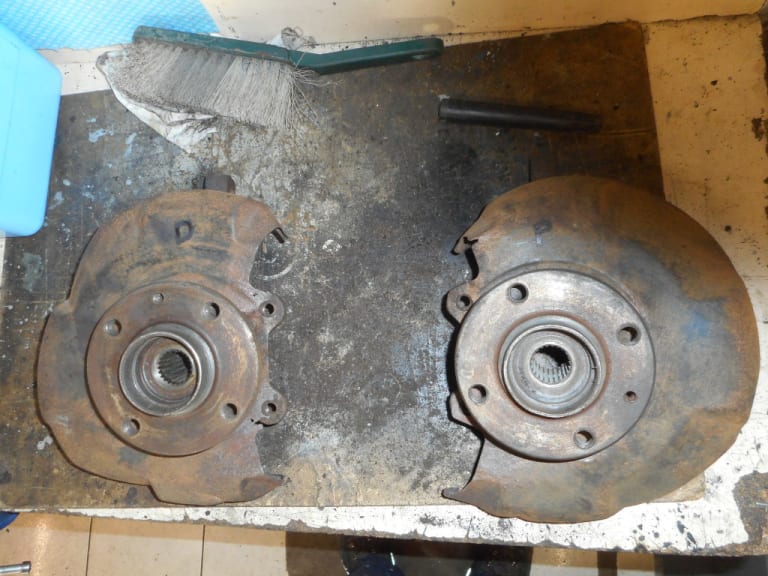
There was no way I could get the front hubs out of the front carriers. The bearings were just too tight.
I therefore took them along to my friendly local garage and for £10 they pressed out the front hubs and pressed out the old front bearings.
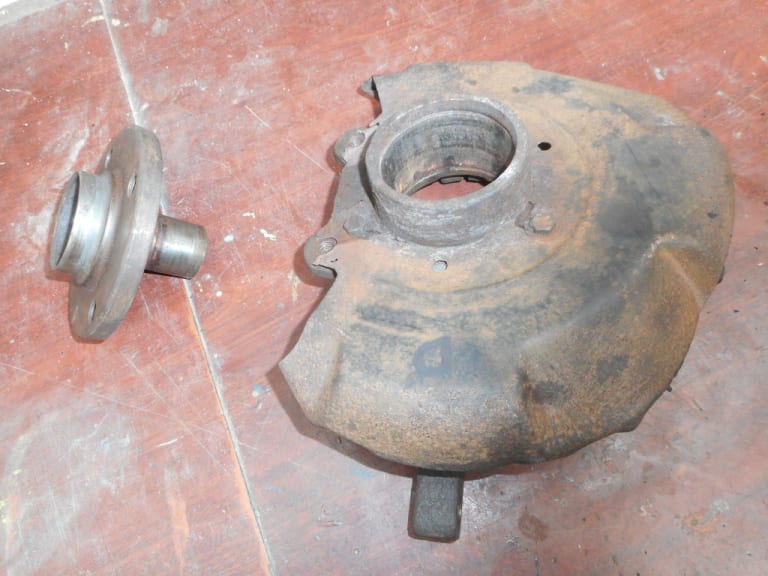
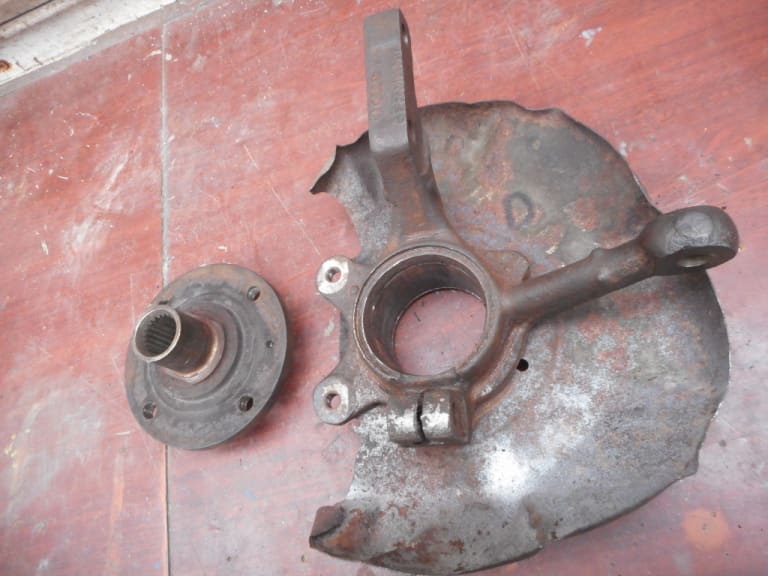
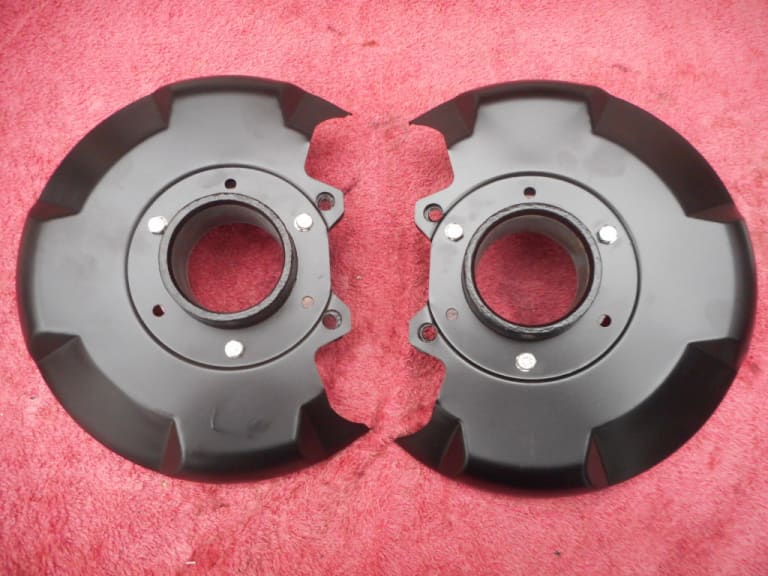
Removing the old rusty/partly rotten brake splash guards was fun!!! All but one bolt came out easily after applying plenty of heat - but one inevitably broke off! I had to drill this out and re-tap the hole.

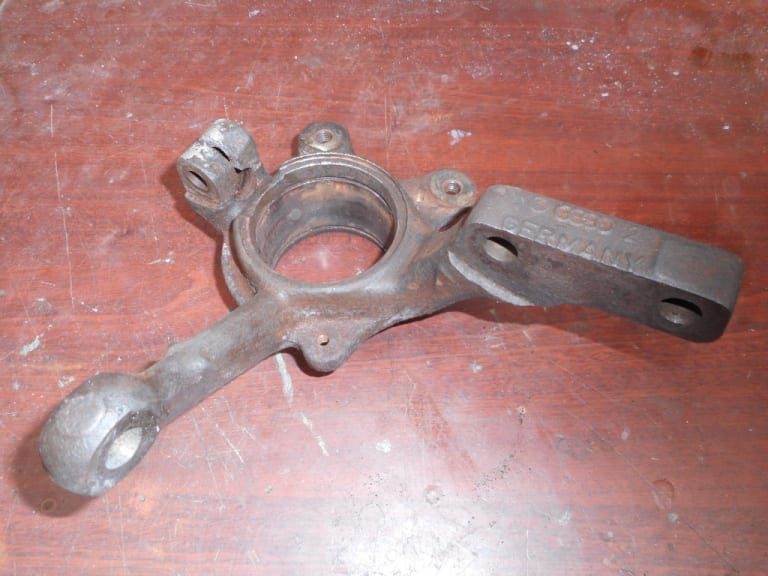
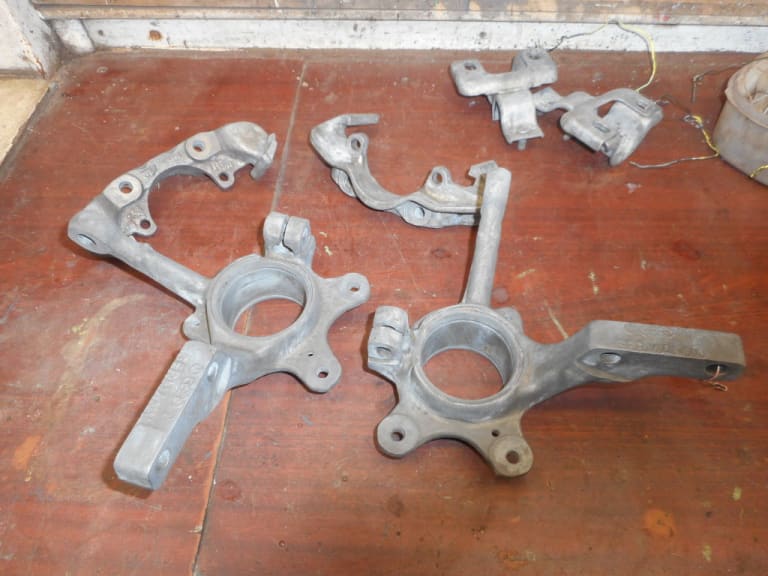
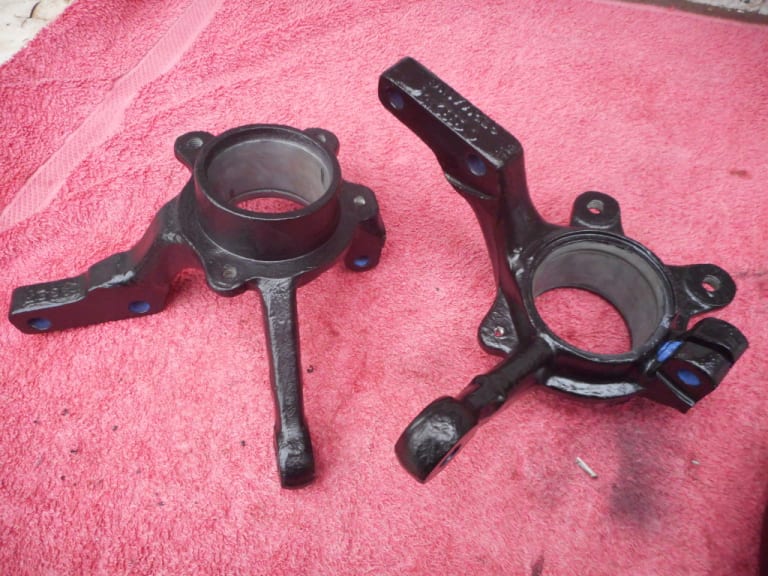
I put the hub carriers into a solution of hot Bilt Hamber Deox solution and used an aquarium heater to keep it hot.

Great results!
These were then painted in Rustbuster Epoxy
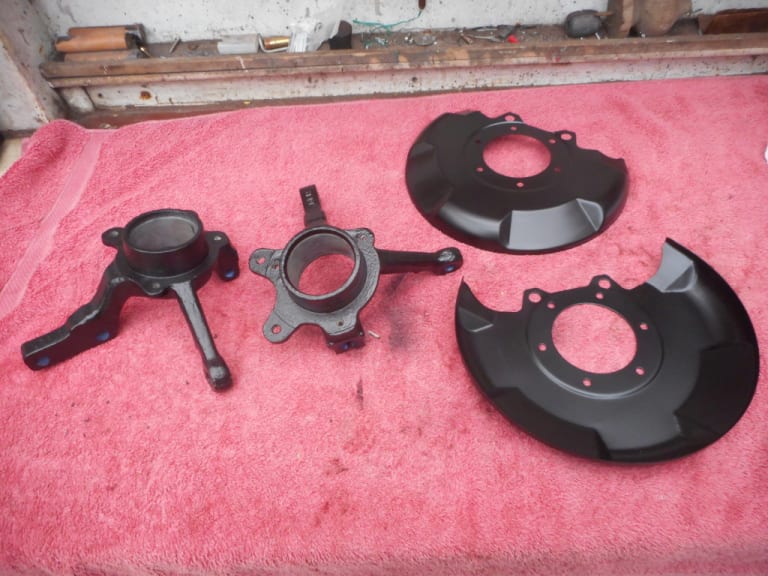
Now to reassemble

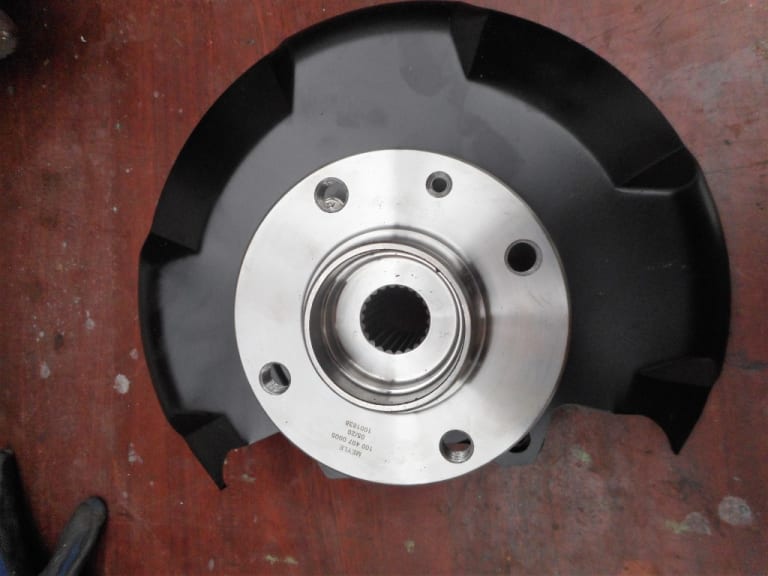
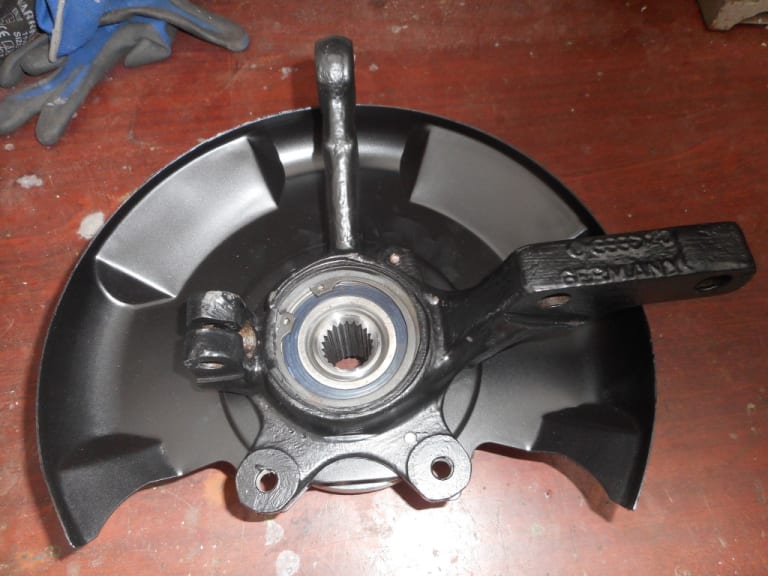
The returned to my local garage who for £20 pressed in new front wheel bearings and new front wheel hubs.
1983 Golf GTi Campaign Edition, Diamond Silver
http://vwgolfmk1.org.uk/forum/index.php?page=topicview&id=projects%2Fyour-mk1-golfs_2%2F-tag-1983-campaign&redirected=1#post_1551531
http://vwgolfmk1.org.uk/forum/index.php?page=topicview&id=projects%2Fyour-mk1-golfs_2%2F-tag-1983-campaign&redirected=1#post_1551531
Posted
Old Timer


"TAG" - 1983 Campaign restoration blog
Sent from my H3113 using Tapatalk
Posted
Old Timer


1983 Golf GTi Campaign Edition, Diamond Silver
http://vwgolfmk1.org.uk/forum/index.php?page=topicview&id=projects%2Fyour-mk1-golfs_2%2F-tag-1983-campaign&redirected=1#post_1551531
http://vwgolfmk1.org.uk/forum/index.php?page=topicview&id=projects%2Fyour-mk1-golfs_2%2F-tag-1983-campaign&redirected=1#post_1551531
Posted
Old Timer


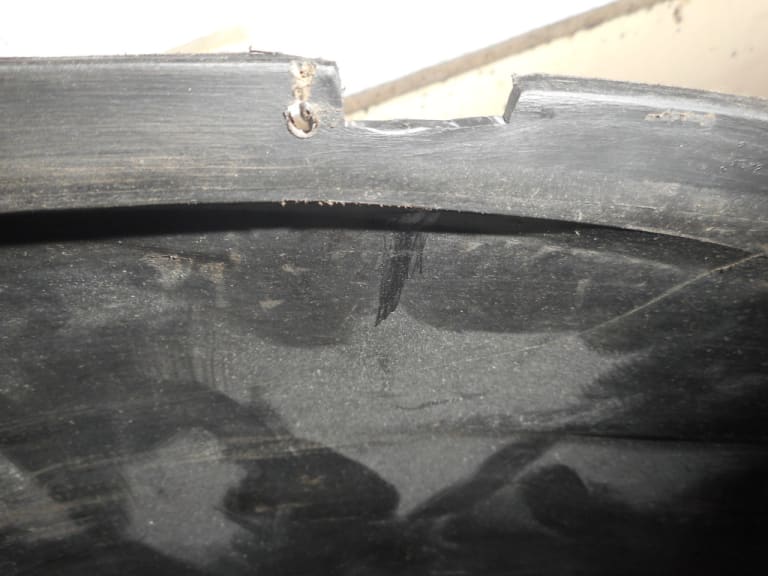
Using a soldering iron I could melt these into place as repair sections - then drill a new hold for the speed nut. Also used the soldering iron to melt over the odd holes. Not the neatest but fully repaired.

1983 Golf GTi Campaign Edition, Diamond Silver
http://vwgolfmk1.org.uk/forum/index.php?page=topicview&id=projects%2Fyour-mk1-golfs_2%2F-tag-1983-campaign&redirected=1#post_1551531
http://vwgolfmk1.org.uk/forum/index.php?page=topicview&id=projects%2Fyour-mk1-golfs_2%2F-tag-1983-campaign&redirected=1#post_1551531
Posted
Old Timer


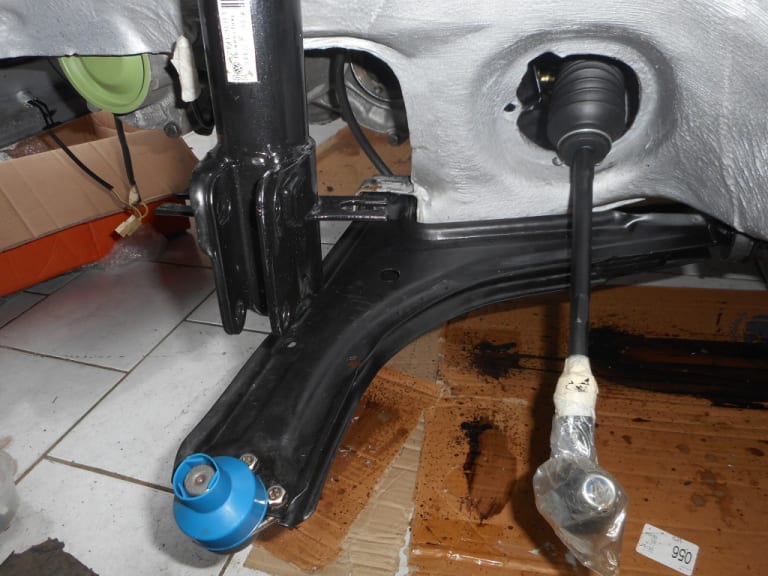
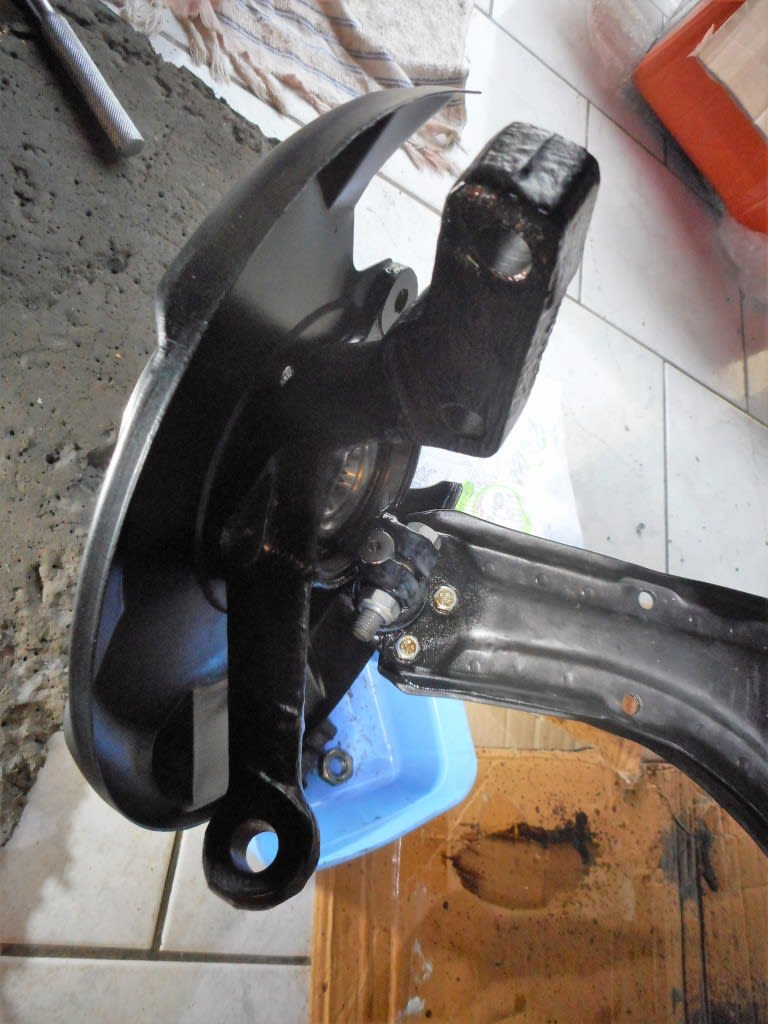
..and front wheel hub carrier
1983 Golf GTi Campaign Edition, Diamond Silver
http://vwgolfmk1.org.uk/forum/index.php?page=topicview&id=projects%2Fyour-mk1-golfs_2%2F-tag-1983-campaign&redirected=1#post_1551531
http://vwgolfmk1.org.uk/forum/index.php?page=topicview&id=projects%2Fyour-mk1-golfs_2%2F-tag-1983-campaign&redirected=1#post_1551531
Posted
Old Timer


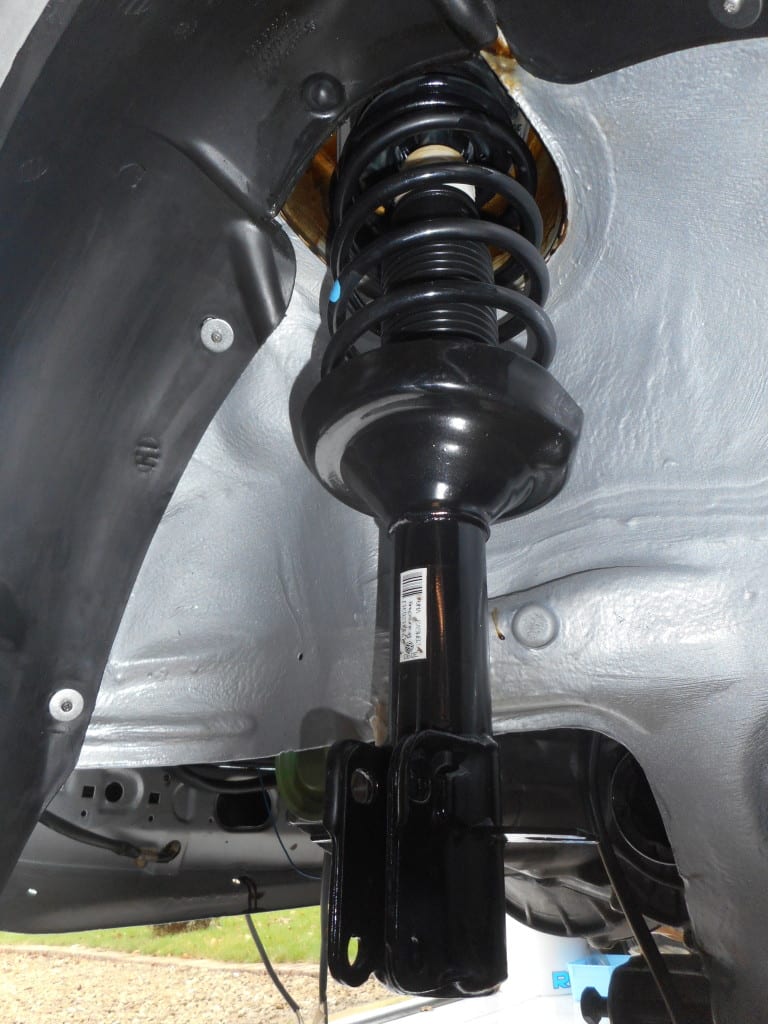
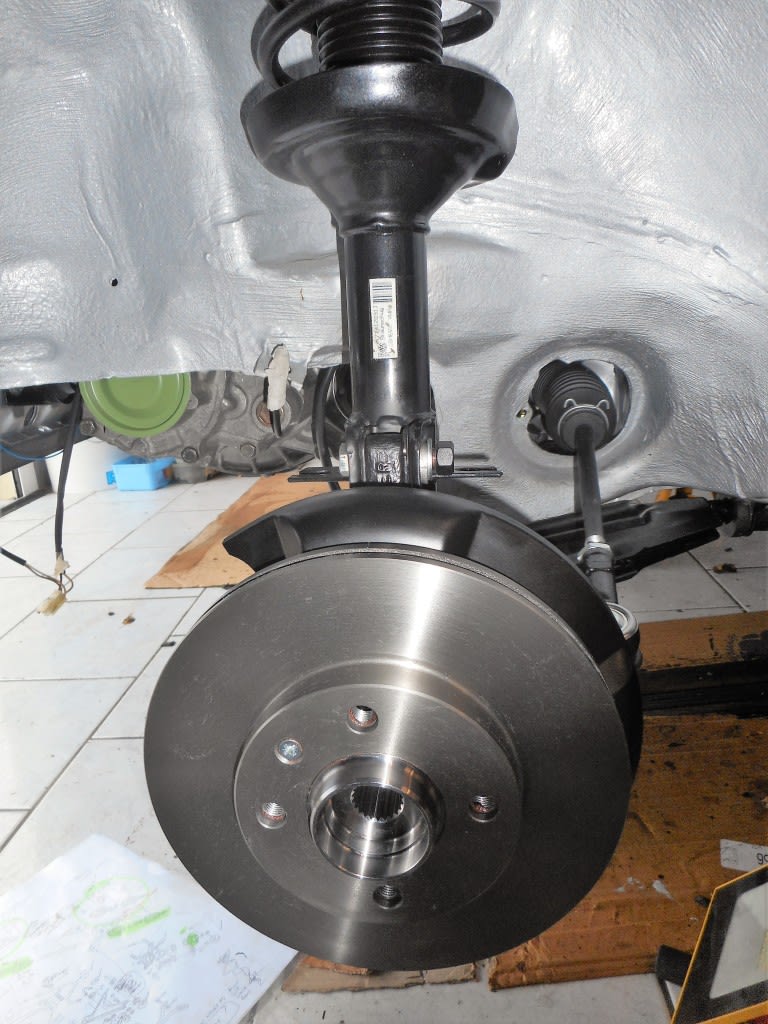
New Brembo discs…
1983 Golf GTi Campaign Edition, Diamond Silver
http://vwgolfmk1.org.uk/forum/index.php?page=topicview&id=projects%2Fyour-mk1-golfs_2%2F-tag-1983-campaign&redirected=1#post_1551531
http://vwgolfmk1.org.uk/forum/index.php?page=topicview&id=projects%2Fyour-mk1-golfs_2%2F-tag-1983-campaign&redirected=1#post_1551531
Posted
Old Timer


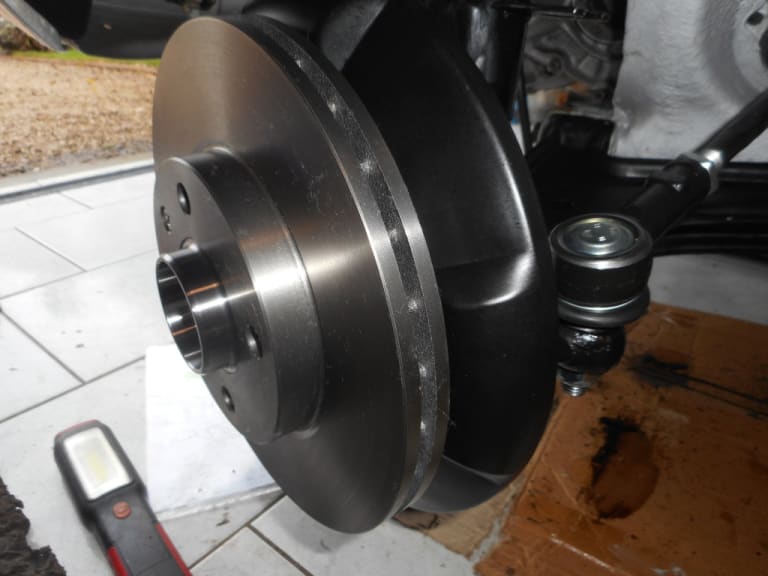
Calliper carrier….
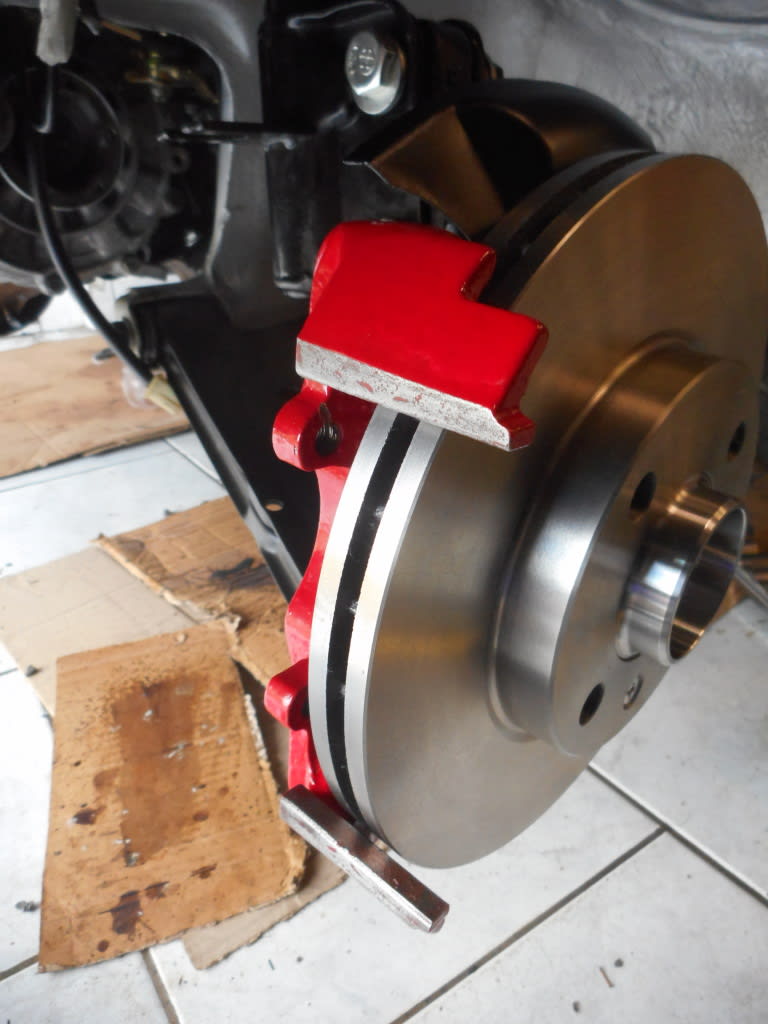

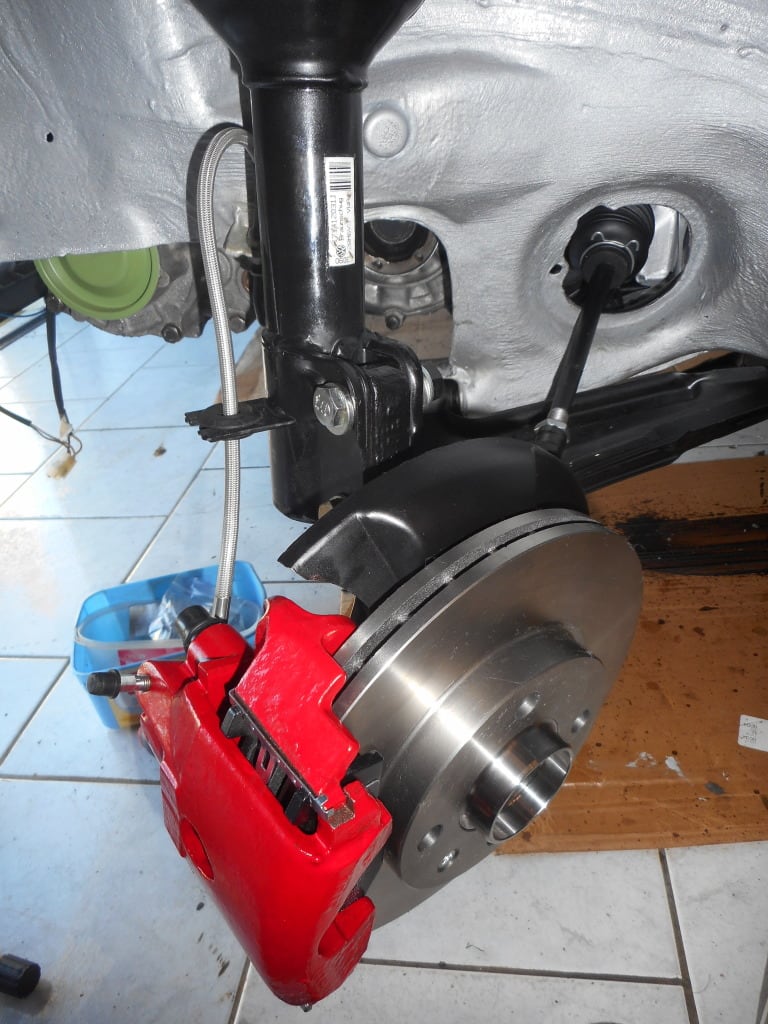
…and finally the brake callipers & new Brembo pads and new flexi brake pipe

1983 Golf GTi Campaign Edition, Diamond Silver
http://vwgolfmk1.org.uk/forum/index.php?page=topicview&id=projects%2Fyour-mk1-golfs_2%2F-tag-1983-campaign&redirected=1#post_1551531
http://vwgolfmk1.org.uk/forum/index.php?page=topicview&id=projects%2Fyour-mk1-golfs_2%2F-tag-1983-campaign&redirected=1#post_1551531
Posted
Old Timer


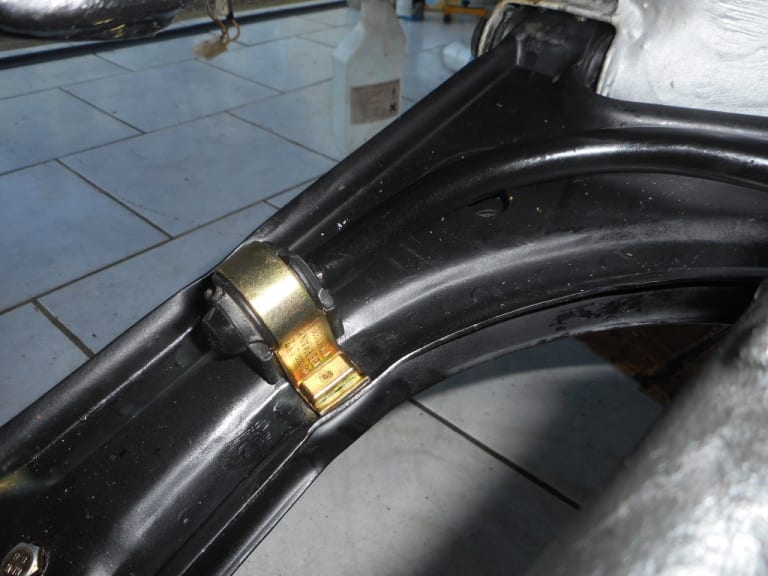
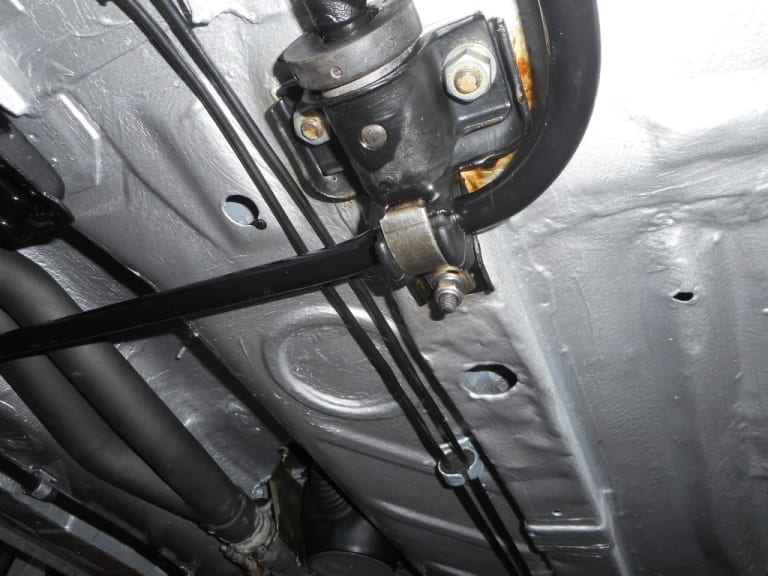
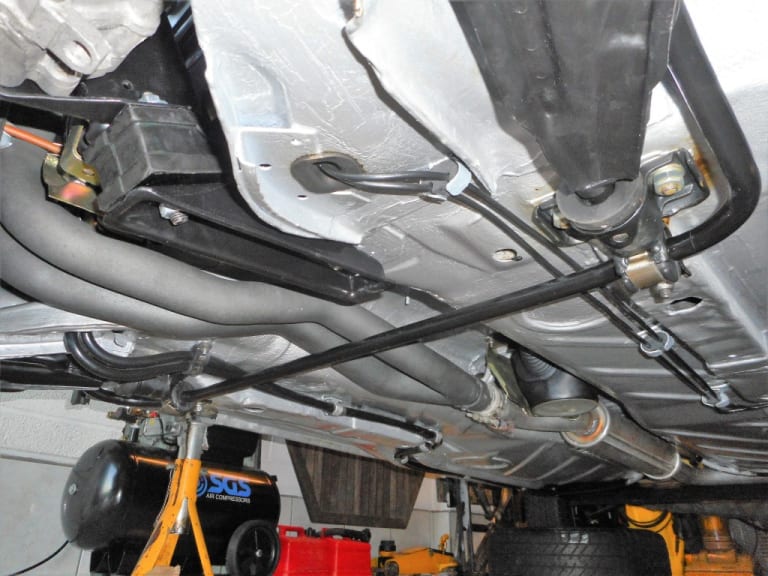
A nice clean underneath - the dark areas are the Bilt Hamber Dynax S50 rust treatment - also used plenty of the clear Bilt Hamber UC rust treatment
1983 Golf GTi Campaign Edition, Diamond Silver
http://vwgolfmk1.org.uk/forum/index.php?page=topicview&id=projects%2Fyour-mk1-golfs_2%2F-tag-1983-campaign&redirected=1#post_1551531
http://vwgolfmk1.org.uk/forum/index.php?page=topicview&id=projects%2Fyour-mk1-golfs_2%2F-tag-1983-campaign&redirected=1#post_1551531
Posted
Old Timer



Reading restoration threads is always a pleasure.
A. Merry Christmas to you as well!
0 guests and 0 members have just viewed this: None.


