"TAG" - 1983 Campaign restoration blog
Posted
Old Timer


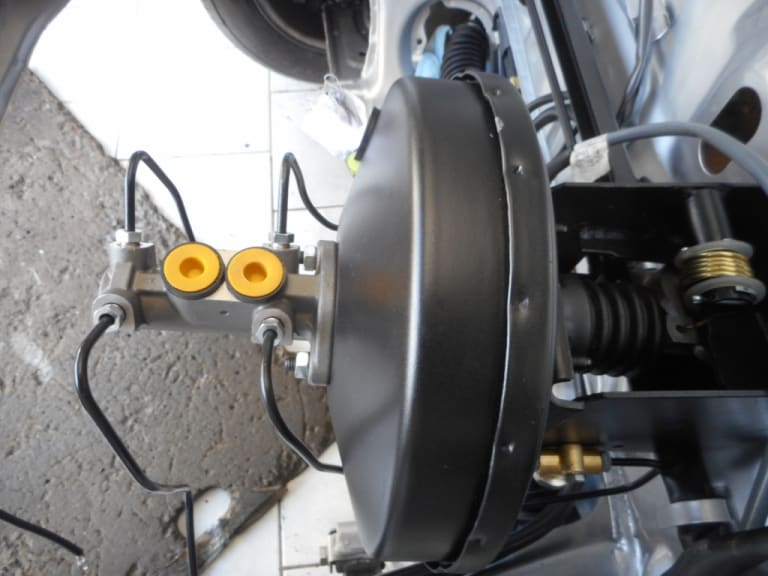
I found I could fit the two required "tee" pieces for the brake light switches either side of the servo mounting bracket. On the n/s there was already a hole - I drilled a matching hole on the o/s and used stainless nut/bolts.


A strange view - from underneath looking up.
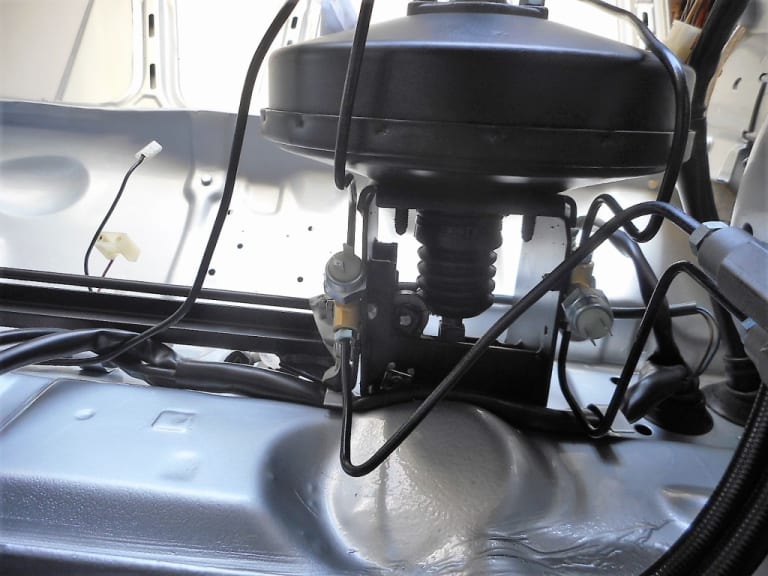
I hope these photos and words will help others when tackling these jobs. I know how invaluable I have found other members photos.
1983 Golf GTi Campaign Edition, Diamond Silver
http://vwgolfmk1.org.uk/forum/index.php?page=topicview&id=projects%2Fyour-mk1-golfs_2%2F-tag-1983-campaign&redirected=1#post_1551531
http://vwgolfmk1.org.uk/forum/index.php?page=topicview&id=projects%2Fyour-mk1-golfs_2%2F-tag-1983-campaign&redirected=1#post_1551531
Posted
Old Timer


Before that - renewing some of the mangled K-Jet plug rubbers.

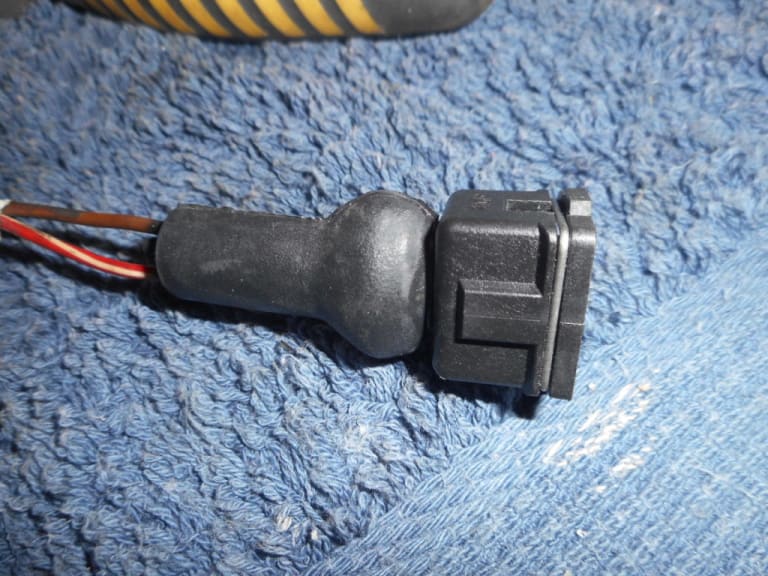
This should be interesting!!!!!!!!!!!!!

I know it all came out of here somehow…….

Beginning to make some sense of the tangle!!

1983 Golf GTi Campaign Edition, Diamond Silver
http://vwgolfmk1.org.uk/forum/index.php?page=topicview&id=projects%2Fyour-mk1-golfs_2%2F-tag-1983-campaign&redirected=1#post_1551531
http://vwgolfmk1.org.uk/forum/index.php?page=topicview&id=projects%2Fyour-mk1-golfs_2%2F-tag-1983-campaign&redirected=1#post_1551531
Posted
Old Timer


Posted
Old Timer


"TAG" - 1983 Campaign restoration blog

Sent from my iPhone using Tapatalk
Mars red 1.8 GTI tintop now MOT'd and on the road!
http://vwgolfmk1.org.uk/forum/index.php?page=topicview&id=projects%2Fyour-mk1-golfs_2%2Fwent-to-look-at-a-golf&kfs79=150
http://vwgolfmk1.org.uk/forum/index.php?page=topicview&id=projects%2Fyour-mk1-golfs_2%2Fwent-to-look-at-a-golf&kfs79=150
Posted
Settling In

Posted
Settled In

I'm certainly inspired by your restoration. Mine was not as bad as yours body work wise but have had to still replace N/S complete chassis leg and full front panel as well as rebuilding the area around the fuel pump/mounting a rear for the beam axle.
I've turned the U bend on my Campaign resto and use your feed as a great reference for putting things back together. I'm just refurbing the rear brake load valve and my is a similar state to what yours was. I'm just stripping it and cleaning it as was badly seized up.
Incidentally your registration ending T "AG" originated in Hull when new (either as Green Arrow Garage's / John Seaton Garages or Dovercourt) I used to be at college in Hull with the son of the owner of the 2 VAG franchise dealerships at the time. He used to come to college in a variety of Golfs and Audi's and I always remember the Campaign golfs with the Pirelli Ps and steel sunroof. Who knows I might have seen yours when it was nearly new with servicing as he used to bring a loan car to college and go and collect a service vehicle to take back to the dealership. That got me going and I always vowed to own a Campaign one day.
MK1 Golf GTi Campaign:Alpine White, Vauxhall Omega MV6, Alpina B10 3.3 Touring, Dolomite Sprint, MG ZT V6, Volvo T5 R estate

Posted
Old Timer


adolf said
Afternoon
I'm certainly inspired by your restoration. Mine was not as bad as yours body work wise but have had to still replace N/S complete chassis leg and full front panel as well as rebuilding the area around the fuel pump/mounting a rear for the beam axle.
I've turned the U bend on my Campaign resto and use your feed as a great reference for putting things back together. I'm just refurbing the rear brake load valve and my is a similar state to what yours was. I'm just stripping it and cleaning it as was badly seized up.
Incidentally your registration ending T "AG" originated in Hull when new (either as Green Arrow Garage's / John Seaton Garages or Dovercourt) I used to be at college in Hull with the son of the owner of the 2 VAG franchise dealerships at the time. He used to come to college in a variety of Golfs and Audi's and I always remember the Campaign golfs with the Pirelli Ps and steel sunroof. Who knows I might have seen yours when it was nearly new with servicing as he used to bring a loan car to college and go and collect a service vehicle to take back to the dealership. That got me going and I always vowed to own a Campaign one day.
Hi Adolf
Many thanks for your interesting message.
Firstly thanks for the praise! I am glad my blog is proving useful. I have a couple of people who I follow closely and refer to for references/ideas etc.
Really interesting about the number plate information. Funny twist here! My car was actually sold new in Northern Ireland where it spent the majority of its life, on a N Ireland number of course. It was then sold to Southern Ireland - and was registered with an Eire registration. When I bought it from Dublin it was still on that Eire plate. When I registered the car in UK I wrote a letter to DVLA requesting a number that if possible contained either my initials/VAG/VW/GOLF or 1983 as this was its registration year. They kindly gave the number with 83 in it. I had no idea till now that my number was from Hull - so thanks for that. I am interested in the history of the car, so even thought the car itself has never been to Hull your fact adds another little nugget to the story.
Good luck with the resto - I am trying to keep mine pretty much standard - suspension etc - with just a few subtle mods like the brake servo and later wiper motor.
1983 Golf GTi Campaign Edition, Diamond Silver
http://vwgolfmk1.org.uk/forum/index.php?page=topicview&id=projects%2Fyour-mk1-golfs_2%2F-tag-1983-campaign&redirected=1#post_1551531
http://vwgolfmk1.org.uk/forum/index.php?page=topicview&id=projects%2Fyour-mk1-golfs_2%2F-tag-1983-campaign&redirected=1#post_1551531
Posted
Old Timer


Rich. said
Looking great as always. What brake fluid reservoir do you plan to run?
I think it's from a Lupo - when I bought the brake servo the breaker threw it in for free.
1983 Golf GTi Campaign Edition, Diamond Silver
http://vwgolfmk1.org.uk/forum/index.php?page=topicview&id=projects%2Fyour-mk1-golfs_2%2F-tag-1983-campaign&redirected=1#post_1551531
http://vwgolfmk1.org.uk/forum/index.php?page=topicview&id=projects%2Fyour-mk1-golfs_2%2F-tag-1983-campaign&redirected=1#post_1551531
Posted
Settled In

Ah right - well at least you've pieced the history together when the car was new. Obviously "TAG" - would have been better if it was "VAG" but at least you got the '83 in there.😄
Good luck with the remainder of the restoration.
I've tried to get the reg : KRO203Y off the DVLA but as it was my old car reg (long since scrapped😩) they won't re-release it - I could have KRO203X if I wanted to buy it, but it's not the same.
MK1 Golf GTi Campaign:Alpine White, Vauxhall Omega MV6, Alpina B10 3.3 Touring, Dolomite Sprint, MG ZT V6, Volvo T5 R estate


Posted
Settled In

Dawned on me - I note your car originally had the 3 piece Zender roof spoiler?
Do you still have it and if so are you looking to sell or keep it? My Alpine White Campaign must have had one as the screw holes are there - so I need to get one, or bodge fill the holes prior to painting.
As it's 1980s period mod - I'm content to fit one, although generally I'm a "standard as they left the factory" sort
Cheers
MK1 Golf GTi Campaign:Alpine White, Vauxhall Omega MV6, Alpina B10 3.3 Touring, Dolomite Sprint, MG ZT V6, Volvo T5 R estate


Posted
Old Timer


First - time to refurb the column

Looking rather better!

UV joint connected.

… and boot

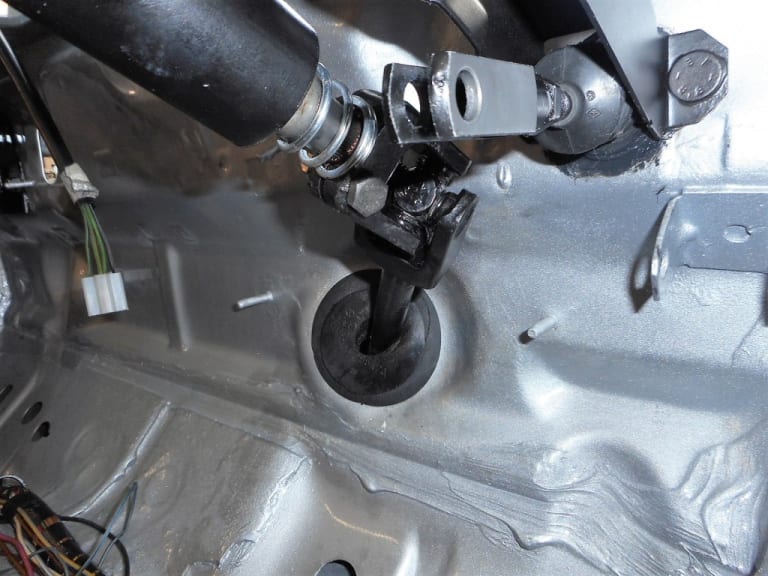
Quite fiddly to get the column back in - aligning the UV joint, and the bolts going through the bulkhead to attach to the end of the brake servo push bar mechanism.
1983 Golf GTi Campaign Edition, Diamond Silver
http://vwgolfmk1.org.uk/forum/index.php?page=topicview&id=projects%2Fyour-mk1-golfs_2%2F-tag-1983-campaign&redirected=1#post_1551531
http://vwgolfmk1.org.uk/forum/index.php?page=topicview&id=projects%2Fyour-mk1-golfs_2%2F-tag-1983-campaign&redirected=1#post_1551531
Posted
Old Timer


After advice I chose to buy an inexpensive engine leveller - VERY glad I did as it made fitting the engine much easier!

I didn't have a lifting eye on the alternator end of the block so used a long bolt through the threaded alternator bracket hole


In the air………………….


Carefully set down on some blocks - making sure no to damage the sump/sump lip/waterpump/pulleys and leaving enough clearance to attach the plate between the engine/gearbox.

1983 Golf GTi Campaign Edition, Diamond Silver
http://vwgolfmk1.org.uk/forum/index.php?page=topicview&id=projects%2Fyour-mk1-golfs_2%2F-tag-1983-campaign&redirected=1#post_1551531
http://vwgolfmk1.org.uk/forum/index.php?page=topicview&id=projects%2Fyour-mk1-golfs_2%2F-tag-1983-campaign&redirected=1#post_1551531
Posted
Old Timer


End of the block/crank seal

Cleaned and plated engine/transmission plate

Plate attached

New Sachs clutch kit

Never having done this before I bought a clutch alignment device.

I'm not sure that it helped a great deal. It was a slightly slack fit in clutch plate so could not be relied on to ensure accurate centering of the friction plate. I had to use a vernier caliper to ensure it was central in the end.

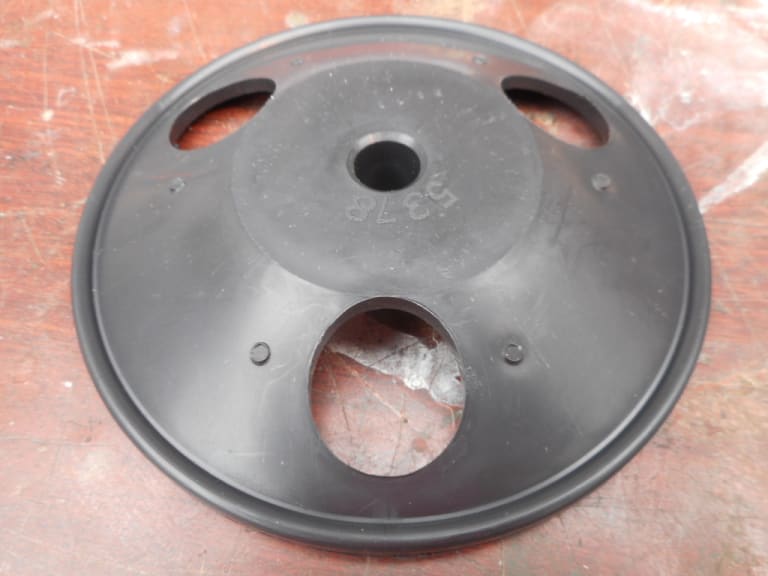
Clutch plate bolted into position. I used a 15mm spanner to "lock" the flywheel in place. Use one of the gearbox fitting bolts in the block and one of the flywheel bolts in the flywheel.
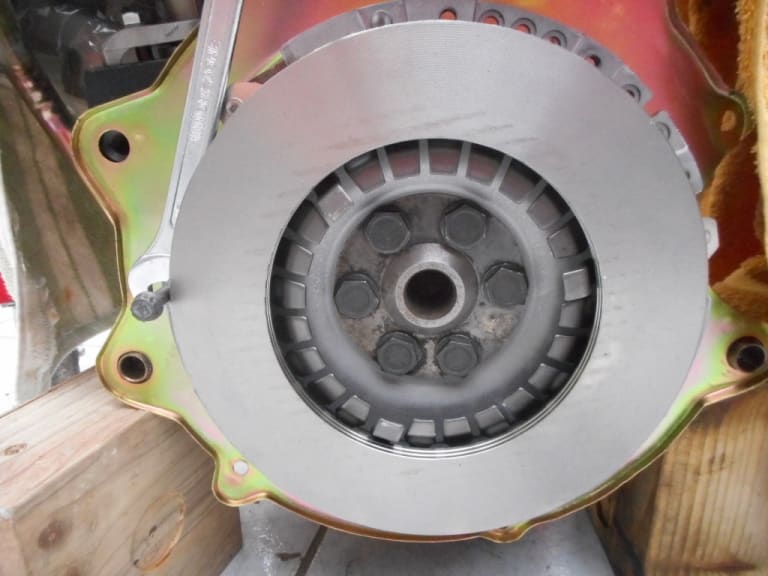
Thrust plate and spring attached

Home schooling……………….
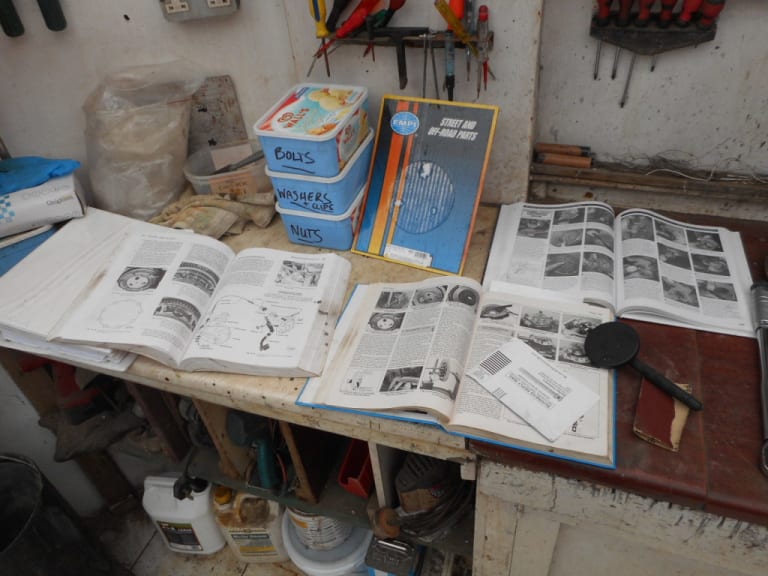
Fitting the clutch plate

Flywheel bolted on. Did the bolts up gradually in a diagonal pattern.

Took the chance to paint the timing marks - hopefully make life a bit easier in the future for timing.

1983 Golf GTi Campaign Edition, Diamond Silver
http://vwgolfmk1.org.uk/forum/index.php?page=topicview&id=projects%2Fyour-mk1-golfs_2%2F-tag-1983-campaign&redirected=1#post_1551531
http://vwgolfmk1.org.uk/forum/index.php?page=topicview&id=projects%2Fyour-mk1-golfs_2%2F-tag-1983-campaign&redirected=1#post_1551531
Posted
Old Timer


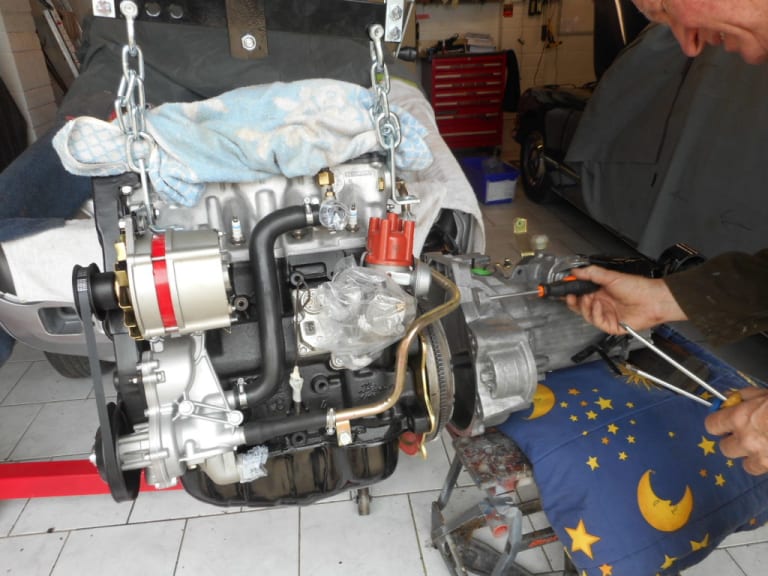
Used lots of padding/supporting blocks/straps as I had to move the engine from the workshop to the garage.


Ready to receive the gearbox. With my able assistant (dad!) - we put the gearbox on a folded down workmate and the adjusted the engine height to match. Screwdrivers through the top bolt holes into the block holes helped line things up
1983 Golf GTi Campaign Edition, Diamond Silver
http://vwgolfmk1.org.uk/forum/index.php?page=topicview&id=projects%2Fyour-mk1-golfs_2%2F-tag-1983-campaign&redirected=1#post_1551531
http://vwgolfmk1.org.uk/forum/index.php?page=topicview&id=projects%2Fyour-mk1-golfs_2%2F-tag-1983-campaign&redirected=1#post_1551531
Posted
Old Timer


My glamorous (?!?) assistant!

In she goes………………….

Used old cardboard to protect vulnerable areas of the bodywork - especially the scuttle area.
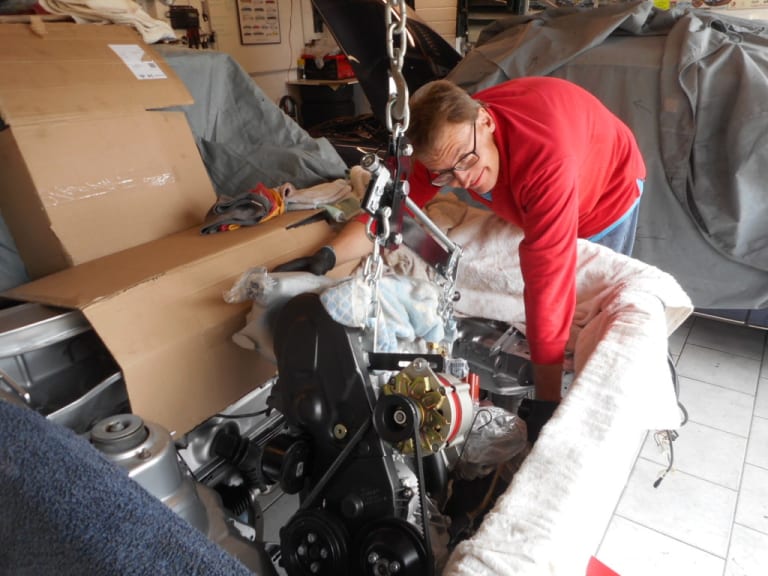
Result!!!!!

Lessons learned:
1. Don't fit the aux air valve on the rear of the intake - no room to get it in otherwise.
2. Don't fit the gearbox side mount to the engine - once the engine is in the right position then fit it. It was just tooo tight for comfort with it in position.
3. Don't fit the front engine steady support to the engine before hand. With the starter fitted and the support bracket - as with the gearbox support it was just too close for comfort to the front cross member and without it fitted I could the move engine about more freely to align the side mounts.
4. Use an engine hoist leveller. It made it so much more manoeuvrable. I found I needed to tilt the engine to quite an angle to get the gearbox under the battery tray side mount position. I bought the cheapest version and for the sake of £25 it saved the paint!!!!!
5. Without the front mount/gearbox mount attached it was possible to get the engine in at an angle and then level it all without catching the scuttle/front crossmember. Once level attached the o/s bolt, then reattached the gearbox mount & bolted that the support and finally reattached the starter/front support.
Everything then seemed aligned very nicely. I checked the alignment on the side mounts and hey presto!
1983 Golf GTi Campaign Edition, Diamond Silver
http://vwgolfmk1.org.uk/forum/index.php?page=topicview&id=projects%2Fyour-mk1-golfs_2%2F-tag-1983-campaign&redirected=1#post_1551531
http://vwgolfmk1.org.uk/forum/index.php?page=topicview&id=projects%2Fyour-mk1-golfs_2%2F-tag-1983-campaign&redirected=1#post_1551531
Posted
Old Timer


All new and plated parts

The old seal around the gear selector housing was perished so I made a new one out of draught excluder.
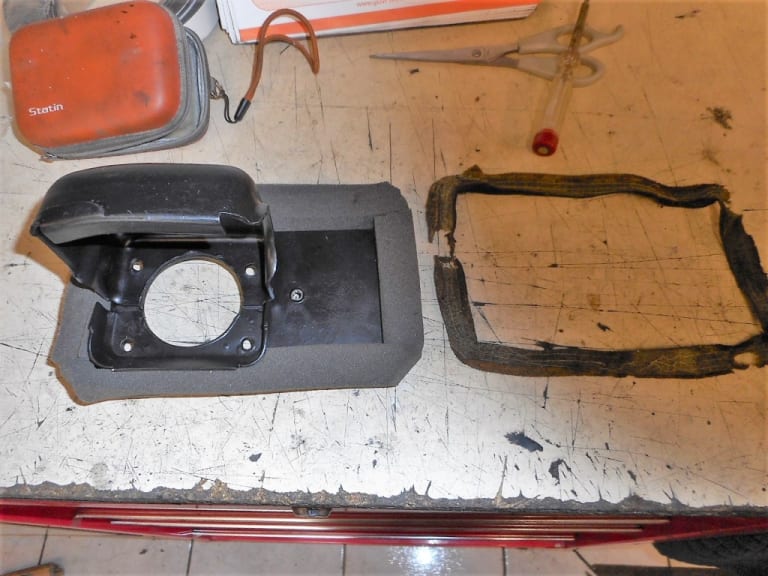
All fitted


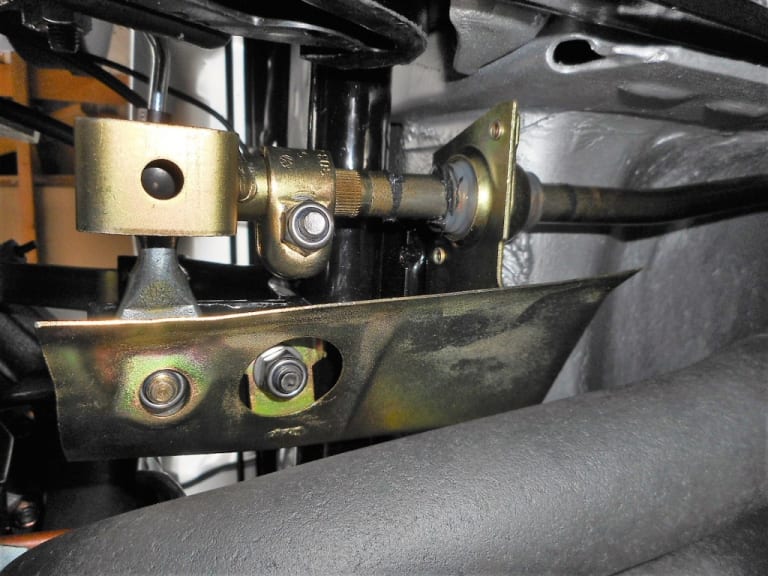

Selector finger adjusted to the correct position - I hope!

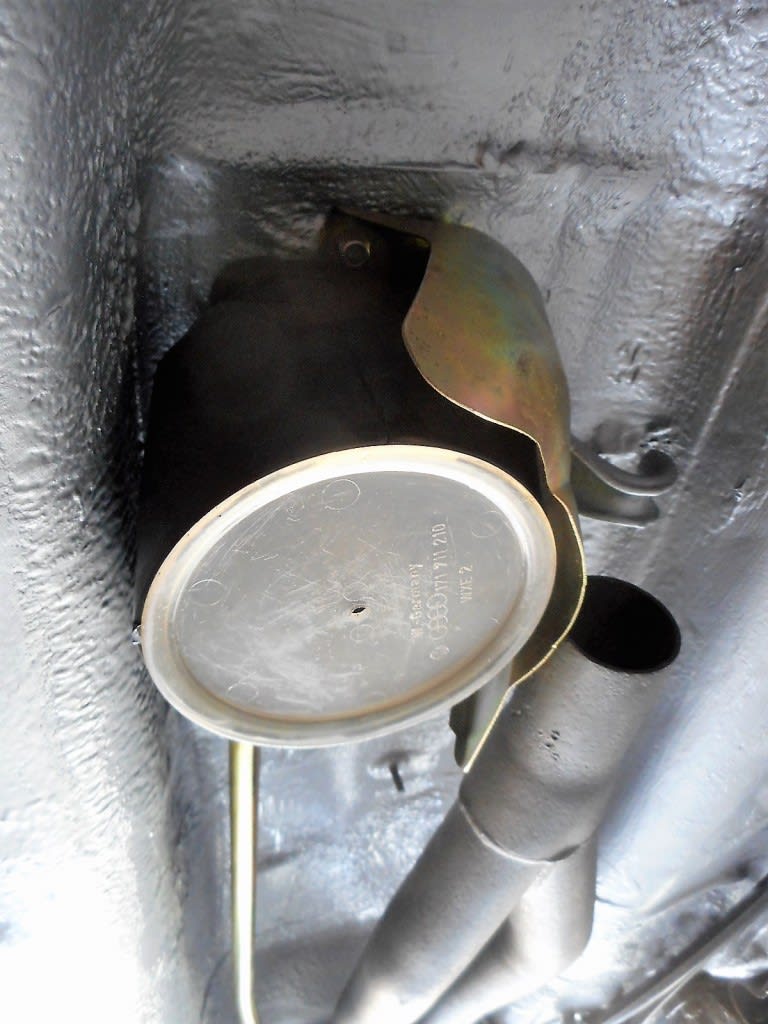
Boot added _ fun job!!!! and heat shield.
1983 Golf GTi Campaign Edition, Diamond Silver
http://vwgolfmk1.org.uk/forum/index.php?page=topicview&id=projects%2Fyour-mk1-golfs_2%2F-tag-1983-campaign&redirected=1#post_1551531
http://vwgolfmk1.org.uk/forum/index.php?page=topicview&id=projects%2Fyour-mk1-golfs_2%2F-tag-1983-campaign&redirected=1#post_1551531
Posted
Old Timer


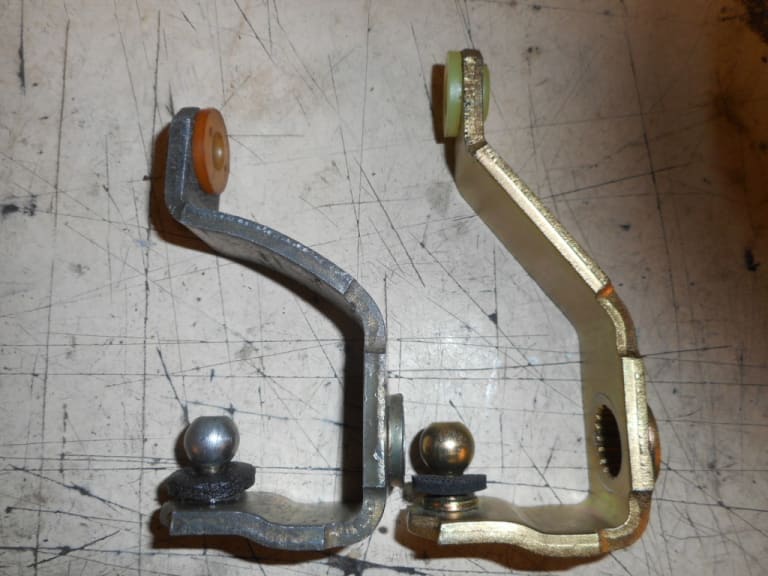
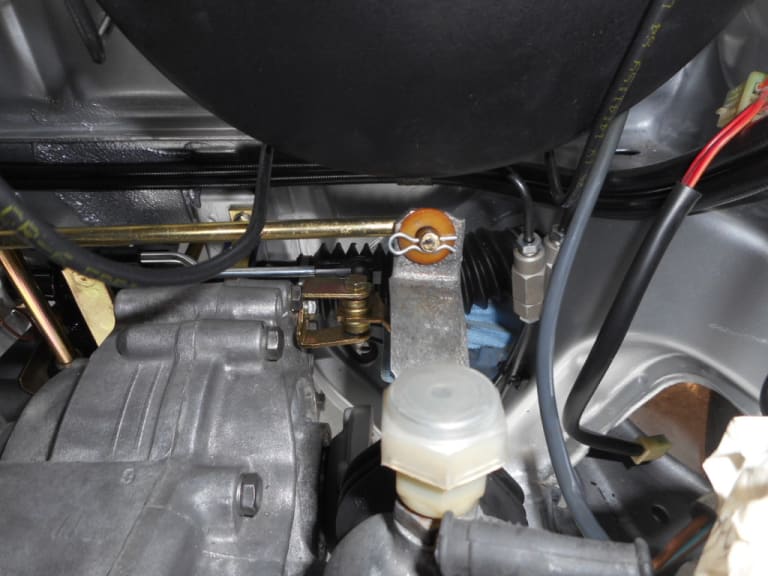
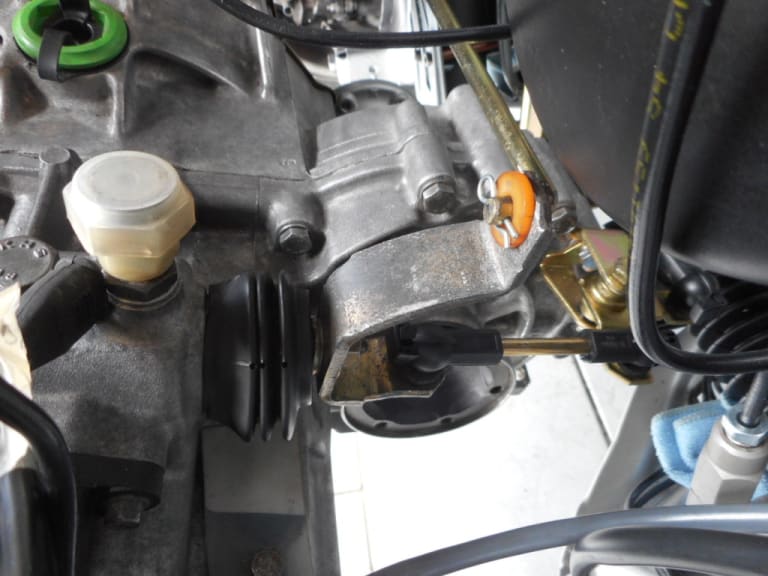
I had a spare shift lever so after much trial and error found that by bending it into a tighter shape it could pass under the servo with plenty of clearance
Original v modified
 .
.

Only when I can get the engine started and try engaging gears will I know if this mod has been successful and hasn't altered the shift. But moving the lever by hand all looks good.
1983 Golf GTi Campaign Edition, Diamond Silver
http://vwgolfmk1.org.uk/forum/index.php?page=topicview&id=projects%2Fyour-mk1-golfs_2%2F-tag-1983-campaign&redirected=1#post_1551531
http://vwgolfmk1.org.uk/forum/index.php?page=topicview&id=projects%2Fyour-mk1-golfs_2%2F-tag-1983-campaign&redirected=1#post_1551531
Posted
Old Timer


"TAG" - 1983 Campaign restoration blog
Interesting your comment on the gear selection for your linkage mod. I had a similar issue when fitting a five speed box in place of the original 4 speed. The sweep and length of each component can affect the actual movement / range at the gearstick / gate.
Whilst your gaiter / boot underneath the gearstick is affectively dry, I added self amalgamating tape around the boot and white cap to keep it in place. Local testing on mine found the white cap to drop out when doing extreme to extreme movements.
Sent from my H3113 using Tapatalk
Posted
Old Timer


As has been said, engine mounts aren't really precision mounting points are they.
0 guests and 0 members have just viewed this: None.


