83 Gti set to get full resto
Posted
Local Hero


My 83 Gti set to get full restoration
Whats the history of the engine? its been stood a long time by the corrosion on the pump.
Posted
Moderator


olethalb said
Maybe run low on oil or starved to the poxy oil strainer clogging problem
I was originally going to buy a 1956 ford f100 to rebuild and maybe build my own chassis but opted for another mk1
Anyway, keep up the good work bud
Now you come to mention it, the oil strainer was bunged up a bit with black mastic that was used to seal the sump.
Glad you opted for another mk1, although the f100 would have been interesting as well
Yomp said
you need to check the crank journals with a micrometer to check that the crank's not worn or damaged due to oil starvation causing the shells to break up like they have.
Whats the history of the engine? its been stood a long time by the corrosion on the pump.
Micrometer is on tomorrows list, I'm off to Machine Mart in the morning to pick up some stuff.
With regards to history of the engine. I was lead to believe it was a low miler with 40K on the clock. The engine was dirty when I bought it and me being a novice didn't really know what to look for. It wasn't till I started stripping it that I started noticing things that didn't look right. There was odd, mismatched bolts all over the place, odd coil packs, 6sp tdi gearbox, the sump is from another car, I'm guessing to accept the tdi box…. the list goes on. I wouldn't expect any of this on a low mile engine.
What's the score if the crankshaft is damaged or worn? can it be repaired or is it a case of buying a new one?
Thanks
Andy.
Posted
Settled In

Posted
Old Timer

If the sumps been changed it's possible the original one may have been damaged causing loss of oil and the shell problem you've got.
Olly
Posted
Settled In

Jimievo said
because those shells are proper daffodil!
How funny! I never referred to them as a flower
:lol
Posted
Moderator


Jimievo said
Jimievo said
because those shells are proper daffodil!
How funny! I never referred to them as a flower
:lol: good old swear filters!
Still knew what you meant flower
Olly, where do I buy a new crank if this one is goosed?
Posted
Old Timer

Posted
Moderator


Posted
Local Hero


The mains have the under cut in them to transfer the pressured oil from the block through the crank itself out to the big ends.
Not sure about the 20V but I was lead to believe on the G60 crank is don't regrind it. Does your Haynes manual give undersize bearing tolerances or have information about regrinding?
If it were a genuine low miler it may have come out of a written off car that was still running whilst on its side for a short while. That would soon cause that sort of damage if no oil was getting to the bearings.
Posted
Local Hero


Andy
LINCOLNSHIRE REGION - https://www.facebook.com/groups/467122313360002/
1983 MK1 Golf GTI Campaign Model - Under (looooong) resto!
1962 Rover P4 80
2002 BMW 745i
2008 BMW Z4 2.5Si
LINCOLNSHIRE REGION - https://www.facebook.com/groups/467122313360002/
1983 MK1 Golf GTI Campaign Model - Under (looooong) resto!
1962 Rover P4 80
2002 BMW 745i
2008 BMW Z4 2.5Si
Posted
Moderator


Graham, I'll check my Haynes for undersize bearing tolerances etc tomorrow. I did see the car it came out of, it was on bricks in Hibbs lock up. didn't look like it had been in a crash, looked straight tbh.
Posted
Moderator


I've checked in the Haynes and it seems the crank can be re-ground, so the bottom half of the engine will be sent off for reconditioning when monies permit. I still want to have a go at doing the head, so I can say I've done some engine work, can't be that hard
So at the minute, I've got a shell I can't do much with and and engine I can't do much with
Posted
Old Timer

Posted
Old Timer

Take it a refurb is expensive ( as all thinks mk1 are!)?
If you can't find anything to do for a while, come to york, I've endless things a man of your talent can do
Posted
Local Hero


Is maximum undersize on your engine 0.75?
You'll be grinding straight to minimum size and if your journals are worn on opposite sides of the crank then technically you could be out by 1mm before grinding.
The grinder could check it but then you have to consider how much case hardening on the crank is left even if it is salvageable.
I would try and find another crank/engine.
Posted
Settling In

Posted
Old Timer

Posted
Moderator


steveey said
This build is the dogs mate. All the metal work pictures will no doubt come in handy too
Thanks very much steveey, much appreciated
watson said
Been following this from the start - amazing work
going into this mk1.
Thanks watson, I'm hoping my engine rebuild turns out like yours!
Posted
Moderator


It's been a while since my last update, mainly because I've been lazy
First off I decided to re-do the fuel filler repair as I wasn't happy with it. The problem with the last repair is that when I did the arch tub repair all those months ago, I had to make the tub out of 2 different halfs. When I came to fit the tub, there was a small gap between the tub and the body of the car, so when I did the fuel filler repair, it shrank back and closed the gap leaving a depression which was quite noticeable.
My new repair still isn't perfect but I've filled the gap between the body and the tub with one of these discs that I had laser cut. I'll let the pics do the talking…
Disc
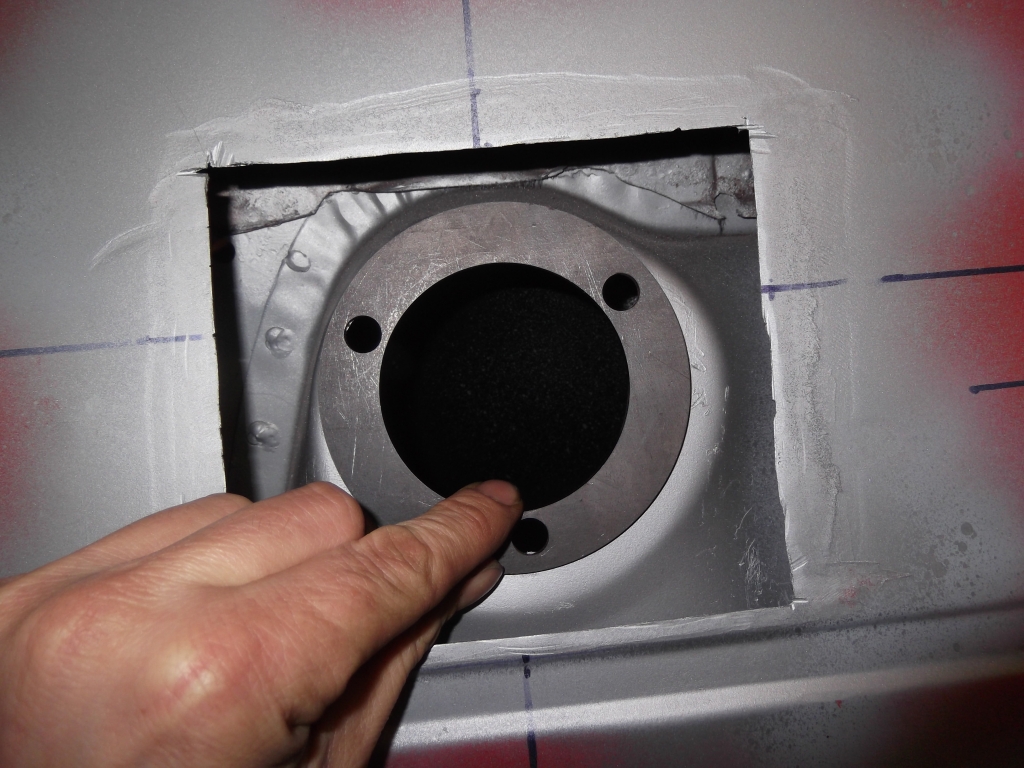
Weld thru primered everything and welded the disc to the back of the repair piece


It was tried in then taken out to be sealed

Tacked into position
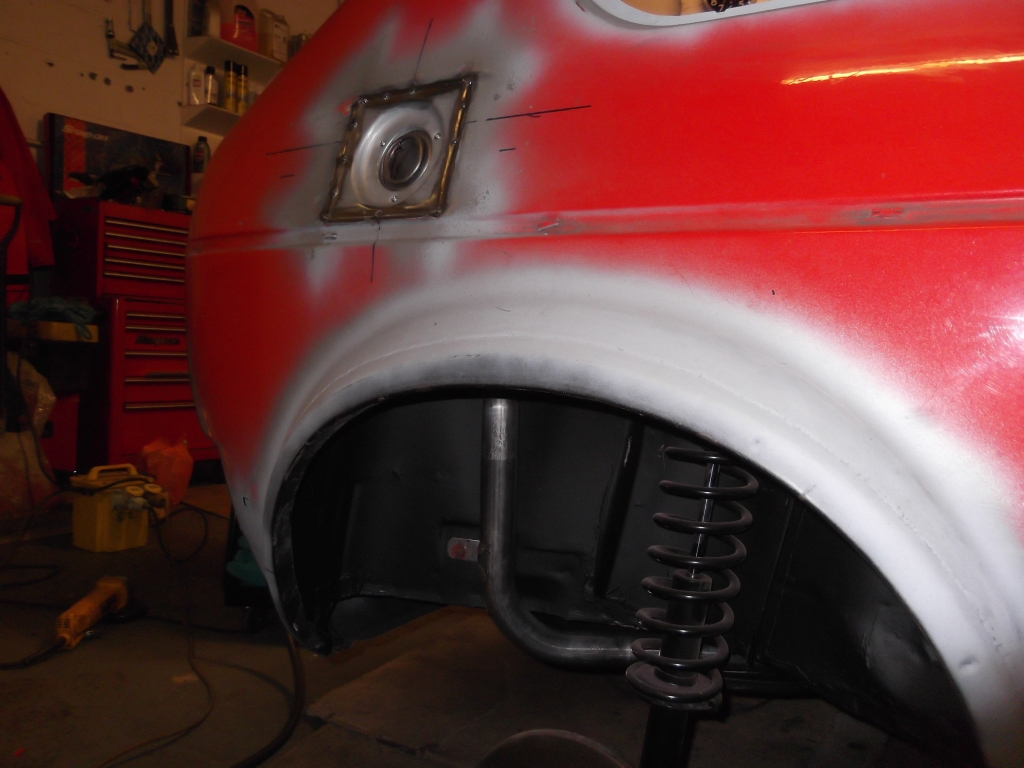
It's now fully welded and there is a tiny bit that has warped but it's minimal.
Secondly, done a small repair to the tailgate hatch lip, for the perimeter seal.


did the old copper trick in a few places

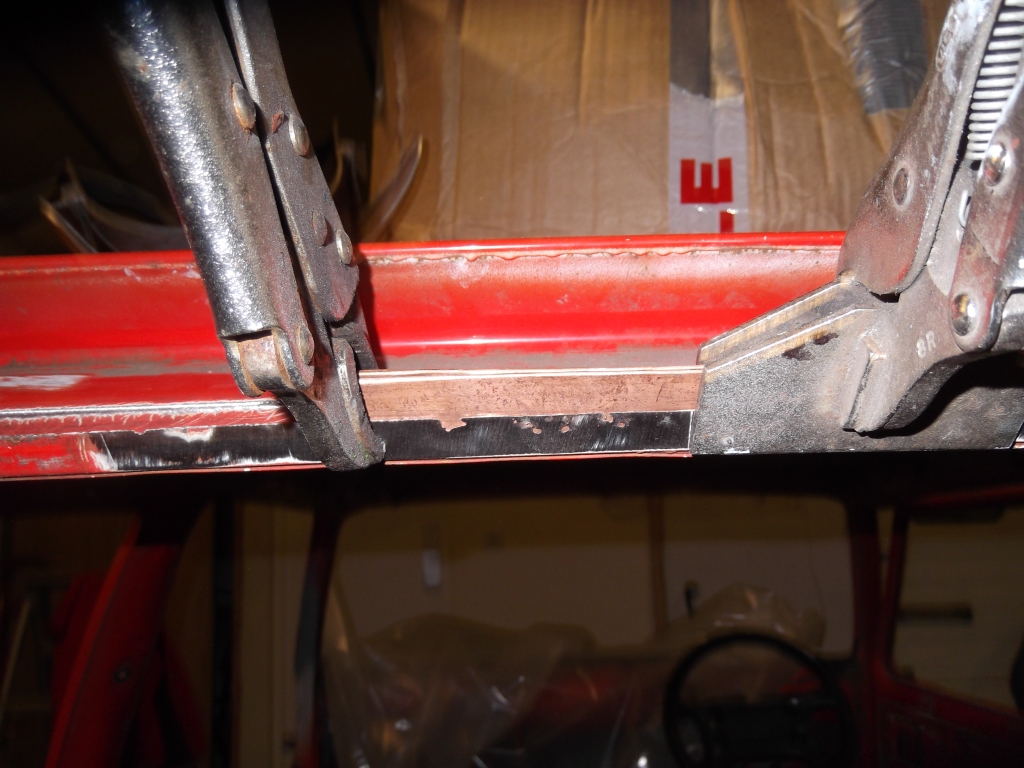


All done

Also thought I'd remove the window from the tailgate for an inspection. Why I waited till now for this I do not know. Here's what I found lol

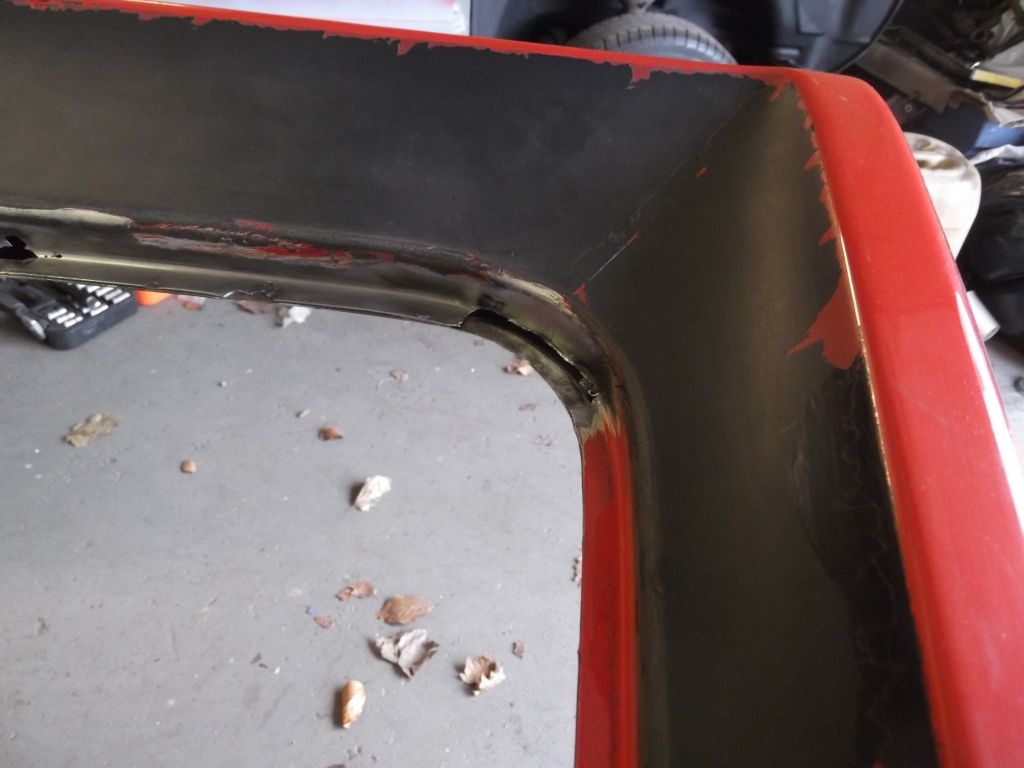
Chopped out all the rot, here's some of the pics, you'll get the idea!


I treated all the infected areas with rust converter and move on to the N/S door which is getting re-skinned. The reason I'm re-skinning the door is again more rot, I love eliminating rot/rust lol.
Grinding the edge off the door

The skin just peels away once you've gone round the edge with a grinder

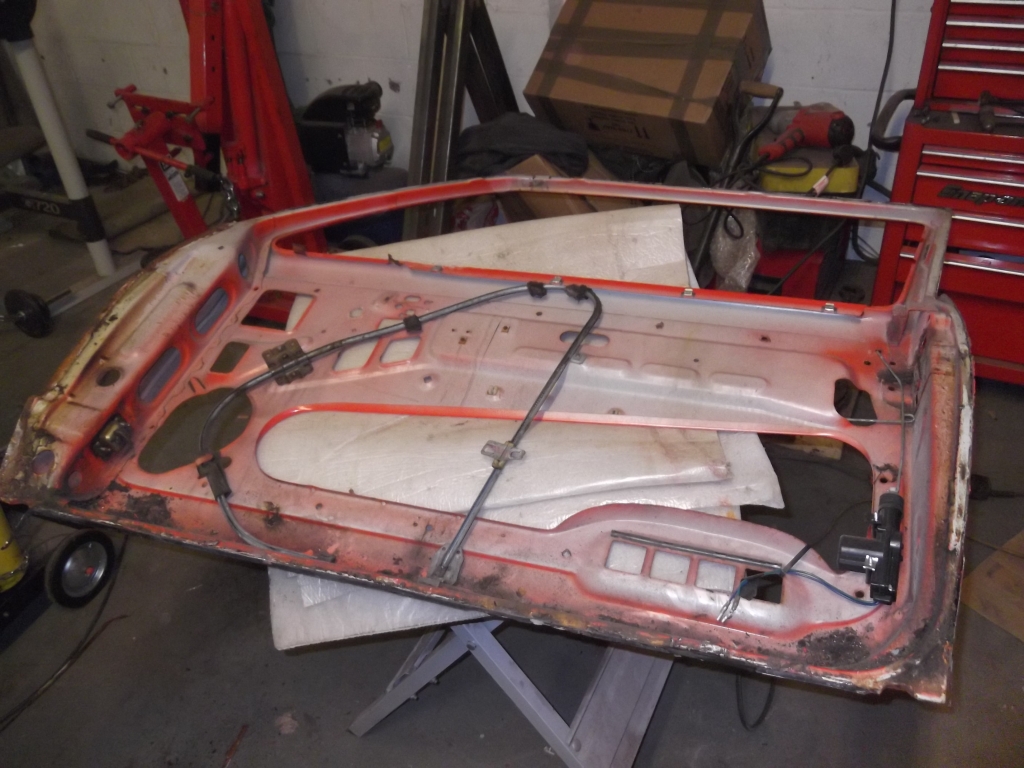
Rot


Looks worse than it is, once I got the wire wheel on it, it wasn't to bad

All the edges are cleaned up like this now and are currently soaking in rust converter. All the edges of the door are held with spot welds, I thought the skin was glued on? this one certainly wasn't.
I'll be back down the unit after work again tomorrow to finish off the door.
The skin I removed from the door will be used foe repair pieces for the tailgate as I was struggling to get sheet metal thin enough for the job anyway
That's it for now peeps.
Andy
Posted
Old Timer

0 guests and 0 members have just viewed this: None.


