


83 Gti set to get full resto

Posted
Settled In

My 83 Gti set to get full restoration
only started reading this thread and i'm on page 7 just.
Posted
Settled In
Melteddrummer said
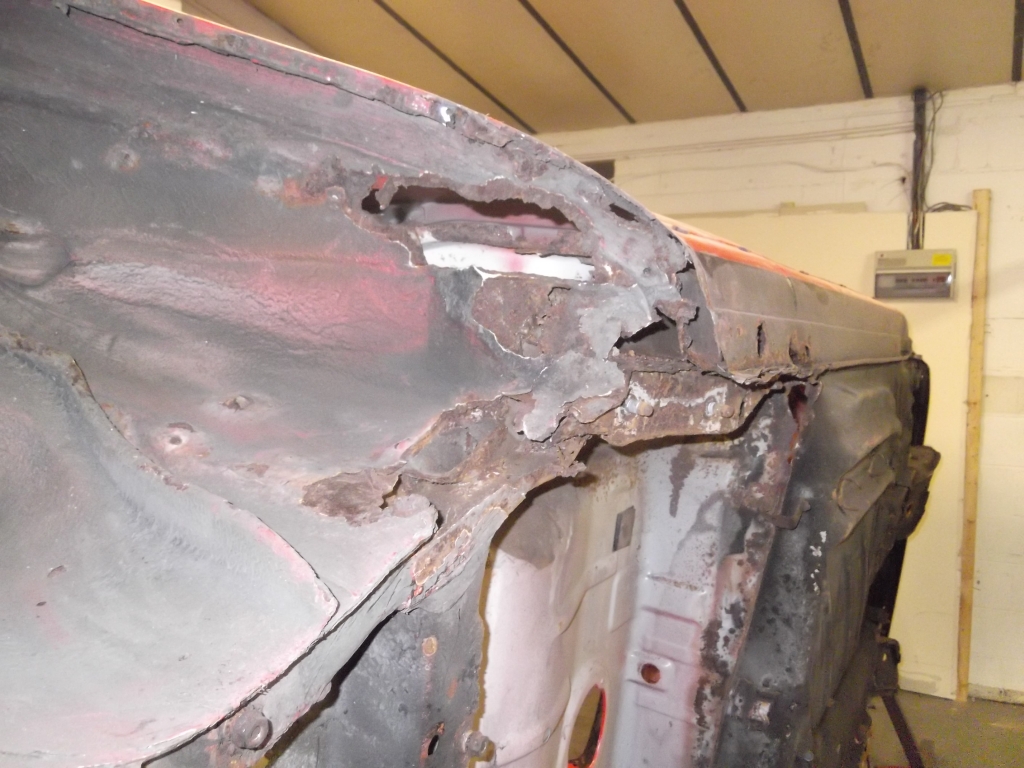
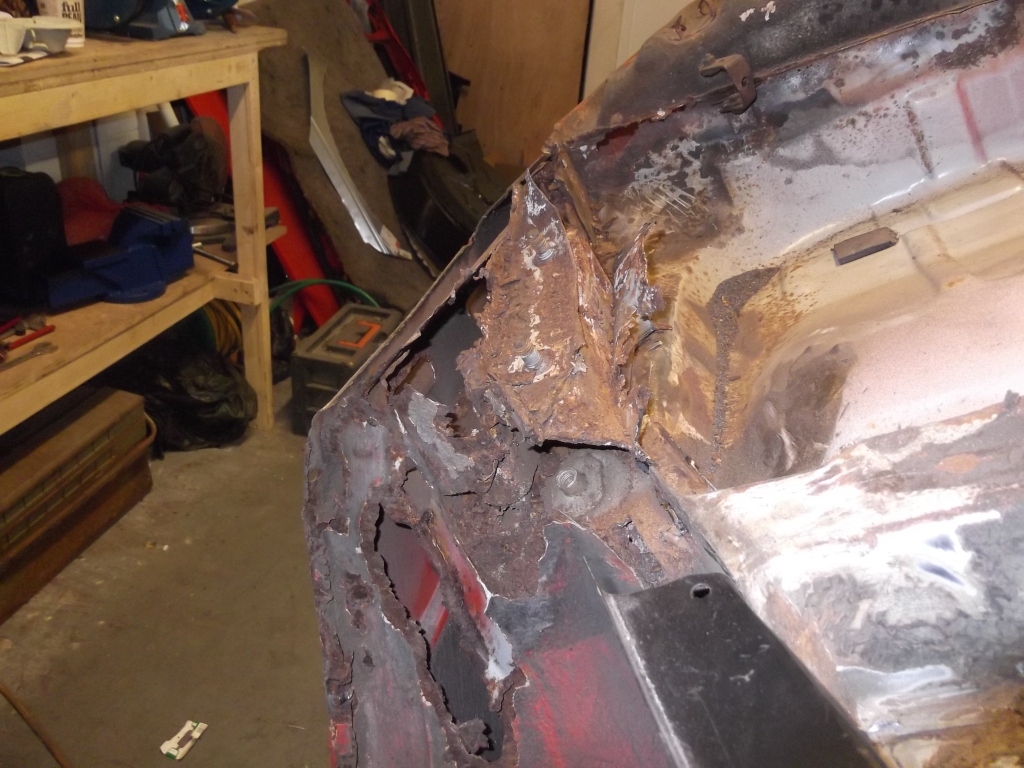
Hi all, small update.
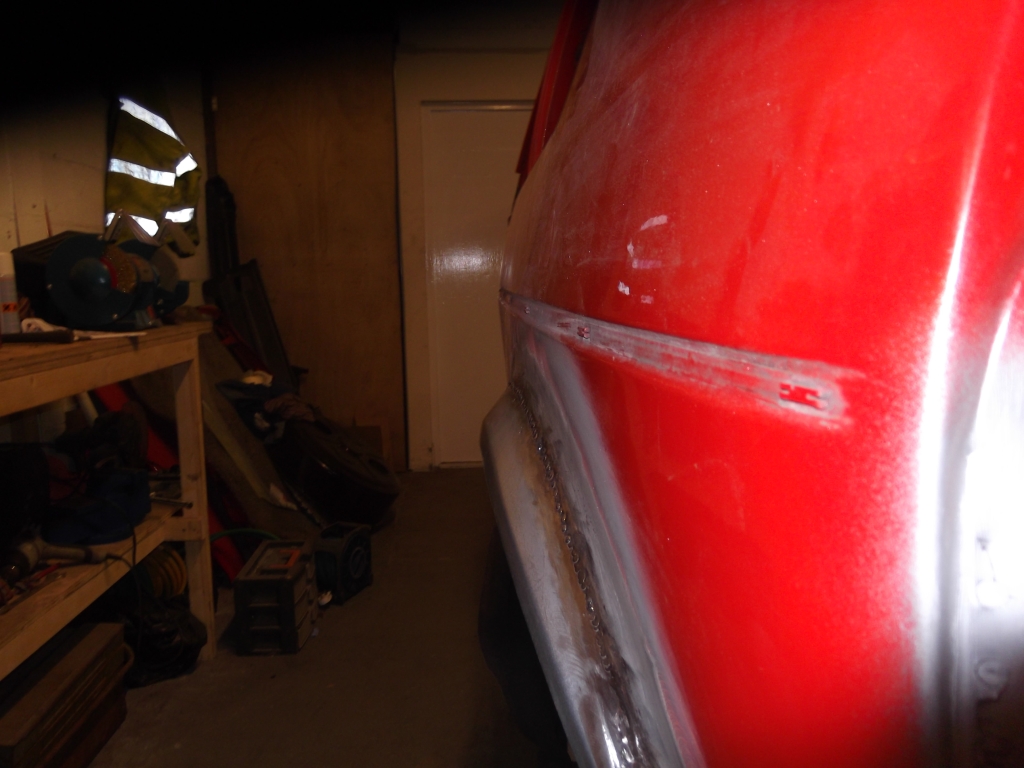
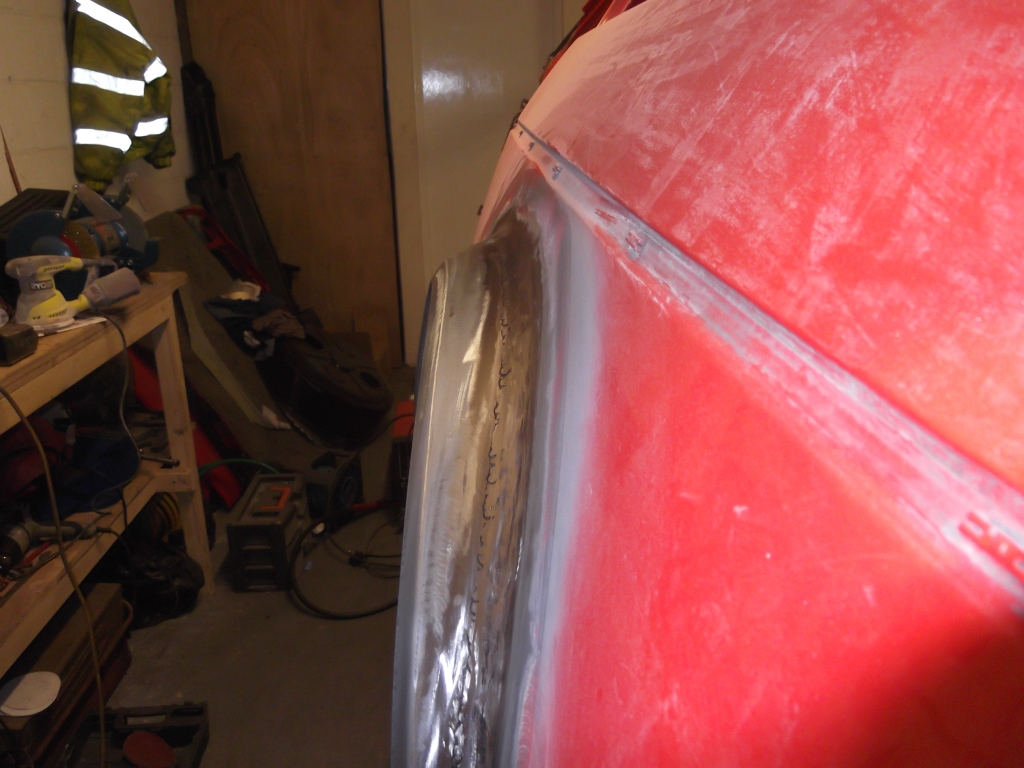
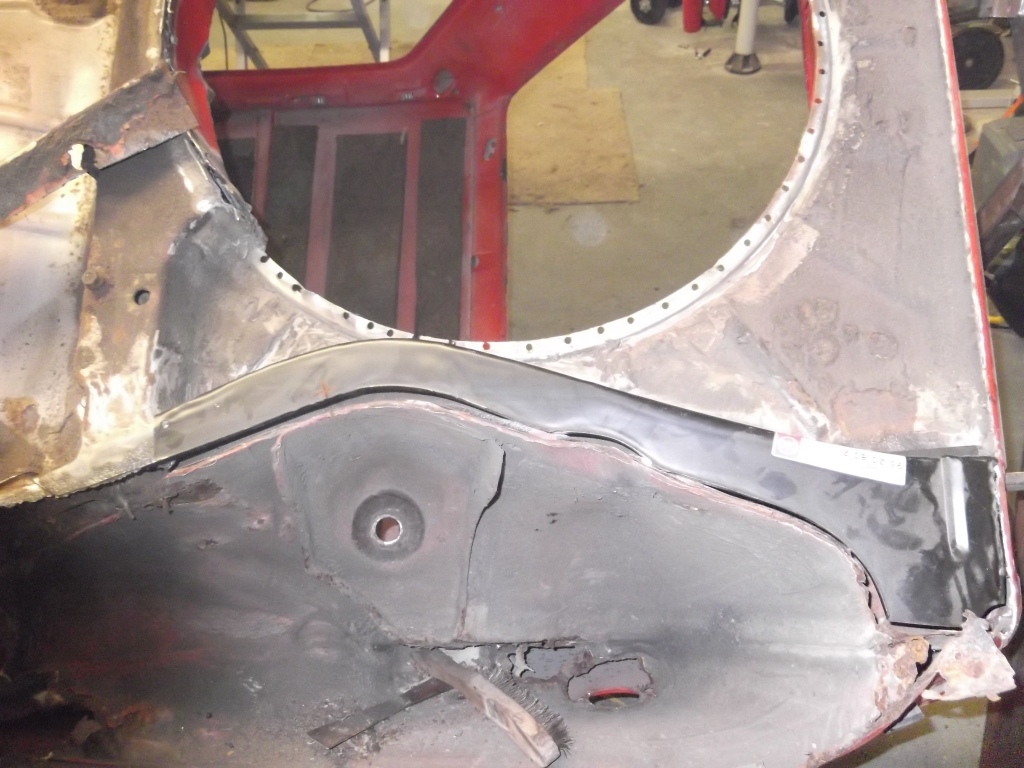
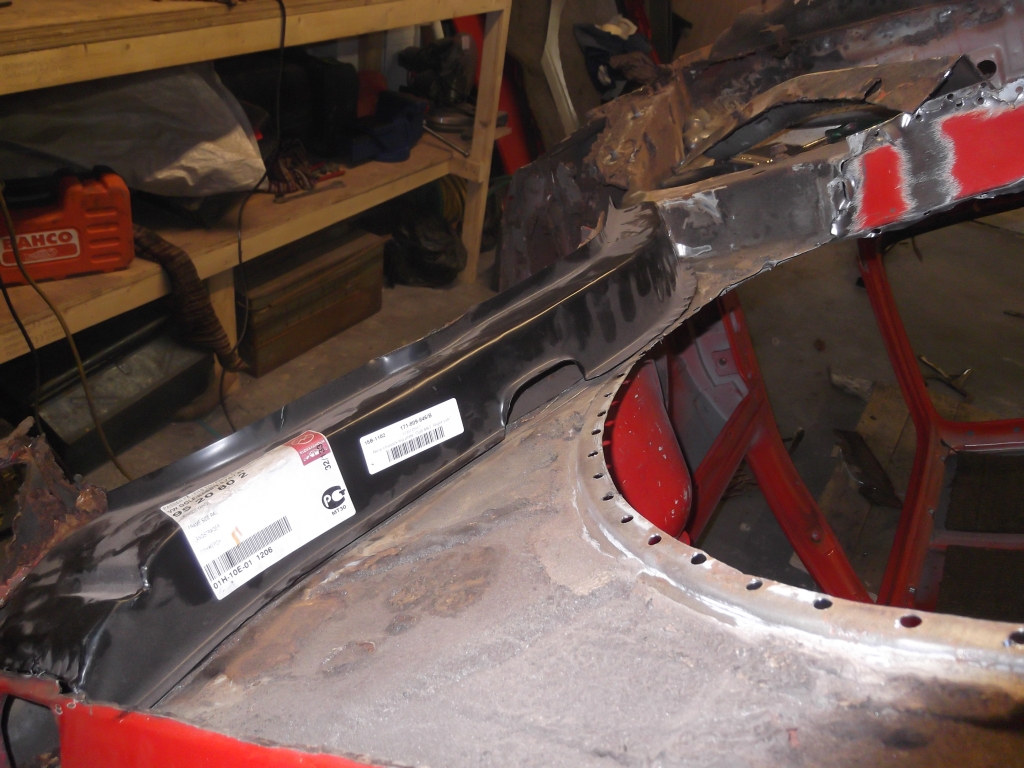
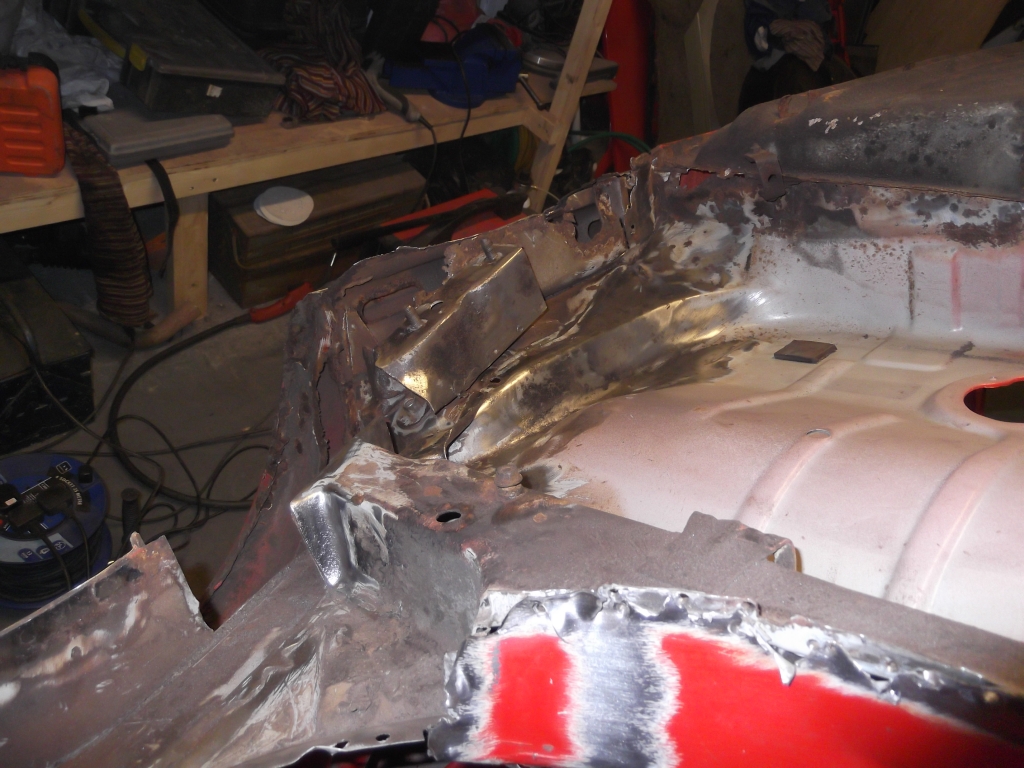
I've been working on the N/S rear outer arch for the past week or so, grabbing a couple of hours where I can. Finally got it to a stage where I can finish it off with some lead. I've never done leading before and will be giving it a go over the Easter weekendTaking Yomps advice I did the spot weld and leave to cool before moving on to the next method, worked a treat!!
Here's some pics…….
First few spots

holes for spot welds on the arch lip

bit further on

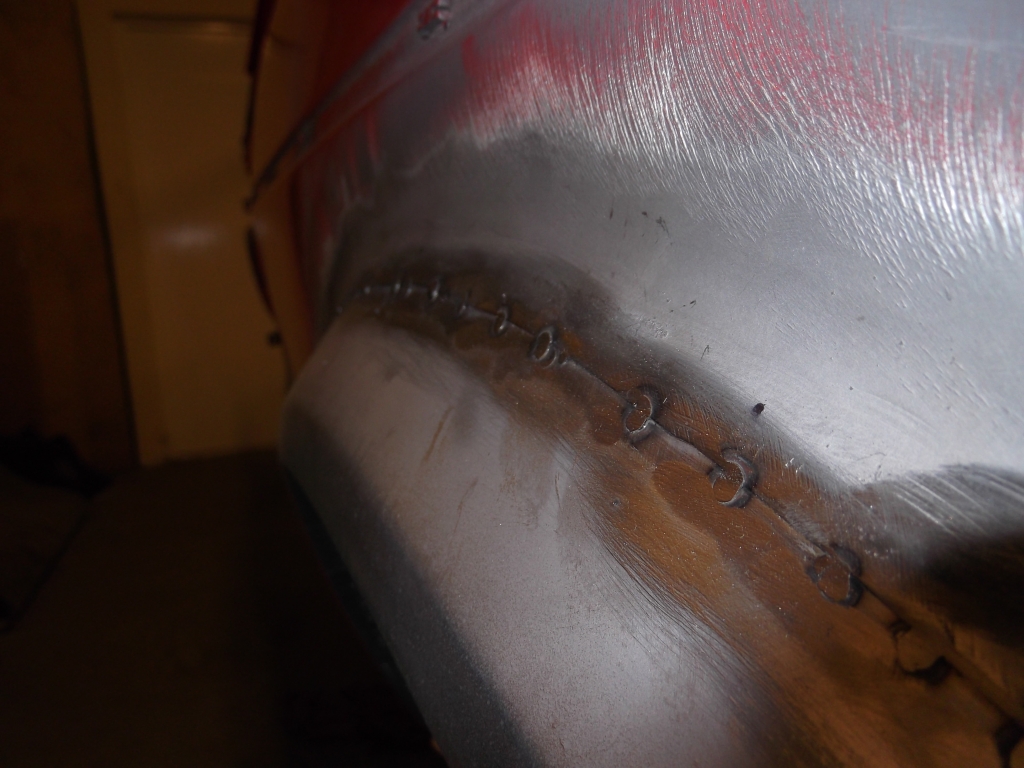
Almost done, arch has no warpege at all
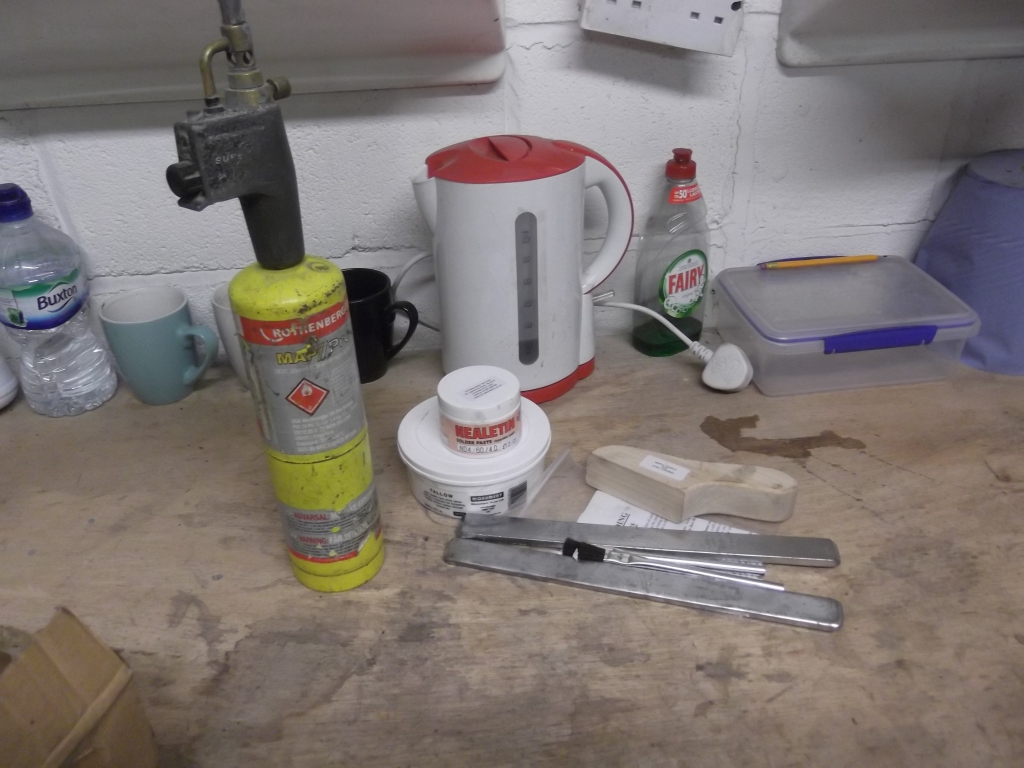
Lead kit arrived this morning
I also made a start on O/S Chassis leg/Axle mount, it's in a right state lolat least now I've done one of these before.

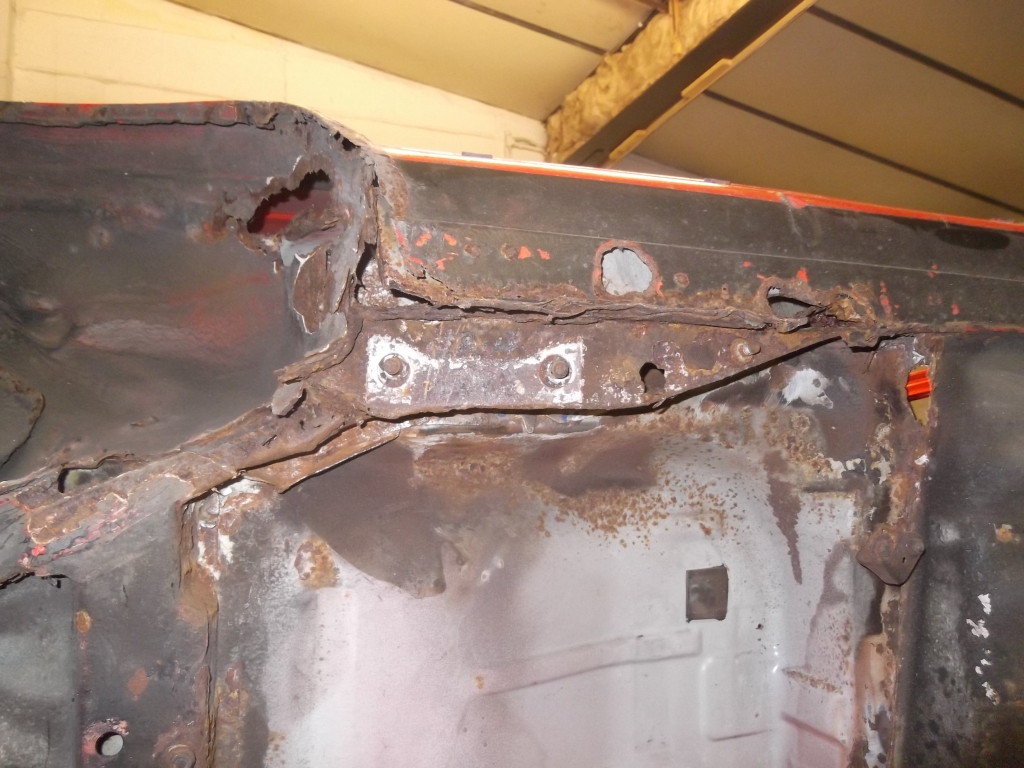
Removed chassis leg and offered new one up, it's a good fit apart from the panel has an extra cut out for something, not sure what though?
This view you can see the extra cut out which I will patch over before fitting.
More pics of the rot
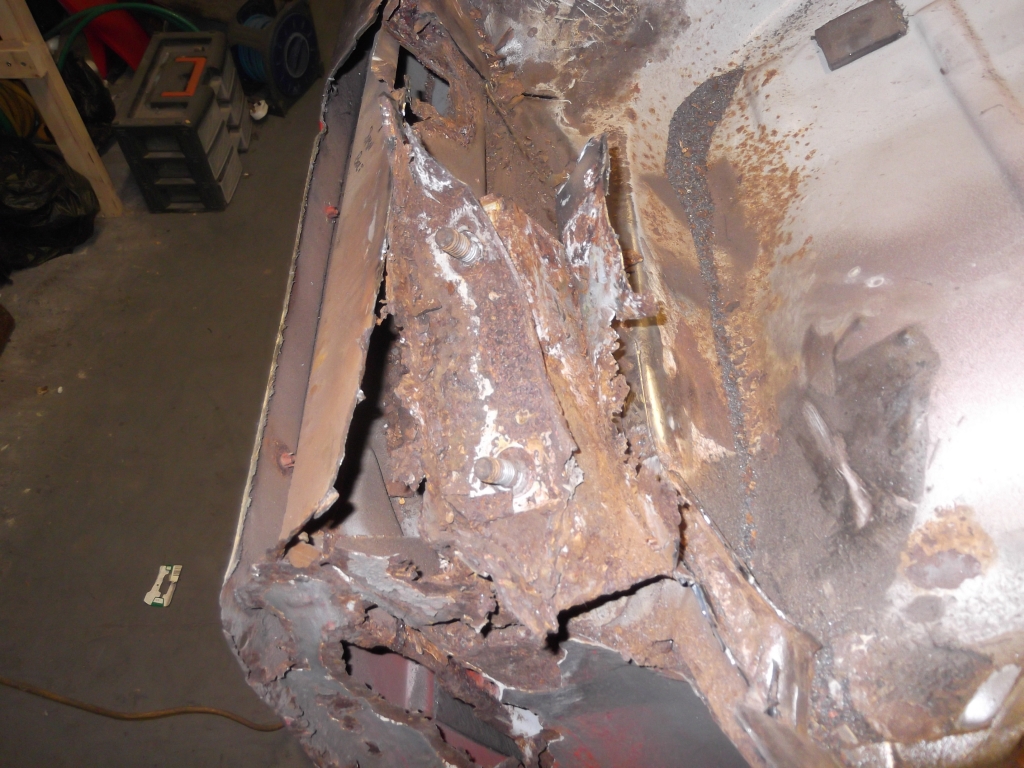

After a bit of a clean up
These are a few of the things I will be looking at over the Easter break. I'll have another update on Monday night hopefully.
Cheers all, Andy.
what tools you using on clean up of all of the chassis rails?
Posted

Old Timer

Such a lot of work but worth it in the end!!!
It's all shits and giggles until someone giggles and shits�
Posted

Moderator


 ramblin
�
ramblin
�After cutting out all of the rot and replacing new metal, I used a combination of wire wheels on a grinder/drill and then sanded it with soft pad on an angle grinder. I also used a rust treatment on the bare metal followed by etch primer.�
Hope this helps.


Moderator
sallyandsean said
Such a lot of work but worth it in the end!!!
Yeah definitely worth it bud. Fired her up yesterday and she's running great. I'll try and get a video later on today.
Cheers
Posted
Moderator
Video of her running 

Old Timer
Superb work mate  . Do you have pictures of the axle repair process?. Me and a friend have started to repair this area on his mk1 and it's so bad that were going to have to brace the u section with the mounting bolts for axle area as the inner sill that supports it is completely shot and needs to be replaced. Was yours that bad? It looks like we will have to remove a fair bit of the outer sill and inner sill to get at back section of inner sill that attaches to the axle mount u chanel. Is that what you have done? Hope this makes sense and sorry to detract from you
. Do you have pictures of the axle repair process?. Me and a friend have started to repair this area on his mk1 and it's so bad that were going to have to brace the u section with the mounting bolts for axle area as the inner sill that supports it is completely shot and needs to be replaced. Was yours that bad? It looks like we will have to remove a fair bit of the outer sill and inner sill to get at back section of inner sill that attaches to the axle mount u chanel. Is that what you have done? Hope this makes sense and sorry to detract from you
Posted
Moderator
Hi
daniboy123
If you look on page 2-3 then from page 8 of this thread, it's all there how I tackled it. I basically had to fit the axle mount repair panels first then chassis rail repair panels then repair the inner sill in that order. I also joined the axle repair panel and the new chassis rail together to make it all one piece. VW used to sell this repair panel all in one piece, so I just tried to copy that!
In hindsight I should have made a brace to go between the axle mounts with the correct hole centres to keep everything right. I'll do that for the next one!
Do you have a roll over jig? as it really helps to be able to work with the car upside down.
Give me shout if you need any help.
Hope this helps.
EDIT: Hey Danny, I see you're just down the road from me, I'm just in Washington. If you need anything give me a shout!
 Last edit: by Melteddrummer

Local Hero

Hey nice one Andy #3!!! That's had me grinning from ear to ear so you must be well chuffed!!
Great to hear it running now, I bet you can't wait until it's out on the open road - so close!
Great to hear it running now, I bet you can't wait until it's out on the open road - so close!
Andy
LINCOLNSHIRE REGION -�https://www.facebook.com/groups/467122313360002/
1983 MK1 Golf GTI Campaign Model - Under (looooong) resto!
1962 Rover P4 80
2002 BMW 745i
2008 BMW Z4 2.5Si
LINCOLNSHIRE REGION -�https://www.facebook.com/groups/467122313360002/
1983 MK1 Golf GTI Campaign Model - Under (looooong) resto!
1962 Rover P4 80
2002 BMW 745i
2008 BMW Z4 2.5Si
Moderator
It's got me grinning too Andy#1  I was sooo close to taking her for a spin on Saturday but I can't for the life of me get fluid into the clutch lines, it just wont go in lol. I need to take them apart again and see whats wrong.
Nearly there though bud!!
I was sooo close to taking her for a spin on Saturday but I can't for the life of me get fluid into the clutch lines, it just wont go in lol. I need to take them apart again and see whats wrong. Nearly there though bud!!
Settled In
what is the insurance like with 20v t conversions. pricey?
Posted
Old Timer
Would be great to pop up and have a look sometime as I'm only in yarm near middlesbrough so not too far. I've got my own project on the go as well but I've had to hand it over to a body's hop as I work away and don't have much time. Would have loved to have got stuck into mine like you have yours, hat off to you for having the determination to stick with it!.
I'll look back through your thread and see how you tackled it. Thinking about it, attaching the axle repair panel first would mean that u section was supported as we were going to spot weld the two panels together.
I'll look back through your thread and see how you tackled it. Thinking about it, attaching the axle repair panel first would mean that u section was supported as we were going to spot weld the two panels together.
Old Timer
Forgot to mention that unfortunately we don't have a rollover jig, my mates car is in his mams drive and there isn't the space to roll it over. We've had to modify the axle repair piece heavily to get it anywhere near, they don't seem the best quality pressings.
Old Timer
Melteddrummer said
Video of her running
Now that is a bit special!!
It's all shits and giggles until someone giggles and shits�
Posted
Moderator
ramblin said
what is the insurance like with 20v t conversions. pricey?
I ended up paying �270 but I know some have paid less.
Posted
Moderator
daniboy123 said
Forgot to mention that unfortunately we don't have a rollover jig, my mates car is in his mams drive and there isn't the space to roll it over. We've had to modify the axle repair piece heavily to get it anywhere near, they don't seem the best quality pressings.
Yeah mine wasn't a perfect fit but I didn't need to do any cutting, it was more a case of bending and bashing it a bit with brute force and ignorance
Moderator
sallyandsean said
Melteddrummer said
Video of her running
Now that is a bit special!!
Cheers mate, yeah she sounds better in the flesh. The vid doesn't do any justice.
Posted
Settled In
jezzer said
Melteddrummer said
jezzer said
I've just used the 3M 2 part product on the underside of my restoration and it goes on lovely and thick. You split the bag at the bottom to mix product with hardener. Connect the spray gun supplied and connect to air supply. Great product but expensive. Retail is �17 a bag but mate who has his own body shop got it for �12 a bag.Yomp said
No it's not thick compared to the yellowy rubbery underseal originally applied but is thick compared to paint.
I applied the 121 and then applied stonechip over the top of it where VW had originally applied a thicker layer and finished it with a Dinatrol black wax which is similar to the wax they put on last thing in the factory after the car had been built.
There's a 3m product which is a 2 part product that you mix together in its own contained crisp bag which is meant to be really thick. I think The guy restoring the swallowtail on here used it.
Only time can tell whether the 121 is any good or any other product for that matter but I was impressed the way the 121 adhered to the bare metal. Seemed like it would never come off.
Cheers for the info. How far does a bag go? how many bags for the underside is needed?
I did the underside, the inner wings and rear arches. The bags don't go very far at all, used about 12 in total.
I have a can of original underseal from vw. Bought about ten year ago. Lol
Still unopened.
Moderator
Sorry for the lack of updates lately! but here she is ready for MOT, booked in next Saturday… fingers crossed!


Settled In
Been watching this thread since the start, all the best for next Saturday!
0 guests and 0 members have just viewed this: None.