


diy port polish 8v

Posted
#688005
(In Topic #83064)
Local Hero

diy port polish 8v
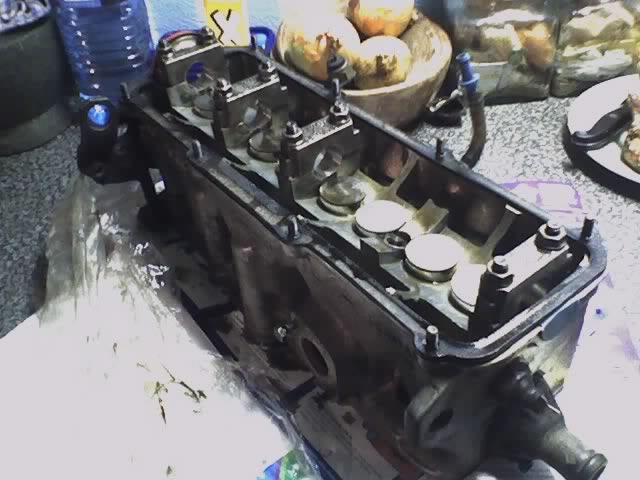
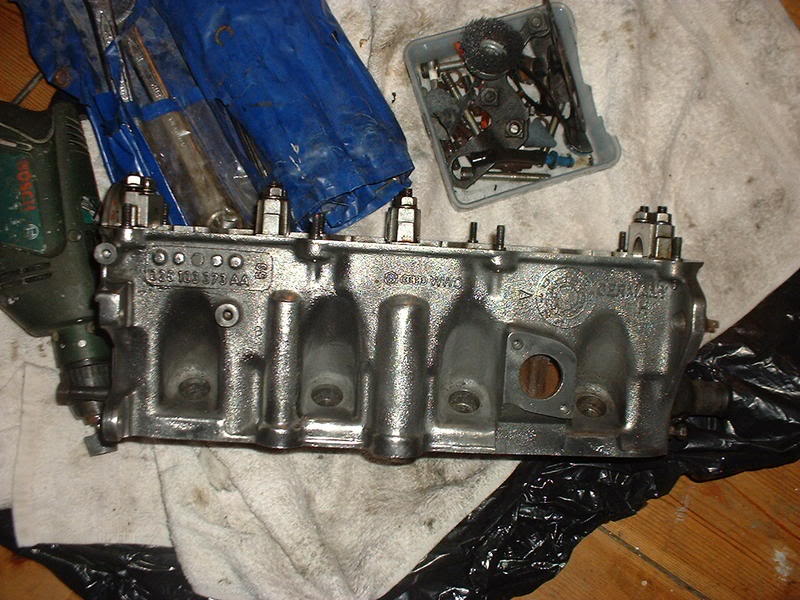
its in really good nick for having done 130k, im going to renew everything but the valves cos theyre looking sweet (so far, i havent got them out yet) with no pitting, spring compressor comes 2mo
ive used so far a wire brush on a drill, variious grades of wet n dry down to 800, wire wool and loads of wd40
this face before
after
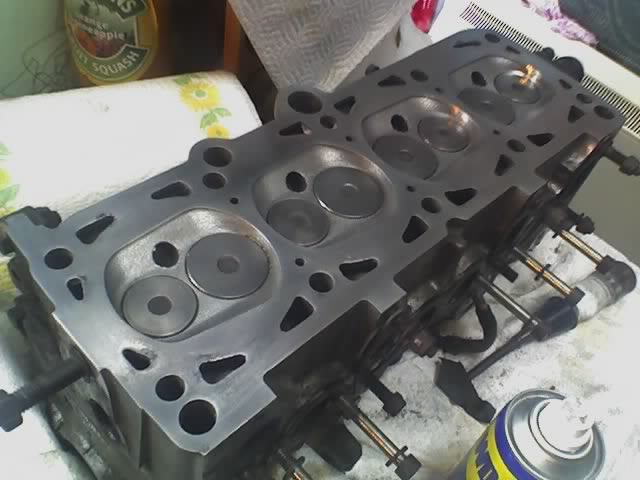
ive checked the head for square wi a metal rule and didnt go to deep to get gasket marks off, reckon flats better than shiny!!!
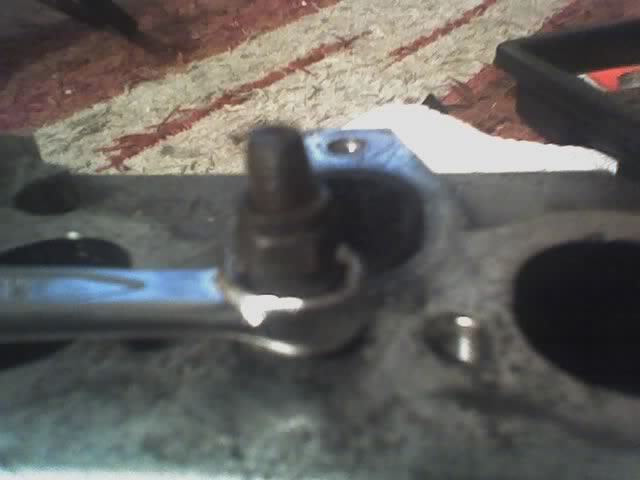
had some trouble getting the exhaust manifold bolts out till i locked two nuts up 12mm
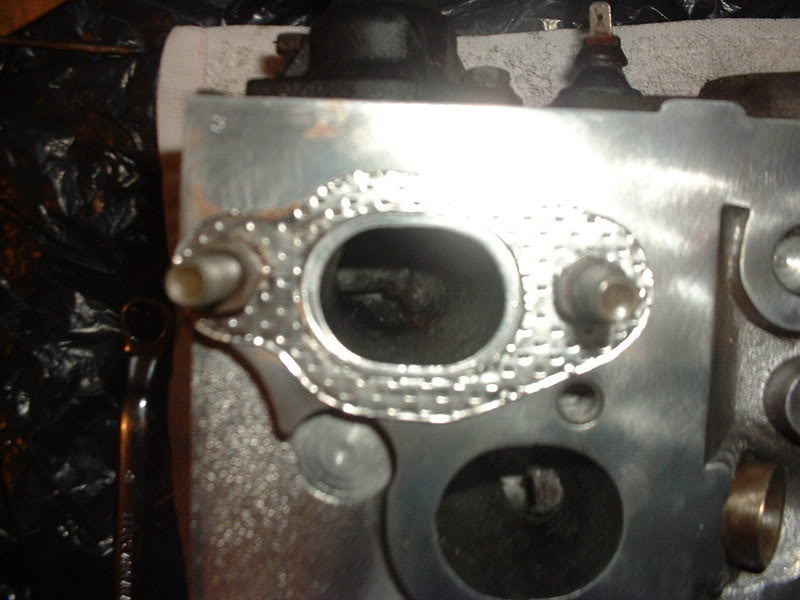
last night i cleaned up the inlet face , im gonna offer up the new gaskets, scribe them off and reduce the bores to that mark. i want to try using internal calipers to make each of the ports equal per cylinder
valves are coming out 2moro then ill start grinding back the ports
rebuild in progress....
Posted

Local Hero


Crazyquiff's Mk1 Golf Parts Emporium
www.golfmk1.co.uk - you know you want to….

www.golfmk1.co.uk - you know you want to….
Posted
Local Hero

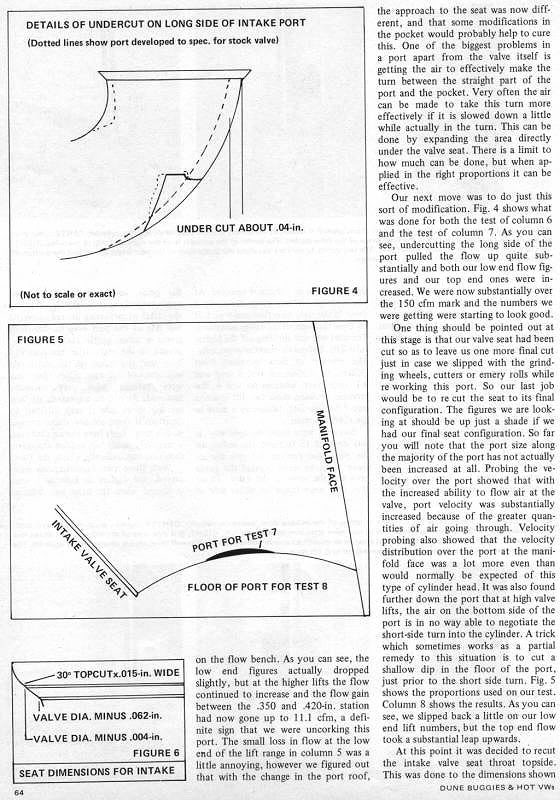
used the old bolts to pin the gasket down, tis easy to see how much to remove
scribed round the gasket, this will act as a maximum level, will grind down to just within this line
ive labelled the gaskets and done them individually so i can use them to mark the manifold later on
polished the side (again!!)
rebuild in progress....
Posted
Settling In

Posted
Local Hero
just got my valve spring compressor, pics to follow!
rebuild in progress....
Posted
Settled In

Posted
Settling In
Yeah behind the valve seats is where I mean, You can also take a bit off the valve seats not much but around mill.
When I did a 16v head for a mate I had the valve guides pressed out first so I could really get in at all angles and then got nice new guide put back in. Also the seat were re-ground for the new guides to be central and this prosscee removed any slips I had made.
Also before I had the guide put in I spent alot of time polishing the ports with wet and dry can remember what grade I used but I was virtually a mirror finish (students that have no beer money have enough time to do this)
Regards
Rich
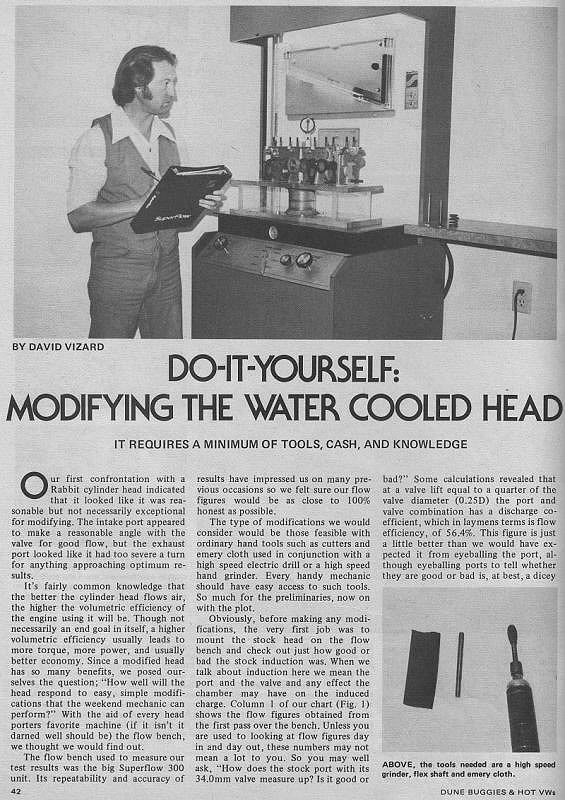
Posted
Local Hero
shot of the cotters
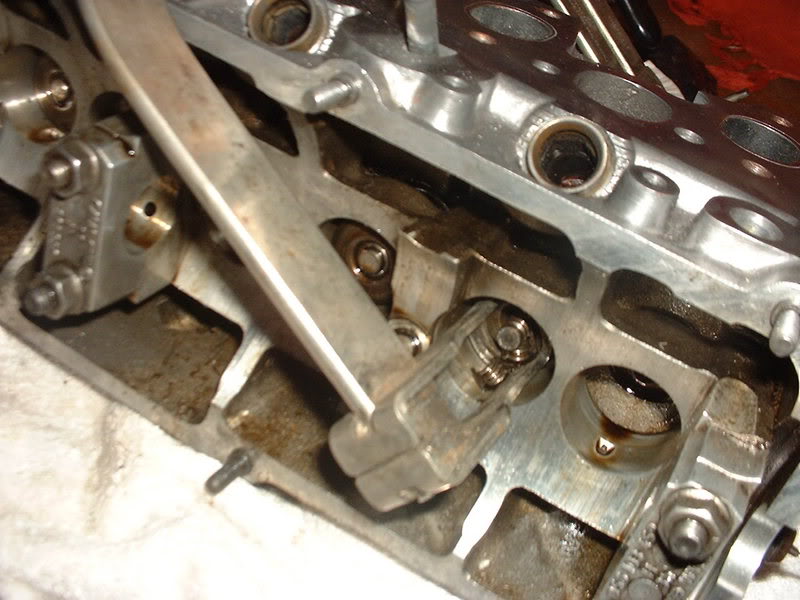
ive got labelled boxes to put everything into so they all go back in the same ones
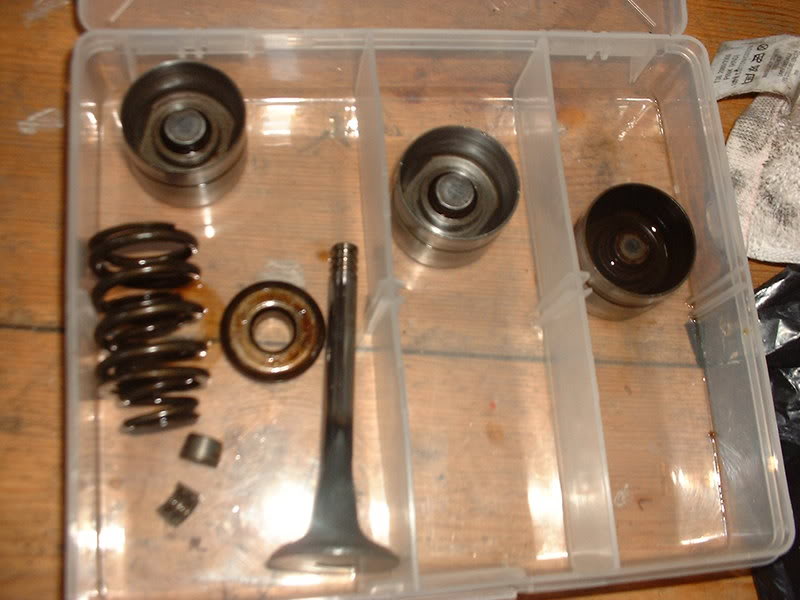
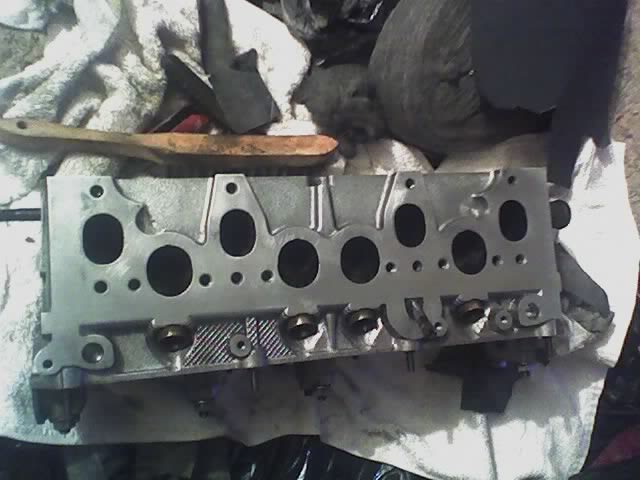
all out
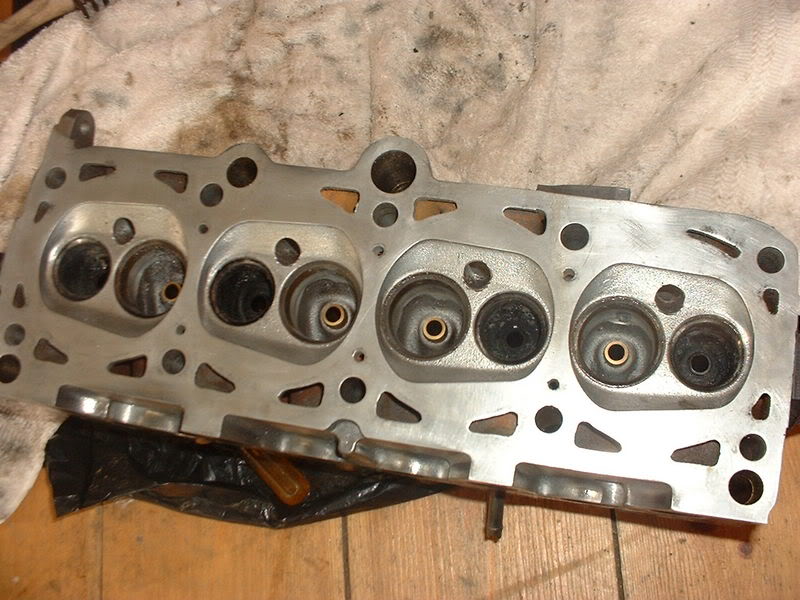
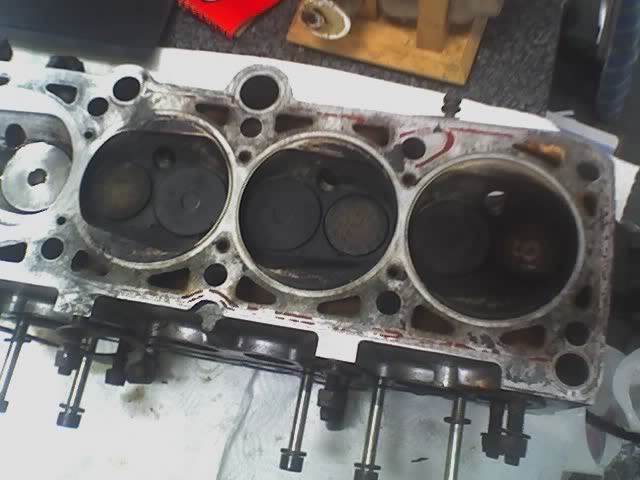
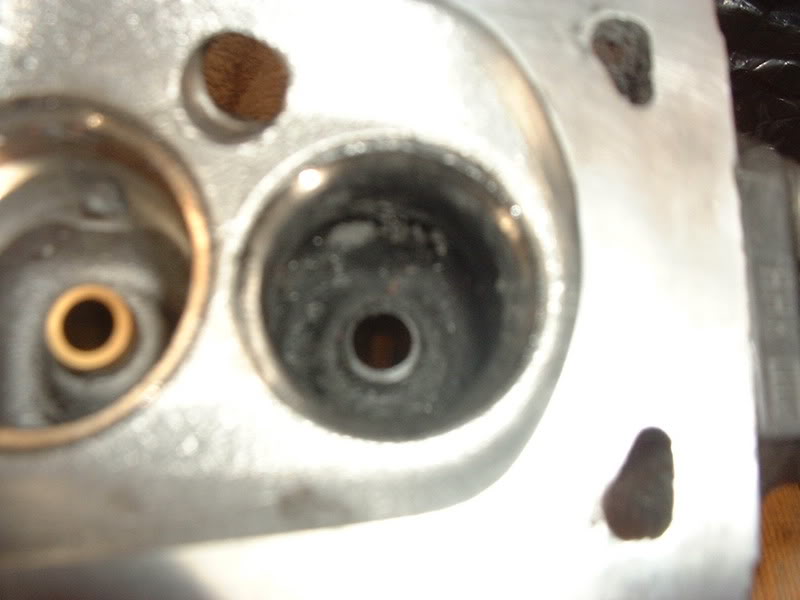
see the amount of crud in the exhaust port, tis pretty thick in there
how did you get the guides out m8, is there any way of doing it yourself??
next stage is to clean up the valves and order new springs.
rebuild in progress....
Posted
Settling In
It is possible to get the guides out your self but its tricky. To start with u need a nice suitable press and a good set of drifts and punches to press them out. They come out the top of the head towards the cam shaft. But also you need to warm the head up and make it loosen its grip on the guides. I have done this before by putting the head in my mum's aga baking oven for a few hours. the temp in the oven was about 200 degrees C maybe more. After I put the new guides back in I then had the head skimmed and the seats re-ground, re-grinding the seats is esetnail as I garanntte you that the new guides wont be central to the seats any more.
The place that use to do TSR's engine work like that charge 6 quid a guide to be fitted and i think its 3.50 a seat fro re-grinding and ?40 for a skim
Posted
Settling In
Also polishing up the ports will stop the build up of carbon in the exhaust as the surface roughness average is much lower it has less chance of sticking and getting inbeded in the little dips and bumps. But what really helps reduce the build up will be the new guides and stem seals and a correctly set mixture but if the piston rings are worn then will still build up but no where near as much.
Regards
Rich
Posted
Local Hero
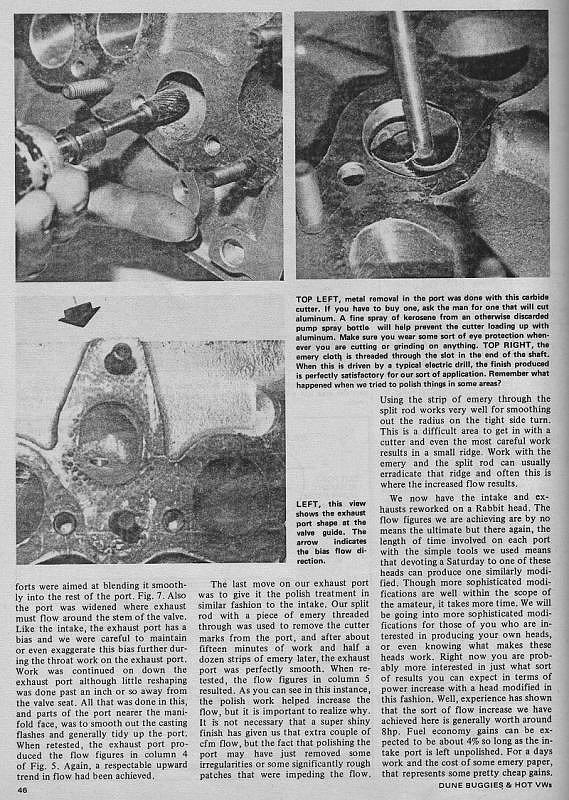
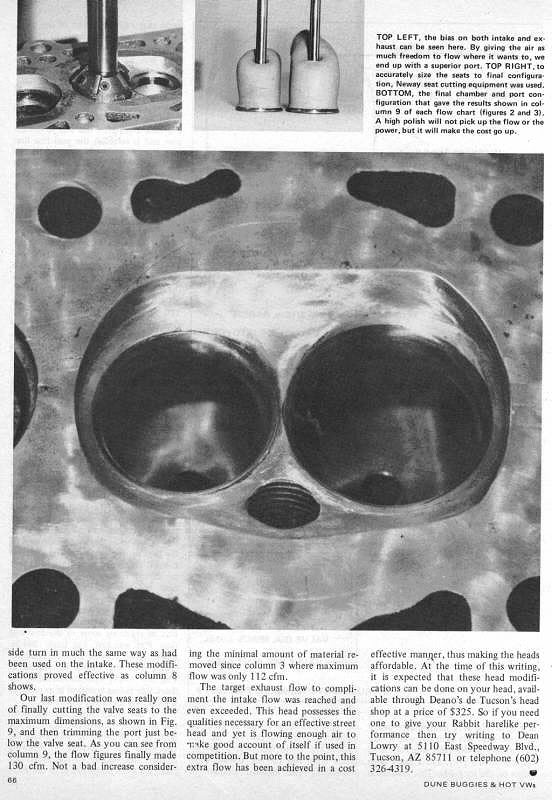
did you remove the injector shrouds, they seem to be the biggest flow disruption imo
rebuild in progress....
Posted
Local Hero
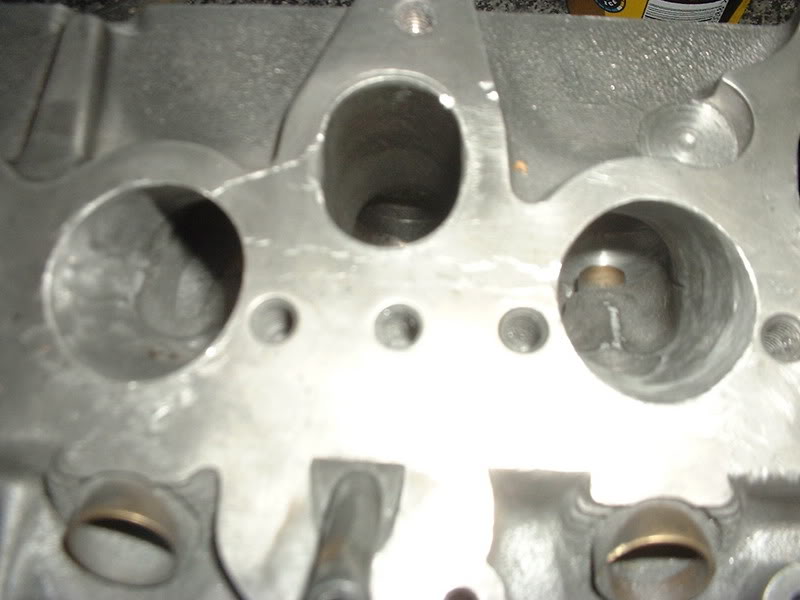

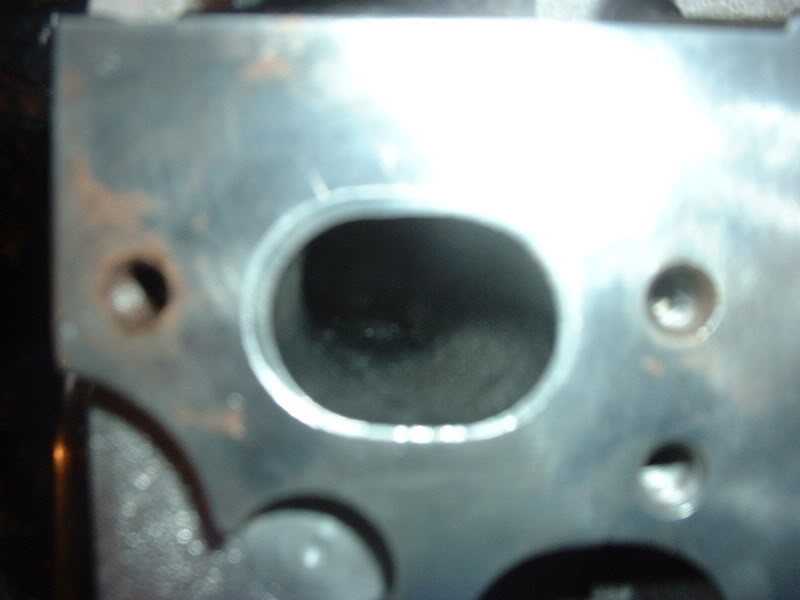
compared to these two that i havent done yet
rebuild in progress....
Posted
Settled In

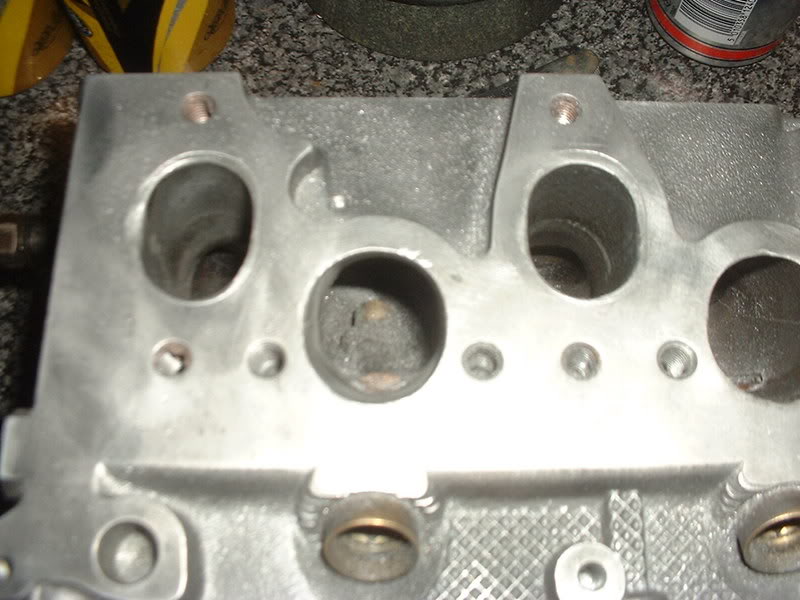
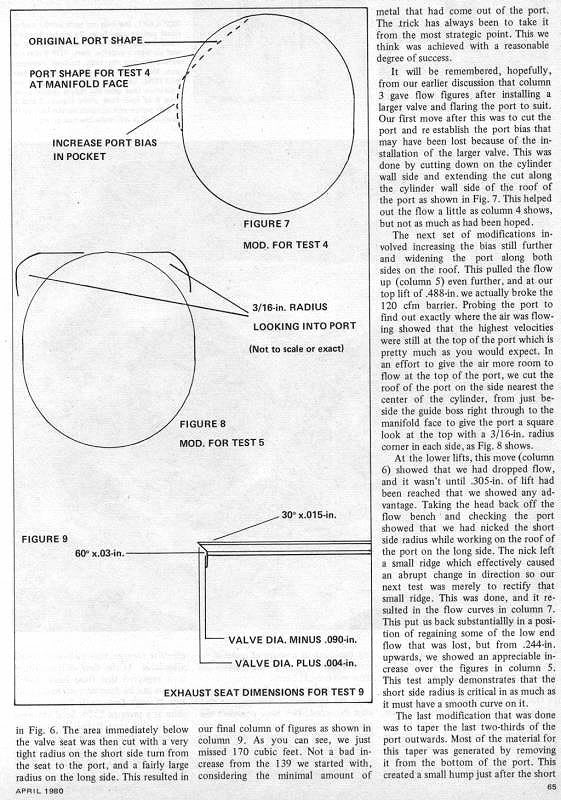
This is with the big stone on my drill.

I didnt get pix of the final finish. just some of the main prep.
Love to see yours in the finished state.. keep up the good work!
Posted
Local Hero
rebuild in progress....
Posted
Settled In
Posted
Settled In
Funny ya know one of my m8`s is VW mad and has a golf Mk2 8V GTI and i got his to do now after before and after road tests.with mine..lol
He has some spare heads and for doing his, i get one free to play with.
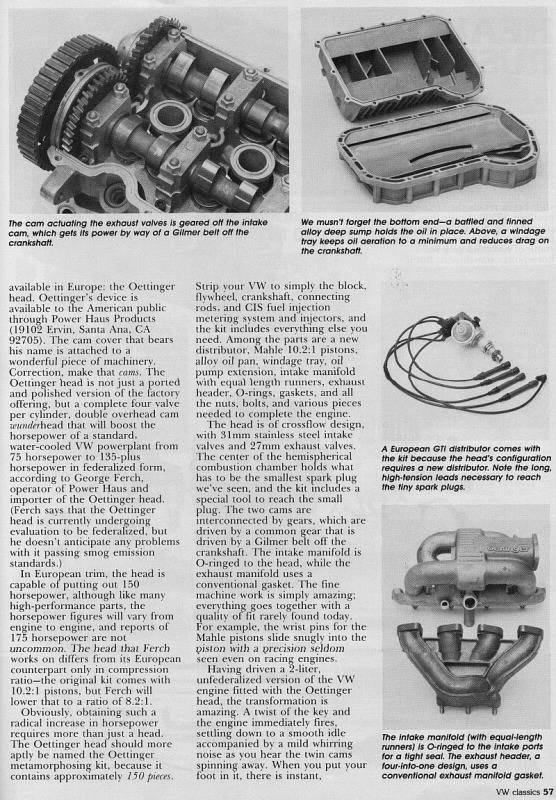
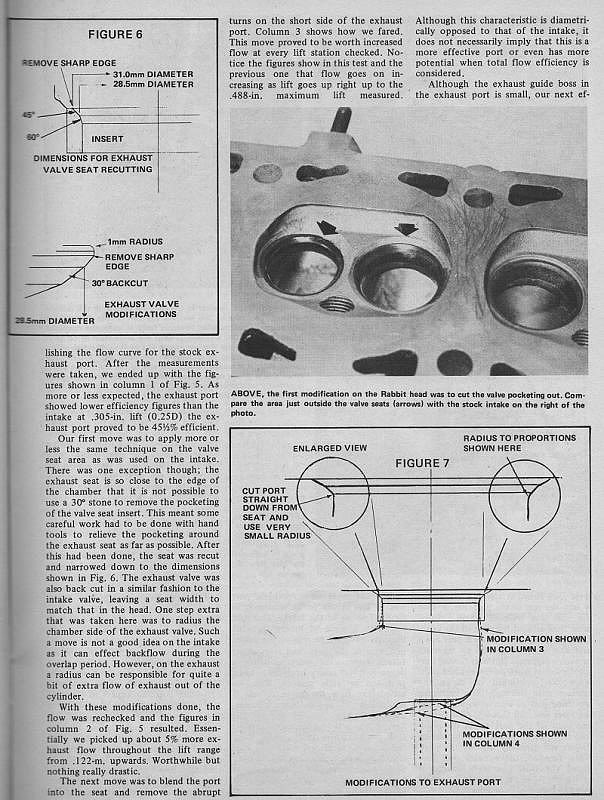
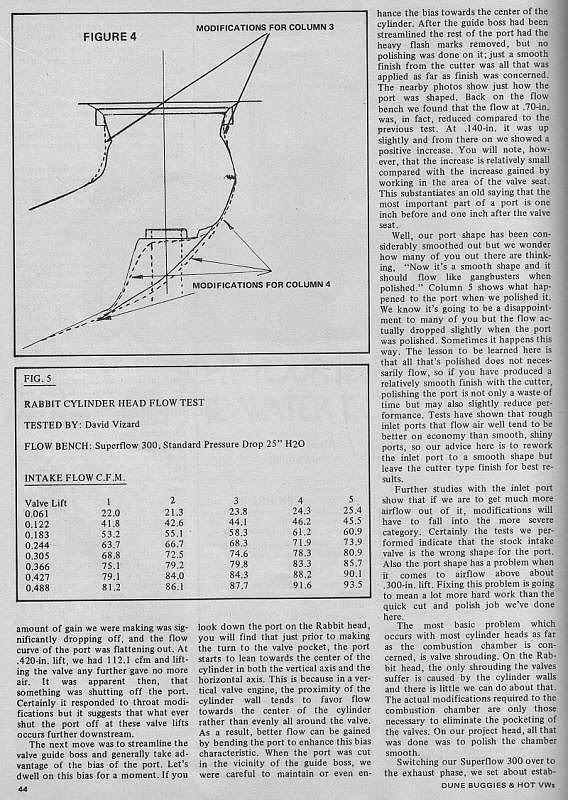
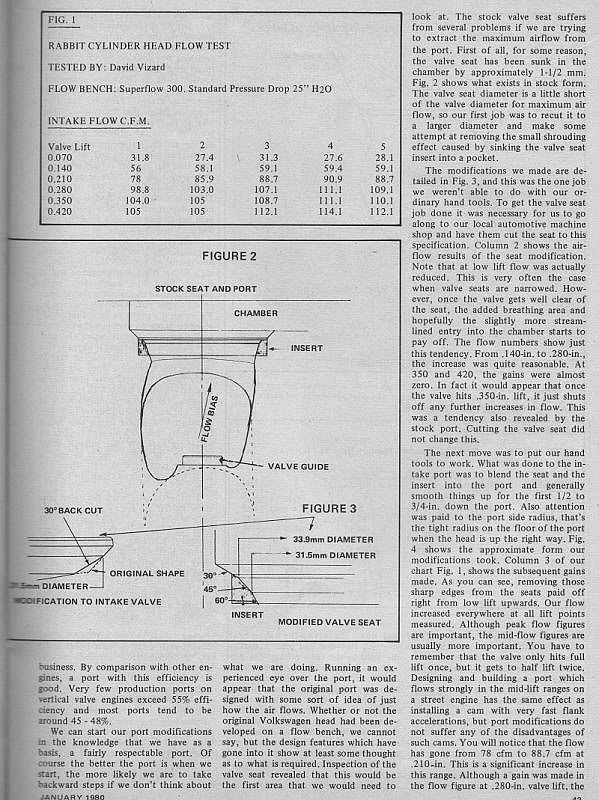
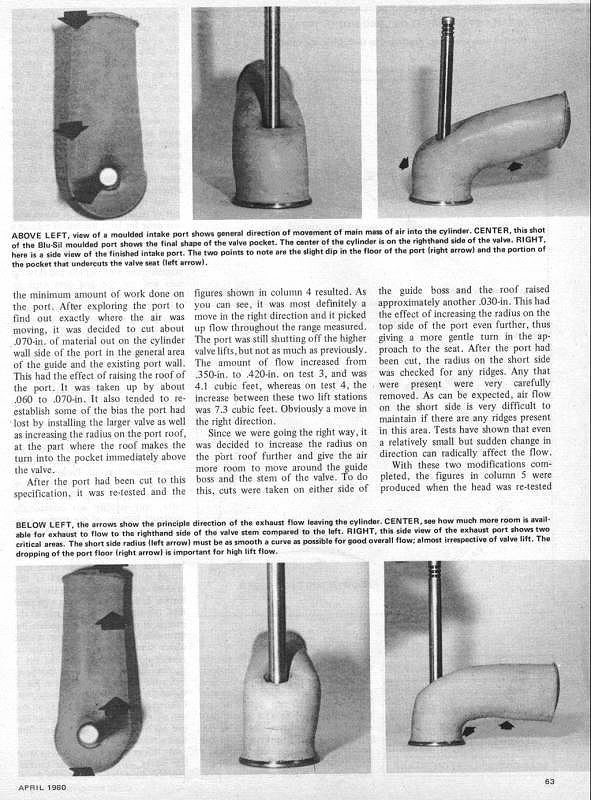
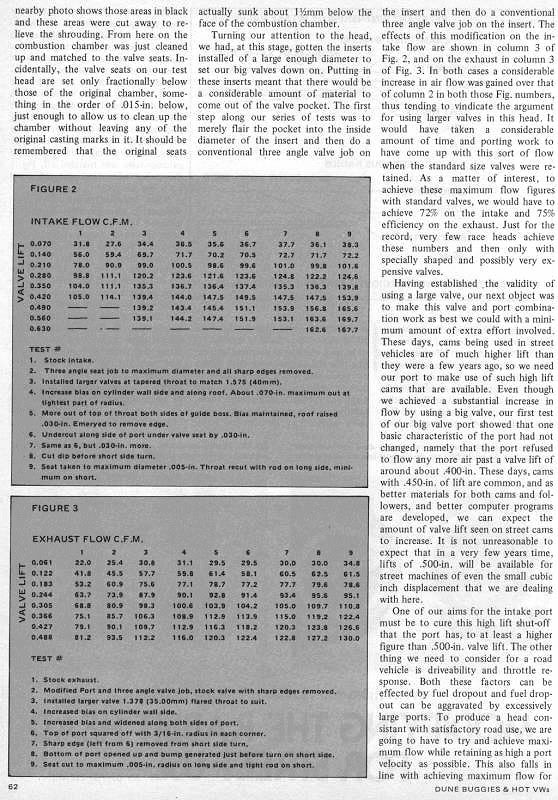
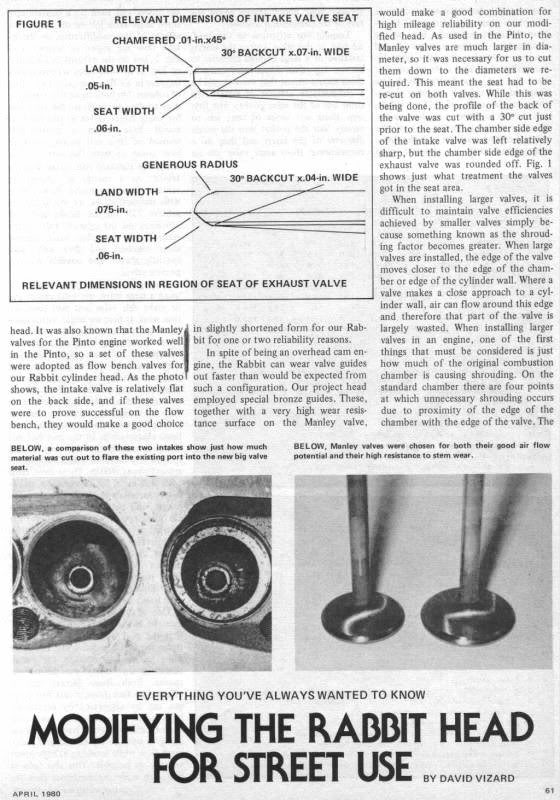
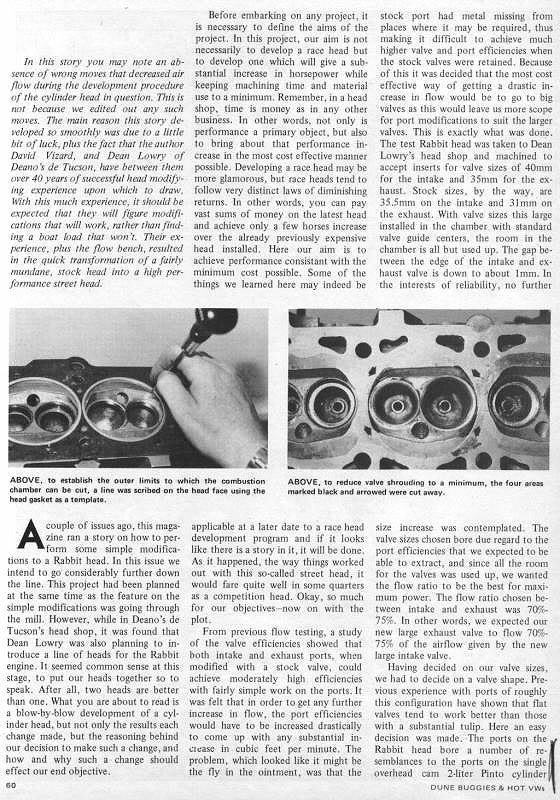
The only a couple of thing i wished i done to mine, when it was on the bench was backshing the valves and doing some work of valve shrouding. Its to take a bit off around the chamber nearest to the inlet and exhaust valves. Its quite close on these heads. Its just a little CFM increase but all of the litte increases make a bigger difference.
here is some info on the subject. Beware there are a few pages. but great reading.

Posted
Local Hero
thats wkd cheers
rebuild in progress....
Posted
Settling In
IMO i would have the valve guides changed as chances are they've done the full 130k and are worn ! the valve gives up most of its heat through the guides, not to mention the crucial role of seating!
great post, keep it comming
rdub
Posted
Local Hero
i think im showing my age tbh!!
rebuild in progress....
Posted

Settled In
Sensible offers only.
Patrick
Diamond Silver s1 gti 1.8 16v on R1 Carbs
Aygo Blue 2010 1.0 vvt (Daily Hack)
Past \'82 1.5 glx cabby converted to 1.9 tsr RIP
0 guests and 0 members have just viewed this: None.