


16v engine in a MK1 by paul-c

Posted
Old Timer

16v engine in a MK1 by paul-c
lol, too true! Enough has gone wrong this year that it well and truely came around, Four CV joints caned!
Mk1 Golf 16V Conversion FAQ Zip, now located at in the Forum WIKI section:�http://vwgolfmk1.org.uk/index.php?page=cedi&type=misc&id=42%2F26%2F3
Posted
Settling In

Just read the whole thread, looks like its coming on well 8)
wonder where you got that idea from dave :wink:
ManicGTI said
good plan, I'll update the FAQ and make it a bit more clear :y:
I bought the LUK 8V and 16V clutch kits from GS&F, used the 8V friction plate and 16V pressure plate, and took '16V' clutch back, ahem. They look the same anyway
wonder where you got that idea from dave :wink:
Citi 2L16v
Posted
Local Hero


my jetta TD has the free wheeling pulley on the water pump,its weird,never seen one before,the car has power steering.
I need to upgrade the clutch in my TD when it does wear out,i heard about using the 16V pressure plate and the 210mm diesel turbo friction plate with existing flywheel??
What size is the petrol friction plates on 8v and 16v?
TD is 210mm
citigolf is 190mm
Bert
And paul,glad to see a dayco belt going on :wink:
I would send the head set back and go for a Payen set though.
Bert
Thats not a rod knockin,its a diesel stupid! floppy top and 1 tin top 
Posted
Local Hero
Bert said
my jetta TD has the free wheeling pulley on the water pump,its weird,never seen one before,the car has power steering.
I need to upgrade the clutch in my TD when it does wear out,i heard about using the 16V pressure plate and the 210mm diesel turbo friction plate with existing flywheel??
What size is the petrol friction plates on 8v and 16v?
TD is 210mm
citigolf is 190mm
Bert
And paul,glad to see a dayco belt going on :wink:
I would send the head set back and go for a Payen set though.
Bert
Both 8V and 16V normally use 210mm clutch, there are some early 8Vs and early Digifants which have a 200mm clutch though.
The gasket set was simply what my FLAPS has supplied, hmmmm you have me troubled now…..
��������������������������������
Posted
Local Hero
Serious bert,dont fit that cheap crap,payen or genuine only,ive hever had any problems,the K series rover gaskets are better made by payen than Origional quality
Only do it once.
Is the tensioner INA in the box? i see its ruville
Eyes up my a…
Bert
Only do it once.
Is the tensioner INA in the box? i see its ruville
Eyes up my a…
Bert
Thats not a rod knockin,its a diesel stupid! floppy top and 1 tin top
Posted
Local Hero
New oil cooler too posh git,how much was it?
Bert
Bert
Thats not a rod knockin,its a diesel stupid! floppy top and 1 tin top
Posted
Local Hero
Bert said
New oil cooler too posh git,how much was it?
Bert
?32.50 plus the dreaded, from GSF. They said they did Berg or VW oil coolers, so its OEM quality.
��������������������������������
Posted
Old Timer
rupe said
Just read the whole thread, looks like its coming on well 8)
ManicGTI said
good plan, I'll update the FAQ and make it a bit more clear :y:
I bought the LUK 8V and 16V clutch kits from GS&F, used the 8V friction plate and 16V pressure plate, and took '16V' clutch back, ahem. They look the same anyway
wonder where you got that idea from dave :wink:
He told me to do it guvna! :dontknow:
Mk1 Golf 16V Conversion FAQ Zip, now located at in the Forum WIKI section:�http://vwgolfmk1.org.uk/index.php?page=cedi&type=misc&id=42%2F26%2F3
Posted
Local Hero
Things are ticking along slowly. Rain prevented work most of the daytime, but I worked until around 7:30pm in the cold/dark, degreasing various parts. Its a really slow job, I've half done around a third of the parts…..

��������������������������������
Posted
Local Hero
ManicGTI said
good plan, I'll update the FAQ and make it a bit more clear :y:
I dug up the pics of the engine as first arrived, to show the double pulley configuation:
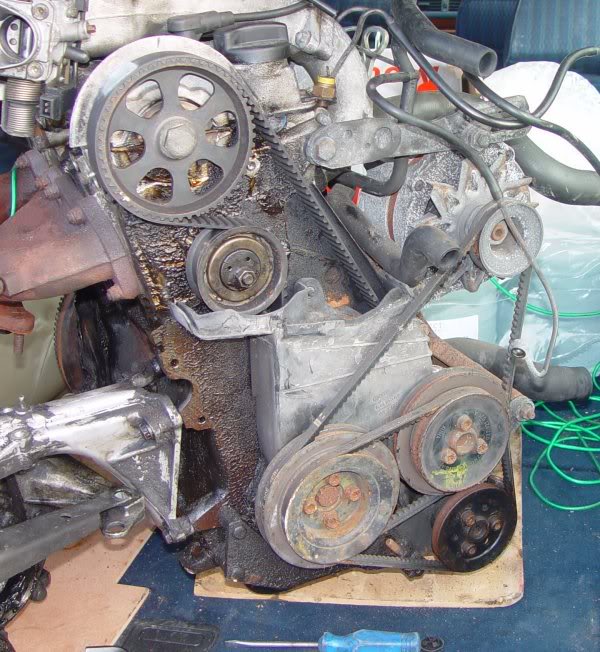
Note the double pulley both on the crank and water pump. The water pump's inner pulley freewheels, its the outer pulley which drives the water pump. Since you don't need to run power steering on a Mk1, you can remove the outer pulley from the crank, replace the 2 pulleys on the water pump with the single pulley (VW part number 027 121 031) and remove the power steering pump and its brackets.
��������������������������������
Posted
Old Timer
Awesome, cheers Paul, will update. Once you're done have another butchers through the FAQ and let me know if theres ought else you reckons missing and i'll update. 8)
Mk1 Golf 16V Conversion FAQ Zip, now located at in the Forum WIKI section:�http://vwgolfmk1.org.uk/index.php?page=cedi&type=misc&id=42%2F26%2F3
Posted
Local Hero
This is turning into "world's longest engine conversion". Today I swung the engine in place for a test fit:
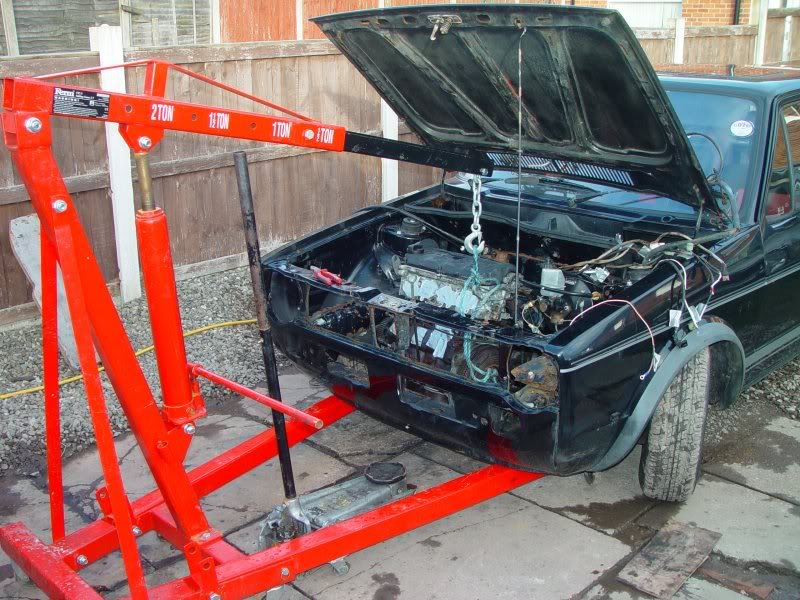
I wanted to see how the induction system and airbox are going to fit. I was planning to cut off the brackets that secure the airbox, from the left of the engine bay (near the battery) and weld them into place the other side, but having seen the proximity to the water pump, alternator, etc I'll construct bolt-on ones nearer the time. I cut a slot in the bottom of the airbox and it holds it on the chassis rail quite nicely, I guess this is what everyone else does.
Since I now have everything to complete it, I could have easily stuck it all in and bolted it up and have it running in a couple of days. Instead, I'm laboriously degreasing and repainting every single little bracket, fitting, etc and I'm also going to tidy up and repaint the engine bay. Its going to take ages….
��������������������������������
Posted
Old Timer
paul_c said
Its going to take ages….
But it'll be worth it in the end. If you're going to do it, might as well do it properly…

Posted
Settling In
Looks like you are doing a good job, just looking at the pic's makes me wanna do it to my golf!! 
Posted
Local Hero
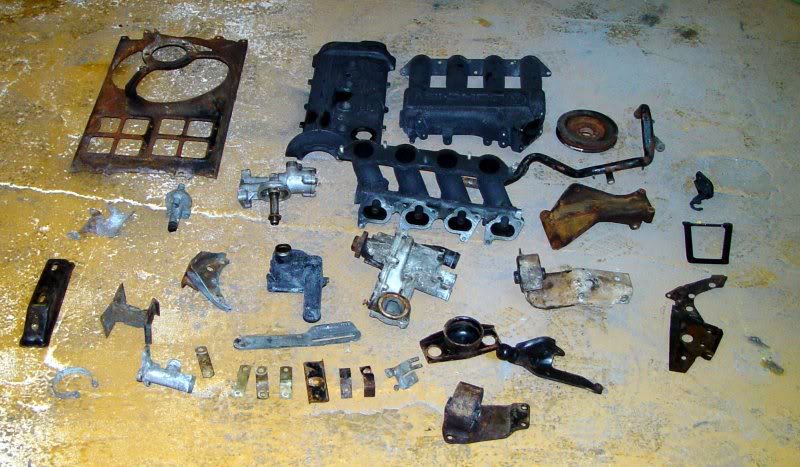
After thinking a little more pragmatically about things, I've realised I can't achieve a decent finish on all the small parts simply by wire brushing then painting myself. So I've sent away a basket of parts to a firm who are going to do the blasting and powder-coating for me. This includes the inlet manifold, cam cover and a couple of other small parts, which have already started to corrode:
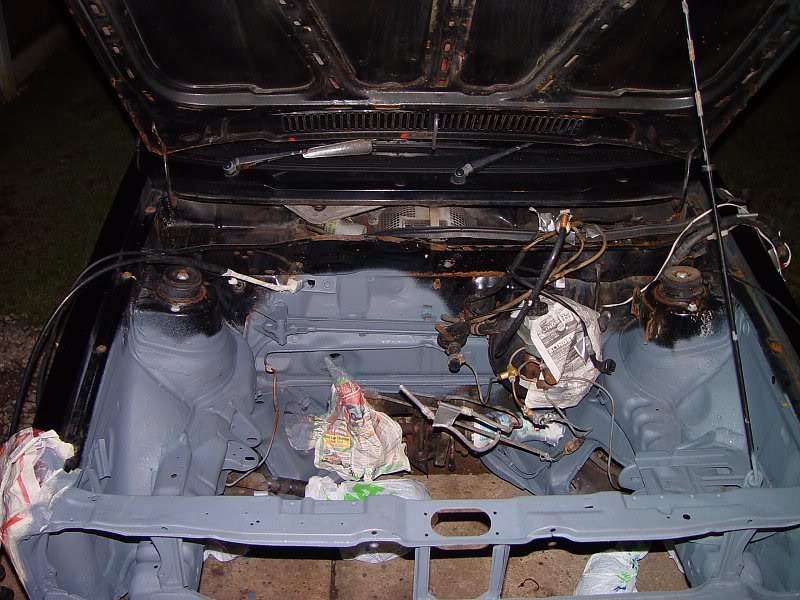
This just leaves me with the engine bay to sort out. It has spots of rust everywhere and the front panel is a bit grotty, so its all going to be wire brushed and repainted. Its so intricate in there! And I also need to work around the steering, brake linkage, brake pipes and fuel pipes. Today I ground off the old air box mounts and started on the wire brushing. Here is a 'before' pic.
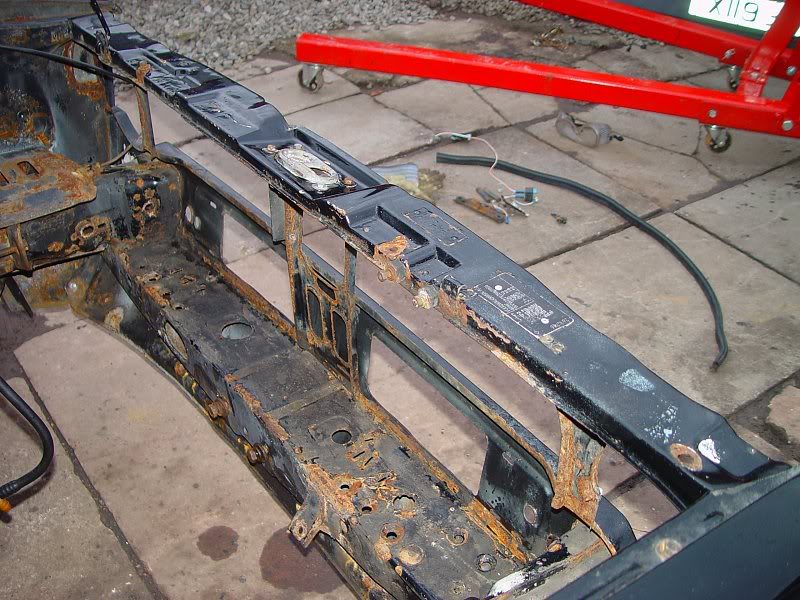
To be honest the whole car was a wreck. I did the rear end last year, so once the front end is done I'll be happy enough, for now.
This just leaves me with the engine bay to sort out. It has spots of rust everywhere and the front panel is a bit grotty, so its all going to be wire brushed and repainted. Its so intricate in there! And I also need to work around the steering, brake linkage, brake pipes and fuel pipes. Today I ground off the old air box mounts and started on the wire brushing. Here is a 'before' pic.
To be honest the whole car was a wreck. I did the rear end last year, so once the front end is done I'll be happy enough, for now.
��������������������������������
Posted
Old Timer
8O yoowzers!!!
Good luck paul!
Good luck paul!

Posted
Life Member

This is the point where you say, hmm if I am going this far I may as well go the whole way 
Watch those inner wings, they have a tendancy to hide the crumbly stuff.
Looks good so far!
Watch those inner wings, they have a tendancy to hide the crumbly stuff.
Looks good so far!

Posted
Local Hero
The inner wings have already been attended to - from the other side. So the corrosion has been attended to, what remains is all the other bits of surface rust. In fact, the whole car was a bit of a wreck when I bought it, I've replaced so much stuff, I really should have found a better car to start with. But I've just sort of stuck with the same car.
��������������������������������
Posted
Local Hero
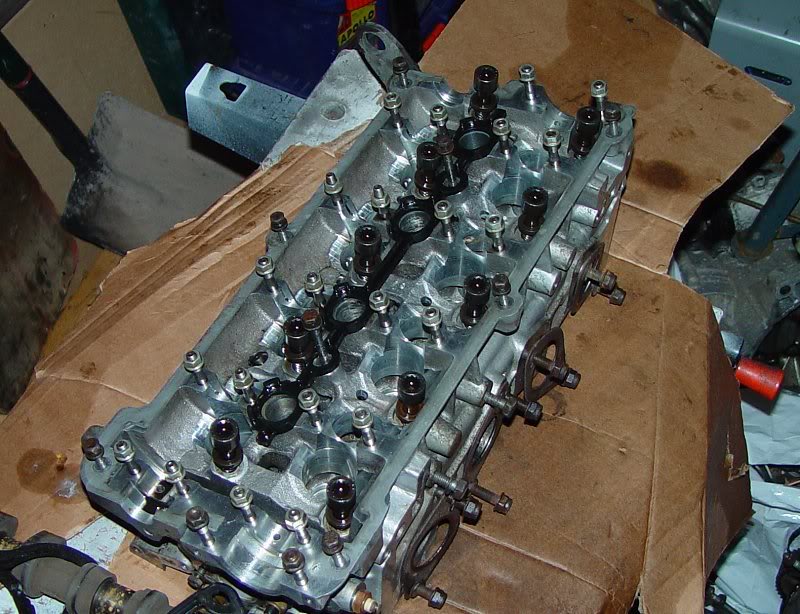
Slow but steady progress is being made. I've decided to completely rebuild the top end, so after equipping myself with a decent valve spring compressor, I've stripped all the valves off the head:
The engine bay is being painted in stages, it takes so long to wire brush because its such an awkward thing, that I can only fit small amounts in per day. This is it 4/5 done in grey stonechip, the only remaining area is the upper section of the rear of the bay. After the stonechip is on I'll apply black topcoat:
The engine bay is being painted in stages, it takes so long to wire brush because its such an awkward thing, that I can only fit small amounts in per day. This is it 4/5 done in grey stonechip, the only remaining area is the upper section of the rear of the bay. After the stonechip is on I'll apply black topcoat:
��������������������������������
Posted
Local Hero
Looking good as always 8)
Looking forward to seeing the engine go in!
Rich
Looking forward to seeing the engine go in!
Rich
There are too many online users to list.