


16v engine in a MK1 by paul-c

Posted
Local Hero

16v engine in a MK1 by paul-c
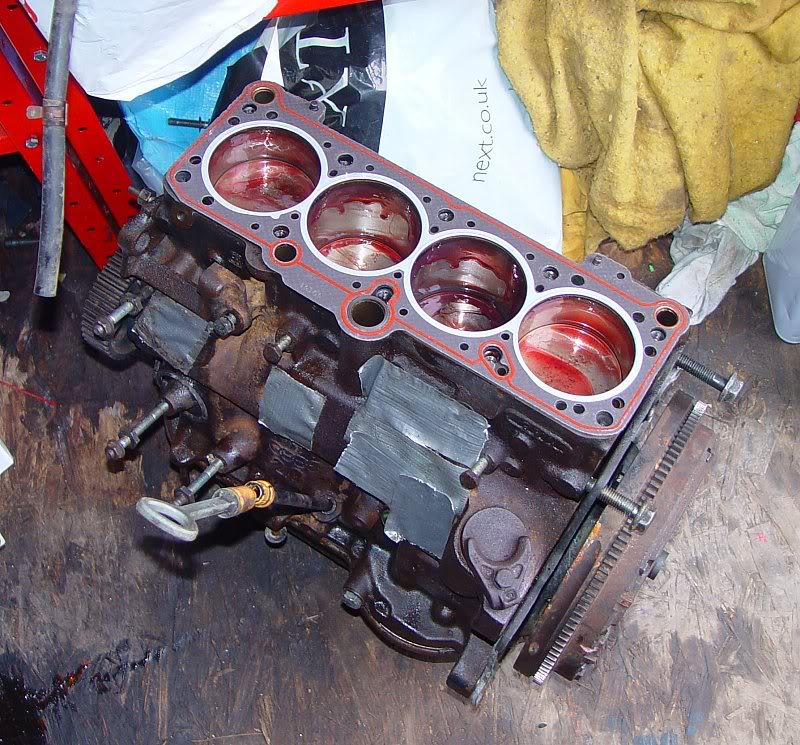
Note the engine assembly lube in the bores, and the brand new head gasket.
New bolts. Anyone ever done this before, the torquing up felt like I was rotating the earth!!!
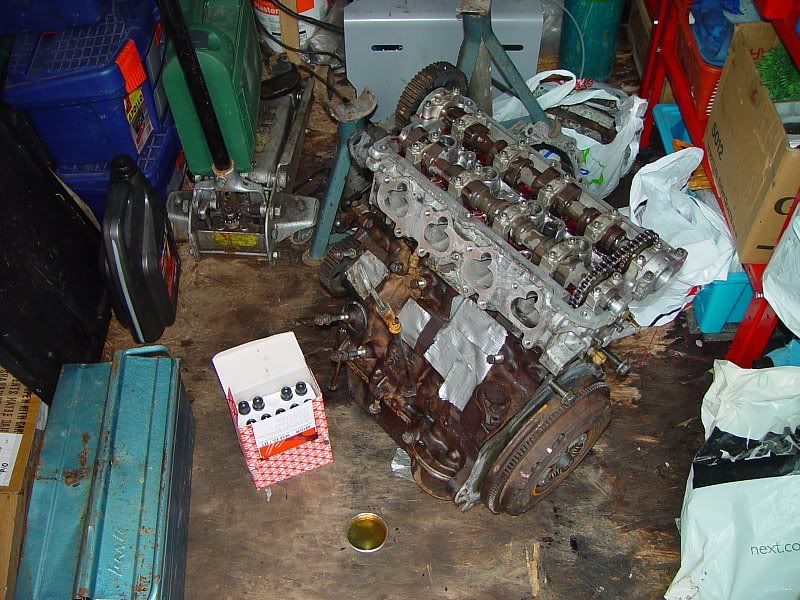
The cam cover is now on and bolted up properly with its new gasket. Strangely, it was a real struggle to fit, the gasket needed a lot of persuading into the slots on the cam cover.
Note the wire (a coat hanger) sticking out of cylinder no 1. I don't know why exactly, but I couldn't find any exact marks to line up TDC on the bottom end (top end was alright), so I had to use the technique of poking something down and seeing where it topped out. I don't know how accurate I got it but I think its enough (within 1 cambelt tooth tolerance). There is a mark on the crank pulley which points straight up, but no corresponding mark on the block! (Unless its on a part not fitted???)
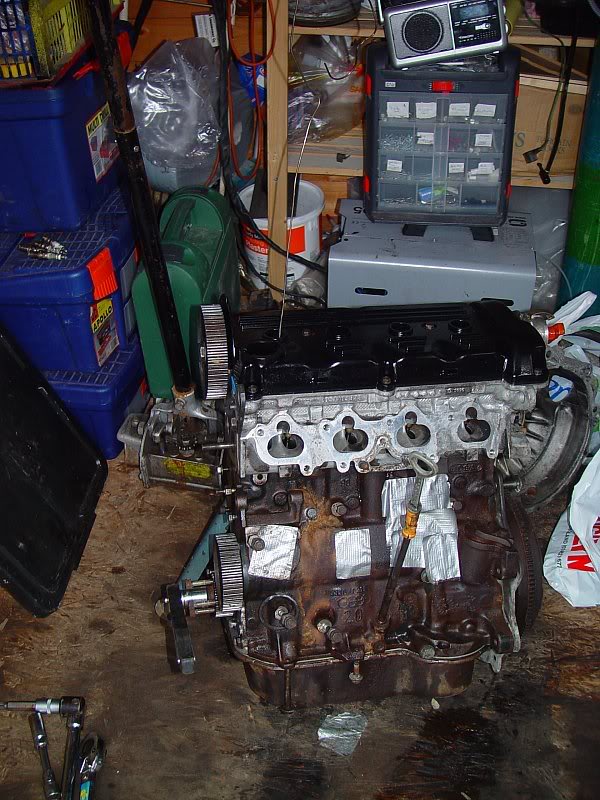
Cambelt all fitted, tension guessed and timed up. Engine has been turned round a number of times so we're all ok for spin up/start up. I thought this would take longer, but it was like falling off a log!
��������������������������������
Posted
Settled In

Posted
Local Hero
I pondered on painting the block, decided not to in the end. 1) It would have created to much rust flakes/dust etc it would have been a nightmare to try keep out of the engine oilways, etc. and 2) I've seen lovely painted blocks, a few years on, and the paint's flaking all over the place etc. So, 'au naturelle' it is.
��������������������������������
Posted
Settled In
Posted
Old Timer

Posted
Local Hero
There i am spending my 'winter' watching tele , reading and dreaming of bigger engines and you Paul are out side doing it !!
Good read with some great tips , looking forward to the fire up .
Cheers………….

Posted
Local Hero
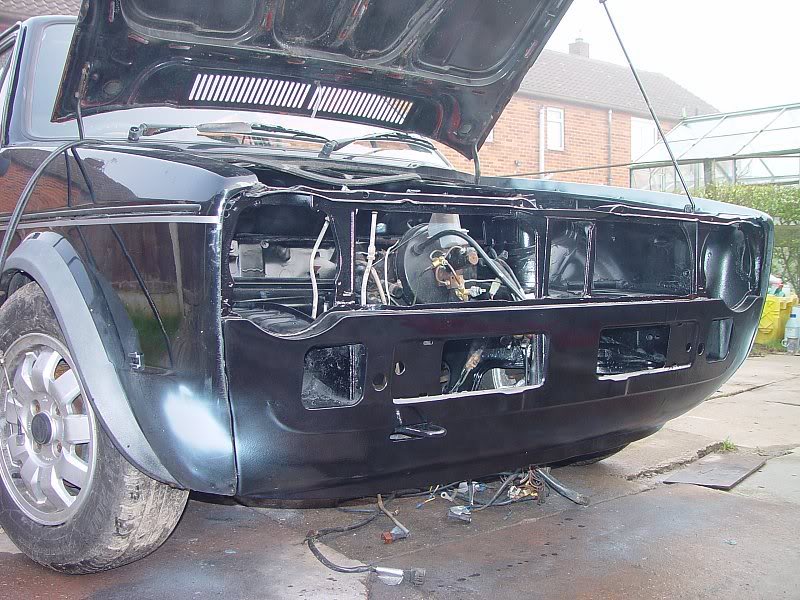
The front panel is resprayed and has turned out quite nice, after a lot of effort. Correcting a few minor paintwork issues (see the primer).
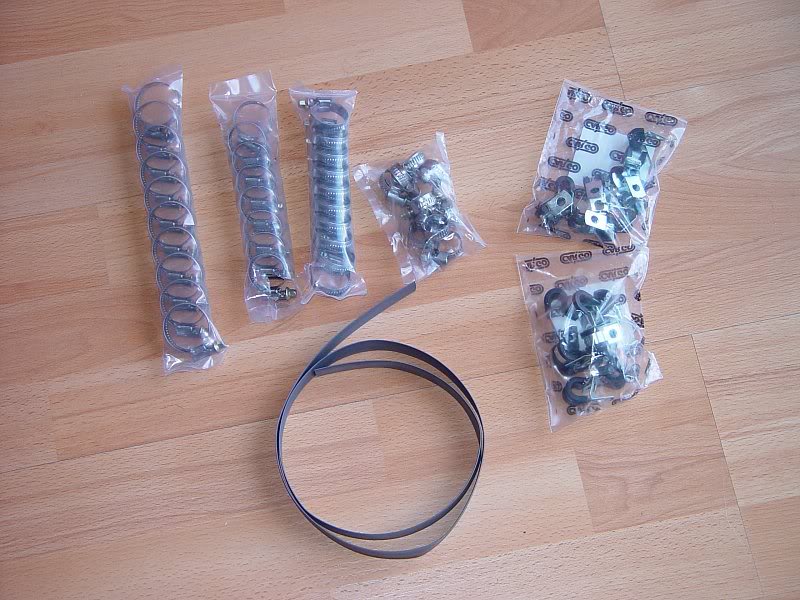
These arrived this morning - 40x hose clips, 20x P-clips and a length of heat shrink wrap
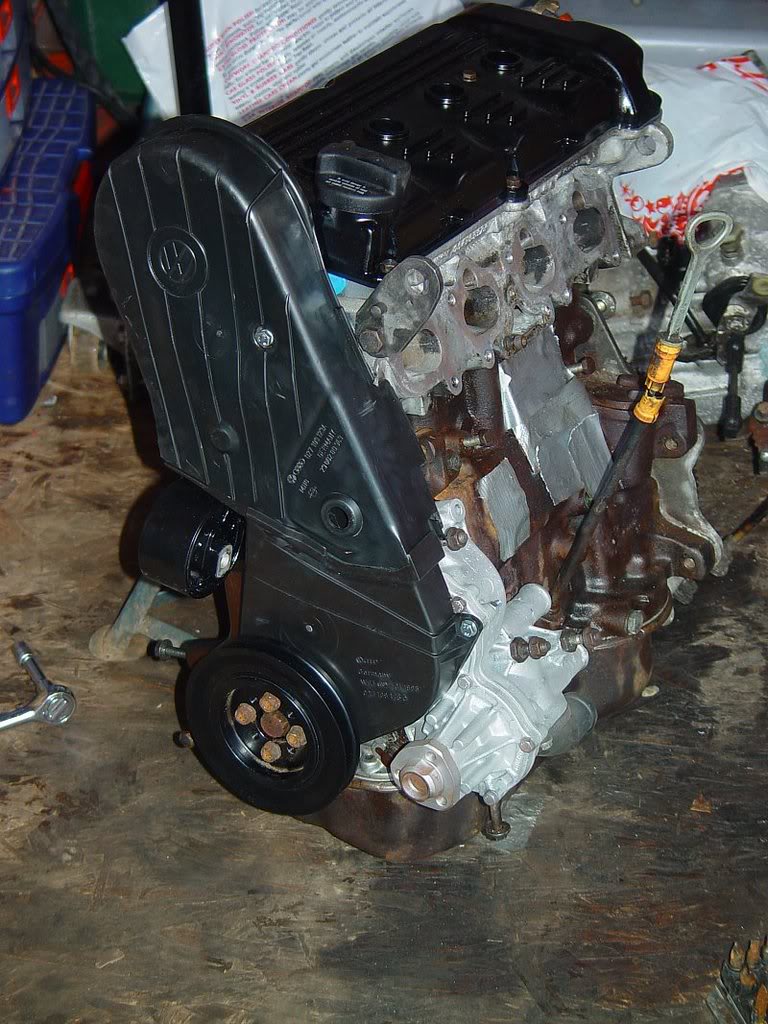
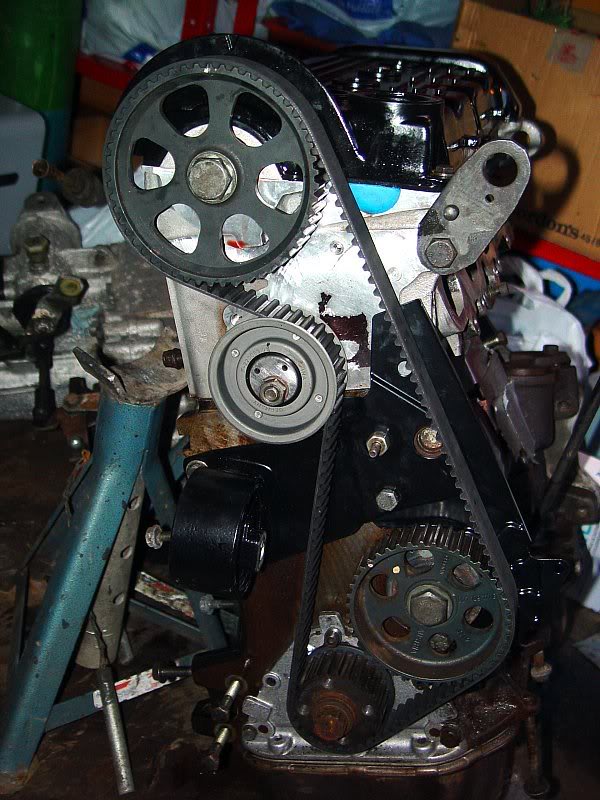
The bottom cambelt cover is new, the top one is the old one cleaned up - scrubbed up nice! Once the bottom cover was fitted, I was able to check the cambelt was timed properly - spot on! So my coat hanger technique had worked fine.
Still a number of smaller items to clean up, which weren't blasted and powder coated. Here is the Audi WUR being cleaned.
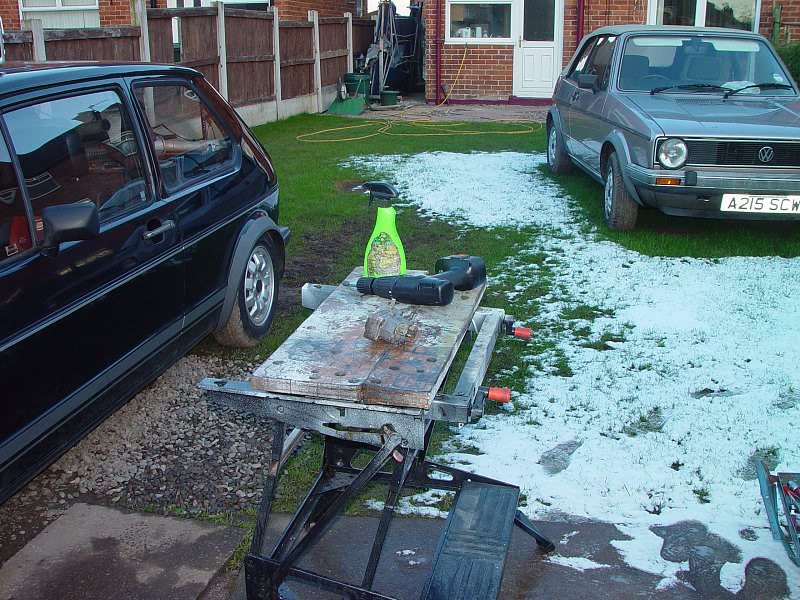
The snow isn't too bad underfoot, but then the work area turned into an ice rink around 4pm, when the temperature once again dropped to below freezing, so I packed up then!
��������������������������������
Posted
Local Hero
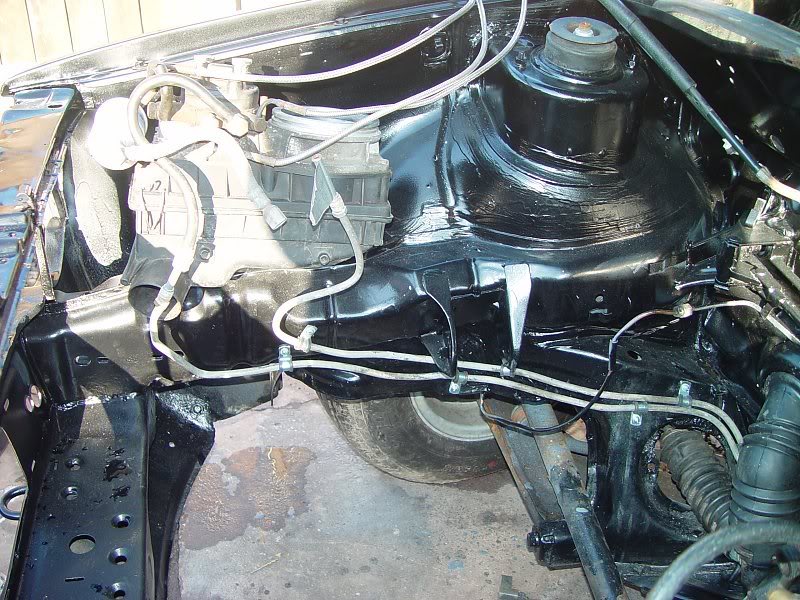
I've now done the job I was dreading the most - bending the fuel lines to the other side of the car. Note the rubber/metal P-clips securing it and the temporary placement of the airbox/fuel metering unit.
I've used a soldering mat, cable-tied at the rear, to shield the steering rack from the worst of the heat.
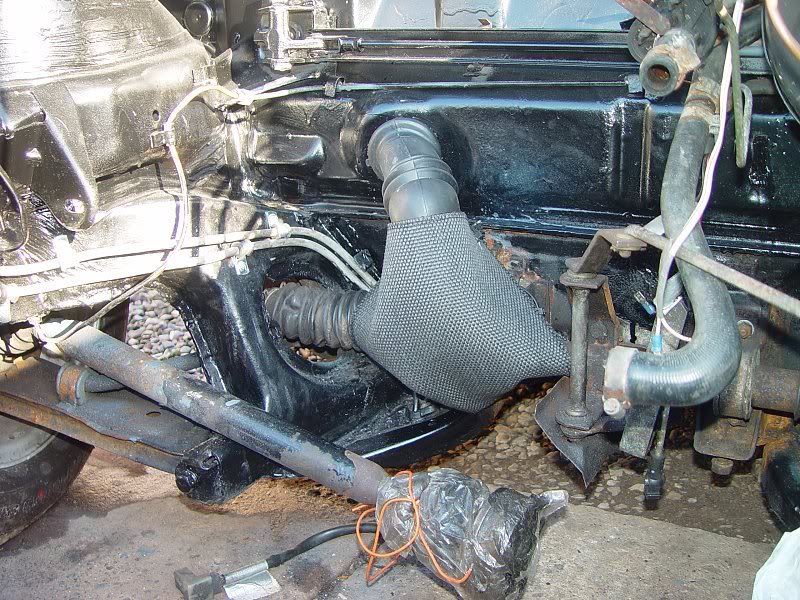
Ready to wrap the exhaust
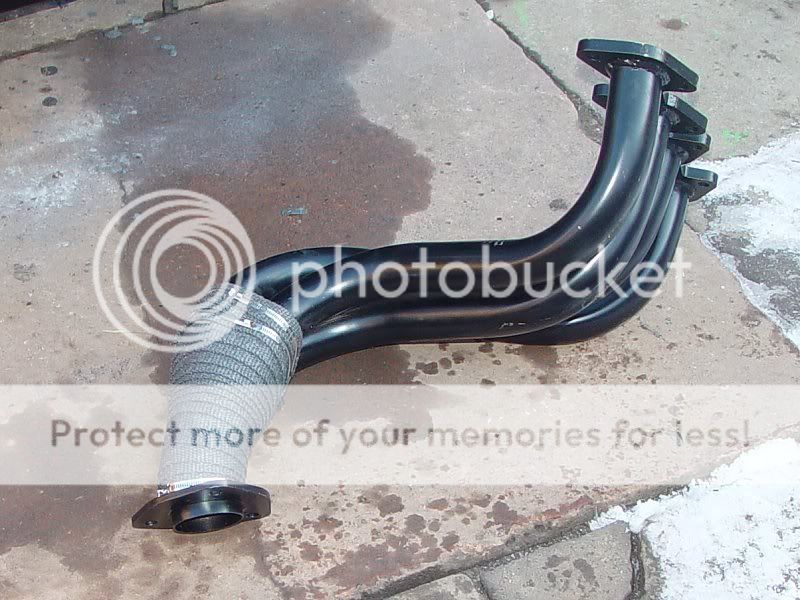
Finished job. I've only wrapped a little section before I ran out of the stuff, hopefully this will be enough for heat shielding purposes.
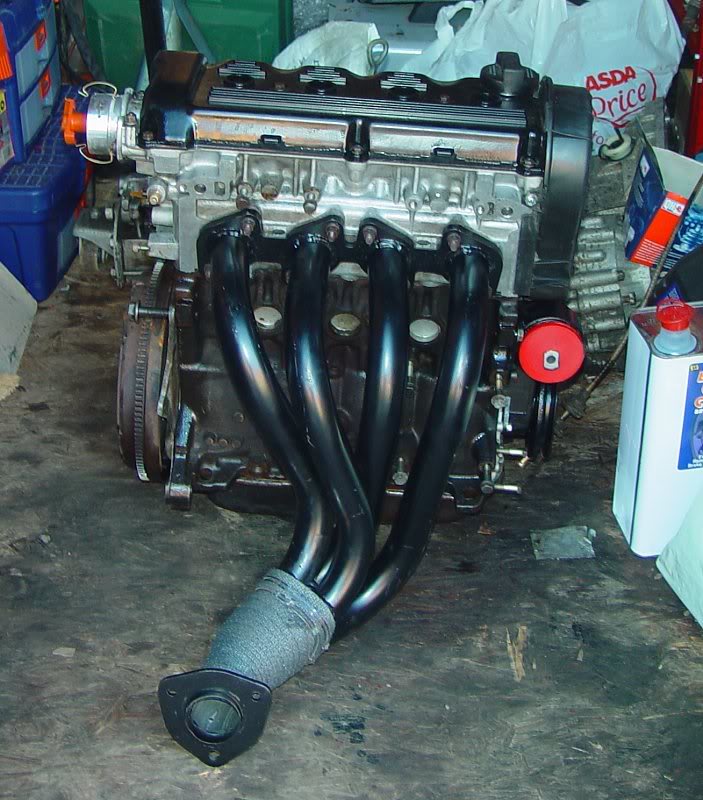
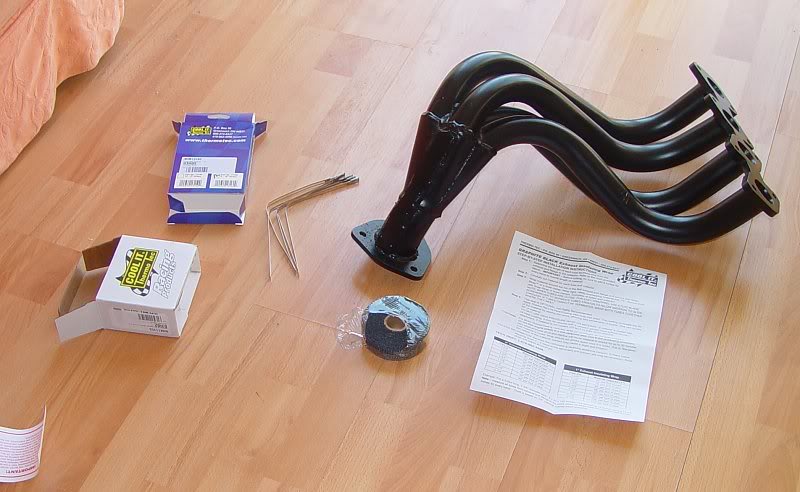
Exhaust manifold is now fitted to the engine. Note also, the engine mount insert (in red). I hope the engine fits through the shed door, now that the manifold's on!
��������������������������������
Posted
Local Hero
i have some fuel lines that would allow moving the metering head over to opposite side and also a piper induction kit for k-jet (replaces whole of lower airbox) doubt i'll use the fuel lines and i may not use the piper airbox either. don't think the mk1 box will fit on that side.
Posted
Local Hero
��������������������������������
Posted
Local Hero
paul_c said
I would wrap it all if it didn't cost so much!
?
should come to about ?15-20. how much are you overlapping by?
Posted
Old Timer
know you mean paul, I wrapped all of mine but cost a small fortune
 . Didn't overlap it as much as you though.
Mk1 Golf 16V Conversion FAQ Zip, now located at in the Forum WIKI section:�http://vwgolfmk1.org.uk/index.php?page=cedi&type=misc&id=42%2F26%2F3
Posted
Old Timer
1/ the poly mount on the cambelt end will give the noisiest vibrations ever, id replace that with a new standard one, i took mine out after 6 months and it was like diving a different car, from the heat it had gone rock solid.. same goes for the rear gearbox one, front one is good though..
2/ When the engine is in and you connect/align the inlet pipe between the throttle body and metering head it will lift the airbox higher so you may experiance clearance issues with the bonnet.. i and many others have chopped the lower part of the airbox, (the section where the air feed is), fits nice n snug
also i wrapped my manifold just like you did as thats the part closest to the uj and bulkhead… although if i ever take it off again i would get the manifold powder coated as its rusted loads. the paint doesnt last 30 seconds. then id wrap the whole thing all over as it get bloody hot in the car!!
just thought id share this with you so you dont do the same as i did and have to go back to them in the future..
ps do you have the flywheel that came with the engine assuming it have an 02a box on it? as im now goin cable change and need the flywheel for my o2a gear box..
cheers
Posted
Local Hero
Posted
Local Hero
I've done a test-fit of the intake system, I think you can combine parts from the 2 engines to achieve a flattish system, I think the Passat 9A came with 2 variations of the intake, and I have the slimmer of the two? Unsure, we'll see in a few days time!
Unfortunately, I don't have the flywheel any more - I think I saw the 'wanted' ad. I sold the gearbox and ended up giving away the flywheel and clutch. It was rusty anyway and taking up space. Sorry….
And cheers for the heads-up on the forthcoming issues, I'm fully expecting something or other to crop up. So I'm planning to just fit the lot, then give it a try-out, I'll probably replace the gearbox and replace the driveshafts for 100mm items quite soon anyway. So when I do this, it gives me a chance to take the engine out again and sort out any other niggles.
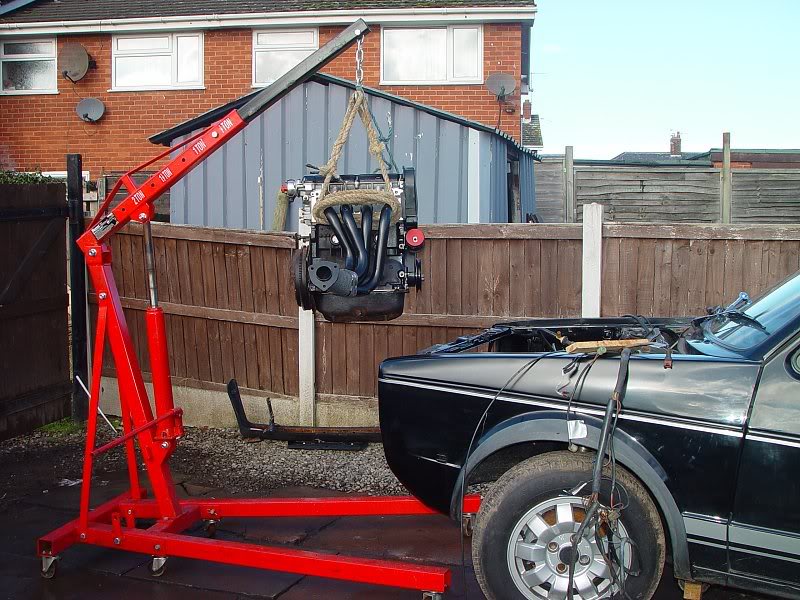
Can you (or anyone) think of anything else I should be doing before I lift the engine into the car? I've fitted the cambelt, covers, water pump and exhaust manifold but no other bolt-on items. I am assuming I can reach and bolt these on once the engine is in (makes it smaller/lighter/easier to clear the front panel, which has just been painted)? Can the sump come off smoothly with the gearbox on?
Also, I've been seriously considering the 'under' technique for engine refit, ie lifting the car over the top of the engine. The only problem is, I'd have to fabricate a sturdy bracket to bolt into the bumper bolt points, which I could lift the car on.
��������������������������������
Posted
Old Timer
i remember one or two bolts being abit tricky to access when the gearbox is on when changing the sump but its still doable (that was on my mk2 valver)
also theres a seal that can leak but can only be changed with the gearbox off but cant remember what its for lol, i think its the crank seal?? so best to do it now
cant think of anything else
with regards to engine fitting, i had the car on stands, put the engine on a rug and dragged it under the passanger side as the wheel was off, then lifted the engine in place with a crane..
shame about the flywheel, ahh well the search goes on!!!
Posted
Old Timer
G60RGE said
also theres a seal that can leak but can only be changed with the gearbox off but cant remember what its for lol, i think its the crank seal?? so best to do it now
cant think of anything else
with regards to engine fitting, i had the car on stands, put the engine on a rug and dragged it under the passanger side as the wheel was off, then lifted the engine in place with a crane..
shame about the flywheel, ahh well the search goes on!!!
lol, same here, I dragged it under the front of the car on Carpet tiles. Depends how high your axle stands are! Mine only just cleared the front panel, had to lean the engine slightly but basically had it as you've got yours, with sump, box and outlet mani.
With the fuel lines, sort out the rough length of the lines before you put the engine in, alkward to saw through the fuel lines to shotern when its in. But I guess it depends how you want to do them. I chopped a small length out of each and linked with inj std fuel rubber line so they were better length, I found they were way too long as std.
Best option is to chop the lower air box anyway, it sits flatter that way, and more solid if you slap a groove in it anyway. With the 'slimmer' 9A inlet jobber it'll clear fine.
Make sure you're happy with the crankshaft seal and box seals (clutch push rod, and shaft), as George said. I had to pull box out and change clutch and seals mine slipped so much….wasn't overly happy about that!
not long to go now eh Paul!! :mrgreen: 8)
Mk1 Golf 16V Conversion FAQ Zip, now located at in the Forum WIKI section:�http://vwgolfmk1.org.uk/index.php?page=cedi&type=misc&id=42%2F26%2F3
Posted
Local Hero

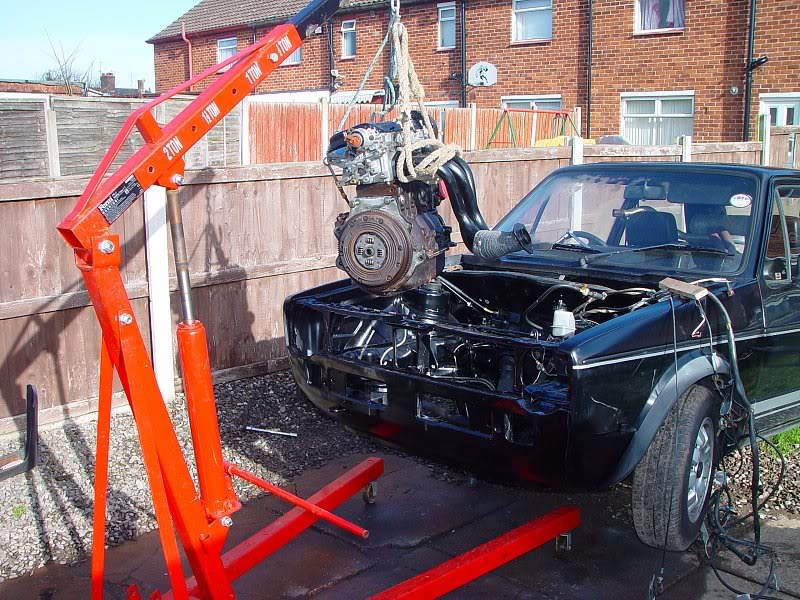
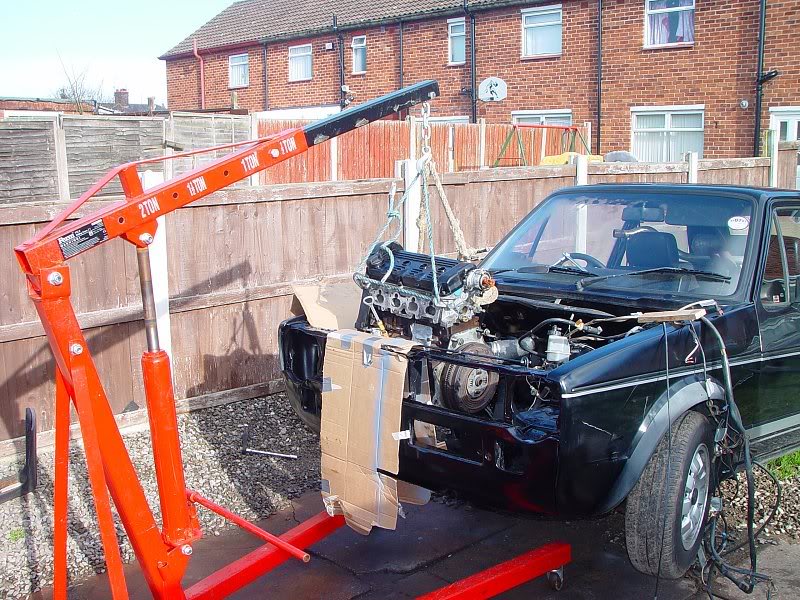
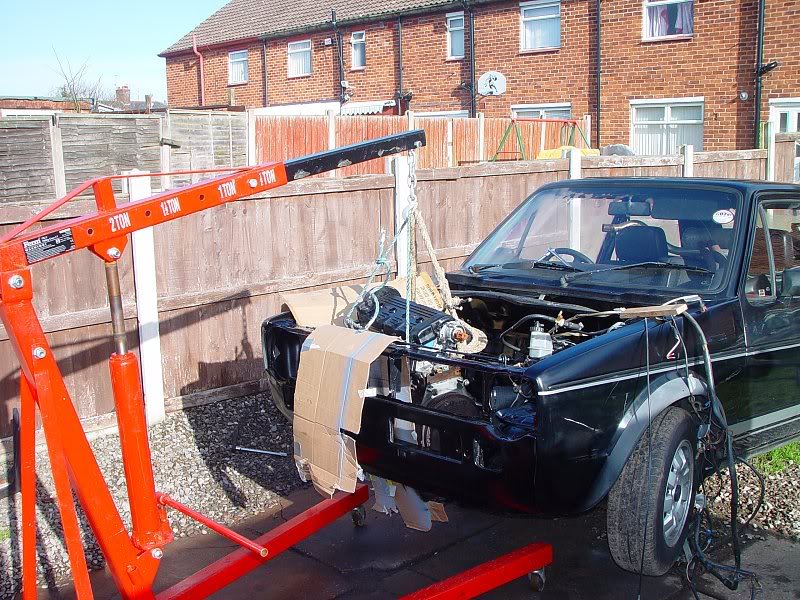


The engine is supported on a trolley jack (and one engine mount), then the crane is swung to the side, to allow the gearbox (see foreground) to be fitted from underneath.
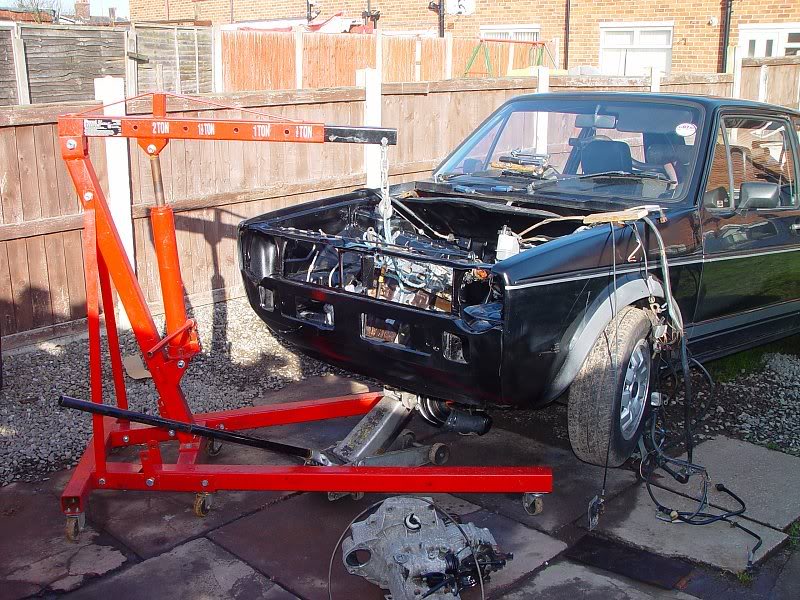
After a lot of jiggling, the gearbox is also in and bolted up to the engine
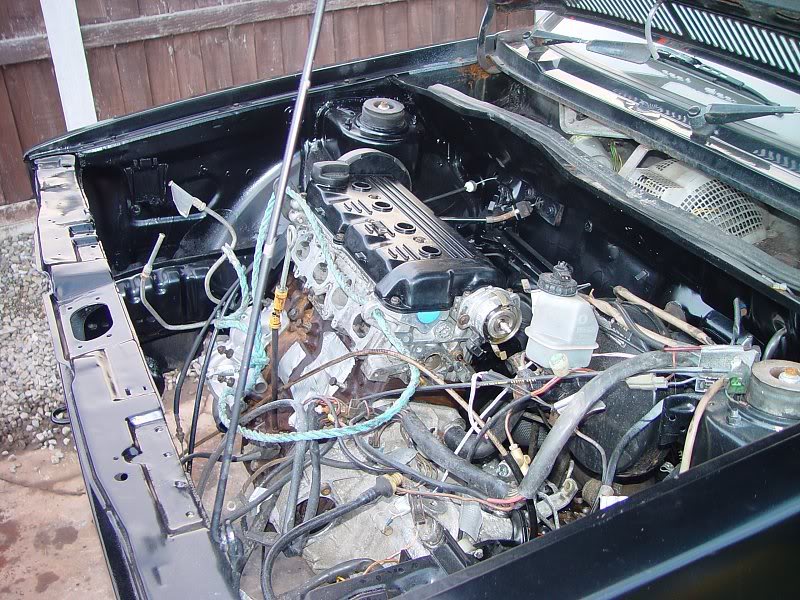
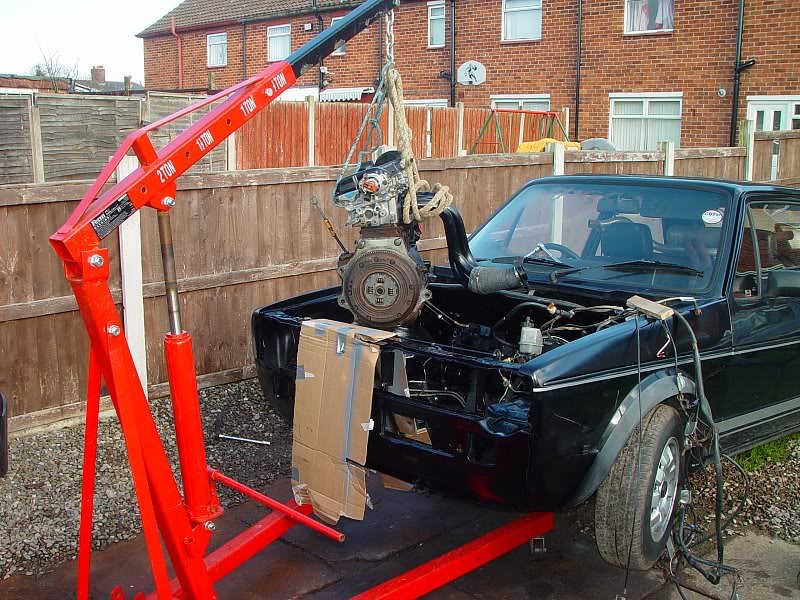
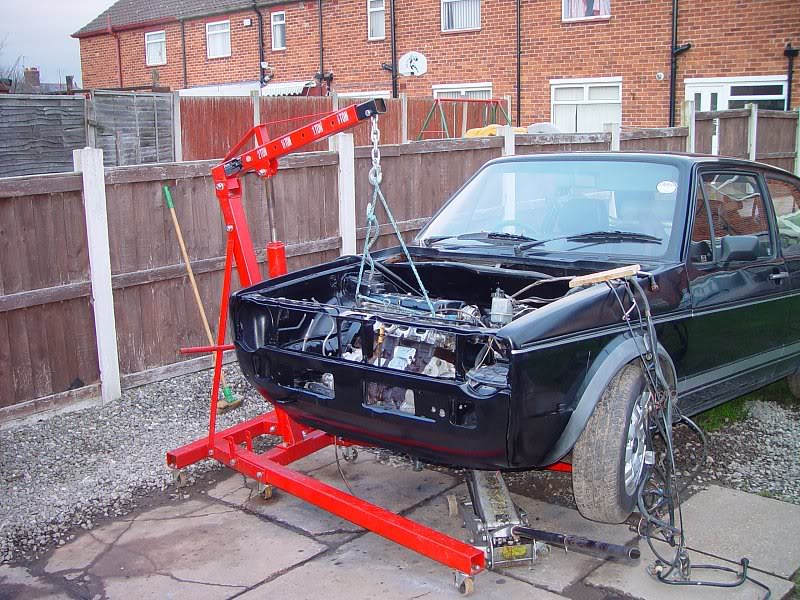
Bonnet was temporarily removed, now refitted to protect engine from rain, before other parts (eg inlet manifold) are bolted to it
I managed to chip a couple of areas of paint and broke the rotor arm (not during refitting, but from when I tried to remove it later!) so these will be rectified in due course……
��������������������������������
Posted
Local Hero
Posted
Local Hero
Have you tried RS or Farnell for heat shrink?
Rich
0 guests and 0 members have just viewed this: None.