


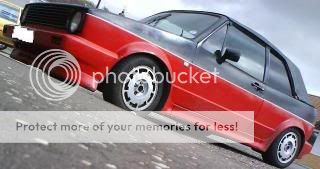
what colour?

Posted
Settling In

what colour?
 looks really good, how you finding it, any problems? did it take much flating back? what grade paper you use?
Posted
Settling In
 ops: used 800 grit paper. i have ended up doing one coat a day because yesterday i could scrape the 2nd coat off with my nail(after 12 hours) so i thought it best to let it dry well
Posted
Old Timer

What colour is the inside?
Posted
Settling In


:mrgreen:
Posted
Settling In
looks quality so far! :clap:
Posted
Settling In
 oh well haven't had a proper look at it since its been dry but i will sort it out………i'll get some pics up soon
 i have used about 1.5ltrs doing 6 coats i did use th 20% mix but very roughly to be honest in my experence it doesn't matter too much, it just needs to be thin enough so it levels well and any bubbles pop, but thick enough it doesn't run.
Taster:

Posted
Settling In
Posted
Settling In
PROJECT CABBY
Posted
Local Hero


Posted
Settling In
Posted

Settled In

:p
'83 MK I Golf 1.3CL
Posted
Settling In
got the drivers seat fixed in today, it still needs some adjustment but its in! also not sure about the roof-rack, but it is going to be used for bikes and boards so its not purely aesthetic! i might mat black it(galvanized at the moment)


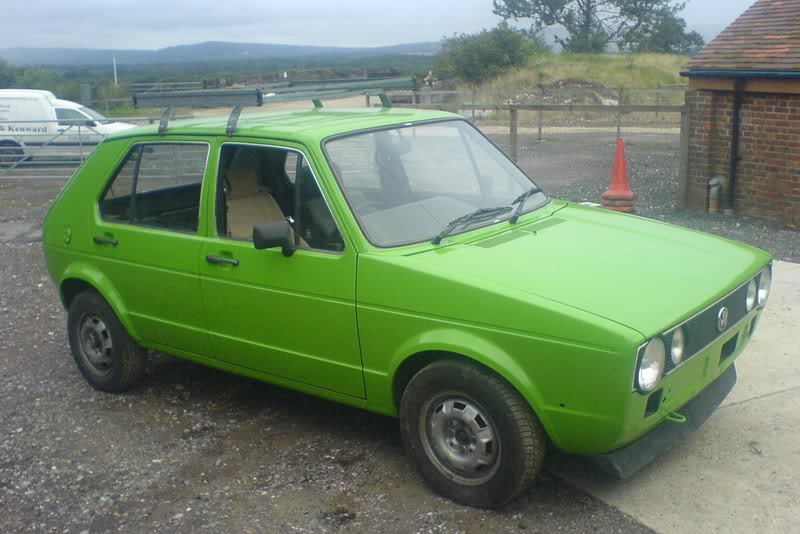


Some close ups…..


the finish on the paint is good but i could have got it a lot better! I'm not going to bother with the final wet sand and buff because my prep work wasn't that great and I'm lazy! but for a daily its great, i would definitely recommend it. :mrgreen:
Posted
Settling In

Get rid of the roofrack, it spoils the lines completely!!!
Otherwise get a single lamp C model grill on it and you will have a sweet ride, remember LESS is more, keep it minimal dont put ADD ONs .
Nice one
HAVE VW ETKA 7.0 SO CAN HELP IF YOU NEED A PART NUMBER FINDING. PM ME.
Posted
Settling In
mind the how to guide
PROJECT CABBY
Posted
Settling In
Equipment:
Rustoleum (2.5ltrs should be more than enough for a golf)
Small gloss rollers and tray (Available from Wilkinsons, Homebase e.t.c there a small high density foam white roller about 4 inches long)
White spirit
600,800,1500+ wet and dry paper
Cheap spray bottle(again wilkinsons etc or you could use an old cleaning bottle)
High speed polisher/buffer? Opt.
Prep
Prep the car as you would for a normal job, the car must have no dirt, grease or rust where your painting. I used used white spirit to degrease it, I have some slow degreaser but decided to use white spirit incase there were any reactions between the two.
once the car is completely clean and dry you can start rollering:
Painting

The paint wants to be mixed with the white spirit to about 4:1(20% white spirit). Another tip was to mix it to just thicker than water. to be honest though i was very rough with my mixes and i had no problem and from what i've heard it completely depends on how hot/humid it is where you are so do a test panel and find what works best. I found the best thing to do was mix up a load of the paint in a bottle(i used a used white spirit bottle) because this way you can get a mix you like and not have to spend ages mixing every coat. you can mix different colours!
Once the paint is mixed you can roller the first layer start on the roof and work down to start with so your not leaning in the wet paint. When painting keep it thin it will barely hide the original paint, for hard to reach places use a brush or a foam brush(i used a normal lossles bristle brush and it worked fine).
If you find the paint is running you may have two much paint or its too thin. As you roller you may get bubbles in the paint on the surface this may be its two thick but it will do this sometimes even if the mix is perfect. The best way to solve this is to run the roller over them a couple of minutes after you've painted it, just roll over the paint using its own weight.

I'm not 100% on how long you should let it dry i heard people had done one in the morning and one in the evening but i left mine for 24 hours because i didn't want to risk the paint cracking.
Then time for the 2nd coat as before.


Wet sanding
Start with the 600 or 800 and work the paint to get rid of any orange peal, runs or flys. be careful on edges and don't worry too much if in places you go through the paint. Its better if you can avoid this but there's 4 more coats to cover it up! keep the paper really wet with the spray bottle people have mentioned using slightly soapy water but i didn't think it was a good idea because of residue and TBH i don't think its needed. when your done the cars going to look rubbish the paint will be completely flat.
Paint coats 3 and 4 and repeat wetsanding with 800grit and then paint 5 and 6.(if coverage isn't very good in places the do another 2 coats on the panel in question)
(it might be worth waiting longer between the last coat and wetsanding to let the paint get really hard, i was going to leave mine a month but i'm sure that complete overkill i just can leave it for a month)
for the final wet sanding use 1500 grit or finer. you could use 1500 then 2000 if your extra keen! if you go through the paint you'll have to repaint that section or that panel so try not to! once the car is smooth you can start polishing the paint to get the gloss back from the paint. use a polishing compound(not rubbing) you could use a single grade or you could work your way up the grades using something like G3,G10 etc. this is easiest to do with an electric buffer(halfords among others sell them) using what i thinks called a buffing bonnet? only use the weight of the machine and each panel will take quite a while, if the paint stays dull looking your not polishing it for long enough or the grade of compound it to low. once it shining you can wax it if you want.

this is the 6th coat with out wetsanding or polishing, I have not wetsanded or buffed this and there are a few surface imperfections, so obviously the guide for the final sanding and polishing stage are what i have read but not done, should be correct though. I would advise doing a tester panel first.
That about it!
Posted

Old Timer
JimbobJones said

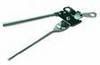
I see you had some left over for the dumper truck. :mrgreen:
Yradave says relax.
07792646786
07792646786
Posted
Settled In
1983 GTi in Black, Completly Standard
Merc ML320 Daily Driver
Merc ML320 Daily Driver
Posted
Old Timer
Thanks
1989 VW GOLF GTI CABRIO
1997 VW POLO 1.0L
2003 VW PASSAT TDI 130 SPORT
1997 VW POLO 1.0L
2003 VW PASSAT TDI 130 SPORT
Posted
Local Hero
yradave said
JimbobJones said

I see you had some left over for the dumper truck. :mrgreen:

nice job that, colours wkd.
r u gonna restore that r/rack? keep it 4 sure
rebuild in progress....
Posted
Settling In
didn't even notice the dumper was the same colour
8) still undecided about the roofrack? i don't want to be constantly taking it on and off but i might? i might paint it, i might modify it(make it lower and give it some wooden battons instead of all metal) or i might get rid) :dontknow: no hurry to decide!
cheers for the positive(and negative) comments lads! :wink:
0 guests and 0 members have just viewed this: None.