


Rivage: Audi 3A conversion

Posted
#758845
(In Topic #91350)
Settling In

Rivage: Audi 3A conversion
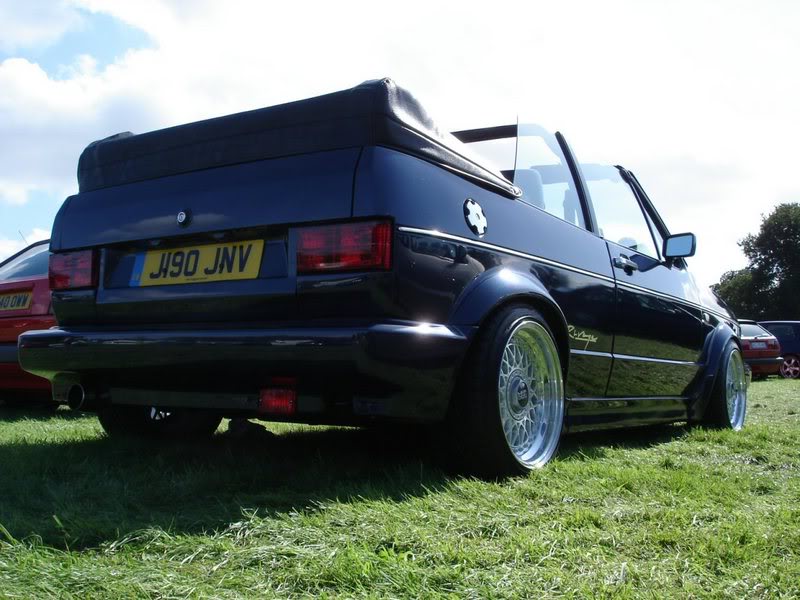
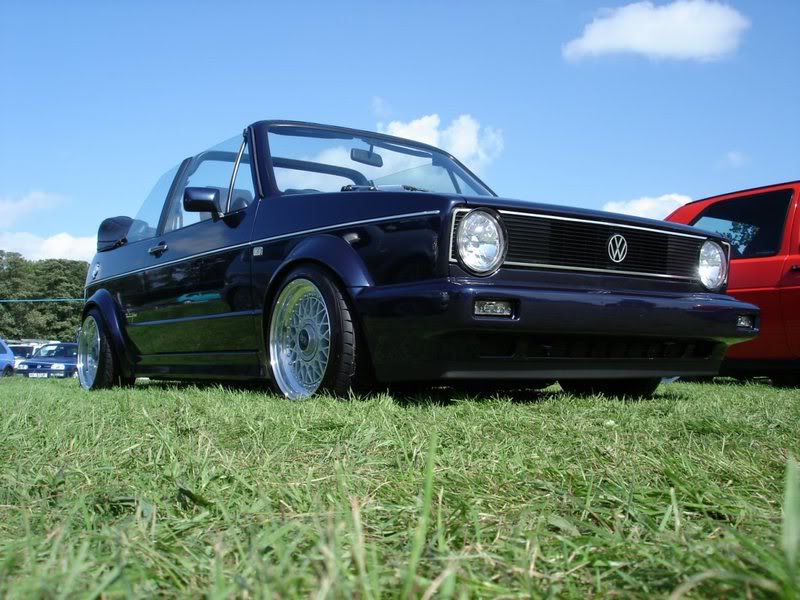
The Vehicle:
Volkswagen MK1 Golf GTI Rivage Cabriolet, classic Blue metallic, 5 speed manual, first registered 1992 (J), vehicle mileage 78,000, originally running the standard GTI 1.8 DX engine and K-Jet mechanical injection.
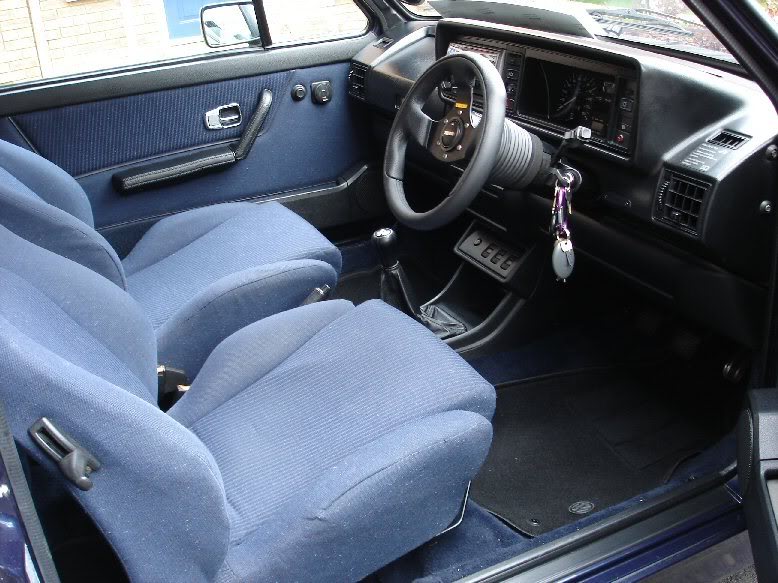
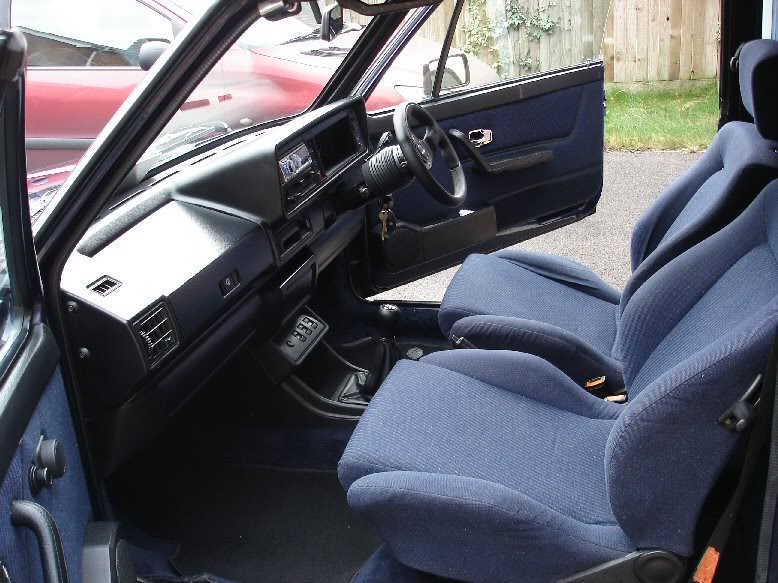
Interior: Factory electric front windows and roof, factory heated front seats. Original cloth interior.
Exterior: A few modifications, early single headlight chrome rad grill, chrome wiper arms, chrome side stip, early polished delocked door handles, polished GTI style fuel cap.
Suspension: KW Variant2 coilovers (height/damper adjustable), new GTI top mounts. Polished top strut brace.
Wheels - set 1: BBS 'RM' 7.5x15 & 8x15 with Toyo T1R 195/45/15 tyres. Refurbished with new polished dishes and bolts, painted centres. New slim hex aluminium centre caps and original BBS badges.
Wheels - set 2: Original Rivage 6x15 'Casteletts' with Toyo T1S 195/50/15 tyres. Fully refurbished with diamond cut face. Chrome centre caps.
At e38 '06

Humble but tidy rivage cloth interior.
Why the 3A conversion?
The blueprint of the 3A matches that of the original DX engine (short block), so no structural changes or clearance issues and nearly all of the original engine components can be reused (cylinder head, gearbox, manifolds, coolant hoses?.) - this makes it relatively simple and inexpensive. The conversion retains the bullet proof reliability of the 8V engine and the standard look and feel of the original engine layout (ideal for those concorse nuts), while offering increased BHP and torque gains. The standard 3A engine fitted in the Audi 80 figures are: 115BHP@5400rpm and 122 ft-lb@3200rpm, with the right fettling and modifications it can reach in excess of 140/150BHP if set up correctly.
Conversion parts sourced:
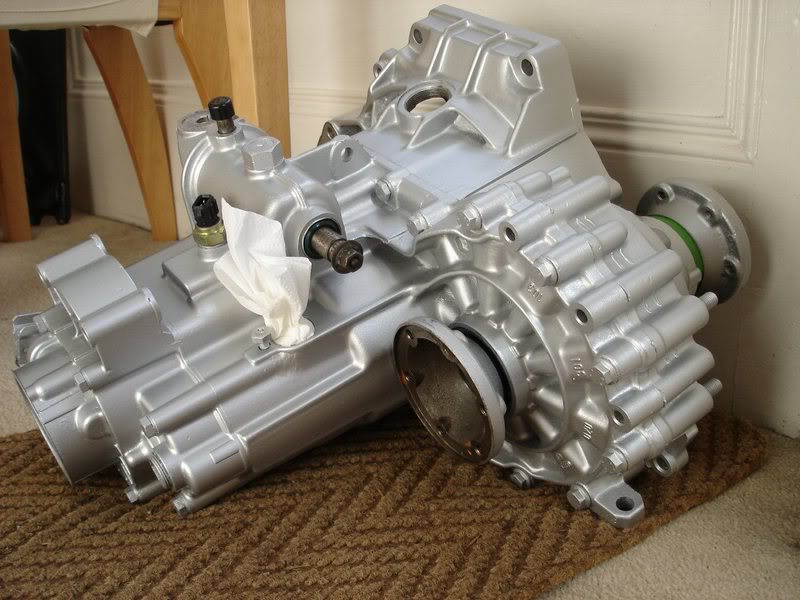
Audi 2.0L (1984cc) 3A engine taken from Audi 80 SE model. Engine stipped down for the following parts: bottom end, oil cooler housing (the DX housing won't fit), and sump tray. The bottomend was sent to 'Robinsons Engineering' in Poole for a rebuild, the bores rehoaned and new pistons/rings/bearings. Its advisable to replace the oil filter with a new unit. Essestial is the 2.0L conversion kit by TSR, which comprises of a 1) blanking plate 2) circular plug 3) dizzy ring, which allows you to run the original distributer, although it will need to be slightly modified to run the gearing from the mk3 GTI 8V 2E distributer.
Further engine parts sourced:
Grant motorsport Pack D big valve head with fast road cam and vernier pulley. New Supersprint 4 branch manifold, powerflow exhaust, K&N induction box and power rohr, port and polished inlet manifold. None of these parts are essential to the conversion, you can run the original 1.8 DX components (cylinder head, manifolds, etc.) with the 3A bottom end.
With increased power comes the need for increased stopping power, im going to uprate the braking system at the same time. Brake upgrade parts sourced:
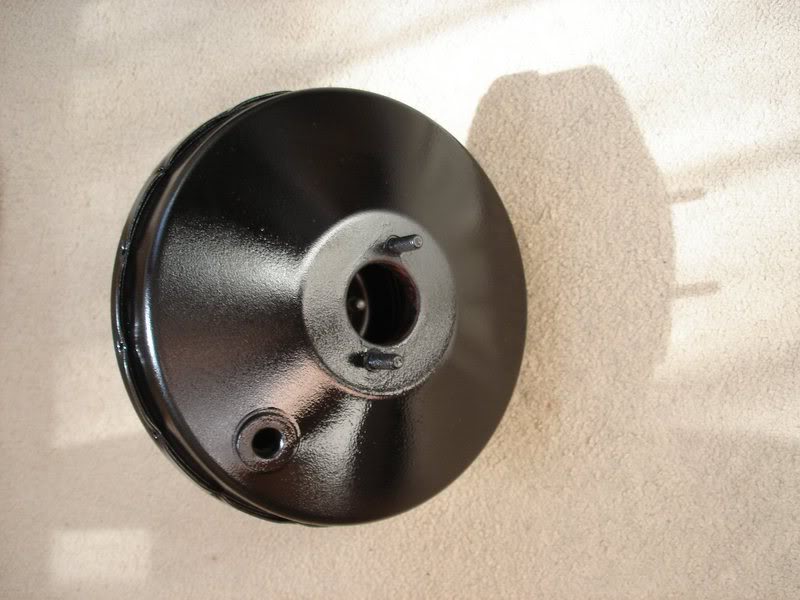
New Audi 256mm calipers and carriers, Brembo 256mm grooved disks, uprated brake pads, Goodridge braided brake lines, 9" brake servo (from mk2 16v), new 22mm master cylinder (from mk2 16v), Audi A4 brake circular reservoir.
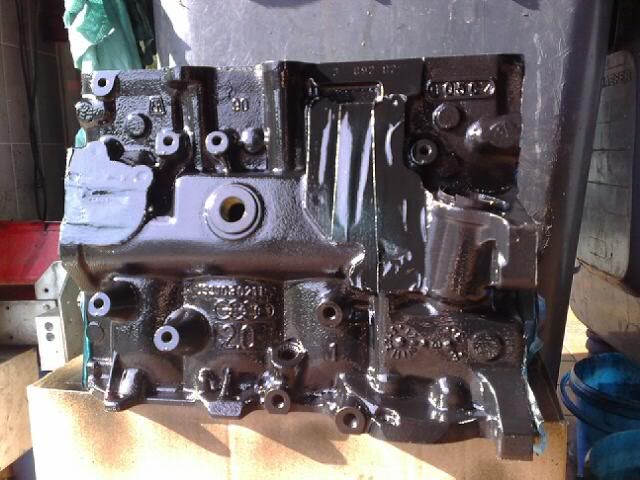
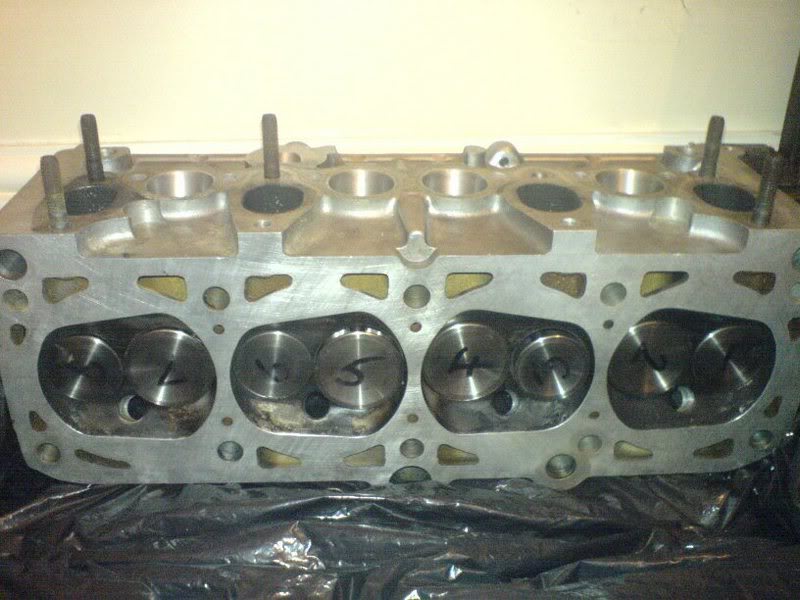
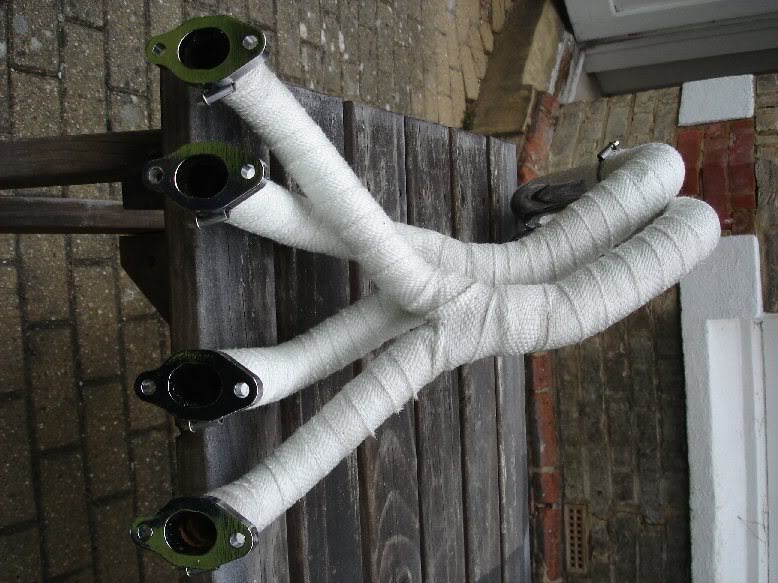
Pics of some of the sourced parts:
3A bottom end sprayed using Satin black 'Hammerite direct to rust metal paint'
Cylinder head
Supersprint manifold in exhaust wrap
Audi brake callipers and carriers
__________________________________
All work carried out with the help of Gary (forum name: trickgti).
Day 1.
Work commences
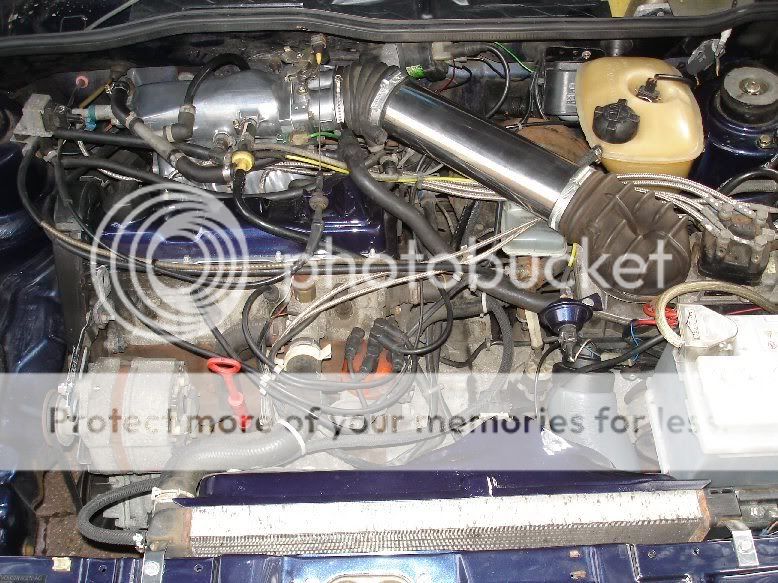
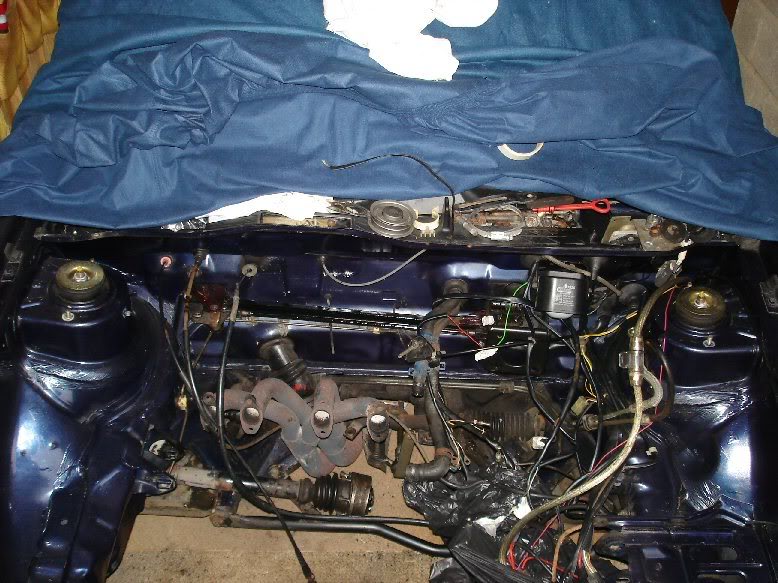
Engine bay before - GTI 1.8 DX engine, not the prettiset but defonately the untidiest.
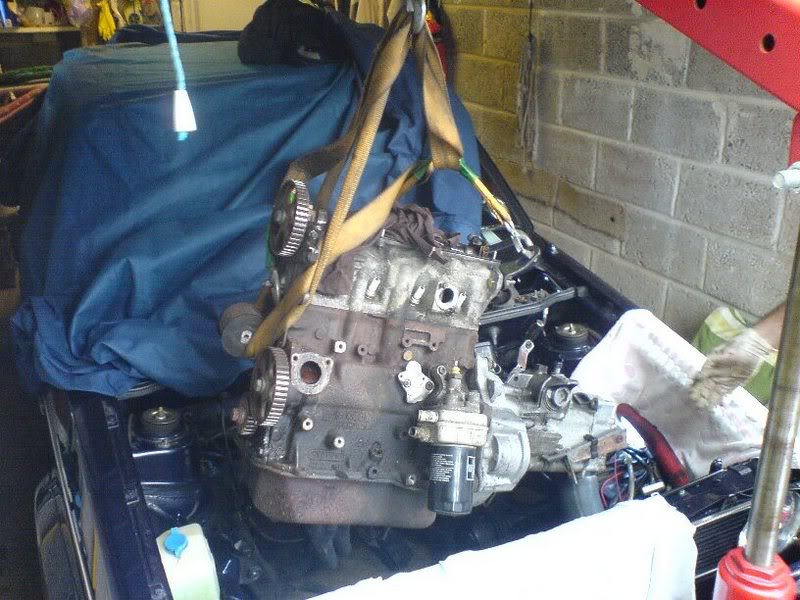
After the first day, stripped down the components around the engine allowing us to crane out the block.

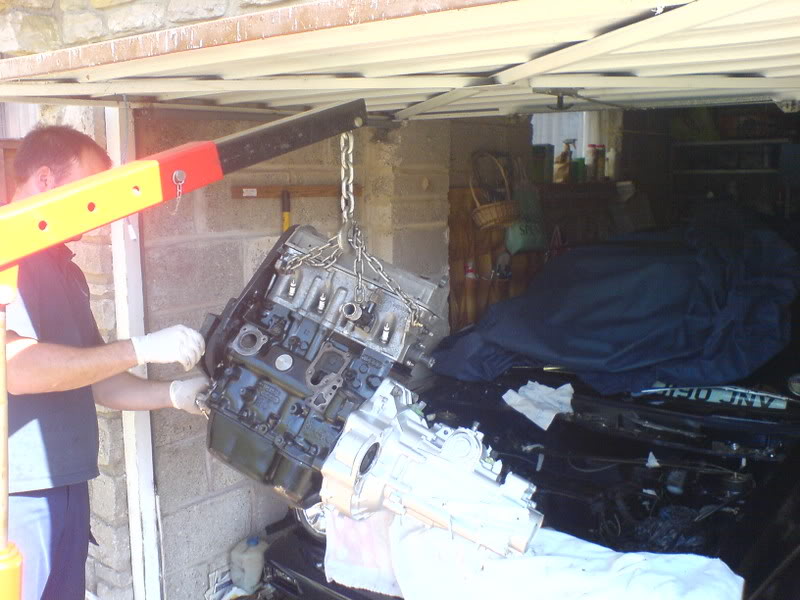
Day 2.
Rich (forum name: Phatone) and his crane get involved
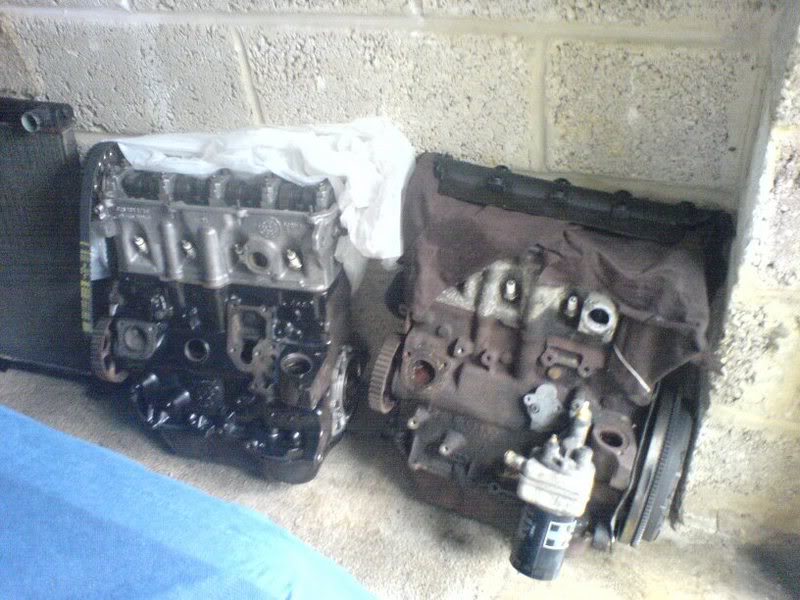
Mutual respect - DX and 3A engines. You can see on the 3A where the circular plug and blanking plate needs to be fitted (which aren't on the DX)
Day 3,4,5.
Spent three full days degreasing and cleaning the engine bay, this is as good as its gonna get. Old steel 4 branch to come out.
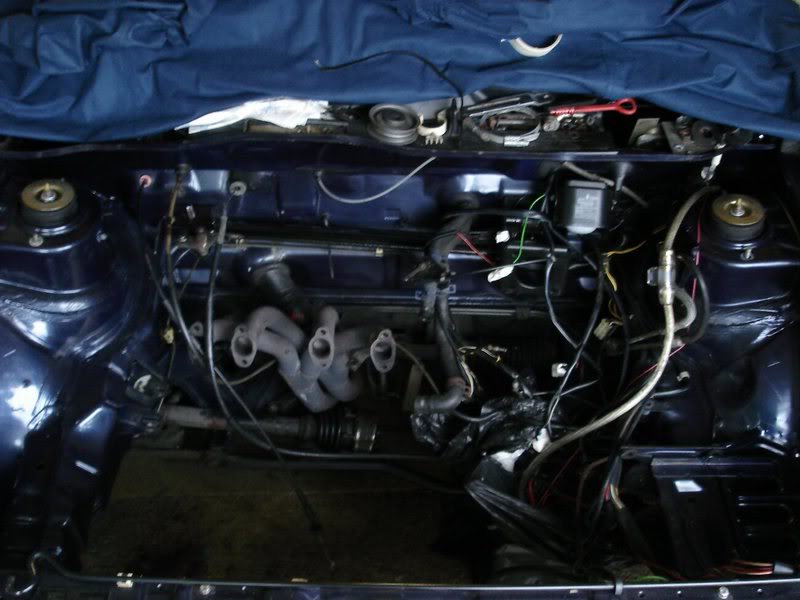
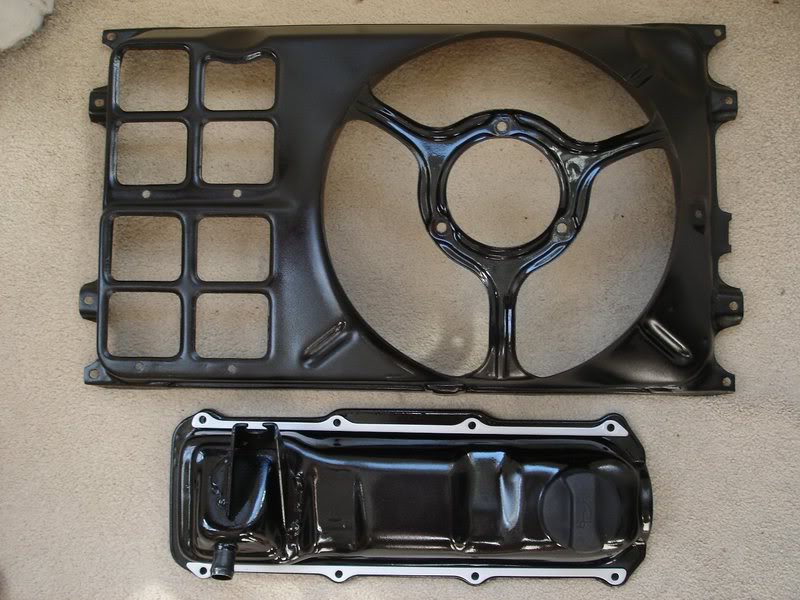
Black and silver/polished theme throughout the engine, so it retains its original asthetics. Again all sprayed using 'Hammerite'
Day 6.
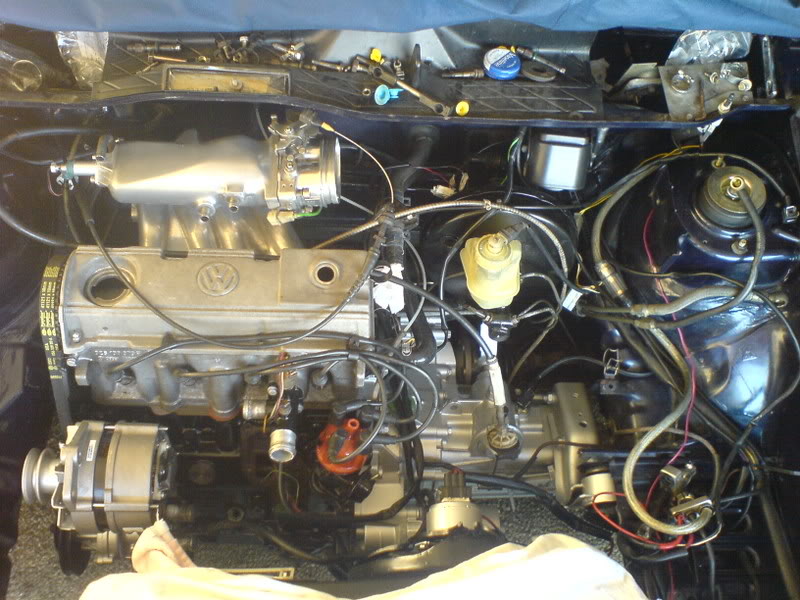
Engine block built up, cylinder head, gearbox, new oil pump, new exhaust/inlet/throttle/oil cooler/head gaskets, new cam and fan belts, new manifold nuts and studs. Engine slots into the original mounts.
Building up around the engine, fitted manifolds, throttle body, brake servo and master cylinder, new water pipe………Experimenting with a G60 rocker cover which is better looking than the original steel cover and matches the blueprint as the original cover (with a rounded opening around the cam/pulley), would need to mount a throttle cable bracket (work in progress).
Came across a small problem with original brake resorvoir fitted to the new master cylinder. Basically it sits too tall and prevents the power rhor from fitting into place. An option could be use to the original plastic induction pipe, but I much prefer the polished rohr. Tried a mk2 16vgti reservoir but suffered the same problem. Tried one from an Audi A4, which is wider but a lot shorter, this worked fine, there is a power steering outlet that needs to the plugged.

Posted
Settled In


Posted
Old Timer

Car looks stunning 8)
Posted

Old Timer
I'm gonna do work on my engine soon??
1983 MK1 PIRELLI EDITION
Alpine White LHD ("SOLD")
Alpine White LHD ("SOLD")
Posted
Old Timer
1989 VW GOLF GTI CABRIO
1997 VW POLO 1.0L
2003 VW PASSAT TDI 130 SPORT
1997 VW POLO 1.0L
2003 VW PASSAT TDI 130 SPORT
Posted
Settling In
Posted
Local Hero

��������������������������������
Posted
Old Timer
Madone with the two Cabs 82 (UK RHD) and 85 (US LHD) (92 sold)
�
�
Posted
Old Timer
Posted
Local Hero

Posted
Settling In
Staffords - just used 'Gunk' engine degreaser, bucket of water and alot of elbow grease and time- not enjoyable!!
Si - settled on the 2l 8v. Hows yours running?
Chudd - A4 brake reservoir fits a treat, thanks for the help!
Posted
Newbie

92 1.8 Clipper
72 Porsche 911 Hot Road
73 Porsche 911 t/e
72 Porsche 911 Hot Road
73 Porsche 911 t/e
Posted
Old Timer
Like a dream mate, it pulls alot better than it ever has and sounds lovely with the raceland manifold on it :twisted:
Madone with the two Cabs 82 (UK RHD) and 85 (US LHD) (92 sold)
�
�
Posted
Settling In
Posted
Settled In
Posted
Settling In
Posted
Settling In
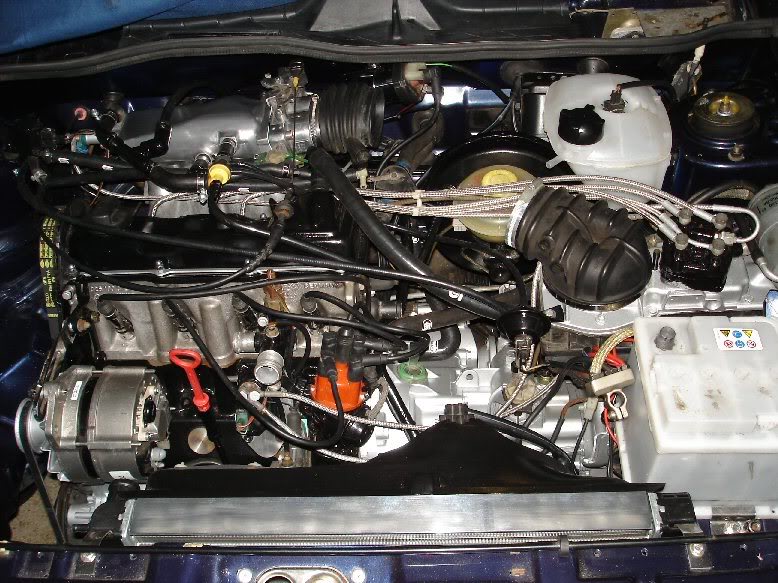
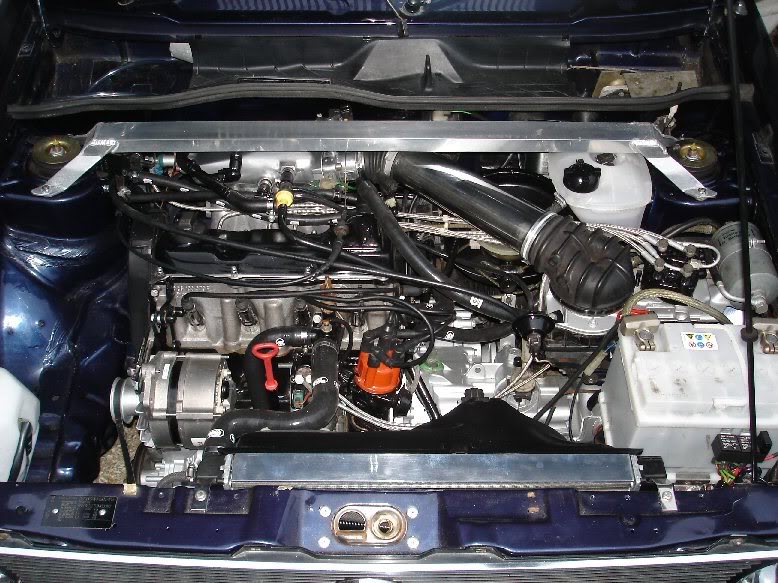
Its starting to take shape, metering head and fuel lines, oil cooler, warm up regulator, original rocker cover back on.
You can see the A4 brake reservoir fitted, whick will allow me to run the polished power rohr. Tidyed and rereouted some of the wiring
Posted
Settling In
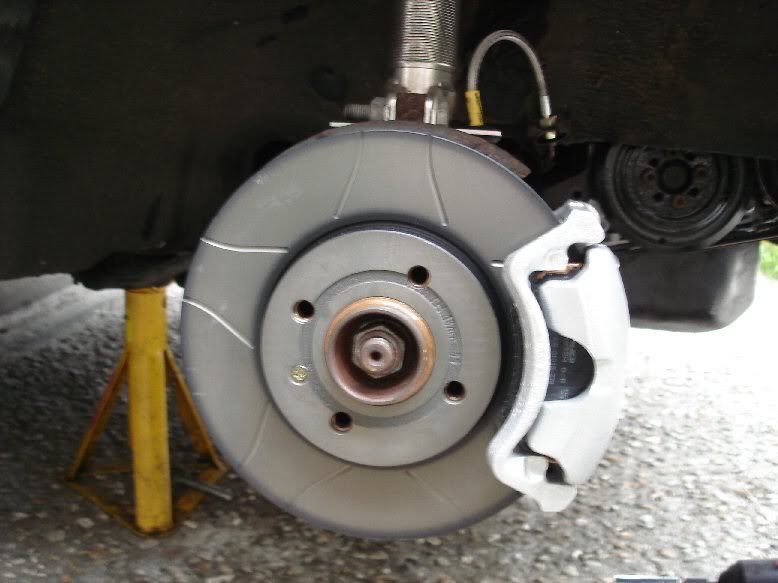
New uprated brake assembley fitted and blead. Audi 256mm carriers bolt straight onto the original GTI hubs allowing for the uprated callipers and larger discs.
Brakes before and after

Some additional new parts, Samco coolant and ancillary hoses, additional silicone hoses and vacum hoses, new header tank, new washer bottle, polished coil cover, polished rad top cover, new gear linkage kit kit fitted, new cambelt cover. Uprated headlight wiring loom has been rerouted to the best of my ability, need to find a home for the relays but there isnt much length to play with (currently up against the battery for now).
All the fluids in, struggled to get a measure on the oil dip stick because the oil is so clean. It fired first time, a slight timing adjustment and it was running well. Engine still isn't completely finished, still got to relocate some more unsightly wiring, paint and replace a few more bits………..but this is how it currently scrubs up
I only noticed today that the speedo has been on exactly 78,000 for the whole time, will make it easy to determine the exact mileage of the engine.
Posted
Old Timer
Mk1 Golf 16V Conversion FAQ Zip, now located at in the Forum WIKI section:�http://vwgolfmk1.org.uk/index.php?page=cedi&type=misc&id=42%2F26%2F3
Posted
Old Timer

Madone with the two Cabs 82 (UK RHD) and 85 (US LHD) (92 sold)
�
�
0 guests and 0 members have just viewed this: None.