


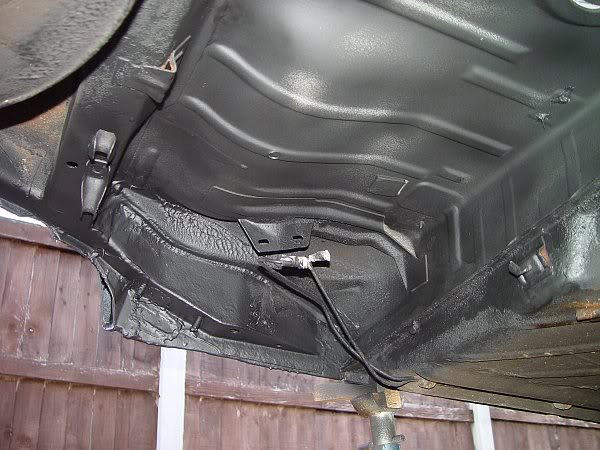
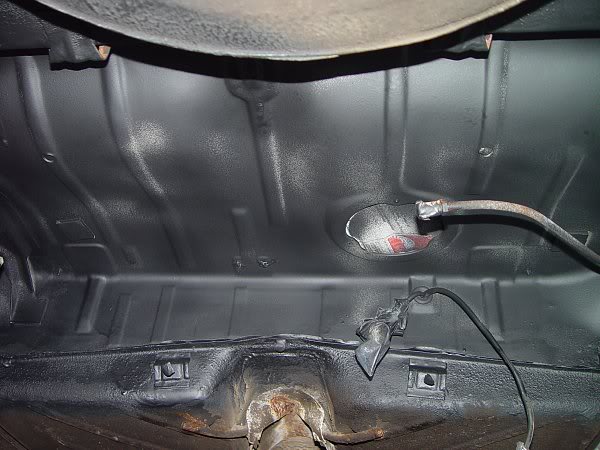
part-way through renovation of underside

Posted
#652982
(In Topic #78749)
Local Hero

part-way through renovation of underside

More pics will be added soon…
��������������������������������
Posted

Local Hero


Crazyquiff's Mk1 Golf Parts Emporium
www.golfmk1.co.uk - you know you want to….

www.golfmk1.co.uk - you know you want to….
Posted

Local Hero


Andy
LINCOLNSHIRE REGION -�https://www.facebook.com/groups/467122313360002/
1983 MK1 Golf GTI Campaign Model - Under (looooong) resto!
1962 Rover P4 80
2002 BMW 745i
2008 BMW Z4 2.5Si
LINCOLNSHIRE REGION -�https://www.facebook.com/groups/467122313360002/
1983 MK1 Golf GTI Campaign Model - Under (looooong) resto!
1962 Rover P4 80
2002 BMW 745i
2008 BMW Z4 2.5Si
Posted
Old Timer

Posted
Local Hero
Hairyarse said
Nice one, what did you coat the underside in? gotta do mine soon
Black stonechip, apparently its alkyd based and its a rubbery flexible paint which can be overpainted and lasts longer before flaking, than traditional underseal.
��������������������������������
Posted
Local Hero
Andy
LINCOLNSHIRE REGION -�https://www.facebook.com/groups/467122313360002/
1983 MK1 Golf GTI Campaign Model - Under (looooong) resto!
1962 Rover P4 80
2002 BMW 745i
2008 BMW Z4 2.5Si
LINCOLNSHIRE REGION -�https://www.facebook.com/groups/467122313360002/
1983 MK1 Golf GTI Campaign Model - Under (looooong) resto!
1962 Rover P4 80
2002 BMW 745i
2008 BMW Z4 2.5Si
Posted
Local Hero
Hairyarse said
Looks tidy Paul. Any particular brand?
No particular brand, I just went for the one that my FLAPS has on the shelf.
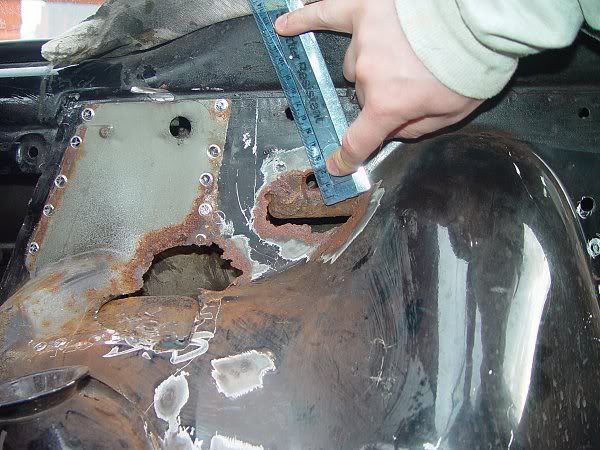
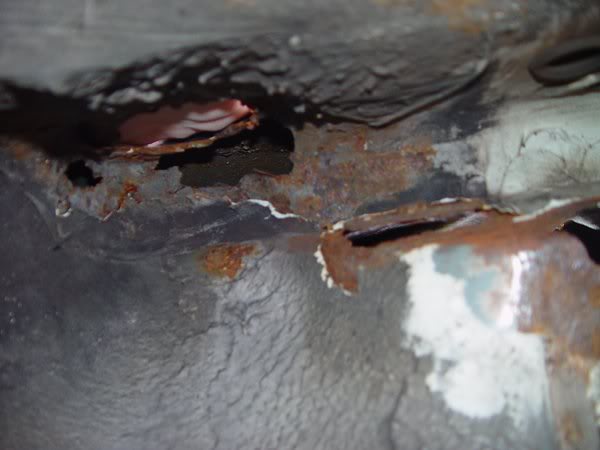
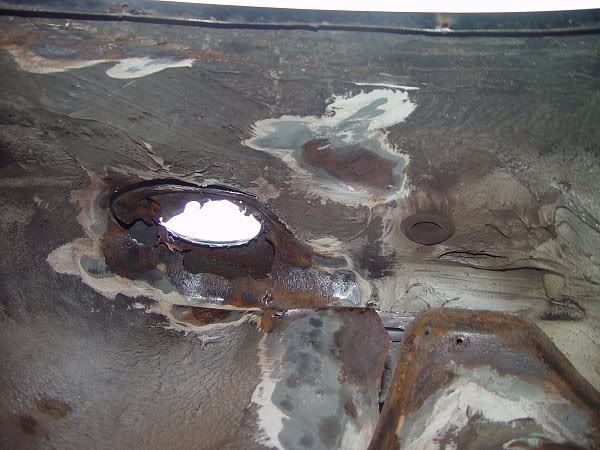
Okay, now I've finished the underside areas, I can reveal the real area of concern. As can be seen, I have removed the seat back support panel to gain more access, and tomorrow I'll be cutting out the rusty areas and making up new ones to let in.


��������������������������������
Posted
Newbie

 ,
,
Posted
Local Hero
��������������������������������
Posted
Settling In

What alerted you to the presence of the rust. The area is hidden under the seat back support and linings isn't it?
Paul
Posted

Secretary
Keep meaning to take some pictures and put on my own thread but always just seem to get carried away working on something else on the car.
Mark one did a similar job on his car an made a great job of it.
Maybe soon I will get around to taking the photos and post them. :roll:
First Golf, lots of work. I've started so I'll finish!
Posted
Local Hero
AUSGOLF said
Paul,
What alerted you to the presence of the rust. The area is hidden under the seat back support and linings isn't it?
Paul
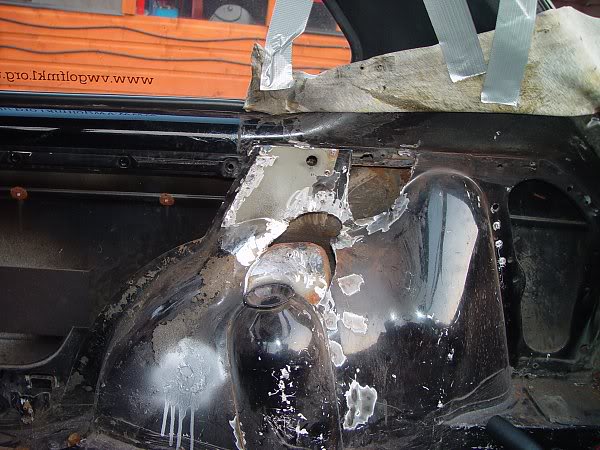
Only some of the area is hidden, the rest was visible inside the boot. Once I'd stripped other items and trim away, I could see the extent of the rust, which has nearly all been cut out. I will make replacement panels to go into the cut away areas. I need to somehow fabricate a seat belt reel mounting point, though.
��������������������������������
Posted
Secretary
Get a nut which is the same thread as the seat belt fixing bolt. drill a hole in the repair panel in the correct position for the seat belt holder (before welding the panel in) then weld the bolt to the rear, or inside of the repair panel. There you have it. :y:
First Golf, lots of work. I've started so I'll finish!
Posted
Local Hero
Macca said
Paul
Get a nut which is the same thread as the seat belt fixing bolt. drill a hole in the repair panel in the correct position for the seat belt holder (before welding the panel in) then weld the bolt to the rear, or inside of the repair panel. There you have it. :y:
Any idea of the correct thread pitch? I know its an M10 (17mm) nut. I'll need a new bolt too, due to rusting of the original one. Aren't they corrosion-resistant too? Like a yellow coating?
��������������������������������
Posted
Secretary
Macca
First Golf, lots of work. I've started so I'll finish!
Posted
Local Hero
Macca said
I'm not sure at this time. As I said I have similar problems, but the fixing bolt for mine is okay. Will check tomorrow and let you know.
Macca
No worries, I forgot I can simply look at the other side to find out the thread! I know its a finer than usual one.
��������������������������������
Posted
Secretary
Anyway keep us posted as how you get on. I will try and get the photos taken and start my own thread.
Off to bed now. Need my beauty sleep lol

First Golf, lots of work. I've started so I'll finish!
Posted
Local Hero
Macca said
In fact is M10 not a standard thread size :dontknow:
M10 is the width of the bolt, but the thread could be 1.5mm (standard), 1.25mm or 1.00mm. I'll buy them off these guys:
http://www.namrick.co.uk/browse.asp?PCID=9
��������������������������������
Posted
Local Hero
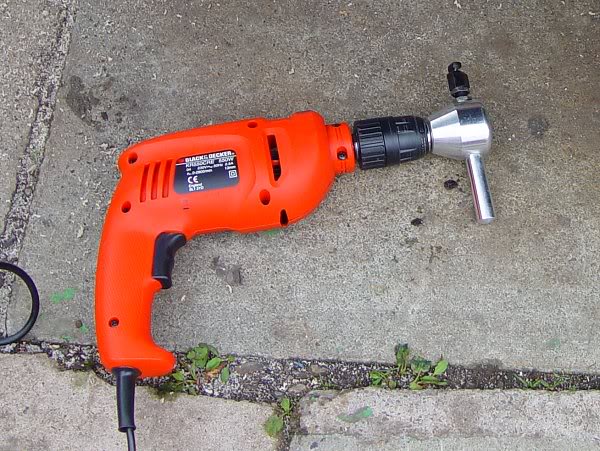
The rest was done using a junior hacksaw, or grabbing the metal with pliers and wiggling back & forth until it snapped. I'll do my best to straighten out the remaining good metal, which will be welded over with a cut repair panel.
The pics aren't terribly clear. Imagine you've completely taken the wheel off and are looking directly upwards.

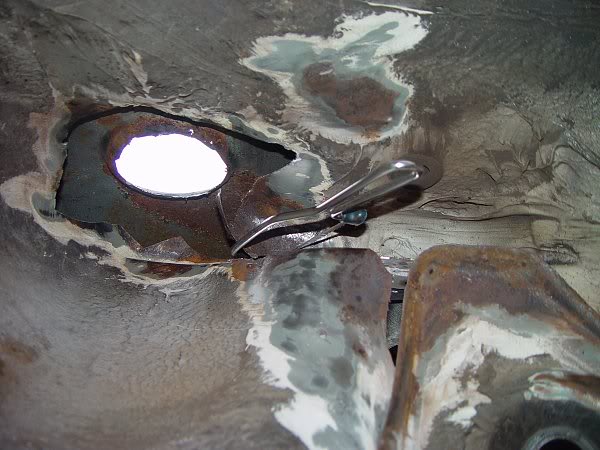

Tomorrow (weather permitting) I'll be welding (upside down) the repair panel into place.
��������������������������������
Posted
Local Hero
Andy
LINCOLNSHIRE REGION -�https://www.facebook.com/groups/467122313360002/
1983 MK1 Golf GTI Campaign Model - Under (looooong) resto!
1962 Rover P4 80
2002 BMW 745i
2008 BMW Z4 2.5Si
LINCOLNSHIRE REGION -�https://www.facebook.com/groups/467122313360002/
1983 MK1 Golf GTI Campaign Model - Under (looooong) resto!
1962 Rover P4 80
2002 BMW 745i
2008 BMW Z4 2.5Si
0 guests and 0 members have just viewed this: None.