


JamesBBT's Mk1 Cabrio - 2.0 16v ITBs, RS's, TT Leather etc

Posted
#1011409
(In Topic #120106)

Settling In


JamesBBT's Mk1 Cabrio - 2.0 16v ITBs, RS's, TT Leather etc
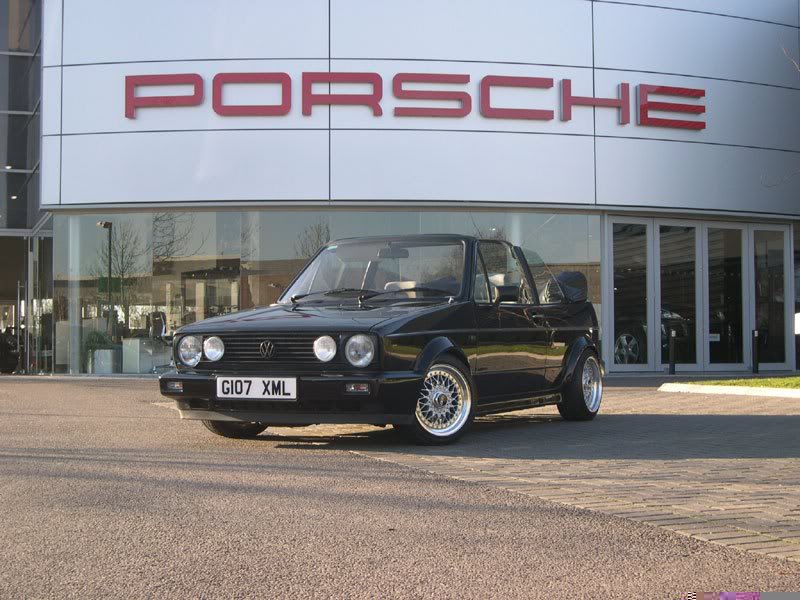
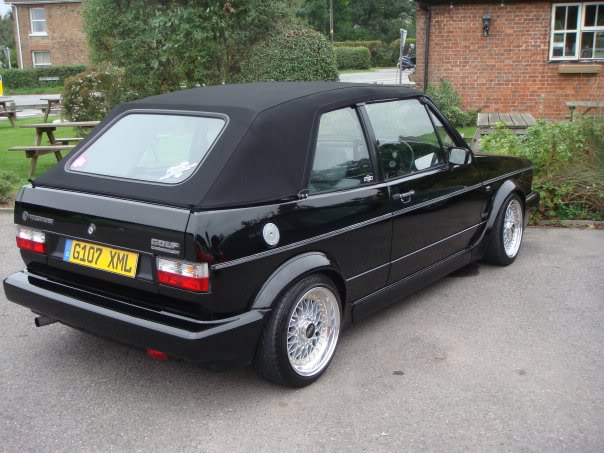
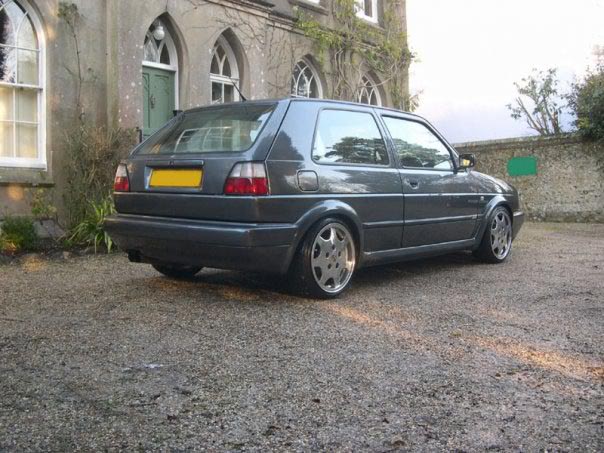
In December 2007, I brought this Mk1 Cabrio, pretty tidy car, fitted with some RS001's, some lowering springs and a mohair hood, other than that, it was a pretty standard car.
As I got it, before I fitted the coilovers (JOM):
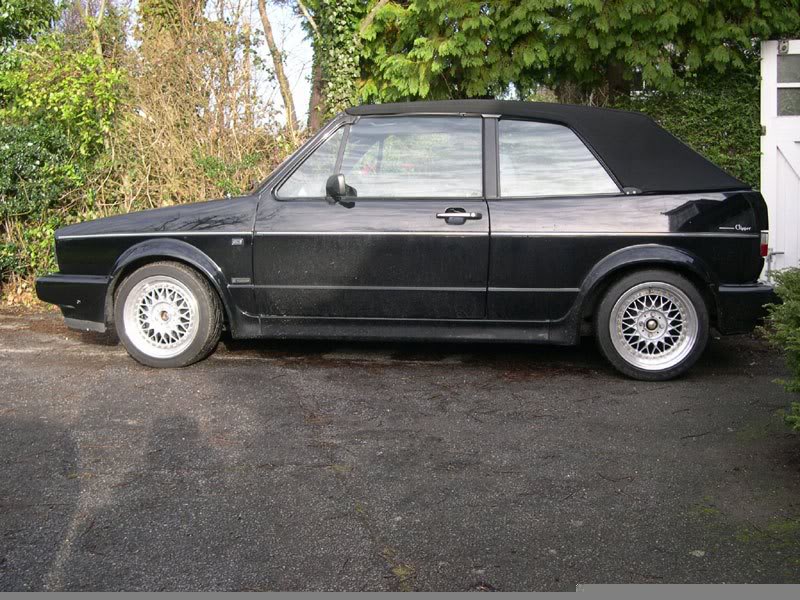
And then once I'd fitted the Coils:
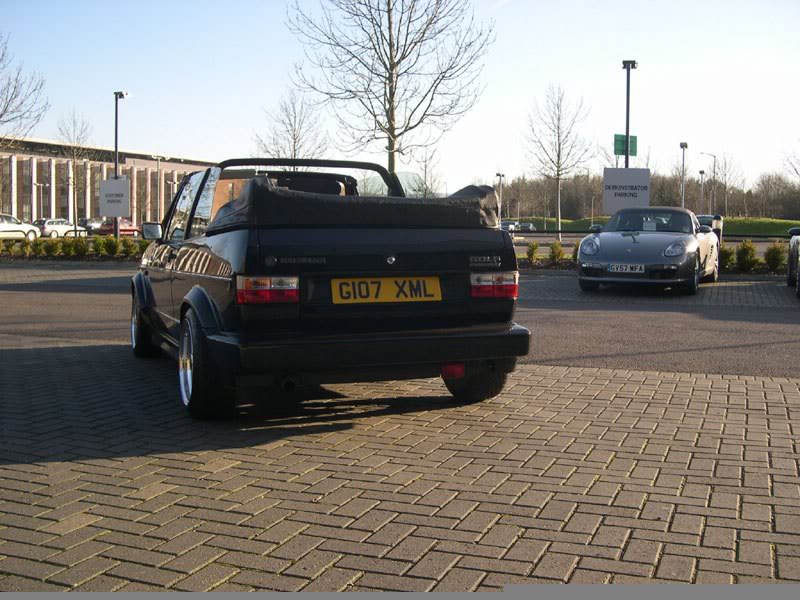
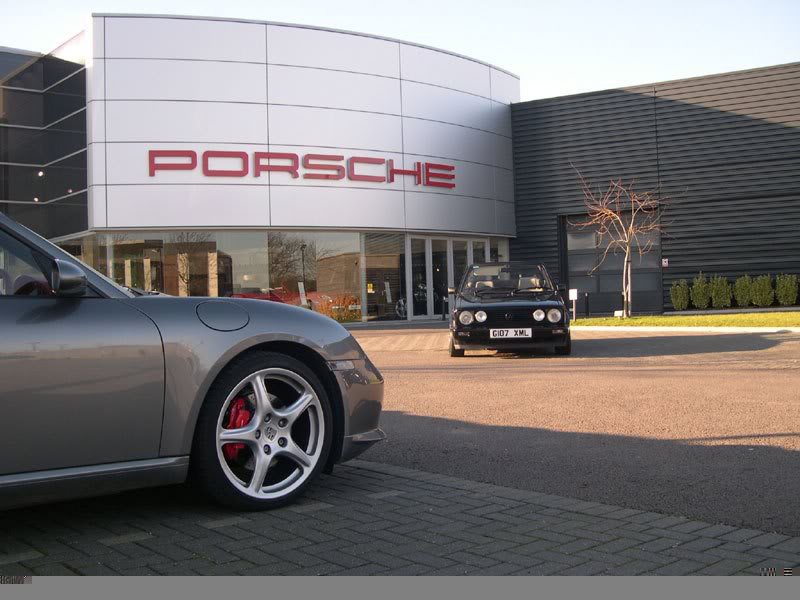
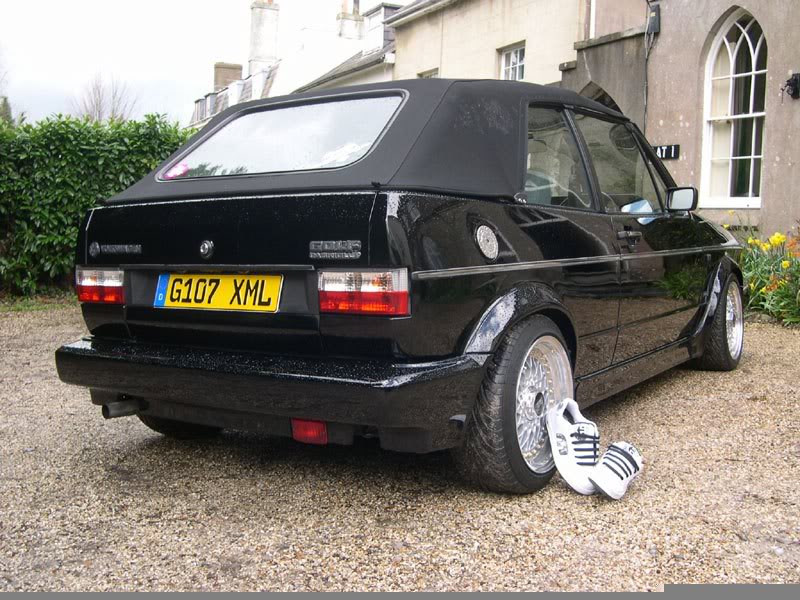
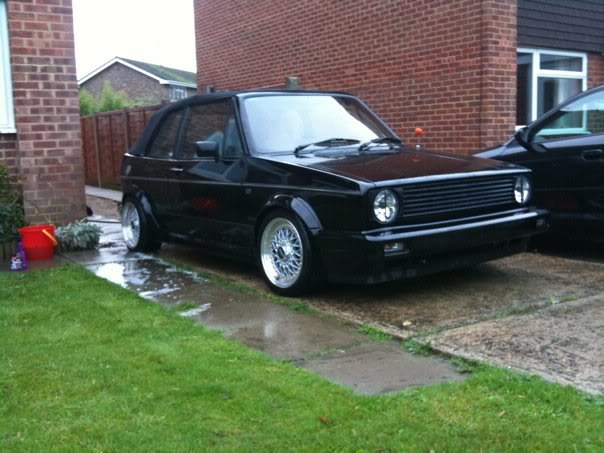
Here's a few of it at the local Porsche garage, with the hood down, Got stance? Er, No…
Fast forwarding to UD08, I brought a few bits, new fuel cap, german plates etc…
All through this it was our daily, living outside our old flat:
James,

Suppliers of Performance & Styling Parts for Mk1 Golf, Caddy, Jetta & Caddy
Suppliers of Performance & Styling Parts for Mk1 Golf, Caddy, Jetta & Caddy
Posted
Settling In
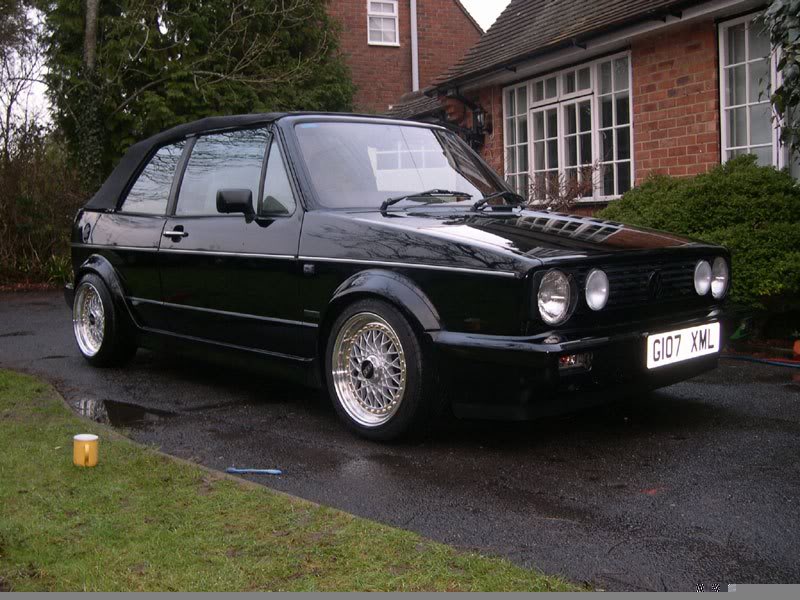
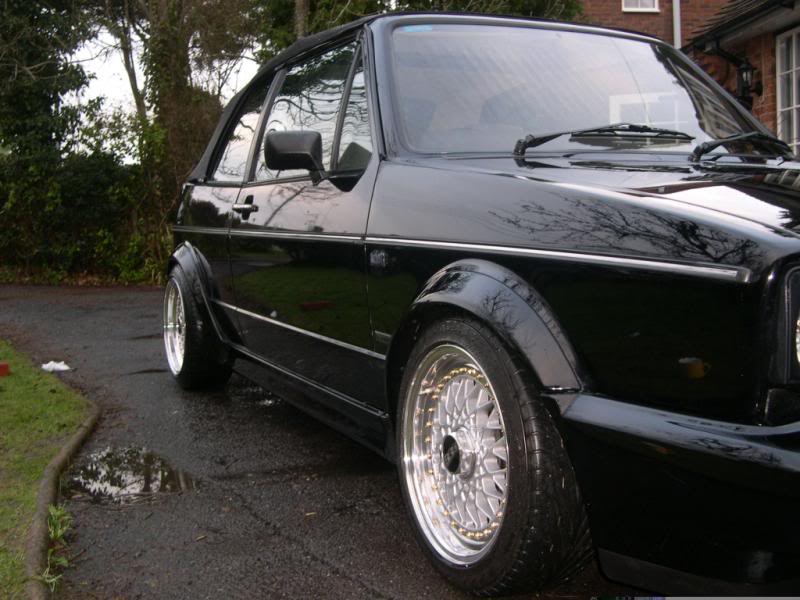
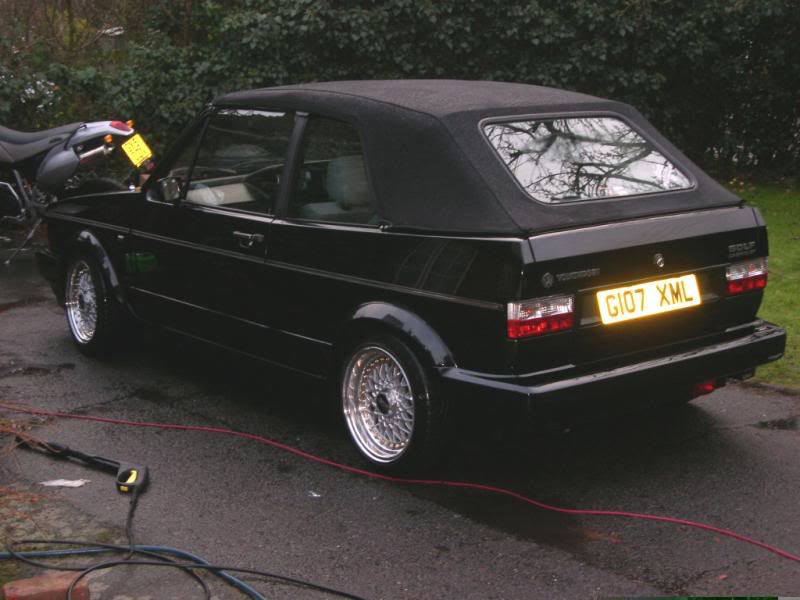
As it was before we headed up to E38 2008, stance was getting better…
At E38 2008…
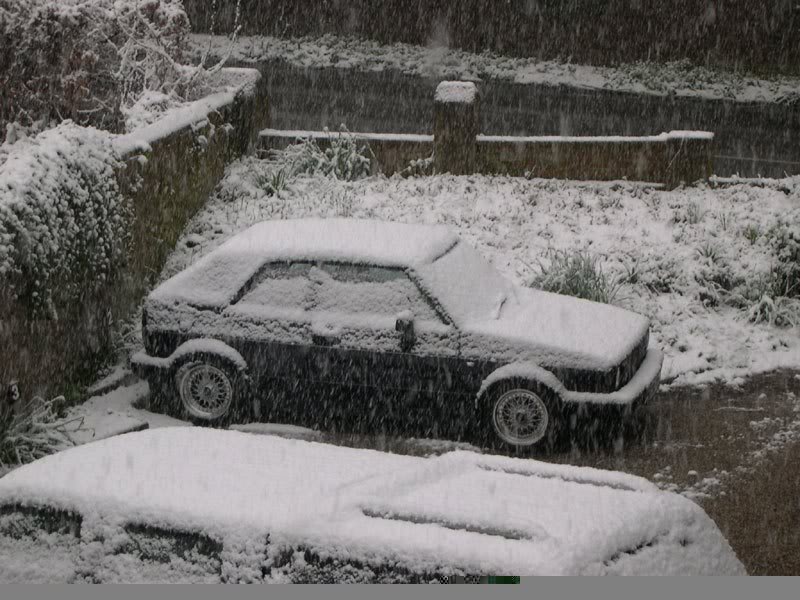
On the way home from E38 the car decided to develop some bizarre electrical issues (anyone who was at E38 2008 will remember the rain on the way home on the Sunday evening!) And I got the hump with the car, and it sat on the driveway for 3 months, My missus' G60 Rado being pressed into daily service…
Then the landlords got the hump with the Cab being sat outside the flat, and I got it towed over to my dads house, where it continued to sit in a carport for a few more month, unwashed, unloved, and feeling very sorry for itself…
In the meantime, the G60 got swapped out for a Mk2:
By this time, I had been working for BBT for a little while, and whilst a few people had seen the cab before it got taken off the road, I think a few others were beginning to doubt it's existence!
James,
Suppliers of Performance & Styling Parts for Mk1 Golf, Caddy, Jetta & Caddy
Suppliers of Performance & Styling Parts for Mk1 Golf, Caddy, Jetta & Caddy
Posted
Settling In
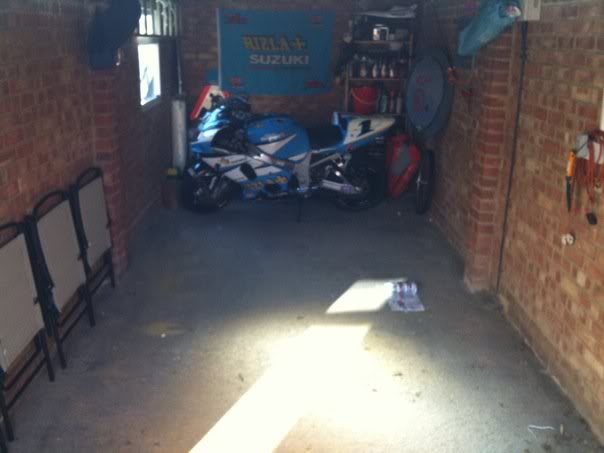
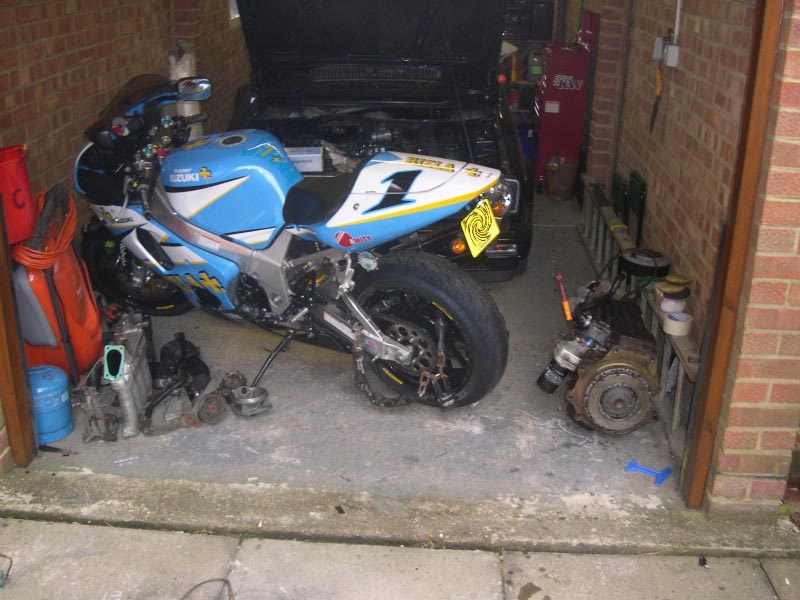
After a few months of chaos, I got another mate of mine to tow the cab from my dads place over to the new house (and my new 1.5 car garage!) Now the pics get a bit sketchy here, as it coincides with the arrival of an iphone!
Garage cleared, and my 97 GSXR750 in,
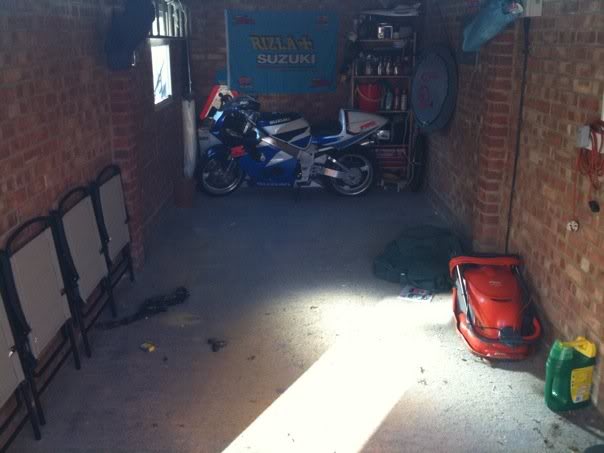
and the Crescent GSXR1000 in,
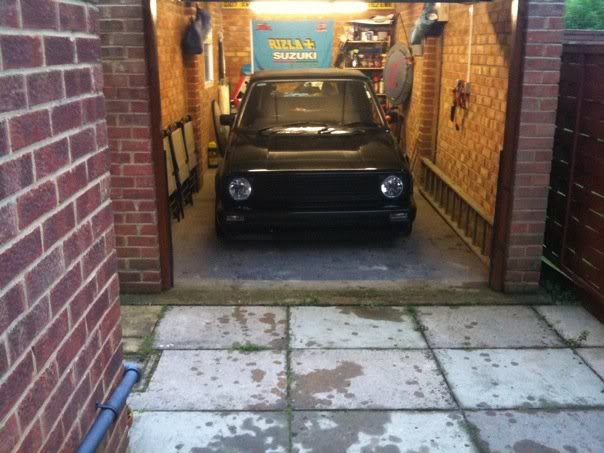
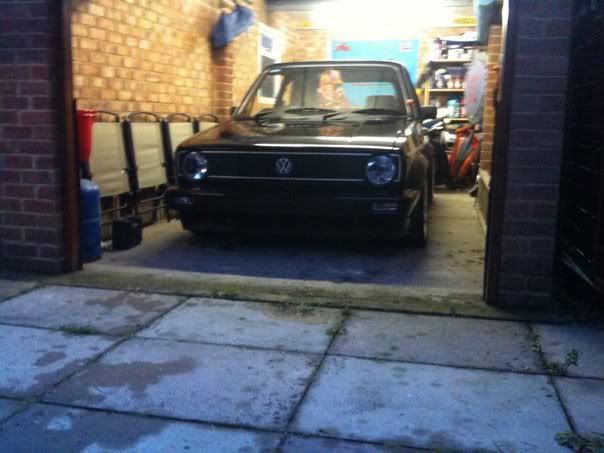
The cabrio on the drive at the new pad
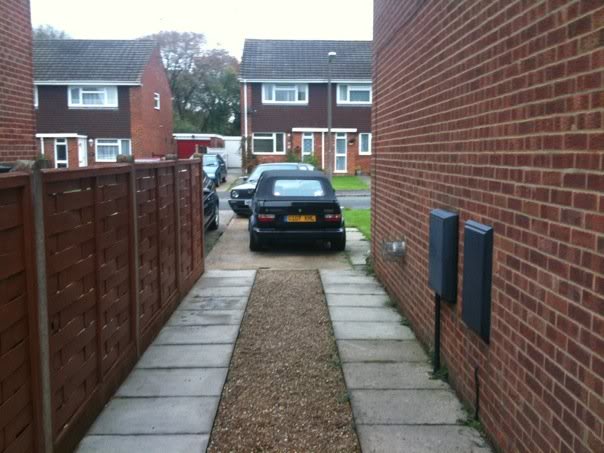
After a quick wash, doesn't look too bad, but the photo's do it a few favours
James,
Suppliers of Performance & Styling Parts for Mk1 Golf, Caddy, Jetta & Caddy
Suppliers of Performance & Styling Parts for Mk1 Golf, Caddy, Jetta & Caddy
Posted
Settling In
I'd been gathering a few bits in the down time, so i got onto fitting the OEM Chrome trimmed early grille…
Much better!
First job was to get the wheels off, after 12 months of living outside, dirty they weren't looking their best…

So off to work with them to get Dave to strip the tyres off, ready for me to split them…
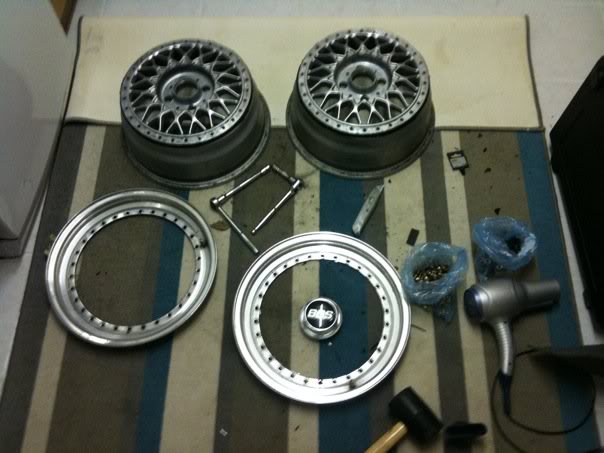
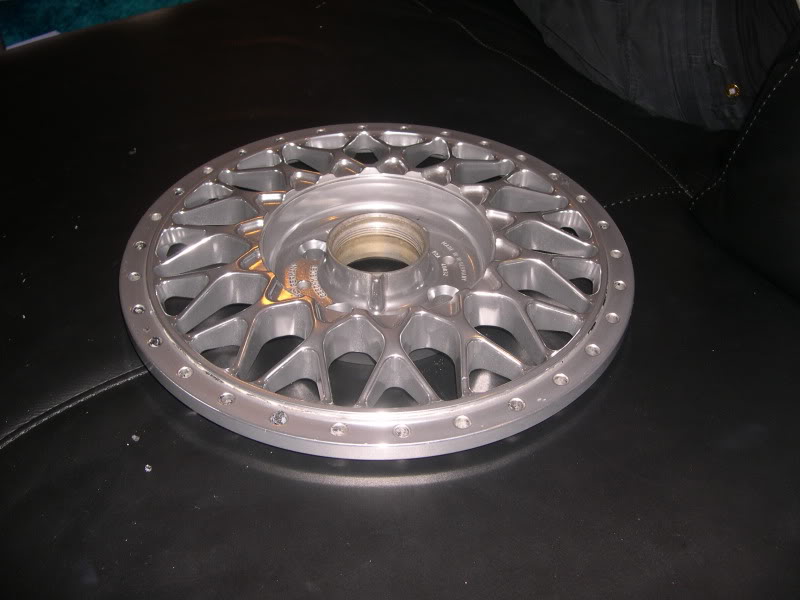
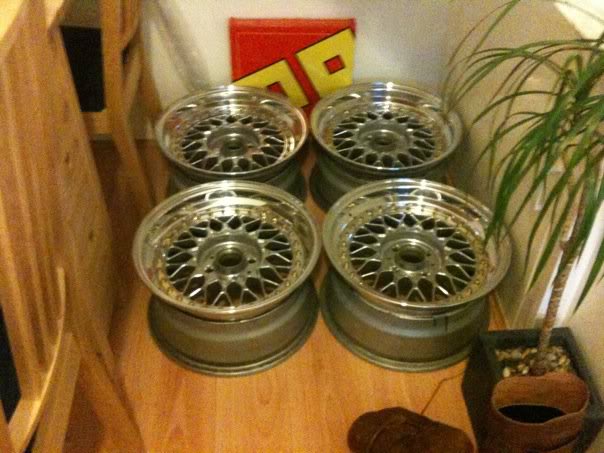
In the meantime, I'd brought some new dishes…
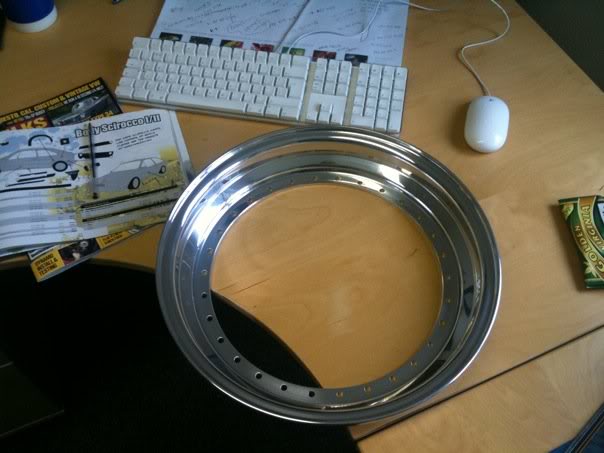
Thought it'd be rude not to try them on…
Then, I tried them with my bolts, which i'd cleaned in windowlene…

But they weren't really cutting it, especially being the plans i had for the rest of the wheels, so…
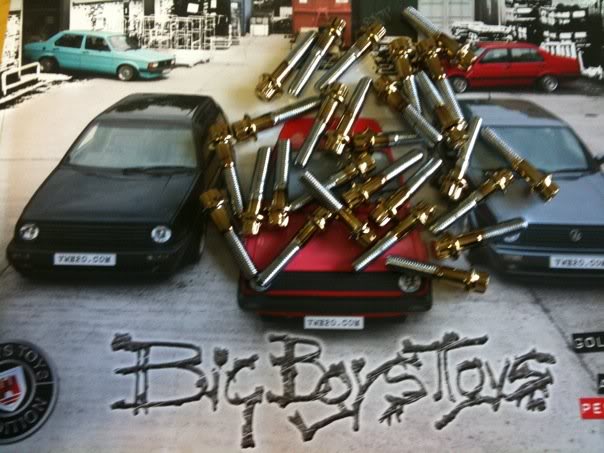
Courtesy of Just Matz
James,
Suppliers of Performance & Styling Parts for Mk1 Golf, Caddy, Jetta & Caddy
Suppliers of Performance & Styling Parts for Mk1 Golf, Caddy, Jetta & Caddy
Posted
Settling In
My missus is patient, and lets me keep bits of car in the living room
 she even brought me this for chrimbo!
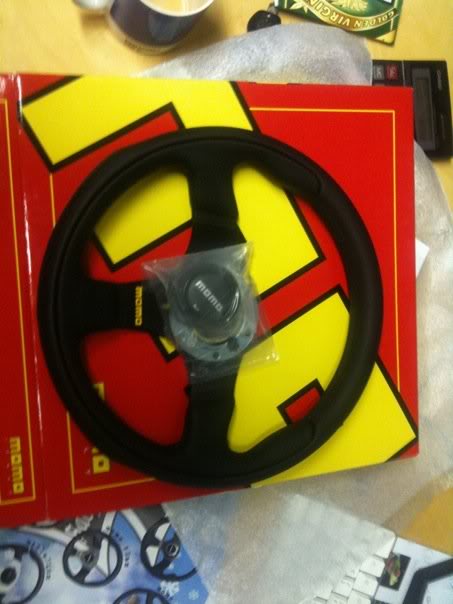
And some early spec chrome waistline trims (you'll see them later)
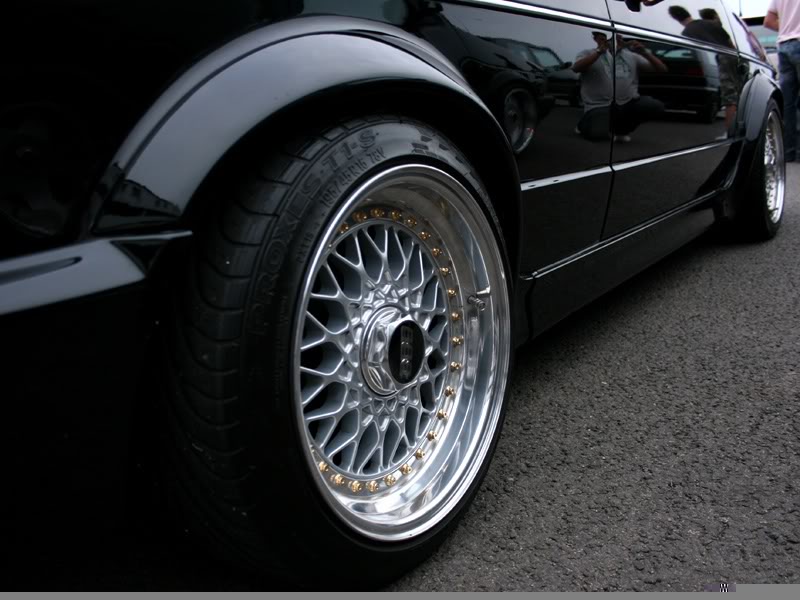
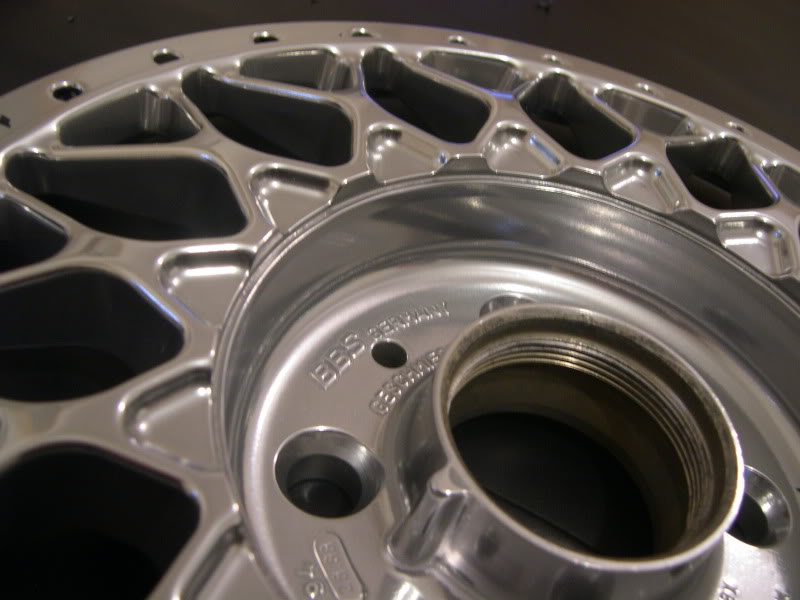
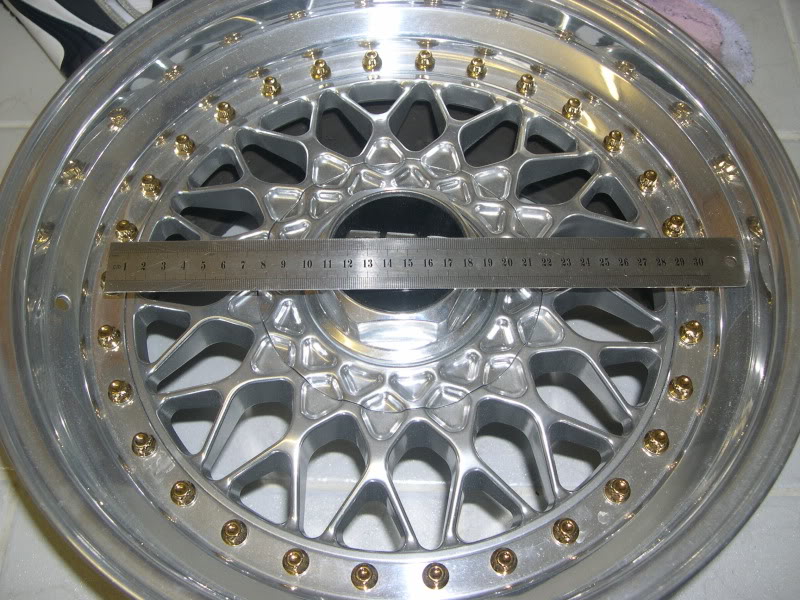
Earlier this week, my centres returned from Mike, and during the time they were away, we'd had a chat, and decided that ceramic polishing was going to be the way forward…
To say i was chuffed would be an understatement…
James,
Suppliers of Performance & Styling Parts for Mk1 Golf, Caddy, Jetta & Caddy
Suppliers of Performance & Styling Parts for Mk1 Golf, Caddy, Jetta & Caddy
Posted
Settling In
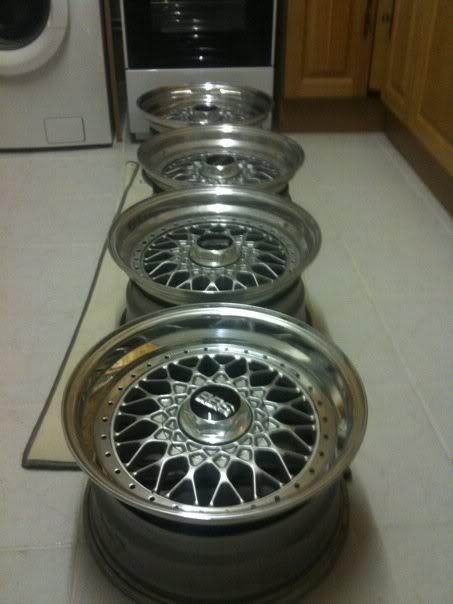
Then did a dry build of them with the barrels,
A friend of mine is going to be powdercoating the barrels in oxblood red for me next week, which hopefully will tie in with some of my plans for the future…
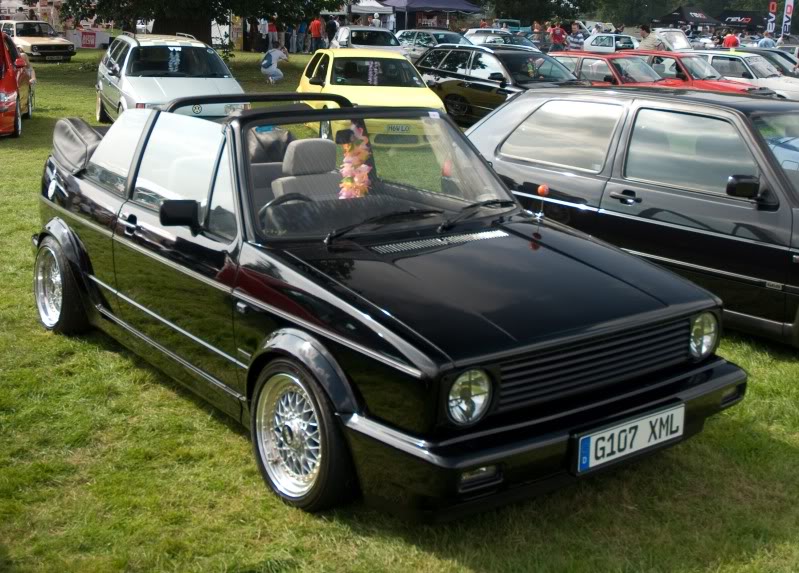
Which brings us up to todays "progress"
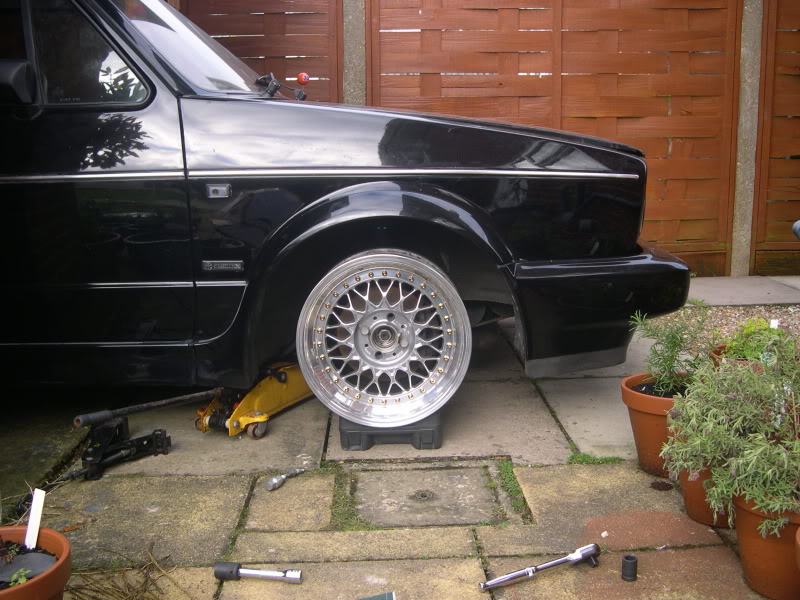
I dragged the old lady out the garage, and indulged myself in a little test fit on the front (I know how the rears fit, as they've always been 8x15.
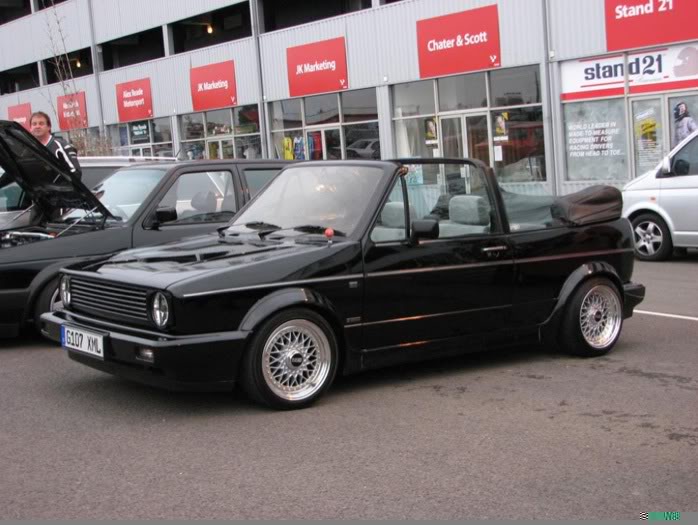
So, here we have 8x15" ET12 RS001, dare i say it myself, perfect fitment?
I'll try and keep this updated as I go along, Long term plans are G60 transplant, and oxblood leather retrim, as well as more pressingly, a bit of paint… we'll see how it goes…
James,
Suppliers of Performance & Styling Parts for Mk1 Golf, Caddy, Jetta & Caddy
Suppliers of Performance & Styling Parts for Mk1 Golf, Caddy, Jetta & Caddy
Posted
Settling In
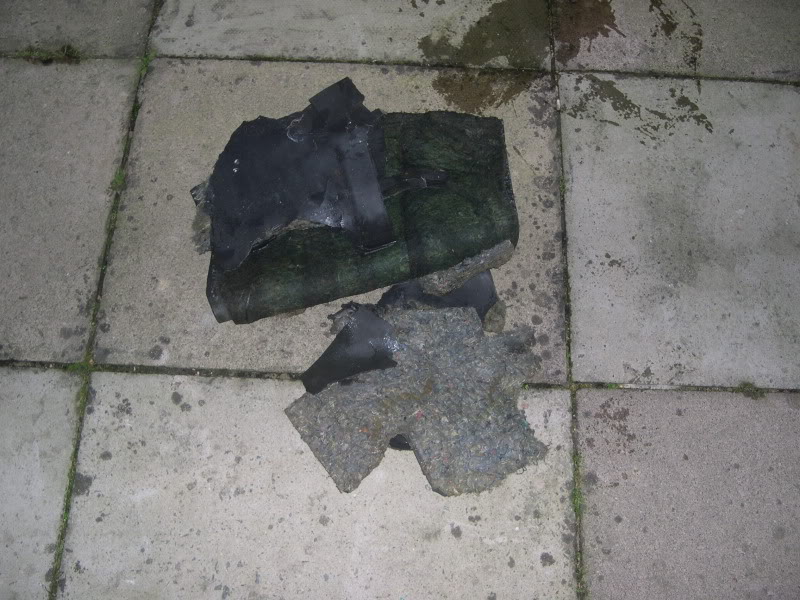
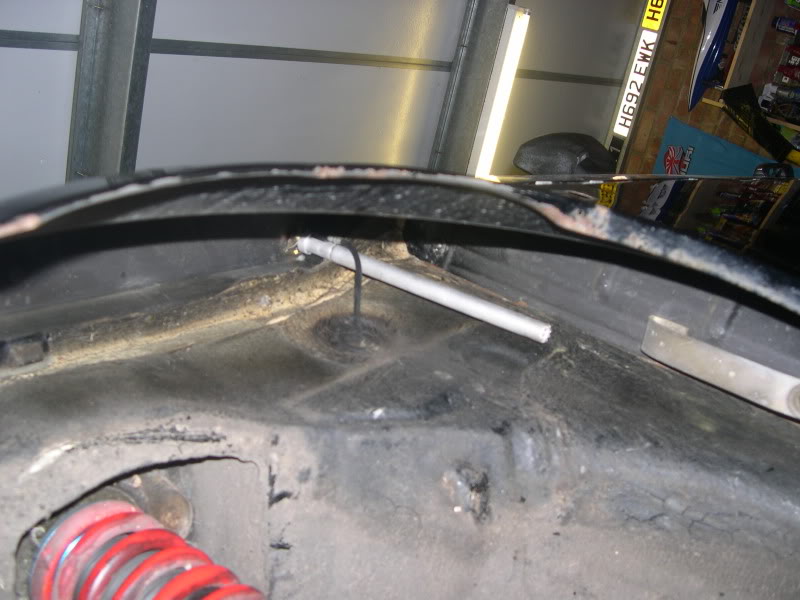
Anyway, I wasn't looking forward to removing the carpet as i had a nasty feeling 12 months of being a swimming pool for midgets would have resulted in me potentially needing to replace or repair the pans…
As they say it has to get worse before it gets better!
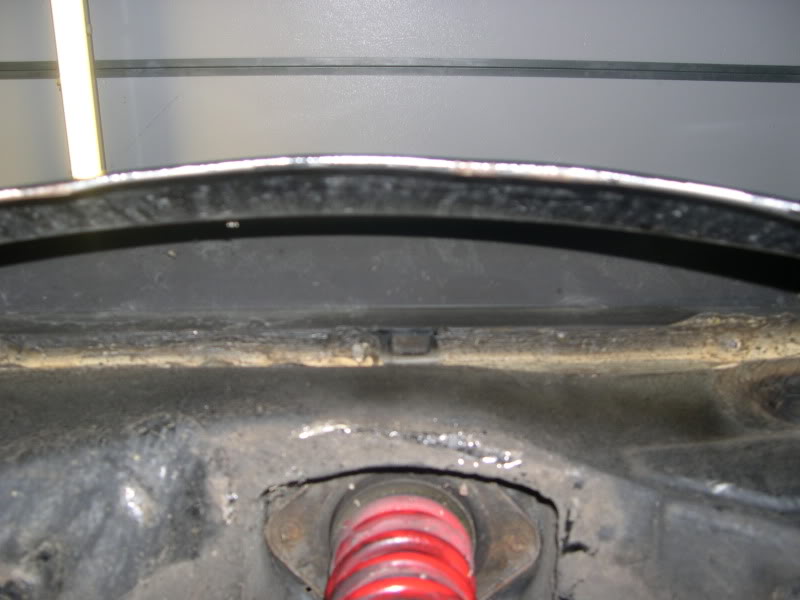
Passenger side seat out, and carpet partially up, looks a bit soggy down there, this doesn't look good :blink:
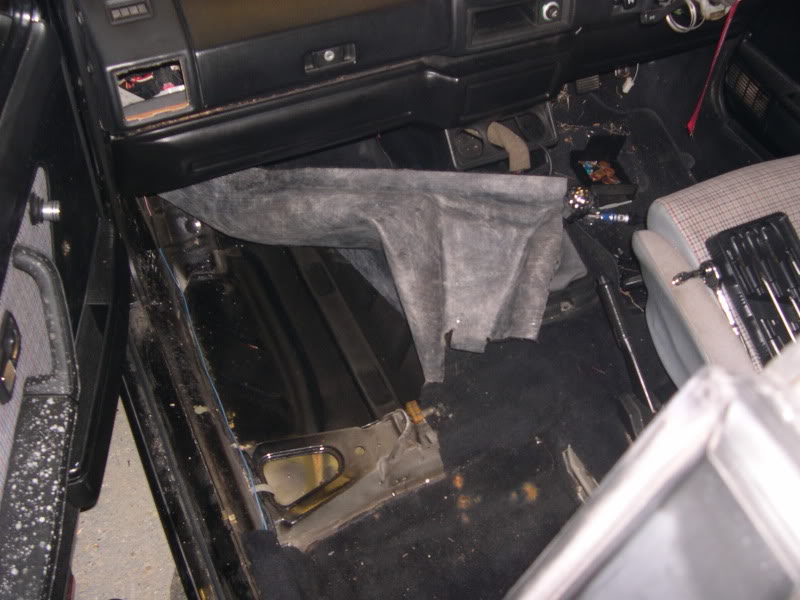
Lets get a bit closer…
Hmm, soggy, but remarkly solid, not a hint of the devils work in there at all

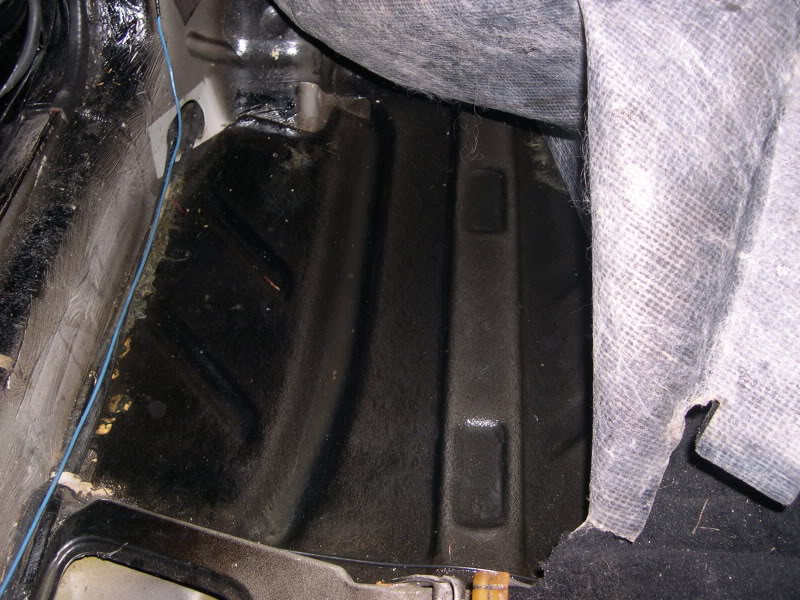
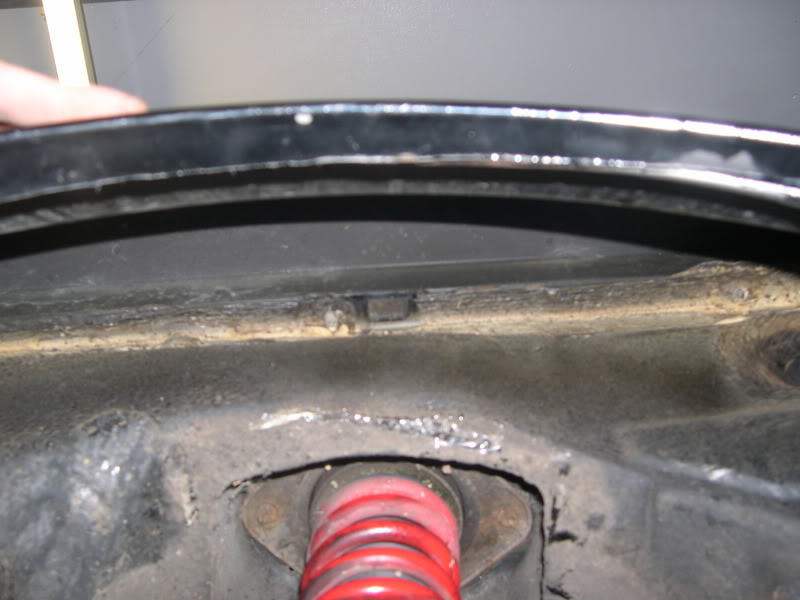
Onto the rear carpet then..
All good under there too

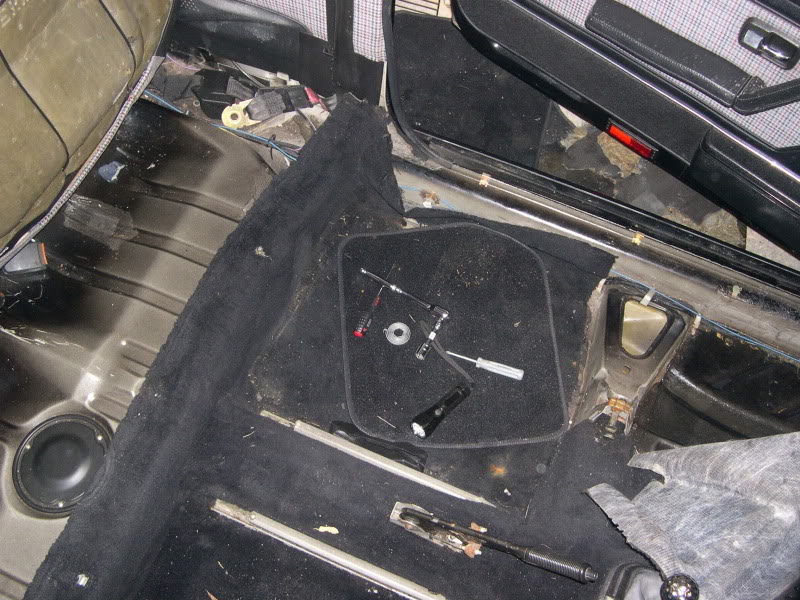
Soundproofing from the front is fit for the bin, luckily we sell the kits at work, so I'll be replacing that
Think I might treat the old girl to a plush new carpet too, whilst all the carpet and so on is out, I'll run an amp wiring kit through, as I'm going to be putting a sub in the boot later on…
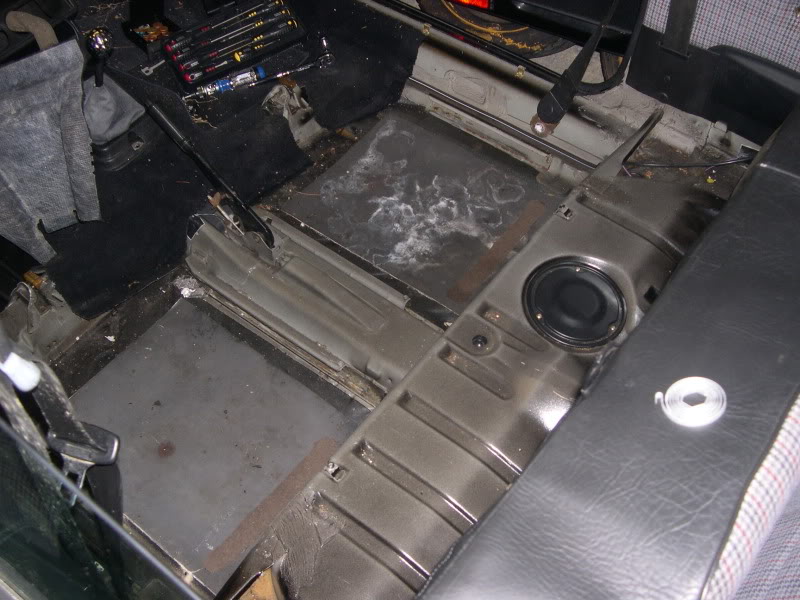
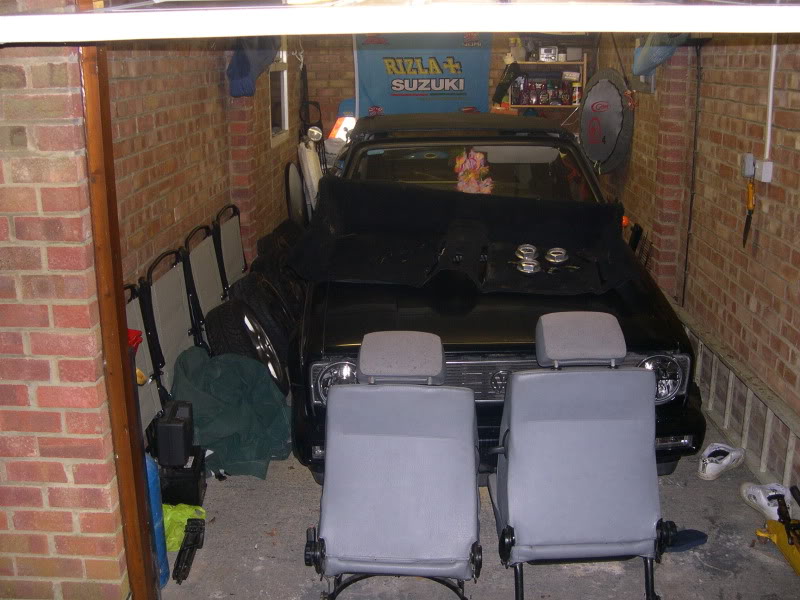
And the final shot for tonight, as I closed the garage door, and sat down with a vodka and lemonade B)
Might be doing some more during the week…
James,
Suppliers of Performance & Styling Parts for Mk1 Golf, Caddy, Jetta & Caddy
Suppliers of Performance & Styling Parts for Mk1 Golf, Caddy, Jetta & Caddy
Posted
Settled In

Posted
Settled In

Alex
Posted
Settling In
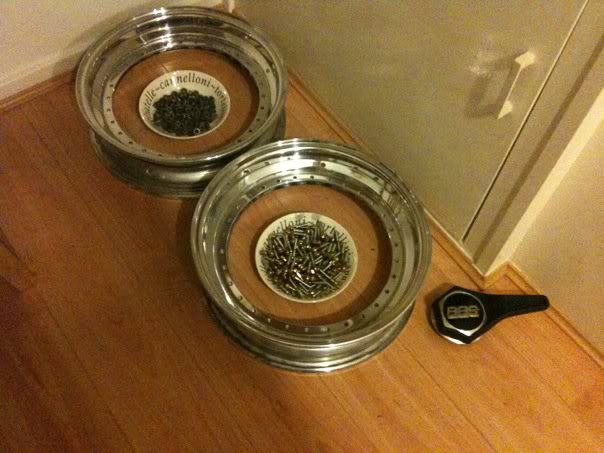
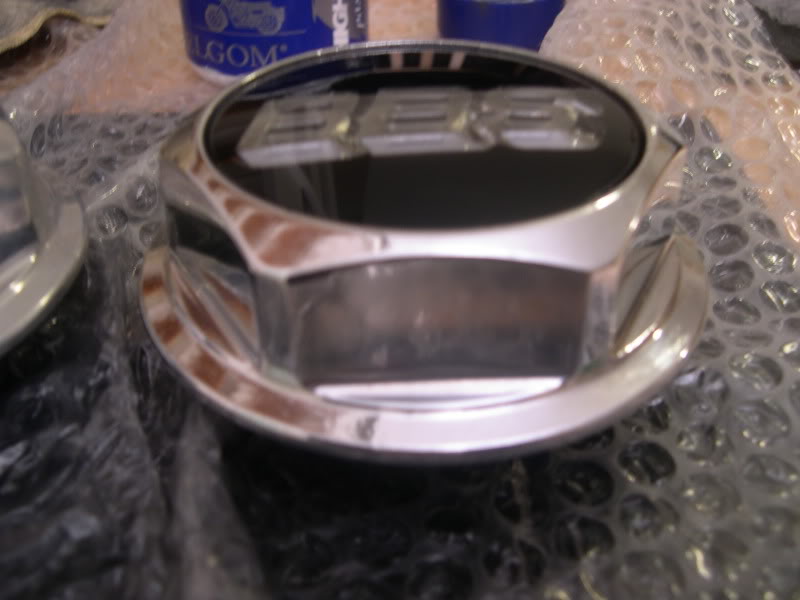
Now obviously I'm talking about the centre nuts from my RS's which were in pretty bad shape :angry:
So armed with some polish, some "fanny" gloves a polishing pad, and a microfibre, work began.
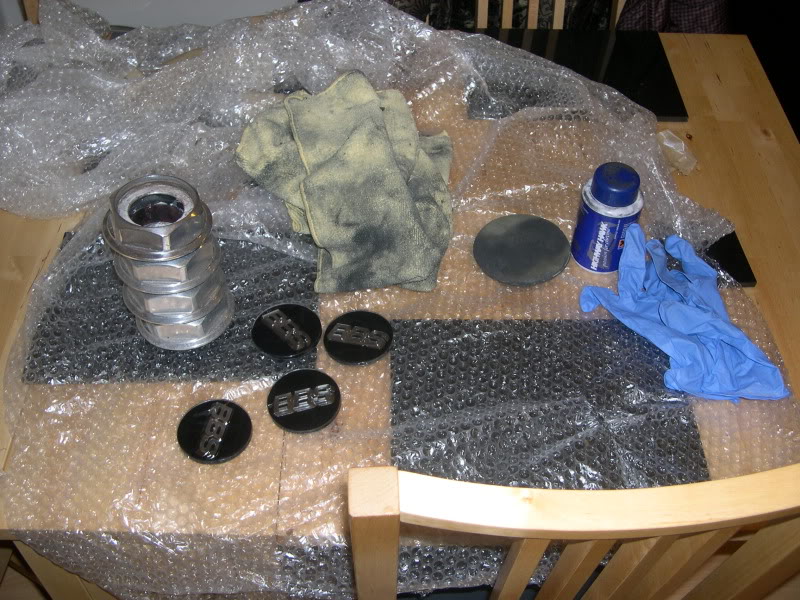
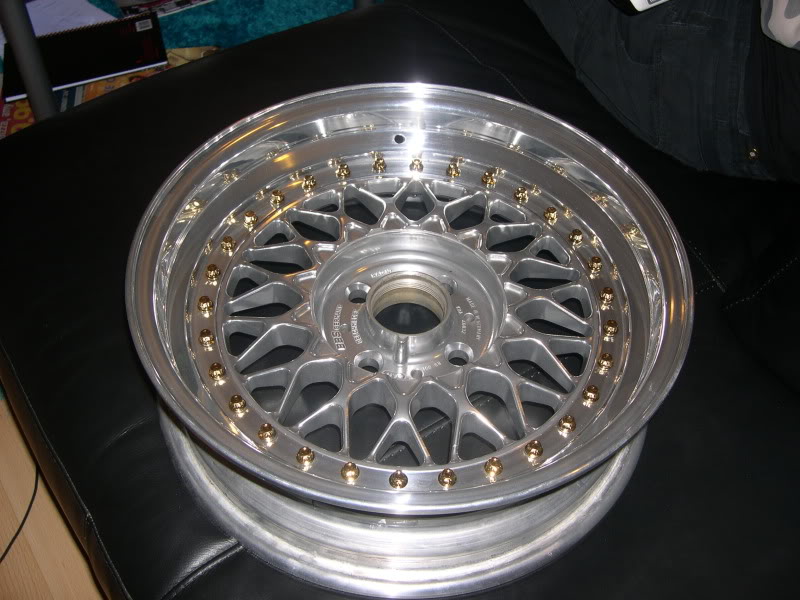
After about 1/2 hour, i had achieved a finish like this:
Compare the meerkat:
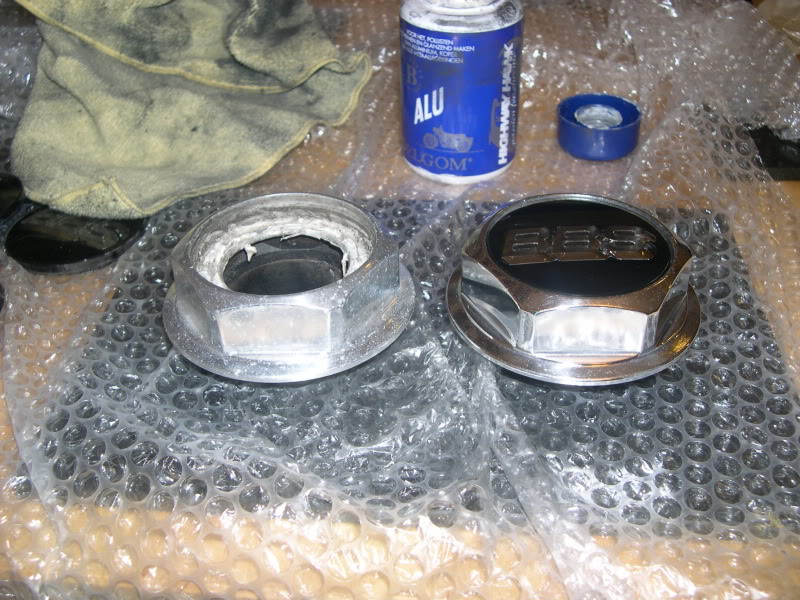
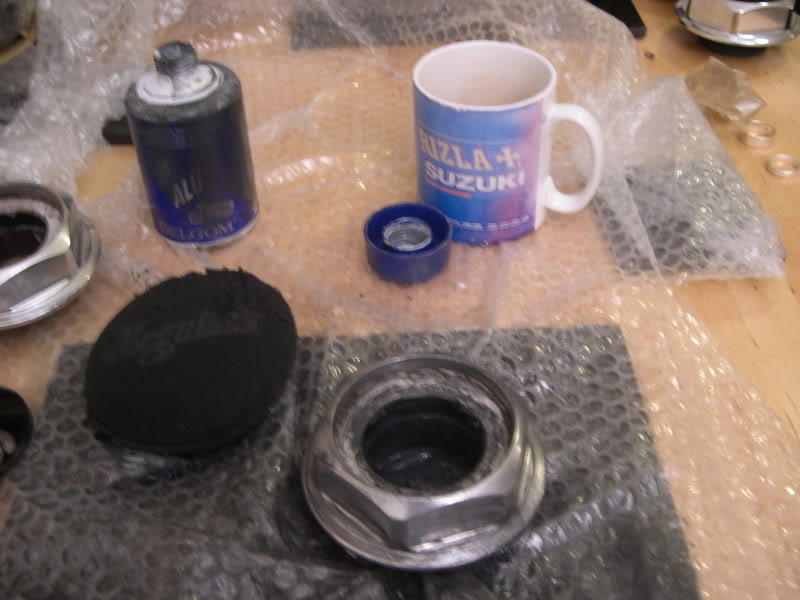
mid-polishing:
and all 4 done B)
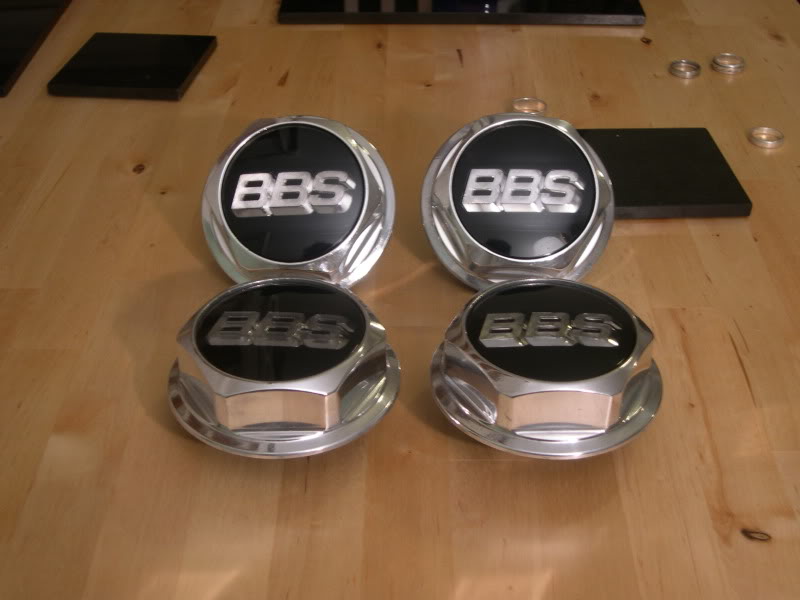
C+C welcome, hopefully more meaningful updates later in the week…
James,
Suppliers of Performance & Styling Parts for Mk1 Golf, Caddy, Jetta & Caddy
Suppliers of Performance & Styling Parts for Mk1 Golf, Caddy, Jetta & Caddy
Posted
Settling In
vdubber2 said
Wheels look amazing. Can i ask who polished them would love to get my wheels looking like that.
Alex
Cheers Alex,
The centres were polished by Mike "The Polisher" they were ceramic polished, then wet laquered to make them slightly easier to look after.
I polished the dishes and the centre nuts myself, using a combination of arm power, and a set of polishing bilts on an electric drill.
James
James,
Suppliers of Performance & Styling Parts for Mk1 Golf, Caddy, Jetta & Caddy
Suppliers of Performance & Styling Parts for Mk1 Golf, Caddy, Jetta & Caddy
Posted
Settling In
Go Hard or Go Home
Posted
Settling In
So yet another weekend of little progress, I was up in London for a Deadmau5 gig on Friday, then recovering saturday, then lunch with the missus, dad, step mum, step sister and her other half yesterday.
Spent quite a lot of time thinking about the car though…
If I'm going to be over doubling the existing power output, then I really ought to do something about the woeful Mk1 standard brakes, so I've come up with the following solution…
285mm Big Brake conversion on the front, running cross drilled Black Diamond discs, Predator Pads, a G60/Late 16v 22mm m/c, and a 9" Mk2 servo, that combined with braided hoses should make quite a difference, don't think I'm going to bother running rear discs as I've never felt the Mk1's need them, unless you're running silly power.
So, I've got the m/c already:
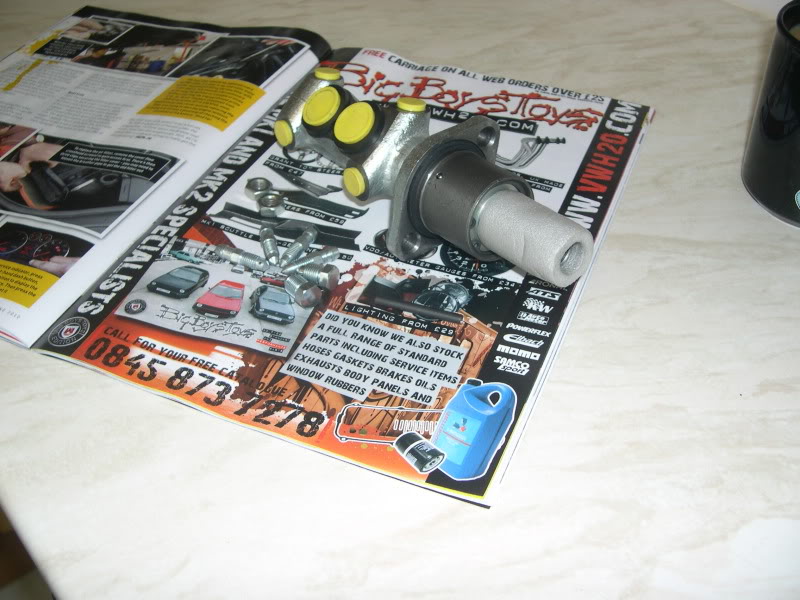
Other bits should be arriving during the week.
Going to collect my 9A next weekend as well, so we're getting there.
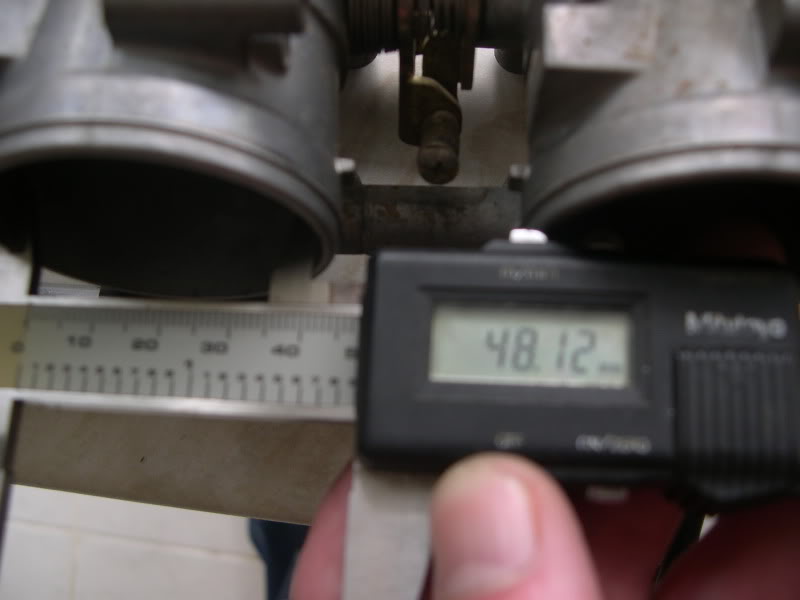
At 285mm, there isn't going to be a huge amount of room left behind the wheels either
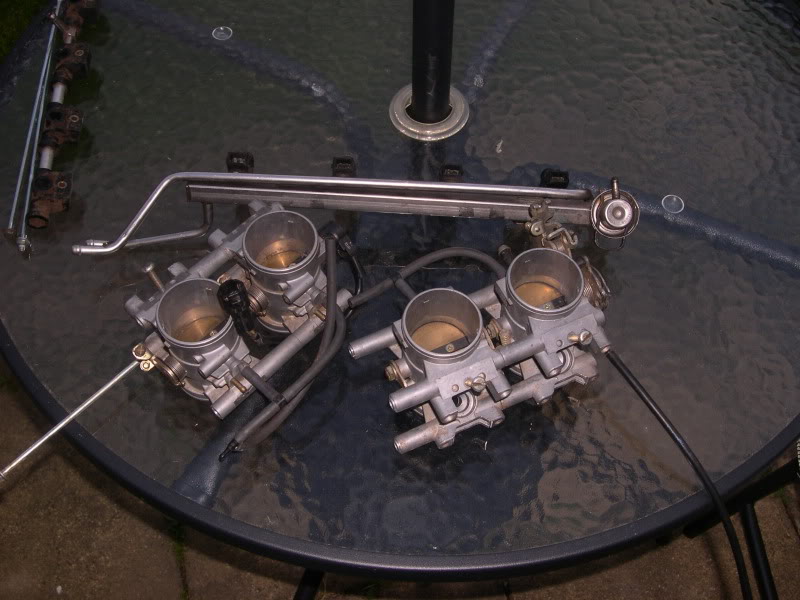
Hmm, the missus went off to Brighton earlier to buy her new MacBook, so i went to see my mate Nick, the guy who's going to be building my engine up, and came back with these:
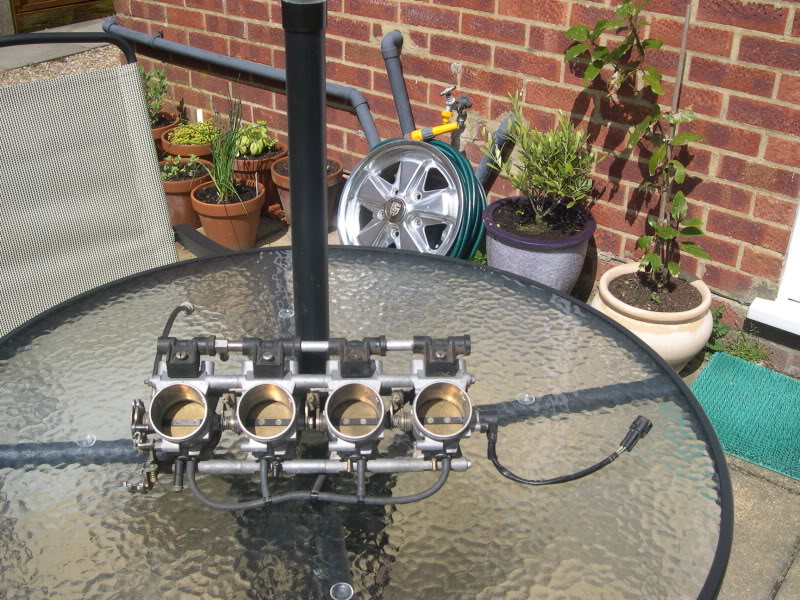
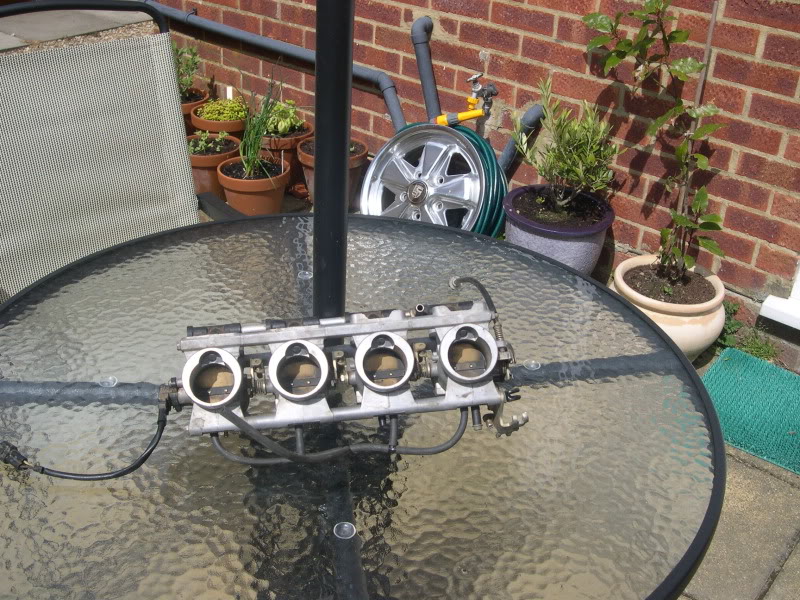
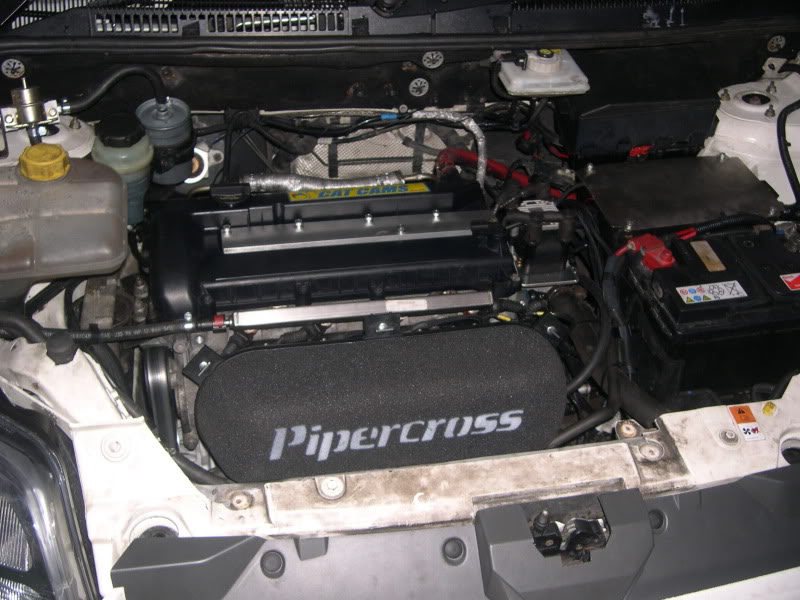
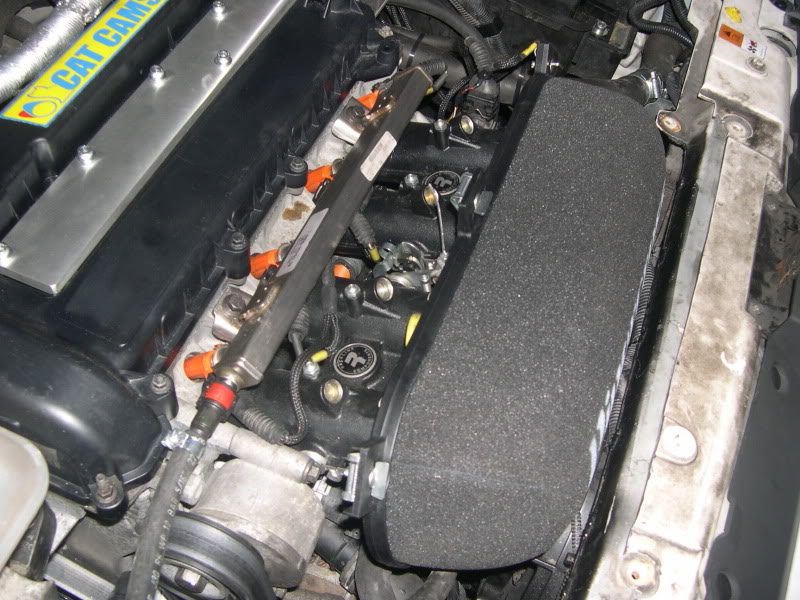
Ready to take to work, and try up for some velocity stacks (trumpets in English) then get the Pipercross Box filter and back plate all ordered up, as well as a little bit of black silicone hose for the intake runners, we're aiming for 15" valve to intake, which is about optimum for a good spread of power, 12" would have a screamer, 20" would have a torquey motor, I'm after a bit of both.
As soon as the engines collected, it'll be head off, ready for big valves and some porting, the flywheel will be going on an intensive diet too
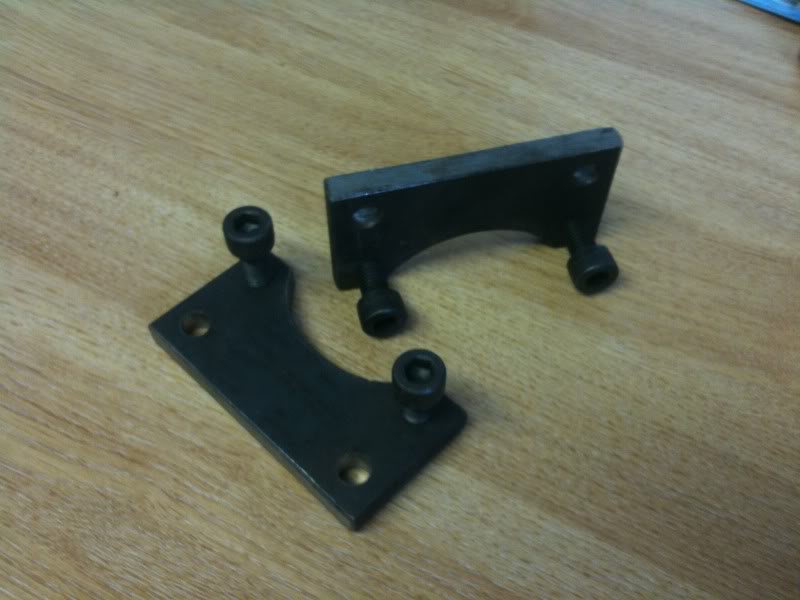
then we can start fabbing up the intake manifold and get them mounted.Well my caliper brackets turned up today, so I'll grab a set of discs from work and trial fit them tomorrow to see if I have any hope of squeezing the brakes under the RS's…
The brackets (not the prettiest things, but they'll do the job!)
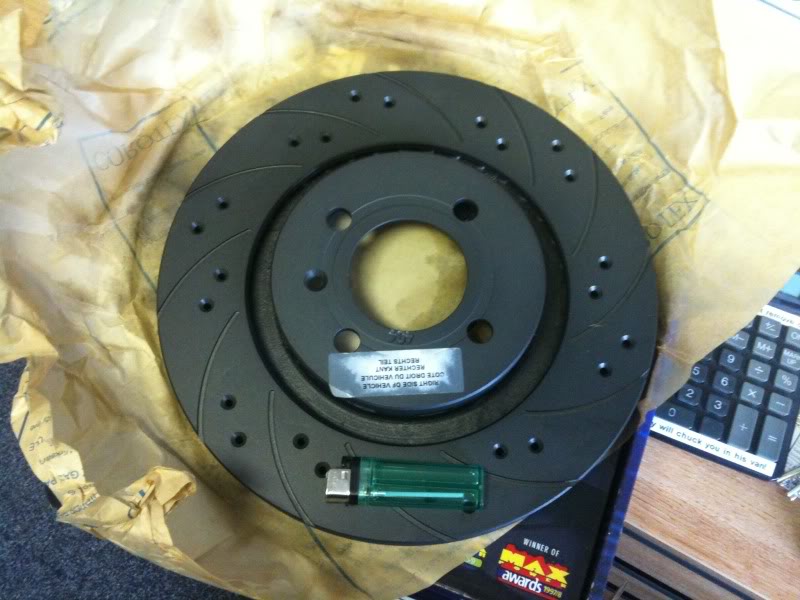
and a set of Black Diamonds finest
James,
Suppliers of Performance & Styling Parts for Mk1 Golf, Caddy, Jetta & Caddy
Suppliers of Performance & Styling Parts for Mk1 Golf, Caddy, Jetta & Caddy
Posted
Settling In
I snapped this in Nicks workshop before we left, a Series 2 RST undergoing a 5cyl Focus ST RWD transplant, will be an animal when it's finished.
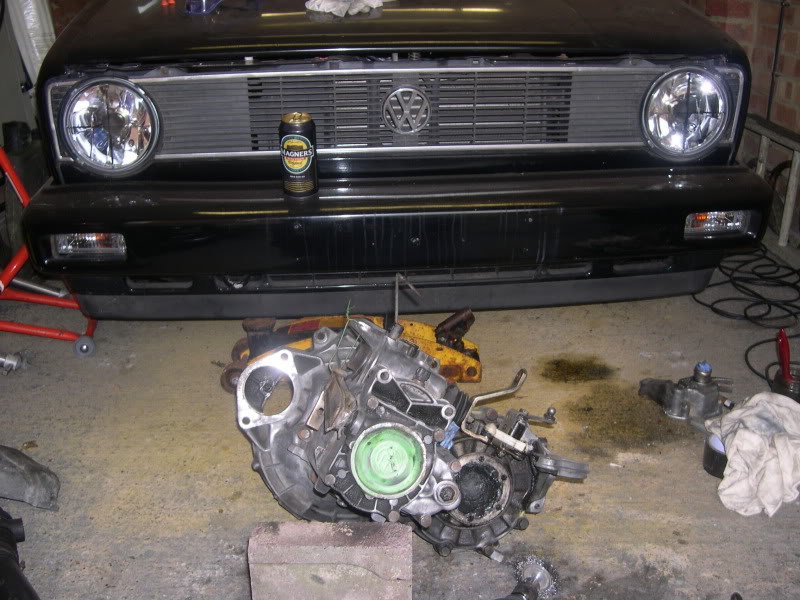
We headed off down to Adams work, and hooked the 'box off before we lifted it into the van, to make life easier, forgot how heavy these lumps are!
The engine is externally in great nick, having not been fitted into Adam's Mk2 that long before he pulled it for a G60 transplant.
Here's the engine in it's previous home:

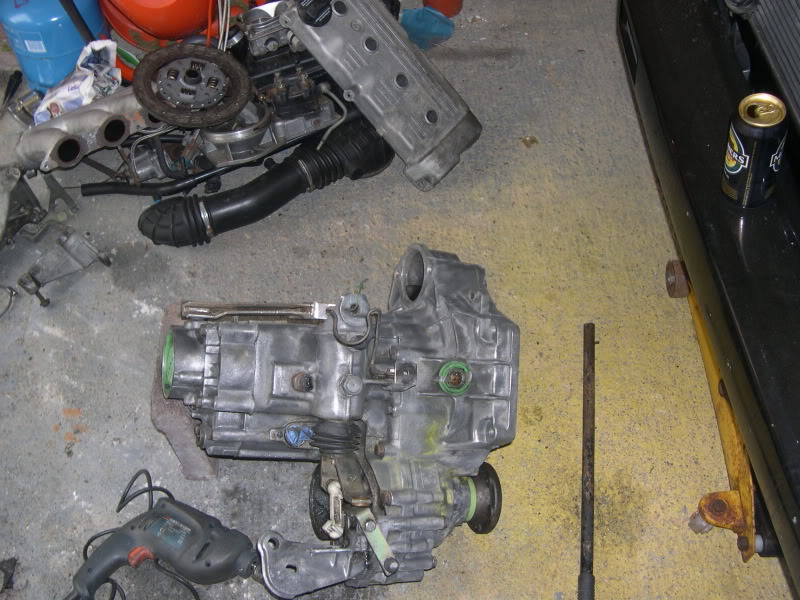
And here it is after we hauled it back to Nicks unit, bang tidy motor really compared to some of the hangin valver lumps I've seen, fitted with all new senders, hoses and flanges etc:
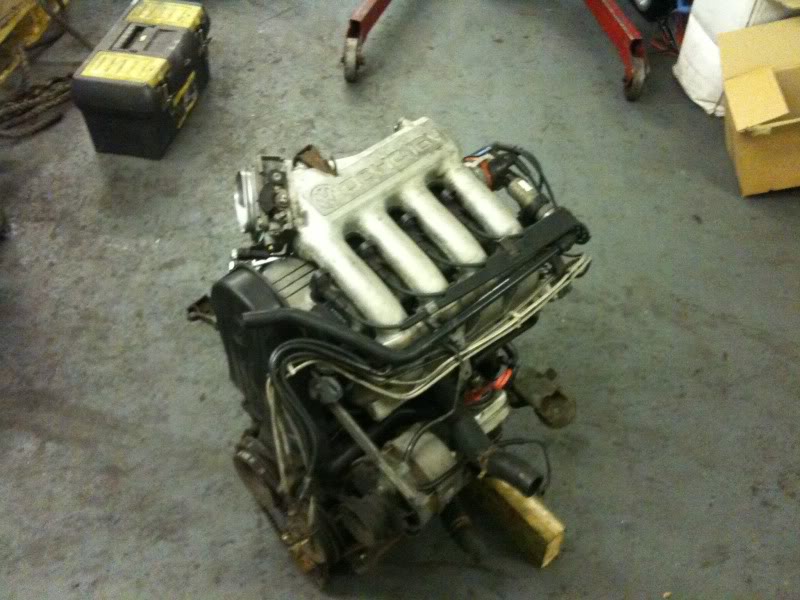
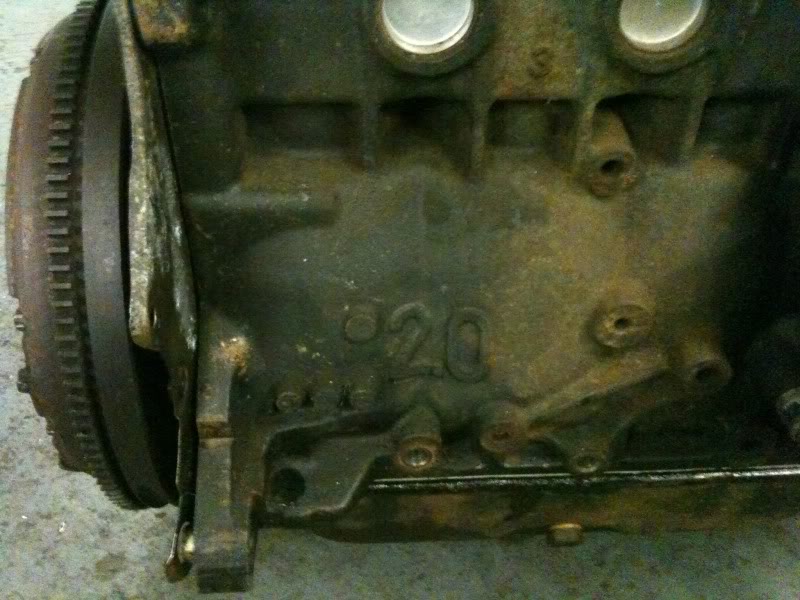
The important numbers:
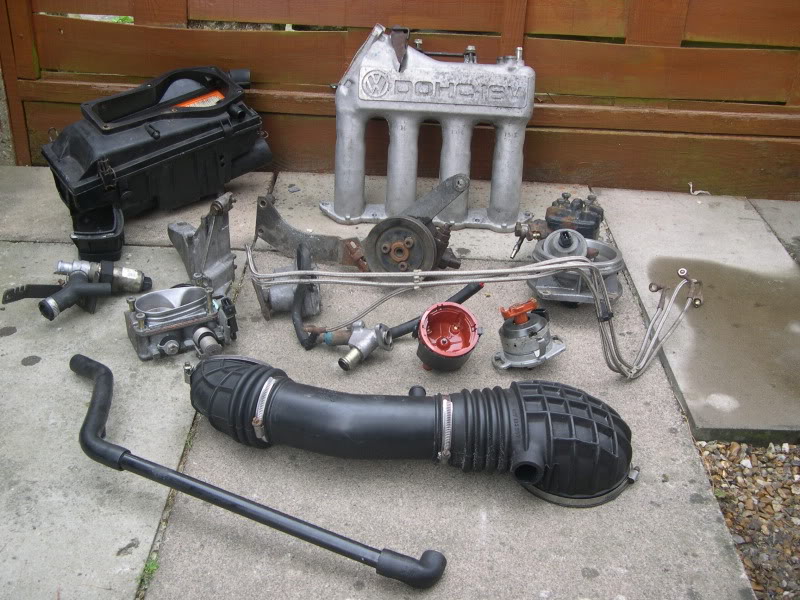
First job was to strip off all the bits i don't need, so that's anything to do with the K-Jet injection, and anything not needed in a Mk1, (the PAS set up will be coming off tomorrow):
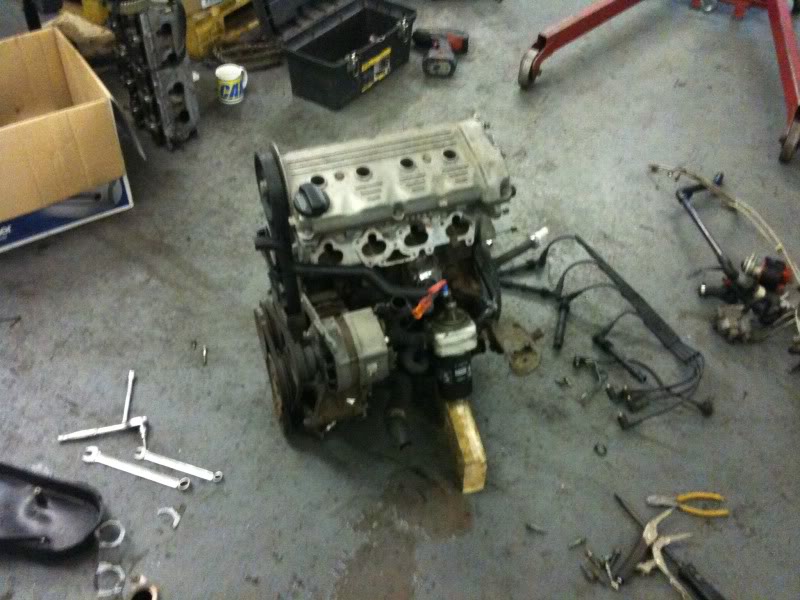
Next job was to strip the head off, ready for Nick to work his magic:
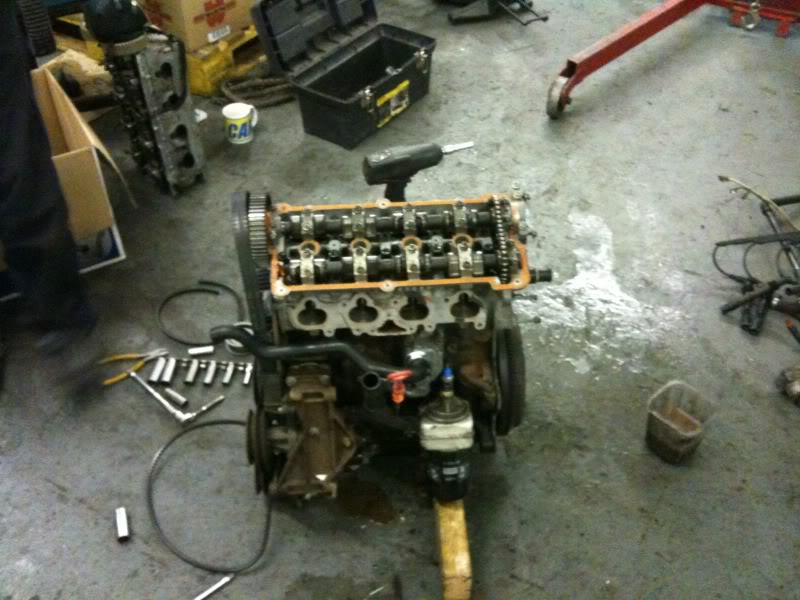
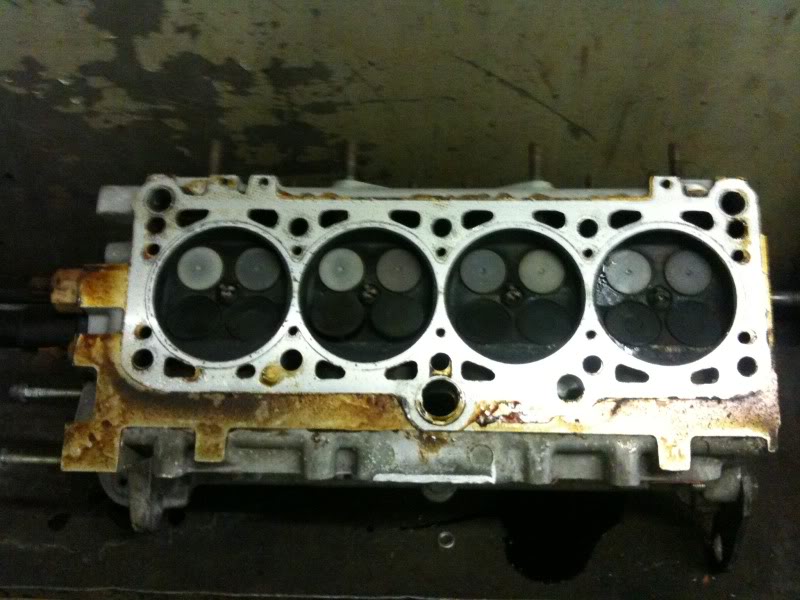
Although the valves are grubby, the top end is in brilliant condition, it's clearly been rebuilt very recently, but we'll still be giving the ports a tickle, and seeing what valves we can fit in there. From previous experience VW seem to always make the ports too big for the valves, so a tidy up, and big valves can see nice results.
You can see from this pic, after the heads come out the parts washer, that the followers etc are all brand new.
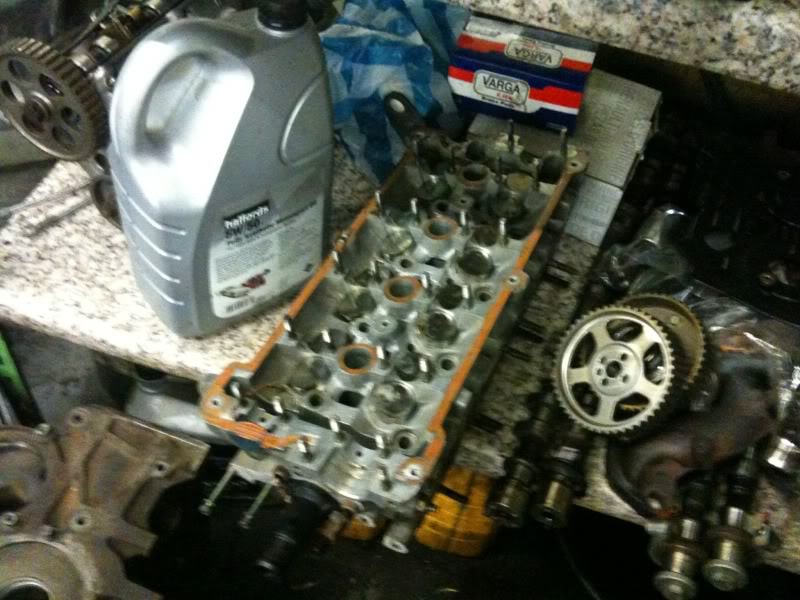
The heads now waiting for Nick to work his magic, and get building the inlet manifold, and I'll be picking up the bottom end tomorrow, ready for a clean up and paint.
In the mean time, I'll have the following for sale:
Throttle Body 9A
Inlet Mani (top half) 9A
PAS Pump, valver
Airbox
Metering head and boot
Braided fuel lines
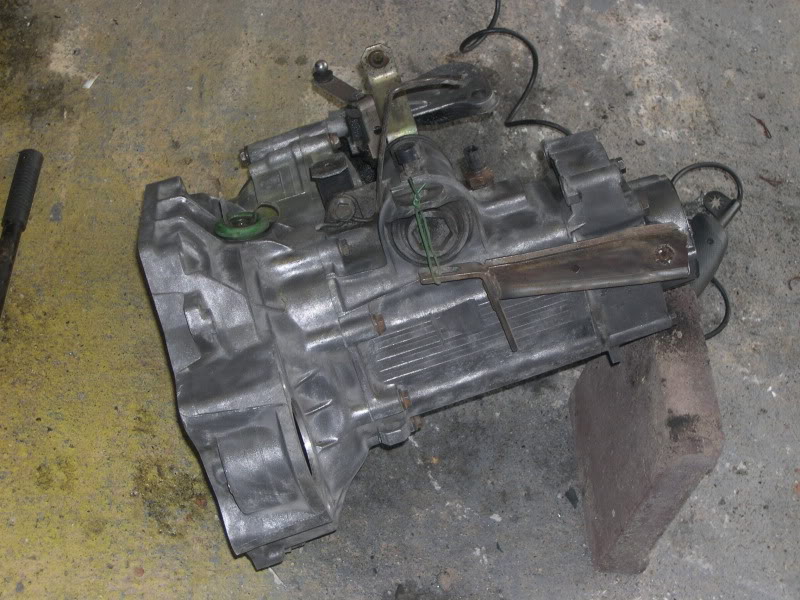
Mk2 valver 'box
ECU & TCI
PAS pump
WUR/Choke unit
Dizzy, with as new rotor arm, and cap
So if you're after any of that, let me know…
And some other stuff I can't remember, it's all in the boot of the Mk2 and it's raining!
Got the bottom end back to my pad this afternoon, stripped most of the removable parts off and gave it a good clean ready for wire brushing it and painting it next.

Worked out all the bits I don't actually need as well, so that's all this lot, plus a gearbox, but I think that's spoken for already…
The garage is getting a bit full now, really need to get my gixxer 750 sold (that's the blue and white one hidden at the back, not the Rizla one!)
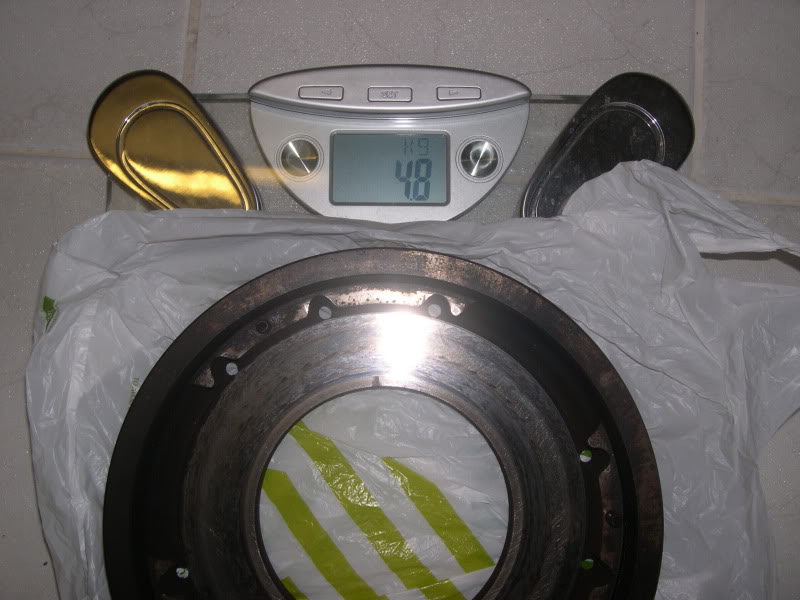
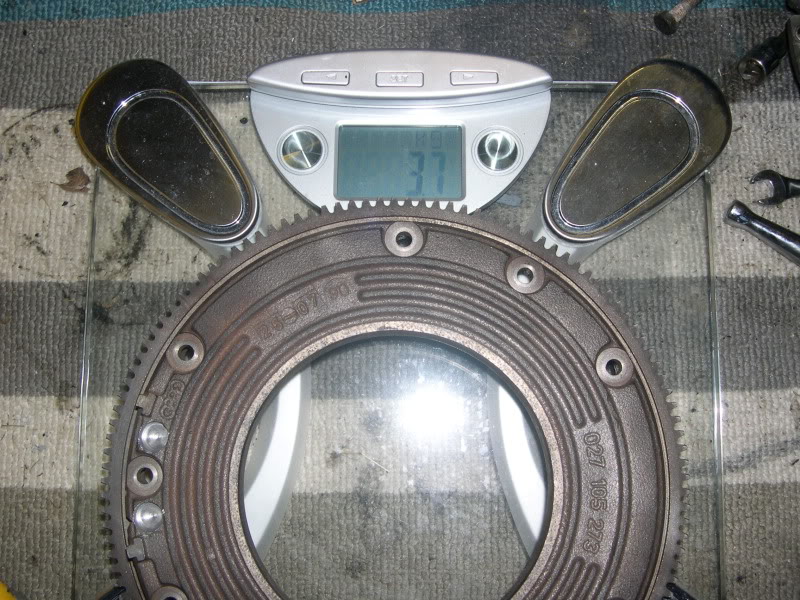
Weighed the flywheel too, that's going back to Nick @ AMS this week ready to be lightened.
That is my favorite mk1 cab. Very smart!
Cheers
 if that's your 993 we could do a swap if you wanted?
Anyways, got in from work and decided to make a start on prepping the bottom end, got the back half of it done tonight, but didn't want to carry on too late as our neighbours have got 2 little kids, will hopefully get the other half of it done tomorrow, then it's time to make a start on prepping all the ancillaries…
so here's the shiny back half…

James,
Suppliers of Performance & Styling Parts for Mk1 Golf, Caddy, Jetta & Caddy
Suppliers of Performance & Styling Parts for Mk1 Golf, Caddy, Jetta & Caddy
Posted
Settling In
yester I began fettling the arches, I'm going to need as much space as I can get with ET12 8"s to fit under the fronts, then probably ET4 by the time I've spaced the rears, granted it's not the prettiest job in the world, but it'll get tidied up before it goes for paint, and the arch trims will cover it all anyway, so I just hammer and dollied the lips round, basically getting them more or less flush against the arch. Then I dremel'd the arch trim to match
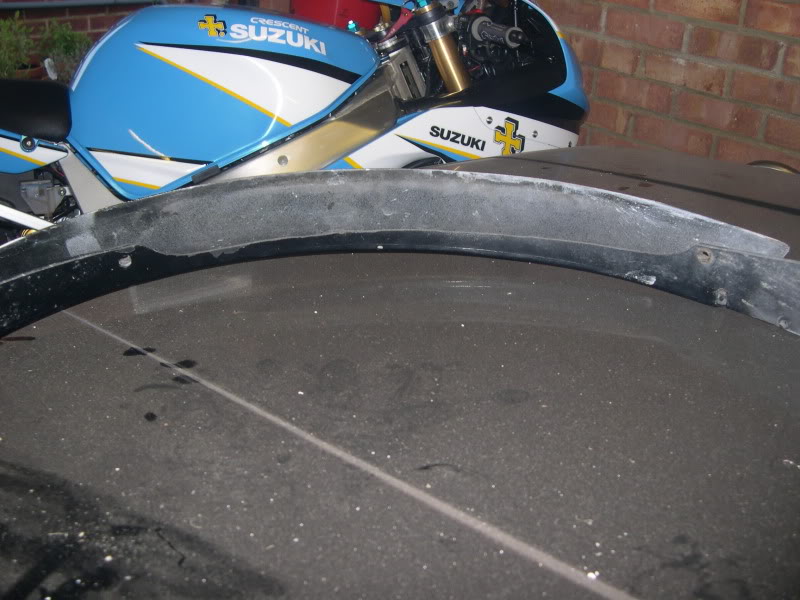
With the plastic arch trim in place:
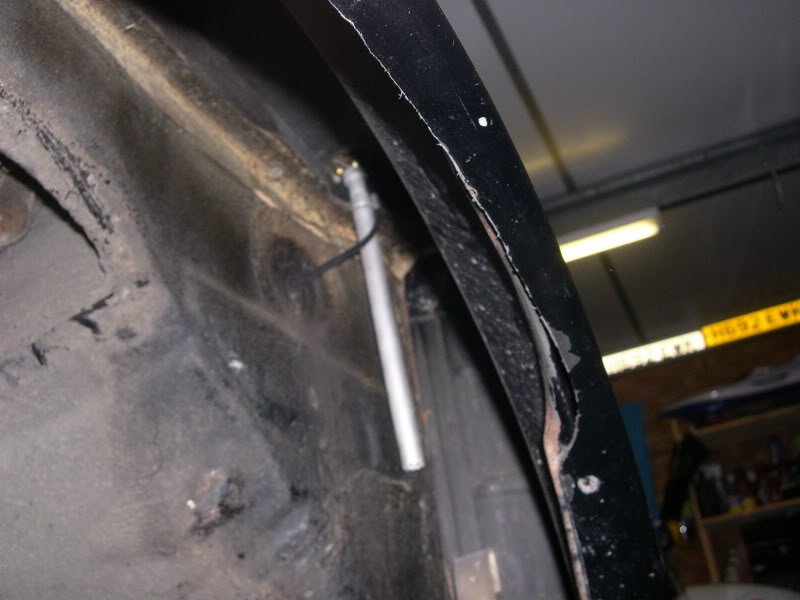
The trimmed arch trim:
Oh and my fuel rail, FPR and injectors turned up, just under 300cc/min so should be fine for what i need…
James,
Suppliers of Performance & Styling Parts for Mk1 Golf, Caddy, Jetta & Caddy
Suppliers of Performance & Styling Parts for Mk1 Golf, Caddy, Jetta & Caddy
Posted
Settling In

The money was supposed to being saved to buy an ECU with, but I got bored of waiting for one to come along at a sensible price, and the plan was always to do something with the interior, saw these, and thought they'd look just the ticket having seen them in k33ts' missus' car, I've got fronts and rears on the way, and I'll match them up with TMI or Newtons black doorcards, should be here back end of next week
James,
Suppliers of Performance & Styling Parts for Mk1 Golf, Caddy, Jetta & Caddy
Suppliers of Performance & Styling Parts for Mk1 Golf, Caddy, Jetta & Caddy
Posted
Settling In
few months worth of updates here:
Ok, been a bit crap at doing anything with the car recently, had quite a lot going on at home, and now saving up for a wedding too! Anywizzle, I want to use the Cabrio as our wedding car, so I need to progress!
Today, I treated myself to some Bugpack bushes, not the most exciting update, but it's something!
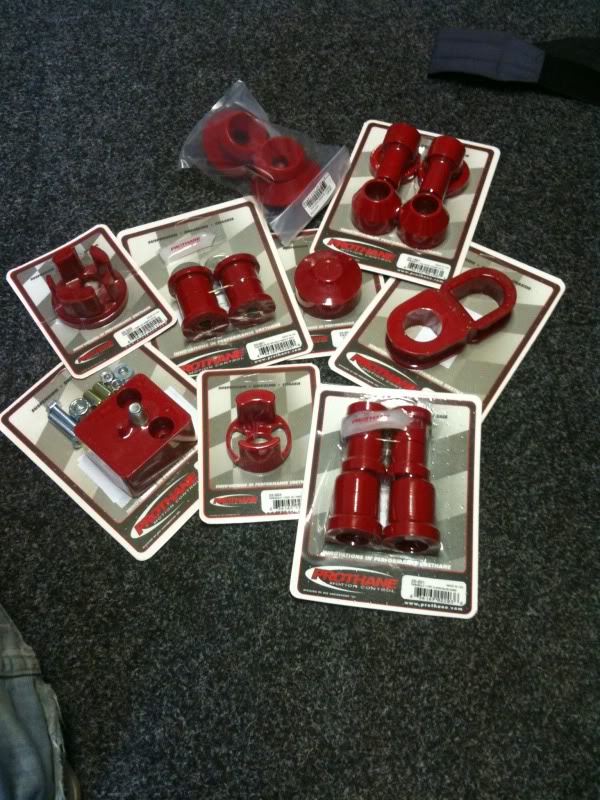
Pretty much all i need, except for ARB bushes, but I'm considering going for a set of Eibach ARB's anyway which come with Poly's. I'll bang a new set of wishbones on it, as I can't be arsed with the hassle of changing the bushes over!
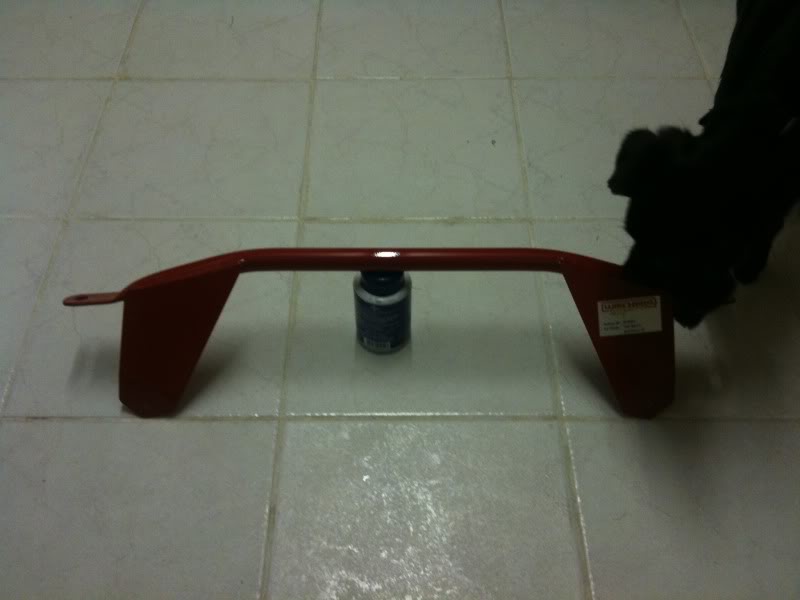
Another red chassis shaped purchase today, this time in the form of a Wiechers lower front strut brace, these really make a difference on Mk1's and with mine being a "floppy-top" I need to stiffen the chassis up as much as possible, a set of the newly re-manufactured Eibach ARB's are on the shopping list too
The hound inspecting the new purchase:
Nothing to report, other than we got a new daily, I'm using the Mk2, and brought this for the missus to use, and for trips up to see the outlaws in Yorkshire…
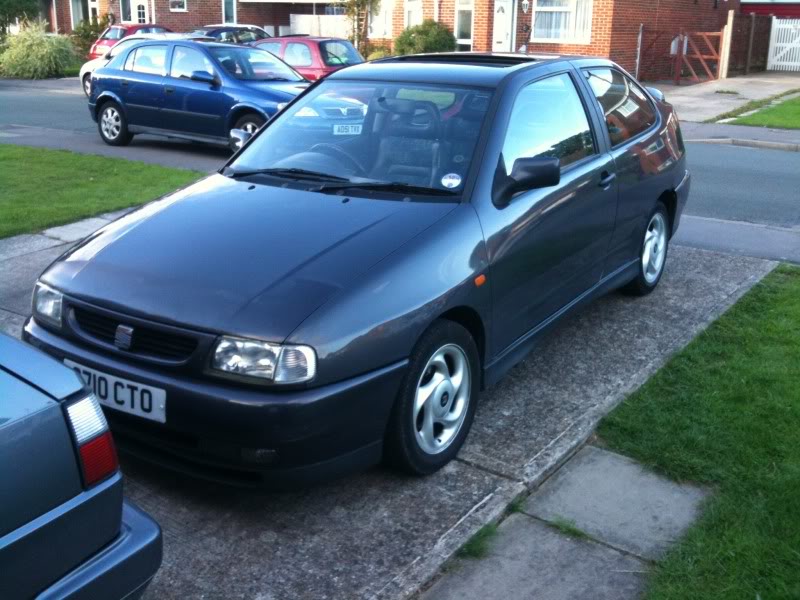
It's a Cordoba SX TDI, they only registered about 30 of them in the UK (you can kind of see why that might be)
Anyway, its an AHU 90hp TDI, half leather, air con, electric everything, full service history, 6 months MOT, 112k miles, 55-65mpg and cost me the princely sum of �700, not a bad little car i reckon…
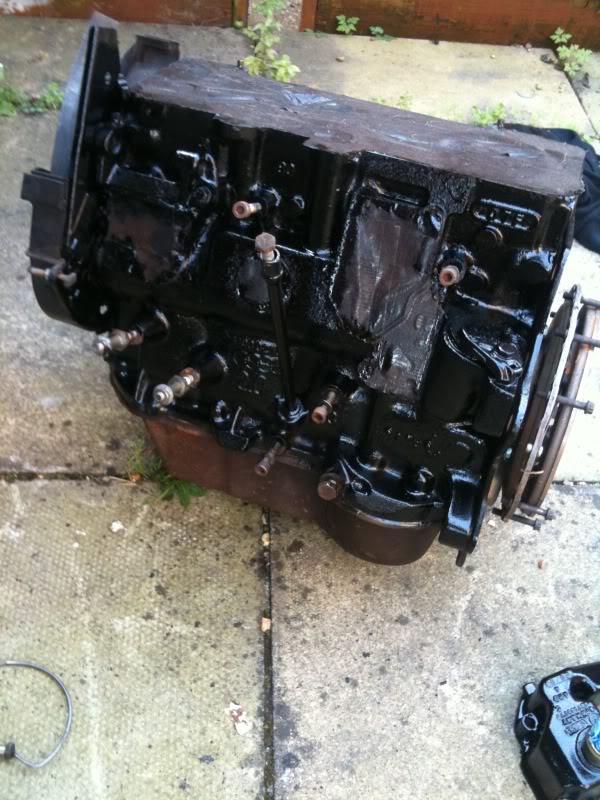
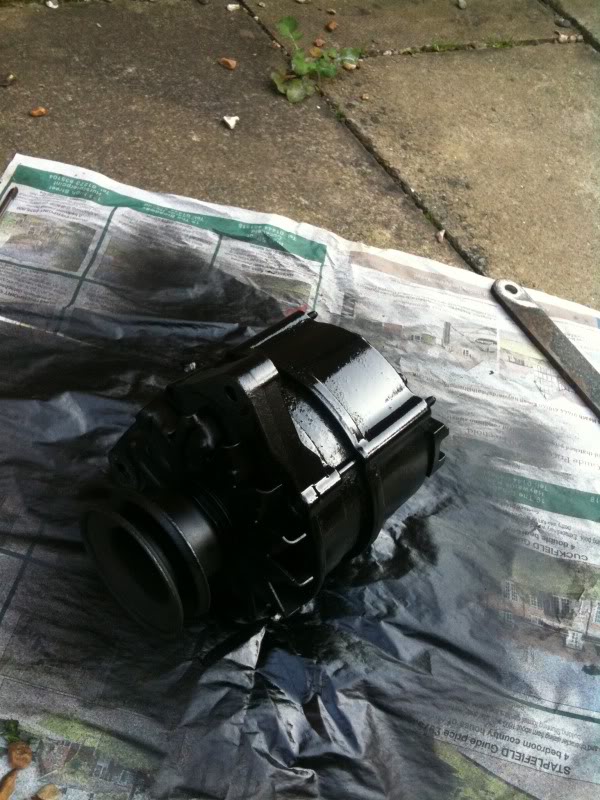
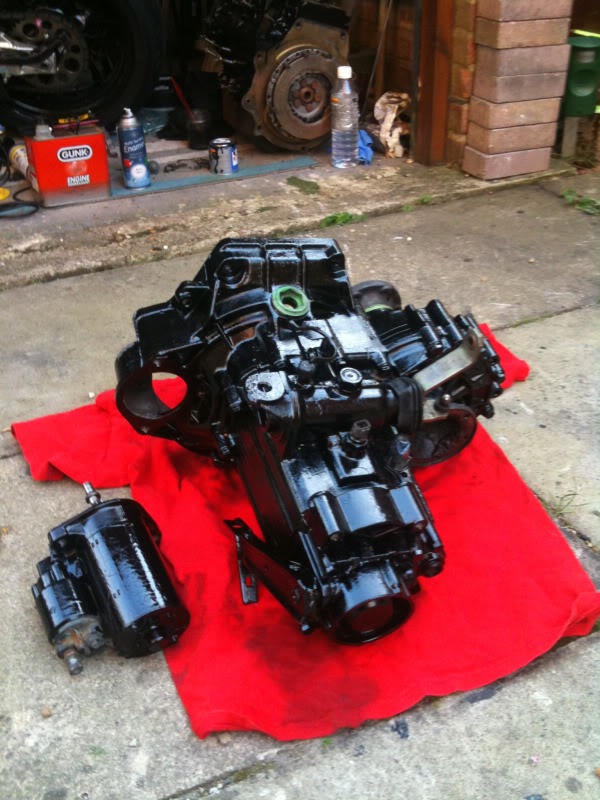
In preparation for the test fitting of the engine, I decided to make a start on getting it and the ancillaries painted up, so used a single stage gloss black engine enamel for the block, waterpump and oil filter housing, then a satin black enamel for the alternator, other bolt ons will be satin too. Will be giving the gearbox a going over tomorrow.


Been working out my exhaust options as well, manifold is sorted, but the main system is causing me a bit of a headache, really I need a minimum of 2.25" to flow enough gas without restricting the motor, which leaves me two options at work;
option 1: A complete Bastuck 2.5" system, which will fit perfectly and comes with a nice subtle tailpipe but is painfully expensive.
option 2: A Jetex 2.5 stainless, which is made for a tintop Mk1, mine being a late cab has the hangers in different places, and the tailpipe exits differently
there is a third option, which is to get a custom number done, but being i get a decent discount at work, it doesn't really make sense as it will end up costing me a fair bit more than the Jetex.
So in reality it's going to be a case of cutting the hangers and tailpipe off the jetex, and then rewelding the hangers and replacing the tailpipe with a nice Schrick style 76mm number.
got the gearbox finished off, along with the starter motor
Rad's stripped out and cowling off, I'll be running a Spal slimline fan mounted on the front of the rad, giving me a bit more space for the 'bodies, thinking of running one of these:

just to cover the top of the rad core, as it'll look a bit dong without anything on top of it
that said, this looks rather nice, but I'm not dropping �225 on a rad yet!

James,
Suppliers of Performance & Styling Parts for Mk1 Golf, Caddy, Jetta & Caddy
Suppliers of Performance & Styling Parts for Mk1 Golf, Caddy, Jetta & Caddy
Posted
Settling In
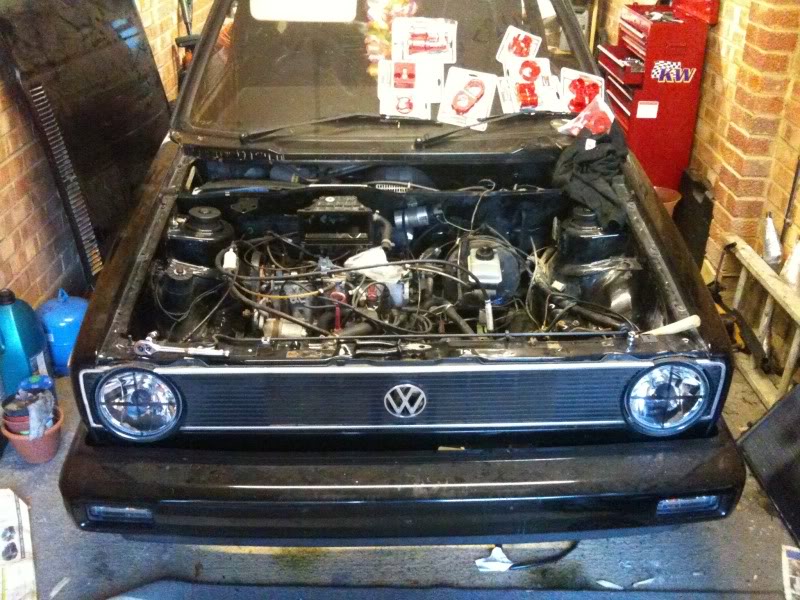
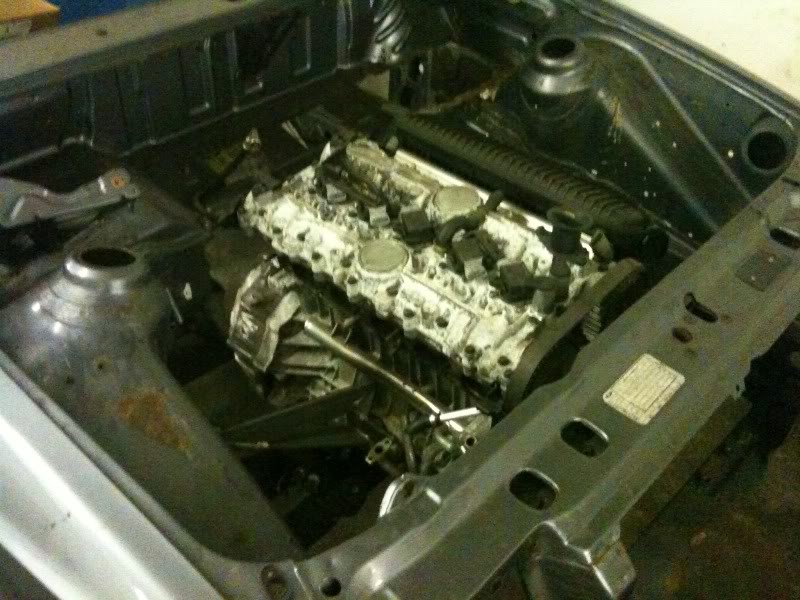
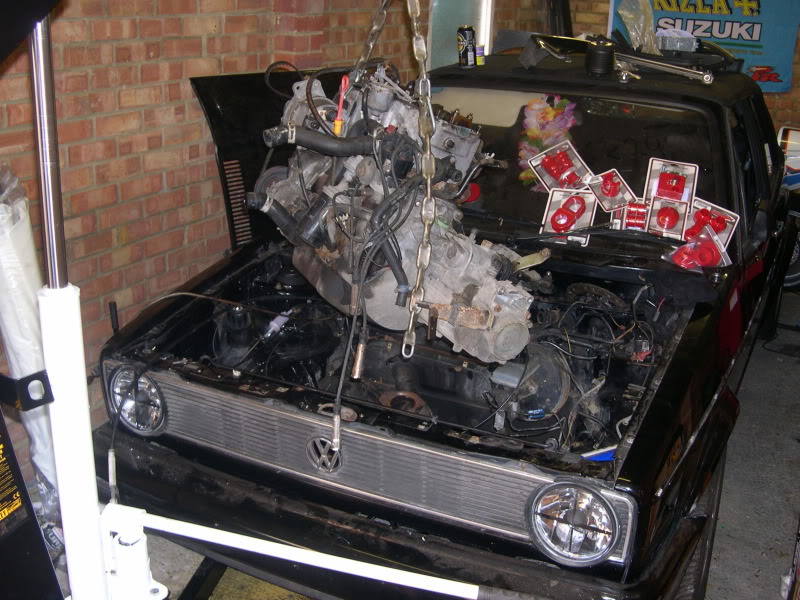
However, it wasn't going to happen, got all the mounts undone went to undo the offside mount, and the f***ing bolt has seized inside the bush in the mount, no bother we thought, we'll just apply a bit of leverage, so attached a 3' bar onto the socket, but couldn't get the movement…
So, off with it's head, easier to undo the headbolts than the manifolds, so off it came:
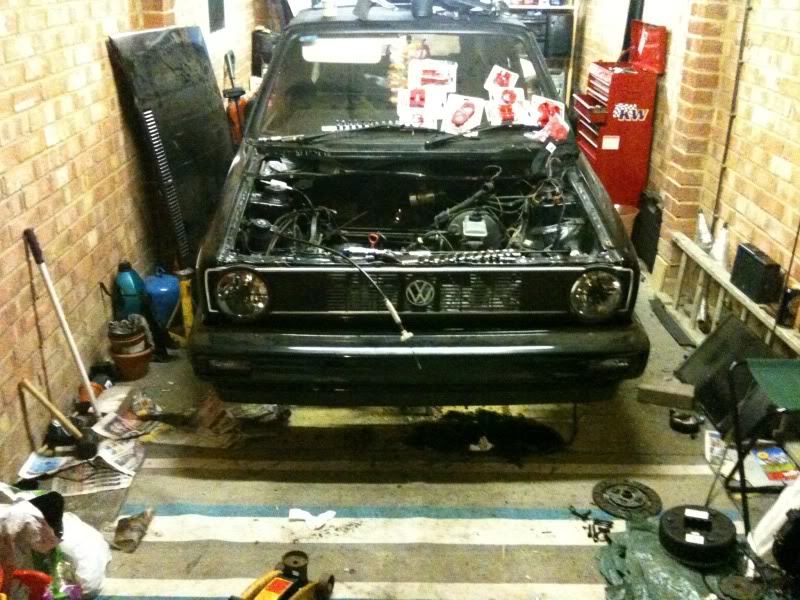
But the ******* bolt still won't undo, so looks like my only option is going to be cutting either end of the bolt out, can't unbolt the mount from the engine, as the mount is in the way of the bolts, don't want to burn it out as I'll wreck the pain, less than happy tonight

As it sits this evening:
James,
Suppliers of Performance & Styling Parts for Mk1 Golf, Caddy, Jetta & Caddy
Suppliers of Performance & Styling Parts for Mk1 Golf, Caddy, Jetta & Caddy
Posted
Settling In
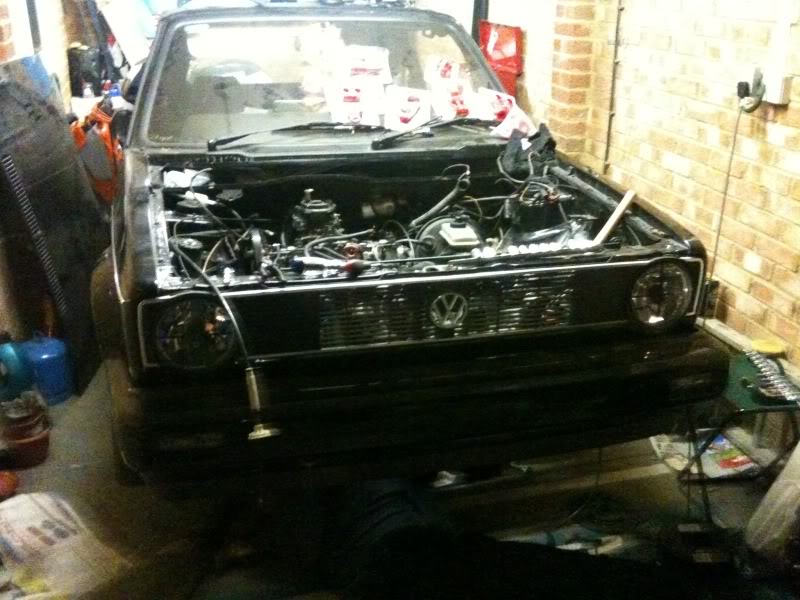
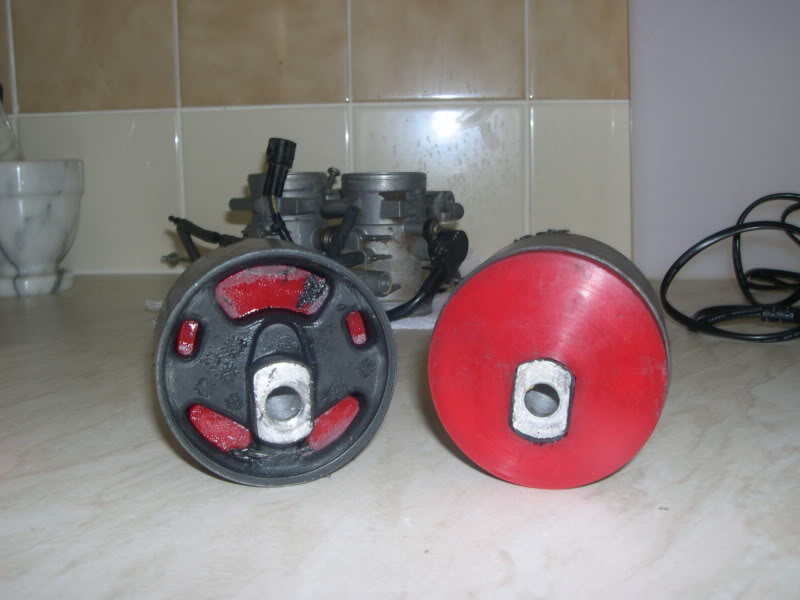
Out ya come:
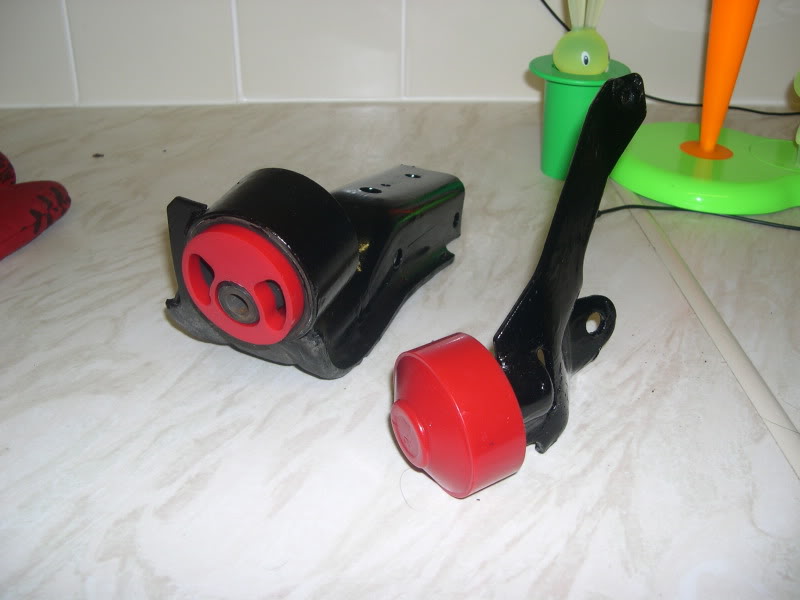
Got some Bugpack engine mount inserts to stiffen up the new repalcement ones:
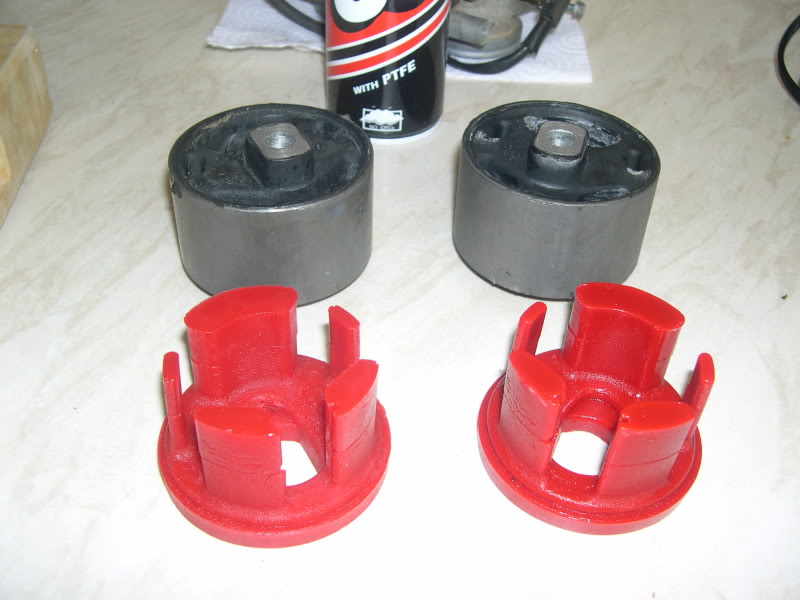
done:
Got my flywheel back from being lightened and balanced by Nick @ AMS, nothing too daft, but should help it spin up a bit quicker.
Before:

After:
Also Nick's finished his Connect (as seen earlier in the thread) here's the money shots:
And his handmade manifold, a real work of art, I'll get some proper pictures, but features V-Band clamps and all sorts, still to have it's final map but should be well into 200+ bhp territory, JE pistons, Cat Cams and Cat rods, not what you'd expect from a van
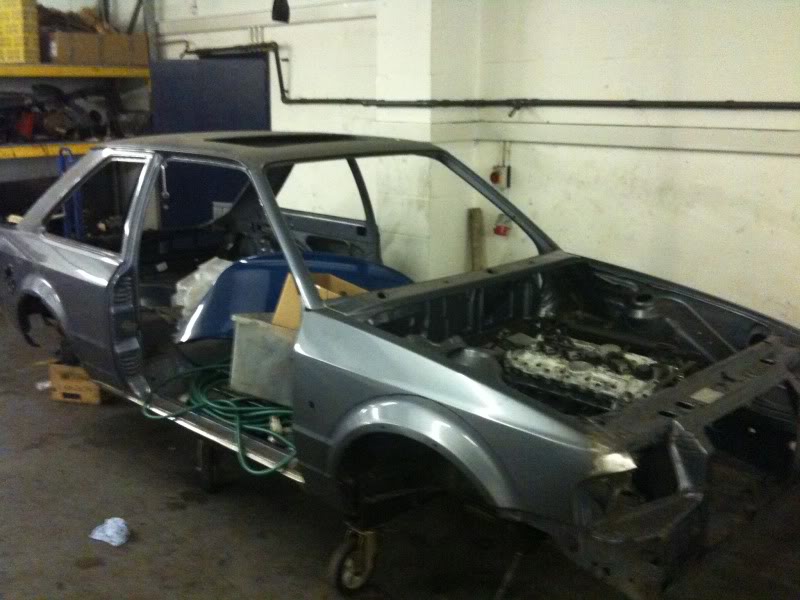
Next job for the Mk1 is gonna be steam cleaning the bay and then test fitting the motor.
Nice to be making progress on it now.
James,
Suppliers of Performance & Styling Parts for Mk1 Golf, Caddy, Jetta & Caddy
Suppliers of Performance & Styling Parts for Mk1 Golf, Caddy, Jetta & Caddy
Posted
Settling In
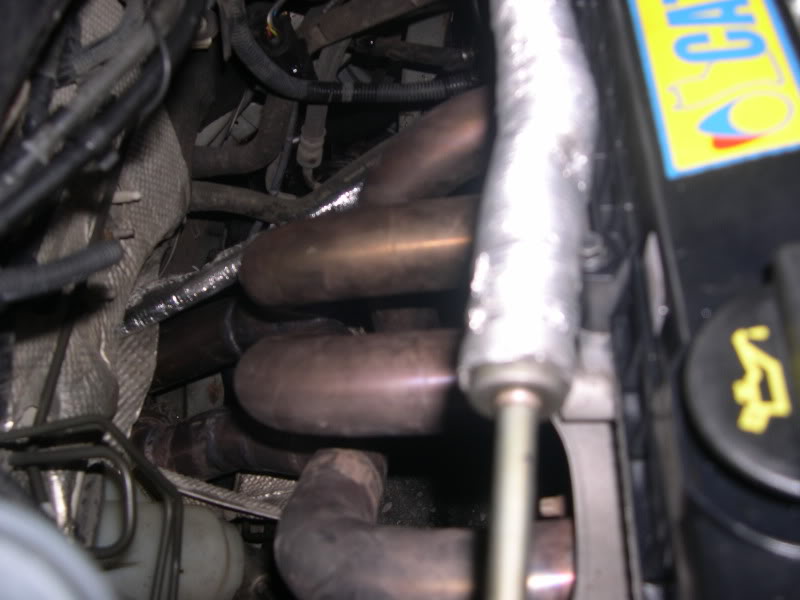
Also picked up my exhaust manifold from work, obviously I'm going to appear a bit biased, but it really is a nicely put together bit of kit, the welding is neat, the finish is great, and it looks like it should flow well (no obstructions, or nasty bits of weld inside) ok so it's not as shiny as an ebay one, but chrome don't get you home, and I'd rather have something that fits and is made in England by craftsmen, as opposed to something shiny that's made by children :ph34r:
Anyway pics…
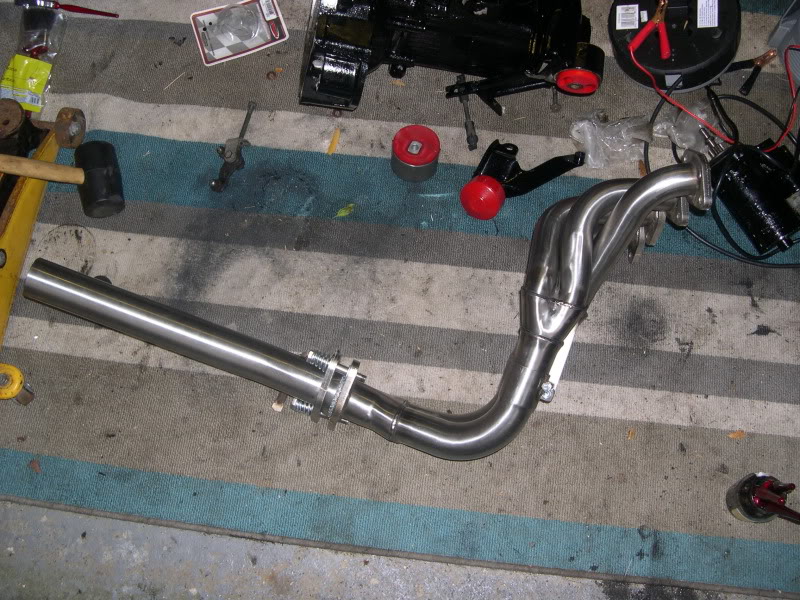
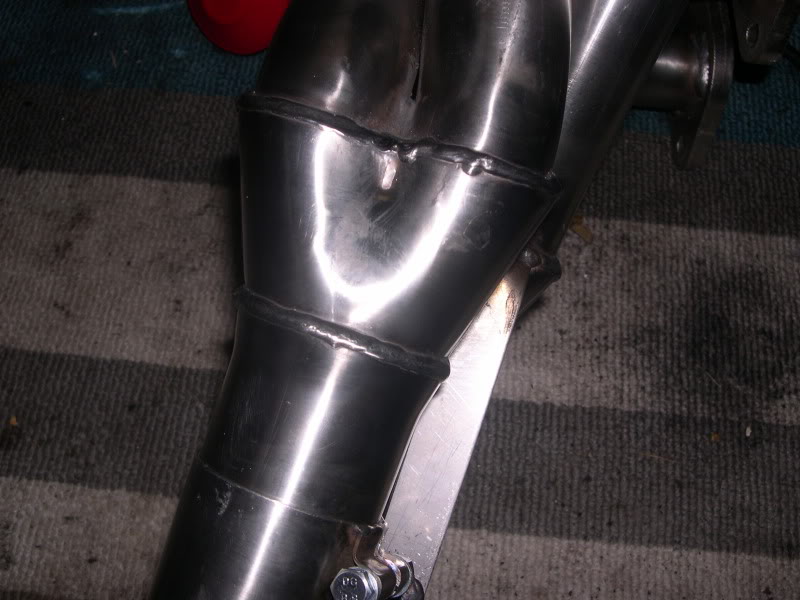
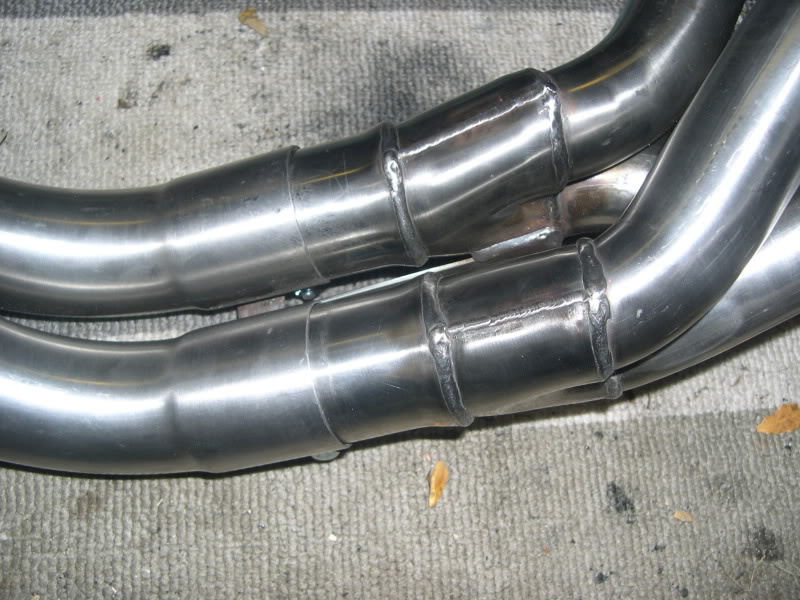
Should hopefully be getting the bay steam cleaned over the weekend.
James,
Suppliers of Performance & Styling Parts for Mk1 Golf, Caddy, Jetta & Caddy
Suppliers of Performance & Styling Parts for Mk1 Golf, Caddy, Jetta & Caddy
0 guests and 0 members have just viewed this: None.