


GTI Restoration - Started, and nearly finished!

Posted
#799330
(In Topic #95933)
Settling In

GTI Restoration - Started, and nearly finished!
So, having not done much on the car after about May last year, I finally hit it again in the winter and am nearing the point when it will be roadworthy.
I bought the car for ?500 as a non-runner (!?) but having obviously had new sills and a respray sometime in the last few years. The previous owner had done a few bits to it, not very well if I'm honest, and finally lost the will to live when it wouldn't start for the MOT tester when he took it for a test. So he dumped it back in his mum's garage and then sold it, to me! I checked it over very thoroughly, and the shell was basically sound; various little bits of rust, and generally needing a lot of tidying.
The non-running problem, as I suspected, was a jammed fuel pump, due to, you've guessed it, rust from an old filler neck. This had been replaced, but there was still rust in the tank. I trailered it home, put a spare pump from my old Audi 80 Sport in it, and it ran!. There followed a lot of work, removing and cleaning out the tank (about 5 times…), and eventually rigging up an in-line filter between the tank and the pump, having jammed another brand new pump with a bit of rust… Not annoying at all….
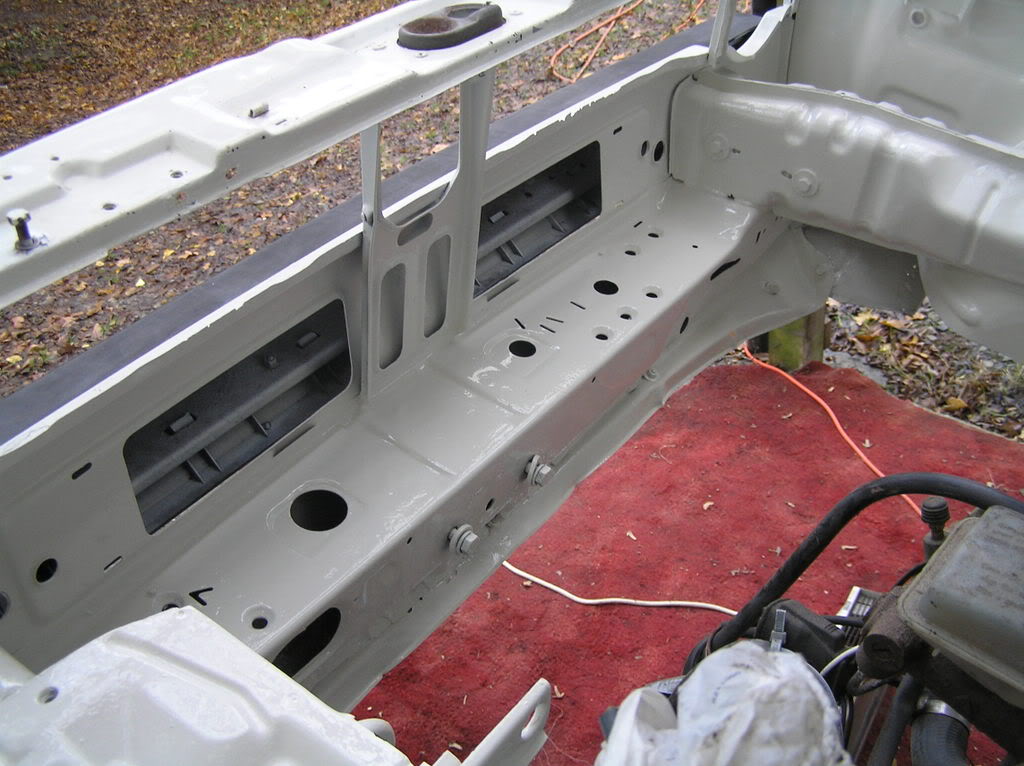
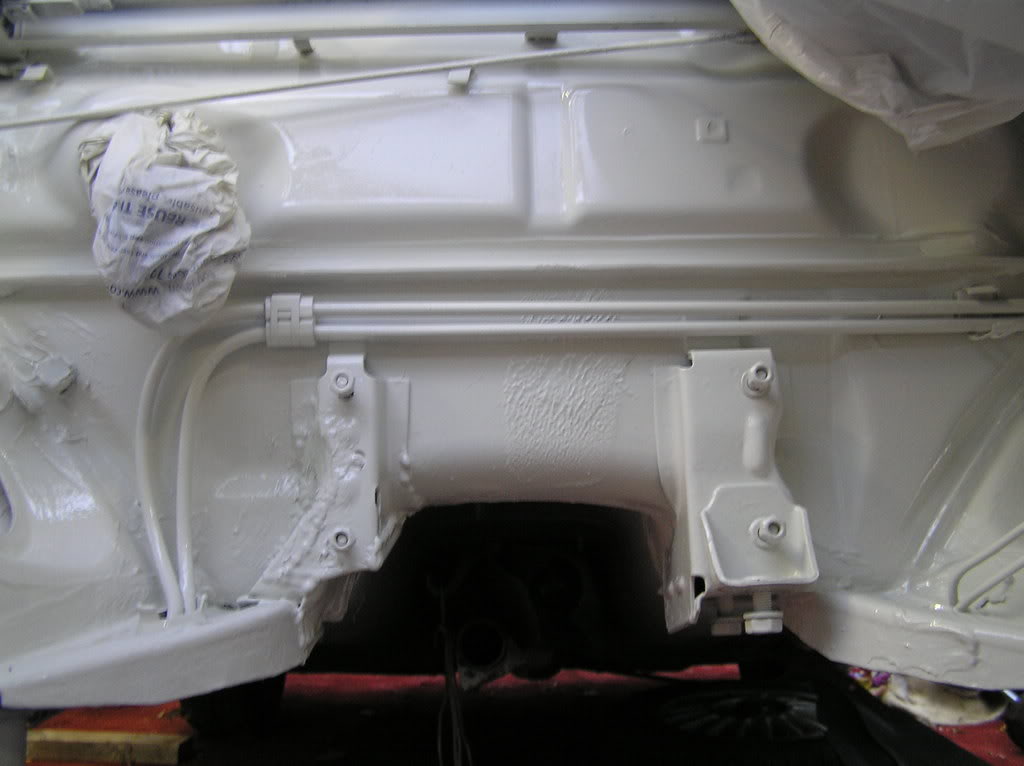
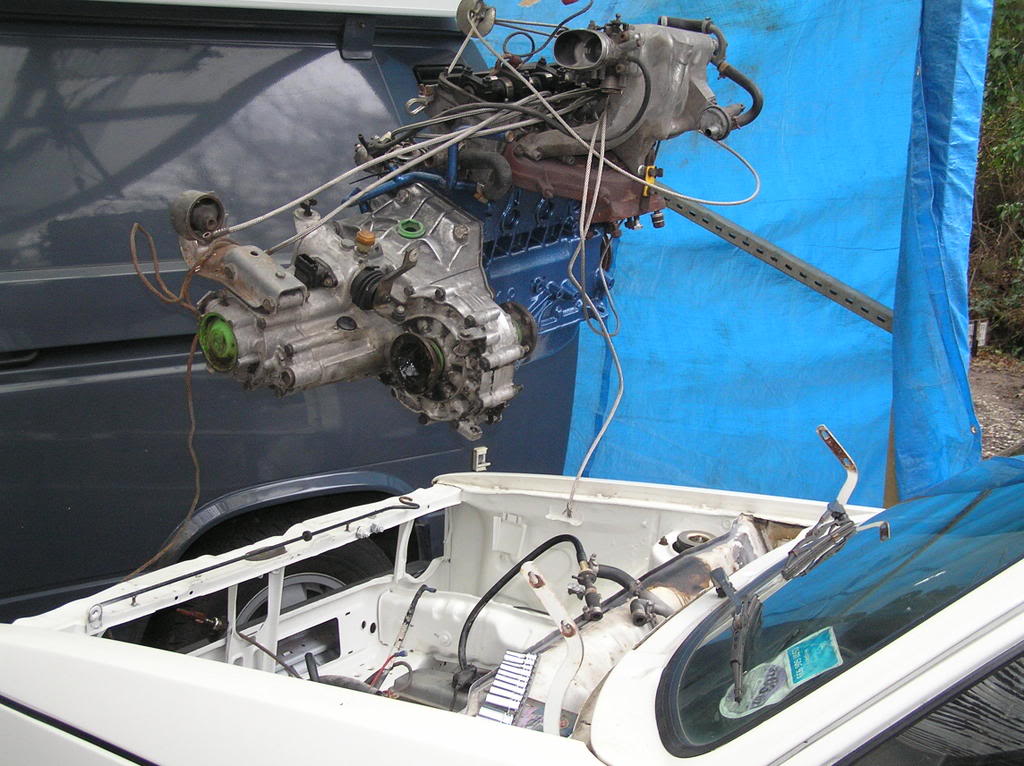
I've got no pics of the rear end rebuild, but it was axle off, fuel tank out, fabricate and weld in new sections from sill to subframe mount, sandblast the subframe and spray-paint, sandblast the body where all the rustproofing was flaking off, re-rustproof. Then I turned my attention, in November, to the engine bay which was basically minging. It was all sound, but wouldn't have been after a couple of winters and the only solution was to take the engine out, partly so I could get to the clutch cable area of the bulkhead and fabricate and weld in a plate. Also a patch near the steering rack mount. Then I de-waxed it, sandblasted it, and painted it (first attempt at 2-pack and it was easy, though I'm probably going to die of cancer later in life…)
Anyway, here's some pics, if I'm lucky.

Posted
Settling In
The first few are as I bought it. I've changed the wheels. Pity really, as I think they suited the car really well, but with stiff suspension as well as 16 inch wheels and 45 profile tyres, the ride was ludicrous, harder than a Pug 205 tarmac rally car I used to campaign, so it now has Audi 80 Sport 14 inch wheels with 60 profile tyres.
I've still got the wheels if anyone is interested. More pics to follow;


The clutch cable area repair - 'laminated' steel plating to spread the load.

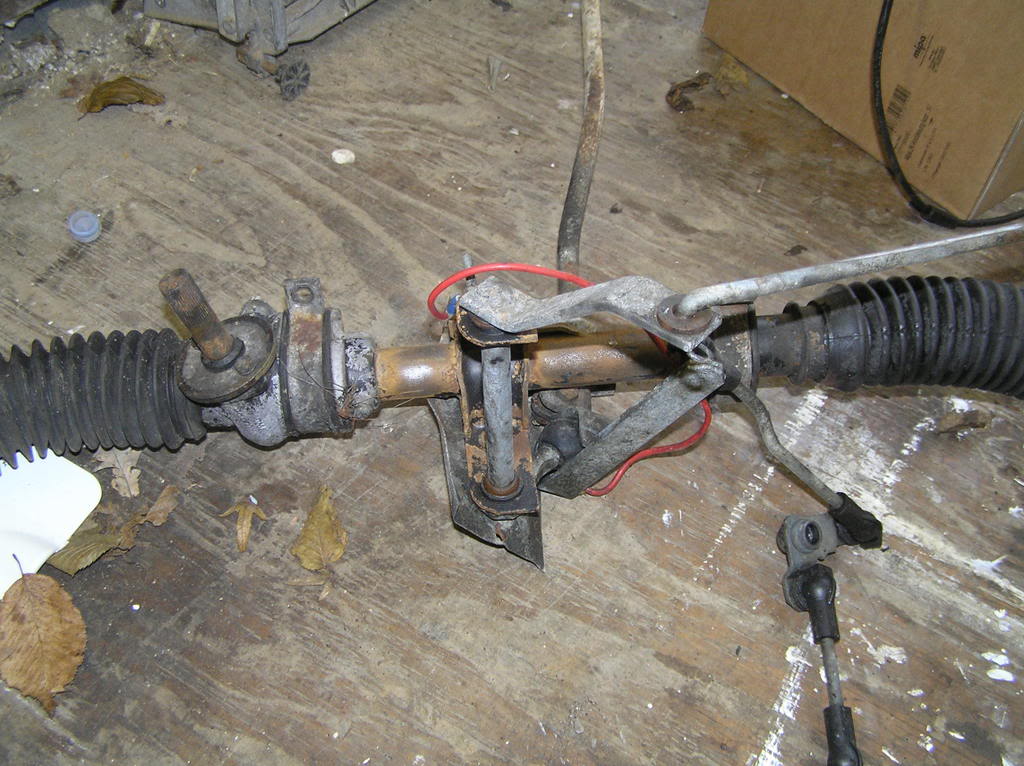
Looking down the exhaust tunnel, and a steering rack mount welded repair patch, painted now

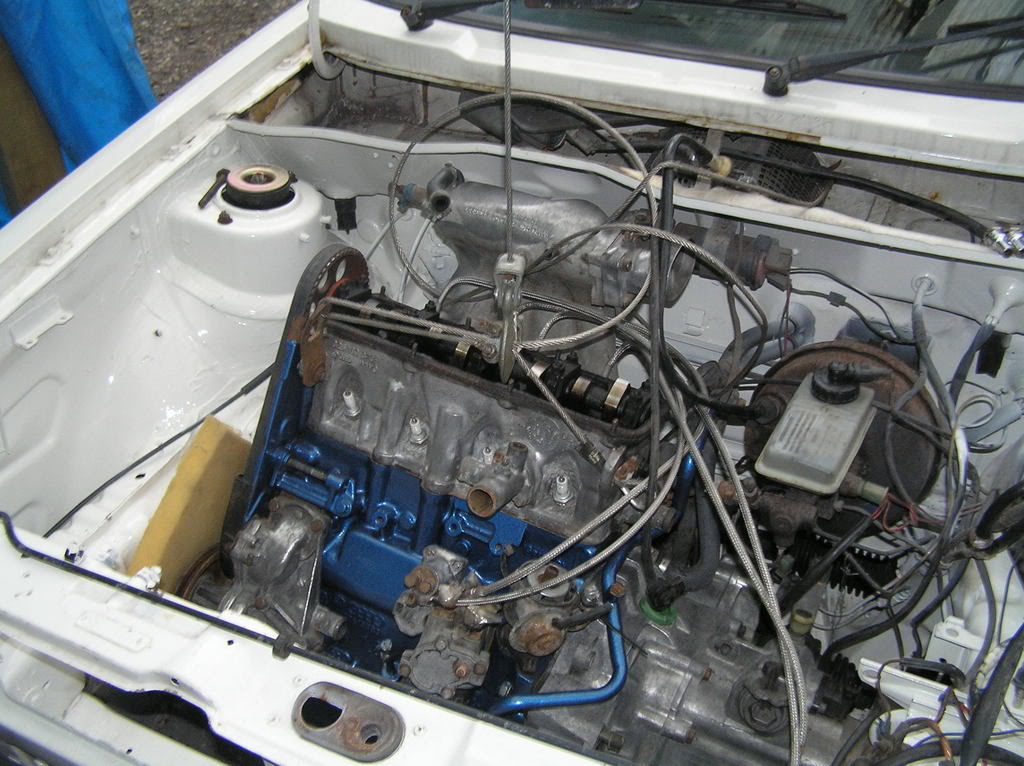
Engine bay painted


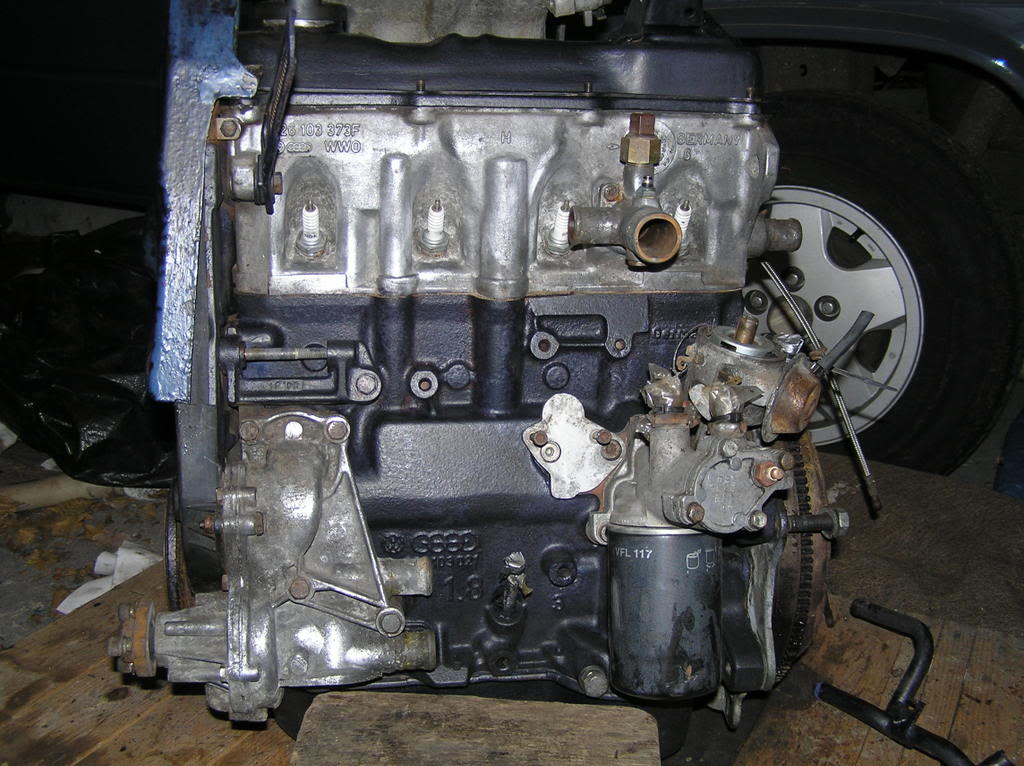
Turning my attenton to the engine. Hadn't ever been out of the car - 25 years of gunge on the block. Nice. Compression was very good before removal, so haven't stripped it - just a new cambelt prior to refit, and blasted and painted. New engine mount, as old one's bolt had corroded to inside of bush. Bloody lucky to get the mounting plate off the block to remove the engine first, otherwise I'd have had to grind the mounting flanges off the inner wing…

Jet washed and sand-blasted

2 coats of Bilt Hamber Hydrate 80
More to follow when I have a few minutes. Cheers
Posted

Local Hero


Cheers
Andy
Andy
LINCOLNSHIRE REGION -�https://www.facebook.com/groups/467122313360002/
1983 MK1 Golf GTI Campaign Model - Under (looooong) resto!
1962 Rover P4 80
2002 BMW 745i
2008 BMW Z4 2.5Si
LINCOLNSHIRE REGION -�https://www.facebook.com/groups/467122313360002/
1983 MK1 Golf GTI Campaign Model - Under (looooong) resto!
1962 Rover P4 80
2002 BMW 745i
2008 BMW Z4 2.5Si
Posted
Settling In
Anti-roll bar painted
ARB mount caps painted
Radiator cowl painted
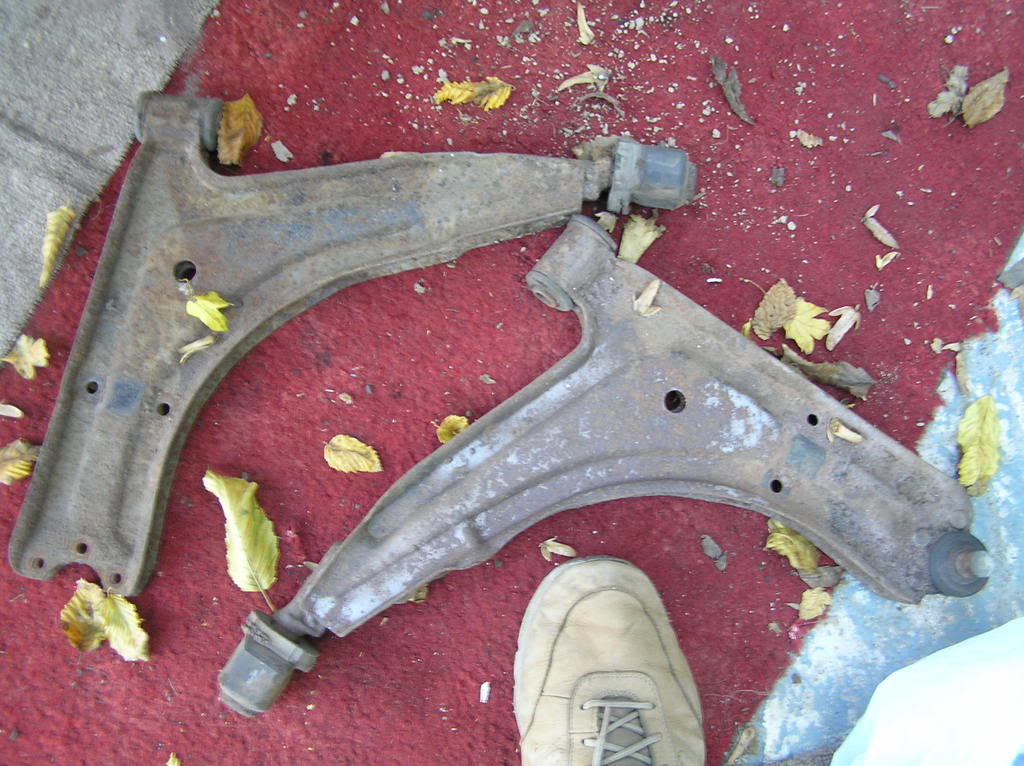
Wishbones, new bushes, blasted and painted, new outer swivels
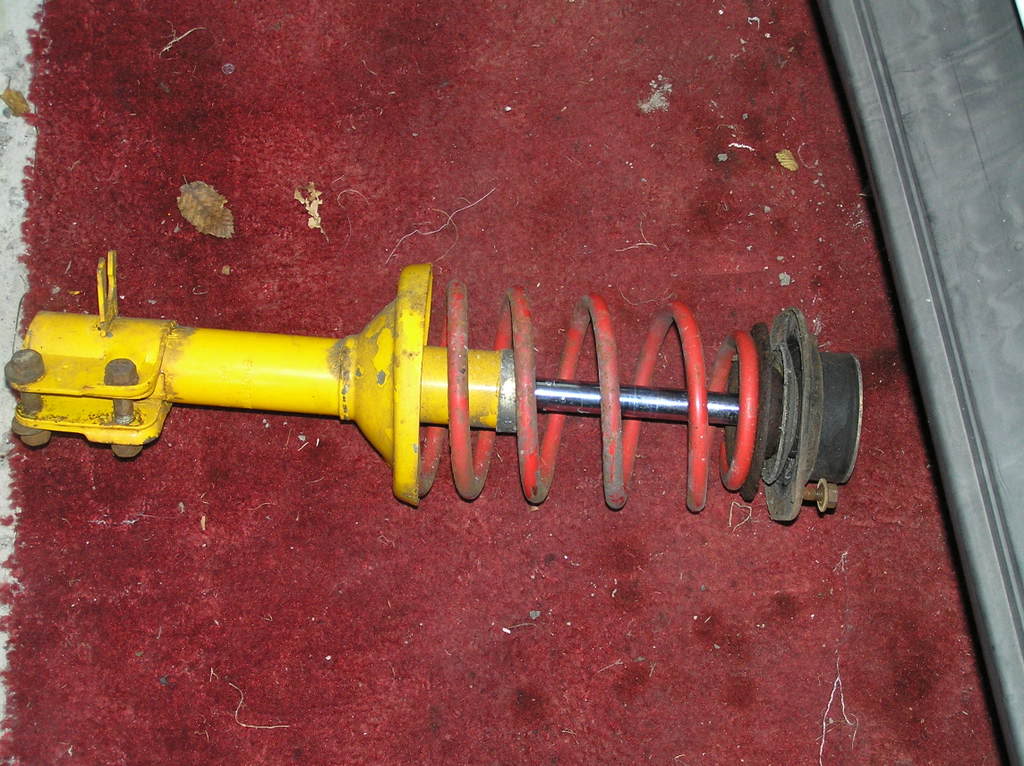
Front struts cleaned, new roller-top mounts
New driveshaft gaitors, all 4!
New VAG steering column gaitor
New gear linkage bush kit
Horn bracket painted
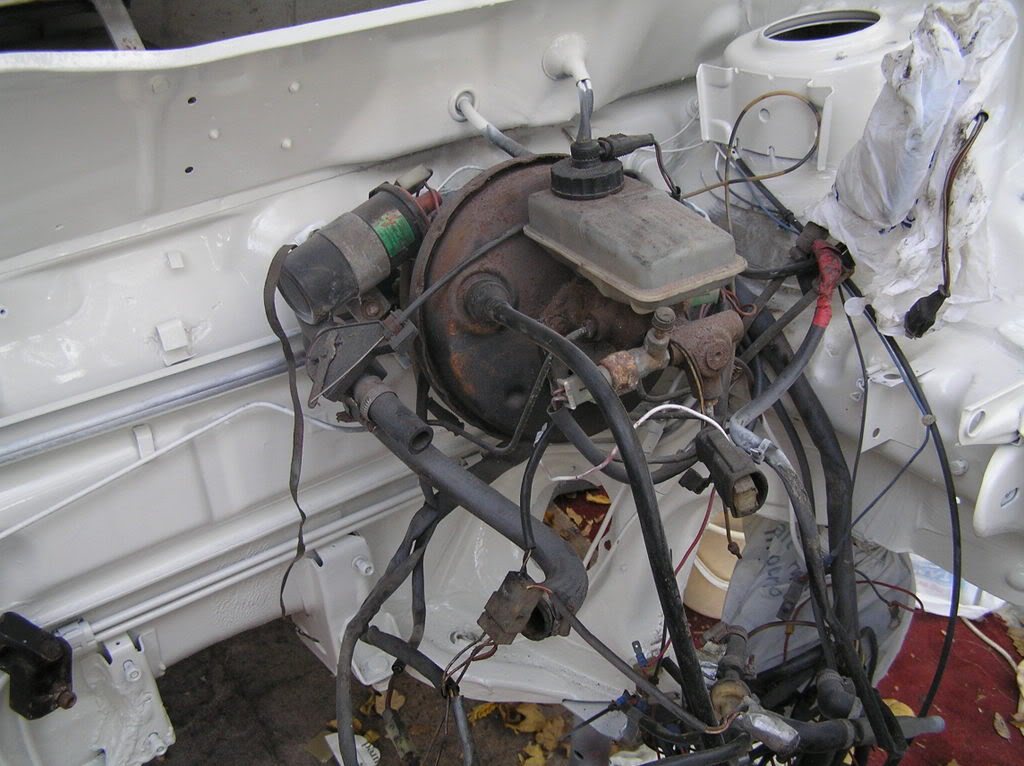
Brake servo painted
New Bosch battery
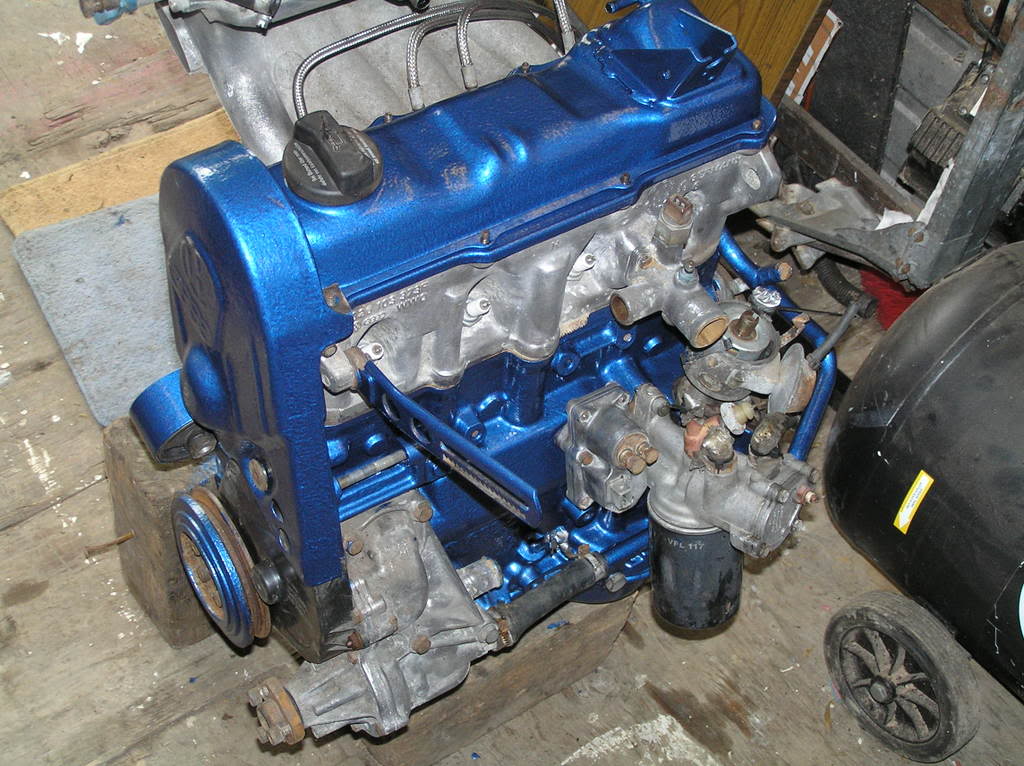
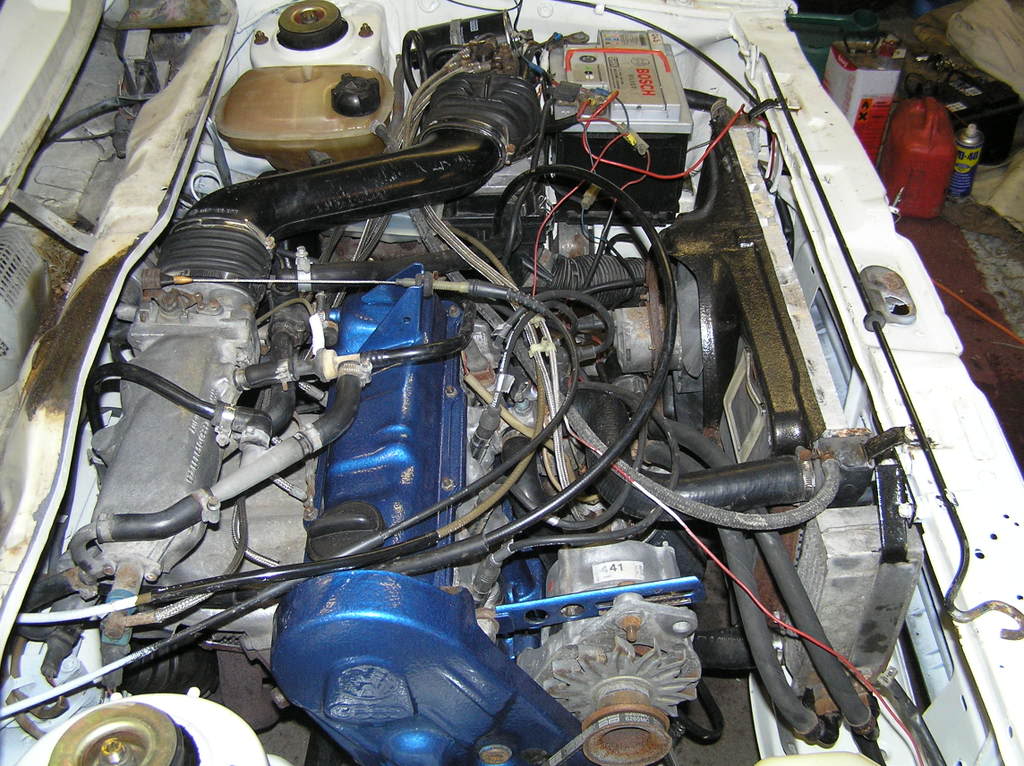
Almost every engine bay part had overspray on it from the previous respray, so this had to be cleaned off with thinners and plenty of elbow grease. Took hours…
Wiring loom needed cleaning and a great deal of tidying up, routing etc.
Manifold had 2 sheared studs, so drilled these out and replaced. Had also been welded, badly, so this needed finishing.


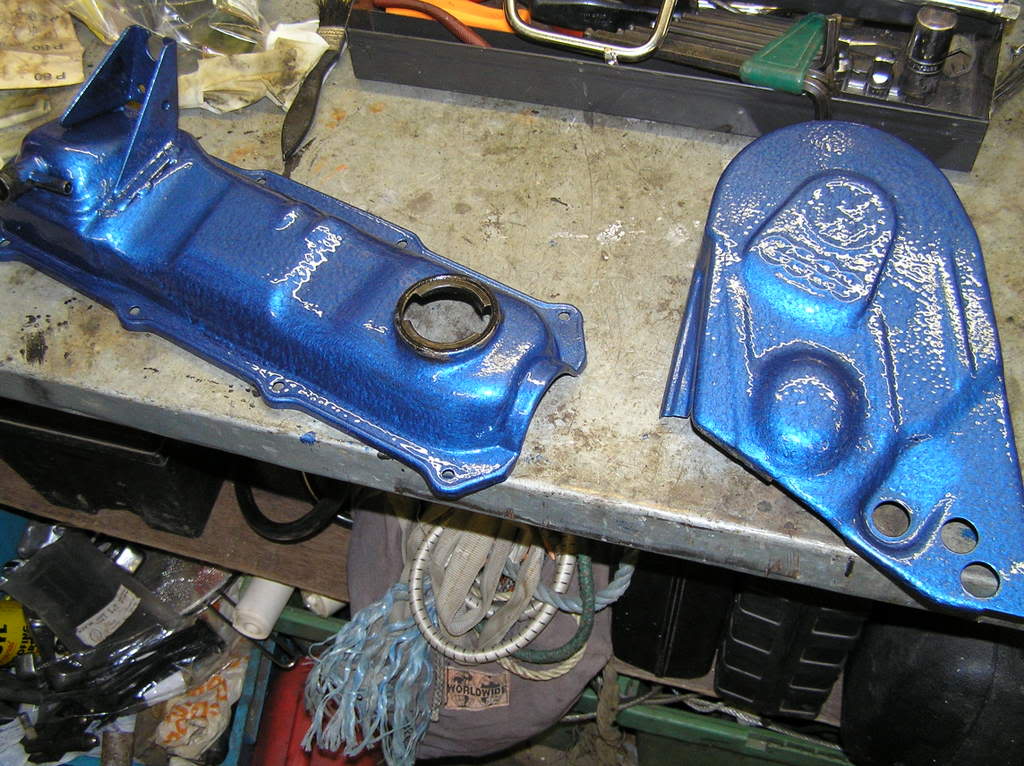
Decided on blue as the colour. Must be a boyhood thing - my brother's new Escort Mexico engines were both blue…
I had dropped the engine out, but didn't much fancy getting it and the gearbox onto a jack to get it back in, so used a hoist

Gearbox was just gunked, jet-washed and wire-brushed - all synchro is fine.

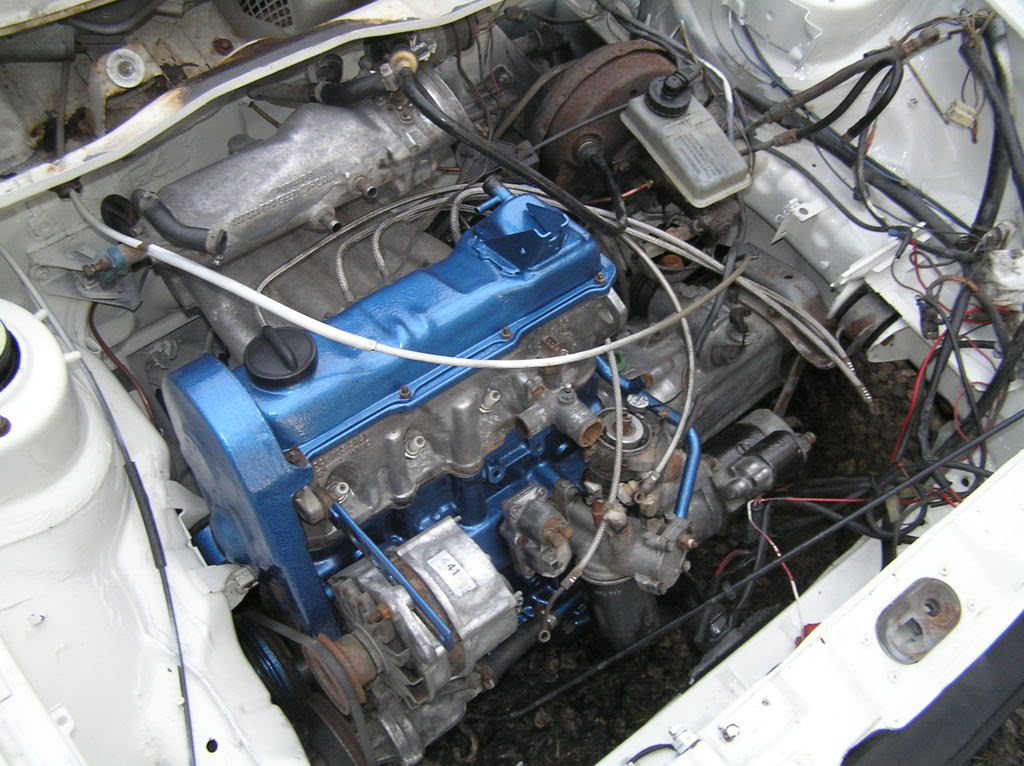
And now it looks like this - lovely! But a shed load of cleaning work of each component.


New linkage bushes
New bushes and swivels, and painted
New top-mounts. I retrieved the original struts and springs with the car. The jury is out until I drive it properly as to whether I'll keep this lowered stuff, or buy decent shocks and return to original springs. I'll see what it handles like and how uncomfortable it is.
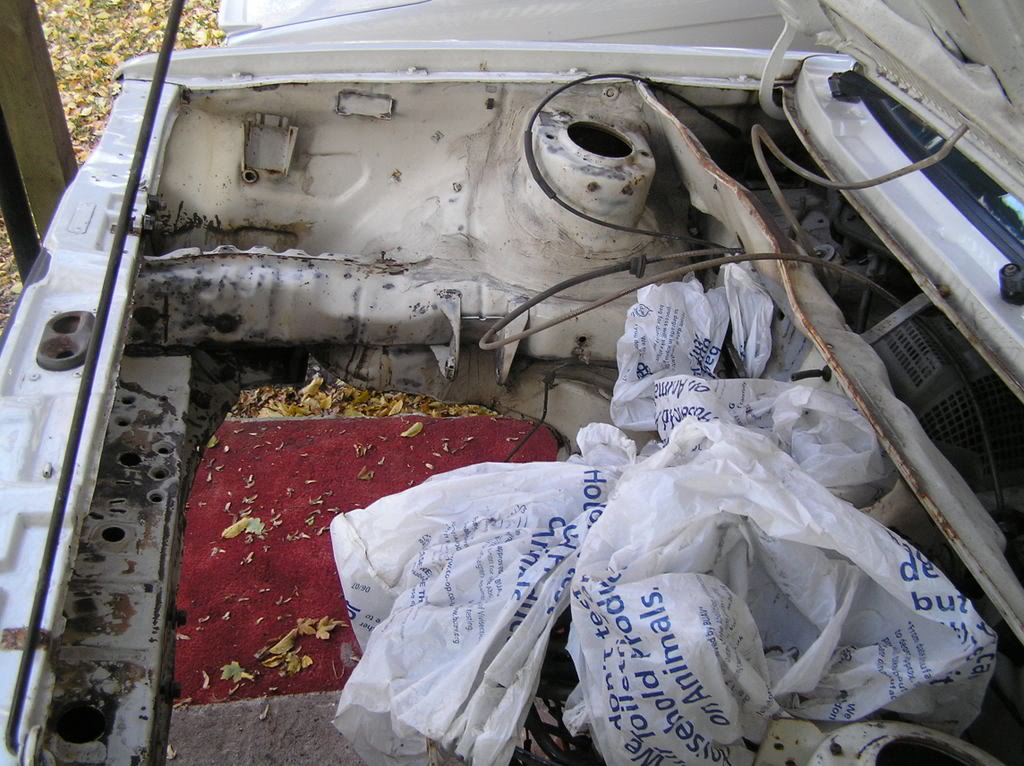
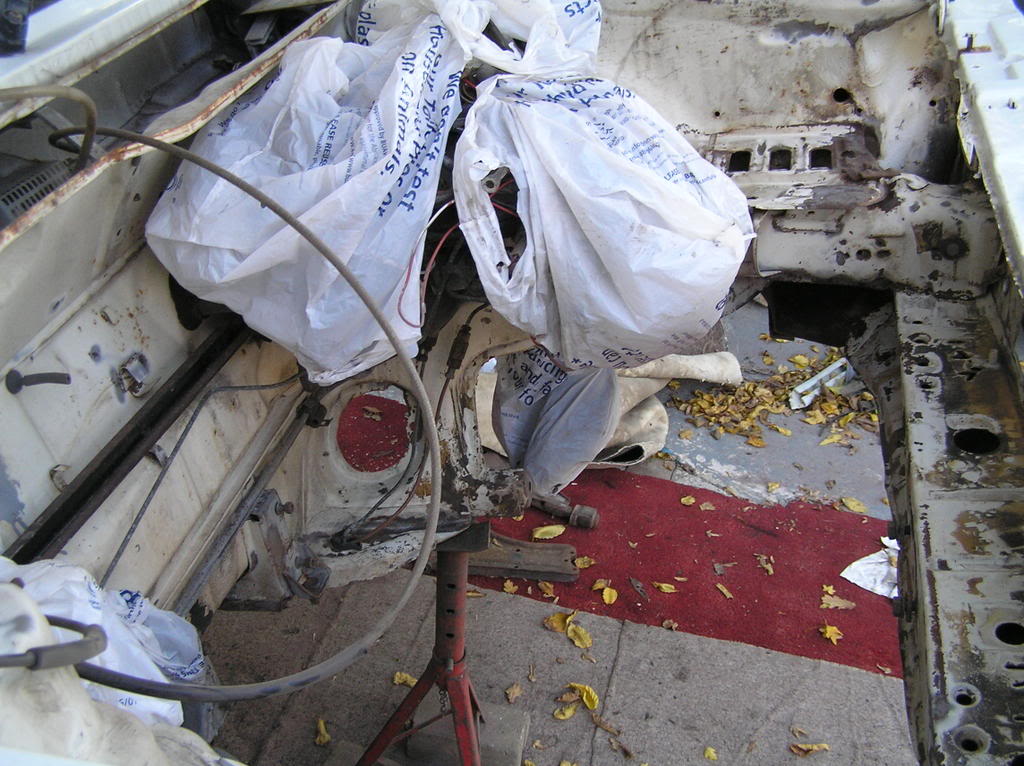
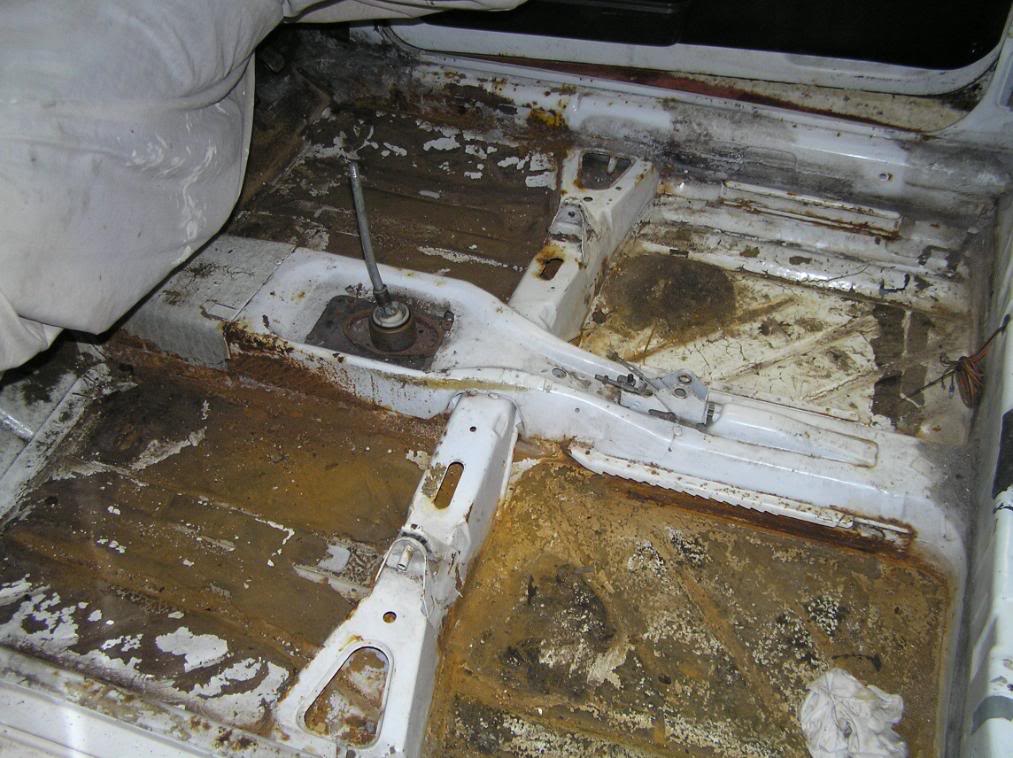
A little taster of the ming-pit that was the interior. It was thoroughly wet and had been for years. Consequently the floor had taken a bit of a pasting, but was just about ok and I salvaged it with no welding required. Mind you, it's a bit thin in places now after sand-blasting…
I've spent ages with the interior stripped, testing, sourcing, repairing every leak before I refit it, as I can't be doing with wet carpets and steamy windows (unless due to the right reasons…!). And there have been plenty of leaks. More pics of the interior soon, but here's what it was like.


Cheers
Posted
Local Hero
I love the blue BTW, one of my favourite colours!
Andy
LINCOLNSHIRE REGION -�https://www.facebook.com/groups/467122313360002/
1983 MK1 Golf GTI Campaign Model - Under (looooong) resto!
1962 Rover P4 80
2002 BMW 745i
2008 BMW Z4 2.5Si
LINCOLNSHIRE REGION -�https://www.facebook.com/groups/467122313360002/
1983 MK1 Golf GTI Campaign Model - Under (looooong) resto!
1962 Rover P4 80
2002 BMW 745i
2008 BMW Z4 2.5Si
Posted

Old Timer

 Car looks great though, well done!
How did you leave the engine bay surface wise, before applying the paint? Scotch down with thinners? And what did you clean/degrease with first?
I'll be doing this soon and I'm scared that I'll end up doing things in the wrong order, and the paint wont stick properly
 I've scotched a few cleaned areas and it just seems to add to the grime!
Cheers,
Arun
Posted
Old Timer
Posted
Settling In
Gunk
High pressure jet wash
Petrol, rag and elbow grease to remove previously applied wax.
Sandblast
Wipe over with thinners
Key with medium grit wet and dry
Wipe with thinners
Then primer, light topcoat, then heavier topcoat.
Seems ok - time will tell…
Posted
Old Timer
 , think I need one of those high pressure jobbies to get rid of the top layer of grime.
Thanks for the info, show us more pics! What does the interior look like now?
Posted
Settling In
Haven't done all of this in the last week (!), more like over the last 2 months or so, but it's getting there now - just stripped the seats today and washed 25 years worth of grub from the covers.
Stripping the interior

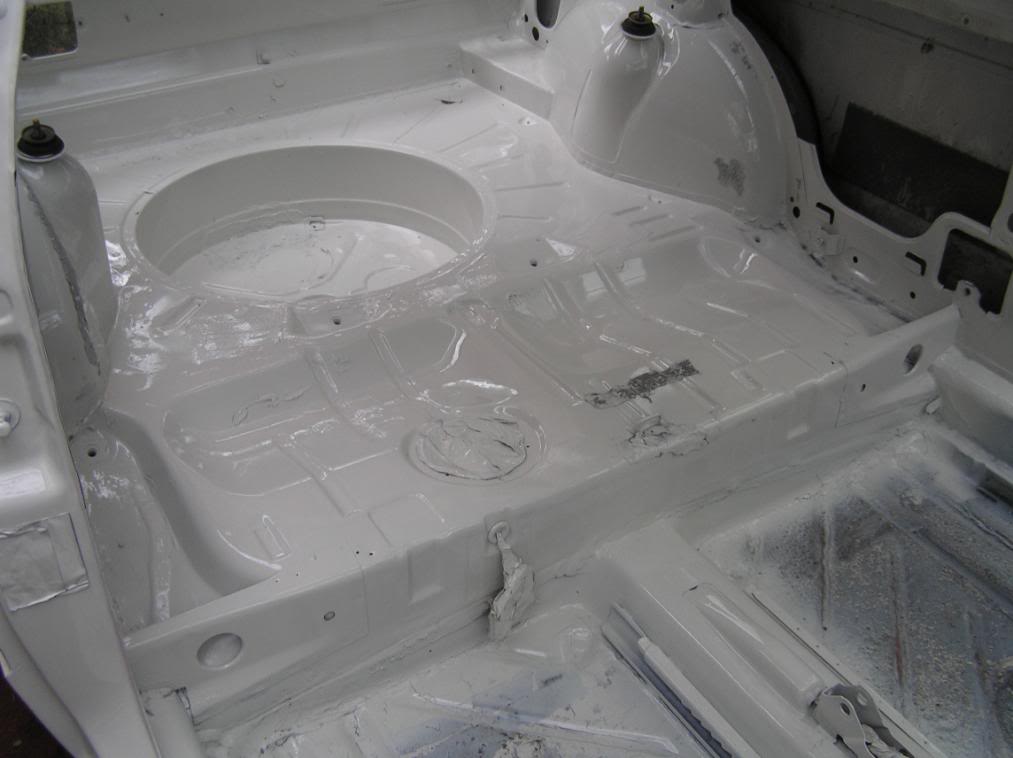
And deciding to do a proper job and weld up the obligatory spare wheel well hole…

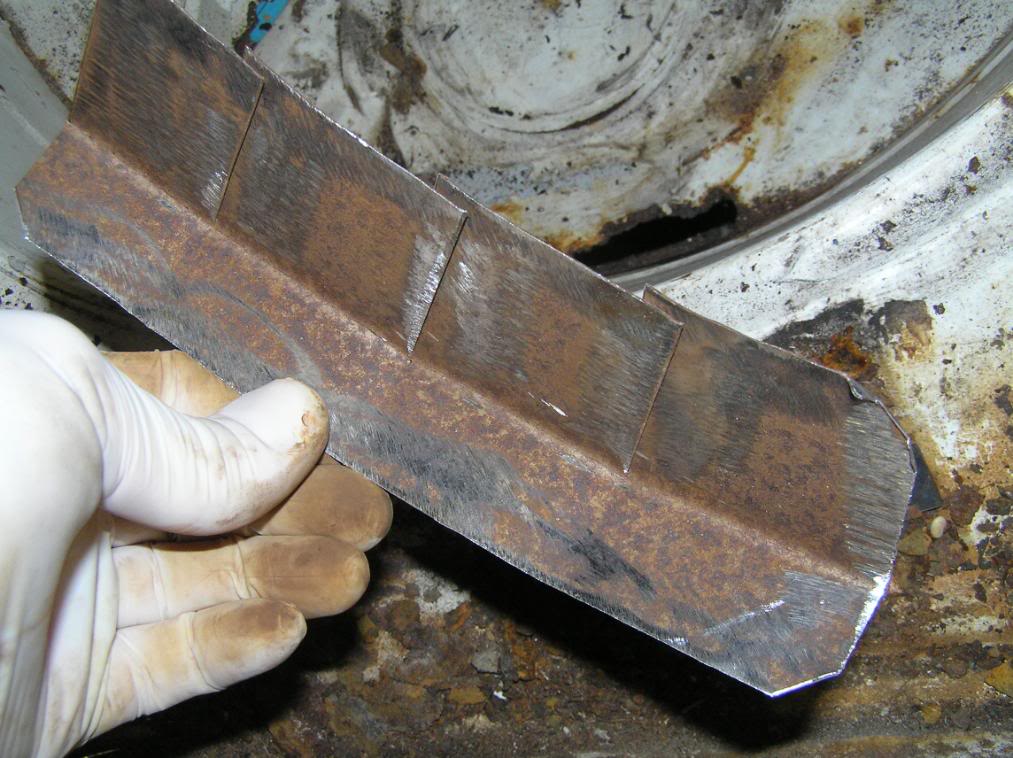
My second ever bit of mig welding - the first was the bulkhead/clutch patch. With a history of gas welding, I am impressed how little mig welding heats up the surrounding panel.

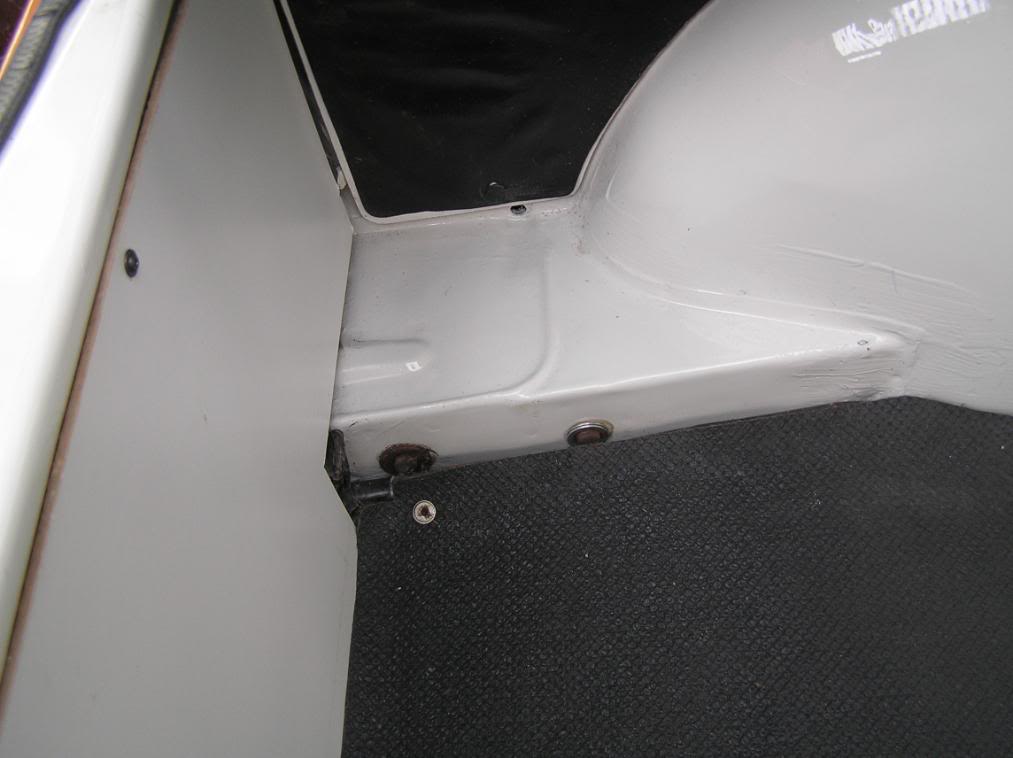
And seam sealed, prior to painting
Bronze welded in a nut to screw the rear seat locating post into - the original had become detached from the inner wing area.
Preparing and sand-blasting the whole interior. Messy job, with full overalls, head 'scarf', goggles, breathing mask and ear defenders. My wife thought I looked bloody funny…!


Etch primed


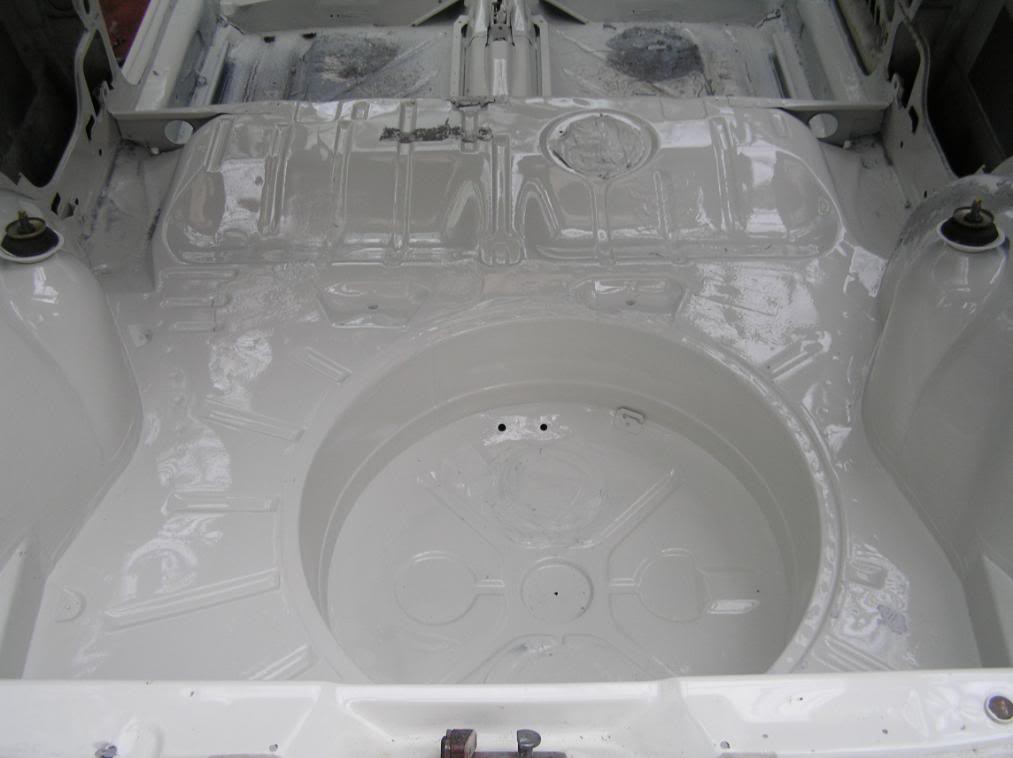
Having probably done myself absolutely no good whatsoever painting the engine bay in 2-pack without an air-fed mask (my compressor won't run both the gun and a mask), I decided it would be ?50 well spent to have a local bodyshop paint the interior for me. I prepped it and supplied the paint. So here it's on the trailer returning, all nice and shiny inside.

I got the car with a few interior bits missing. Managed to get a boot carpet and un-holed rear shelf for ?5 from the scrapyard!! Also made a panel to tidy up the rear where the lights and wiring are all-too visible otherwise

Both bumpers were bent from 25 years worth of bumps, so extracted the irons, straightened out, re-welded an indicator mount, re-painted and waxoyled prior to re-assembly.


Quite a few more pics to follow when I get a moment. Cheers.
Posted
Old Timer
Speeding is like masturbation, everyone does it ,but it's not something you should record and put on the internet!!�
Posted
Settling In
Yes, they look nice don't they?! I'd like to keep them, if they were maybe 14", but I want a bit of ride comfort. Shame, because they suit the car, appearance-wise.
I don't know what they're worth. Suggest a price - I'm sure someone will pipe up if your offer is stupidly low…!
Rgds Jon
Posted
Old Timer
Where did you buy your etch primer? I need some good quality etch or high build primer for my bay.
Cheers
Arun
Posted
Settling In
I think the footwells are ok - quite a bit of the bitumen had chipped off or I did so with any loose stuff. the rest is well bonded and the floor from underneath is ok, so hoping this will be ok.
I used Bilt Hamber Etchweld primer, mail order by phone, number from the 'net. 10 pounds per aerosol. Supposed to be very good, but to be honest I've no way of telling, at least for a few years… It's not high build though - I think it's advantage lies more in the fact that you can prime surfaces before welding them thus increasing the welded result's rust resistance. On that basis it may have been a bit of a waste in my case, but as I say, we'll see… The high build primer I used for the engine bay was just 2k stuff from the paint factors, can't remember the name now.
Regarding the 2k death-paint, I am given to understand through a fair bit of research that if you can smell the fumes, paint OR lacquer, whether spraying or even just mixing, then it's doing you no good and you must stop or sort your breathing apparatus. Mind you, I've sprayed a fair bit of cellulose in the past when health and safety was not so over-the-top, apparently safely, but I wonder what the precautions I took then, which were considered ok at the time, would be thought of now…
Posted
Settling In
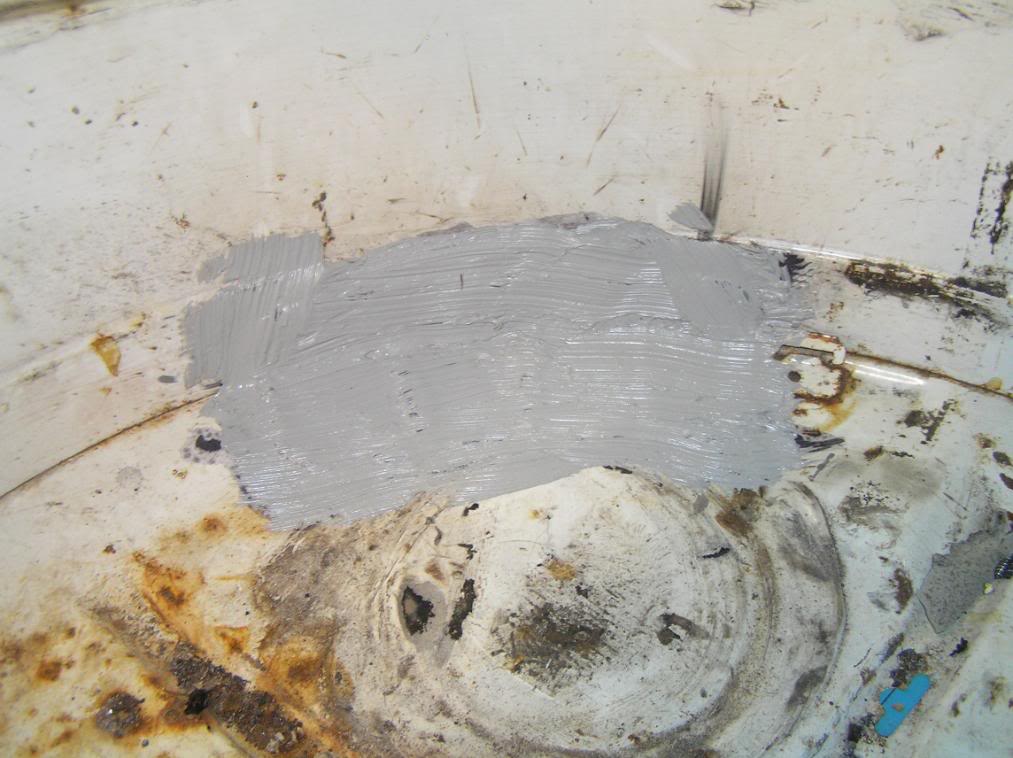
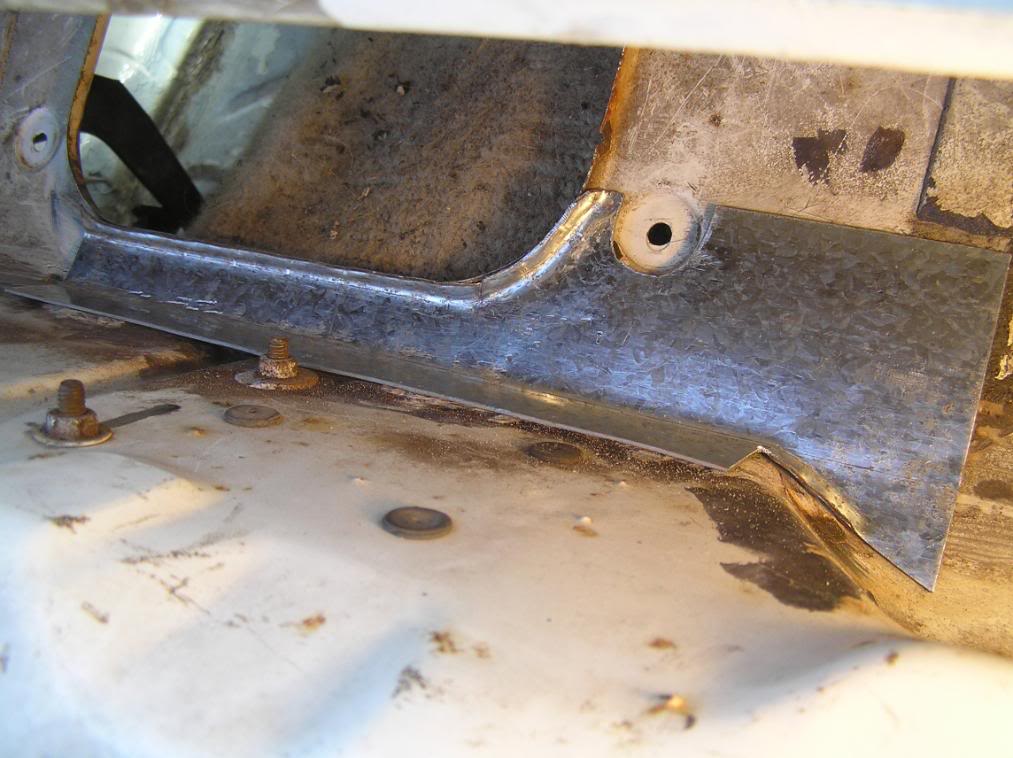
Having stripped the interior and played a hose all over the car, it was apparent that the scuttle was leaking. A bit of digging revealed some unwelcome news…


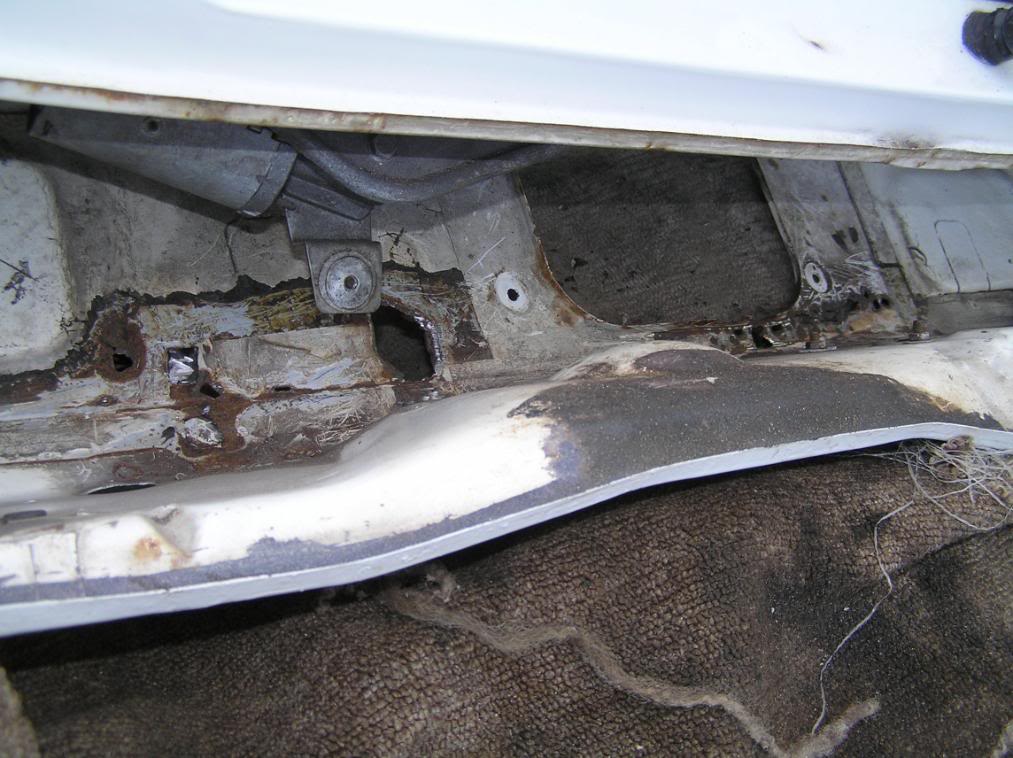
So a bit of fabrication required. Decided not to weld these panels since they're not structural, but rather screw down with plenty of seam sealer underneath and around.

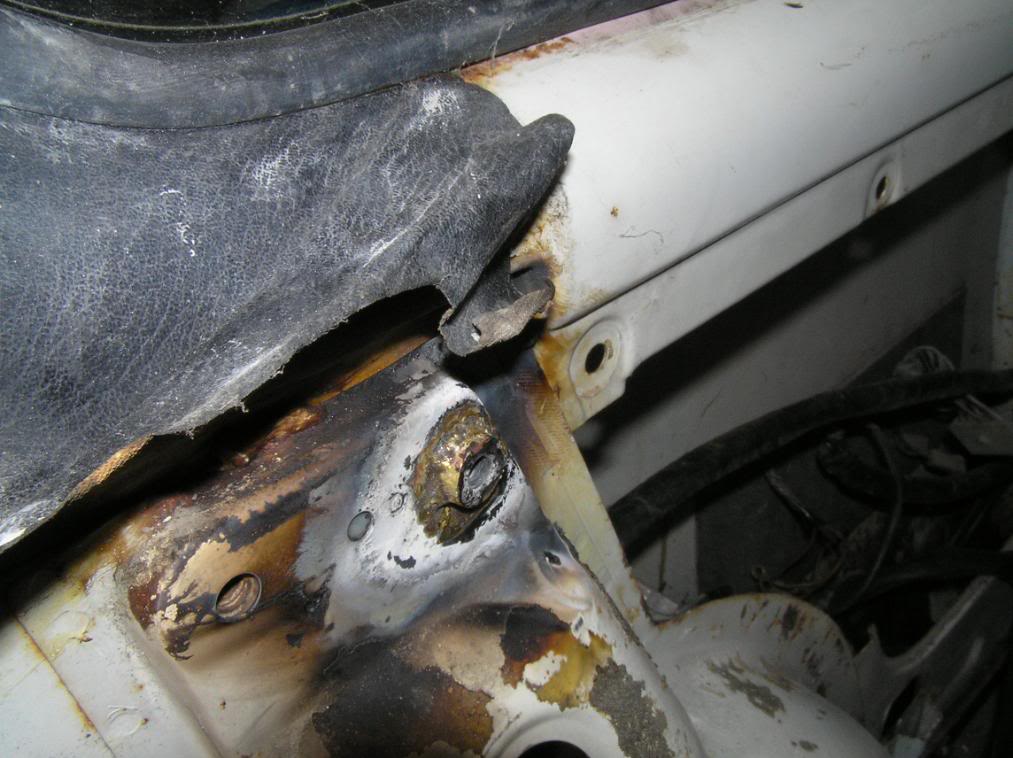
Also found the windscreen seal was leaking, and broke the windscreen in it's removal… Not annoying at all, wasting 85 quid on a new one…


The glass sunroof seal was beyond redemption, and the roof had obviously rusted badly prior to the re-spray to a point that there are filled holes adjacent to the sunroof frame (…!), so reluctantly I had to accept either a new roof, which is just a step too far, or in the meantime the dreaded step of sealing the glass in the closed position. Hope this summer's not too hot… Any ideas on this gratefully received.
A source of one of the 4 leaks was the rear window demister wire, which had been routed outside of the trunking, and was therefore sitting between the hatch seal and the hatch - a nice gap for water. Thus I re-routed in the correct way.

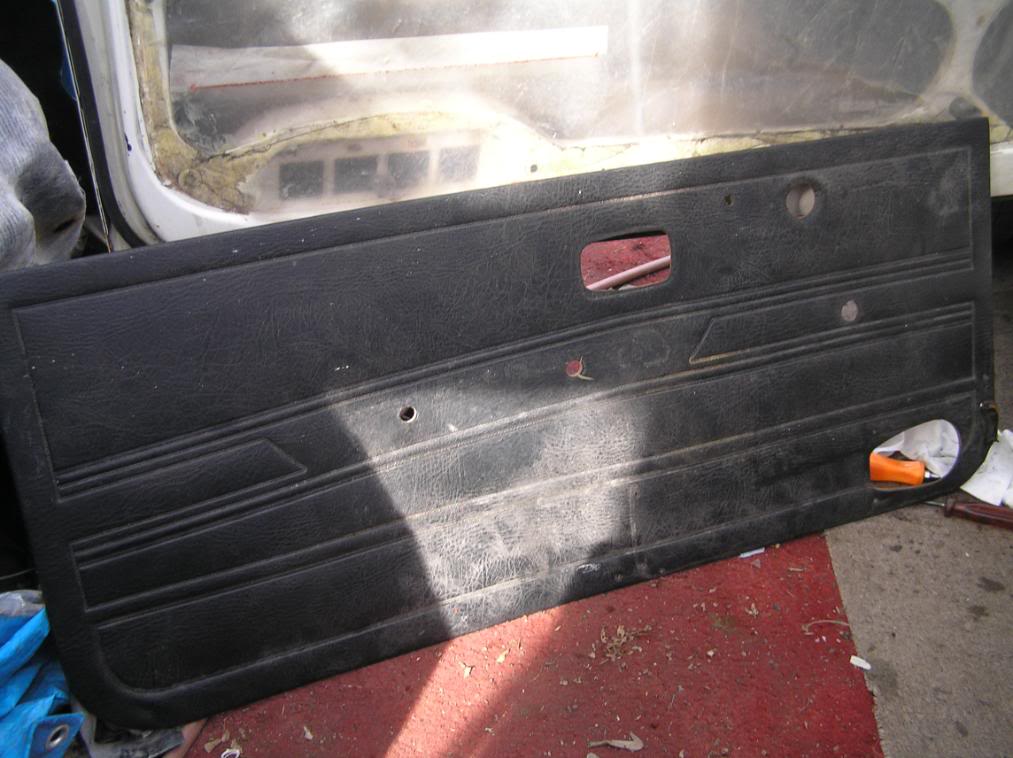
There were no door cards, and the membranes had been removed, ill-advisedly, so I made new ones from builders polythene and contact adhesive, fitting only AFTER any window or mirror work…

A doorcard, thanks to fellow forumite Mk1Mayhem, for which thanks!
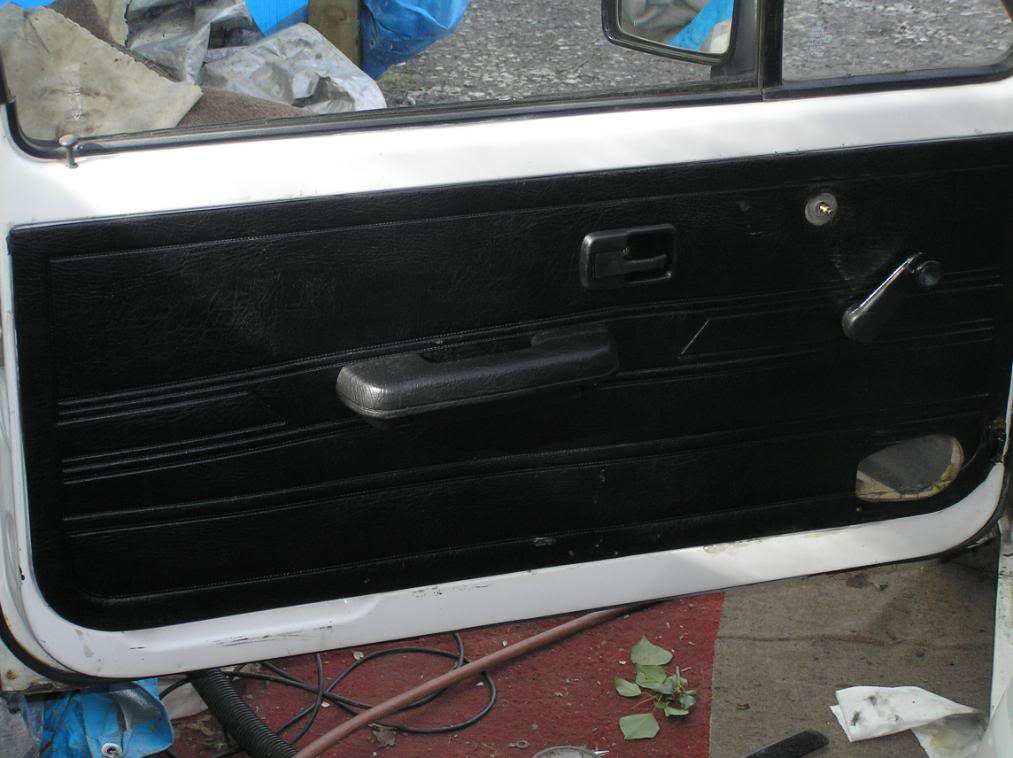
Door furniture from my old (now scrapped) Audi 80 Sport. The handles are the Audi's rear door handles
Drivers door seal was missing completely, and n/s one had seen better days. I was in South Africa on holiday so bought a new 4-door seal from VW for each side. You're then about 12" short on each door, which you can sort by either buying a 3rd seal, or using part of the old seals in the least important area, which I deemed to be the bottom edge of the door. 22 pounds for 2 from SA, and the exact same solution is used here in the UK, where you pay twice as much… They fit perfectly.

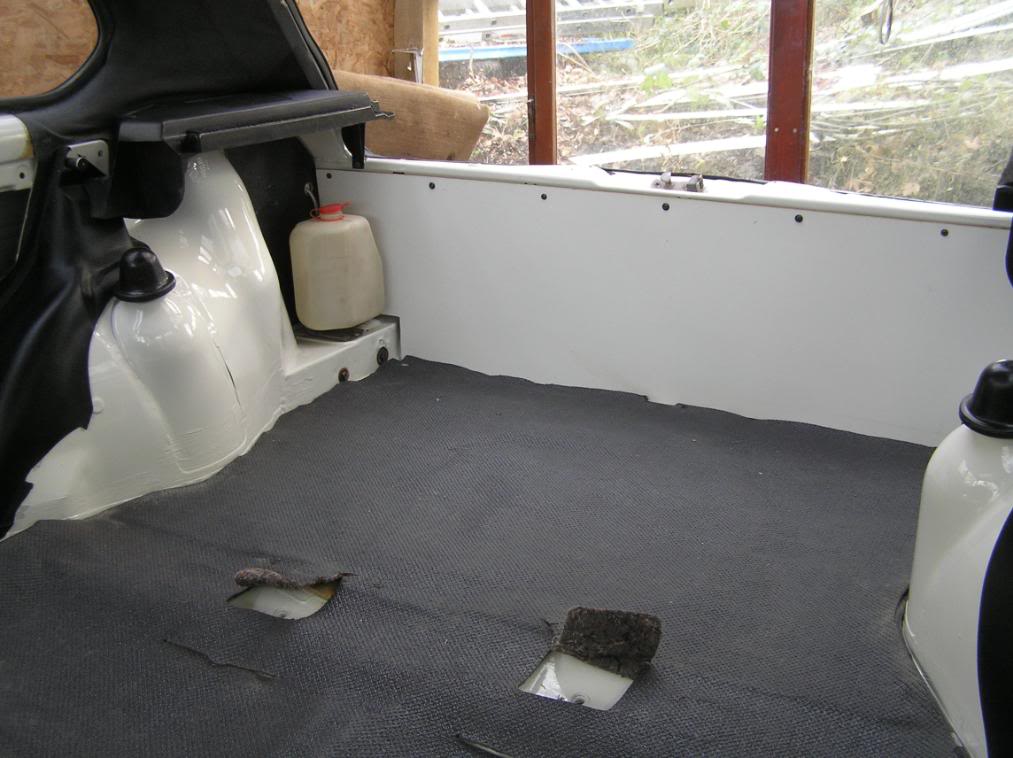
Finally, with what I believe will hopefully be a dry car, I fitted the carpet and underlay. The underlay was robbed from 2 scrapped Audi's, and the carpet was cleaned, washed, cleaned again, beaten, cleaned, washed. You get the picture… I'm not sure the car originally had underlay on the rear footwells (anyone?), but I want it to be as quiet as possible inside.


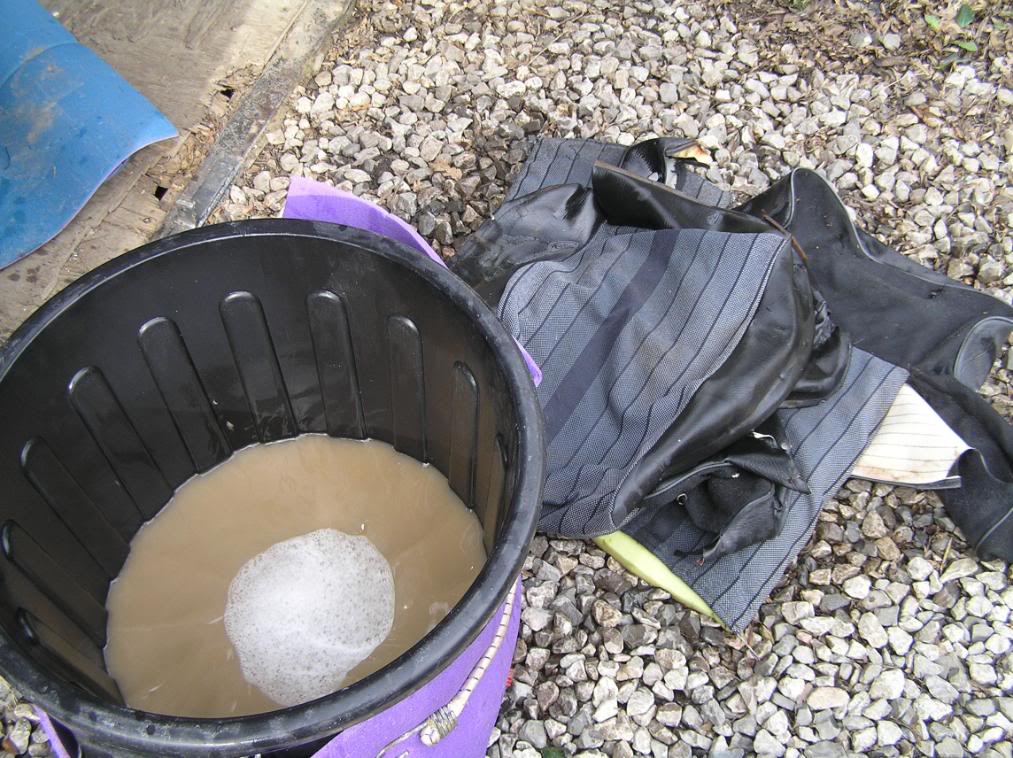
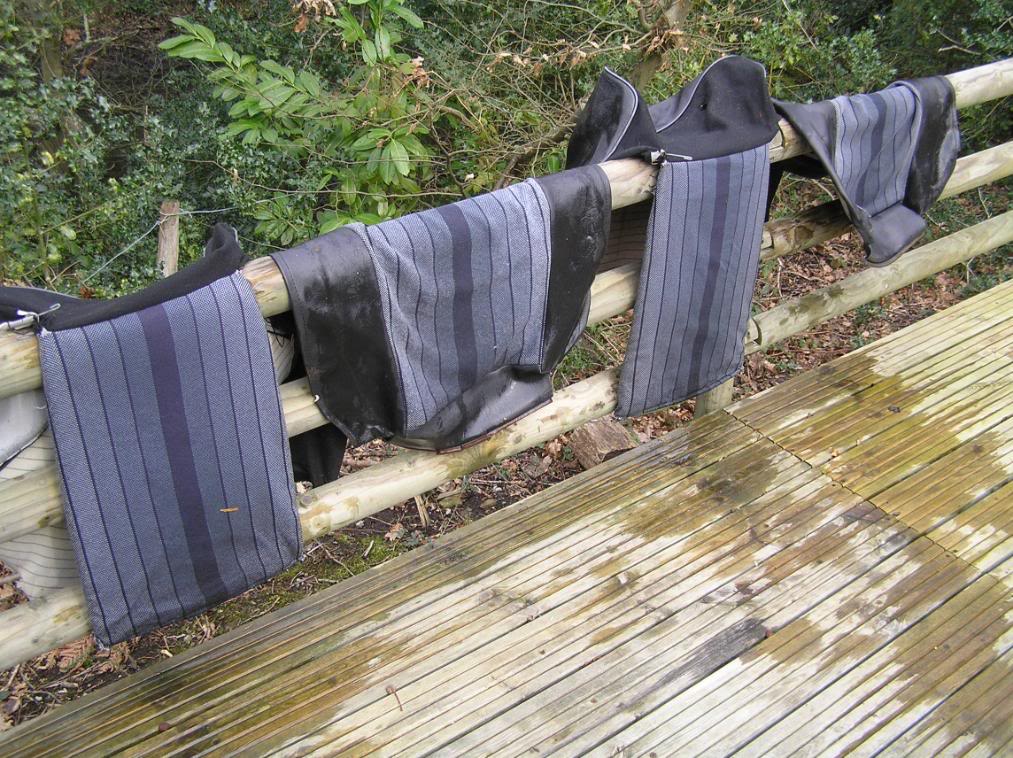
And now the seats let the shiny interior down. They were pretty filthy, and the drivers side upper bolster had a worn torn bit, so I decided to strip them and wash the covers separately, and repair the torn section. Not sure what with yet, as I believe the original black material is not available, so any suggestions welcome.


The water was totally minging! This bucket was the 3rd wash… Hot water and Persil. The foam mats are to keep the water warm while they soaked.
Nice…
That's pretty much up to date. Remaining jobs are;
Refit centre console and dash under-trays
Rebuild seats and refit
Sort various electrics - fog light, interior light, headlight relay.
Set tracking
Finish undersealing under floorpan
Probably replace AFM and fuel metering head, depending on emissions and fuel consumption. The old rusted filler neck has, I think, done it's dirty work on the metering head and injectors…
MOT
And then start driving it. And start discovering how much more work needs doing…!
Cheers
Posted

Secretary
First Golf, lots of work. I've started so I'll finish!
Posted
Local Hero
Andy
LINCOLNSHIRE REGION -�https://www.facebook.com/groups/467122313360002/
1983 MK1 Golf GTI Campaign Model - Under (looooong) resto!
1962 Rover P4 80
2002 BMW 745i
2008 BMW Z4 2.5Si
LINCOLNSHIRE REGION -�https://www.facebook.com/groups/467122313360002/
1983 MK1 Golf GTI Campaign Model - Under (looooong) resto!
1962 Rover P4 80
2002 BMW 745i
2008 BMW Z4 2.5Si
Posted

Old Timer
Posted
Old Timer
Ouch those holes must be annoying! I found a couple in the same area. Nice bit of fabrication work on the wiper motor support!
I look forward to seein how those seats turn out after all that cleaning!
Posted
Settling In
Need to get my mother on the case with her sewing machine to fix up the torn bolster cover, then I think I'm on the home straight. Famous last words…
0 guests and 0 members have just viewed this: None.