


Fast Road 1600cc GTi

Posted
#973448
(In Topic #115227)
Settling In


Fast Road 1600cc GTi
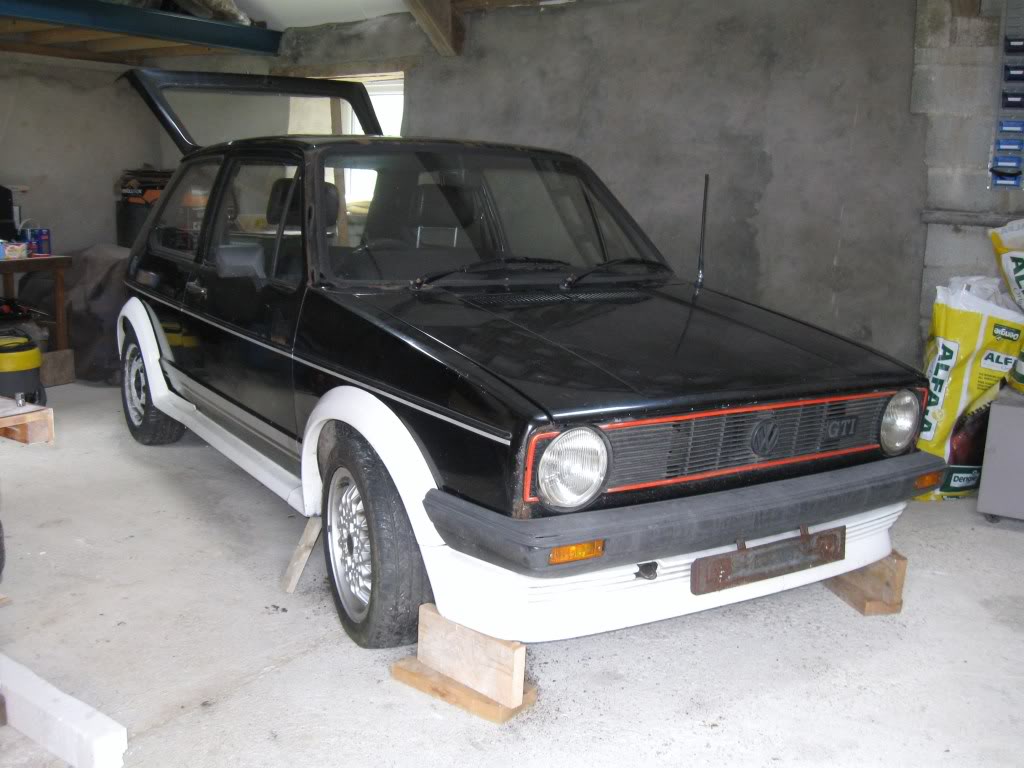
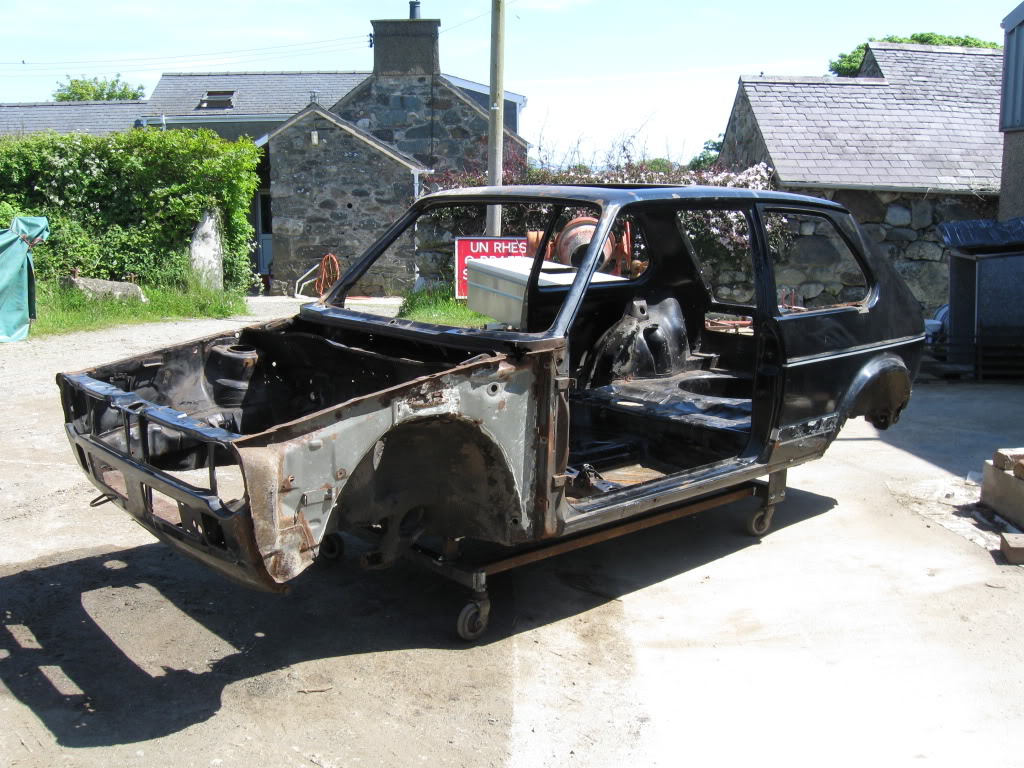
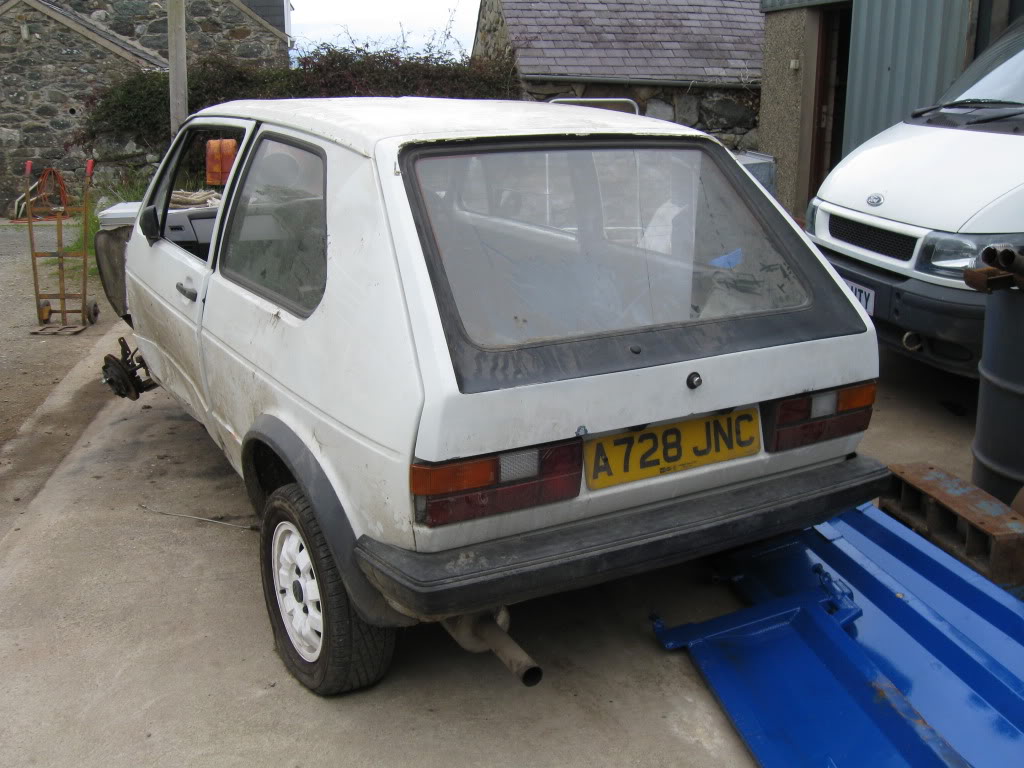
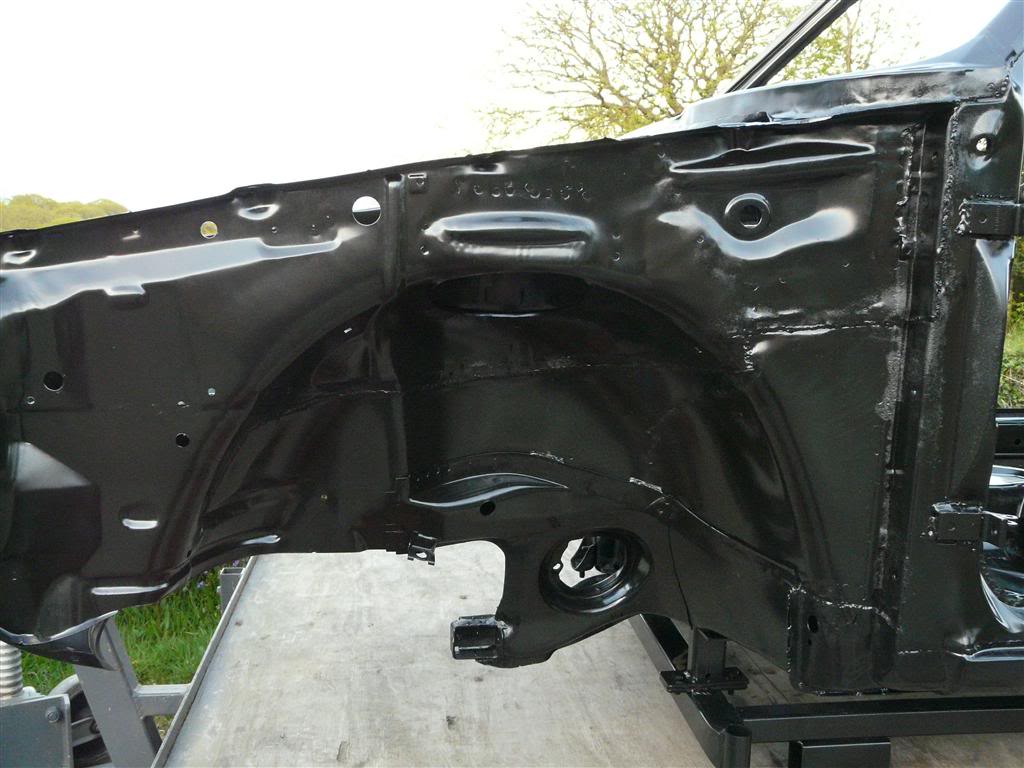
These are a few weeks after we brought the car home from Bristol, which is about 5.5 hours away from my home in North Wales. We didn't get off to a flying start because of a dodgy V5 document and we were busy plastering the garage where it currently resides when not in the main workshop, but these are taken a few minutes after I vacuumed out the interior.
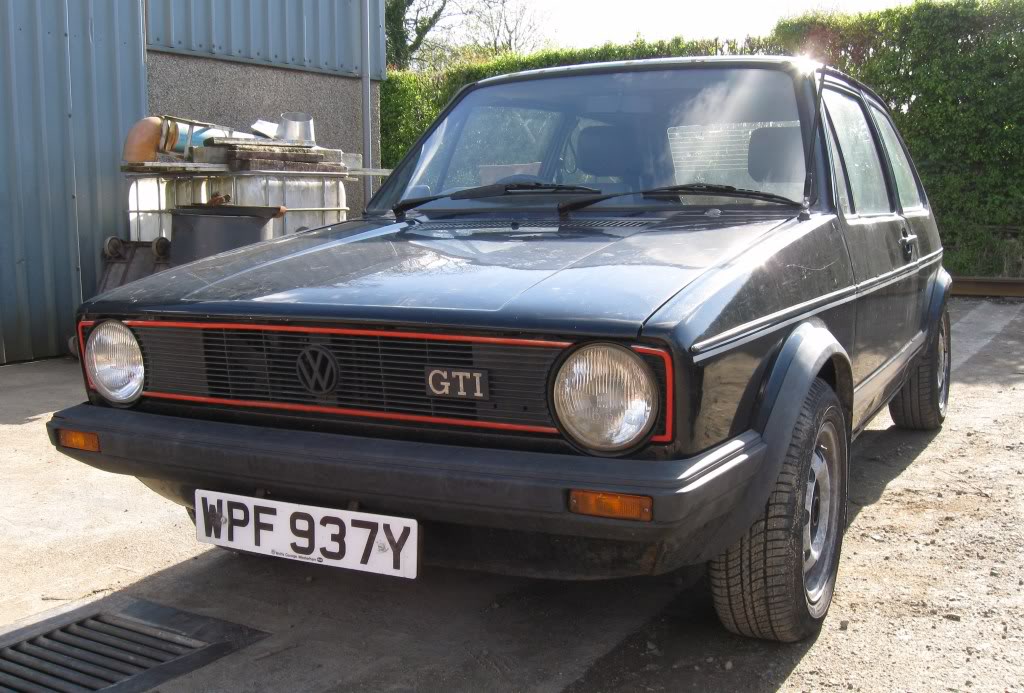
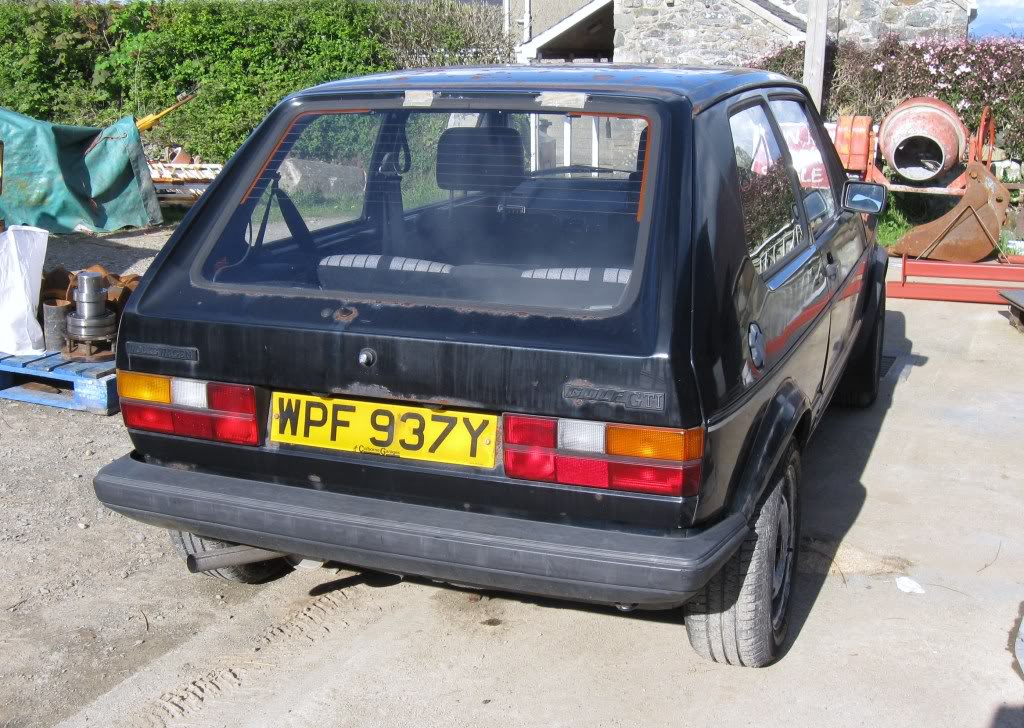
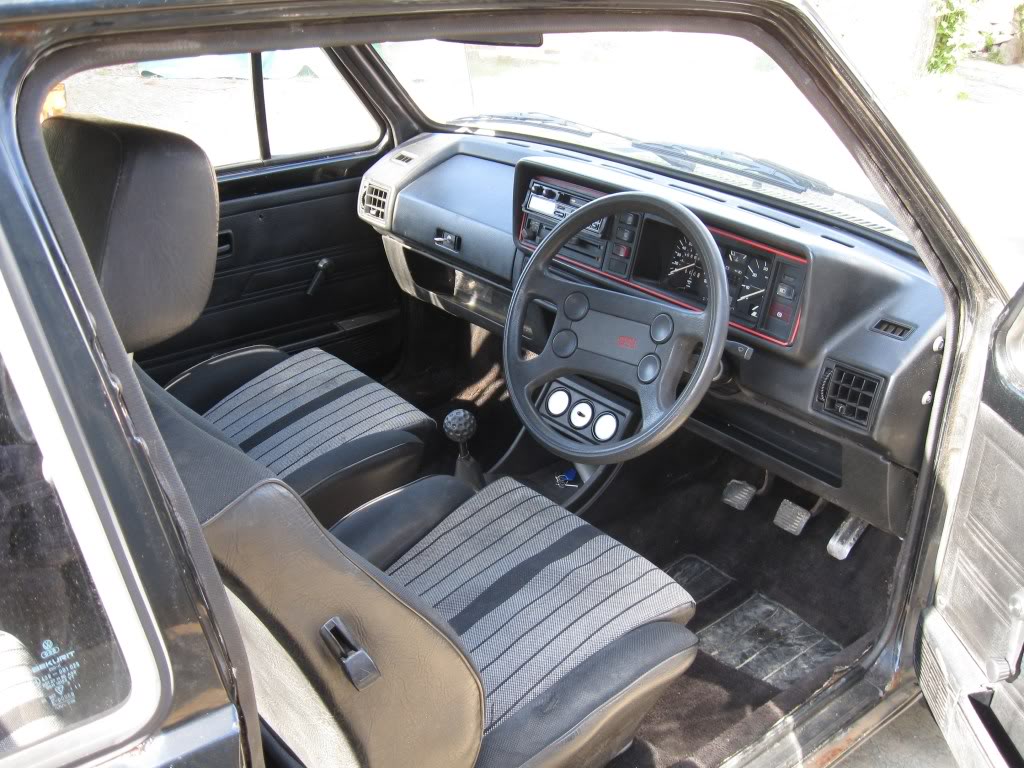
As you can see from these photos, "she" is a 1982 1600cc GTi on a Y plate, probably one of the last 1600s before the 1800cc engine came in. She is a comparitively low spec for a GTi, with only one wing mirror and no twin headlamps. She is equipped with a Clarion audio system which I presume is original although the rear speakers are Pioneer.
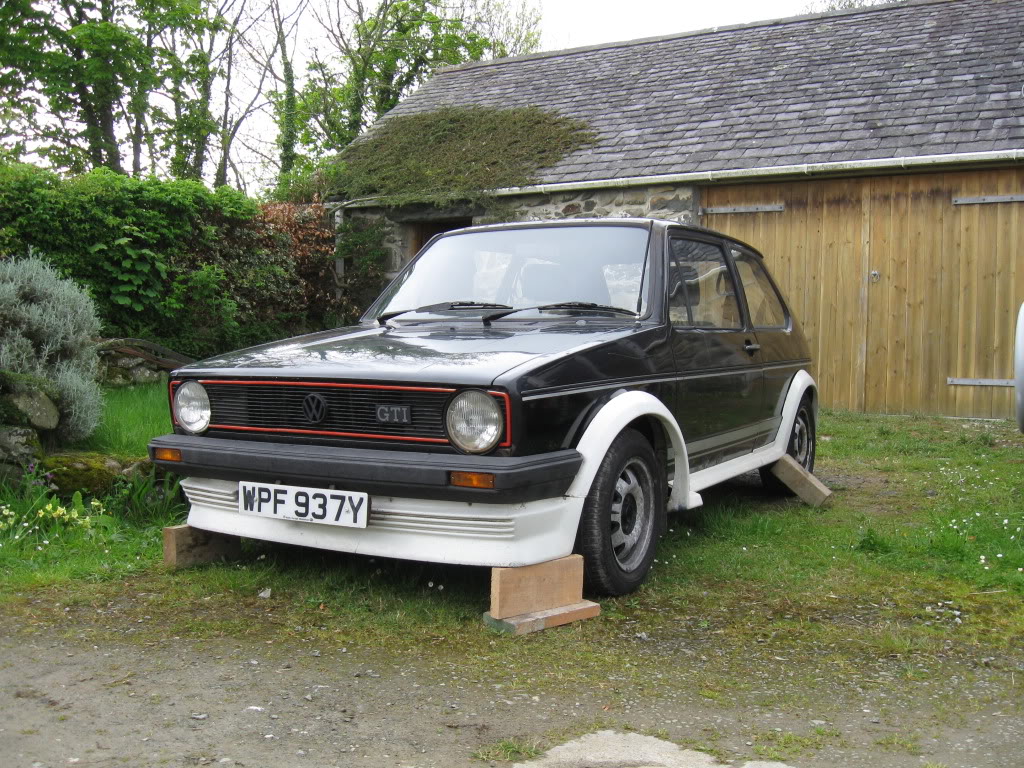
These next two photos are the first indiction of where I am taking the car with an original BBS body kit and the BBS RA 15" wheels from a Mk2 (I don't personally like the ATS Cup wheels I have now and will be selling them eventually after most of the restoration is complete).
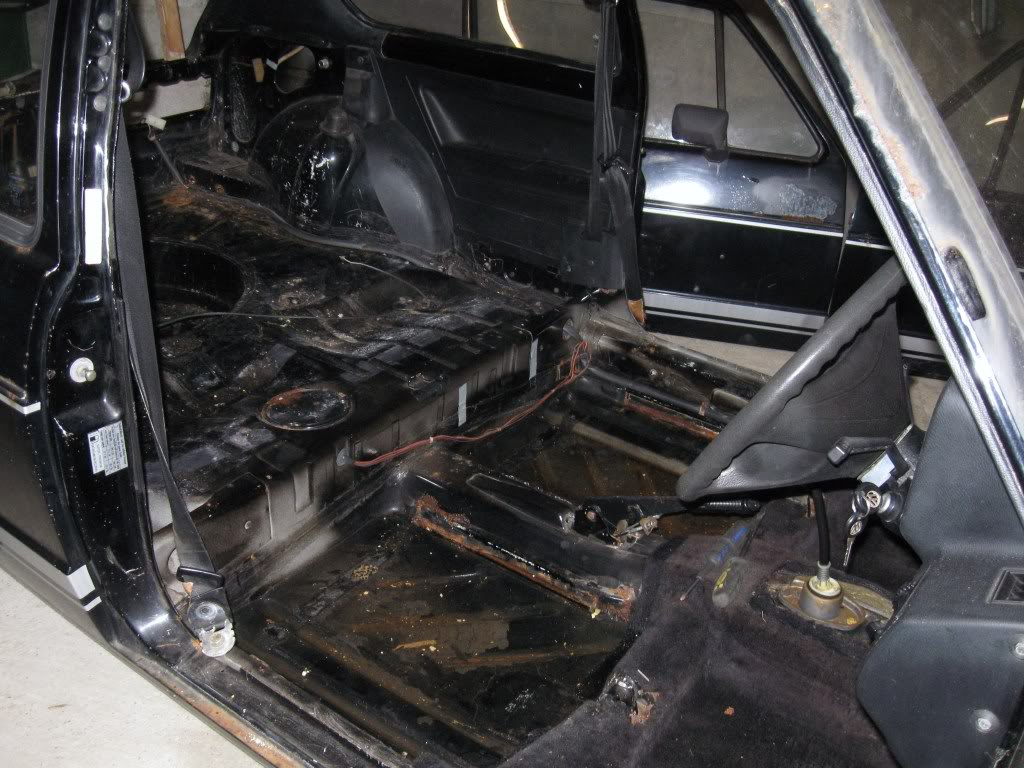
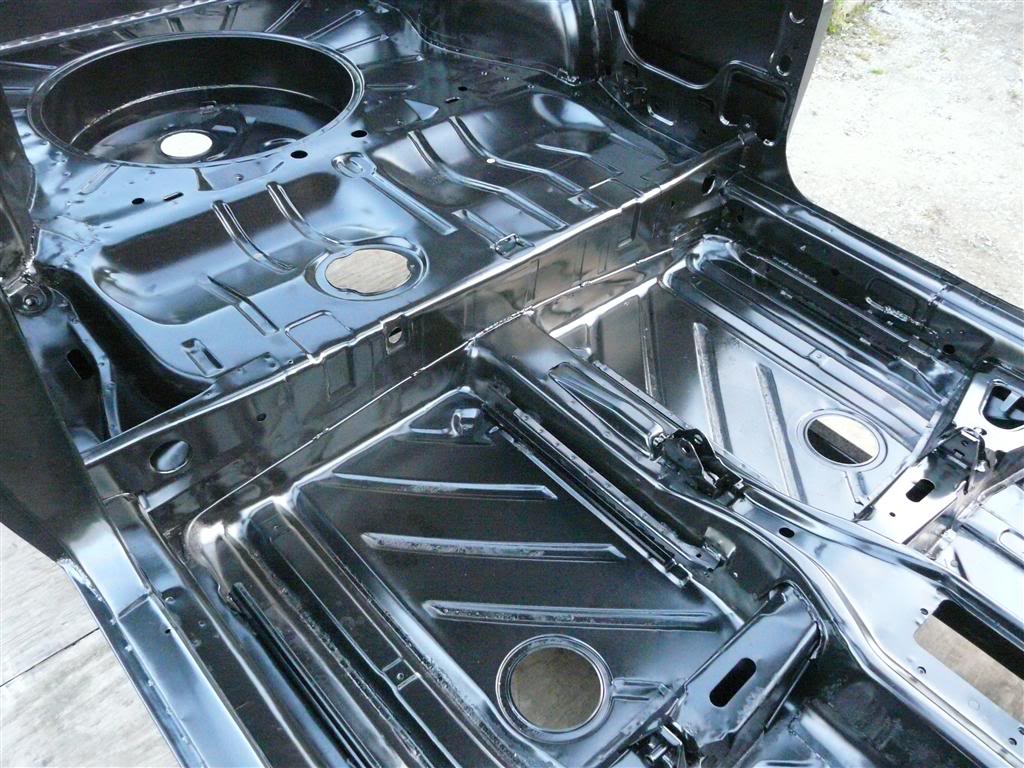
After playing around with more of my eBay purchases I got down to the busy work of stripping everything down ready for welding.
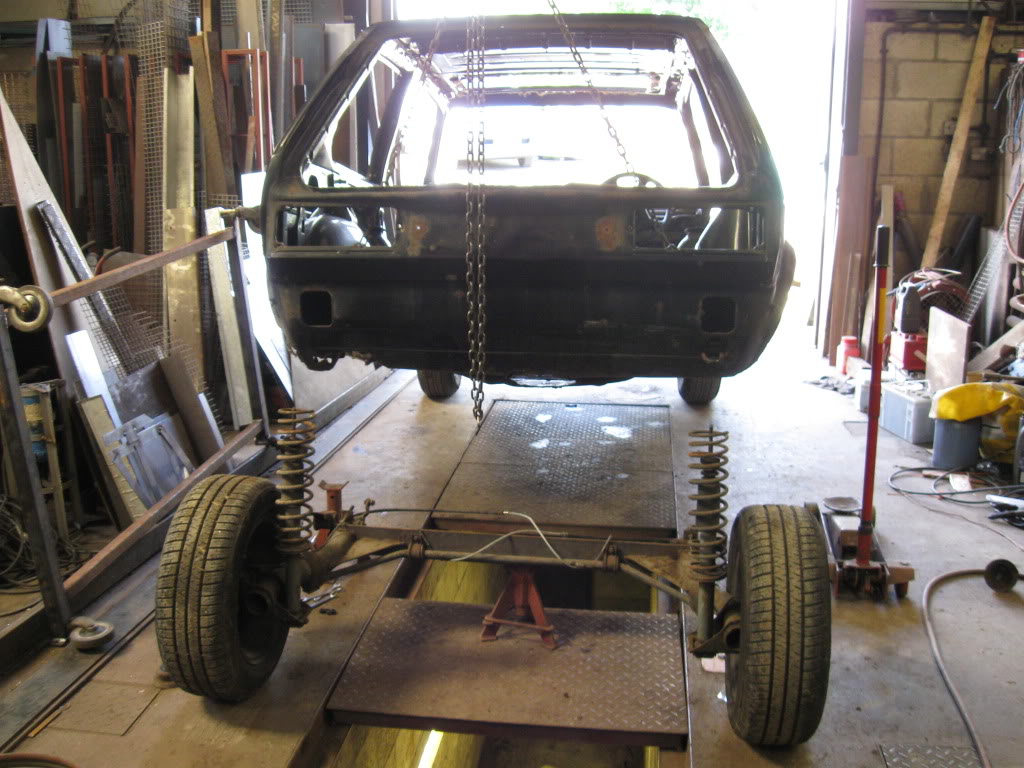
We made this trolley so we can move the car around and for painting, eventually!
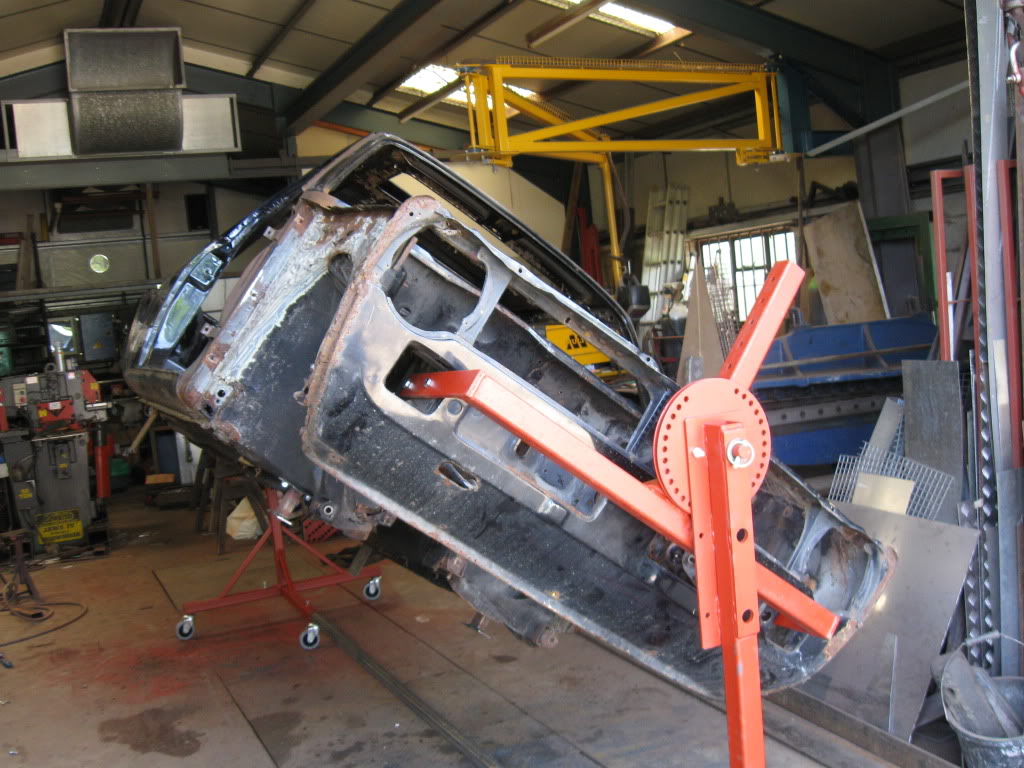
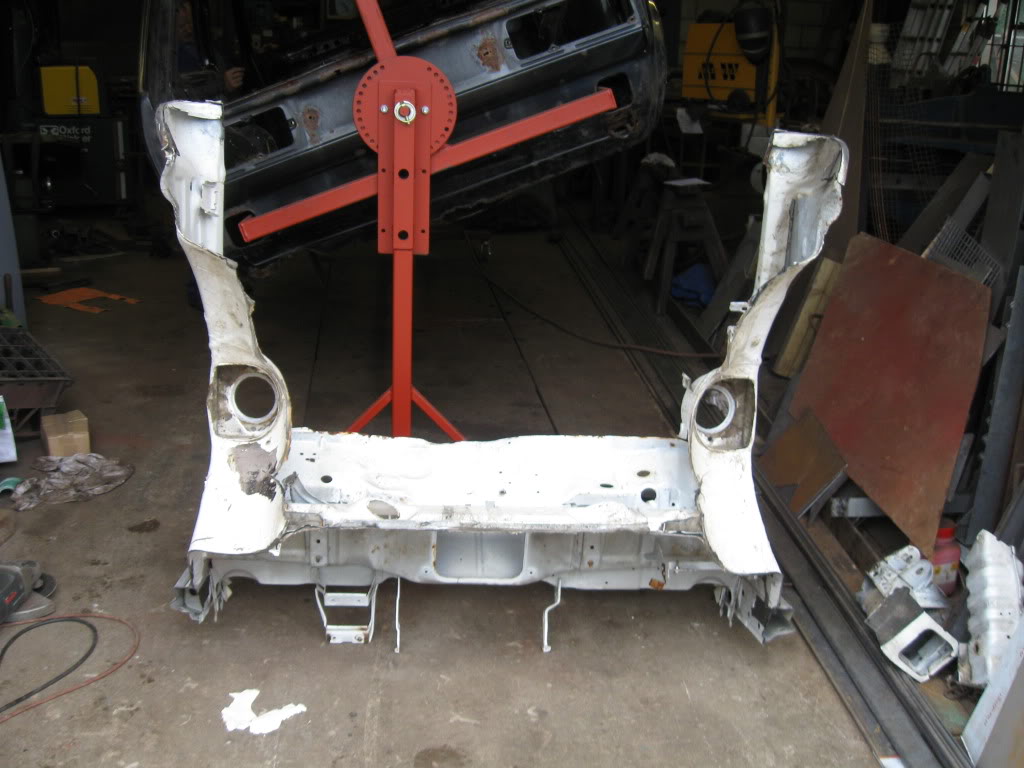
My father, who is an Engineer specialising in metalwork by trade, whose workshop we use for welding and other big jobs on the Golf, went about making a rotisserie for rolling the car after endlessly researching them on the web and ultimately came up with this, which is brilliant!
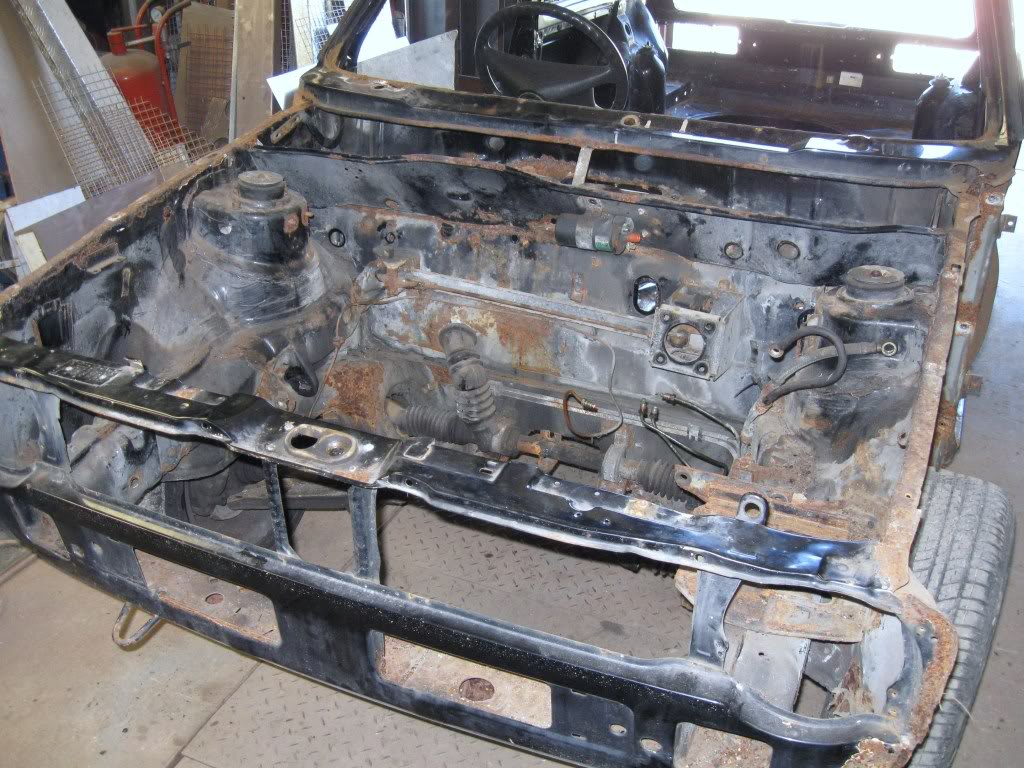
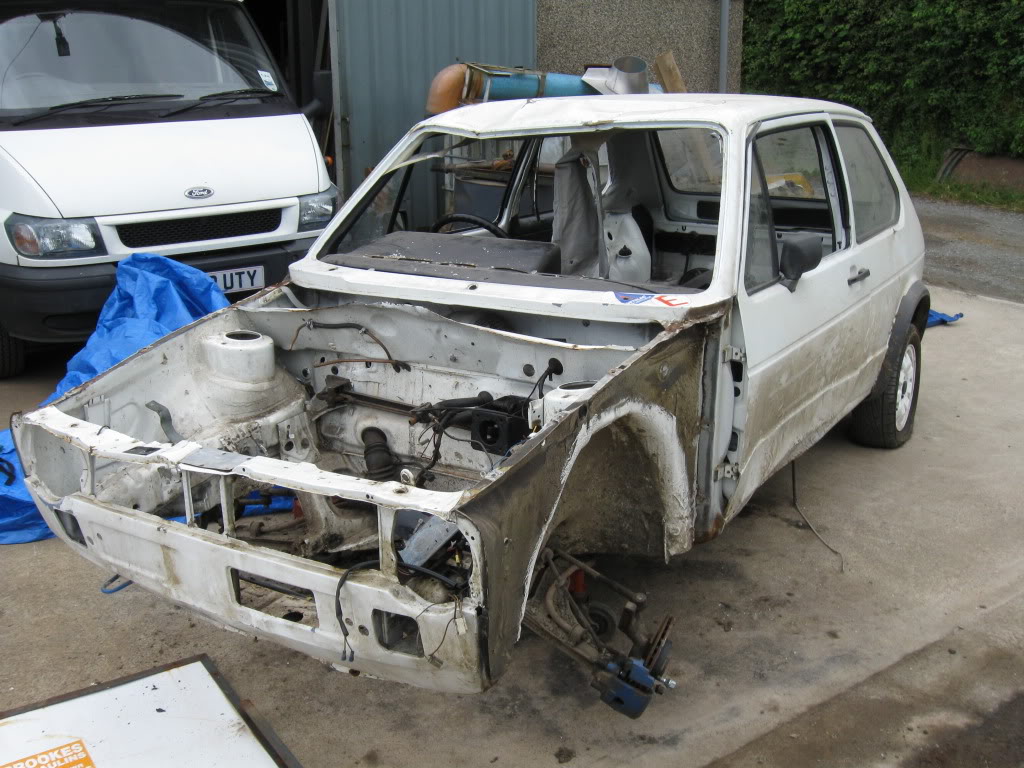
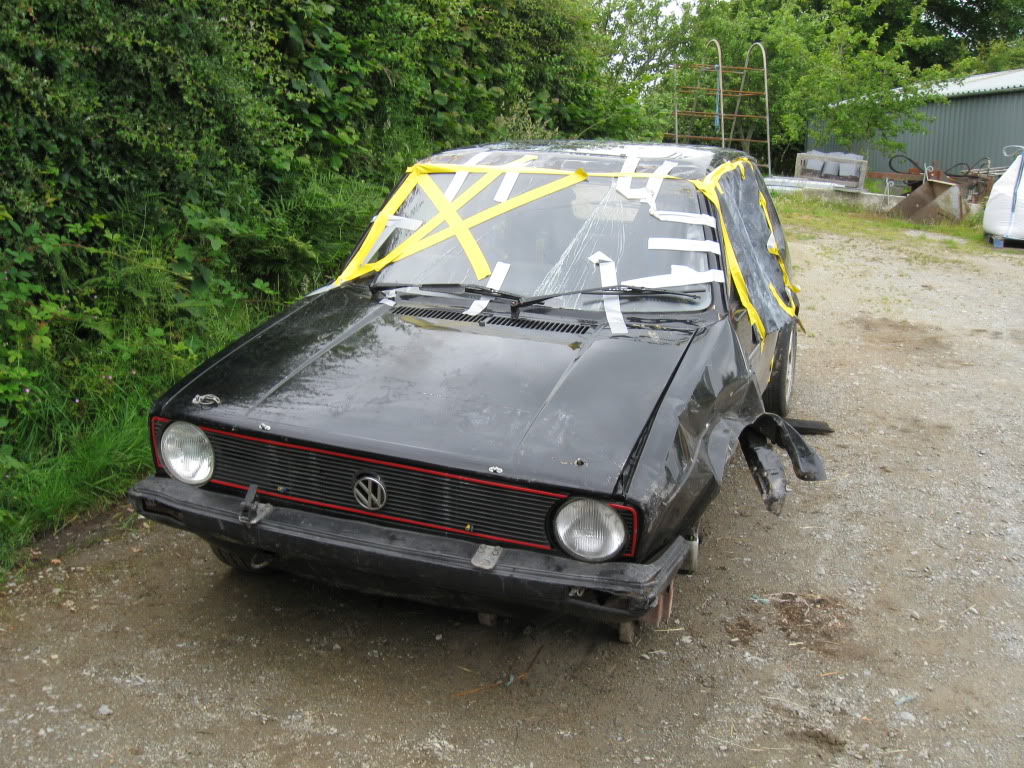
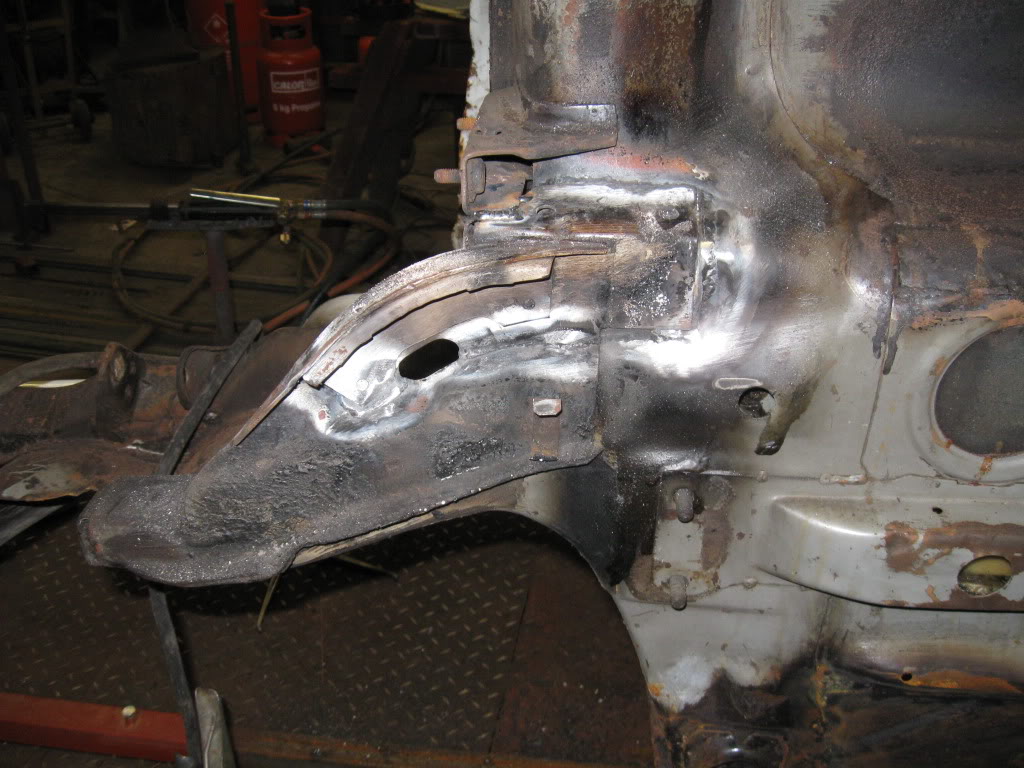
After a few weeks of welding in patches on the floor and front rear wishbone mounts, and a busy few weeks for me in my summer job on the silage harvest, we got in some donor vehicles for parts. These two cars are ex-rally cars, both from the same owner and both suffered the same accident! The white car arrived as a shell with no engine, although still had a dashboard and all parts underneath.
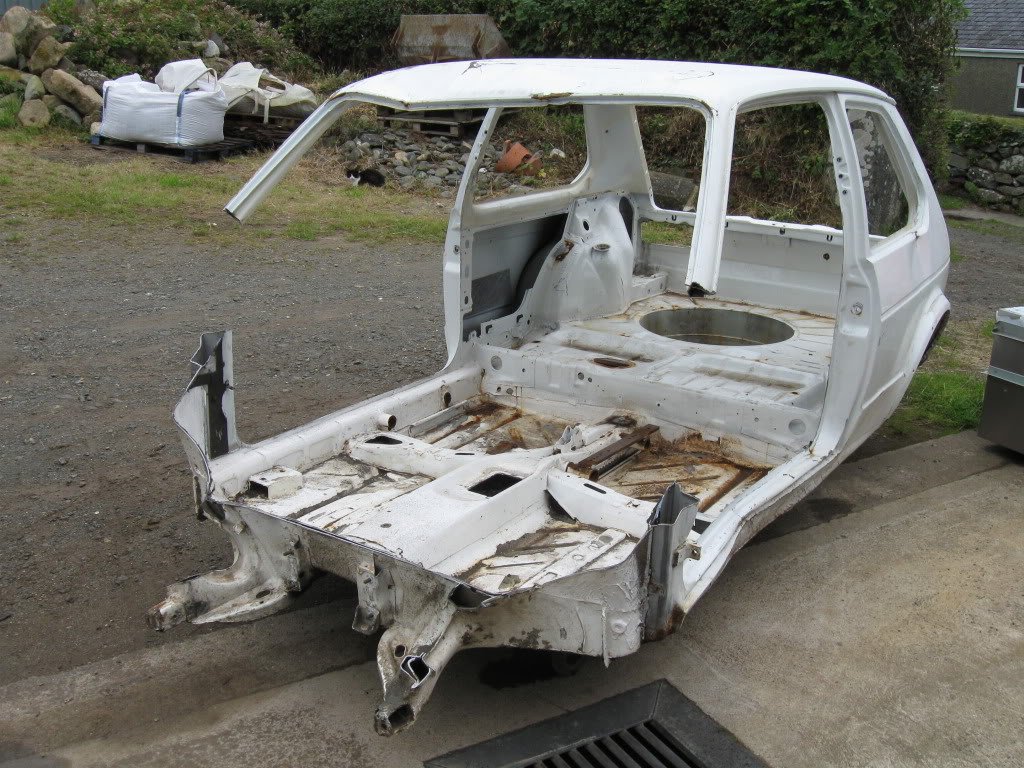
I don't want to be questioned on this so I'll make it clear now that the white shell is twisted, and in no way repairable although being in better rust-position than my project car!
This black Golf is not as valuable as the white one, in fact it is mostly constructed of filler, having been in a roll-over accident twice, but being re-jigged between. There is nothing in the roof but rust and filler, and the same is true for the sills, front panel and inner wings. Lucky it had a half-decent roll cage then, and even that has buckled.
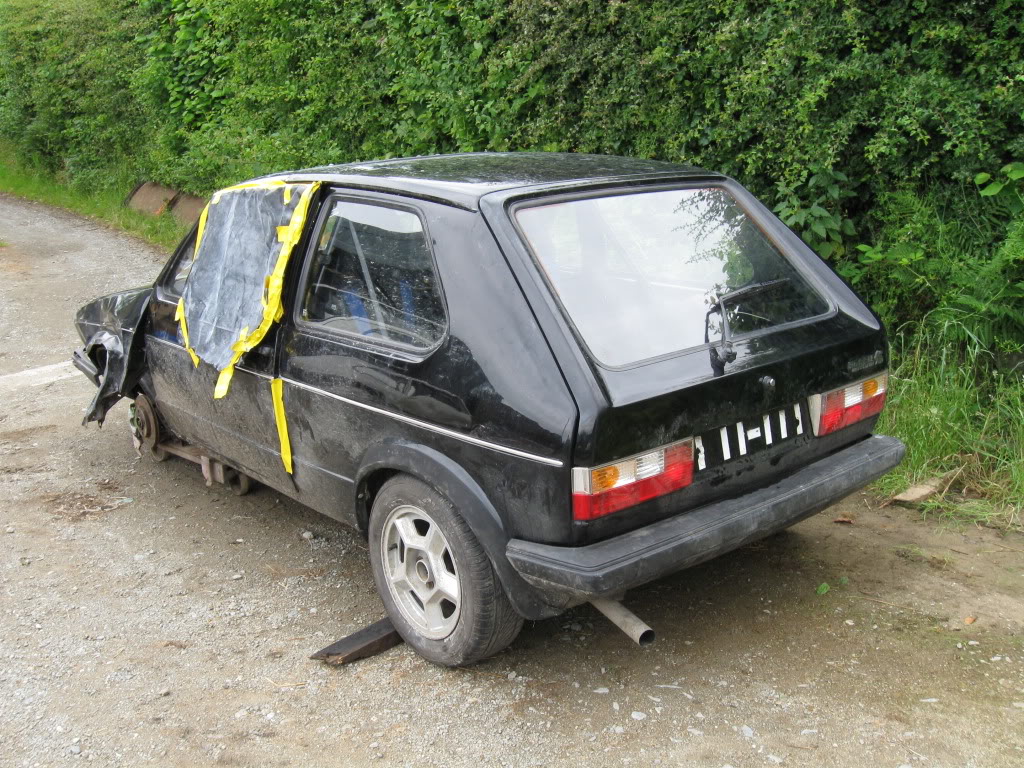
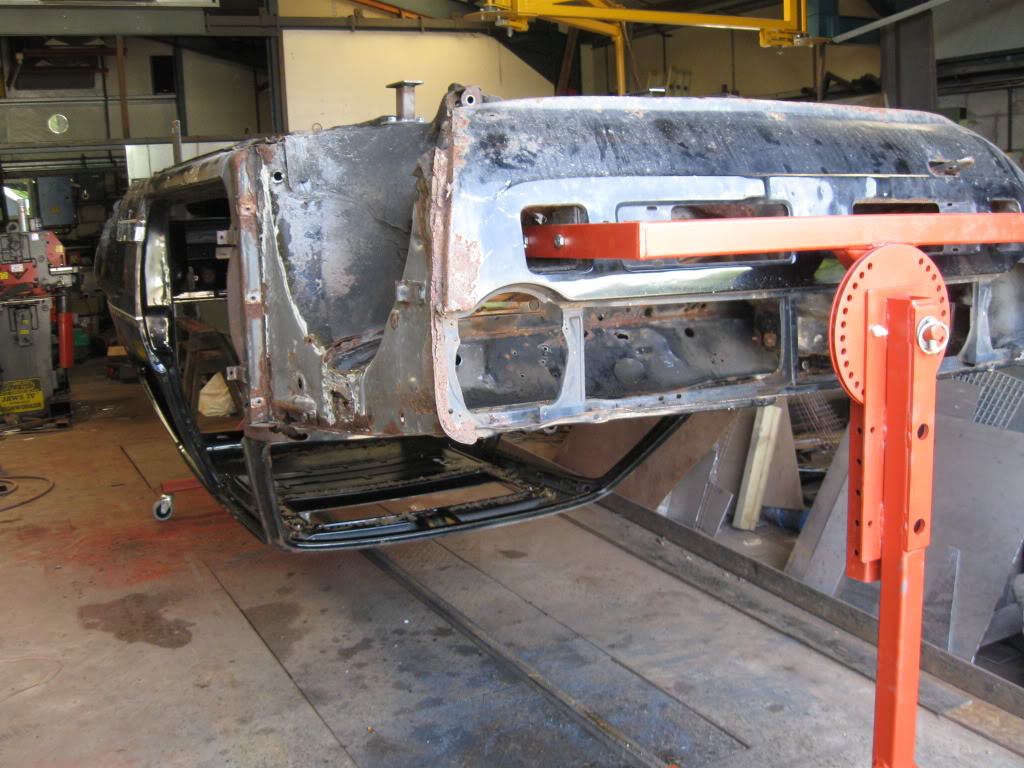
We then went on to strip the white car and remove the bulkhead and inner wings to be placed in my project car, which is more efficient and stronger than welding endless patches.
My car then had to be cut in the negative way, which was nerve-wrecking as I believed the shell would twist without the strength of the bulkhead, although my dad was quietly confident…
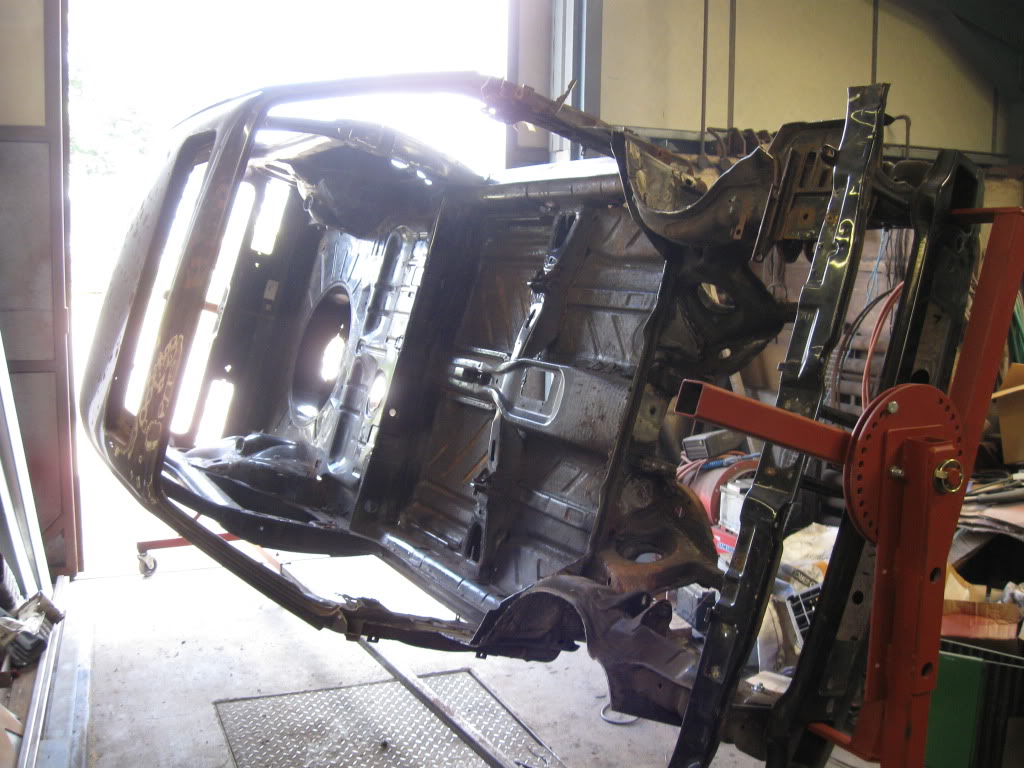
This is the bulkhead in place and all welded in, which is quite impressive even for someone so used to machine surgery as myself and my dad!

This is the latest photo on my camera, which shows one of the front wishbone mounts replaced with one from the white shell, as the original was rusting from the rear!
Well, thanks for looking and I will be sure to update this thread as I go along.
Posted
Local Hero

foxy
Posted
Settling In
Posted
Settled In


Posted
Settled In
 8)
8)
Posted
Settling In
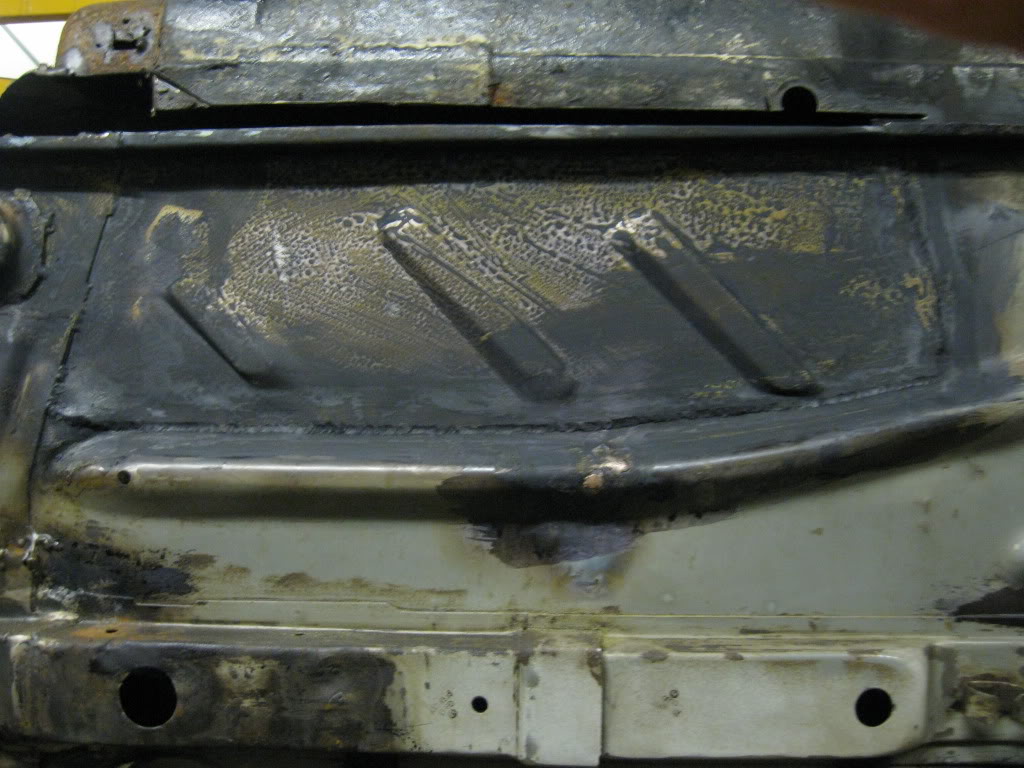
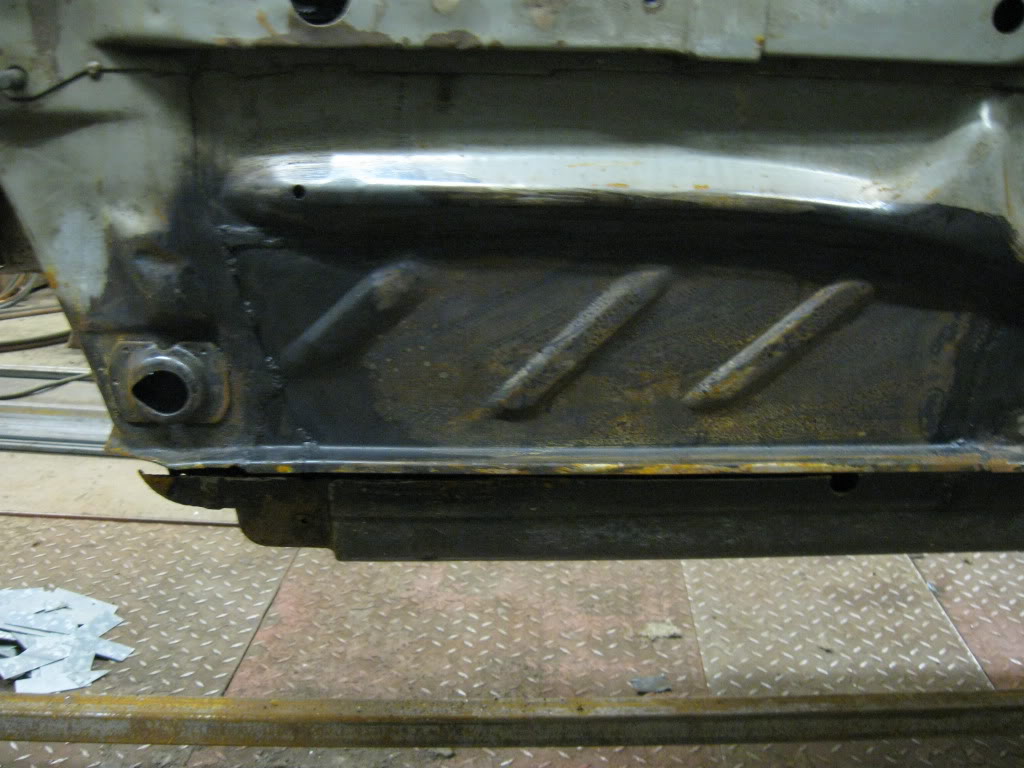
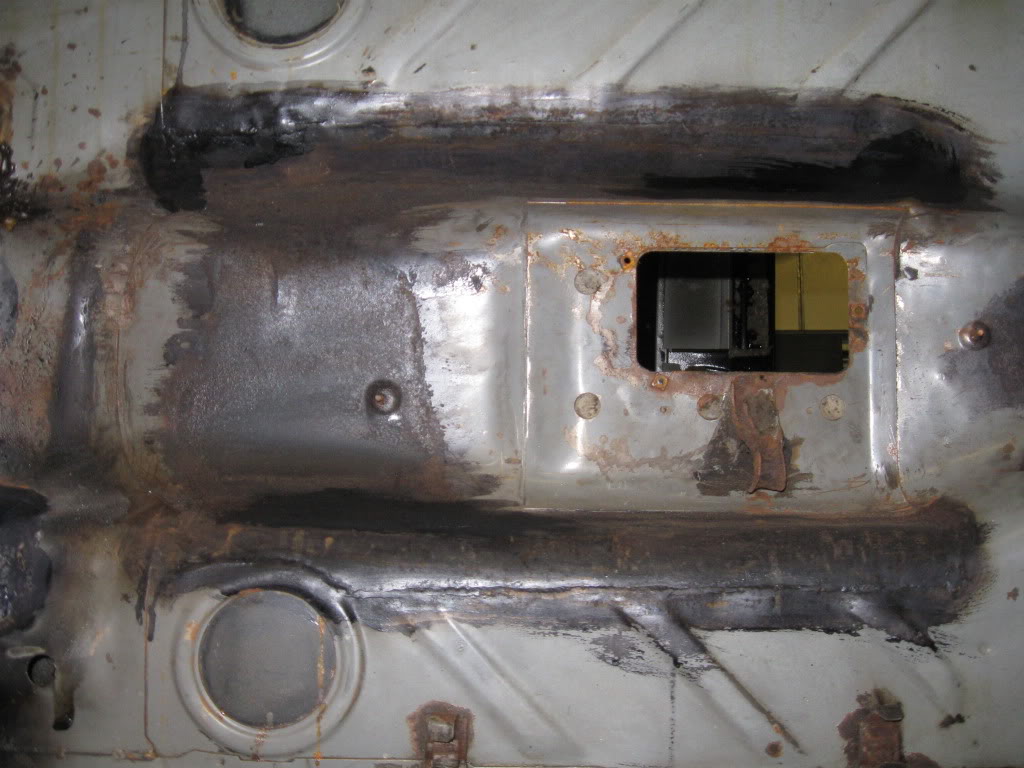
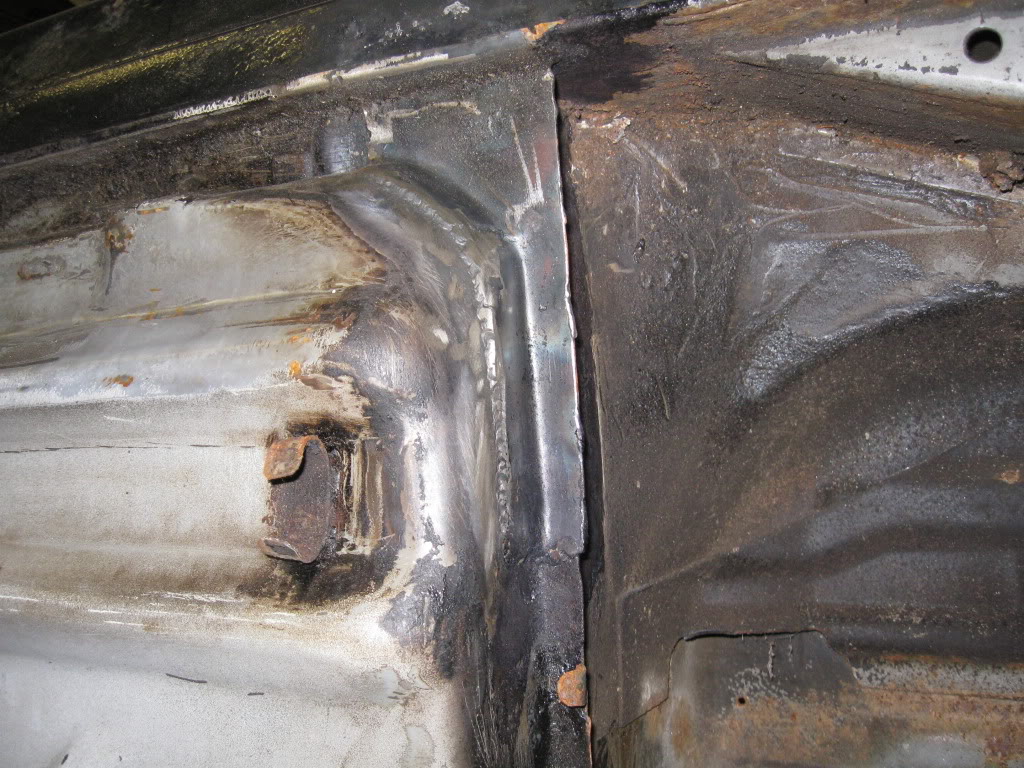
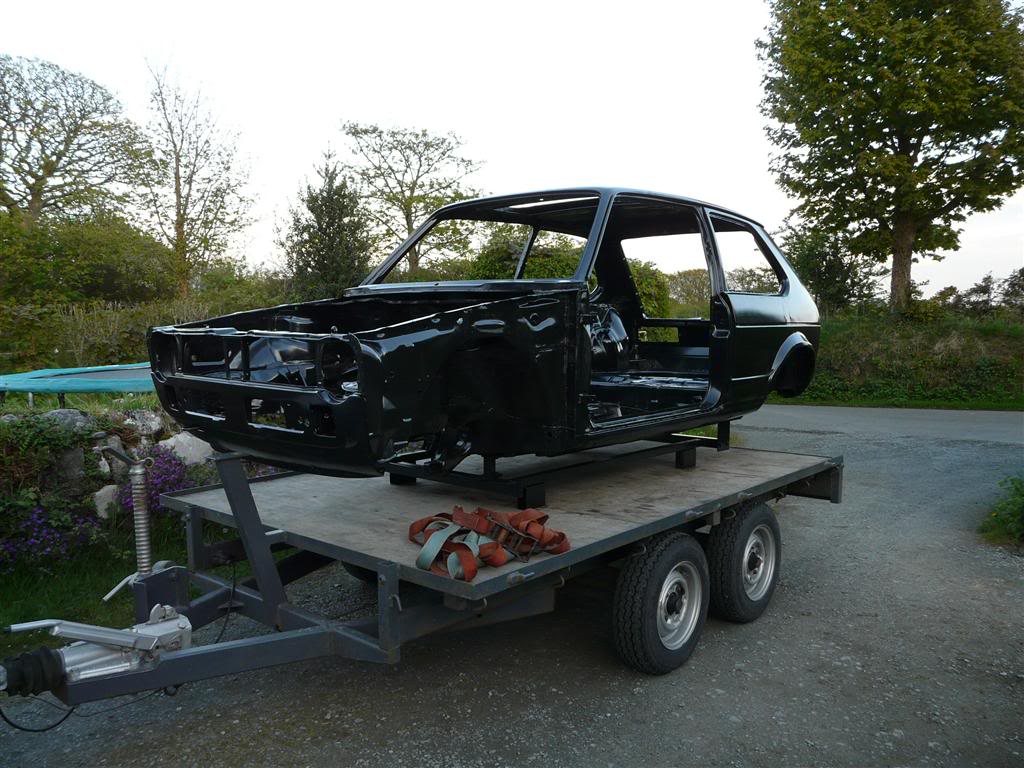
Both floorpans have been finished up to the seat crossmember, ready for new sills
Transmission tunnel has been patched where the metal was wearing thin
Rear corner of nearside floorpan has been patched
Thanks for the comments guys, I'm trying to head for something similar to what a company like BBS would do to demonstrate their skills in a demo car kind of a way - like the original, just slightly modified.
Posted
Settling In
Posted
Local Hero
Good luck
Diesel Possessed
A97JCE
Feeby
A97JCE
Feeby
Posted
Old Timer

<a href="signature2.jpg picture by jools182 - Photobucket"><img src="http://i88.photobucket.com/albums/k182/jools182/signature2.jpg" border="0" alt="Photobucket"></a>
Posted
Settled In
I bet it ace having those kinda toys when doin work like this. No lying on your back stripping sealant, fantastic!!
Looks like your cracking on quite nicely.
Will definately be watching!!
Posted
Settling In
I will be selling that rotisserie after we've finished with it, it's good because you can balance the pivot centre so it turns easily whatever the weight of the shell (up to a point of course). The only time you need really lock it by passing a bolt through those plates is when you want to press down hard on it or at a couple of angles where the shell won't stay still, due to the way it was constructed.
I don't think my dad will be making any more rotisseries, unless there's interest in making one specially for someone. In that case, send me a pm and I'll get back to you.
Posted
Settling In
Pictures will follow quite soon, but the list goes on as follows:
- Inner rear arches finished
Sills finished
Front panel fitted
Doors and tailgate fitted
Front wings fitted and matched with bonnet
[/list:u]
the shell and doors etc. are now going to be dipped and e-coated at Walsall, twelve months into the project and i feel that spending money on rust proofing is worthwhile! Plus the student loan has to go somewhere!
Next comes pre-assembly
Posted

Old Timer
Member of the month GET YOUR SAY IN NOW
http://www.vwgolfmk1.org.uk/modules.php?name=Forums&file=viewtopic&t=86608&highlight=
Posted
Settling In
long time no post!
My car's finally come back from dipping - and it looks awesome
Just a few pinholes here and there but easily repairable - hopefully the bulk of it will last a long time now. Check out the pictures!
Pre-assembly comes next!
Posted

Old Timer

that was acid stripped and then dipped??
what the colours going to be

Posted
Local Hero
Alex
Posted
Settling In
jellybelly
- the colour i'm going for is a dark grey metallic - like the one you can have on modern day GTisthanks for the comments - i just want to finish my term at uni and get stuck in now!
Posted
Settling In
83 GTi Campaign in diamond silver
62 BMW 330d M Sport f30 in estoril blue
12 Transporter t32 sportline swb kombi 180 in white
09 Ducati Streetfighter in pearl white
07 Suzuki king quad 700 in red
62 BMW 330d M Sport f30 in estoril blue
12 Transporter t32 sportline swb kombi 180 in white
09 Ducati Streetfighter in pearl white
07 Suzuki king quad 700 in red
0 guests and 0 members have just viewed this: None.