


back in black

Posted
#1033170
(In Topic #123153)
Settled In

back in black
So finding a garage that i could do the work in was the next stop, coming up trumps a work colleage offered up his empty garage for free for as long as i needed. When i went to look at it i was plesently surprised oversized with full electrics and a working pit bonus.
Next was to get myself a decent set of tools and a couple of manuals, right good to go.
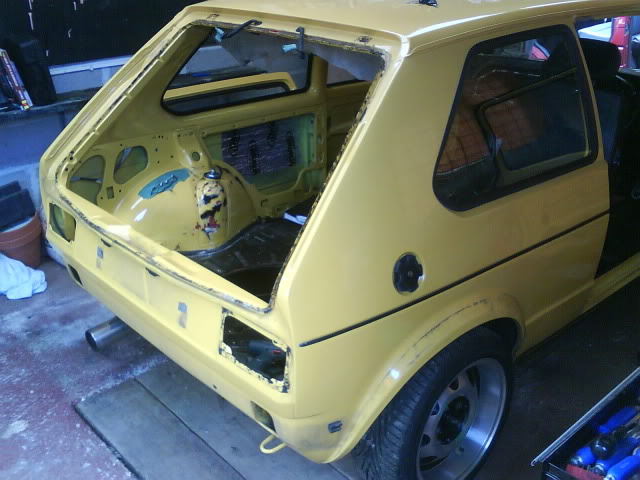
ok so i moved the car in to the garage
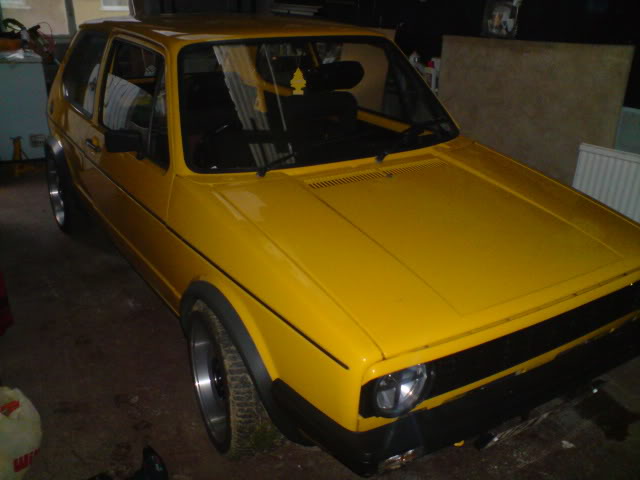
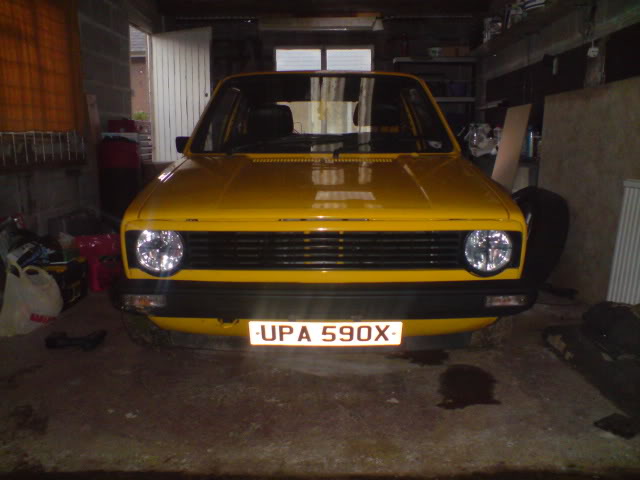
Ok bearing in mind i have no mechanical training whatsoever i dived straight in I mean really how hard can all this be(I was about to find out)
the begins
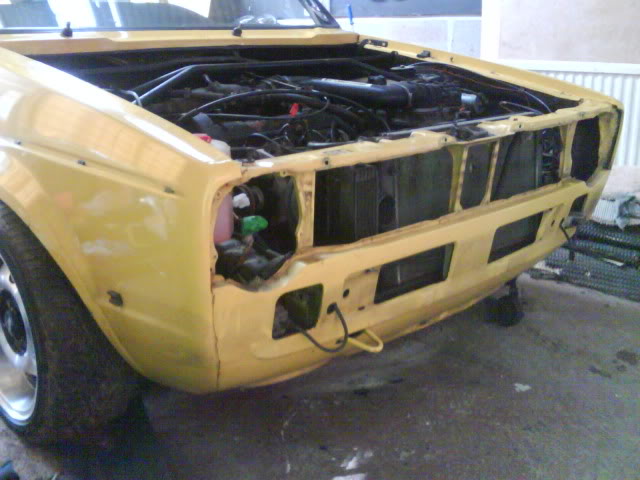

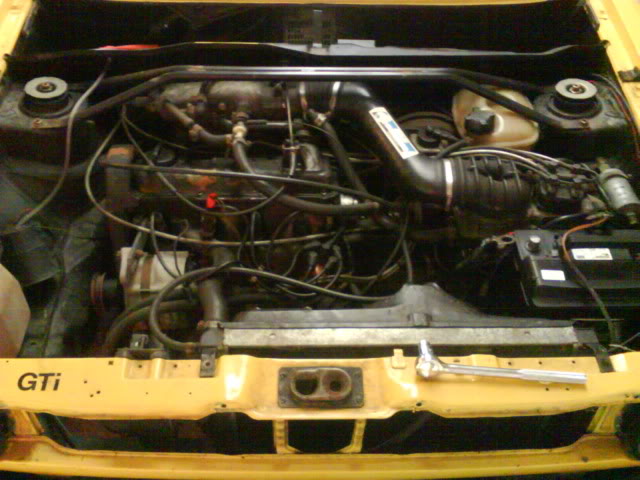
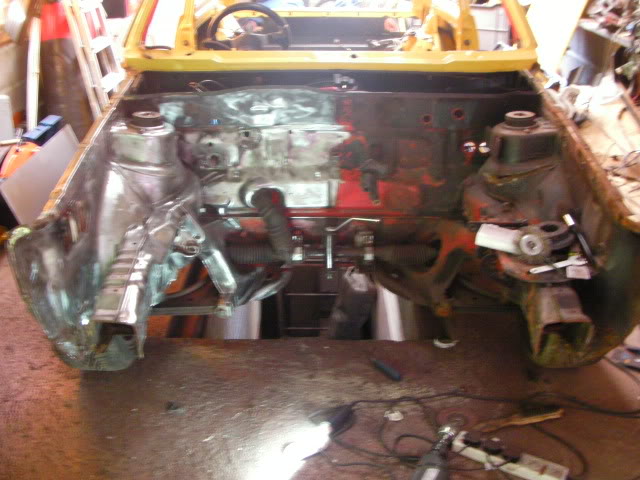
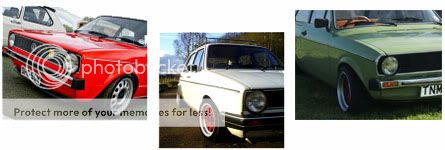
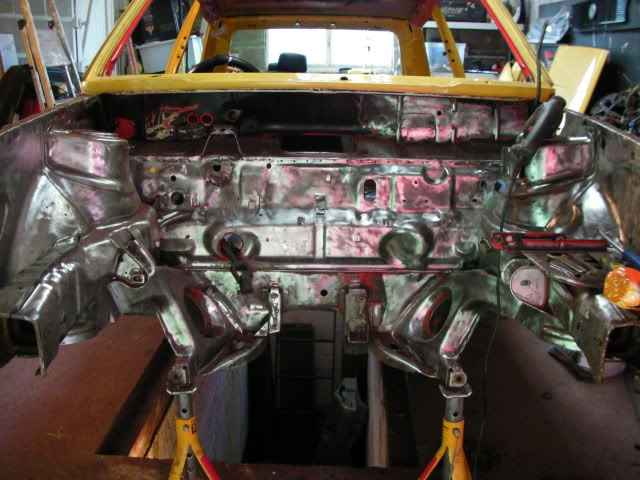
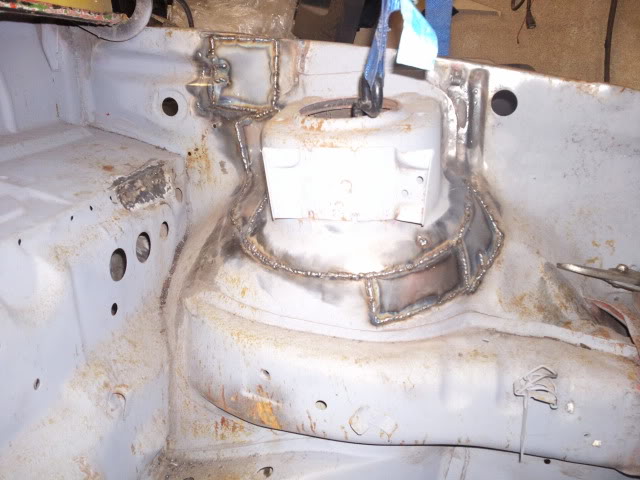
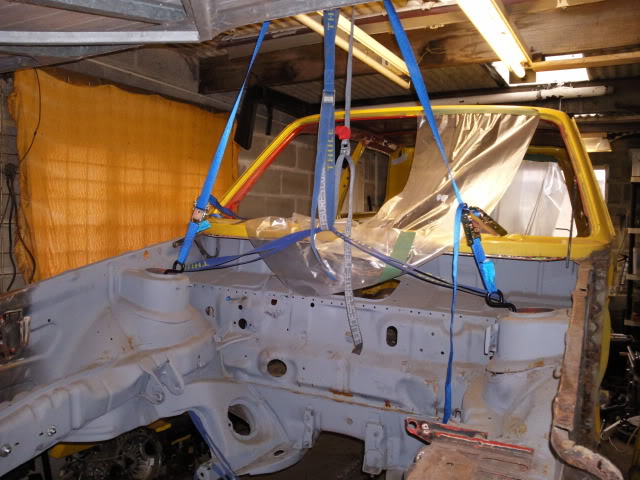
ok so with the majority of the external stripped it was time to look at the engine bay,so out came the engine


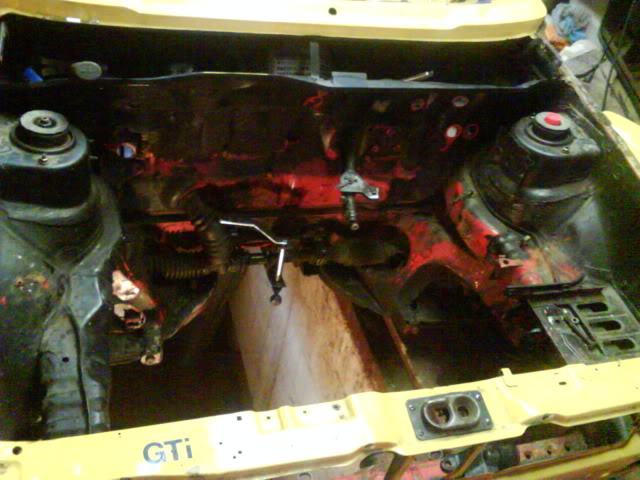
I got the engine out on my own with no crane managed to lower the engine to the floor then lift the whole car over it, not the easiest option didnt quite realise just how heavy they are.
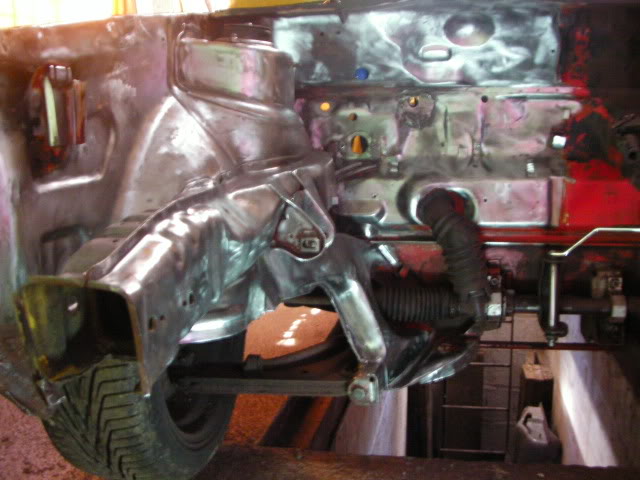
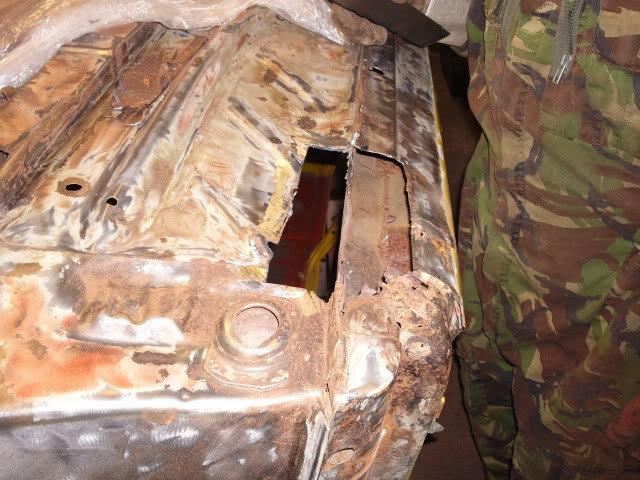
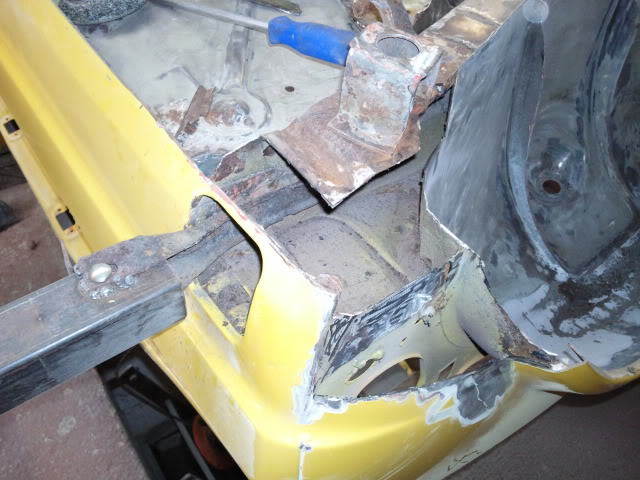
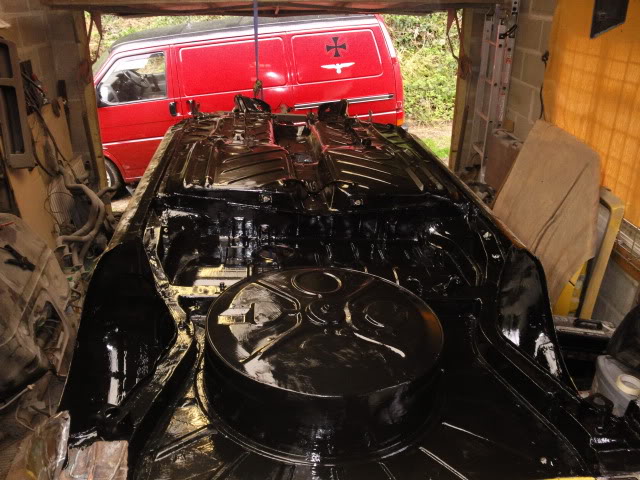
Right now all this was removed it was time to start finding what was solid and what was not so out came the grinder and drill and a whole load of wire wheels and brushes,I did remove the front pannel as this turned out to be rotten this did make access to the bay easier

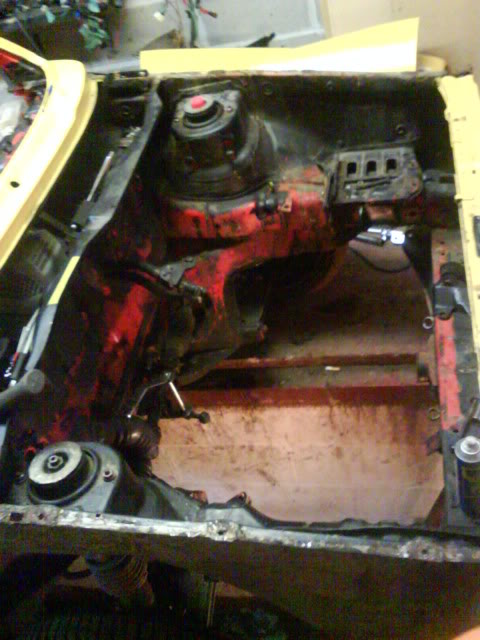
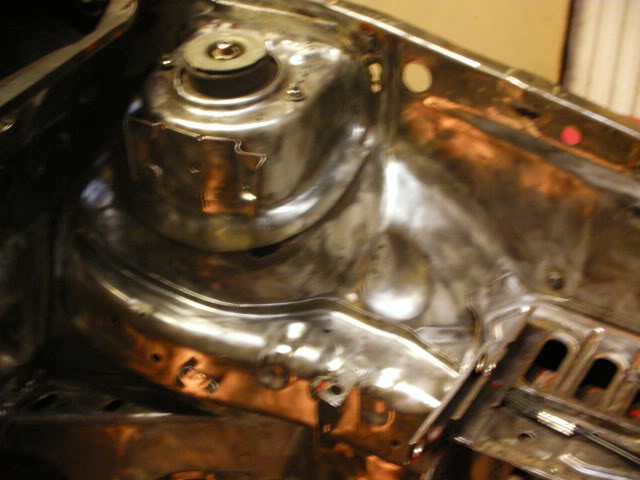
after about a 4hours 10 smokes and a lot of arm shaking and resting this is what i had
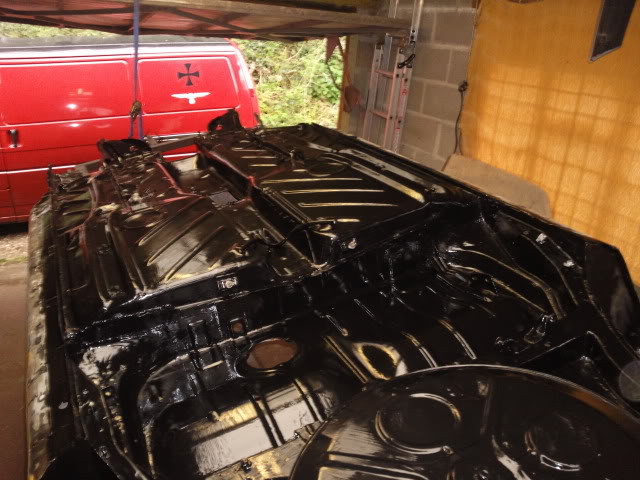
another 4 hours

more soon
Posted
Settling In

 al
al
Posted

COTM Team

chris

Chris

Posted
Settled In
Posted
Settled In
<a><img></a>
Posted
Settled In
Posted
Settled In

1.3 Driver - 1.8t in progress
http://www.vwgolfmk1.org.uk/modules.php?name=Forums&file=viewtopic&t=56551
Daily driver : e36 325 tdi se / slammed on konis and bbs rco401's
Daily offroader : discovery 1 6" lift monster
http://www.vwgolfmk1.org.uk/modules.php?name=Forums&file=viewtopic&t=56551
Daily driver : e36 325 tdi se / slammed on konis and bbs rco401's
Daily offroader : discovery 1 6" lift monster
Posted
Old Timer

Posted
Settled In
prior to primer

7 months later

not too bad even if i do say so myself. i also removed the rain scuttle pannel bit for easy of work

slapped a load of filler over the top ready for a later date. then replace both front parts of the inner wings


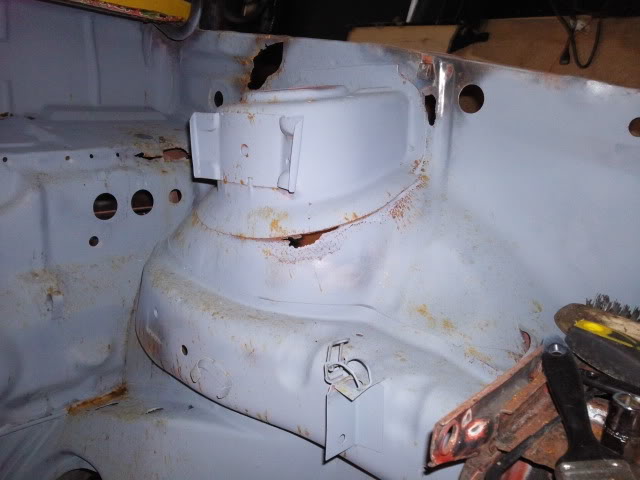
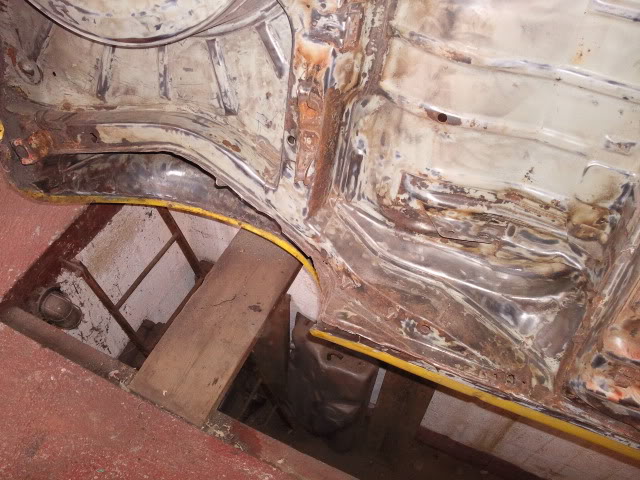
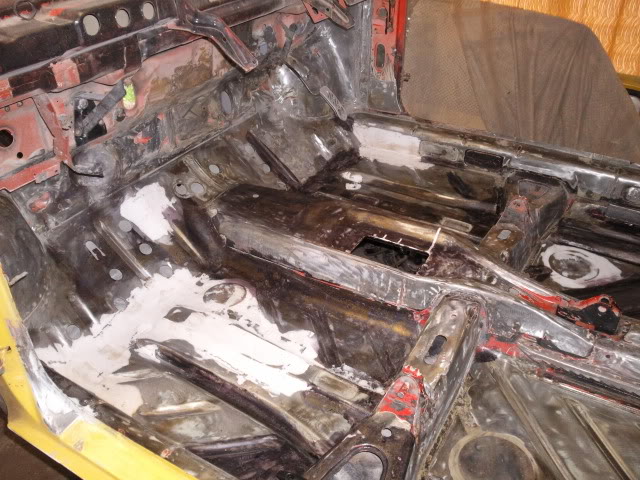
next was too strip the inside back to metal
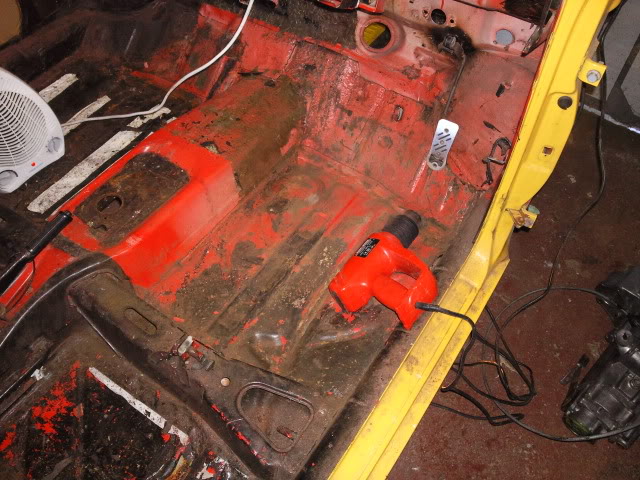


that done which luckily wasnt too bad just a few areas that need sorting main one being the drivers side floor pan and inner sill
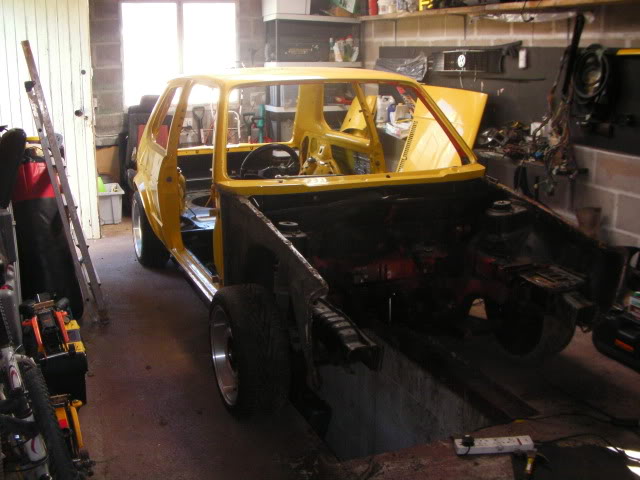
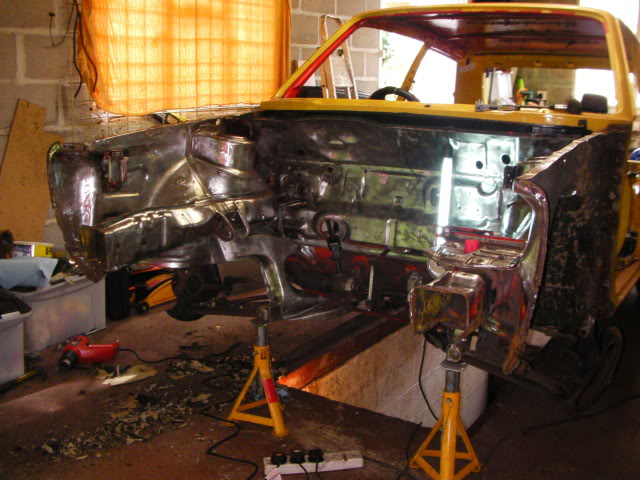
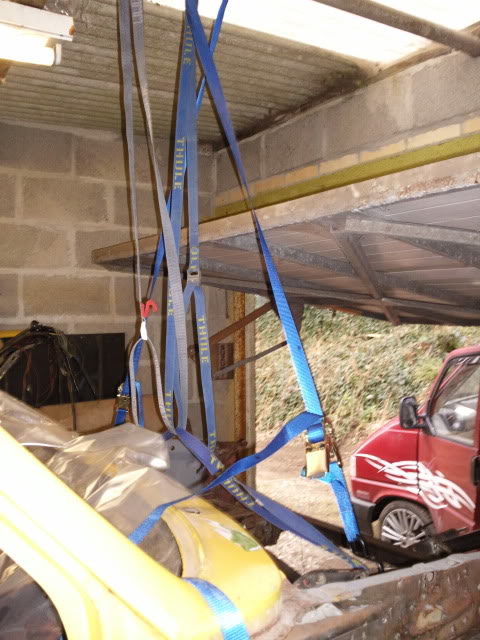
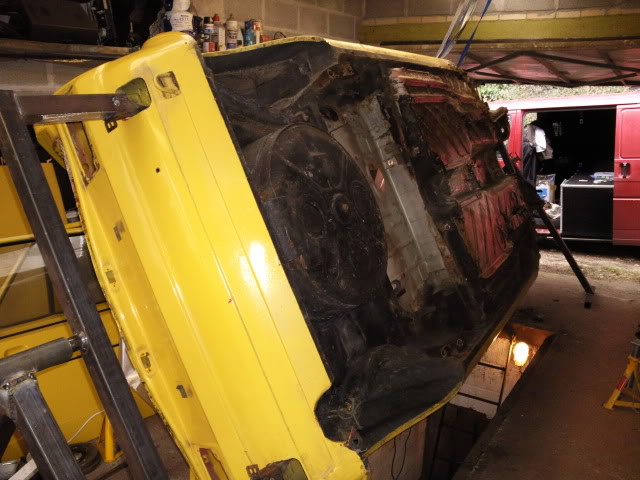
ok so i was happy for now, i made a jig/spitt up as you may have noticed which makes life so much easier i again lifted the shell on my own on to it which was no easy feat had to to use ratchet strapps and brute strength which almost dislocated my shoulder at one point when one of the straps slipped but determination is the key.
final up time for a cuppa and a paracetamol
 .
.
Posted
Settled In
dan
Posted
Settled In

forgot to mention that to strip all the inside and bottom i used a heat gun and filler knife with end ground to sharpen it up a little.
and my old set of wood chisels :cry: dont think they will ever be the same again, then the trusty grinder with its wire wheel mate just to finish off.

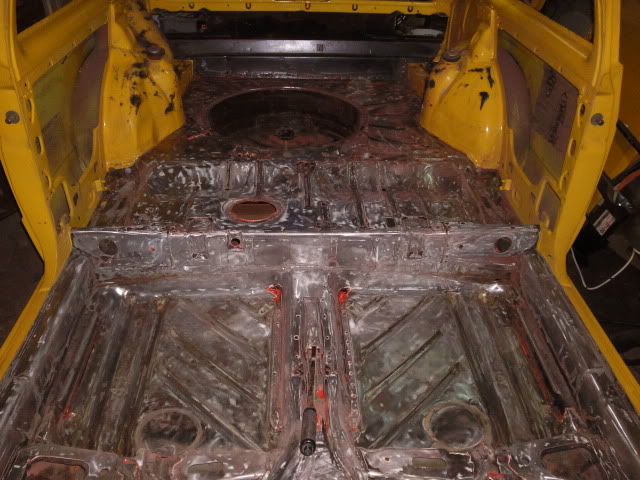
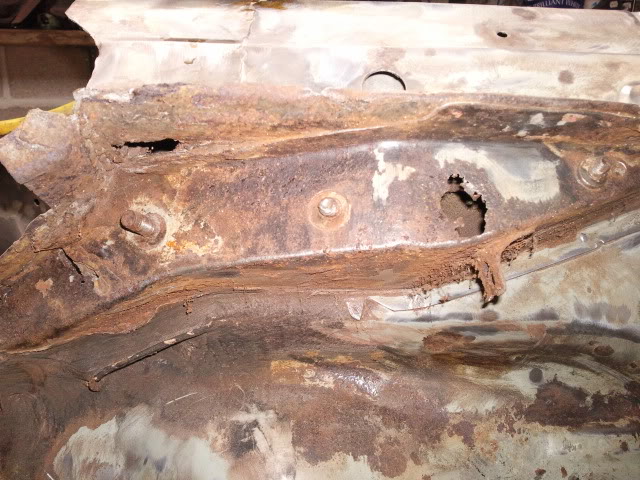
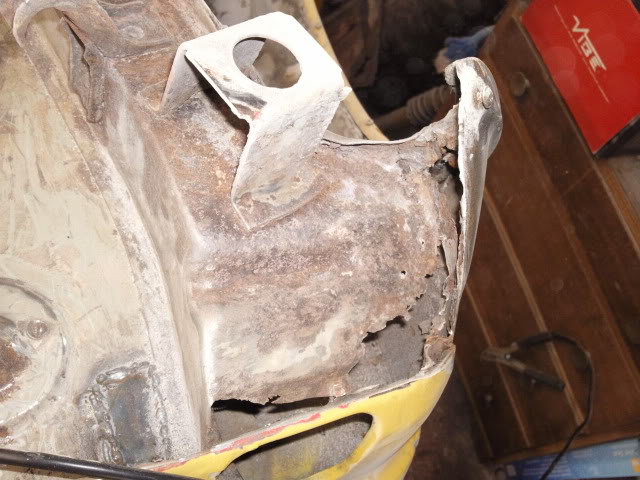
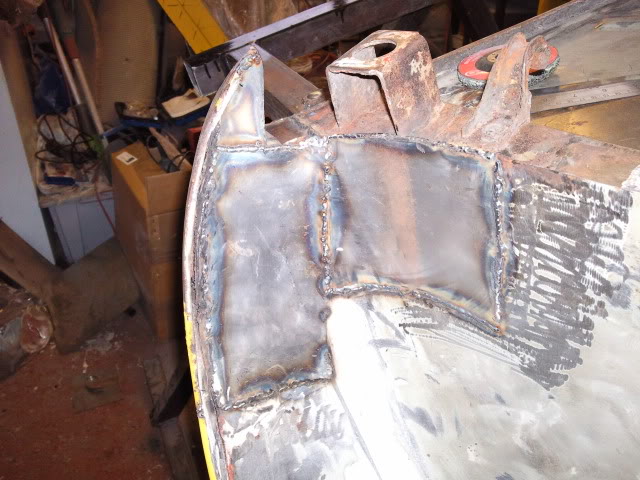
ok at this point i ran over my camer and lost a load of photos, but basically the bottom was completly stripped to reveal a world of hurt, almost to the point where i almost gave up on it, but i changed my mind and cracked on cut out a lot of rot and did what i could
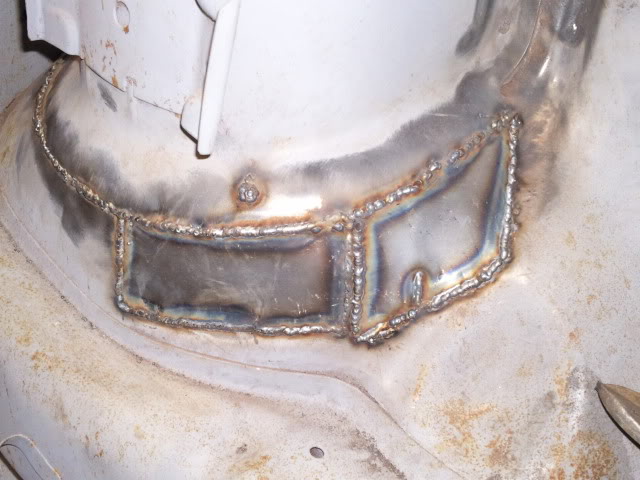
to put right , there was a few parts that i had to get a mate from work to come and weld as one part was the rear chassi mounting point and there was no waywas i was going to attempt such a vital part with my, tomy my first welder.


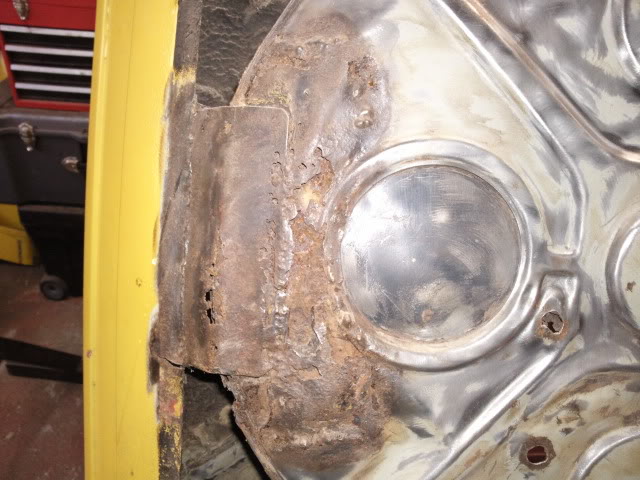

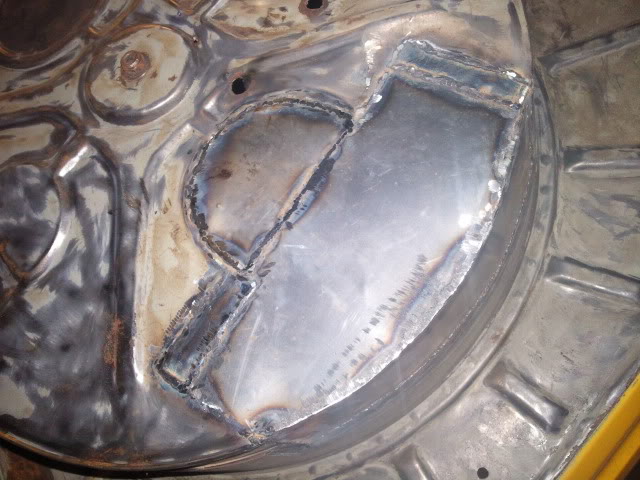
all the holes and cut outs have all been seal up now and all sorted
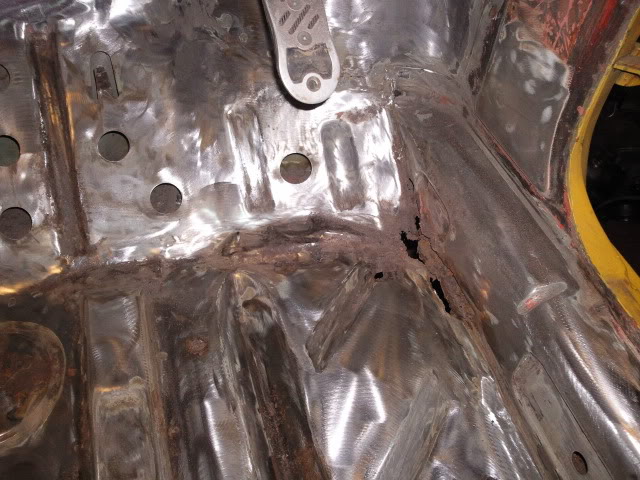
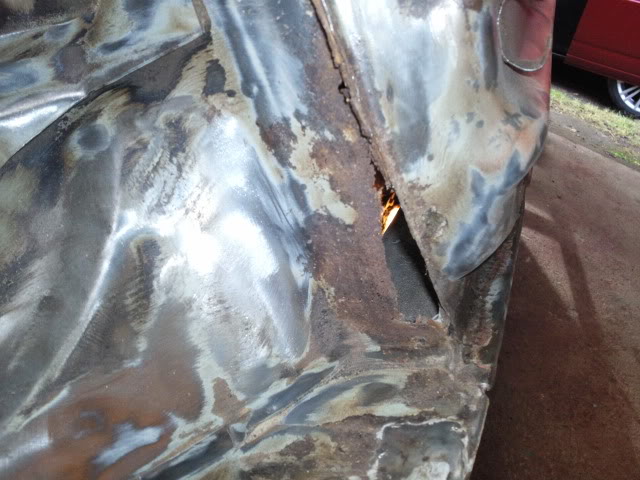
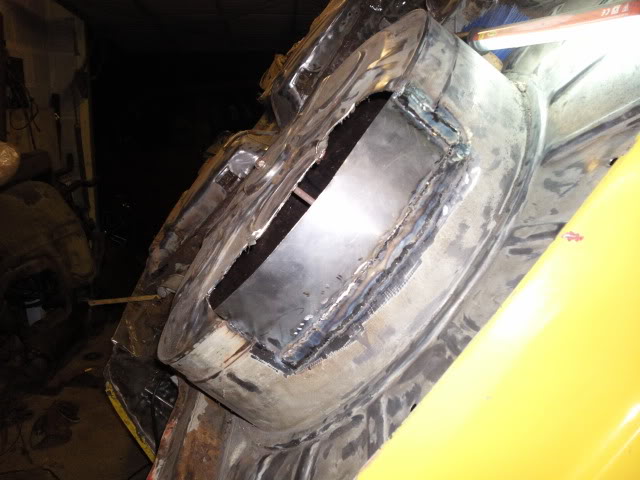
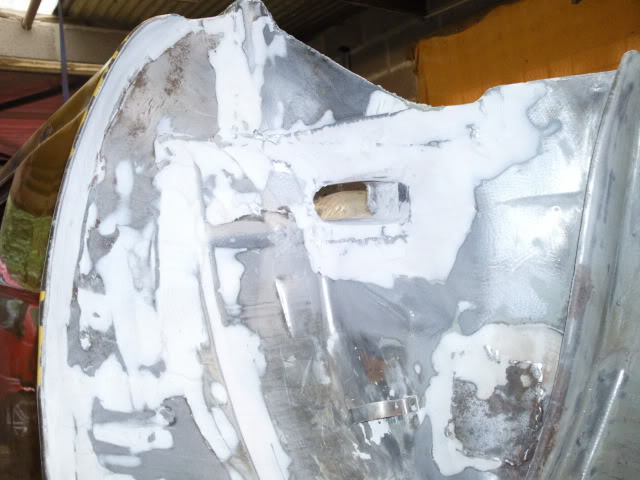
next stage was the rear end which was a messonce chopped of the bottom of the rear panneli could get to where i need

and it was pretty much the same story on the other side. Ok more to come in a day or two
Posted
Settled In
Thanks. learning every day im quite lucky in the fact that i can stand an observe someone doing something then pretty much copy what they do with in a very short time,ie the welding whatched a friend once and that was that.shepp said
Love the fact you dont have any experience but relying on determination lol! Giving me some confidence to have a go! It looks great by the way!
dan
Posted
Old Timer

Posted

Local Hero

Weber,ATS,Apex,Ripspeed,Supersprint,K&N MOMO..tbc
Posted
Settled In
brucieboy said
inspirational mate! truly! and fair play to ya! just shows what you can do with the determination you have and the good friend you have for a free garage!! good for you bud!
Cheers, the garage is a god send i imagine that it is the most difficult thing to find when doing a resto espically if you dont know how long it will take, my hat goes off to those that do it outside and just cover the car up cant imagine the pain in the backside it must be at least when ive had enough i can just put everything down and close the door, the thread is catching up with were i am now so i better get back down to it and get cracking.
Posted
Settled In
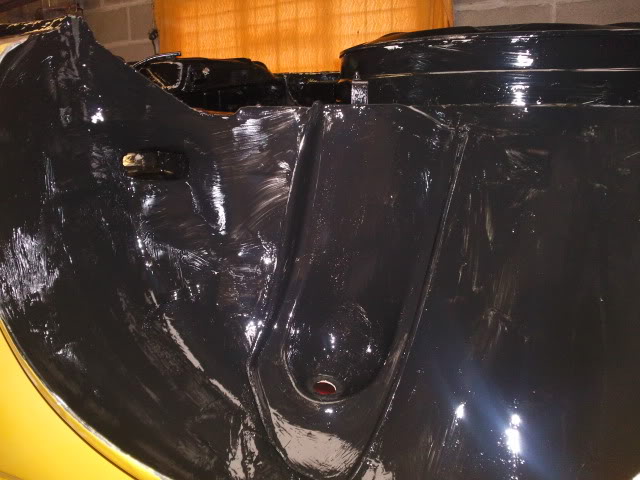
now it was just a case of tidying up bits and bobs before the the layer of mastic 121 was applied basically went round parts of the car and grinded and rubbed down then filled and one final rub down.
just quick one dont use hammerite metal paint for anything on a car especilly the underside or inner wings as i had the missfortune to find out the hard way, basically was in a rush to get the bottom done and without researching first thought this might have been an easy soloution, heres a pic of it hammerited.

looks ok untill i put stone chip guard on it and it reacted badly, i had to strip the whole bottom again not a happy bunny. Fortunatly with a grider and wire wheel it only took a couple of hours

After a couple of days on forums and website i came up with the mastic 121 2 pack chassi paint designed for oil rigs in the north sea. The really old classic car guys were impressed with it so if it was good enough for them was good enough for me,it comes in 2 tins that you mix and come with its own thinners really easy to do and on it went was really pleased with the finish.
thats as far is ive got with the chassi im now just collecting break parts and sorting out the rear beam new bushes and fresh paint on everythingshall take pics tomorrow of all the painted stuff,
welding the rain scuttle tray thing back in tomorrow and might get round to painting the inside of the floor pan shall see what time i get up
Posted
Settled In
Epoxy mastic is excellent stuff, you made the right decision there.
Good luck with the rest of the project.
Posted
Settled In

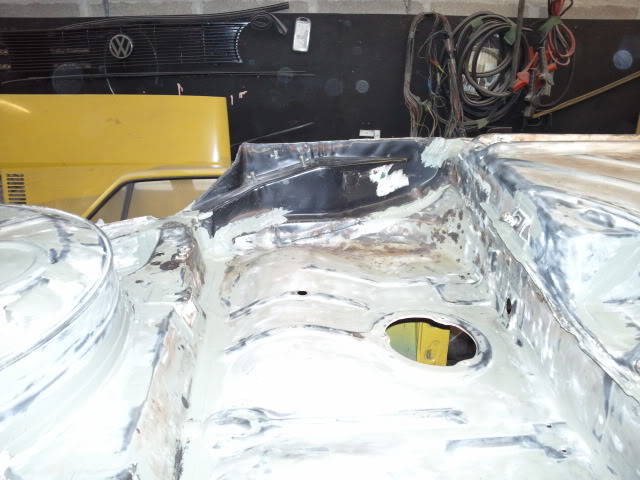
once that was done time to paint. The floor has now been sandwhiched between mastic 121 so touch wood should be good for another 10 years plus.
also welded back in the rain tray scuttle thing and seamsealed it. took the pic before seamsealer which has now plugged all the old holes. What is it actually called?

right well untill afew bits arrive i cant go any further so i stripped my rear beam and painted fitted stub axels ready for my disk conversion which again cant fitt till i get some carrier mounting bolts and few bits and bobs.

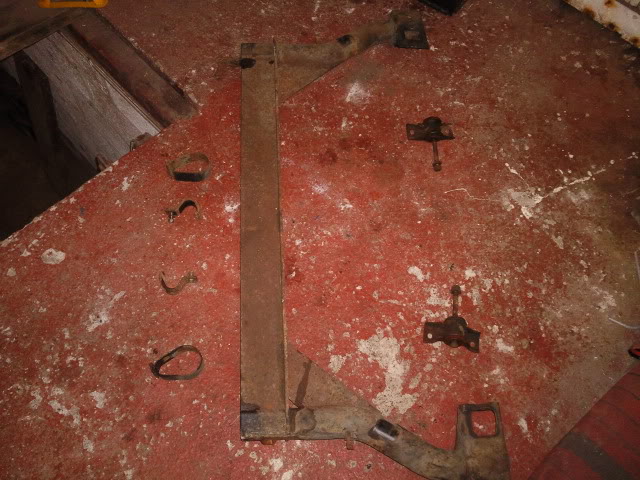

also cleaned up bonnet hinges tank straps wisbones, with new superflex bushes, did anti roll bars and brackets that fix everything in position
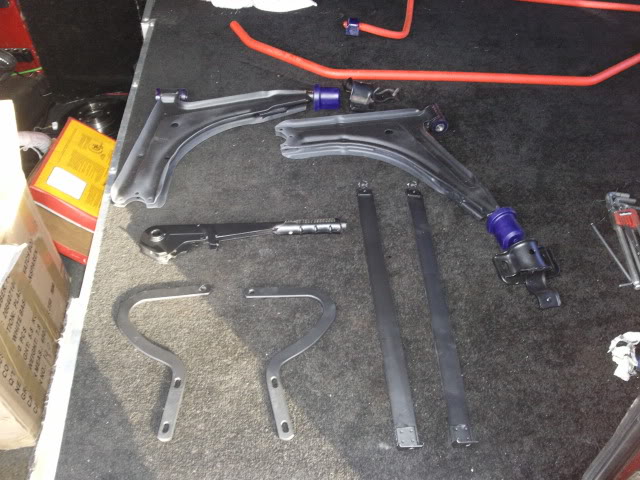
basically anything that was on the floor got picked up, cleaned and sprayed, all done by rattle can but with stone chip paint brilliant stuff.
with nothing left to do i decided to fit my bushes. Now i have read loads about how to fit these everything from hitting them hard with a hammer to presses, and all thode that have wrote about this have said what a pain in the arse it was, however it took me 10 minutes from start to finish and that was getting everything out and putting it away, this is how i did it
first make sure you have grease a threaded bar, nuts to fit bar annd some washers as in pic and 2 spanners
right grease the bush
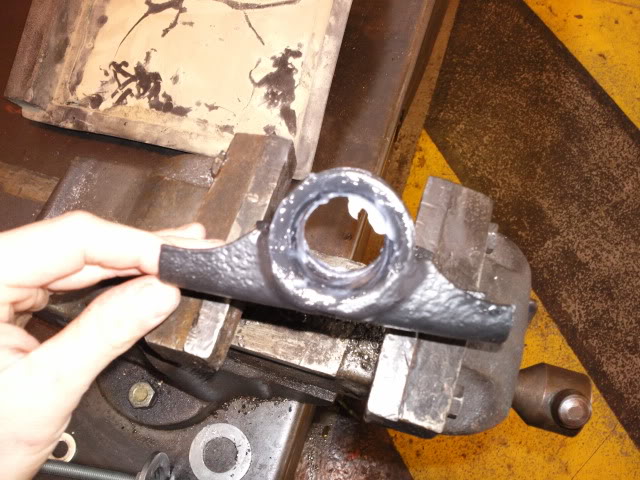
next insert bar through bush and bracket, add washers and nut on to the bar, the washers closest to the bracket need to be larger than the hole itself, now start to tighten up nut untill the bush is firm up against the bracket
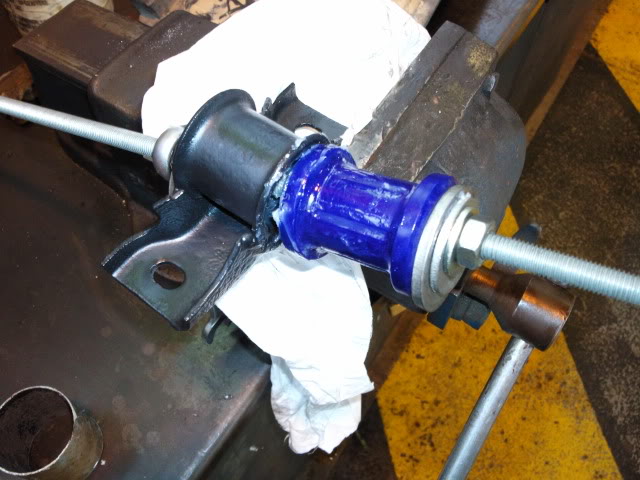
now what you want to do is push one side of the bush in to the bracket and just tighten up the nut on one side the bushe will disstort a tad but it will slide through and pop out through the other side.
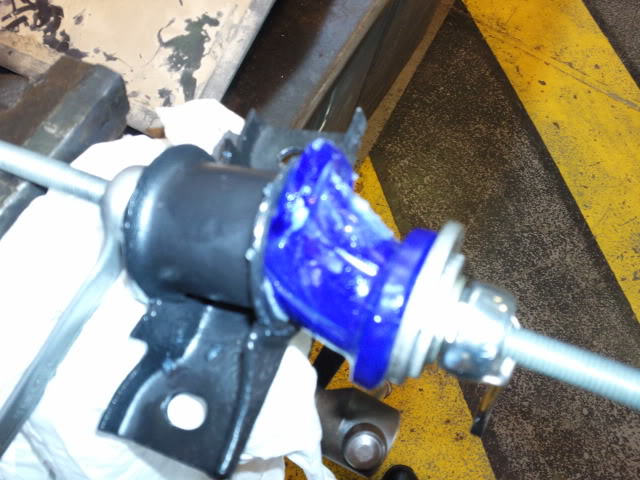
and pop there she goes
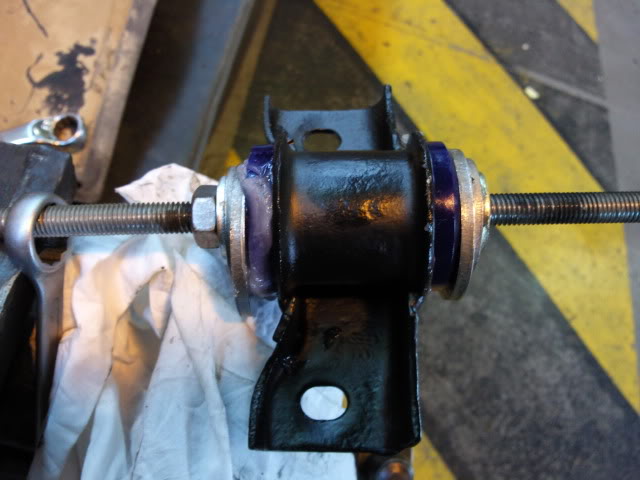
you dont need a vice you can do this stood up easy as.
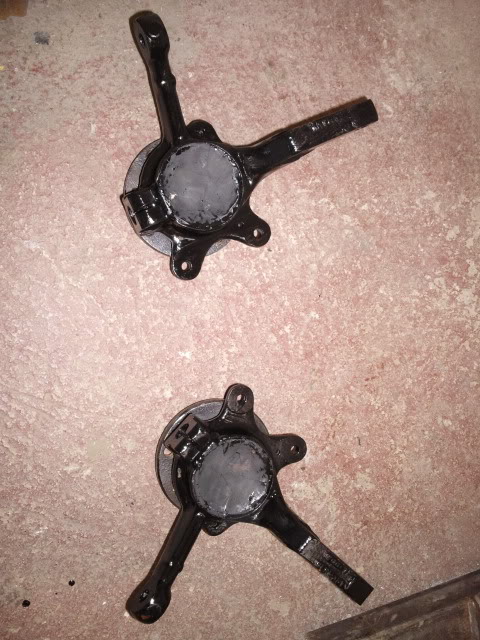
the last thing today was to paint my hubs
so thats it for now just waiting for mister post man so i can get the few things i need before i bolt up the beam and front end and put it back on its wheels for the first time in over a year, whatch this space
Posted
Old Timer
Also, I love the yellow colour. Definately worth keeping (or respraying in the same), different and very cool.
Can't wait to see more pics!!
Downs
Posted
Settled In
cheers fella its a lot of work especially as i have done 99.99999% of it myself, but now its on the rebuild i can actually see the light at the end of the tunnel, the colour is porsche gt yellow, still undecided about the colour at the moment im planning on a candy apple red well its actually vaxhaull flamingo red which i think would look awsome on a mk1, but i might change my mind again.Downster32 said
Wow!!! Great work, really inspiring. As soon as I can find a garage and a cheap daily runner I'm going to follow your route and strip and redo everything.
Also, I love the yellow colour. Definately worth keeping (or respraying in the same), different and very cool.
Can't wait to see more pics!!
Downs
0 guests and 0 members have just viewed this: None.