


Head gasket remove and install guide?

Posted
#1238387
(In Topic #148083)

Settled In


Head gasket remove and install guide?
1.3 carb
Posted
Local Hero

Bert
Thats not a rod knockin,its a diesel stupid! floppy top and 1 tin top 
Posted
Settled In

Just a few issues with her at the mo
Posted

Local Hero
Let's start with my example, my head gasket was weeping oil out of the bottom corner:
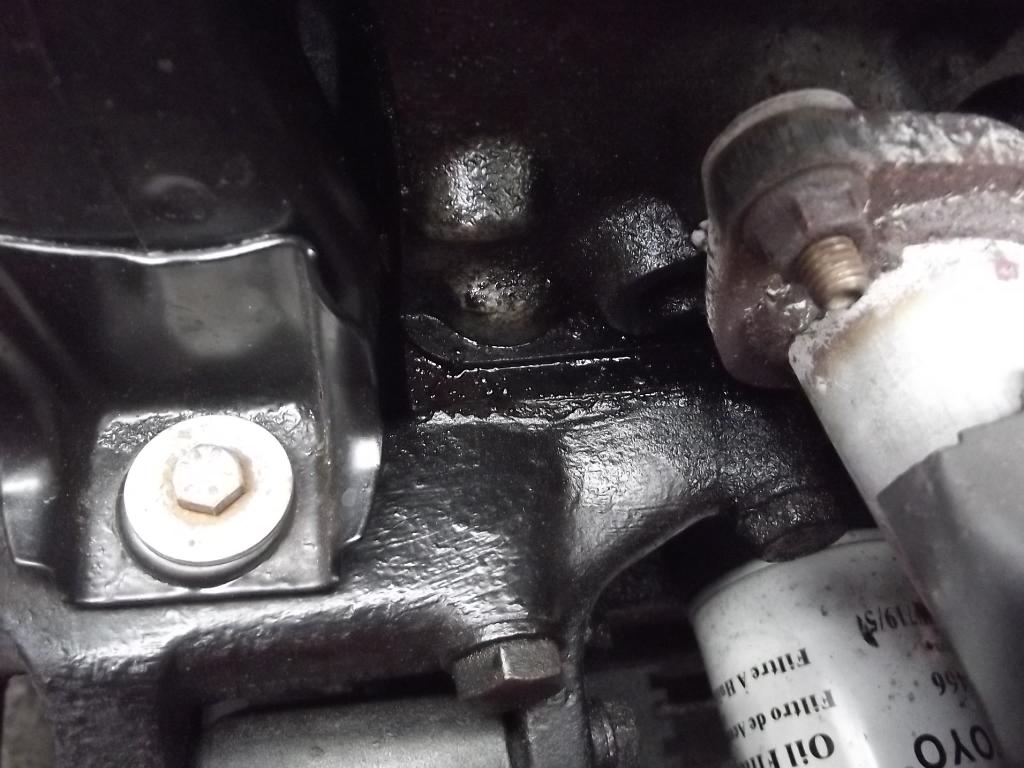
So it wasn't urgent - but I got annoyed with using more oil than petrol.
I intended to leave the carb and inlet manifold intact - so all I needed was:
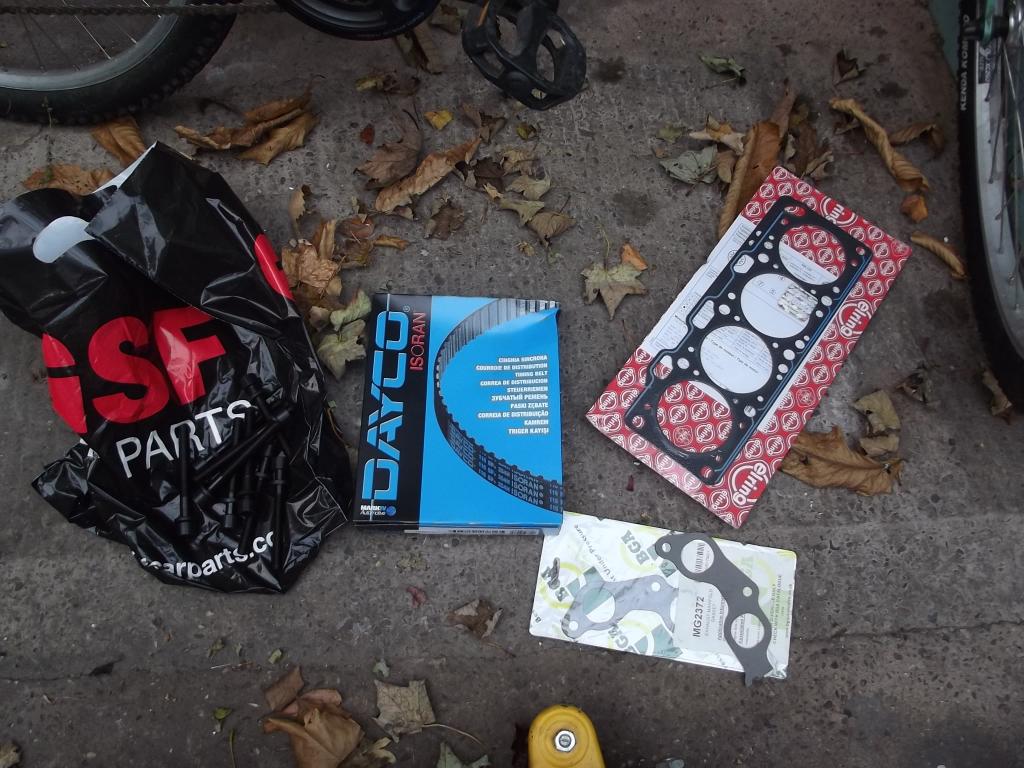
Because the cylinder head is being removed, you'll need a new set of head bolts - mine cost �1.20 each from GSF.
first, turn the engine to top dead centre, by lining the crank pulley up with the triangle timing mark on the engine block. Then, take the belts off, slacken the bolts that hold the tension in the alternator - then shove it towards the back of the car and remove the alternator belt - if you're keeping it mark the rotation on the belt for reference.
To remove the cambelt, remove the cam belt cover (3 bolts, front, dipstick and back bottom), slacken the 3 bolts around the water pump and use a chuffing great lever (I used a screwdriver in a lug in the water pump) and release the tension. The cam belt should now thread between the crank pulley and the engine (it's unlikely you'll get the crank pulley off without disturbing TDC).
Get a bucket! You'll need to drain the coolant, if you want to keep it put it somewhere safe, then take the top hose off the engine. Take it off at either end, I took it off at the rad, 'cos it was easier.
Take off the cam cover and keep safe - the gasket will need replacing, another GSF part.
Take the airbox off, undo the 2 bolts inside the box, and pull out of the way slowly. there's 3 pipes you'll need to take off. the large oil breather pipe, and the 2 vacuum pipes on the orange diaphragm - remember which way round they go (the notched pipe goes to the distributor).
You'll now need to take everything off the carb and engine before undoing anything else. Choke cable; throttle cable; fuel pipes (tape over the end of them so that you don't lose any fuel); and the 2 or 3 connectors that attach to various bits around the spark plugs (remember/write down where they go!). Finally, take the centre plug lead out of the distributor cap, and move out of the way - it attaches to the ignition coil.
Have a fiddle around underneath the carb and you'll find the downpipe that carries the diverted gas from the gas-heated cylinder head, these are 2 13mm nuts/studs, one either side of the flange - take them off.
On my car, I've got a 4-2-1 branch manifold/downpipe, so I took the manifold off the head - it's your choice whether you do this, or take the downpipe off the manifold - note that the cylinder head is bloomin' heavy with the inlet on, so you might want to keep the weight down!
Now comes the tough part, roll your sleeves up and get the multi-spline tool that you've obviously got loads of. :roll: Undo the cylinder head bolts in the following order
|——————|
| 1 7 10 6 4 |
| 3 5 9 8 2 |
|——————|
That's the most important part!
There's a 10mm bolt that's hidden behind the cam sprocket that holds the inner cam cover to the head, take it out!
You SHOULD now be able to rock the cylinder head loose from it's seal on the gasket. When you lift it, put a load of cloths on something like the slam panel so you can rest it before you put it whereever you're putting it. Be aware that it'll be full of oil, so some will leak everywhere you don't want it to.
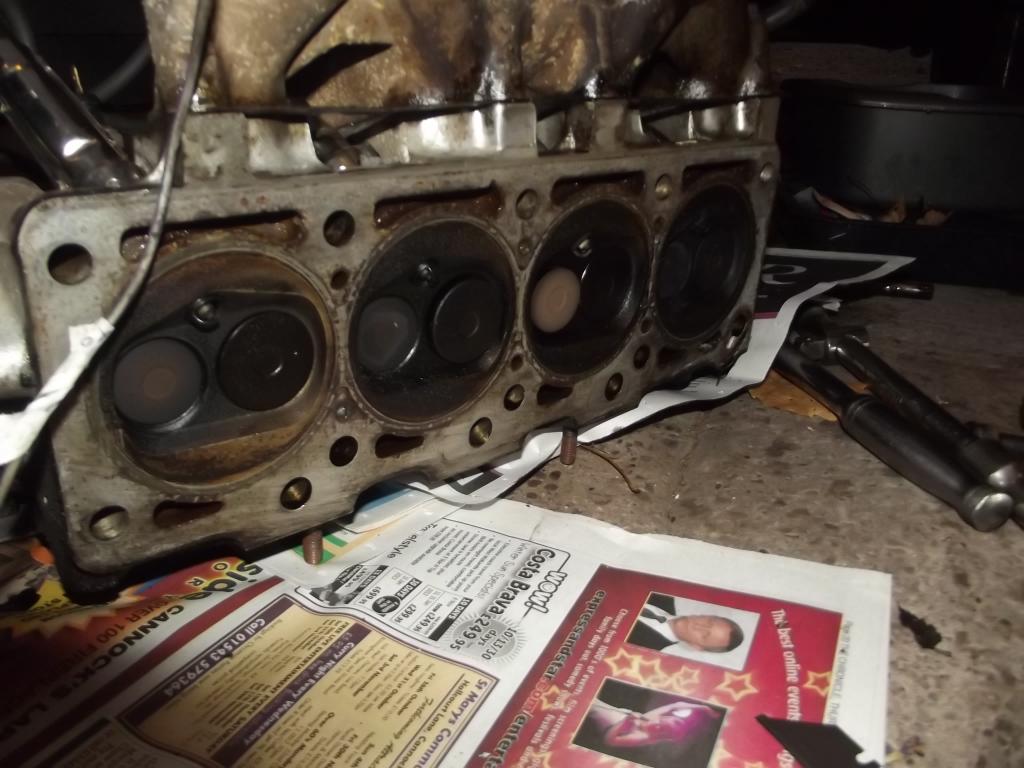
You should be looking at these images now:
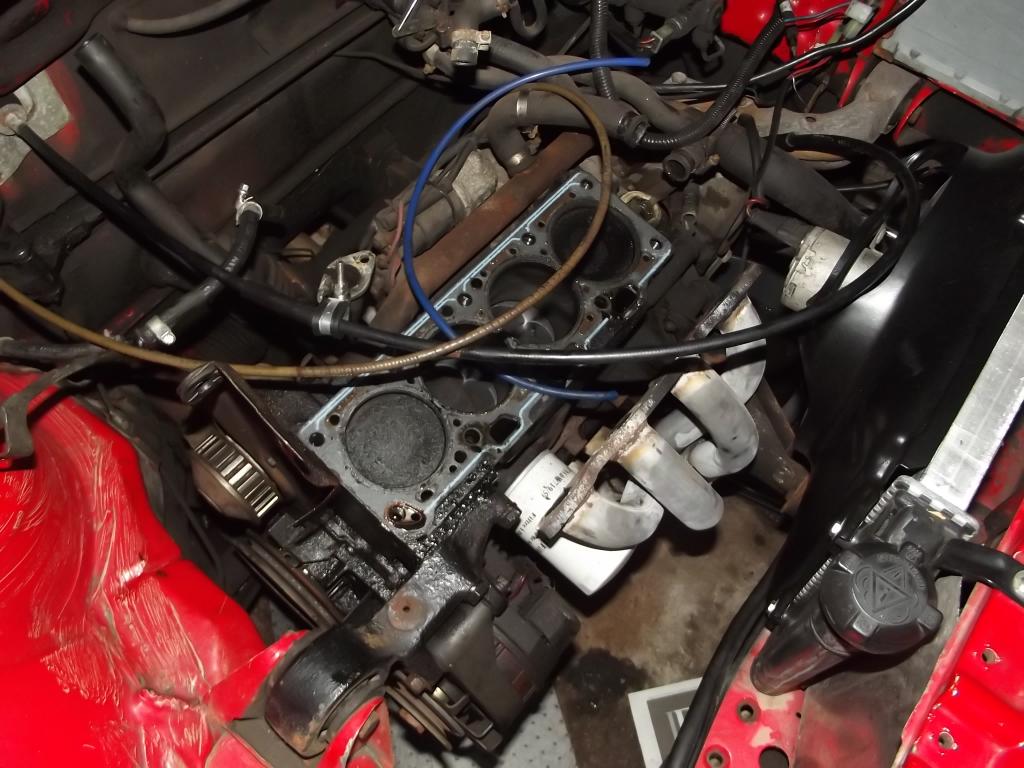
Peel the head gasket off the cylinder block, it doesn't really matter if it breaks apart, 'cos you'll clean up the surfaces next.
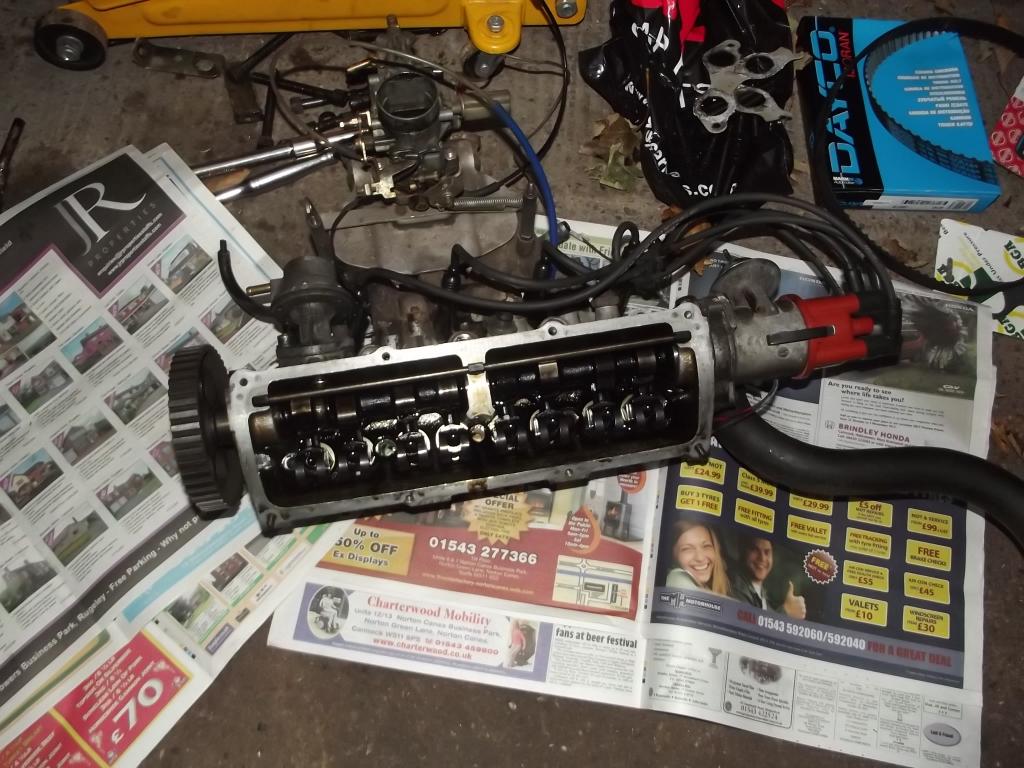
Use a razor blade to gently scrape off the gunk from the mating surfaces, but try not to damage the valves or plugs on the head:
Scoop out the rubbish from the pistons if you've got any, and it's a good idea to run a rag around the bores to take out any grit etc.
Before anything put something flat across both surfaces and check they're straight. They should be, but you never know - if they're warped, they'll require skimming/scrapping.
On mine, This was left behind from the gasket:
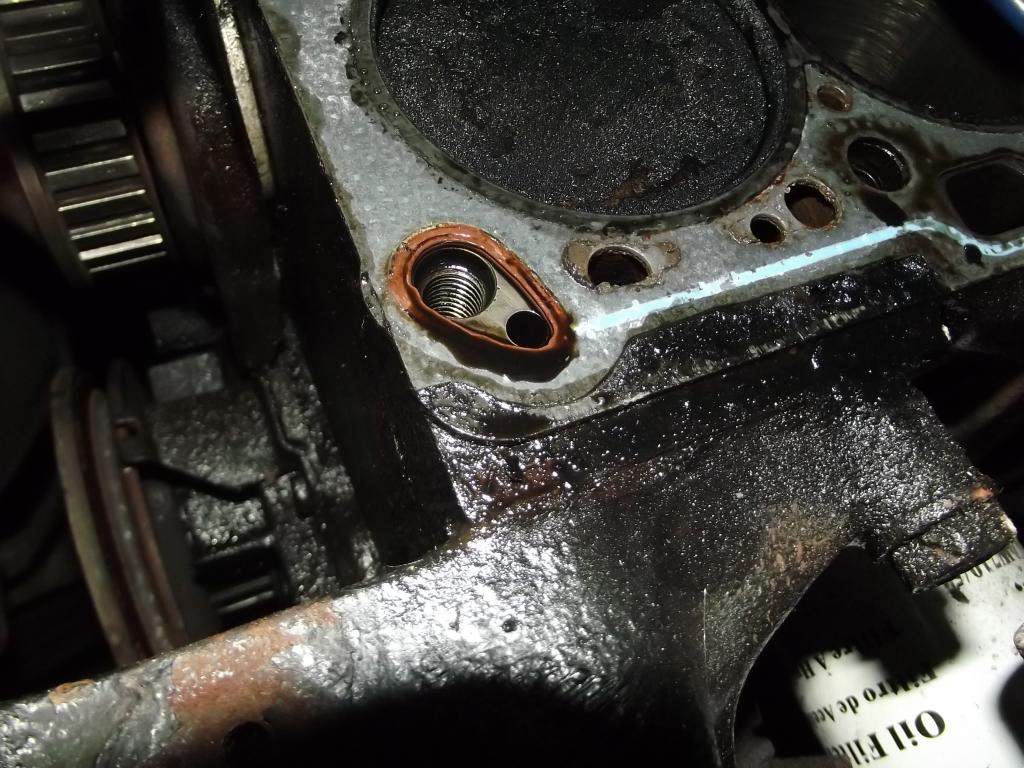
I thought it was part of the head, but scrape it off - the new gasket will have one.
Now you're ready to put everything back together - basically follow this guide backwards!
When tightening the new head bolts, dab a bit of oil on the threads and tighten them up as follows:
|—————-|
| 10 3 1 5 7 |
| 8 6 2 4 9 |
—————–|
First, tighten them all finger tight;
Then tighten them until they're fairly tight, but not very tight (this isn't critical)
The critical part is to tighten them all another 180 degrees, you'll go red in the face, unless you're strong (I'm not!)
Things to look out for:
Don't trap any cables/pipes between the surfaces, you'll break 'em (trust me!)
be careful when you're hooking up the 3 fuel pipes back to the Y-piece, you'll break it (trust me!)
check, double check and triple check that you've connected ALL of the connectors and pipework.
When you're fitting the cambelt on (a new one, I hope) check that the cam sprocket lines up with the TDC indicator (a bit of metal on the inner cam cover - at 6 O'Clock.
When you're tensioning the belts, you might want to get a mate to hold the tension whilst you tighten the bolts, makes things easier.
Use some sealant when you're putting the exhaust pipes back on, use plenty!
On first start up, don't rev it too hard, let it stand and tick over up to temperature and check for leaks etc
After a few days/miles double check the bolt tension, just make sure they're still �ber tight!
Aaaaaand that's it!
Hope this helps!
EDIT: turns out this isn't all that basic!
1983 Golf 1.3 Driver:

0 guests and 0 members have just viewed this: None.