


removing clipper kit, bumper etc

Posted
#948605
(In Topic #111866)
Local Hero

removing clipper kit, bumper etc
how do you remove the front bumper cover on a clipper, plus the rear bumper and side skirts? please, if any one got piccies on how to do it even better, much appreciated, as I have re painted the front bumper today and now want to do the Metal work and the section under the grill (some stone chips).
Thanks
"Making Cabbies More Beautiful One Roof at a Time"�
Posted
Local Hero
"Making Cabbies More Beautiful One Roof at a Time"�

Settling In

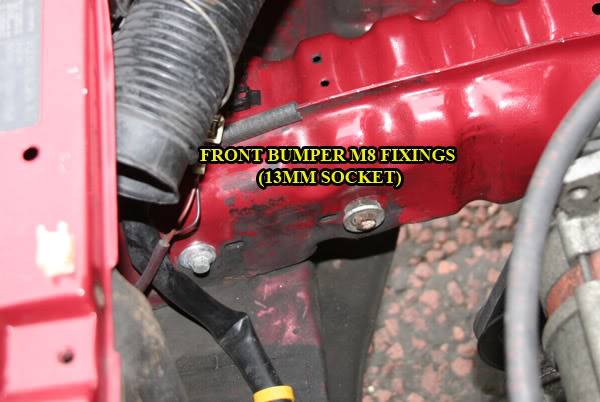
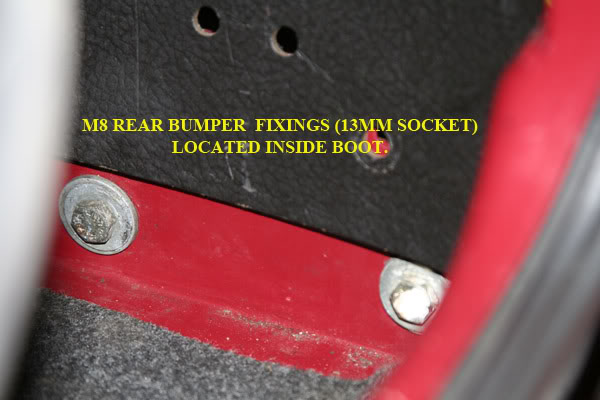
The rear bumper securing bolts are located in the boot and can be removed very easily, after removing them just ease the bumper back away from the car "providing you have already removed the screws from the inner arches.
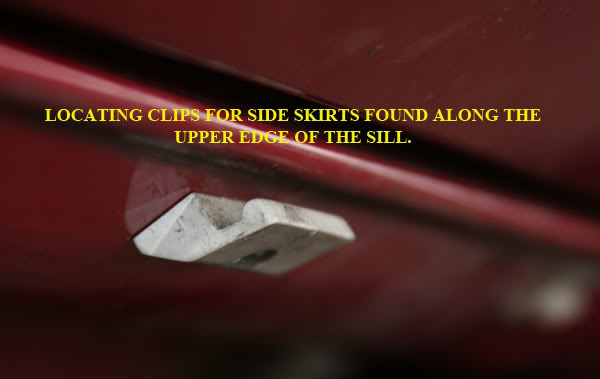
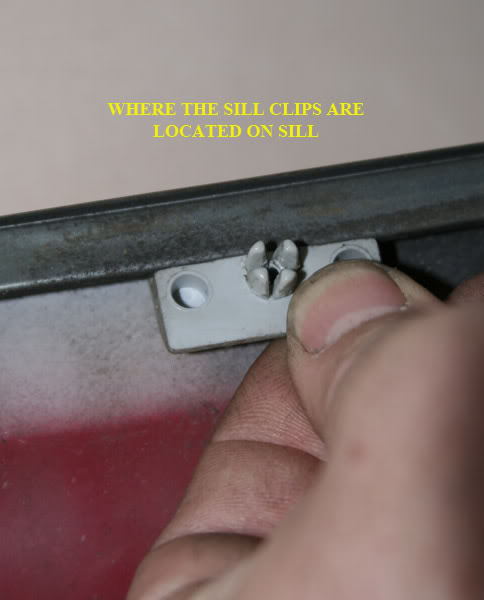
The arches can be a nightmare and care should be taken or they can crack "as I found out" Before removing them get the side skirts off 1st as one of the fixings for front arches is behind the sill skirt, do this by undoing all the self tappers from the underside of the sills then it is a simple case of lifting the skirt up over as they are located on clips along the upper face of the sill, you may have to use your palm to gently nudge the skirt in an upwards direction, just spend a little time and go easy.
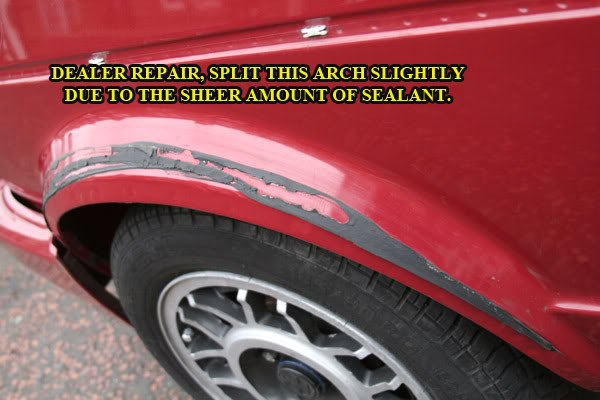
Now the arches!! Take care as the VW dealer decided to use a sikaflex type sealant and bonded them to the body, undo the screws around the arch and one behind the skirt and drill out the rivets but before trying to pull the arch from the car ensure that they are not cold (this makes them brittle and I found warming them with a hair dryer eliminated the risk of them splitting) one of mine had been re-fitted after a dealer repair to a lower rear quarter and the fitter had smothered the inside with sealant so I had to gently prize the arch off whilst getting behind with a stanley blade and cutting the sealant but sadly I already cracked it.

I was pleasantly suprised to not find any corrosion anywhere, before reffiting I plan to wax oil every hole and area that is covered by the kit.
Hope it helps a little.
<a href="http://www.golfcabrio.co.uk">New Golf Cabrio Forum NEEDS YOU</a>
<a href="url">http://www.golfcabrio.co.uk</a>
<a href="url">http://www.golfcabrio.co.uk</a>
Posted
Local Hero
Thanks again.
"Making Cabbies More Beautiful One Roof at a Time"�
0 guests and 0 members have just viewed this: None.