


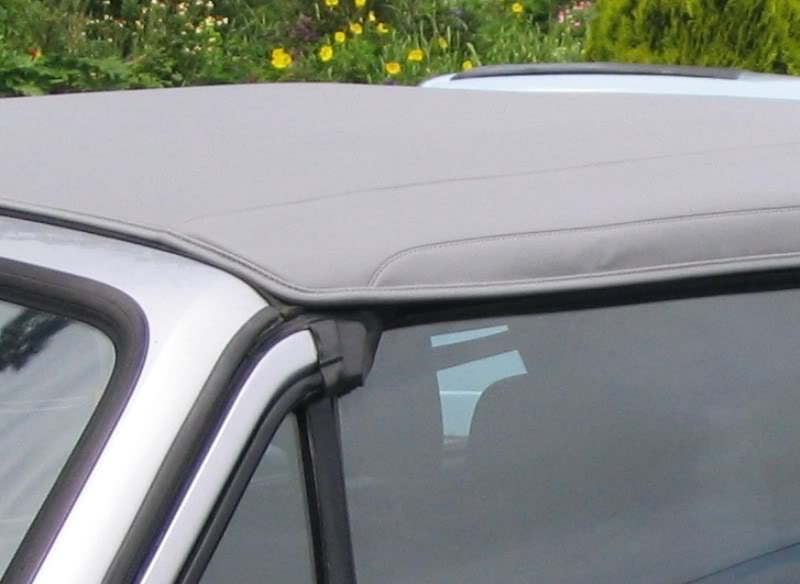
.How To Replace that Cabriolet Hood .

Posted
#667084
(In Topic #80327)
Old Timer

How To Replace that Cabriolet Hood .
Version 1.0
This guide is based on a car with a manual hood mechanism. There are minor differences on a car with a powered roof not covered by the guide. It might be advisable to turn the T shaped screw on the pump to allow the hood to be raised and lowered manually. This will allow the fitter to judge the tightness of the hood more easily.
Please bear in mind that fitting takes a fully experienced fitter several hours & is not a job to be undertaken lightly. We cannot take any responsibility for damage to the hood or vehicle. Howsoever caused, as a result of following these instructions.
Preparation
Tools
?� �Heavy Duty Staple Gun
?� �Riveter
?� �Craft knife
?� �Screwdrivers flat and cross head various sizes
?� �10mm spanner (preferably ratchet type)
?� �5mm spanner - to fit side cable (size may vary)
?� �Bit of wood shaped like a bolster chisel at one end and flat at the other.
?� �Digital camera!
Materials
?� �Brushable contact adhesive glue (preferably Dunlop S1358) ? or other brand that has high melting point.
?� �Silicone sealant
?� �Staples
?� �Rivets
?� �Tubs to keep screws, etc. from getting lost.
Part Nos.
?� �Rear window frame - 155 871 423
?� �Rear window rubber - 155 845 521
?� �Side seal gaskets - 155 871 431
Links
www.carhoodwarehouse.com
www.carhoodsdirect.co.uk
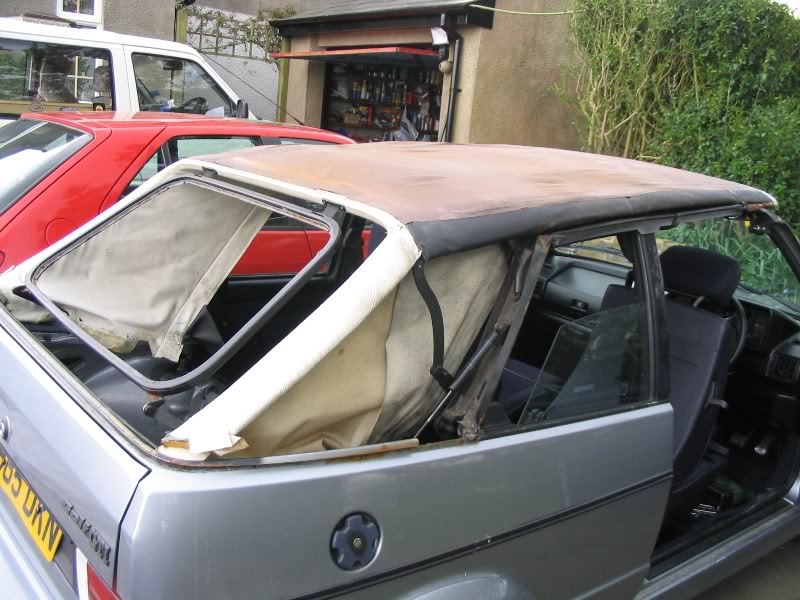
Get a good feel for how the top fits to the car. Take pictures as you dismantle to refer back to if you feel there are areas that need more detail than the pictures show in this guide.
Removing the rear seat isn?t essential but it might help access some of the frame mechanism more easily. It might stop it getting dirty anyway. If you feel the need to, remove the base of the rear seat by removing the two screws at the front and then lifting the base out of the car. The backrest can then be folded down flat if necessary.
Move the two front seats forward as far as they go and tilt them forward.
Remove the rear parcel shelf.
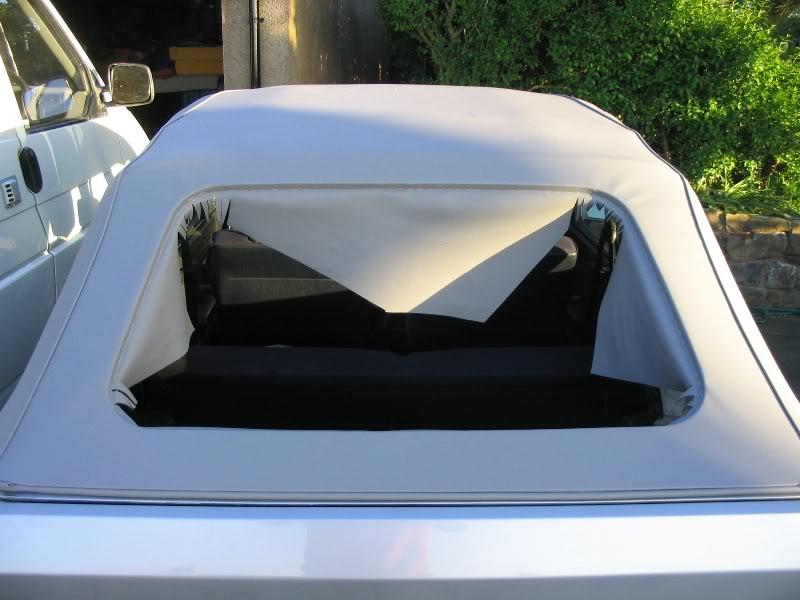
1.� �Remove the wiring to the headed rear window and then remove the window.
To do this curl the lip of the window?s rubber seal away from the frame in one of the top corners and push against the glass in that corner at the same time. Ease the seal lip away from the frame all the way along the top of the window whilst pressing against the glass. Push it out just so far so that you can get outside the car and pull the window the rest of the way out. Or get a mate to catch it if you like!
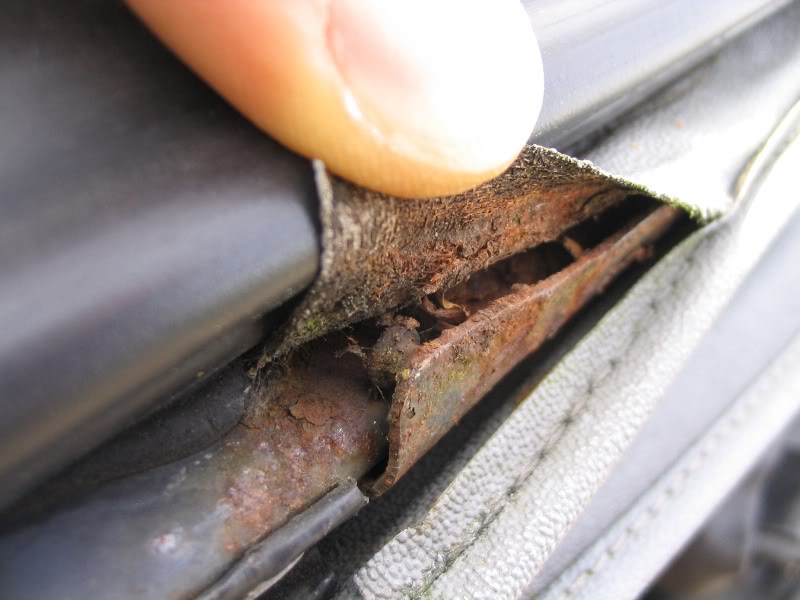
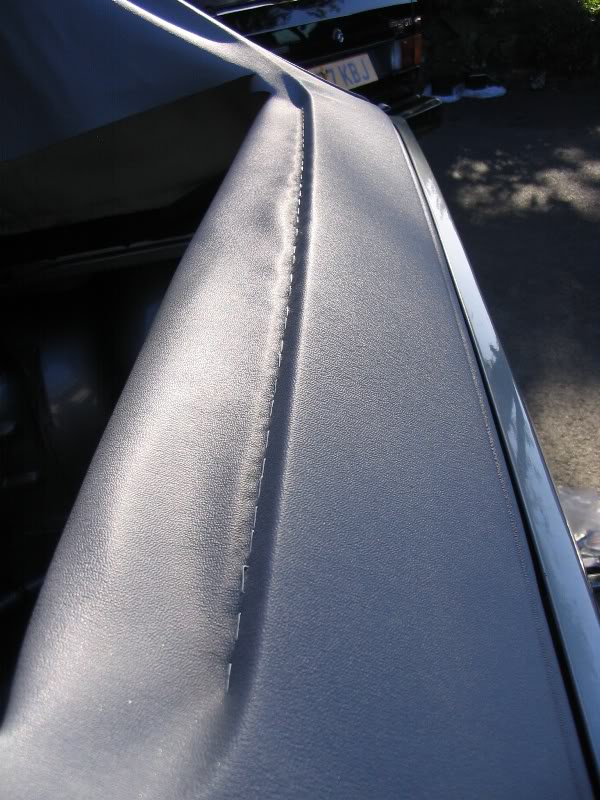
2.� �Lever out the staples that attach the hood to the window frame with a screwdriver or if the frame is so rusty that it needs replacing just cut the hood off the frame.


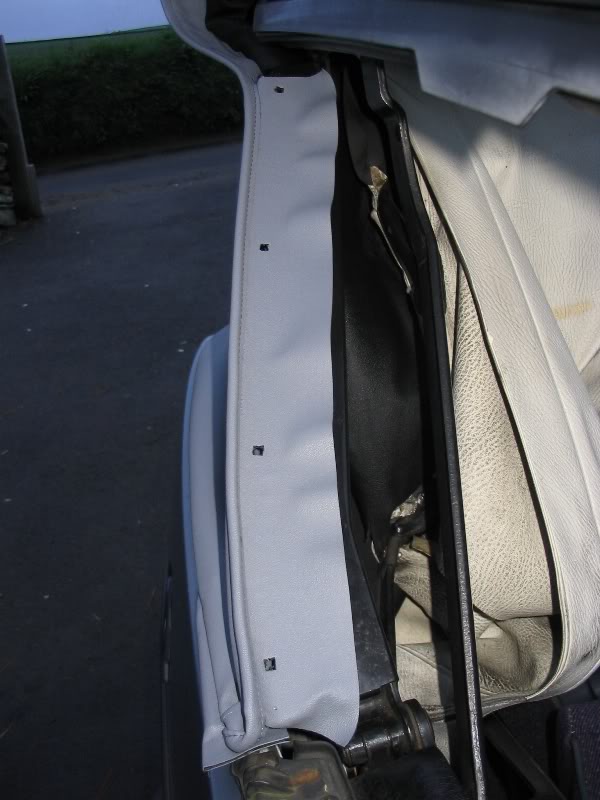
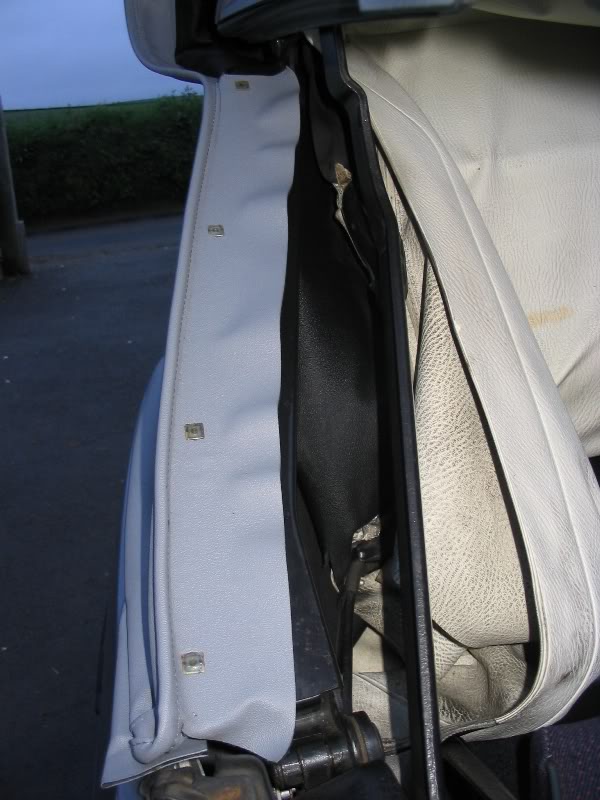
3.� �Move to the front of the car and open the hood fully. Remove the front and rear side seals. There is no need to slide the seals out?

The front one has a screw to remove but after that?s taken out the seals can just be pulled off. Do this carefully so the black plastic clips at the ends of the seal brackets don?t snap.
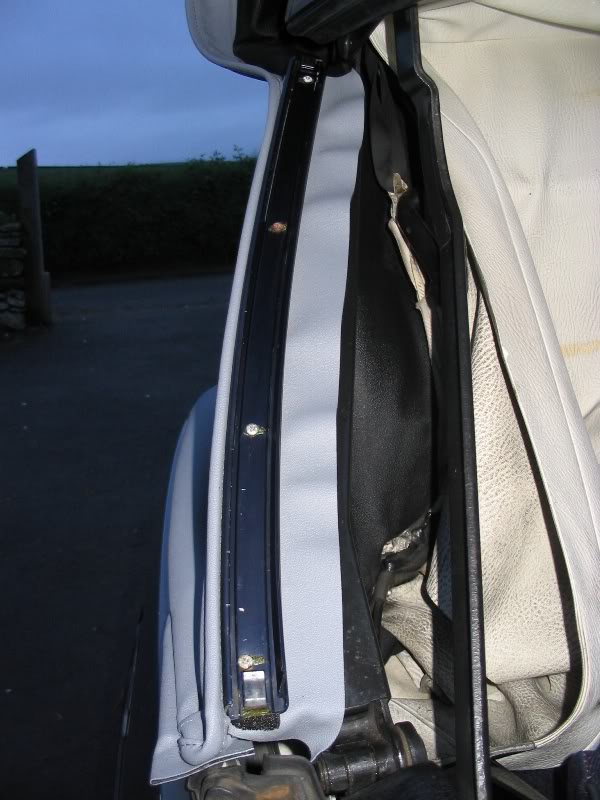
Once the seals are off unscrew and remove their brackets and then lever out the transparent screw clips from the hood frame where necessary.
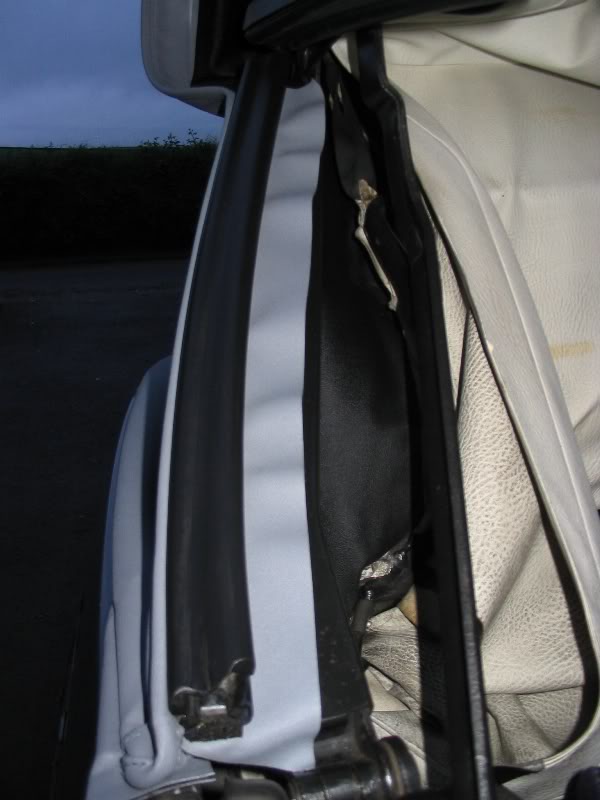
Pull the hood away from the sides of the frame.
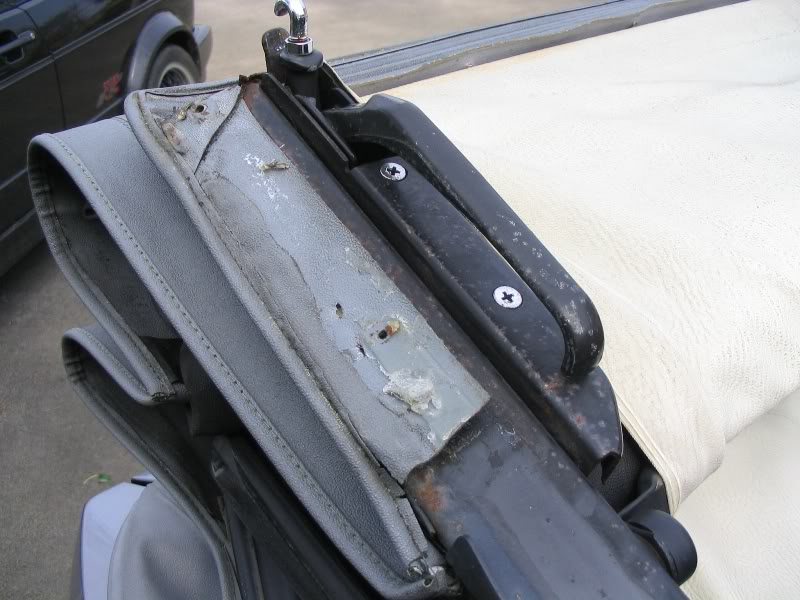
4.� �Unscrew and remove the metal strip and the two edge pieces that fasten the hood to the frame at the front of the hood.
5.� �Close the hood half way and drill out the rivet holding the strap in the centre of the hood to the frame.
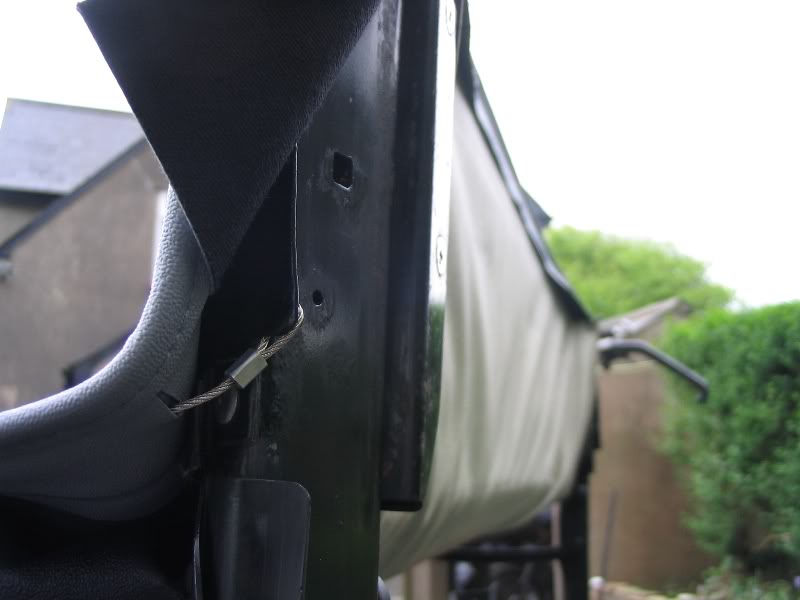
6.� �Detach the side tension cables from the rear spring and the front hook if they are still attached. I didn?t have any cables!
7.� �Pull the front pocket of the hood away from the frame.
8.� �Open the boot, reach inside and detach the base of the headliner from the metal spikes on the under side of the two parcel shelf supports. Tuck the headliner up over the rear window frame to get it out the way while you work on detaching the rear cable in the next few steps.
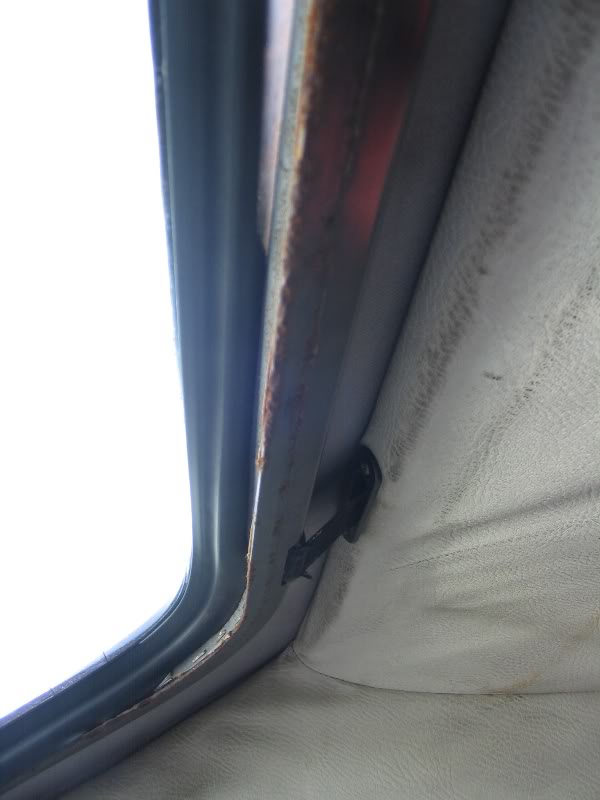
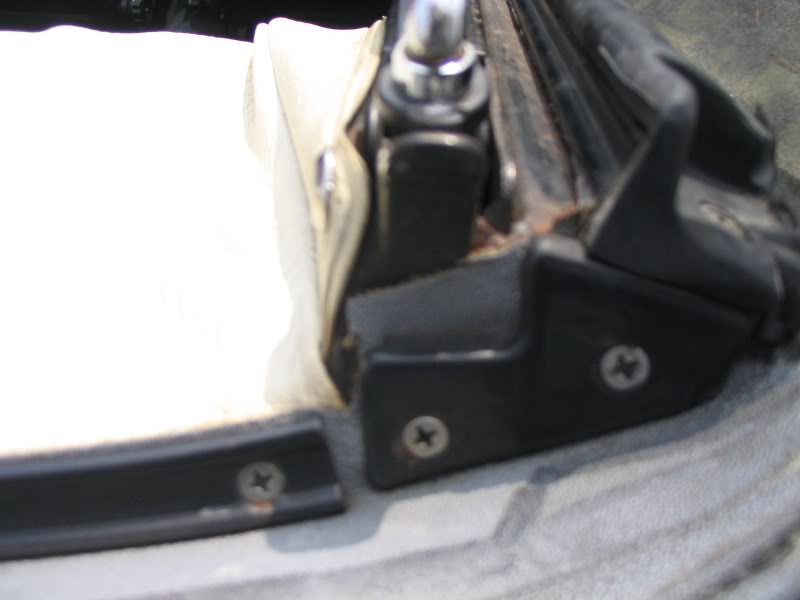
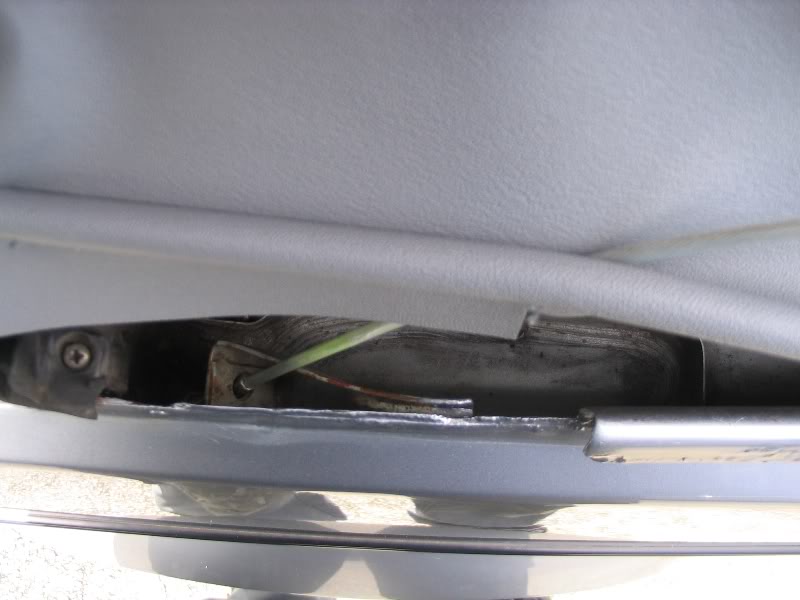
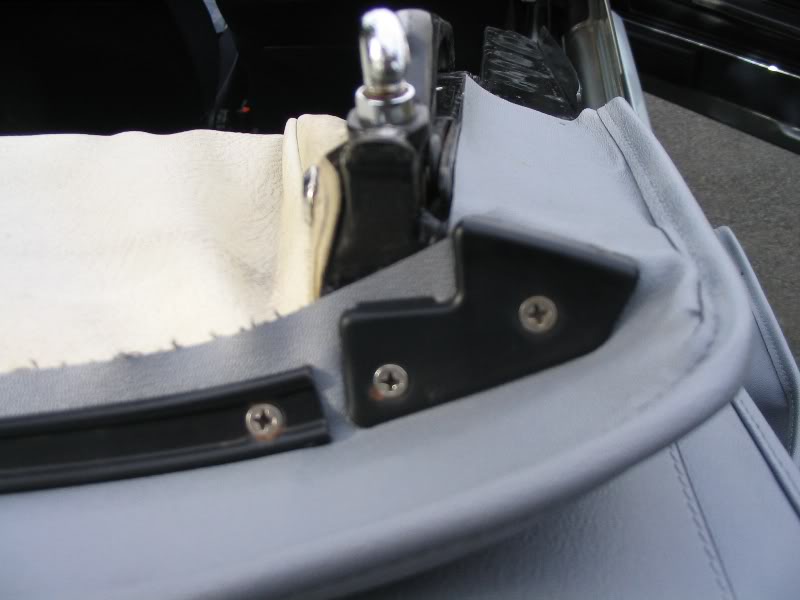
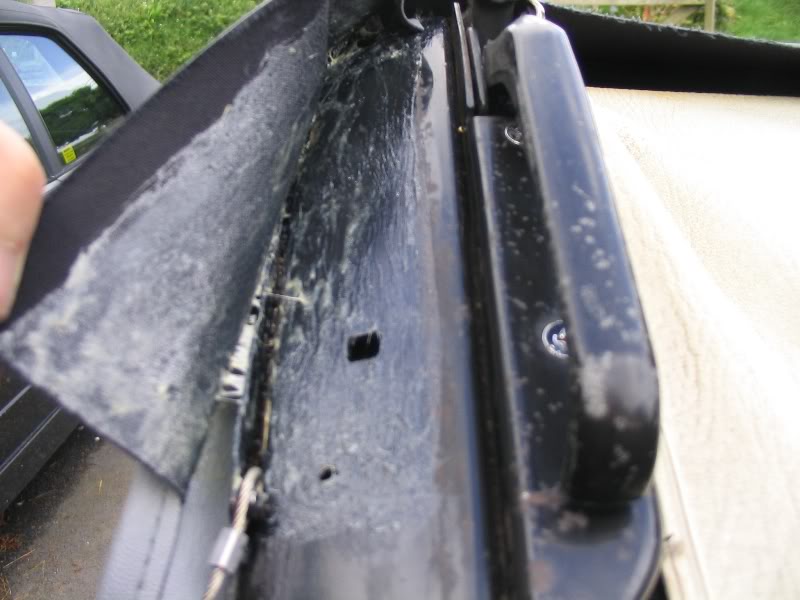
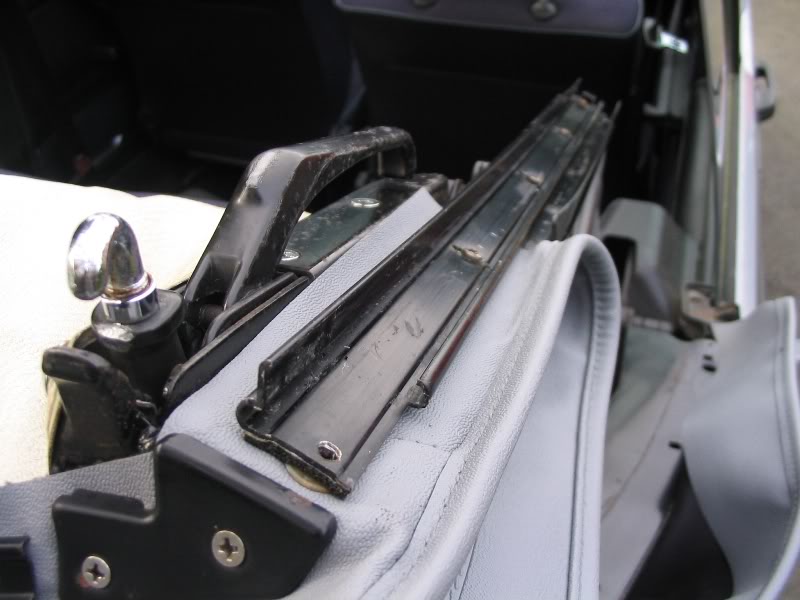
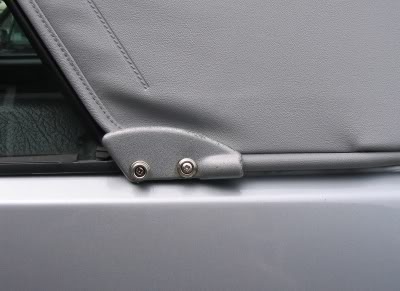
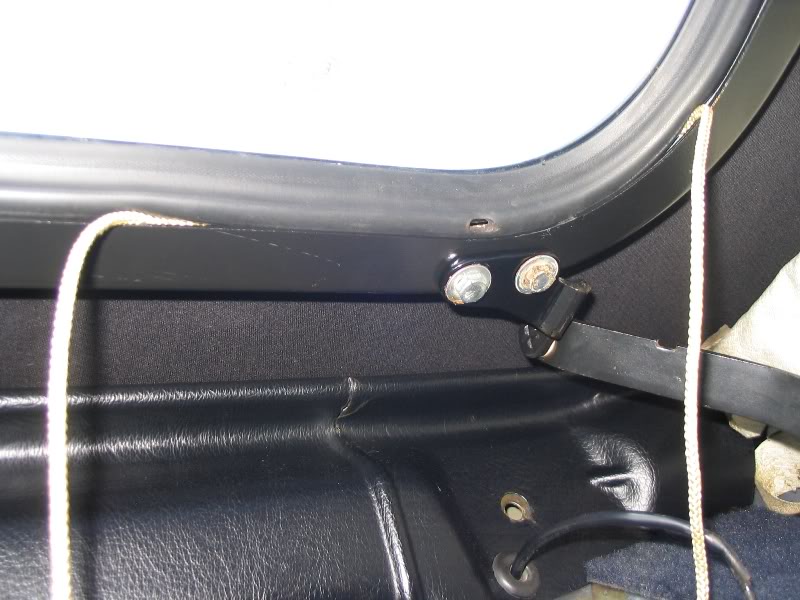
9.� �Close the hood and unscrew and remove the covers just behind the rear side window.
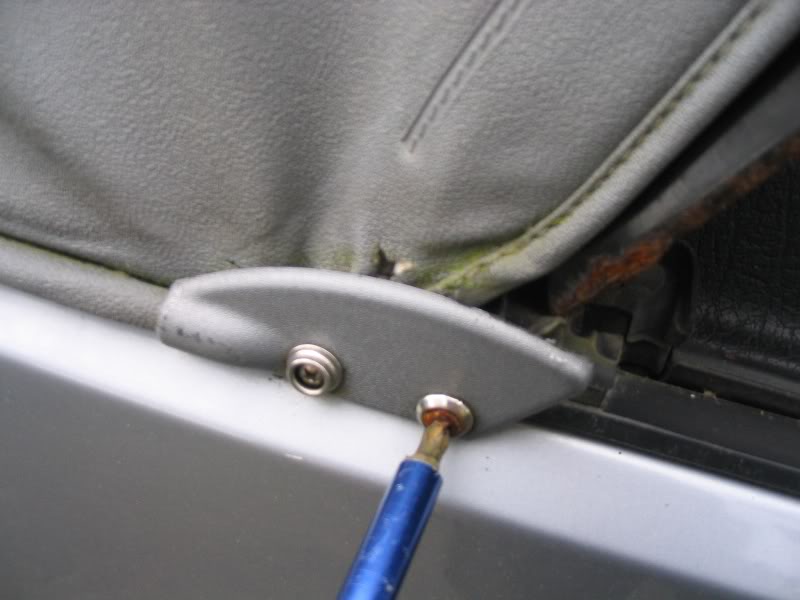
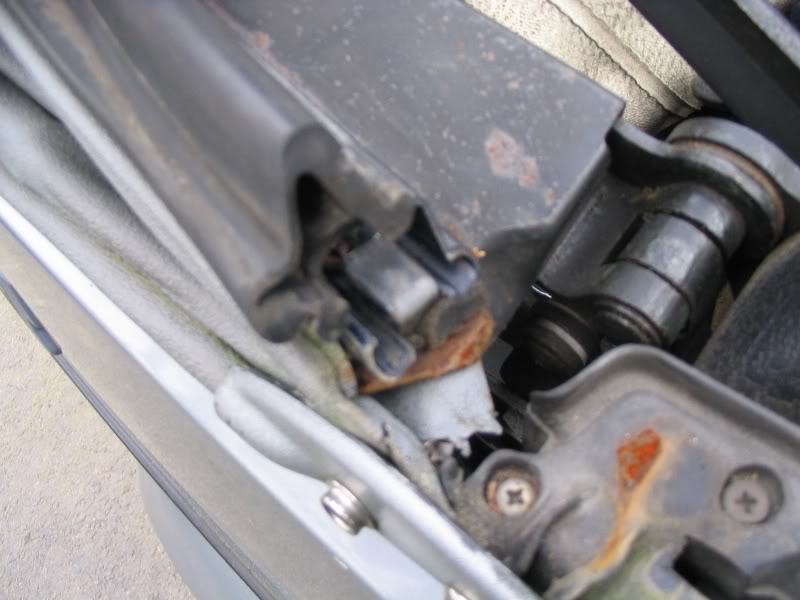
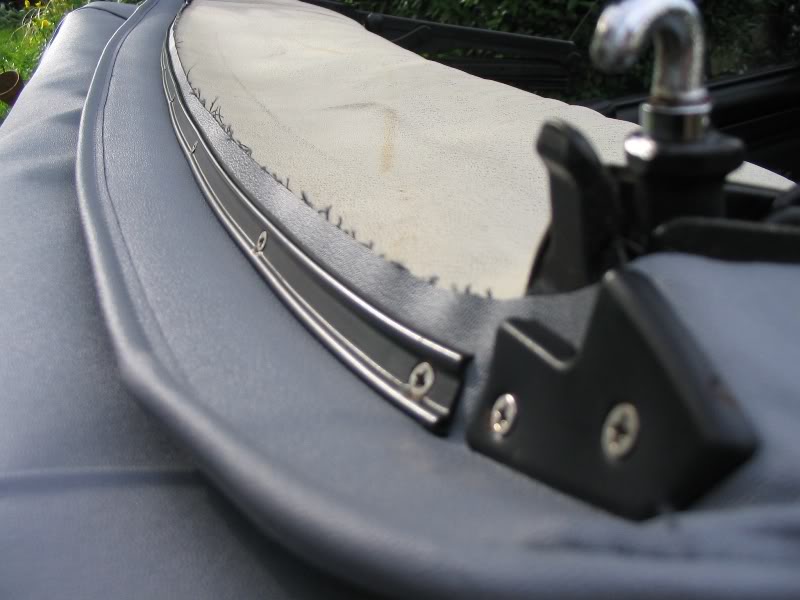
10.� �Unscrew the hydraulic strut and move it out of the way to gain better access to the ends of the rear cable.
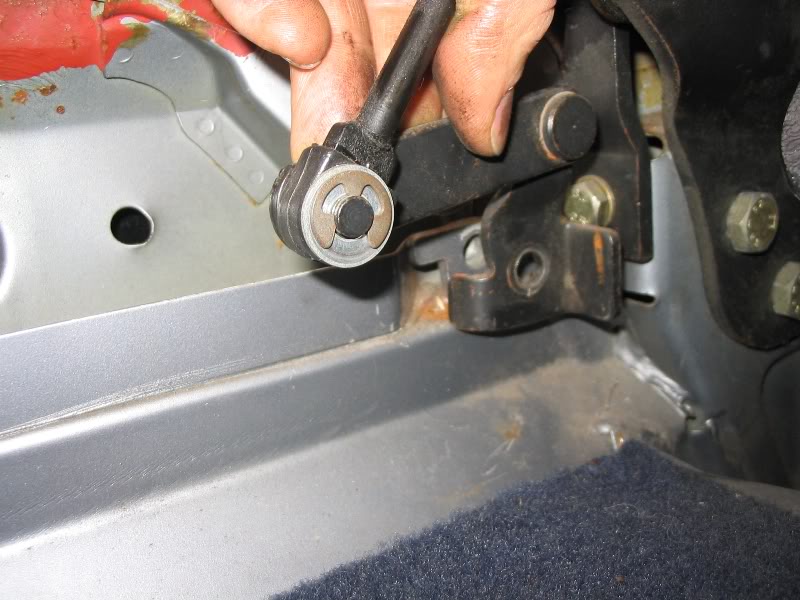
11.� �Position an open ended 5mm spanner on the rear cable itself to stop the cable twisting ? allowing it to twist will snap the cable, keeping it intact will save a few quid. Its best to use a 10mm ratchet spanner to undo the nuts on the ends of the cable as access is tight.
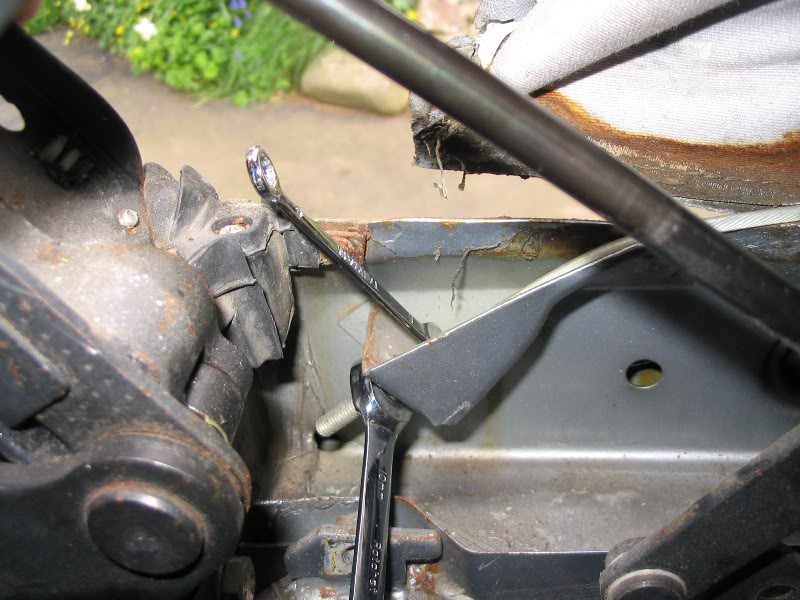
12.� �Once the nuts are off the ends, pull the cable out and free it from the rear of the car.
13.� �The hood should then be free from the car! Your half way there! Re attach the hydraulic strut so you can open the hood for cleaning the frame etc without doing any damage to the strut.
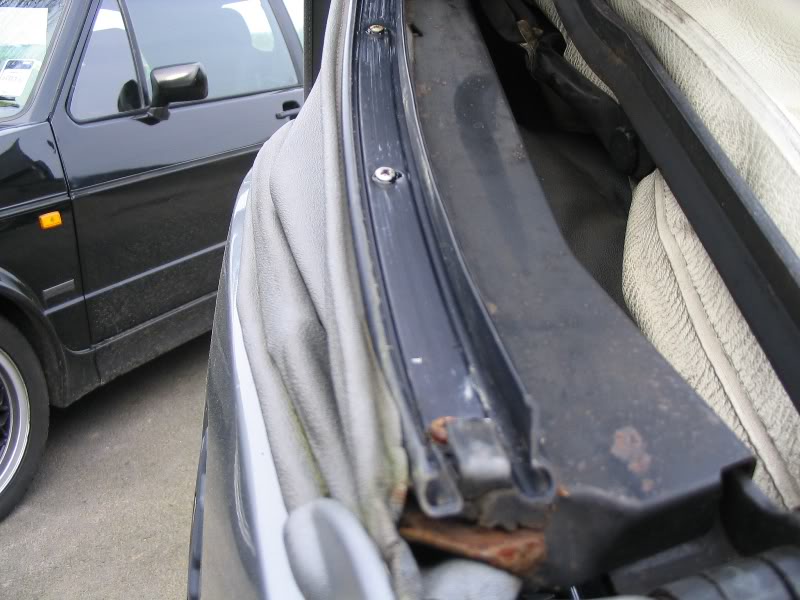
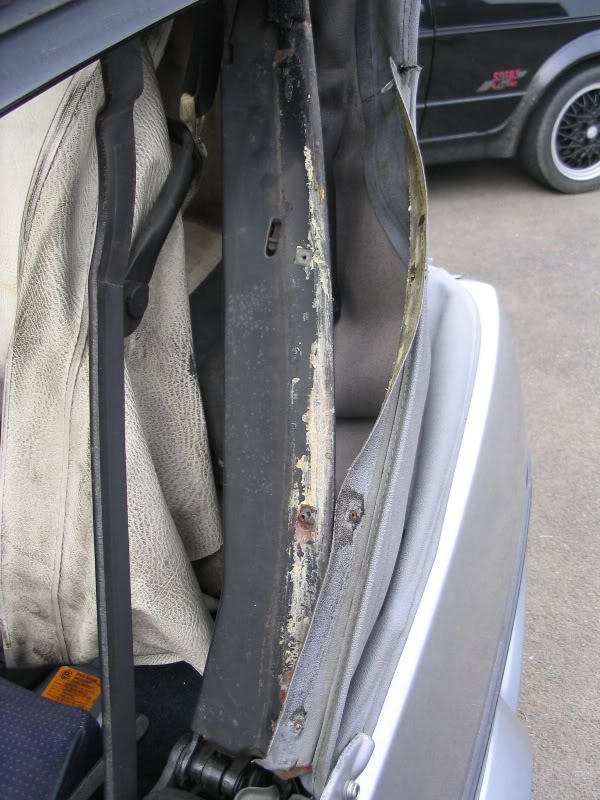
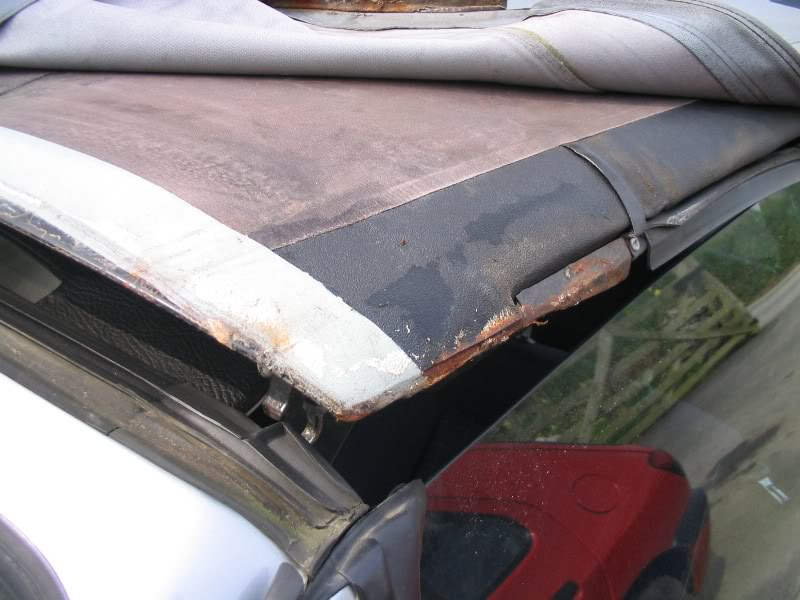
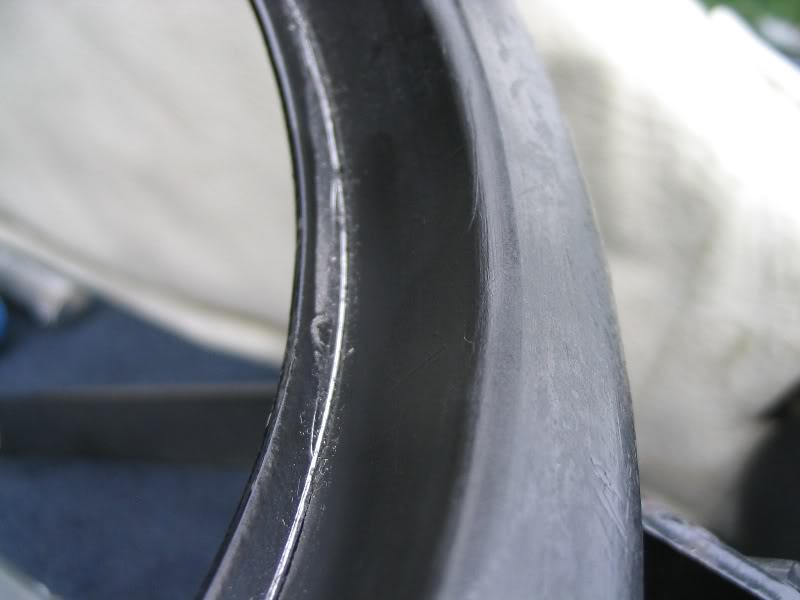
14.� �Clean up all the seals, rear window, cables, etc. Treat any rust on the hood frame and rear lip of the car?s body, you?ll have to weld in new sections if its really bad as you need quite a bit of strength in it. If the rear window frame is rusty now?s the time to either treat the rust on it or replace it if it?s really bad. I used satin black Hammerite on the hood frame and on the new window frame to give it more protection. On the brand new window frame I fitted, I noticed that the paint had been scratched where excess glue had been scraped off. This is asking for trouble! It would soon start to rust if left untreated.
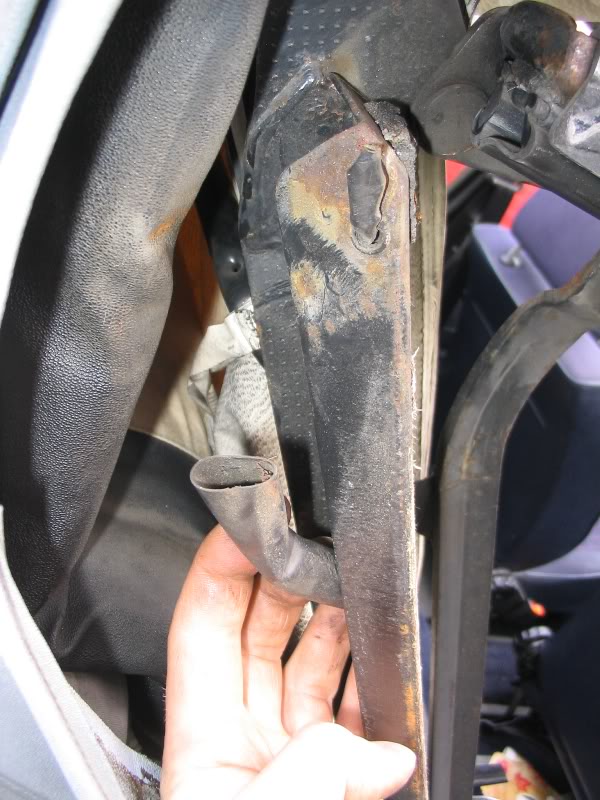
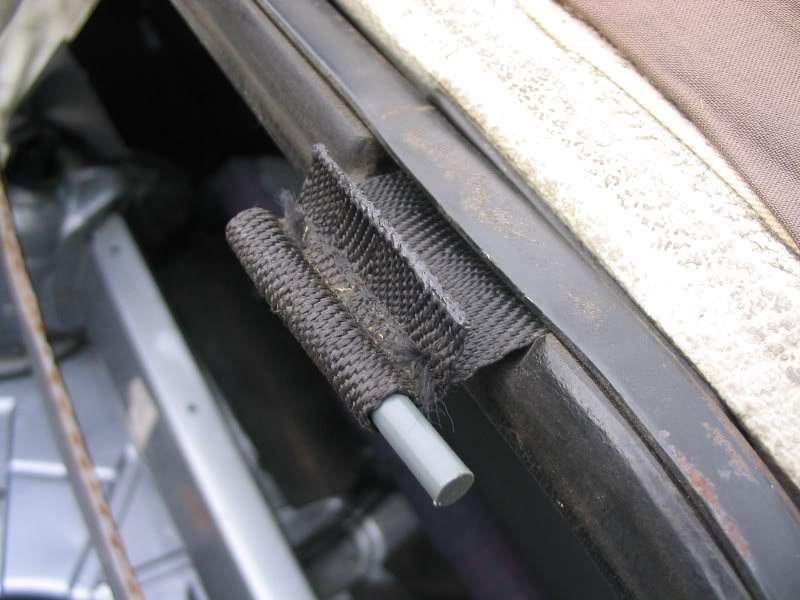
15.� �To remove the rear window frame, unbolt it at the bottom (try not to shear the bolts!). Then remove the plastic rods from the straps at the top and feed the strap through the frame. Installation is the reverse of removal but make sure it?s lined up ok and not wonky!
16.� �Close and latch the top. Make any repairs to the insulation layer that maybe needed. Now?s the time to replace the layer and headliner if you need to (not covered here).
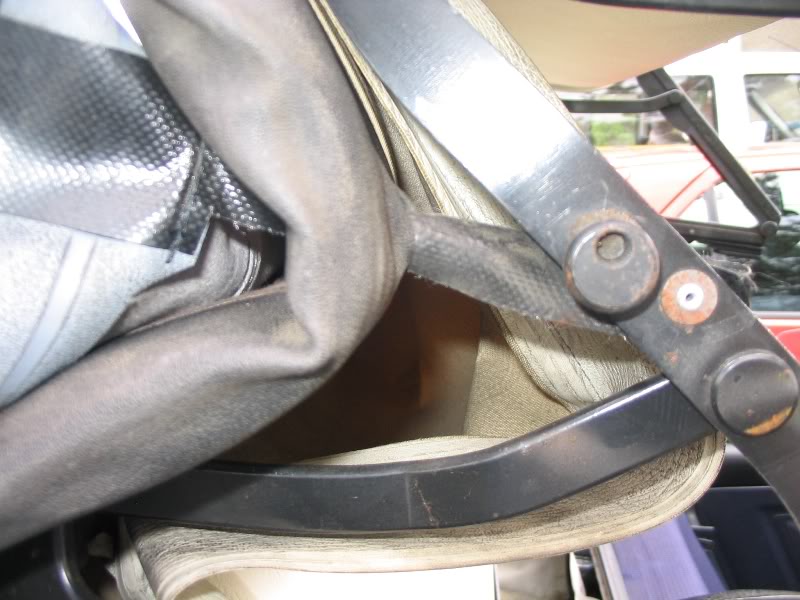
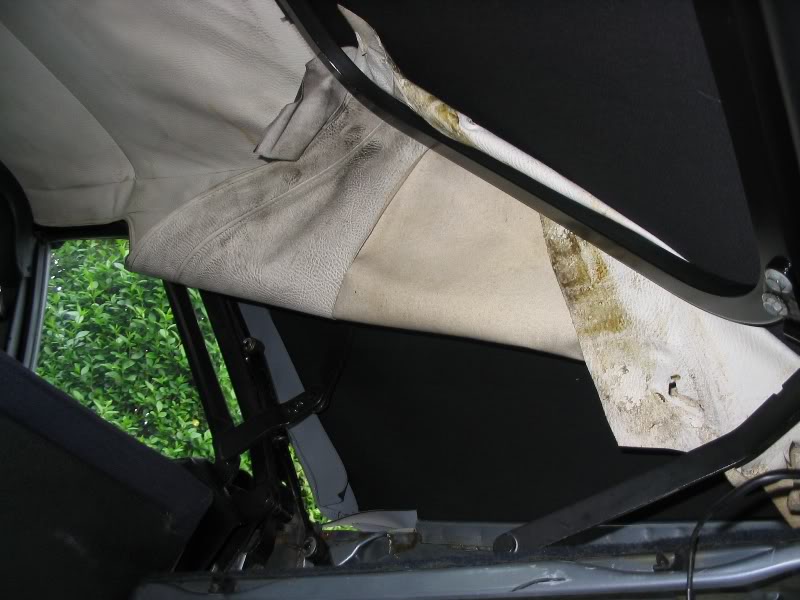
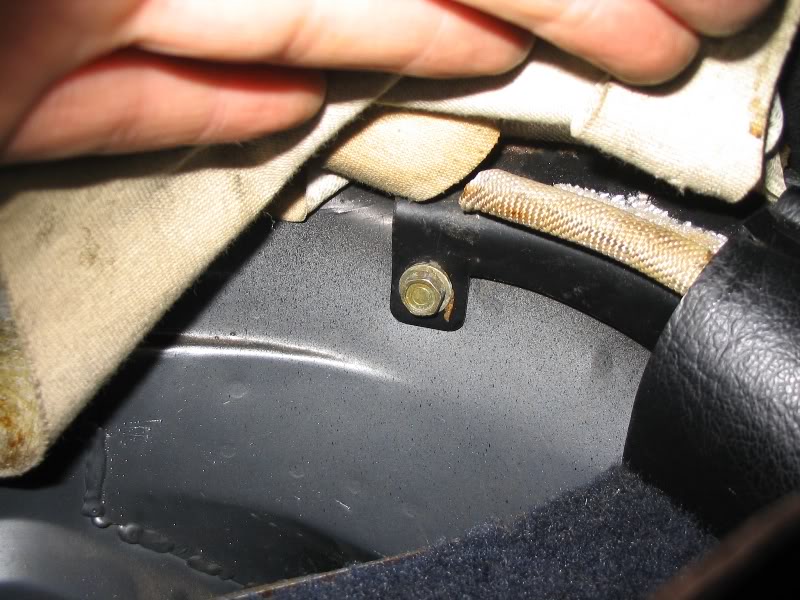
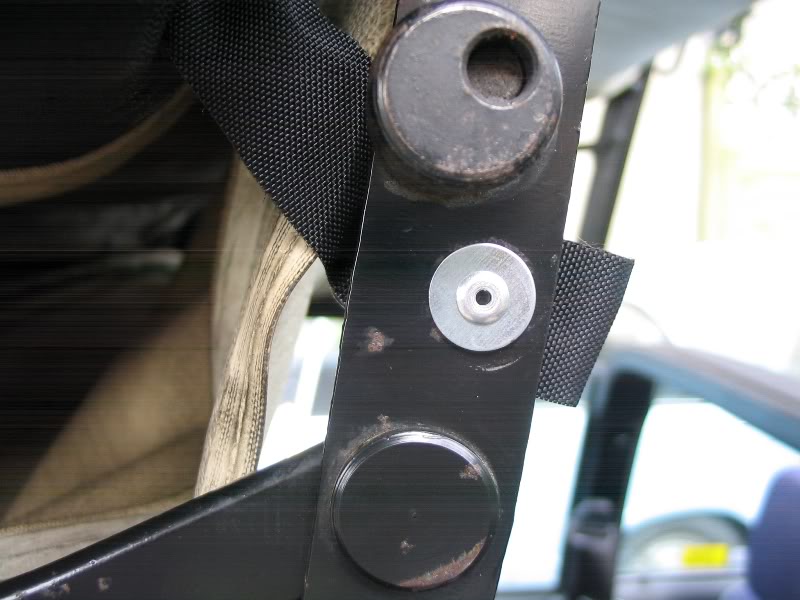
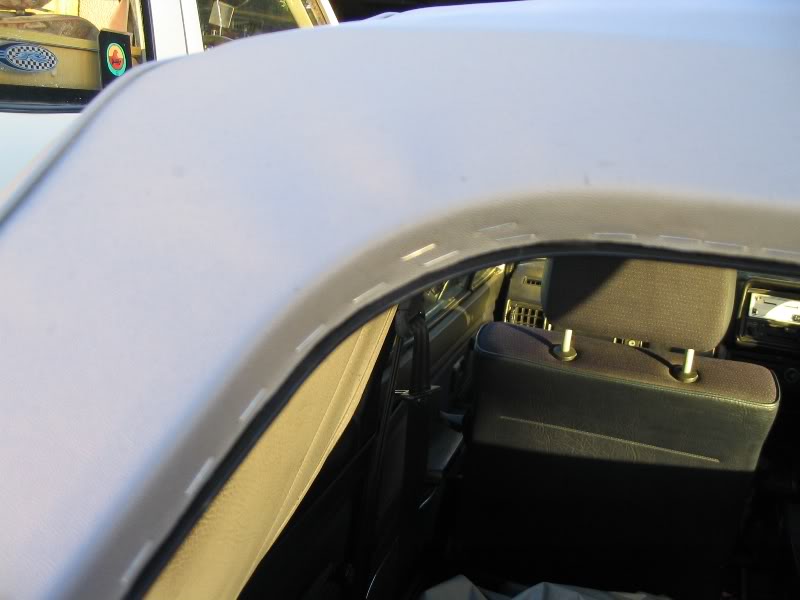
17.� �Make sure the rear side straps that the rear of the headliner drapes from are nice and taught. If they aren?t it will be impossible to fit the rear window without getting creases around the corners, as the hood won?t sit properly at the back. Adjust the straps by loosening the bolts, pulling the strap taught, and then tightening the bolts again clamping the strap in its correct position.
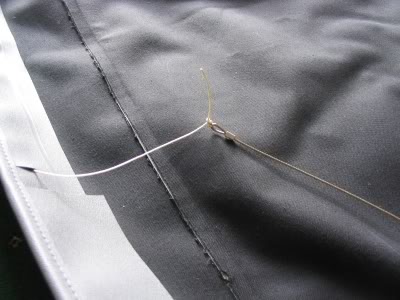
18.� �Lay out the new hood on the floor and fit the side tension cables. The hoods from www.carhoodwarehouse.co.uk come with cord in the sides where the cables go. This makes fitting the cables very easy. Just attach one end of the cord to the cable and pull the cable through until it just pokes out the other side. Leave the cord attached to the cable for now in case the cable moves about before you attach it to the frame.
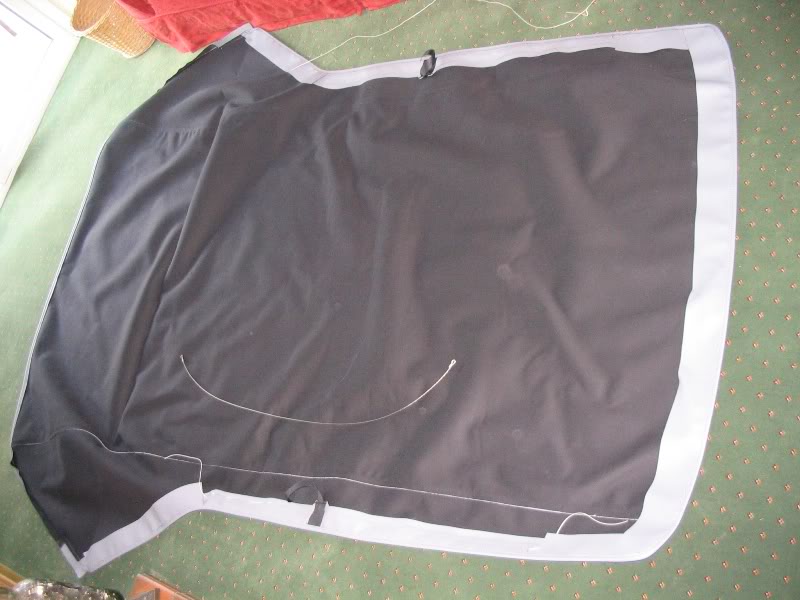
19.� �Some hoods (often mohair) come with excess material on the rear perimeter of the hood than needs trimming off along the line of the beading before fitting. I don?t have any more detail on this.
20.� �Lay the hood over the car.
21.� �Slot the rear cable through the hood.
22.� �Remember to add the two loops the cover attaches to.
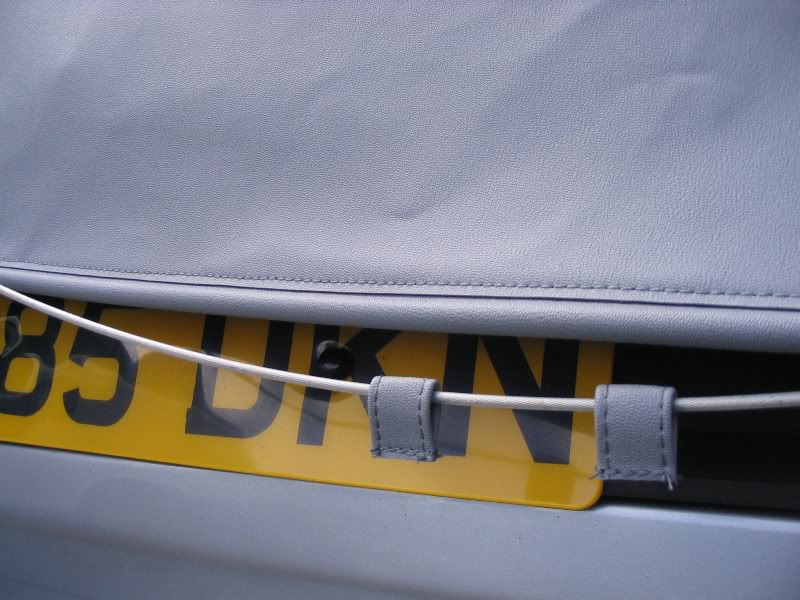
23.� �Slot the cable into its holes and put the nuts on the ends of the cable a couple of turns. Undo the hydraulic strut again to provide better access to the nut.
24.� �Lay the cable around the rear perimeter of the hood, just in front of the beading ? in a position so that it pulls the hood into the lip of the car?s body as you tighten the nuts on each end of the cable. Tighten the cable gradually and do not allow it to twist or it will snap. Tuck the headliner up out of the way again.
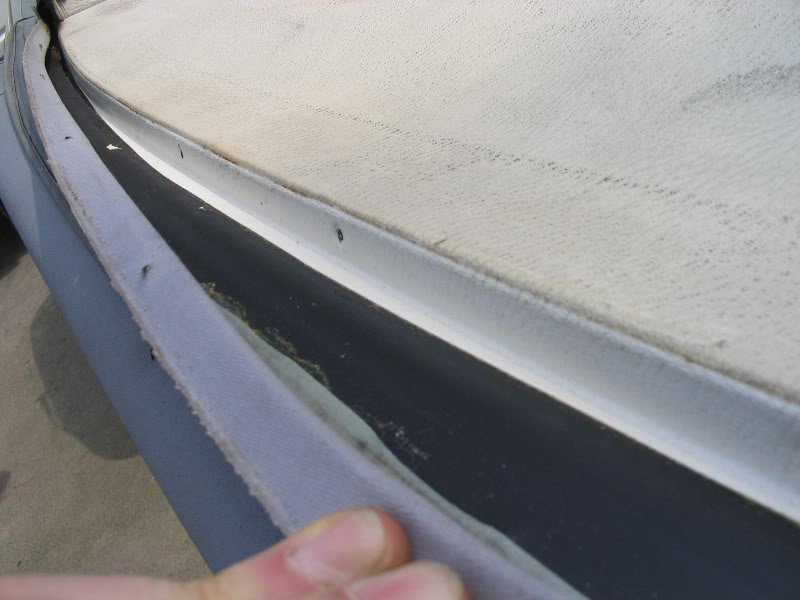
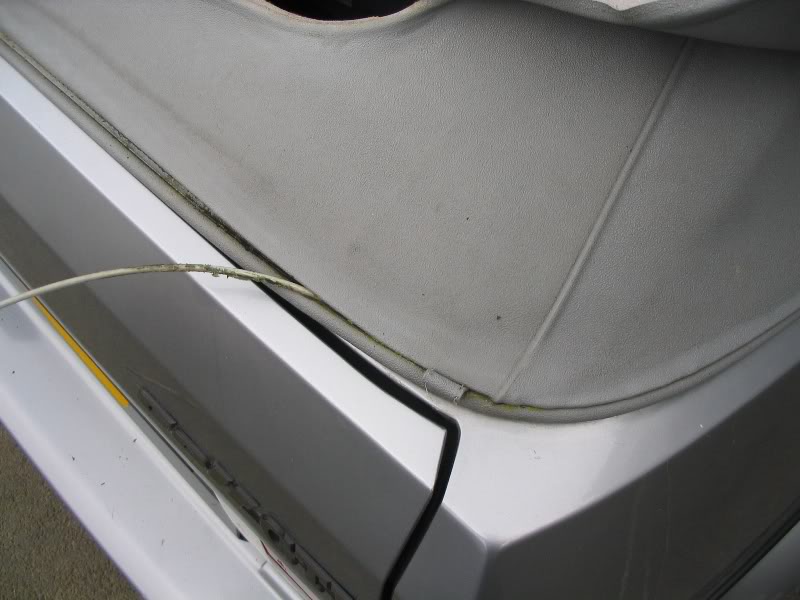
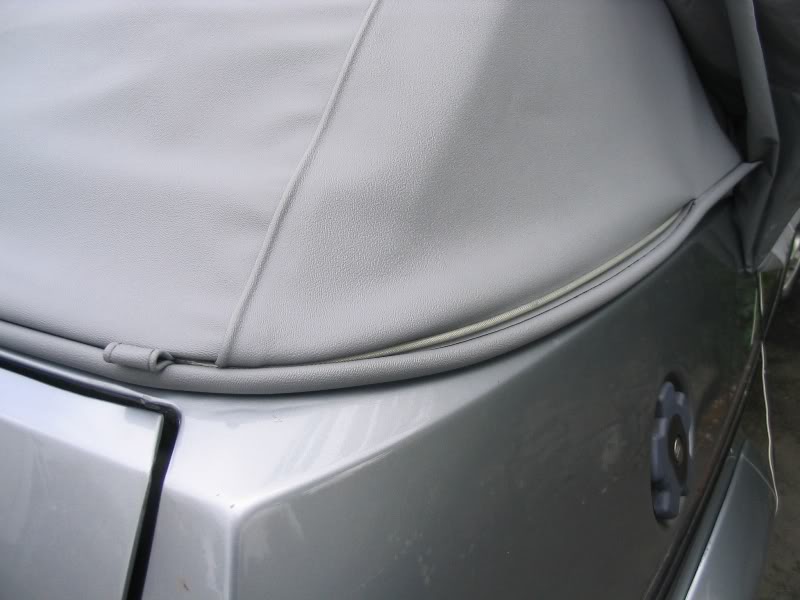
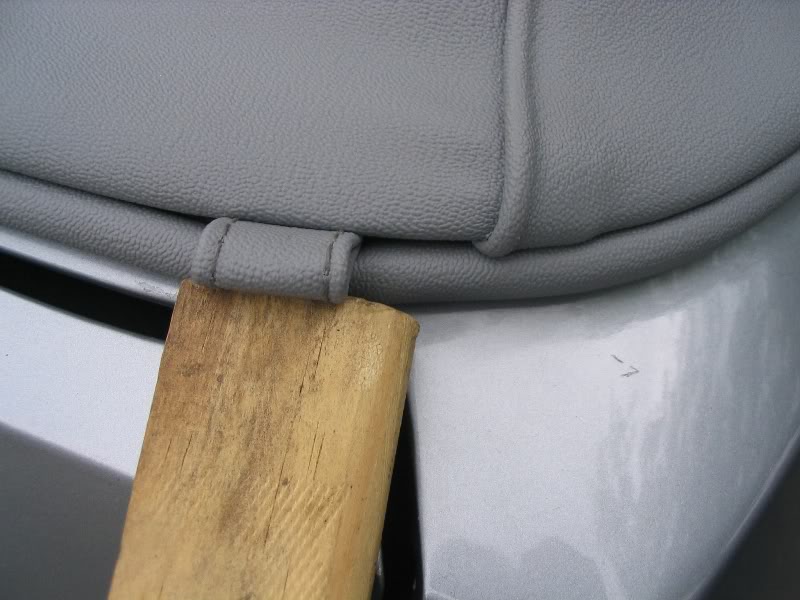
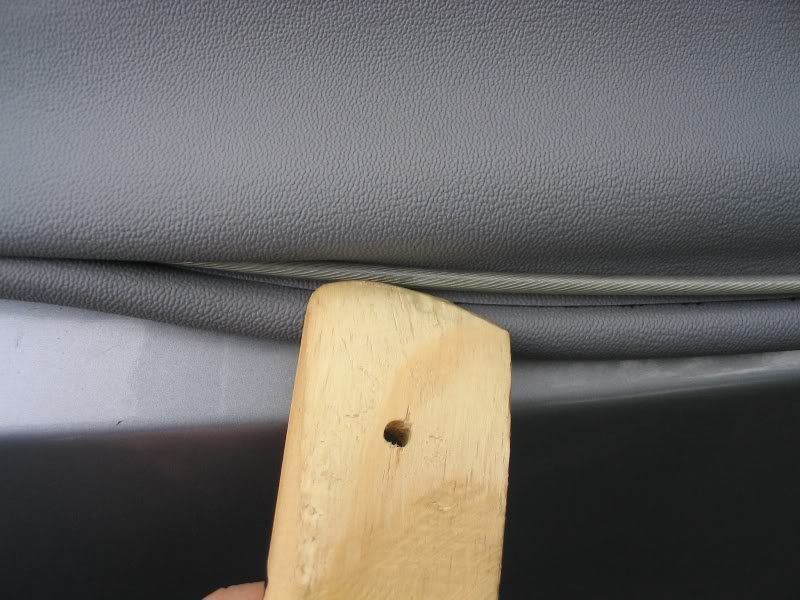
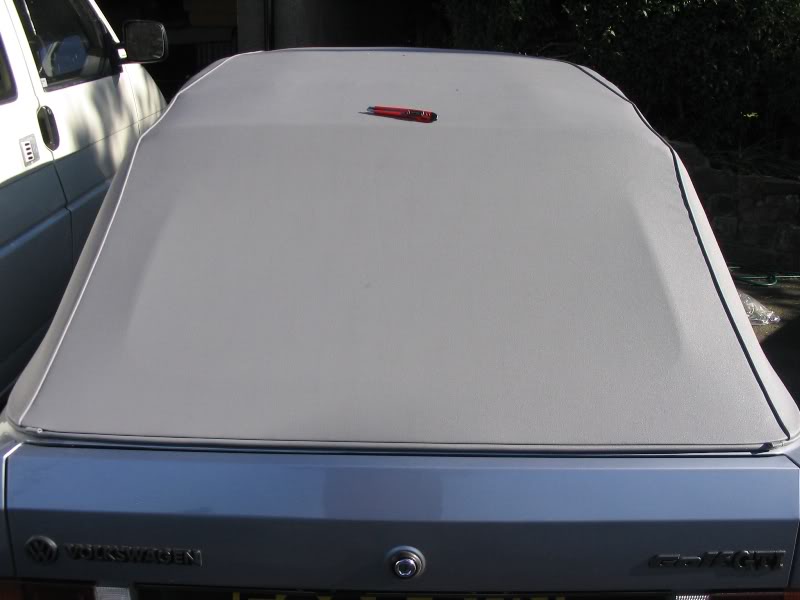
25.� �Once the cable is starting to get tighter, start poking the cable right up inside the lip. Start at the centre of the rear and working around the sides. Make sure the hood is central while doing this. It should be positioned so the seams, which run from the front to the rear, are in line with the small bodywork seam at the front corners of the boot-lid. This might require the hood to be stretched to achieve this.

Posted
Old Timer
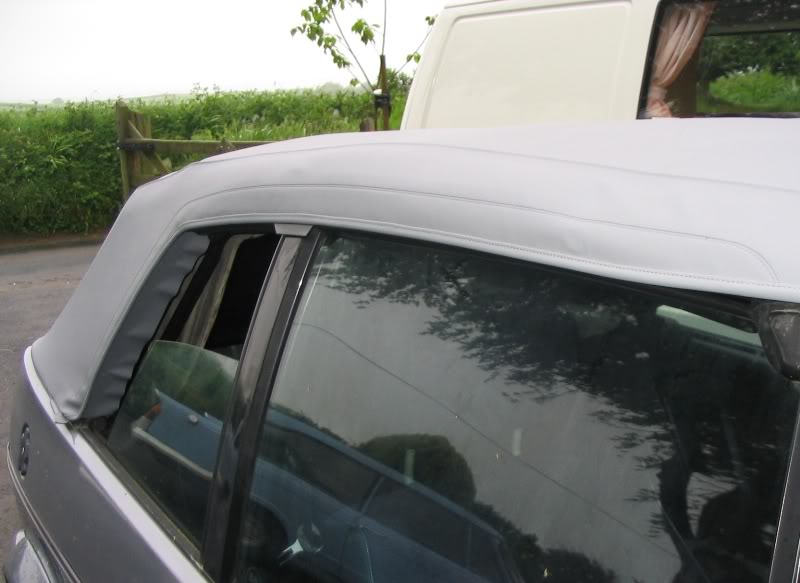
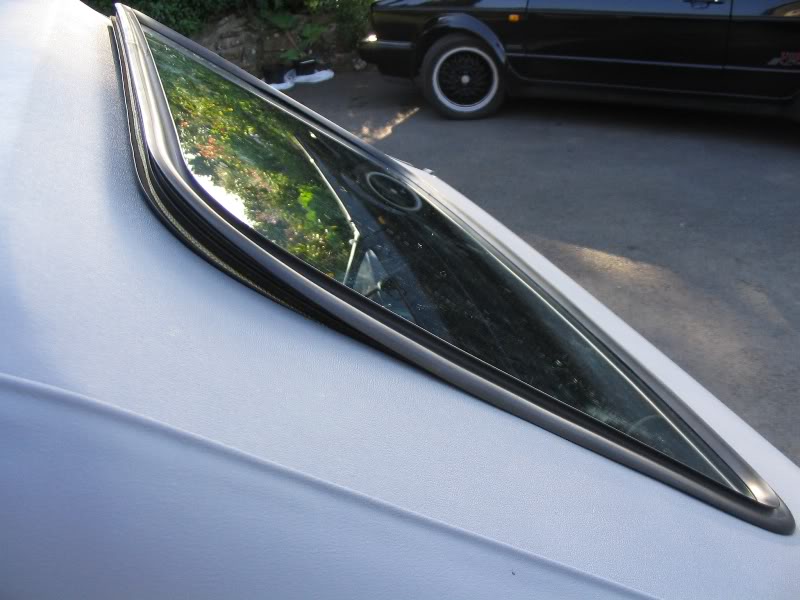
26. Also ensure the beading of the side flaps on the rear quarter of the hood just fit to the frame of the rear side window.
It?s a tricky process and frustrating but persevere and you?ll get there and?
27. Make sure the two loops the cover attaches to are positioned in the correct places. It will be a squeeze to get so much fabric under the lip in these places so I shaped a bit of wood into a bolster chisel shape at one end to help it in and used the flat end of the wood and a hammer to knock it in nicely.
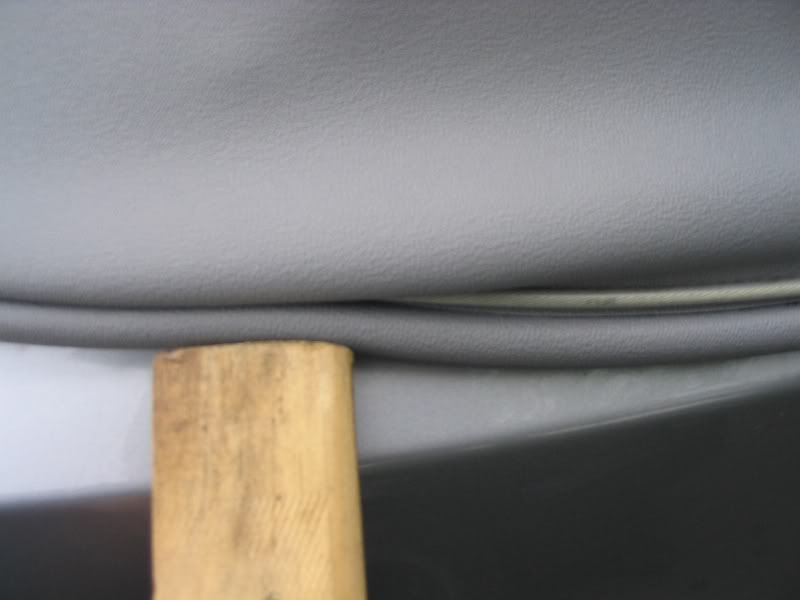
28. Finish off at the sides and poke the cable right up inside the lip. Tighten the cable up as tight as you think it will go without snapping. It?s very similar to a handbrake cable so it will take some stick. Replace the hydraulic strut again after the cable has been fully tightened.
29. Half open the roof and fit the pocket in the hood to the front of the frame and attach the side cables to the springs at the rear and the hooks at the front.
30. Close the hood and check it all aligns up ok. (Some guides say to cut a U shape in the hood within the rear window frame approximately 10cm from the frame edge. This is supposed to relieve tension in the hood, but I didn?t do this as I didn?t think it was that tight anyway. The guides also say the front edge of the frame should be glued to the frame with contact adhesive but my car showed no sign of glue ever being there so I didn?t use any). When closed the front edge of the front side flaps of the hood should be aligned with the corner of the frame and folded to the frame using the beaded edge as a guide.
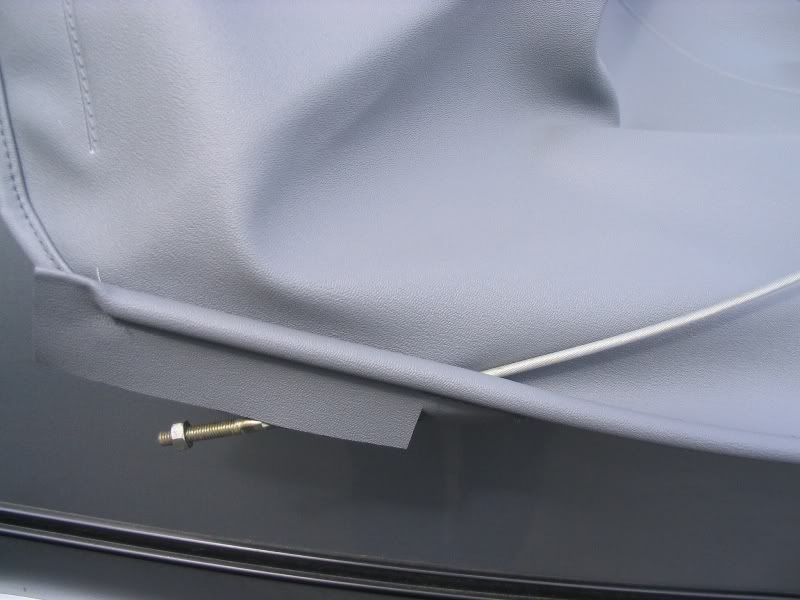
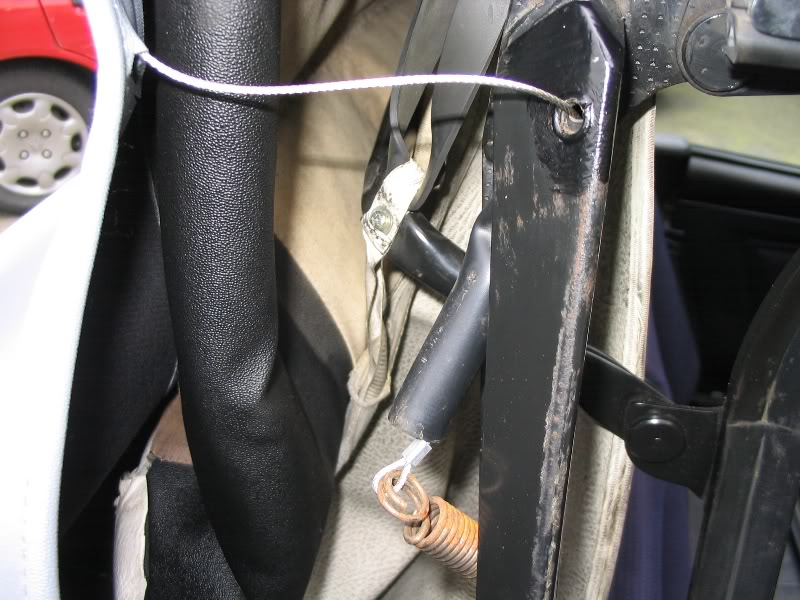
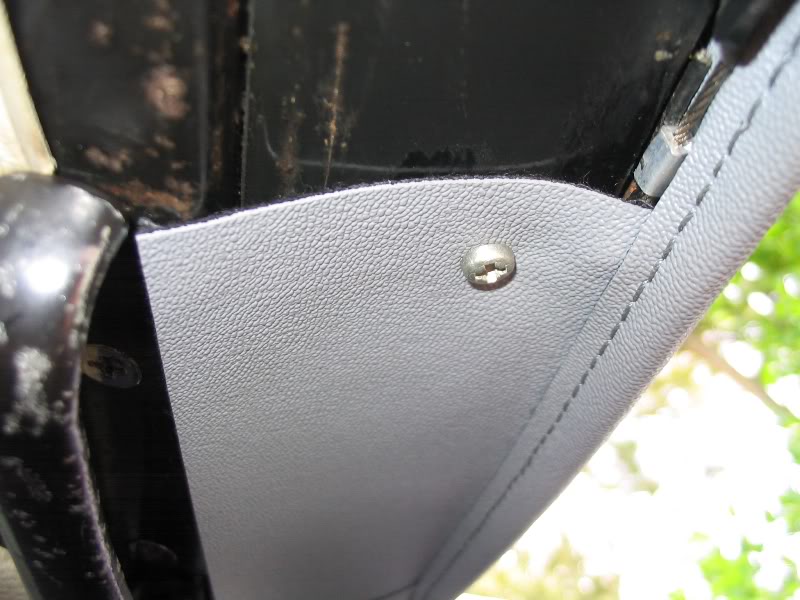
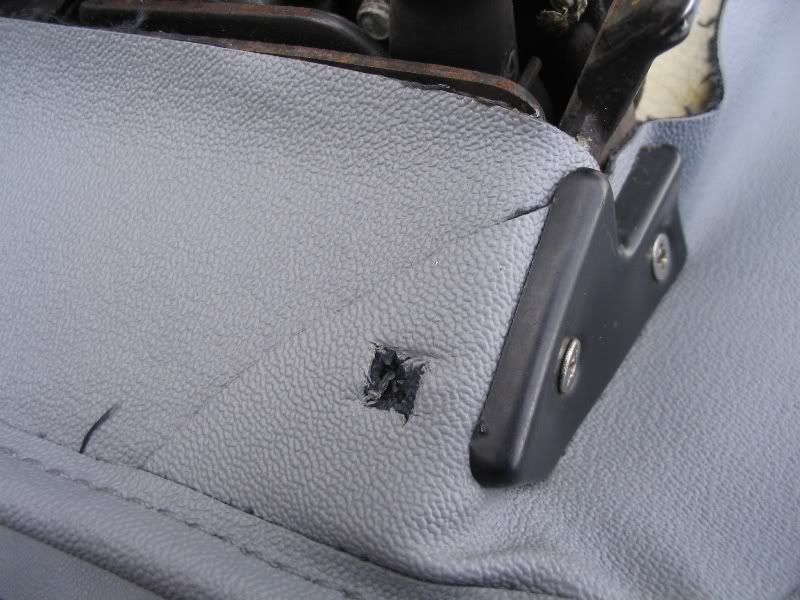
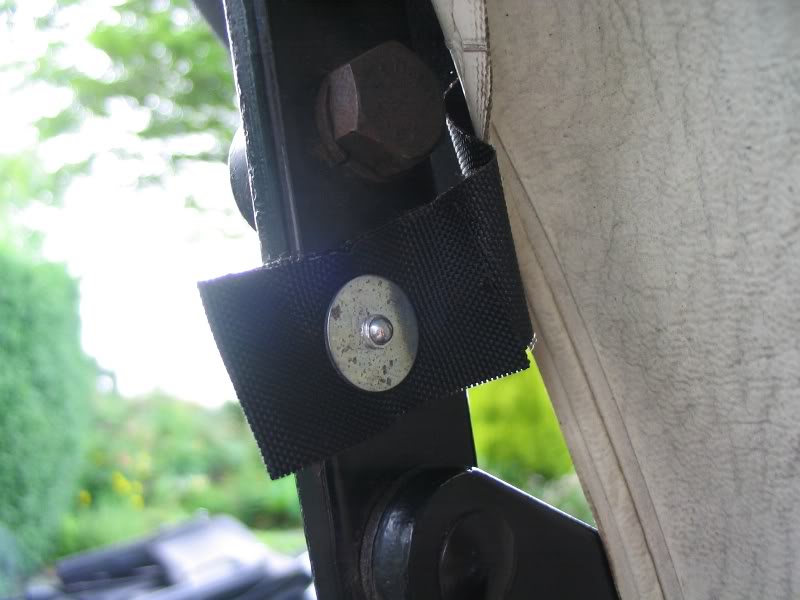
31. A car from new would at some point have rivet added where the screws is in this pic. I used screws temporarily which I later took out. They helped to keep the hood in the right position for the time being before the side flaps are glued. You might feel you don?t need them. There are also holes for rivets at the rear side parts of the frame.
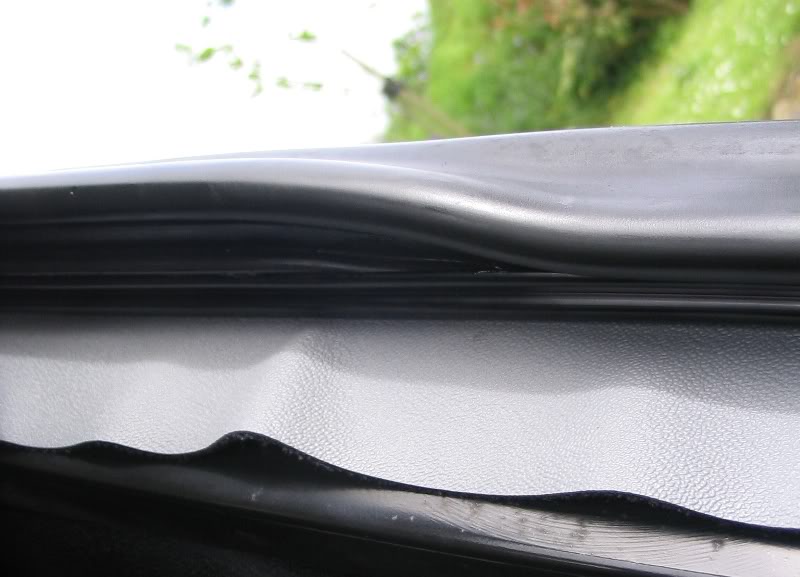
32. Now open the hood again and fit the front rail and the two other bits of metal that clamp the front of the hood to the frame. Make sure the beaded edge of the hood is in align with the front edge of the frame so that when the hood is latched down the beaded edge makes good contact with the header seal. If you don?t get it flush like this you will get nasty wind noise at high speeds. Close the hood to make sure alignment is still correct. Then reopen it!
33. Next glue the front side flaps to the frame with contact adhesive. Check the front edge of the front side flaps of the hood is aligned with the corner of the frame and folded to the frame using the beaded edge as a guide.
34. Cut square holes in the correct positions in the front side flaps for the screw clips to go in and fit the screw clips.
35. Then stick new gaskets to the side seal brackets and refit the brackets to the frame.
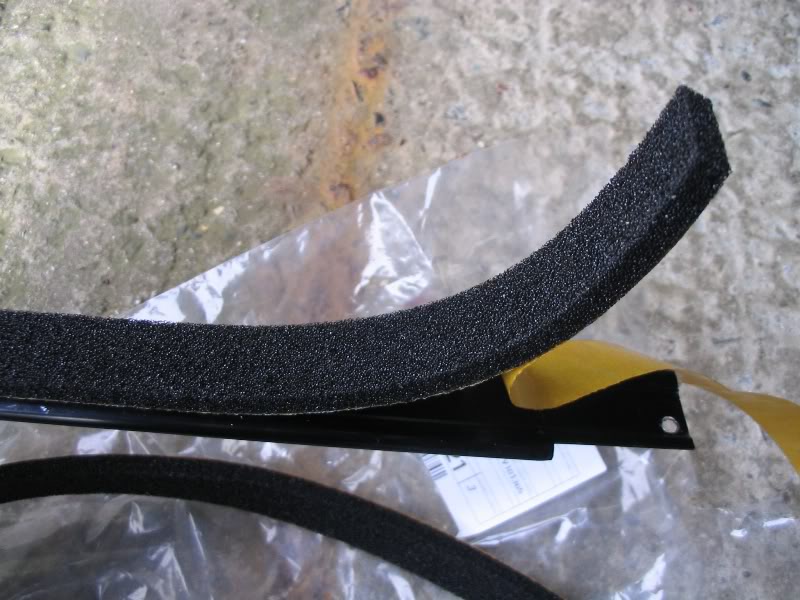
36. Then fit the rubber seals. I found another use for KY jelly! They don?t have to slide in, you can pop them in?
37. Close the hood and do the same to the rear side flaps of the hood and refit the seals. When gluing the rear side flaps, make sure the beaded edge of the hood is aligned nicely with the frame. I glued the rear side flaps on in two goes to get the alignment right (half of the flap with the roof closed, and half of it with it open). Open and close the hood as necessary to get the access required to screw in the screws of the seal brackets.
38. Trim all the excess hood fabric from the side seals and at the front of the hood.
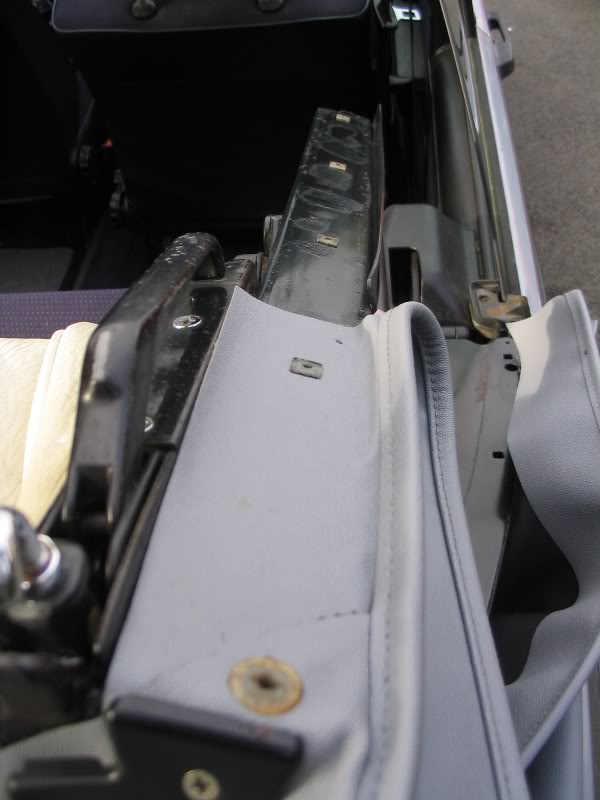
39. Raise the hood and reattach the side covers just behind the rear side windows screwing the screw furthest to the rear of the car through the edge of the hood.
40. Feed the strap in the centre of the hood through the slits in the insulation layer. Double over the strap at the end to give it more strength and push the rivet through the strap then rivet it to the frame. Motorworld do a box of rivets and washers exactly the right size.
41. Time to fit the rear window! This is a bit daunting but it?s not that bad really!
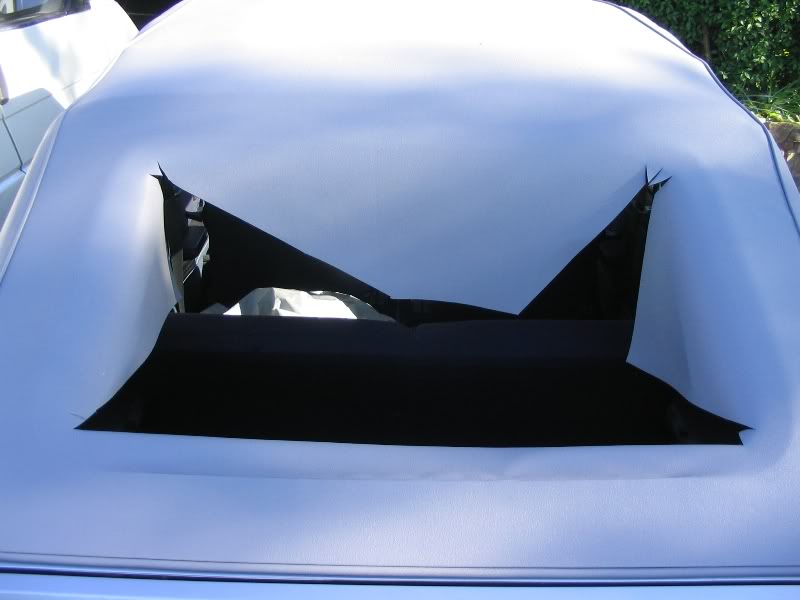
42. Cut an X in the rear window 30mm from the corners if you?ve already made a U shape, make the U into an X!
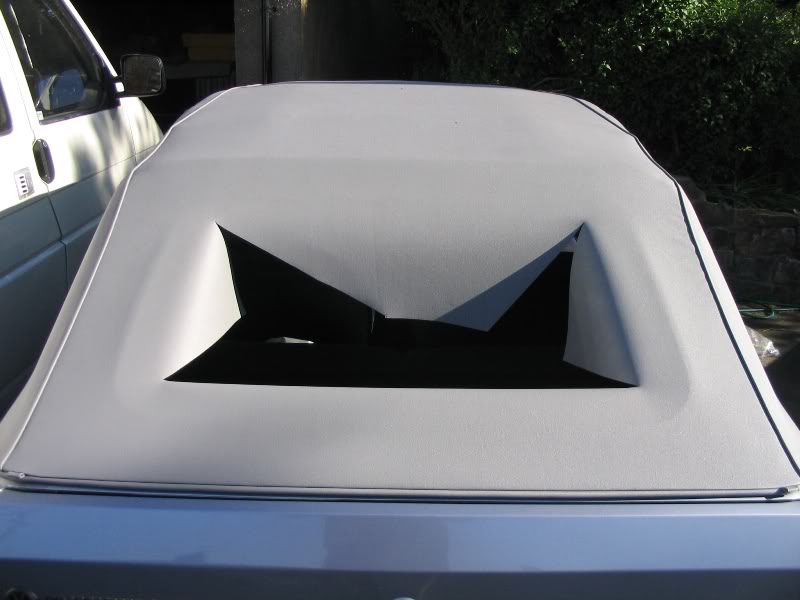
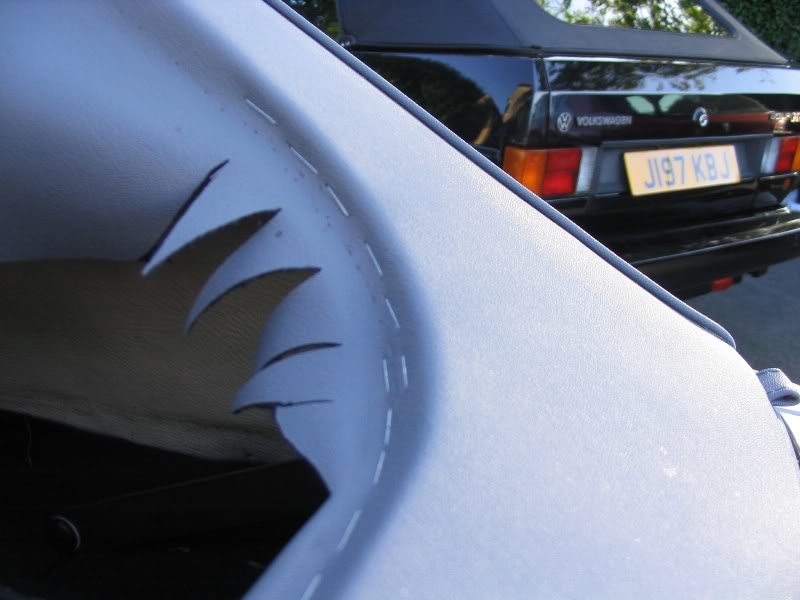
43. Then feather the corners like this, increasing the numbers of cuts when necessary to get the material to stretch up enough to the frame so you can staple it.
44. Pull the hood towards the centre of the window area stapling from the centre bottom area up each side and finally along the top. Trimming excess material as you go. Make sure you don?t get wrinkles anywhere and if you do just pull out the staples and re-staple that area until you get it right. Just make sure you don?t cut too much material off before you have it in the position you need!

45. Finally trim any excess off you have left over to make sure the window seal will seal well.
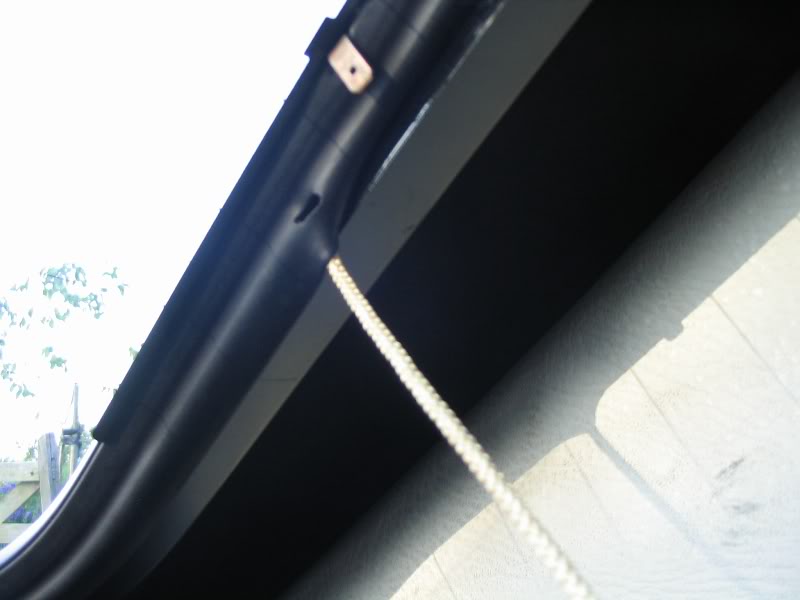
46. Fit the window seal to the rear window and wrap a strong length of cord around the inner lip of the seal. Once round will be enough but cross the ends over a bit. Make sure the cord ends are at one of the bottom corners. Place the window in position like this?
47. Get an assistant to push against the glass from the outside, while you from inside the car, pull the cord so that the lip of the seal gets pulled over the window frame. Go along the bottom of the window, up the sides, and finish at one of the top corners.
48. Then finally run a bead of silicone sealant between the hood and the window seal.
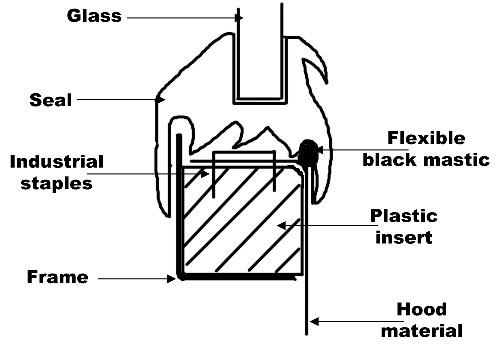
(diagram courtesy of www.vwgolfmk1.co.uk cheers prowler)
Mask the hood off so that silicone doesn?t go where it shouldn?t.

49. Re connect the heated rear window, reattach the head liner on the spikes and refit the seat and parcel shelf.
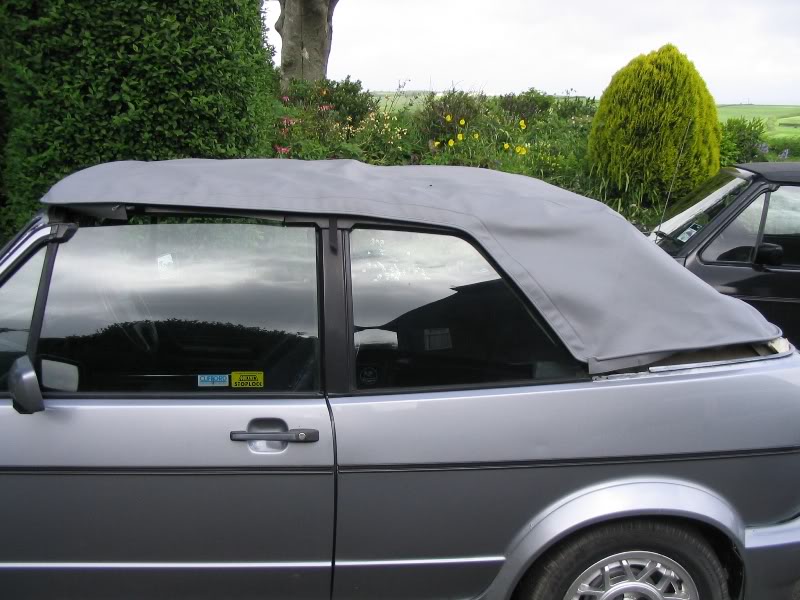
50. You?re done!!!
Phew!!!
I bet my photobucket download limit will max out in minutes!!! 14Mb of pics!
Me thinks I'll have to sort something else out probably.
Any feedback, comments suggestions welcome :wink:
Ross
Be sure you remove any excess materials from the back of the top and the corners. We went out of our minds for a few hours trying to fit the back bead and corners until finally i trimmed the excess material and the rear and corner went on one , two, three. also much easier to adjust the top if you zero the adjustment used to adjust the clearance over the roll bar. After the top is on for a few days and is stretched out they can be adjusted again.
============================================================
=====
Clicking the following link:
http://uk.geocities.com/rossonline@btinternet.com/GOLFS/hoodreplacement.doc
I also got this one when I bought the hood from www.carhoodwarehouse.co.uk. I OCR'd it…..
PLEASE BEAR IN MIND THAT FITTING TAKES A FULLY EXPERIENCED FITTER
SEVERAL HOURS & IS NOT A JOB TO BE UNDERTAKEN LIGHTLY. WE CANNOT
TAKE ANY RESPONSIBILITY FOR DAMAGE TO THE HOOD OR VEHICLE.
HOWSOEVER CAUSED, AS A RESULT OF FOLLOWING THESE INSTRUCTIONS.
FITTING INSTRUCTIONS FOR FORD ESCORT MK 3-4 & VW GOLF MK 1.
1 . Remove rear window.
2. Remove staples from the rear window frame.
3. Undo all fixings to the front roof rail and remove same.
4 Remove front and rear side rubbers and unscrew the holding channels.
5. Remove side cables (usually broken).
6. Undo rear-retaining cable and remove from old hood. Note 10mm nut on underside of bracket. Ensure cable does not twist or it will snap.
7. Remove hood.
8. Trim excess material from rear perimeter of hood along the line of the beading.
9. Place hood on car, thread any material tags onto the rear cable and lay cable around the rear of the car.
10. Insert the cable through the holes in the lower side of the hood and place through the mounting brackets on the car. Attach nut to each end of the cable (just enough to be completely on the cable).
11 . The wire should sit around the rear lower edge of the hood, just in front of the beading so as the cable is tightened it pulls the hood under the metal lip of the bodywork.
12. The hood should be positioned so the seams, which run from the front to the rear, are in line with the small bodywork seam at the front corners of the boot-lid. This will require the hood to be stretched to achieve this.
13. Tighten the rear cable gradually, regularly?DO NOT TWIST THE CABLE - IT WILL SNAP.
14. Ensure the beading of the side flaps on the rear quarter of the hood just fit to the frame of the rear side window.
I 5. Re-attach the side cables.
16. Fit the hood to the front of the car using contact adhesive (Dunlop 51358) with the frame half open.
17. The front edge of the front side flaps of the hood should be aligned with the corner of the frame and folded to the frame using the beaded edge as a guide.
18. Before closing the roof, cut a U-shape within the rear window frame approximately 10cm from the frame edge. This will relieve tension in the hood.
19. Refit the front rail and trim excess material.
20. Refit front side channels and rubbers.
21 . With the frame half open, glue and pull the side flaps positioning the lower edge at or near the bottom of the frame.
22. Close and lock down the roof.
23. Check the sides to ensure the hood is positioned correctly (no creases).
24. Open roof and refit channels and rubbers.
25. Fit hood to rear window frame using staples. Pull the hood towards the centre of the window area stapling from the centre bottom area up each side and finally along the top. Trim excess material.
26. Replace the rear window and seal between the rubber and hood on the outside of the roof with silicone sealant.
E & OE
This site has scans of a proper VW guide but its in German…
http://vwcabriolet.fw.hu/
Cheers,
Ross
Posted
Old Timer
I had a car cover from Lidl and it kept thinks dry even in this!…

I did all the stripping down in one afternoon, that didn't take long.
Fitting took longer as I was taking pics and learning the best way to assemble it. I'd guess a day to refit?
Thanks for all the comments everyone
 . It took a couple of evenings to put the guide together but it was definately worth doing. DIYing is a big money saver. Hopefully it will benefit many owners now and in the future
  .
. If anyone uses the guide, please let me know if you find anything that you think needs changing or needs improving. It would be nice to add some info and pics on the differences between an install on a power hood and a manual hood.
If you're hood leaks, dont keep putting it off. Its not a hugely difficult job at all so get too it! The weather maybe better(ish) at the moment but come winter you'll be regretting it if you didn't fit a new one now.
Cheers,
Ross
0 guests and 0 members have just viewed this: None.