Door cards
Posted
#1585164
(In Topic #215205)
Settling In

Anyone re cut their door cards before?
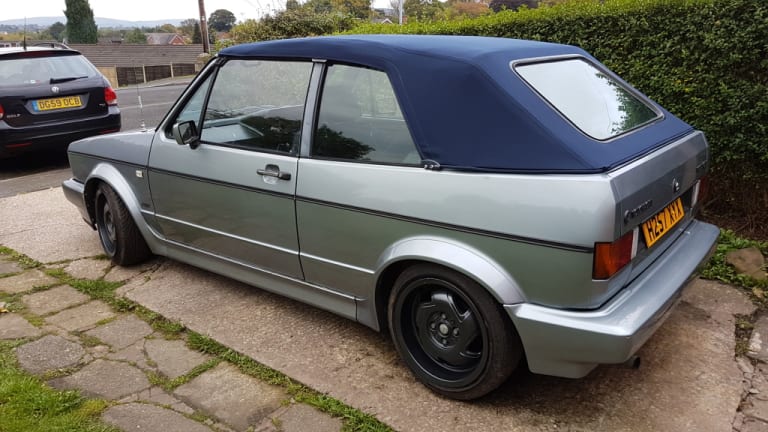
Posted
Local Hero

You have to remove the card off of one side, and remove the coverings and stuff very carefully.
Once you get it off, you can make a template of it.
Now here is my thoughts on replacement board.
1 You can use "Masonite" fibreboard which is similar to the OEM, but the catch is that after you get it cut out, and before you attach the material you have to use a Varnish and varnish all sides and edges, if the varnish says cleans up with water, well that isn't the one you want it is water soluble, you want one that cleans up with a petroleum agent….
2. I have been looking in to the corrugated plastic board that are used for signage…
3. When going back to assemble it you have to use a good High temp water proof glue, you need to have a ton of spring clamps to hold the material on the edges and centers….
I had fun re-doing mine, the cards weren't that bad, but I did varnish them.
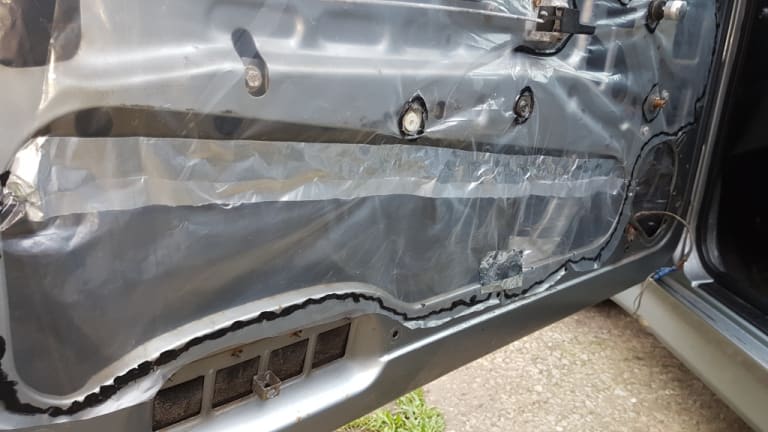
Lastly you have to have Vapor Barriers on the metal panels and you have to have them sealed. This keeps moisture you can use heavy gauge vinyl what I love is the mildew resistant shower curtain liners, I glue them with a non-hardening urethane, and for flaps and such I reinforce with metal foil tape.
Oh and why the only remove the one side, as the left is the right but backwards.
Once you get the one panel off cut and drilled then the other side is the reverse as the one you cut. So you just cut 2.
What do Divorces, Great Coffee, and Car Electrics all have in common?
They all start with GOOD Grounds.
Where are my DIY Links?
They all start with GOOD Grounds.
Where are my DIY Links?
Posted
Settling In

Posted
Local Hero

phillyd said
..there isn't any vapour barriers in my doors so I don't have a clue how they are supposed to be..
My dash has warped too around the vents… and was thinking of trying to gently use a heat gun! I had to buy one with 11 previous owners didn't I haha thanks for the help
Well that explains alot….
The Vapor barrier has slits at the rear, I wish I had photos of it, but basically it is inside the recess around the door and puckered in at the speaker holes.
To make the slits at the rear I use a hole punch to make holes above and below, then I slice a line between the holes. I cover that from the rear with a piece of vinyl attached at the top with the Foil tape….
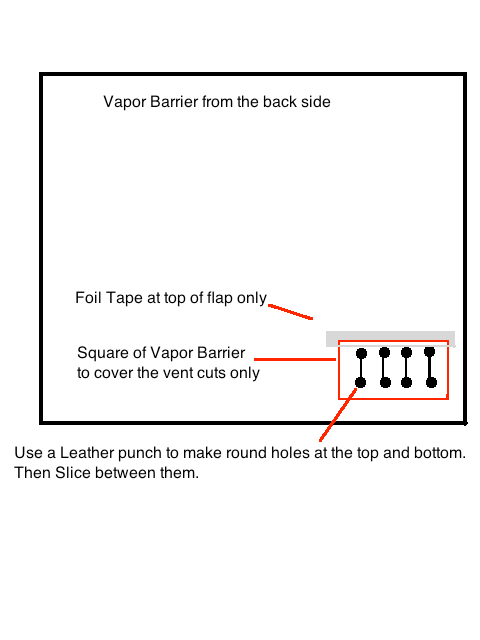
The Vapor barrier is about the same size as a door card. but it is affixed to the metal door. You can google vapor barrier mk1 vw golf and find lots of images.
Are you talking about puckers at the side vents, or the defroster (demister) vents. As a warning a heat gun can soften the glue that holds the vinyl so you could make it worse…. Just saying….. There are 2 kinds of puckering.
The Vinyl shrinks and separates from the padding.
Or the glue weakens and can't hold the shrinking vinyl.
What do Divorces, Great Coffee, and Car Electrics all have in common?
They all start with GOOD Grounds.
Where are my DIY Links?
They all start with GOOD Grounds.
Where are my DIY Links?
Posted
Settling In

Posted
Settling In

Thanks
Posted
Settling In

Posted
Local Hero

phillyd said
Replaced the outside window scraper seals on the door as the original ones were dead, I ran some water over the window and checked the inside of the door and it was dripping in mainly down the window runners which I think can't be helped, is this how it should be? With the vapour barrier I think water will run out of the bottom of the door and not splash in (like it's doing now) just need some form of clarification on how it should be before I put the vapour barrier on!
Thanks
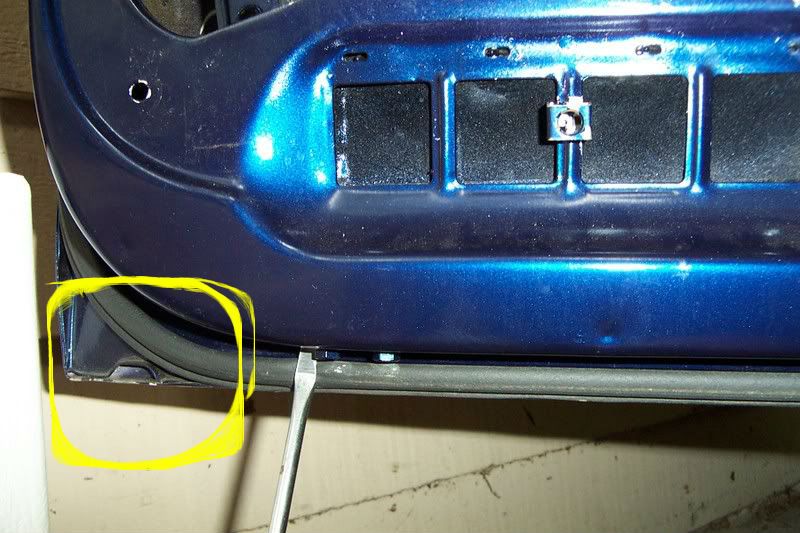
There are drain puckers in the front skin of the door where it is attached at the rear inner frame. They have to be cleaned and cleared to prevent water from backing up. Debris that by-passes the scrapers.
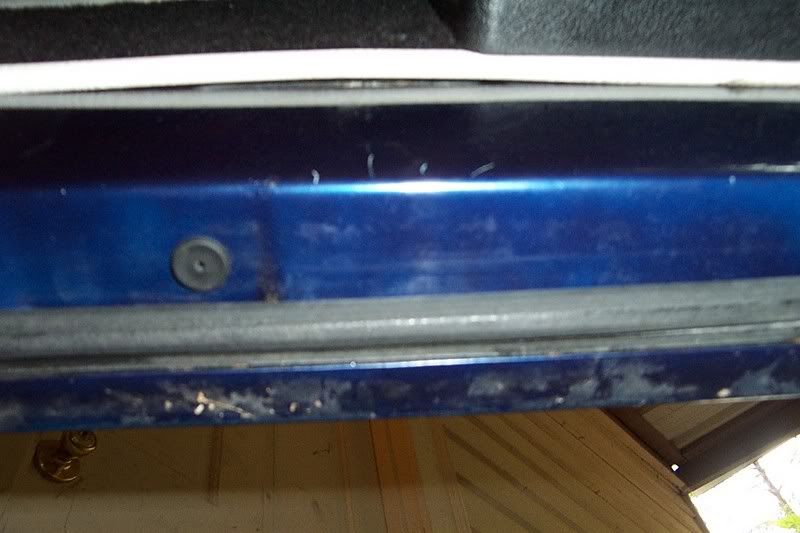
There is also a rubber plug in the middle of the inner door frame, that if it is missing then any water can leave the door and enter the cabin. There are also puckers at the rear quarters as well, on a Cabriolet "clipper" they are hidden by the clipper kit.
pucker on the door is in the yellow square.
door plug
What do Divorces, Great Coffee, and Car Electrics all have in common?
They all start with GOOD Grounds.
Where are my DIY Links?
They all start with GOOD Grounds.
Where are my DIY Links?
Posted
Settling In

Posted
Local Hero

IF you look at the door sans cards,
See the recess in the door where the card fits?

The Vapor barrier is affixed to the door it the same area,
When you place the door cards on, it will pierce the barrier.
The vent slits are placed at the lower rear 4 squares of the door.
bad example
But you should get the idea.
Here is the replacement it is a cut to fit.
https://www.ecstuning.com/b-genuine-volkswagen-audi-parts/protective-foil-priced-each/3a0867201h/
191867147P pn, for a cabriolet in the ETKa.
here is a super beetle so you can see the relationship to the door frame and the door card.

Cut slits to run the lock rods and such, but what I do is to re-enforce the cuts or slits with foil tape to limit air infiltration.
 Last edit: by Briano1234
What do Divorces, Great Coffee, and Car Electrics all have in common?
They all start with GOOD Grounds.
Where are my DIY Links?
They all start with GOOD Grounds.
Where are my DIY Links?
Posted
Settling In


Posted
Local Hero

But dang that don't look too shabby sire.
Be doubly sure that the plug is in the bottom, and that the drain puckers are devoid of garbage.
What do Divorces, Great Coffee, and Car Electrics all have in common?
They all start with GOOD Grounds.
Where are my DIY Links?
They all start with GOOD Grounds.
Where are my DIY Links?
Posted
Settling In

Posted
Local Hero

phillyd said
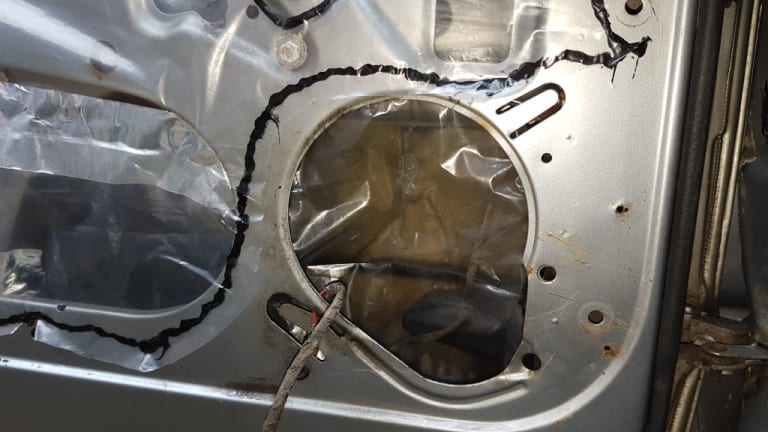
the four holes seems fine as there is a rubber flap already behind it, I've got the inner layer of poly sheet covering behind it also so water runs past it (in the door) and the speakers i have placed a sheet of its own behind where the speakers will sit with a bead of sealing butyl around and over the top.

Cool I didn't see that in the previous pictures.
What do Divorces, Great Coffee, and Car Electrics all have in common?
They all start with GOOD Grounds.
Where are my DIY Links?
They all start with GOOD Grounds.
Where are my DIY Links?
0 guests and 0 members have just viewed this: None.


