


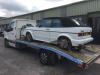
Clipper auto 1991 starter motor trouble

Posted
#1648280
(In Topic #232394)
Old Timer


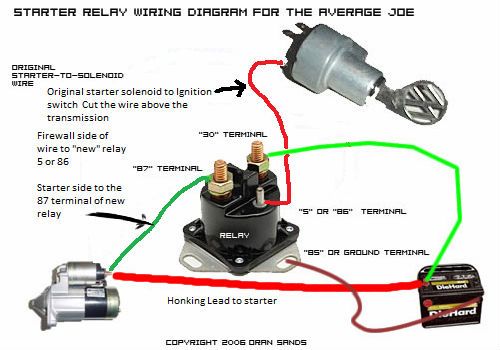
so today we removed the starter motor for a clean up, with a view to following the VW technical bulletin and fitting a relay to cure the heat soak / non start issue that apparently the auto’s suffer from.
Does anyone have a simplified wiring diagram for fitting this relay , that a bozo like me could understand? The VW bulletin makes no sense to me whatsoever…..
Posted

Local Hero

On the automatic starter or any other starter, you don't have to remove the starter.
Locate the RED/Black wire that runs to the Starter solenoid from the ignition switch. it is from the left and goes over to the starter solenoid. There is a White/Yellowed white connection in the middle of it.

Cut that wire in twain. Now you need to get a ford starter relay or any 40 amp relay. The ford starter relay uses a frame ground so it wires simply.
Find the two smaller posts and attach the red/black from the Ignition switch to the pick or little post of the relay.
Take the red/black that goes to the starter solenoid and wire it to one of the big honking lugs on the starter relay.
Take the other big honking lug, straight to the Positive side of the battery.
Attach the relay to the frame of the car this provides ground for the pick.
When you start the car the current flows from the Ignition switch to the positive post of the real pick, since the other side is grounded the relay will engage.
When the relay engages it will apply 12V 40 or 50 amps or more to the Solenoid which causes the starter to go wow, and engage every time no matter how hot it gets.

The ford starter relays that we have over here on 40, 50, 60, 70, 80 era Ford trucks are rated for about 100amps and only about 12 bucks.
You basically are taking the ignition switch and using its lower voltage wires, and using it to pick the Ford relay.
The ford relay reduces the run of wire from the battery to the ignition switch and back to the starter solenoid to the battery to the starter motor more direct, and higher current and lower voltage drop.

see: https://www.vwvortex.com/threads/starter-relay-for-heatsoak-problems.2593146/
What do Divorces, Great Coffee, and Car Electrics all have in common?
They all start with GOOD Grounds.
Where are my DIY Links?
They all start with GOOD Grounds.
Where are my DIY Links?
Posted
Local Hero
The starter interlock circuit, and the frigging brushes that are on each side of the shifter.
I have had the bristles break and fall on to the PRNDL switch, so that when I went from drive to park, the insulated teh parking switch and the car wouldn't start in park, but would in Neutral….
The first mention is here.
intermittent no start 90ish cabbies with auto, and digifant.
http://www.toplessrabbit.com/forums/viewtopic.php?f=27&t=1667
What do Divorces, Great Coffee, and Car Electrics all have in common?
They all start with GOOD Grounds.
Where are my DIY Links?
They all start with GOOD Grounds.
Where are my DIY Links?
Posted
Old Timer
Clipper auto 1991 starter motor trouble
On trying to remove the starter heat shield to get to the connections, one of the long screws unwound itself making it impossible to get the heat shield off due to no space, so the starter had to come off - a really fun job getting the top bolt out!!!
I Wired up a 30amp relay from the original red/black feed. Nothing!! Discovered that when the ignition key is wriggled in the ignition at crank position the live came and went, so now suspecting ignition switch….
Sent from my iPhone using Tapatalk
Posted
Old Timer
Posted
Local Hero
jazzydog said
Wow thanks!
On trying to remove the starter heat shield to get to the connections, one of the long screws unwound itself making it impossible to get the heat shield off due to no space, so the starter had to come off - a really fun job getting the top bolt out!!!
Taking the starter off is about a 30 minute Job, you need but a 1/4 drive 13mm Short Socket, and a 2" wobble extension to get the starter heat shield heat sink bolt out. For the upper bolt I use a 12" 3/8 drive Extension, and a 6" extension and a Deep Well socket, If you follow the length of the starter then you can feel for the bolt.
You remove the block to starter (Y) fingers last as it takes all the weight of the starter, so you don't have to hold it in place, going back I use the "y" shape bracket to hold it while I put the bolts back in. Yes you have to remove the 2 10mm nuts that hold it in place to remove the upright shield bracket, after removing the upright I replace the "y" and bolt it back to the block loose as well as returning the nuts loose to hold the fingers in situ.
Going back
I usually tape the bolts with Blue Masking tape to the socket to hold it.
Now for the steering wheel do you have the "Air Bag" or not?
As there is the clock spring that you have to contend with.
After getting to the ignition switch, going back, place the shaft nut on the shaft, then using channel locks be sure that you pull it back up. As usually I move the lower bearing and race out. So be sure that your lower bearing and that the shaft is pulled up first.
At the base of the steering shaft is the u-joint. I place a large straight slot screw driver in the u-joint. I use a bit of a 2X4 as a fulcrum, and Pry the shaft up and keep it there with my foot. I found that if I don't then I fight the shaft lowering or starting to collapse and can't get that "C" clip back on as it is too far in to get the spring compressed to seat the "C" clip on.
For resetting the Clock spring, you turn it from what ever it is at to the stop CCW or CW it doesn't matter then rotate it the other way counting the turns I think it is like 12-14 IIRC, then reverse the direction by half the turns, and the clock spring can be placed on the shaft and the turn lever cancel will work correctly.
Starters: https://www.volkswagenownersclub.com/threads/automatic-starter-removal-install.32183/
Going back I strongly urge you to use Copper Grease on all the 10mm Nut and bolts that hold the heat shrink on.
What do Divorces, Great Coffee, and Car Electrics all have in common?
They all start with GOOD Grounds.
Where are my DIY Links?
They all start with GOOD Grounds.
Where are my DIY Links?
Posted
Old Timer
Clipper auto 1991 starter motor trouble
Ggggrrrrrr
Sent from my iPhone using Tapatalk
Posted
Local Hero
Spoked flex plate (late 89-93) usually

Solid
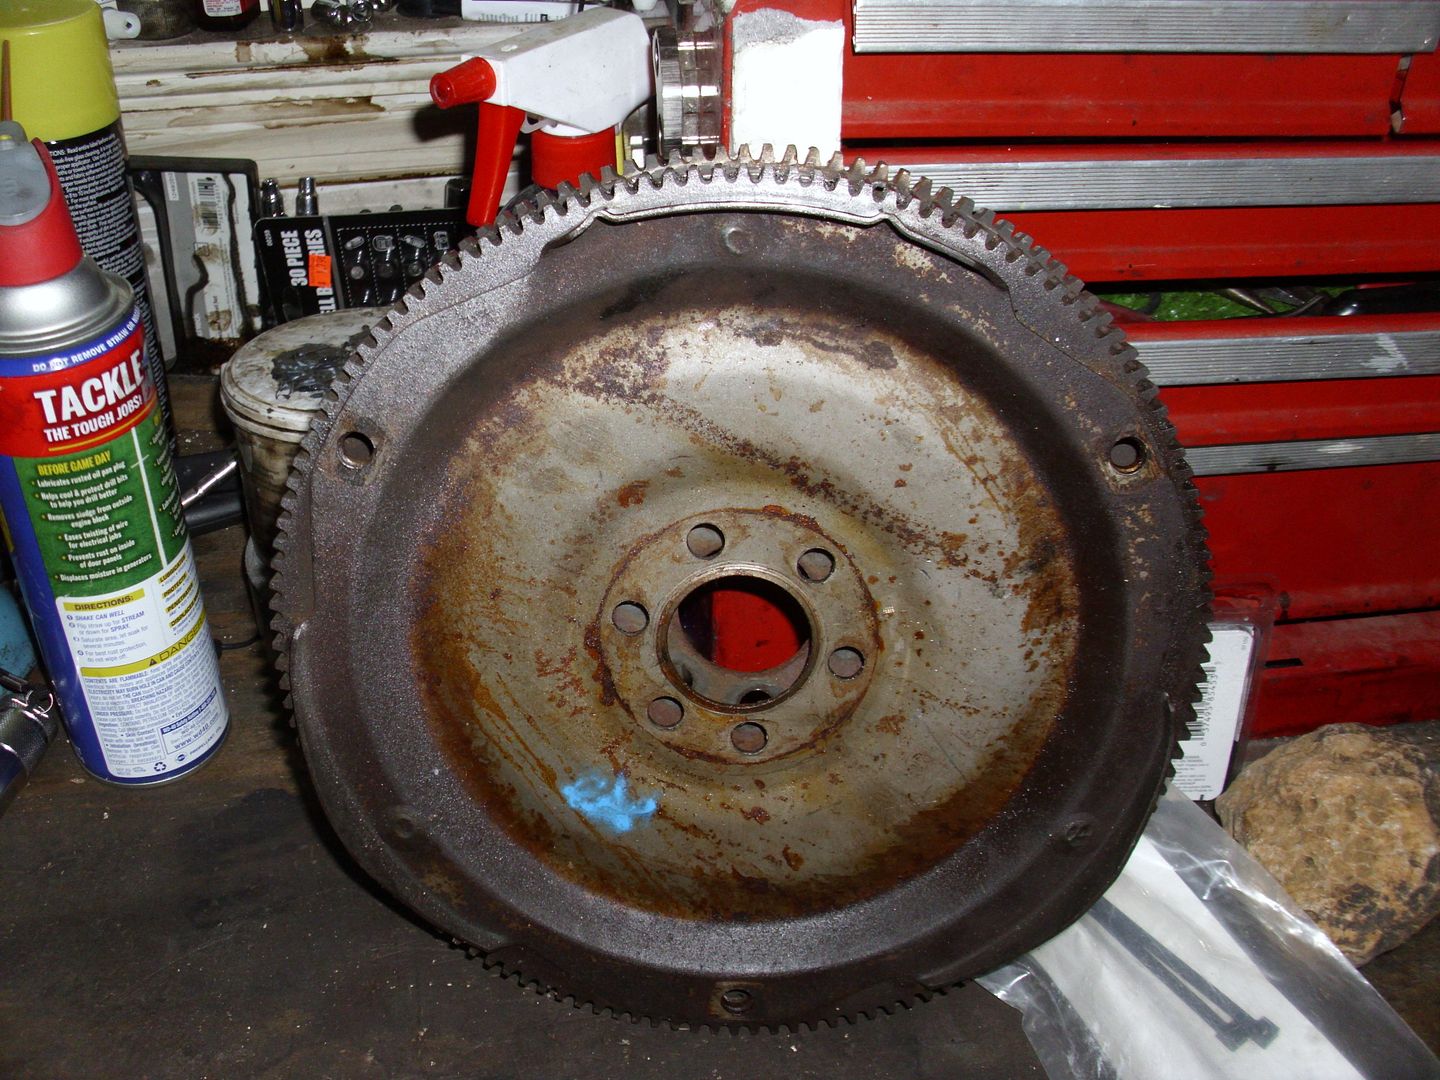
Solid flex plate starters:
Spoked flex plates have bumps in the casting in the circled areas..

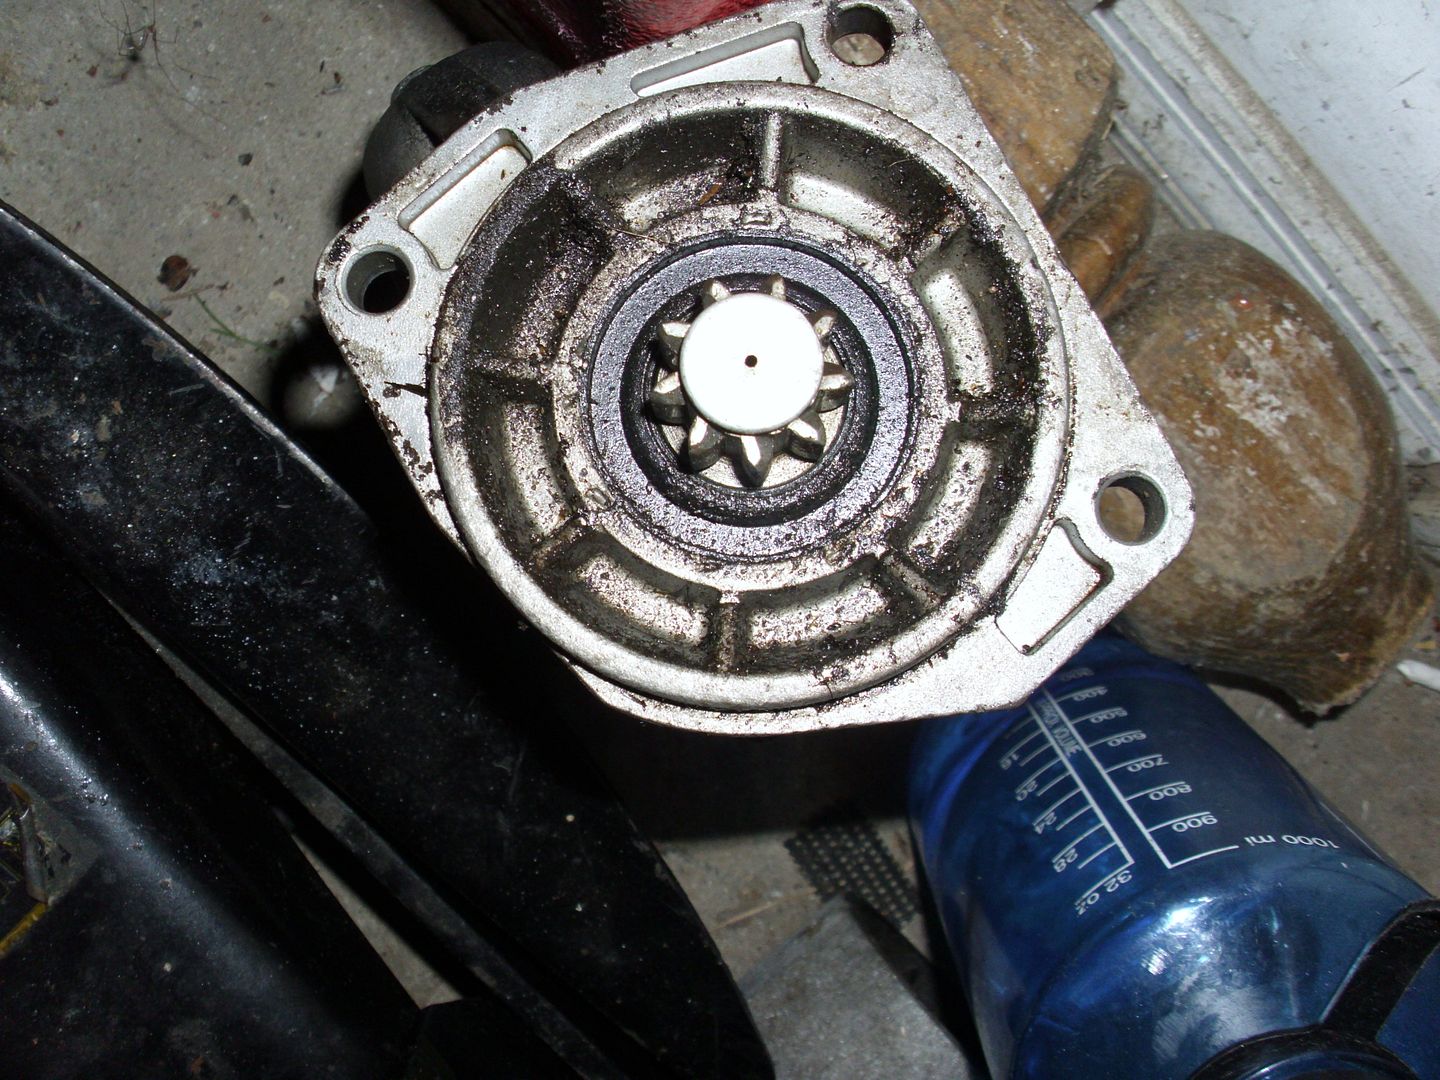
Starters are not interchangeable getting the wrong starter for your flex plate as in solid starter in a spoked flexure can lead to stripped teeth.
And if that happens as I had because of a Daughter and a trip to Baltimore that I didn't know of led to the Brandy new Bosch Spoked Starter replaced with a Solid starter and about 6months later 4 stripped teeth… As Flex plates are difficult to find I dropped the tranny and Welded the Flex plate teeth to fill them and filed them to spec, which lasted for about 8 months to allow me to locate a flex plate in the yard (solid off a 85 Cabby.)
They do make one that is 93 spec that didn't have the bumps on the casting so it can go either way, but alas I had the solid starter so I stayed with it.
Stripped teeth.
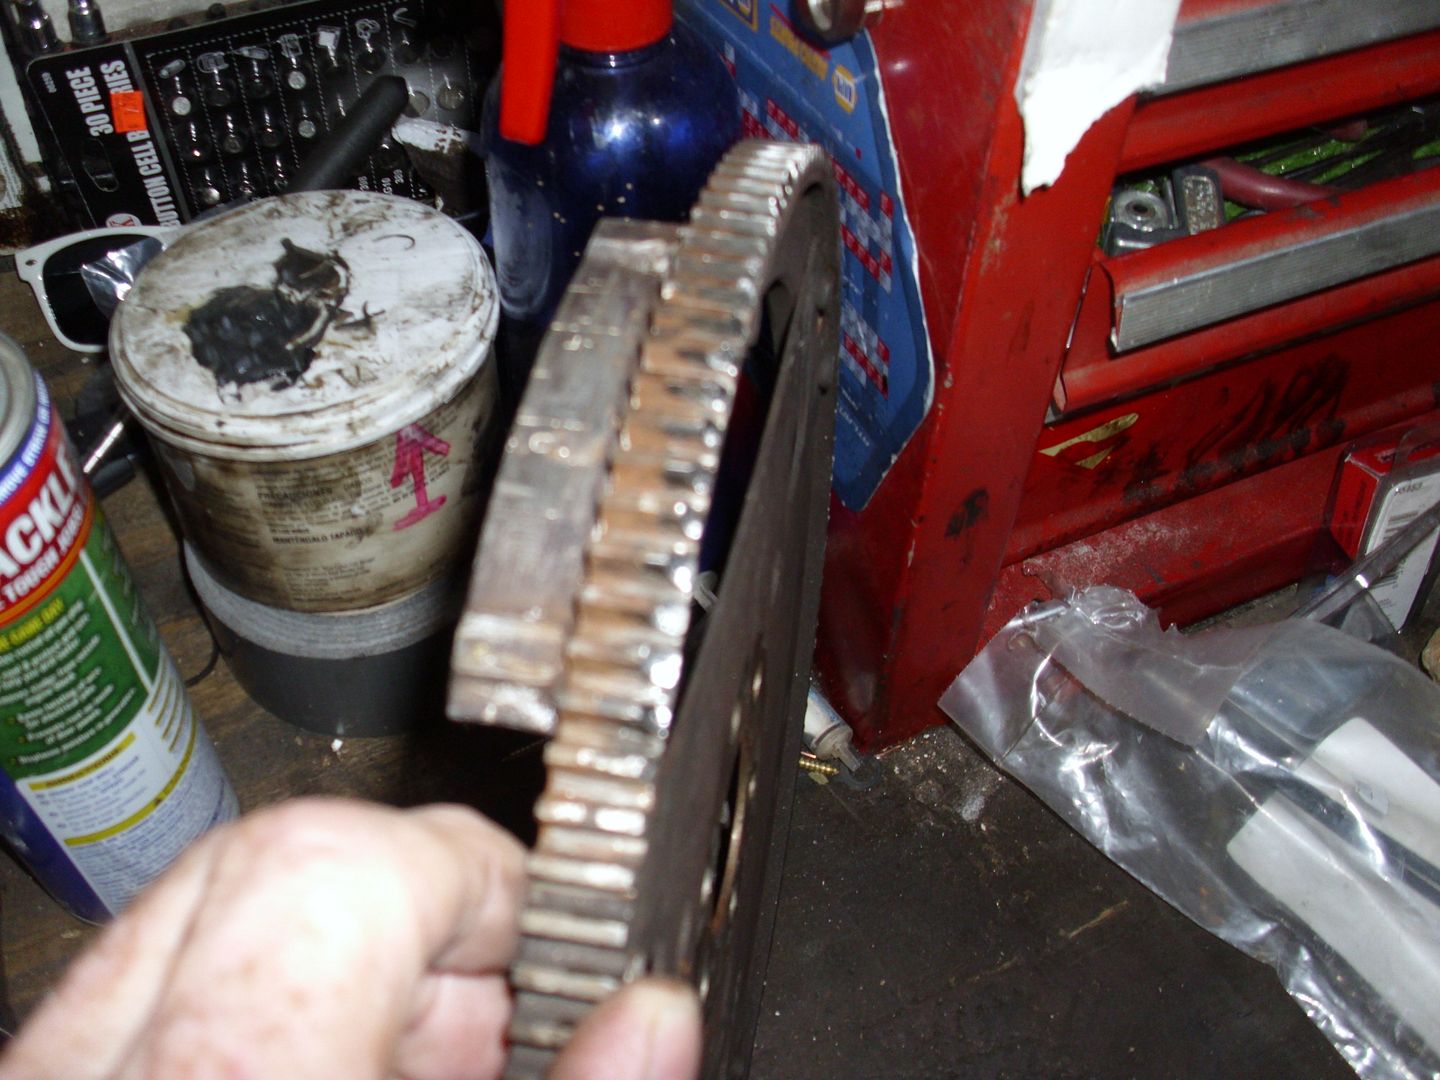
The solid starter doesn't fully engage the spoked flex plate sometimes…..
 I forgot to add that in the old days, I used to jack the car in the air, and remove the right front tire (your Drivers side), as it allowed me to see the upper bolt and to use about 3 feet of extensions to get the socket on the bolt, and use a good sized 3/8 ratchet to get to it.� Going back I start all 3 bolts using
the Y bracket to hold the starter in position, and allows me to use 2 hands to align and run the bolts in, I do the 2 bottoms first as I can see them, and if you crane your neck right you can see the upper bolt from under to assist you,� Do the 2 bottoms first and leave loose so you can rotate to align the upper, and lock it down tight then re-tighten the lowers Remove the "y"� install the wires and replace the other bracket re-tighten the y and BOB's Your Uncle you are done, and all you have to do is clean your forearms and jack the car down, clean the tools and POP a Pint or 3.� I will concur and whole-heartily agree that the first time I did it without any ones helpful knowledge was a Right Royal Pain in the Keister right up there with a Power steering rack or Ignition switch on a air-bag as you have to lower the Kneebar a wee bit to get to the shaft cover screws…..(oh and did I mention that the center console has to be re-moved, and layed to the passenger side to get the knee bar lowered)….but just lowering it enough to get to the screws is better than having to remove it.
Another thing I found was that some of the bolts are easier to get to if you remove the side vents as you can see what you are doing without having to crawl under it.� Remove the bolts and barely loosen the nuts and you can lower it the 2-3 inches that you need.
 Last edit: by Briano1234
What do Divorces, Great Coffee, and Car Electrics all have in common?
They all start with GOOD Grounds.
Where are my DIY Links?
They all start with GOOD Grounds.
Where are my DIY Links?
Posted
Old Timer
I've dropped the starter motor off at a specialist for a rebuild, I should get it back tomorrow or Monday, and yes, I'm getting good at R/R the starter, this time round it was laying on the floor in under 10 minutes LoL.
We don't have airbags on our rabbits over here Bri.
BTW, the wire link from the ignition to the starter was totally decrepit- all green with verdigris and crumbly, a fix in itself to be fair, so it's been a job worth doing.
Thanks for all the information - amazing!!!
I'll update in due course - I'm sure the journey is not over yet….
Posted
Old Timer
Clipper auto 1991 starter motor trouble
IMG]https://uploads.tapatalk-cdn.com/20210315/accf9c1ecb67c8a9fa73e97b97924b6a.jpg
Rebuilt with a new solenoid, fitted and working TaDaaaa!!!
Still need to take the ignition switch to bits to fix the intermittent fault there tho …..
Also got this little puppy fitted and working Huzza!!!

Sent from my iPhone using Tapatalk
0 guests and 0 members have just viewed this: None.