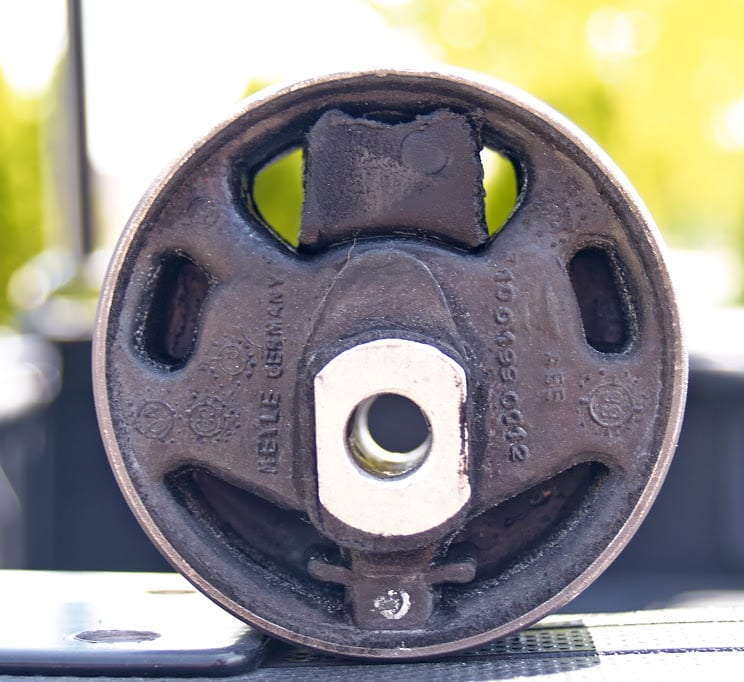
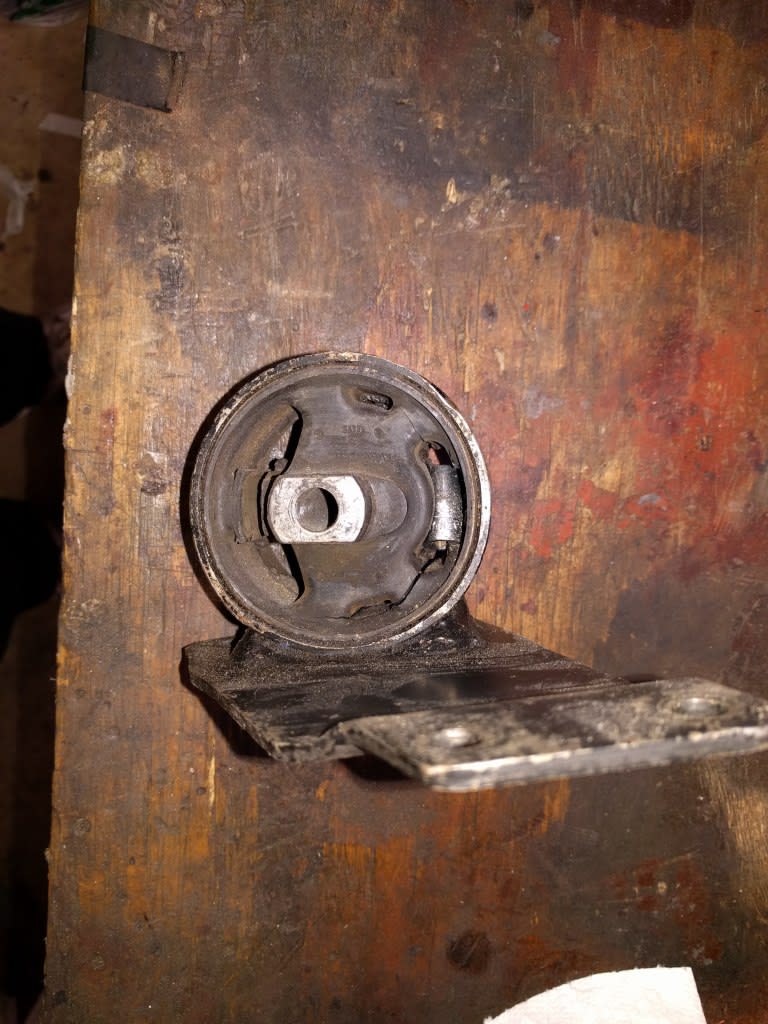
1.6D CR engine mount bushings
Posted
#1593665
(In Topic #216549)
Settling In

I have a diesel 1.6, engine code is CR.
I can't seem to find any info on all the engine/gearbox bushings anywhere, what size ( as I spotted some difference, one can be 64mm an another 74mm) and how many of them are there.
I have seen the front engine "stub" as Id like to call it, that goes below the radiator, but I am unaware of the rest of the bushings.
Is it a hard job changing them?
I found an ebay listing with a picture of what may be the right ones, but I am unsure, thus I seek this forum's help.
https://i.ebayimg.com/images/g/6pIAAMXQHU1RuZvS/s-l1600.jpg
Thanks in advance!
Posted
Local Hero

The Transmission mount and the drivers side mount are a Pain in the keister to replace.
You have to remove the Injection pump, as the bracket that holds the mount also holds the injection pump inplace.
There are a couple of tricks to learn, and why they are a pain to replace is the fact that they have to be cut or pressed out and pressed back in.
They are directional, so going back you have to make sure that they are aligned right, arrow on them points up in the mount as they are in the car..
If you are going to do them yourself, it is more easily done if you heat the bracket in a charcoal grill and get it red hot…..
3 days prior place your engine and tranny mount in the Freezer to chill it, then use Dry ice to keep it chilled when you move it outside.
A couple of blocks of wood and a BFH (BIG FLOCKING HAMMER) 5 lbs mini-sledge are going to be your friend.
Drill a 1 inch hole in both blocks of wood so that the mount has a recess to fit in to, use leather gloves and Vice grips to pick up the metal off the grill. place the bracket centered over the hole in the block of wood, Insert the frozen mount in to the hot bracket and cover with the other block of wood and smack the thing in to place about 4 or 5 good smacks will get it done. Then immediatly quinch it in a bucket of cold water.
To Prevent the rubber from melting. (Red Neck version number 1.)
Use a wheel bearing kit, and a block of wood with 1 inch hole in it warm still chill the mount…..
Place the bracket over the block of wood, insert the mount and liberally spray it with wd-40, and with the top of the bearing press plate and cover plate, using the forementioned BFH beat it in to position Takes a few more smacks,,,,, (Red Neck version number 2.)
You can also use the bearing press plates in a large vice and press it in that way still chilling the mount prior and lubbing it (Red Neck version 3.)
Or you can buy a 12 ton press and press it in yourself (Red-neck Version number 4.)
(I have done all the above.)……
Or take the transmission Bracket and the engine bracket to a machine shop and have them pressed in.
Things I have learned over the years is that if you shave a bit of rubber off the old mount (Use a Ginsu knife (serrated) and wd-40 ) to slice a wedge insert it between the top of the rubber mount and the mount. It will increase the longevity of the mounts, and when the mounts break which they will, your engine will not drop out of position, and the tranny shifters don't go goofy until you replace them again.


Notice that the rubber bit is at the top, and the mount has an arrow in rubber pointing up. You can also use a 1/4 drive socket wedged between the mount and the top plate…… as when the mount breaks again, it will not drop the engine alignment as it stays because of the wedged socket or rubber bit.

For the front mount you can cut the old one off and lube the ball with grease and smack the new one on.
The rear tranny mount is but a few bolts.
DO NOT GO POLY on the mounts, as the Diesel will rattle your teeth loose, and possibly crack the fuel injector lines.
Now with the through bolts loosed you wiggle the engine about 3-to-4 times and let it settle, and your engine aligns perfectly so you can tighten down all the mounts, and your engine sits perfectly, Do one mount at a time.
I use my home made engine support to do mine.


Notice 2x12 on the left and 1X14 on right. I use toggle bolts and muffler clamps to secure it to the bar, and the bar is secured by u-bolts to the blocks…… The toggle bolts I have longer than normal Eyebolts that I usually buy separately, and have them in 10, and 12 inch lengths as well as 4 and 6 on the top, just to give me a variety of movements.
They also make this that you can buy.

I have 2X12's that are notched for the big engine work, as it allows me to raise or lower the engine easily as in ift the front or the rear….. Doesn' get in the way of your doing the work.
I would strongly suggest that if you haven't replaced the timing belt and tensioner to do it as you have to take about everything off to do the mount as you would a timing belt.
Make sure that you place the engine in time first.
Yes the Engine mount is wider or bigger than the Transmission mount.
Last big HINT. When you remove the 2 rear ip/mount bracket bolts next to the firewall rear of block (they are allen) Take them to a hardware store and buy Hex headed bolts grade 8- or 10 same total thread length and replace the allens with the hex. They are easier to install and remove in the future, and you will be glad you did.
What do Divorces, Great Coffee, and Car Electrics all have in common?
They all start with GOOD Grounds.
Where are my DIY Links?
They all start with GOOD Grounds.
Where are my DIY Links?
Posted
Settling In

I can maybe see a DOOM reference (BFG and BFH), which if it is one, be sure its noted
Last question, about the Hint: which is the mount in question, that you are refering to, when you mentioned replacing the allen for hex bolts?
Posted
Local Hero

What do Divorces, Great Coffee, and Car Electrics all have in common?
They all start with GOOD Grounds.
Where are my DIY Links?
They all start with GOOD Grounds.
Where are my DIY Links?
Posted
Local Hero

I have been wrenching on them since 1980, I have learned a few tricks.
I can maybe see a DOOM reference (BFG and BFH), which if it is one, be sure its noted
Don't do video games….they are written for right-handed non-Irish distracted folks, what with 3 daughters, 1 son, a Alabama born wife, what with their and my cars, a non-mechanically inclined son-in-law, I have no time to do games…. I have too much fun. Besides I have worked on Computers since 1976 think Punch Cards, Tubes, from building sized mainframes to Server Farms of today, when dos didn't have a version, to Unix/Linux as well as Cloud, and I don't want to "play" on them in the after hours.
I can remember when life with out Cellphones or pagers was wonderful, and Social networking was Church, and your real-life friends, church socials, and the like.
Shoot, the first telephone I can remember and my parents still have had a Crank on it, and everything as a party line.
What do Divorces, Great Coffee, and Car Electrics all have in common?
They all start with GOOD Grounds.
Where are my DIY Links?
They all start with GOOD Grounds.
Where are my DIY Links?
0 guests and 0 members have just viewed this: None.


