


Report On Electro Static Magic Powder Coating Machine

Posted
#1261293
(In Topic #151316)

Old Timer

Report on Powder coating machine
To start with, I have no association with the company, and this is totally unbiased, although they have said they'll send me a free packet of powder if I send them some 'photos!
This is what you get in the kit:-
(I've used there 'photos from the website, as mine were rubbish)
�
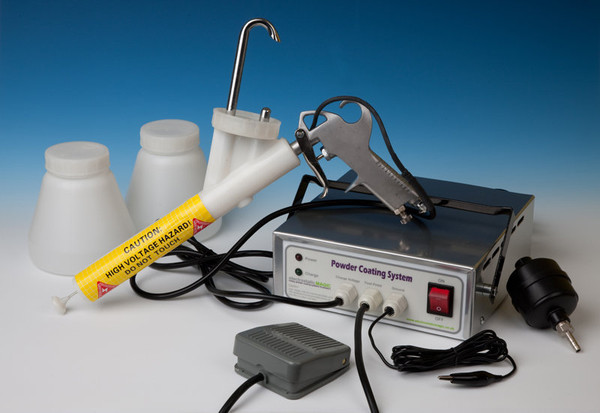
I opted for the more expensive kit, and ended up with 5 of those plastic bottles,(which means you can store the powder in them, easier to change over etc) a couple of filters, some extra powder and I ordered the stand as well.
Firstly, the machine is� probably from China,(I can't confirm this) but appears to be well designed, is stout enough and well finished, with no rough edges.
The optional stand, I would say is made 'in house' it appears to be cut with a plasma arc or similar, is well designed and nicely finished.:-
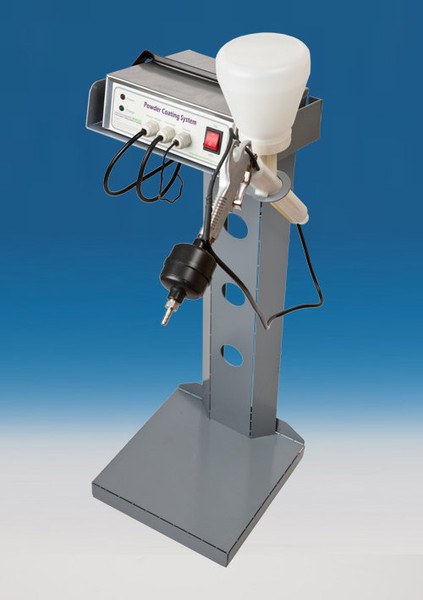
However, I modified our stand, as if you look carefully, it comes 'naked' also, the edges are slotted, to make assembly easier. The stand is bolt together and seemed to be to be a bit top heavy. Therefore, the mods I did were:-
Seem welded for added security, and firmer handling!
Lump of metal on the bottom for lower CoG.
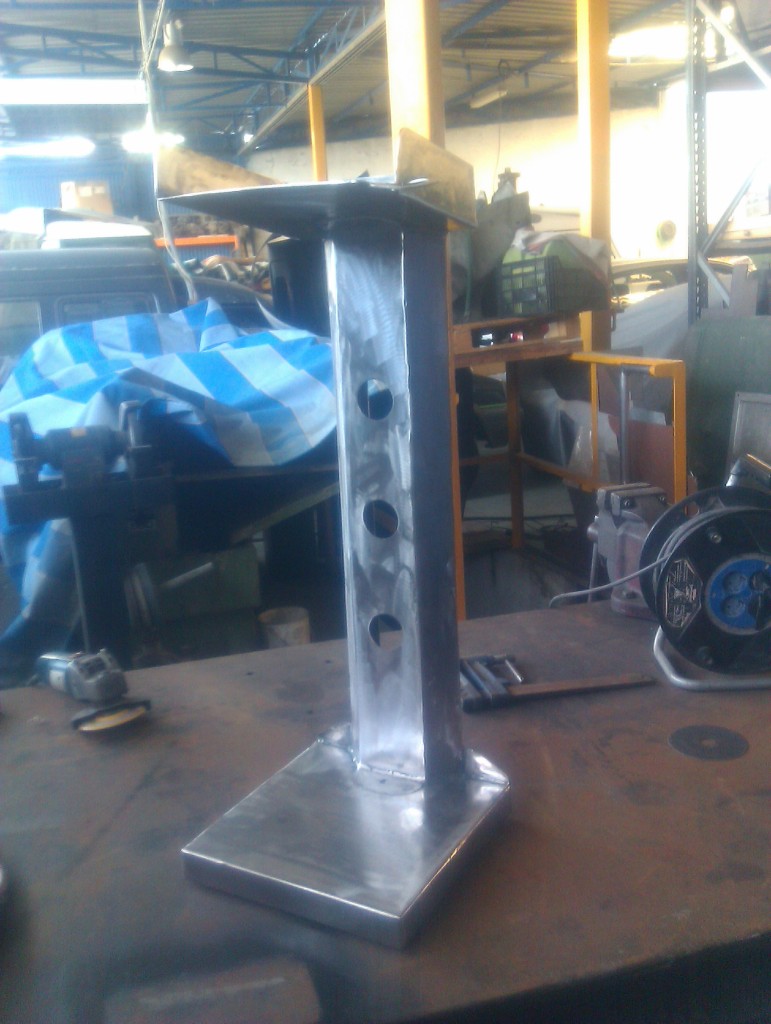
Welding ground back & smoothed and then a coat of etch primer.
Currently, I powder coated it Flat Black, but I don't like it, so that will change this week, if I get time.
Using the machine is a doddle, although reading the instructions thoroughly is advisable, as there are safety concerns with high voltage and the potential for fire, as the powder is flammable to naked flame in dust form, which is why I'm doing the work in the wood shed!(saw dust is also flammable and I have everything here just in case, I hope)
Therefore, using a naked flame, such as a blow lamp, gas cooker or space heaters is a no-no.
You also need an air supply, only minimal pressure, so a regulator is needed to if your using a big compressor. The gun has an inline filter on as well, and obviously the powder won't like the cold or damp (or humidity) so a clean air line is important.
If you've seen the video, http://youtu.be/qLf29vANARc , you will see that in practice, once you are savvy with the safety instructions, it's really easy to use.
The amount of leads means they can get in a twist as well, so some Velcro straps to keep things neat & tidy wouldn't go amiss.
I would say that there were a couple of things I should have had and would do different next time:
Firstly, I NEVER do any cooking, and forgot things get a little warm, so a silicon oven glove would be good. I've nicked my missus one now….
Secondly, I had a bit of a game getting the stuff in the oven, so take the tray out first, and use the wire tray not the one for doing roast's in, so the heat can get round.
A rocker cover just fits in a standard oven at an angle.
I used an old second hand oven that will not be used for food, this is important if you don't want a)food poisoning and b) an expensive divorce
The Oven was� pre-heated as well, it needs to be about 220 deg c, but the powder needs to melt, so it's not the temperature of the air, if your using a heat gun. I made this mistake the first time, using a nice new digital readout heat gun. I used it again on the stand, and this method works fine, although I had it set to max, (630deg c) I will do some more experiments and post again on this later, with the results)
The pieces were pre-heated slightly with the heatgun, just to give the powder a helping hand, I don't know if there was an actual benefit to this, but I guess in the UK it would be good to get the snow and ice off before starting work!
I also managed to miss a couple of places, so whilst good lighting is a must, I thought the overhead lights were too much, which you can see clearly in the Video.
Missed bits:
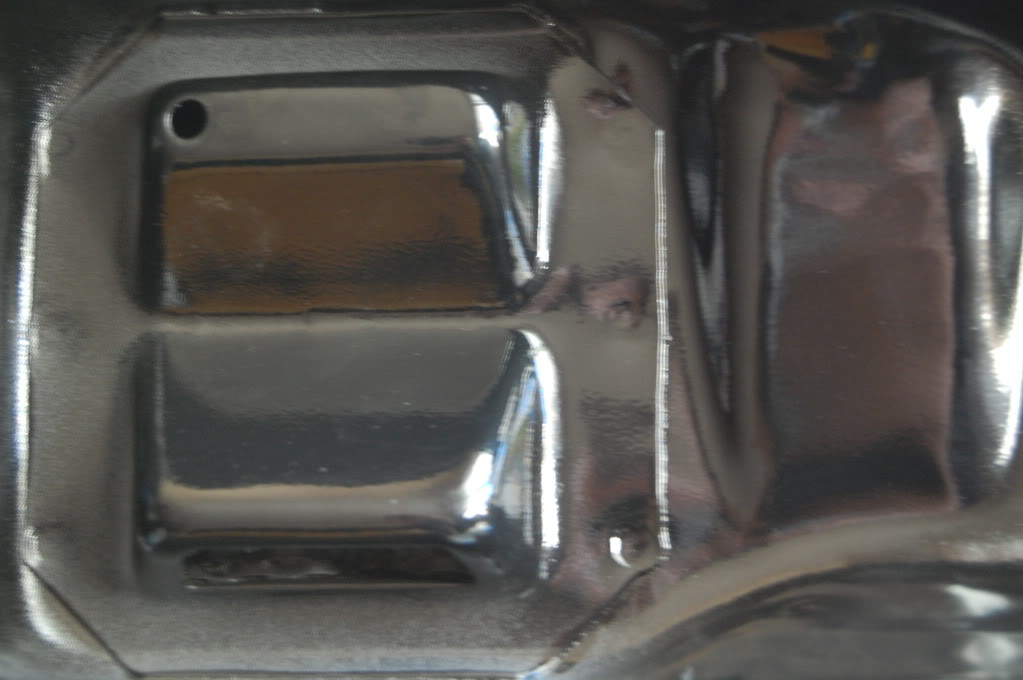
around breather inside.
again around the breather on the outside
on the step of the rocker cover was a bit thin

Inside of timing cover

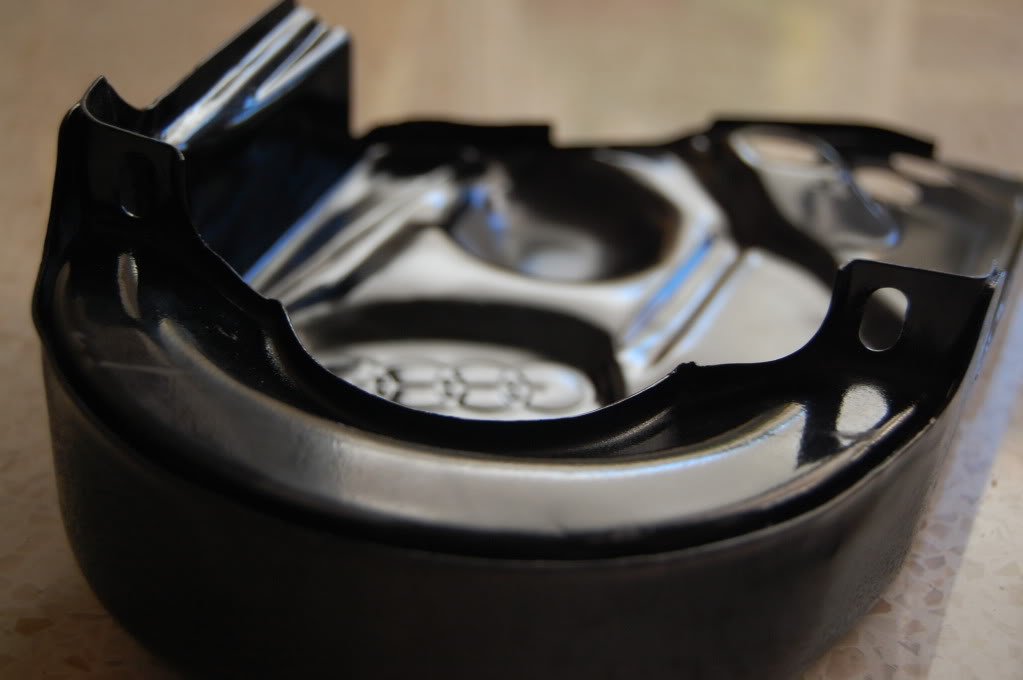
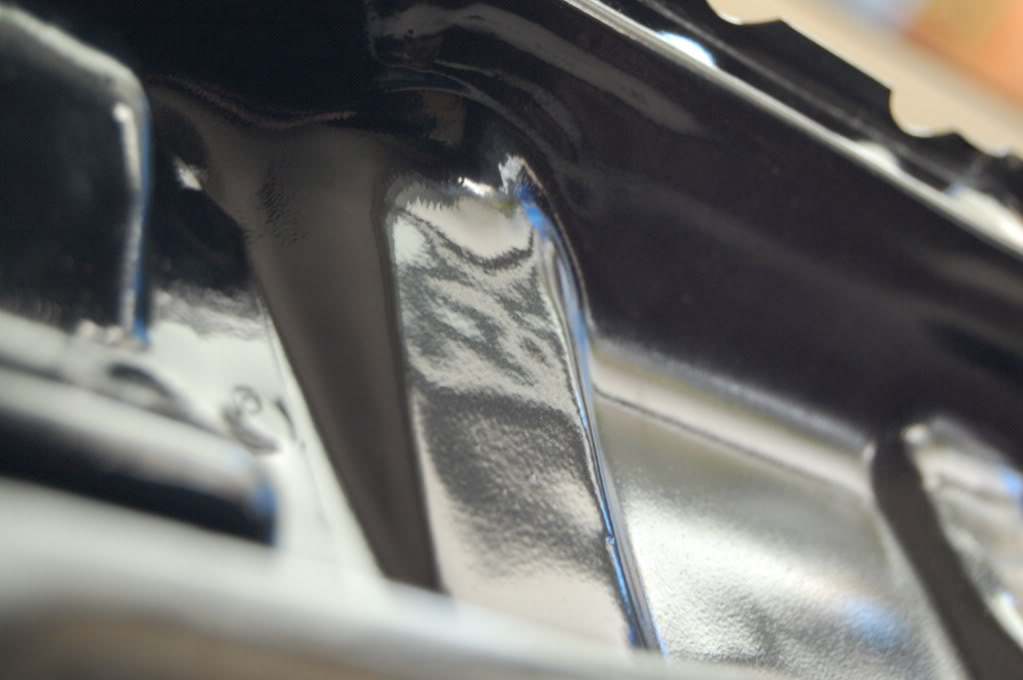
I also could have given it a coat of primer filler as well, as the powder will not fill any roughness, note the finish were the items had been rusty before sand blasting:
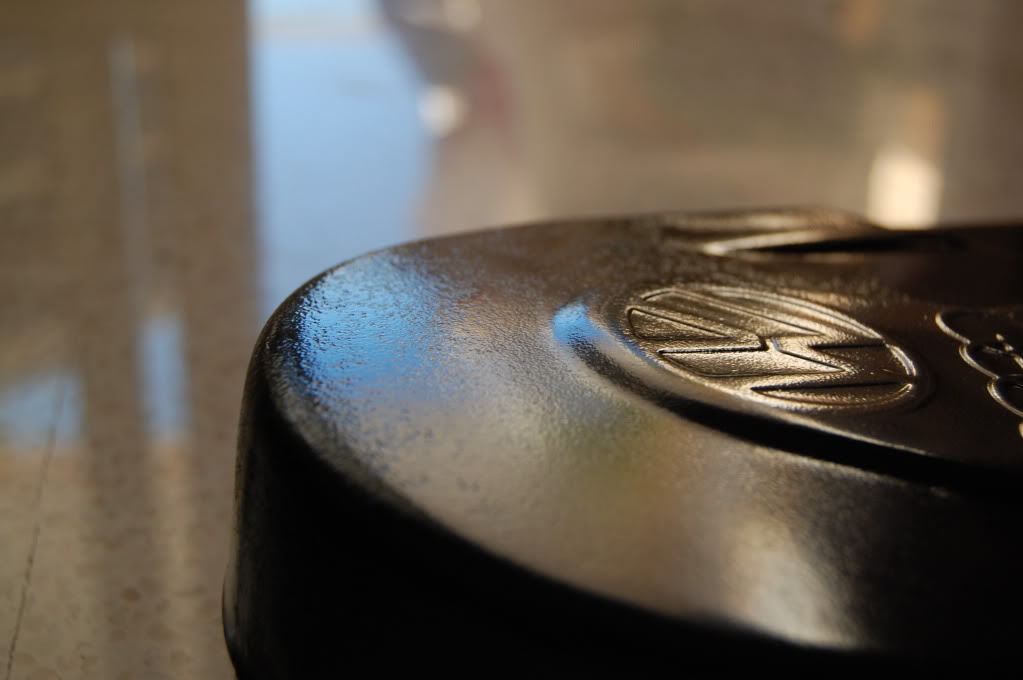
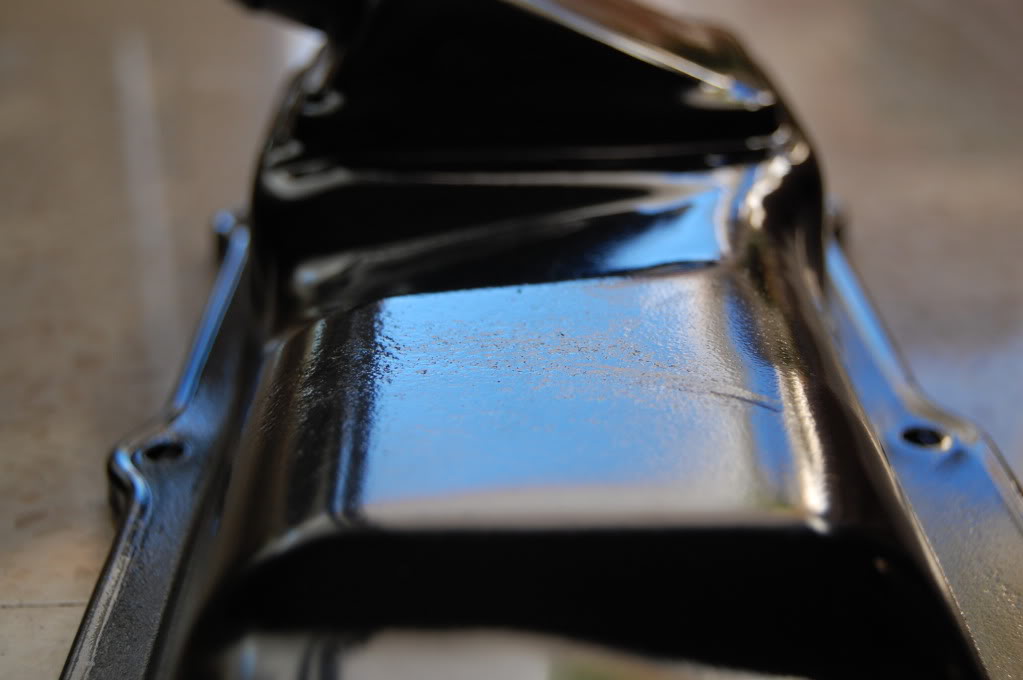
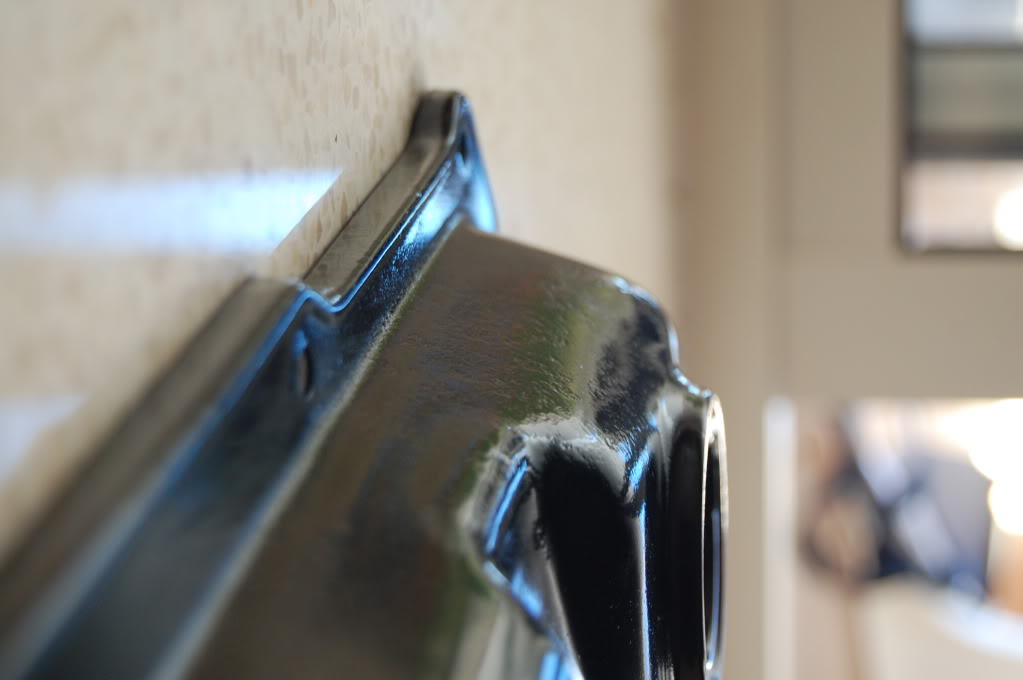
This is the finnish you should get, if everything is prepared properly:
In General, I am more than pleased with the result. Can't wait to get back in the wood shed for some more!
I will be ordering some more colours, as I think the Gloss black, whilst I think is brilliant, is probably too gloss for a 'factory' finish, therefore I will give the Satan Black a go.
So, was it worth the money? Considering I had to pay a bit more to get it shipped to Spain, and I can't find anyone within 100km round trip that will do this work. It's well worth it.
My Missus wants the Microwave & her push bike done now

 To come.. heating with a heat gun and the 'Chrome' finish
What do you think of the finish?
Any questions?
�
 Last edit: by Longimanus
If you want the PSD Boot Sticker file, it's here: Boot Sticker
Posted

Old Timer


putting some serious thought into getting one of these
how does curing with a heat gun work?

Posted
Old Timer
The heat gun works OK. so far it's much better in the oven. �I got a digital readout heat gun that goes up to 630 degrees, which I also intend to use for plastic welding. The only bit I have done with the heatgun so far is the stand, which is made of thick metal. It takes sometim to get the powder to melt, and if it's not on properly, the heat gun will blow it away! so, need to pre-heatit, then apply, then preferably heat from the back till the front melts, then give it another coat and spread the heat from the already melted stuff.
It's easier than it sounds.
I have a load of work to catch up with this week, and I've ordered a load more powder, inc Satin Black, which I think may represent a more factory finish.
Once I have the powder here, and some spare time, I am going sand blast, prepare and powder coat the radiator surround, using the heatgun to cure the powder.
I also have plans to make a bigger oven, but that will take a little time.
TBH I reckon once you have one of these, you'd never want to go back to paint. Just needs some thought and space in setting it up.
I'm also waiting for a new camera to arrive, so when it's all together, I will do another write up with some more 'photos and maybe a better Vid.
If you want the PSD Boot Sticker file, it's here: Boot Sticker
Posted

Settled In

Posted
Old Timer
1) you can get it to conduct electricity, so if it's not metal, it will need a coat of zinc spray or something similarly conductive.
2) The thing you want to powder coat will put up with being heated up past the melting point of the paint, say 400 degerees c.
Im very happy with the finish, for a first attempt, just need to spend sometime with the primer filler first next time.
A question for those that may know, can I use primer filler on the rocker cover & sump, or will the heat and expansion etc crack it after a while?
I did think about leading it….
If you want the PSD Boot Sticker file, it's here: Boot Sticker
Posted
Settled In
Posted
Old Timer
Maybe I can powder coat me toast at the same time

If you want the PSD Boot Sticker file, it's here: Boot Sticker
Posted
Old Timer
really good tho
first the blasting cabinet, then this machine i think

Posted
Old Timer
If you want the PSD Boot Sticker file, it's here: Boot Sticker
Posted
Old Timer
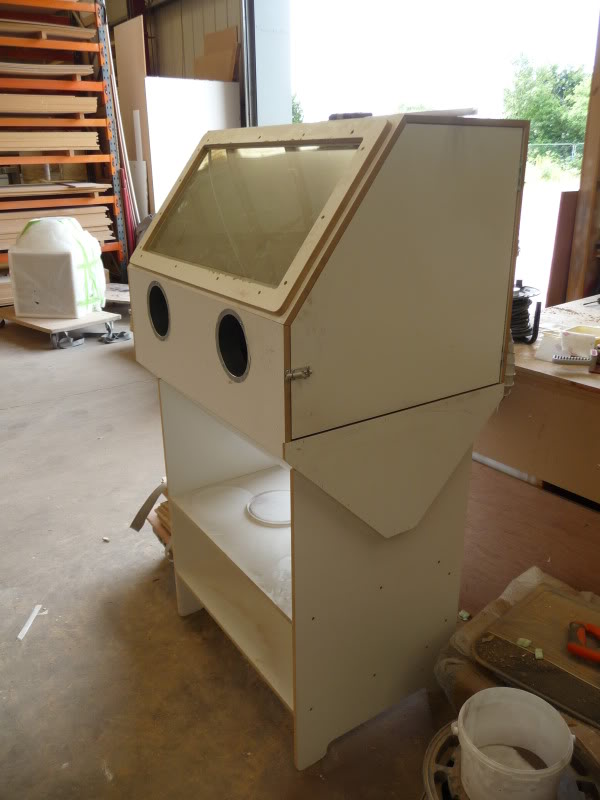
bit big with extraction and everything
the next one will be alot more simple
Posted

Moderator


Posted
Old Timer
Like the cabinet JB, gives me an idea for mine….
If you want the PSD Boot Sticker file, it's here: Boot Sticker
0 guests and 0 members have just viewed this: None.