


New sills, inner arches and arches

Posted
#616396
(In Topic #74080)
Old Timer

New sills, inner arches and arches
Posted
Local Hero

Best way is to fit the inner arch , use only what you need too replace the rot . Follow with the outer arch panel at the same time , again using only the minimum part of the panel . This keeps distortion down to a minimum and ensures that both panels will fit correctly together and retains more of the original car . Lastly go for the sills , at the wheel arch end simply trim the sill to fit your new arch panels .
I have just carried out this on my MK1 and am quite pleased with the results , i used panels from Hadrian / LMC fitting with a mix of MIG and Spot welding . There are some previous posts covering the subject and if you havn't got it buy the Golf Haynes Restoration Manual from Amazon it covers it in great detail
Drop me a pm with your email address if you want the pics i took when i did mine .
Cheers ……..

Posted

Old Timer
Posted
Old Timer
Posted
Old Timer
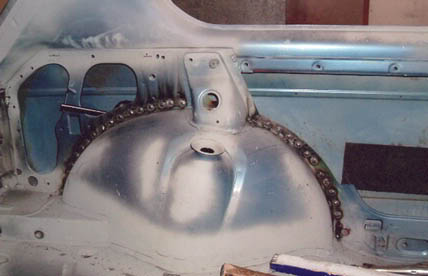
pic of new inner in place - very good and strong job.
these spot welds were grinded to level off as new!
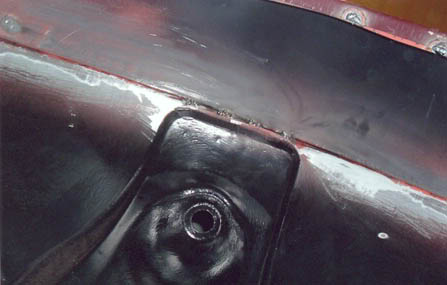
heres the other side - don't have a pic uploaded of the new inner on this side but this shot shows the outer arch spliced off above the rusted edge also revealing the rusted edge of the inner arch. The complete inner was replaced on this side - it was slightly trickier but was better than a cut and splice as I had to replace the filler aperture as well so this gave more room for inner removal.
here's that inside shot painted! i love this shot - it came out black and white on the scanner for some reason so its not a true reflection of the paint colour - but it still looks sharp!
Posted

Local Hero


Andy
LINCOLNSHIRE REGION -�https://www.facebook.com/groups/467122313360002/
1983 MK1 Golf GTI Campaign Model - Under (looooong) resto!
1962 Rover P4 80
2002 BMW 745i
2008 BMW Z4 2.5Si
LINCOLNSHIRE REGION -�https://www.facebook.com/groups/467122313360002/
1983 MK1 Golf GTI Campaign Model - Under (looooong) resto!
1962 Rover P4 80
2002 BMW 745i
2008 BMW Z4 2.5Si
Posted
Old Timer
Posted

Local Hero
I've done pretty much the same to mine, but had to learn the hard way about just using what you need of the new panel, try to keep all work on the outer arch along the arch and not onto the flat body otherwise it'll take longer to get flat again (if it'll go flat).. I still have some uneven spot's above the arch where I welded the new panel in
this was how much I cut out (I know now this was too much!)
this was half way through welding in the new arch
I used a new inner arch the same as Carbs4ever that way you know you've got the arch the right size (if that makes sense)
get some pics up of your work :wink:
Posted
Local Hero
Take a rusty arch and cut out the inner and outer rot leave the sill for now
use weldable primer on all parts as you go , it will stop it rusting again

Trial fit inner at the same time you are fitting the outer . Leave one side as it was as a reference in case you forget how it should look .

Trial fit outer

When your happy weld them in i used self tappers to hold the inner arch while trial fitting

Then chop off the sill to match the arch

Weld on the sill and grind down the welds don't go mad with the welder or you will distort the panels - go for a little weld then move to another bit to allow it to cool down - i use little tack welds that make one big one when they all meet up .

Then light skin of filler ready for painting


Must pull my finger out and get painting , i have just bought an air fed mask and will be painting it in 2pack Mars Red ….
Watch this space !!
Good luck with yours …………
Posted
Local Hero
come on Chudd! get it sprayed :wink: looks nice and solid
daniboy, keep us posted
Posted
Old Timer
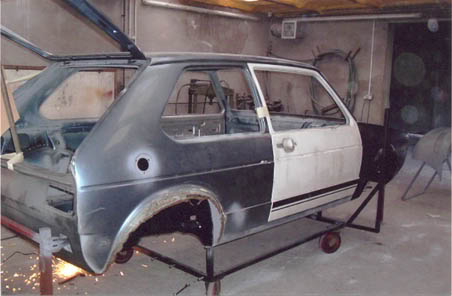
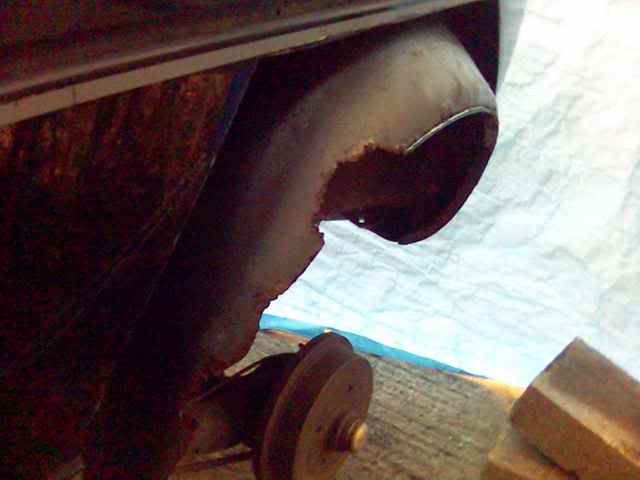
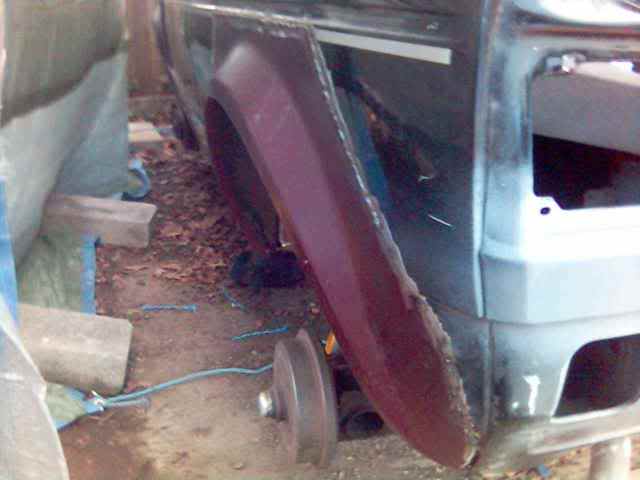
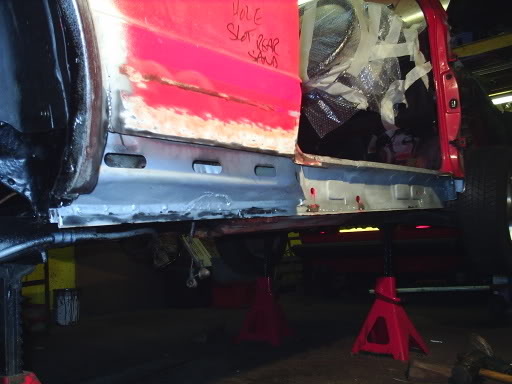
I have only ever driven the car once (silver mk1 campaign) just after i bought it and before i took it for an mot. It failed on a blowing exhaust and a hole on the axle mounting point which meant that the whole back end of the car had to be stripped to get at it properly. As usual it turned out to be 10 times worse and so far we have replaced both axle mounting points, a sheared axle mounting bolt (horrible job!), both chassis outriggers, part of spare wheel well, repairs to both inner arches, replaced rot under the chassis outriggers, inner sill repairs.
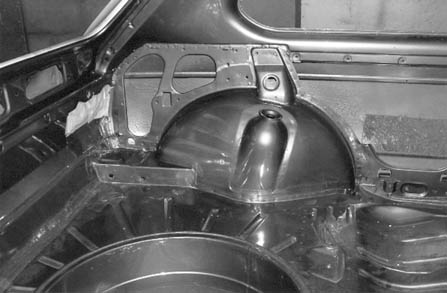
My uncle repaired the o/s inner arch and outer. Instead of removing the inner arch at the spot welds (time consuming) he just cut out the rotten lip and replaced that then put the new arch on. After looking at it again i have realised that there is more rot further up in the arch which is included in the repair panel. I`m considering buying another panel and taking it all out but wondered if it would be possible to this this with the new arch in place?. Anyway thanks for the help and i will keep you posted, cheers.
Posted
Old Timer
so have you the new inner in place but have found more rust….. you risk serious distortion from removing/rewelding the outer arch… you will need to take it very slowly - a wet rag too to hold close to the weld point won't do any harm either to keep the metal cool.
Chudd that's a sin that thing is not painted yet very nice welding work btw- get to it boy

Posted
Local Hero
Posted
Local Hero
One of our master filesystems had a disk fail. We do have raid so no data is lost, however it was slowing things down to the point where everyone was effected.
We have taken the albums on this volume offline to speed things up. It should be finished within 12 hours.
Sorry
Alex
Posted
Old Timer
daniboy123 said
a sheared axle mounting bolt (horrible job!)
Tell me about it ! For anyone about to remove the rear beam on their Mk1, make sure you clean the stud threads with a wire brush on a drill, use loads of 'Plus Gas' or similar, and don't 'force' anything. If the nut doesn't feel like it's coming off easily, wind it back (tighten) a bit, clean the threads some more and use more Plus Gas. You DON'T want to snap one of these ! Easily the worst job I've had to do on any car ever !!!
0 guests and 0 members have just viewed this: None.