


Cabriolet Hood Replacement - Yorkshire Area

Posted
#1302576
(In Topic #156838)
Settling In

So anywhere within about an hour of either town would be grand.
Ive trawled the search engines on here and wider web and I found one place in Bradford called
Has anyone every used them or know of anywhere else?
S
Posted
Settled In

Check my build fit mine last year.�
I'm in doncaster where are you ?
2000 R1 ��TOY ;-)
2003 CIVIC TYPE R reliable daily
1989 cabby 1.8 gti �ongoing project (my 1st vw)
husqvarna te 410 supermoto
just aquired a series 1 tintop
2003 CIVIC TYPE R reliable daily
1989 cabby 1.8 gti �ongoing project (my 1st vw)
husqvarna te 410 supermoto
just aquired a series 1 tintop
Posted
Settling In
Not sure how much one would cost but I understand buying online for a mohair is around the 230quid mark.
Who did yours fella?
S
Posted
Settled In
Fitted it myself
2000 R1 ��TOY ;-)
2003 CIVIC TYPE R reliable daily
1989 cabby 1.8 gti �ongoing project (my 1st vw)
husqvarna te 410 supermoto
just aquired a series 1 tintop
2003 CIVIC TYPE R reliable daily
1989 cabby 1.8 gti �ongoing project (my 1st vw)
husqvarna te 410 supermoto
just aquired a series 1 tintop
Posted
Settling In
Good work fella! How long did it take you?
Not that I'd have the balls to do myself lol.
S
Posted
Settled In
2000 R1 ��TOY ;-)
2003 CIVIC TYPE R reliable daily
1989 cabby 1.8 gti �ongoing project (my 1st vw)
husqvarna te 410 supermoto
just aquired a series 1 tintop
2003 CIVIC TYPE R reliable daily
1989 cabby 1.8 gti �ongoing project (my 1st vw)
husqvarna te 410 supermoto
just aquired a series 1 tintop
Posted
Settled In
There is a walk through showing how to do it on here somewhere.�
You will also need an electric staple gun for around the rear window
2000 R1 ��TOY ;-)
2003 CIVIC TYPE R reliable daily
1989 cabby 1.8 gti �ongoing project (my 1st vw)
husqvarna te 410 supermoto
just aquired a series 1 tintop
2003 CIVIC TYPE R reliable daily
1989 cabby 1.8 gti �ongoing project (my 1st vw)
husqvarna te 410 supermoto
just aquired a series 1 tintop
Posted
Settling In
Posted
Local Hero

Do you have the headliner and interliner and top pad?
If so what condition are these in?
What year is the car as the frames are different. 3 different ones to be exact?
Is it manual or power top frame?
Side tension cables are different sizes depending on year also.
"Making Cabbies More Beautiful One Roof at a Time"�
Posted
Settling In
The bare frame is complete
Do you have the headliner and interliner and top pad?
I dont have anything other than the frame and the webbing fibre lined strips that connect from the frame to the rear corners of the car (dont know the official name). All the rubbers are in place though.
If so what condition are these in?
What year is the car as the frames are different. 3 different ones to be exact?
its a 1985 GTi 1.8
Is it manual or power top frame?
Manual hood
Appreciate the help by the way guys
Posted
Local Hero
Here goes.
The top section as it's called is made up of 4 components and in order of fitting onto a bare frame are:-
1) The headliner. This is the part you see looking up from inside the car. Usually white, cream or black vynil.
2) The Interliner. A large sheet made up from various materials. This encloses the top pad.
3) The Top Pad. A special made padding that smooths out the top covers appearence, provides insulation against road noise and heat loss etc.
4) The Top Cover. More common;y known as the hood, roof, top. Made from a variety of materials, such as vinyl or cloth fabrics i.e. Mohair or Sail Cloth ( that's how you get a white mohair top).
The frame has various webbing/straps placed from the frame rails etc to the rear window frame. That go to the corners on the rear boot area from the corner rails of the frame.
Plus 3 rubber tensioning bands. 2 for the rear/centre rails and 1 to the front retaining rod for the interliner.
Further 3 plastic webbing straps. 1 to the tensioing band as above. The other 2 suspend the headliner in the rear corners from the frame.
Manual frames have rams connected to them at the bottom rear main hinge points to assist with opening and closing of the top.

So you need to see what you have missing compared with the diagram and source them.
The 2 Springs Jaybo mentions are in different places depending on year of car also. On earlier frames they are at the front sides and not the rear frame arm sections.
Take some pics of what you have got at the moment, that way it will be easier to guide you in the right way.
For example:-

"Making Cabbies More Beautiful One Roof at a Time"�
Posted
Settling In
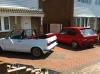
Below if the link to the photos of the roof as it stands right now.
Copy and paste this fella:-
http://s1251.photobucket.com/user/stevene12000/library/Golk%20Mk1%20Project%20-%20Stage%201%20Roof%20Refit/#/user/stevene12000/library/Golk%20Mk1%20Project%20-%20Stage%201%20Roof%20Refit?sort=3&page=1&_suid=136938340565409963894249832383
Car has moved on a fair bit since though as Im now at a point where all the new interior is in and exterior is almost complete (windscreen and new exhaust to fit)
Posted
Local Hero
can't really see from the pics.
but it seems you have some of the straps.
Have you got 2 rubber black bands that go from the rails at the back where the white strap is in each corner.
Look at the photo in my post of the top see the white strap with a screw through it? The loop at the end should have the black band through it and the other looped around the bar behind. These are the same as the tyre tie down straps so should still be able to get them easy enough.
The webbing straps are the long ones that run from the frame across the top to the window frame. These have a pocket stitched across them to insert the grey plastic pins.
Ok.
You will need to make some webbing straps up then if you haven't got any or find some off E bay, sure there was some bits on there the other day.
Contact Hibbs or funkstar to see if they have any about or put a wanted parts post up.
The headliner, can I ask where you got it from?
Same for the hood?
I would of left the interior and rear door cards off if your doing this as it will be easier to do.
I can supply a full complete kit for the interliner and padding. So PT Me.
cheers
chortle
"Making Cabbies More Beautiful One Roof at a Time"�
0 guests and 0 members have just viewed this: None.