


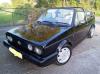
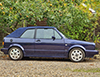
BOOT TRIMS?

Posted
#1309707
(In Topic #157909)

Settled In


Thanks
Posted

Moderator


Here is a pic of the drivers side:

and passenger side:

I refurbed mine some time back with some €10 boot trim from lidl and some impact adhesive. Did the job!
Cheers Hugh.
www.vwgolf1.com - vw golf parts and genuine accessories!

www.vwgolf1.com - vw golf parts and genuine accessories!
Posted
Settled In
Sticker Pig
Posted

MOTY 2013
the boot lid has a middle cover panel, not sure about the sides off hand
Hello my name is John and I'm a dub addict.
My wiring diagrams and other documents have moved here:
VAG Documents & Downloads
You'll need to sign into google/gmail for the link to work! (its free!)
My wiring diagrams and other documents have moved here:
VAG Documents & Downloads
You'll need to sign into google/gmail for the link to work! (its free!)
Posted
Moderator
9double9 said
What did you buy in Lidl? Thanks
It was a boot liner/protector which came in a 1 metre roll. A thin carpet like trim, I used impact adhesive to bond it to my existing boot cards. Then trimmed it to size. I also did the back of the rear seat and boot floor with it.
As rubjonny says my boot door too only has the middle cover panel and I have a power hood.
Cheers Hugh.
www.vwgolf1.com - vw golf parts and genuine accessories!
www.vwgolf1.com - vw golf parts and genuine accessories!
Posted
Moderator

Ended up like this.

Cheers Hugh.
www.vwgolf1.com - vw golf parts and genuine accessories!
www.vwgolf1.com - vw golf parts and genuine accessories!
Posted
Settled In
Posted
Settled In
Were all the same!

Posted
MOTY 2013
http://www.ebay.co.uk/itm/VW-GOLF-MK1-BOOT-SIDE-TRIMs-And-Light-PANEL-/370833486383
Hello my name is John and I'm a dub addict.
My wiring diagrams and other documents have moved here:
VAG Documents & Downloads
You'll need to sign into google/gmail for the link to work! (its free!)
My wiring diagrams and other documents have moved here:
VAG Documents & Downloads
You'll need to sign into google/gmail for the link to work! (its free!)
Posted
Settled In
Posted
Settling In

9double9 said
It was a boot liner/protector which came in a 1 metre roll. A thin carpet like trim, I used impact adhesive to bond it to my existing boot cards. Then trimmed it to size.
I know that this is an old post, but I copied this method, and I think that it worked quite well. My boot trim was really warped and moist and falling apart, and I thought that the replacements were quite expensive for what they are (especially hiding in the boot), so I thought that I'd give it a try. I added some Gorilla tape to reinforce the edges (probably unnecessary, and I hope that I don't regret this down the road should it start falling off).
As I don't really have any decent tools (I used an exaxto knife and scissors), nor a bench to work from (North London flat), the grommet holes, etc could be a bit tidier, but the end result should be fit for purpose. Just thought that I would share! My small contributions to the forum!


'91 VW Clipper Cabby, 5 speed, 1.8 (Weber with manual choke). I have no idea what I'm doing, so please show mercy.
�

�
Posted

Local Hero
You can use plastic corrugated board for the base design, and then cover it with the grained papers it is more durable than the fibreboard that was oem.� As you have the sides, the left side is the right side but in reverse.. Save for the hole for the courtesy light, and hole for the power top res.
Also you can use speed nuts on the holes for the clips and use interior trim screws to hold the covers in place.� On the 90's cabbies with the shoulder belts they cards have a wing that comes out and covers the brace for the seat belts in the rear and there is a clip that holds it to the brace. The etka doesn't show it or the shoulder belt for the 90 ish cabriolets.
I know that at home centers over here (HomeDepot) we sell the plastic corrugated board in various sizes. �Shoot this time of year you can usually get it free from political adverts
 just don't get caught….
I have repaired my OEM stuff, but decided that going forward to use the corrugated plastic as it is weather proof… the OEM stuff will eventually absorb moisture and deteriorate.
Another thing I did in my Cabbies boot was to buy a piece of 1/8 �plywood and seal it front and back, then used my carpet to trace a outline and cut it to fit. �I placed it under the carpet in the boot to cover the Spare Tire hole and make it look prettier. I didn't have the Saggy Hole any more and stuff laid flat.
What do Divorces, Great Coffee, and Car Electrics all have in common?
They all start with GOOD Grounds.
Where are my DIY Links?
They all start with GOOD Grounds.
Where are my DIY Links?
Posted

Settling In
I'm hoping I can jump on the back of this thread - although I see it's some time since it was active.
I am looking for patterns/drawings/samples of the side panels for the boot of my very late '93 Cabrio - with hydraulic hood mechanism. I have seen the pics above - so i guess they are available?
My car had nothing at all in the boot when I got it - unless you count some very oily remains of carpets, leaves and assorted "barn-find" rubbish.
Am I right in thinking that the panels for a car are different/larger than those for a car with a manual hood mechanism??
Posted
Local Hero
The one on the inside of the boot to cover the lock should be the same.
1988 Mk1 Golf GTi Cabriolet 1.8cc DX, K-jet. Daily drive. 317,000 miles and counting
1978 Mk1 Scirocco GLS 1.6cc FR, Webber carb. Weekend toy.
1978 Mk1 Scirocco GLS 1.6cc FR, Webber carb. Weekend toy.
Posted
Settling In
P
Posted
Settling In
Briano1234 said
.� As you have the sides, the left side is the right side but in reverse.. Save for the hole for the courtesy light, and hole for the power top res.
In my experience this isn't true; neither the power hood or the non power hood trims are the same left/right, I have originals of both.
I'm having CAD drawings done of the originals and having them laser cut out of 3mm black foamex board (originals are 2.5mm), won't have the original grain but will fit correct, will be lightweight and won't end up like weetabix if damp.
Hydraulic roof:
.jpg")
These have folds in them; top and bottom on N/S and a double one at the top on O/S, unsure how the foamex will deal with this, will try with a partial cut (score) and see how it goes.
Interesting that the two holes at the bottom of the trims which align with the bumper mounting bolts aren't big enough to go over the head of the bolts and therefore I assume you would have to unbolt the bumper to fit the trims?? It looks as if these have had washers on the outside of them. Obviously the power hood trims go further inboard covering the hydraulic mechanism and relays than the non power trims which go right at the outside of the inner arches.
Manual roof:
.jpg")
I intend to have a few sets made and stick them on eBay.
Chris.
0 guests and 0 members have just viewed this: None.